Anmelden
Hochladen
Anleitungen
Marken
Bosch Anleitungen
Steuerung
Rexroth PSI 6 Serie
Bosch Rexroth PSI 6 Serie Handbücher
Anleitungen und Benutzerhandbücher für Bosch Rexroth PSI 6 Serie. Wir haben
2
Bosch Rexroth PSI 6 Serie Anleitungen zum kostenlosen PDF-Download zur Verfügung: Betriebsanleitung, Anwendungsbeschreibung
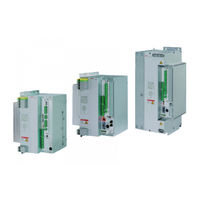
Bosch Rexroth PSI 6 Serie Betriebsanleitung (460 Seiten)
Schweißsteuerung mit Mittelfrequenz-Umrichter
Marke:
Bosch
| Kategorie:
Steuerung
| Dateigröße: 2.57 MB
Inhaltsverzeichnis
Deutsch
3
Inhaltsverzeichnis
3
Zu dieser Dokumentation
7
Gültigkeit der Dokumentation
7
Zusätzliche Dokumentationen
7
Tab. 1: Erforderliche (D) und Ergänzende Unterlagen
7
Darstellung von Informationen
8
Sicherheitshinweise
8
Tab. 2: Beispiel zum Aufbau eines Sicherheitshinweises
8
Tab. 3: Gefahrenklassen nach ANSI Z535
10
Tab. 4: Beispiele zur Klassifikation der Sicherheitshinweise
10
Symbole
11
Bezeichnungen
11
Abkürzungen
11
Tab. 5: Verwendete Symbolik
11
Tab. 6: Bezeichnungen
11
Sicherheitshinweise
13
Zu diesem Kapitel
13
Bestimmungsgemäße Verwendung
13
Nicht Bestimmungsgemäße Verwendung
13
Qualifikation des Personals
14
Allgemeine Sicherheitshinweise
16
Produkt- und Technologieabhängige Sicherheitshinweise
17
Evtl. Verwendete Symbolik am Produkt
17
Transport
17
Tab. 7: Mögliche Symbole am Produkt
17
Einbau und Montage
18
Elektrischer Anschluss
20
Betrieb des Produktes
22
Nachrüstungen und Veränderungen durch den Betreiber
24
Wartung und Reparatur
25
Konformitätserklärung / CE-Kennzeichnung
26
Pflichten des Betreibers
27
Allgemeine Hinweise zu Sachschäden und Produktschäden
29
Transport und Lagerung
29
Einbau und Montage
30
Elektrischer Anschluss
32
Betrieb
34
Wartung und Reparatur
35
Lieferumfang
37
Zu diesem Produkt
39
Tab. 8: Überblick über die Leistungsteiltypen
40
Leistungsbeschreibung
41
Produktbeschreibung
44
Abb. 1: Beispiele: Schweißsteuerung PSI6100, PSI63C0, PSI64C0
44
Programmierung und Bedienung
45
Funktionsprinzip des Mittelfrequenzschweißens
46
Abb. 2: Übersichts-Blockschaltbild: PSI 6000 mit Trafo
46
Abb. 3: Detail-Blockschaltbild einer Mittelfrequenz-Umrichteranlage
46
Abb. 4: Sekundärseitige Gleichrichtung durch den PSG-Transformator
47
Abb. 5: Zusammenhang: Pulsbreite der Primärspannung und Sekundärstrom Beim Mittelfrequenzschweißen
47
Aufbau
48
Abb. 6: Prinzipieller Aufbau einer MF-Schweißeinrichtung mit PSI 6Xxxx
48
Teil-Frontansicht PSI 6X00.XXX
50
Abb. 7: Teil-Frontansicht PSI 6X00
50
Teil-Frontansicht PSI 6Xcx.XXX
52
Abb. 8: Teil-Frontansicht PSI 6Xcx
52
Module
54
Anybus-Modul "Profinet IO
54
Abb. 9: Anybus-Modul "Profinet IO" (2-Port-Variante)
54
Anybus-Modul "CC Ethernet 100 Mbit
56
Abb. 10: Anybus-Modul "CC Ethernet 100 Mbit" (1-Port-Variante)
56
Baugruppe "CC Ethernet 100 Mbit
57
Abb. 11: Baugruppe "CC Ethernet 100 Mbit
57
Baugruppe "CC Profinet
58
Abb. 12: Baugruppe "CC Profinet
58
Baugruppe „Profinet-IRT, 2-Port (M40-Modul)
59
Abb. 13: Profinet-IRT, 2-Port (M40-Modul)
59
Baugruppe "LWL Profinet
60
Abb. 14: Baugruppe "LWL Profinet
60
Baugruppe „Profinet-IRT, LWL (M40-Modul)
61
Abb. 15: Profinet-IRT LWL (M40-Modul)
61
Diagnosemodul
62
Abb. 16: Frontansicht Diagnosemodul
62
Abb. 17: Diagnosemodul: Hauptmenü
63
Abb. 18: Diagnosemodul: Menü ETHERNET
64
E/A-Modul "E/A DISK R2ED" und "E/A DISK R4ED
66
Tab. 9: Technische Daten: E/A-Modul "E/A DISK R2ED" / "E/A DISK R4ED
66
Abb. 19: Frontansicht: E/A-Modul "E/A DISK R2ED
68
E/A-Modul "E/A DISK
69
Tab. 10: Technische Daten: E/A-Modul "E/A DISK
69
Abb. 20: Frontansicht: E/A-Modul "E/A DISK
70
E/A-Module "E/A DISK 2R" und "E/A DISK 4R
71
Tab. 11: Technische Daten: E/A-Module "E/A DISK 2R" / "E/A DISK 4R
71
Abb. 21: Frontansicht: E/A-Modul "E/A DISK 2R
73
E/A-Modul "E/A IBS OPC mit LWL" (INTERBUS-S)
75
Tab. 12: Technische Daten: E/A-Modul "E/A IBS OPC mit LWL
75
Abb. 22: Frontansicht: E/A-Modul "E/A IBS OPC mit LWL
77
E/A-Modul "E/A IBS FERN" (INTERBUS-S)
79
Tab. 13: Technische Daten: E/A-Modul "E/A IBS FERN
79
Abb. 24: Frontansicht: E/A-Modul "E/A IBS FERN
80
Abb. 25: Klemmenbelegung der INTERBUS-S-Anschlüsse
81
E/A-Modul "E/A IBS X_FERN_8EA" (INTERBUS-S)
83
Tab. 14: Technische Daten: E/A-Modul "E/A IBS X_FERN_8EA
83
Abb. 26: Frontansicht: E/A-Modul "E/A IBS X_FERN_8EA
84
Abb. 27: Klemmenbelegung der INTERBUS-S-Anschlüsse
85
E/A-Modul "DEV-NET" (Devicenet)
87
Tab. 15: Technische Daten: E/A-Modul "DEV-NET
87
Abb. 28: Frontansicht: E/A-Modul "DEV-NET
88
E/A-Modul "Comnetm-DP" (PROFIBUS-DP)
89
Tab. 16: Technische Daten: E/A-Modul "Comnetm-DP
89
Abb. 29: Frontansicht: E/A-Modul "Comnetm-DP
90
UI-Regler-Modul (PSQ 6000 XQR)
91
Abb. 30: Frontansicht: UI-Regler-Modul PSQ 6000 XQR
92
Belastung und Dimensionierung
94
Grundlegendes
94
Wird der Umrichter Überlastet
94
Belastungsdiagramme
96
Abb. 31: Zulässiger Primärstrom in Abhängigkeit der ED: PSI 61Xx.XXX
96
Abb. 34: Zulässiger Primärstrom in Abhängigkeit der ED: PSI 62Xx.XXX
100
Abb. 35: Zulässiger Primärstrom in Abhängigkeit der Stromzeit: PSI 62Xx.XXX
101
Abb. 40: Zulässiger Primärstrom in Abhängigkeit der ED: PSI 64Xx.XXX
106
Abb. 41: Zulässiger Primärstrom in Abhängigkeit der Stromzeit: PSI 64Xx.XXX
107
Abb. 42: Zulässiger Primärstrom in Abhängigkeit der ED: PSI 65Xx
108
Abb. 43: Zulässiger Primärstrom in Abhängigkeit der Stromzeit: PSI 65Xx.XXX
109
Identifikation des Produkts
110
Typenschlüssel
110
Abb. 44: Typenschlüssel der Psx 6Xxx-Baureihe
110
Typenschild
111
Tab. 17: Typenschild Gerät Benennung
111
Abb. 45: Typenschild Gerät
111
Transport und Lagerung
113
Montage
115
Produkt Montieren
115
Maßbilder und Anschlusspositionen
116
Produkt Elektrisch Anschließen
133
Allgemeine Informationen zu Elektromagnetischen Feldern
133
Entstörung
134
Netzanschluss
134
Tab. 18: Dimensionierung Entstörkomponenten
134
Trafoanschluss (Primärkreis)
137
Anschluss Programmiergerät
137
VDC-Logikversorgung (X4, Eingang)
139
VDC-Spannungserzeugung (X4, Ausgang)
140
E/A-Modul-Versorgung (X4, Ausgang)
141
VDC-Spannungsverteilung (X4)
142
Master-Slave-Applikationen
145
Externer Lüfter (X4, Ausgang)
146
Versorgung Externer Geräte (X5, Ausgang)
147
Analoge Ausgabe der Elektrodenkraft (X2, Ausgang)
148
Rückmeldung Elektrodenkraft
149
Sekundärstrom-Messeingang (X3)
151
Reduktion des Messsignals
153
Überwachung Transformator-Temperatur (X3)
154
Hauptschalter-Auslösung (X8)
156
Sekundärspannungs-Messeingang
158
Master-Slave-Verbindung (X6, X7)
159
Wasserversorgung Anschließen
160
Inbetriebnahme
161
Einstellung der Stromregelparameter für die Transformatoren der PSI 6Xxx Steuerungen
163
Tab. 19: Trafoparameter
165
Betrieb
167
Instandhaltung und Instandsetzung
169
Wartungsplan
169
Wartung
170
Batteriewechsel
170
Firmware-Update
172
Firmware-Update Per "Winblow
173
Firmware-Update Per "Memtool
174
Firmware-Update Per "Fwupdate
175
Firmware-Update Per "Psupdate
178
Ersatzteile
179
Tab. 20: Ersatzteile
179
Demontage und Austausch
181
Entsorgung
185
Umweltschutz
185
Erweiterung und Umbau
187
Optionales Zubehör
187
Tab. 21: Optionales Zubehör
187
Zubehörsatz für Rückwandmontage
188
Produkt Erweitern
190
Ein-/Ausbau Anybus-Modul
190
Ein-/Ausbau der Lizenz-Memory-Card
192
Master-Slave-Betrieb
194
Tab. 22: Beispiele: Erzielbare Schweißspitzenströme
194
Funktion
195
Besonderheiten Beim Einsatz von Stromsensoren
197
Besonderheiten Bezüglich Diagnose
199
Tab. 23: Slave-Fehler
199
Fehlersuche und Fehlerbehebung
201
Technische Daten
203
Tab. 24: Leistungsteil-Übergreifende Allgemeine Daten
203
Tab. 25: Leistungsteil-Übergreifende Umgebungsbezogene Daten
204
Tab. 26: Leistungsteil-Übergreifende Elektrische Daten
205
Tab. 27: PSI 61Xx - Mechanische Daten
206
Tab. 28: PSI 61Xx - Umgebungsbezogene Daten
206
Tab. 29: PSI 61Xx - Elektrische Daten
206
Tab. 30: PSI 62Xx - Mechanische Daten
207
Tab. 31: PSI 62Xx - Umgebungsbezogene Daten
207
Tab. 32: PSI 62Xx - Elektrische Daten
207
Tab. 33: PSI 6300/63C0 - Mechanische Daten
208
Tab. 34: PSI 6300/63C0 - Umgebungsbezogene Daten
208
Tab. 35: PSI 6300/63C0 - Elektrische Daten
208
Tab. 36: PSI 64C0 - Mechanische Daten
209
Tab. 37: PSI 64C0 - Umgebungsbezogene Daten
209
Tab. 38: PSI 64C0 - Elektrische Daten
209
Tab. 39: PSI 65Xx - Mechanische Daten
210
Tab. 40: PSI 65Xx - Umgebungsbezogene Daten
210
Tab. 41: PSI 65Xx - Elektrische Daten
210
Service und Support
211
Anhang
213
Konformitätserklärung / CE- / EAC- Kennzeichnung
213
Tabellenverzeichnis
215
Abbildungsverzeichnis
217
Abkürzungen
221
Tab. 42: Abkürzungen und Begriffserklärungen
221
Stichwortverzeichnis
225
English
229
1 Regarding this Documentation
233
Validity of the Documentation
233
Additional Documentation
233
Table 1: Necessary (D) and Supplementary Documents
233
Presentation of Information
235
Safety Instructions
235
Table 2: Example for the Structure of a Safety Instruction
235
Table 3: Danger Classes According to ANSI Z535
236
Table 4: Examples for Classification of Safety Instructions
236
Icons
237
Designations
237
Abbreviations
237
Table 5: Icons Used
237
Table 6: Designations
237
2 Safety Instructions
239
On this Section
239
Intended Use
239
Inappropriate Use
239
Qualification of Personnel
240
General Safety Instructions
242
Product- and Technology-Dependent Safety Instructions
243
Possible Icons on the Product
243
Transport
243
Table 7: Possible Icons on the Product
243
Installation and Assembly
244
Electrical Connection
246
Operating the Product
248
Retrofits and Modifications by the Operator
250
Maintenance and Repair
251
Declaration of Conformity / CE Marking
252
Obligations of the Operator
253
3 General Information on Damage to Property and
255
Products
255
Transport and Storage
255
Installation and Assembly
256
Electrical Connection
258
Operation
260
Maintenance and Repair
261
4 Scope of Delivery
263
5 Information on this Product
265
Table 8: Overview of the Types of Power Units
266
Description of Performance
267
Product Description
270
Fig. 1:Examples: Weld Timer PSI6100, PSI63C0, PSI64C0
270
Programming and Operation
271
Functional Principle of Medium-Frequency Welding
272
Fig. 2:Block Diagram Overview: PSI 6000 with Transformer
272
Fig. 3:Detailed Block Diagram of a Medium-Frequency Inverter System
272
Fig. 4:Secondary Rectification by the PSG Transformer
273
Fig. 5:Interrelationship: Pulse Width of Primary Voltage and Secondary Current with Medium-Frequency Welding
273
Structure
274
Fig. 6:General Structure of an MF Welding System with PSI 6Xxx
274
Partial Front-Panel View PSI 6X00.XXX
276
Fig. 7:Partial Front-Panel View PSI 6X00.XXX
276
Partial Front-Panel View PSI 6Xcx.XXX
278
Fig. 8:Partial Front-Panel View PSI 6Xcx.XXX
278
Modules
280
Anybus Module "Profinet IO
280
Fig. 9:Anybus Module "Profinet IO" (2-Port Variant)
280
Anybus Module "CC Ethernet 100 Mbit
282
Fig. 10: Anybus Module "CC Ethernet 100 Mbit" (1-Port Variant)
282
CC Ethernet 100 Mbit" Module
283
Fig. 11: "CC Ethernet 100 Mbit" Module
283
CC Profinet" Module
284
Fig. 12: "CC Profinet" Module
284
Module „Profinet-IRT, 2 Port (M40 Module)
285
Fig. 13: Profinet-IRT, 2-Port (M40 Module)
285
Module "Optical Fiber Profinet
286
Fig. 14: "Optical Fiber Profinet" Module
286
Module „Profinet-IRT, LWL (M40 Module)
287
Fig. 15: Profinet-IRT LWL (M40 Module)
287
Diagnosis Module
288
Fig. 16: Diagnosis Module: Front Panel View
288
Fig. 17: Diagnosis Module: Main Menu
289
Fig. 18: Diagnosis Module: ETHERNET Menu
290
E/A DISK R2ED" and "E/A DISK R4ED" I/O Module
292
Table 9: Technical Data: "E/A DISK R2ED" / "E/A DISK R4ED" I/O Module
292
Fig. 19: Front Panel View: "E/A DISK R2ED" I/O Module
294
E/A DISK" I/O Module
295
Table 10: Technical Data: "E/A DISK" I/O Module
295
Fig. 20: Front Panel View: "E/A DISK" I/O Module
296
E/A DISK 2R" and "E/A DISK 4R" I/O Modules
297
Table 11: Technical Data: "E/A DISK 2R" / "E/A DISK 4R" I/O Modules
297
Fig. 21: Front Panel View: "E/A DISK 2R" / "E/A DISK 4R" I/O Module
299
E/A IBS OPC with Optical Fiber" (INTERBUS-S) I/O Module
301
Table 12: Technical Data: "E/A IBS OPC with Optical Fiber" I/O Module
301
Fig. 22: Front Panel View: "E/A IBS OPC with Optical Fiber" I/O Module
303
Fig. 23: "E/A IBS OPC with Optical Fiber" I/O Module: Setting of Transmission Power and the Baud Rate
304
E/A IBS FERN" (INTERBUS-S) I/O Module
305
Table 13: Technical Data: "E/A IBS FERN" I/O Module
305
Fig. 24: Front Panel View: "E/A IBS FERN (REMOTE)" I/O Module
306
Fig. 25: Terminal Assignment of the INTERBUS-S Ports
307
E/A IBS X_FERN_8EA" (INTERBUS-S) I/O Module
309
Table 14: Technical Data: "E/A IBS X_FERN_8EA" I/O Module
309
Fig. 26: Front Panel View: "E/A IBS X_FERN_8EA" I/O Module
310
Fig. 27: Terminal Assignment of the INTERBUS-S Ports
311
DEV-NET" (Devicenet) I/O Module
313
Table 15: Technical Data: "DEV-NET" I/O Module
313
Fig. 28: Front Panel View: "DEV-NET" I/O Module
314
Comnetm-DP" (PROFIBUS-DP) I/O Module
315
Table 16: Technical Data: "Comnetm-DP" I/O Module
315
Fig. 29: Front Panel View: "Comnetm-DP" I/O Module
316
UI Controller Module (PSQ 6000 XQR)
317
Fig. 30: Front Panel View: "PSQ 6000 XQR" UI Controller Module
318
Load and Rating
320
Basics
320
Is the Inverter Overloaded
320
Load Diagrams
322
Fig. 31: Permitted Primary Current Depending on the Duty Cycle: PSI 61Xx
322
Fig. 33: Permitted Primary Current Depending on the Welding Time: PSI 61Xx.XXX L2/W2 324 Fig. 34: Permitted Primary Current Depending on the Duty Cycle: PSI 62Xx
326
Fig. 38: Permitted Primary Current Depending on the Welding Time: PSI 6300/63C0.XXX L1/W1
330
Fig. 39: Permitted Primary Current Depending on the Welding Time: PSI 6300/63C0.XXX L2/W2
331
Fig. 40: Permitted Primary Current Depending on the Duty Cycle: PSI 64Xx
332
Identification of the Product
336
Type Designation
336
Type Plate
337
Table 17: Type Plate Device Name
337
Fig. 45: Type Plate Device
337
6 Transport and Storage
339
7 Assembly
341
Assembling the Product
341
Dimensioned Drawings and Locations of Connections
342
Fig. 46: Dimensioned Drawing: PSI 61Xx.XXX L1
342
Fig. 47: Dimensioned Drawing: PSI 61Xx.XXX L2
343
Fig. 48: Dimensioned Drawing: PSI 61Xx.XXX Wx
344
Fig. 51: Dimensioned Drawing: PSI 62Xx.XXX W1
346
Fig. 52: Location of Mains and Transformer Connection: PSI 62Xx.XXX W1
347
Fig. 53: Location of Cooling Water Connection: PSI 62Xx.XXX W1
348
Fig. 54: Dimensioned Drawing: PSI 6300/63C0.XXX Lx
349
Fig. 55: Dimensioned Drawing: PSI 6300/63C0.XXX Wx
350
Fig. 57: Location of Cooling Water Connection: PSI 6300/63C0.XXX Wx
351
Fig. 58: Dimensioned Drawing: PSI 64C0.XXX W1
352
Fig. 59: Location of Mains and Transformer Connection: PSI 64C0.XXX W1
353
Fig. 60: Location of Cooling Water Connection: PSI 64C0.XXX W1
354
Fig. 61: Dimensioned Drawing: PSI 65Xx.XXX W1
356
Fig. 62: Location of Mains and Transformer Connection: PSI 65Xx.XXX W1
357
Fig. 63: Location of Cooling Water Connection: PSI 65Xx.XXX W1
358
Electrical Connection of the Product
359
General Information on Electromagnetic Fields
359
Interference Suppression
360
Line Connection
360
Table 18: Rating of Noise Suppression Equipment
360
Fig. 64: Noise Suppression Examples
360
Fig. 65: Typical Curve of the Mains Voltage (Top) and the Related Mains Current (Bottom) in One Phase During the Welding Process
361
Transformer Connection (Primary Circuit)
363
Connection for Programming Terminal
363
Fig. 66: Connection of Programming Terminal Via X1
363
Fig. 67: Connection of Programming Terminal Via X3C
364
VDC Logic Supply (X4, Input)
365
Fig. 68: Logic Supply Input of the Timer
365
VDC Voltage Generator (X4, Output)
366
Fig. 69: Internally Generated 24 VDC Voltage Supply
366
I/O Module Supply (X4, Output)
367
Fig. 70: Connection of the I/O Module Supply at X4 of the Timer
367
Fig. 71: Direct Connection of the I/O Module Supply to Separate 24 VDC Power Supply Unit
367
VDC Voltage Distribution (X4)
368
Fig. 72: Wiring Examples for 24V Voltage Distribution
370
Master Slave Applications
371
Fig. 73: Wiring Example: 24V Voltage Distribution for Master Slave Applications
371
External Fan (X4, Output)
372
Power Supply to External Units (X5, Output)
373
Fig. 75: Power Supply to External Consumers
373
Analog Output of the Electrode Force (X2, Output)
374
Fig. 76: Analog Output of the Force Actuating Variable
374
Electrode Force Feedback
375
Fig. 77: Possibly Available Feedback Signal Inputs for Pressure/Force
376
Input for Secondary Current Measurement (X3)
377
Fig. 78: Connecting a KSR Sensor on the Secondary Side
377
Reducing the Measurement Signal
379
Fig. 79: Adjustment Circuit Required for Secondary Circuit Currents of >120 Ka
379
Transformer Temperature Monitoring (X3)
380
Fig. 80: Connection for Monitoring the Welding Transformer Temperature
380
Fig. 81: Transformer Temperature Not Monitored by Timer
380
Main Switch Tripped (X8)
382
Fig. 82: Connection Terminals for Main Switch Trip
382
Measuring Input for Secondary Voltage Measurement
384
Fig. 83: with PSI 6X00.XXX: Connection for Secondary Voltage Measurement
384
Fig. 84: with PSI 6Xcx.XX: Connection for Secondary Voltage Measurement
384
Master Slave Connection (X6, X7)
385
Fig. 85: Master Slave Connection
385
Connecting the Water Supply
386
Fig. 86: Example: Cooling Water Connection
386
8 Commissioning
387
Fig. 87: Display at the Timer Unit
388
Setting of the Current Control Parameters for the Transformers of PSI 6Xxx Timers
389
Table 19: Transformer Parameters
391
9 Operation
393
Fig. 88: Display During Normal Operation if no Error Is Present
393
10 Service and Repair
395
Maintenance Schedule
395
Maintenance
396
Battery Replacement
396
Fig. 89: Battery Fault Display
396
Fig. 90: Battery Compartment
397
Firmware Update
398
Firmware Update Via "Winblow
399
Firmware Update Via "Memtool
400
Firmware Update Via "Fwupdate
401
Firmware Update Via "Psupdate
404
Spare Parts
405
Table 20: Spare Parts
405
11 Dismantling and Replacement
407
Fig. 91: Display at the Timer Unit
408
12 Disposal
411
Environmental Protection
411
13 Extension and Conversion
413
Optional Accessories
413
Table 21: Optional Accessories
413
Accessory Kit for Rear Panel Installation
414
Fig. 92: Dimensioned Drawing: Accessory Kit for Rear Panel Installation
414
Expand Product
416
Installation/Removal of Anybus Module
416
Installation/Removal of the Licence Memory Card
418
Fig. 93: Location of the Licence Memory Card
418
Master Slave Operation
420
Table 22: Examples: Attainable Welding Peak Currents
420
Function
421
Fig. 94: Master Slave Mode: Principle
422
How to Use Current Sensors
423
Diagnosis
425
Table 23: Slave Errors
425
14 Troubleshooting
427
15 Technical Data
429
Table 24: General Data Across Power Units
429
Table 25: Environmental Data Across Power Units
430
Table 26: Electrical Data Across Power Units
431
Table 27: PSI 61Xx - Mechanical Data
432
Table 28: PSI 61Xx - Environmental Data
432
Table 29: PSI 61Xx - Electrical Data
432
Table 30: PSI 62Xx - Mechanical Data
433
Table 31: PSI 62Xx - Environmental Data
433
Table 32: PSI 62Xx - Electrical Data
433
Table 33: PSI 6300/63C0 - Mechanical Data
434
Table 34: PSI 6300/63C0 - Environmental Data
434
Table 35: PSI 6300/63C0 - Electrical Data
434
Table 36: PSI 64C0 - Mechanical Data
435
Table 37: PSI 64C0 - Environmental Data
435
Table 38: PSI 64C0 - Electrical Data
435
Table 39: PSI 65Xx - Mechanical Data
436
Table 40: PSI 65Xx - Environmental Data
436
Table 41: PSI 65Xx - Electrical Data
436
16 Service and Support
437
17 Annex
439
Declaration of Conformity / CE / EAC Marking
439
18 List of Tables
441
19 List of Figures
443
20 Abbreviations
447
Table 42: Abbreviations and Definitions
447
21 Index
451
Werbung
Bosch Rexroth PSI 6 Serie Anwendungsbeschreibung (138 Seiten)
Marke:
Bosch
| Kategorie:
Schweißzubehör
| Dateigröße: 2.13 MB
Inhaltsverzeichnis
Inhaltsverzeichnis
3
1 Zu dieser Dokumentation
5
Gültigkeit der Dokumentation
5
Zusätzliche Dokumentationen
5
Tab. 1: Erforderliche und Ergänzende Unterlagen
5
Darstellung von Informationen
6
Sicherheitshinweise
6
Tab. 2: Beispiel zum Aufbau eines Sicherheitshinweises
6
Tab. 3: Gefahrenklassen nach ANSI Z535
7
Tab. 4: Beispiele zur Klassifikation der Sicherheitshinweise
7
Symbole
8
Bezeichnungen
8
Abkürzungen
8
Tab. 5: Verwendete Symbolik
8
Tab. 6: Bezeichnungen
8
2 Sicherheitshinweise
9
3 Allgemeine Hinweise zu Sachschäden und Produktschäden
11
4 Lieferumfang
13
5 Allgemeines zur Option „UI-Regelung
15
Funktion und Möglichkeiten
15
Voraussetzungen
16
Informationen zu Montage und Anschluss
18
Bei PSI 6X00
18
Bei PSI 6Xcx
19
Spannungsabgriff
20
Abb. 1: Spannungsabgriff
20
Firmware-Änderungen
22
Versionsanzeige
23
Abb. 2: Firmware Version des Reglers
23
Änderung Reglermode Alu/Stahl Elektrodenabhängig
24
Abb. 3: Betriebsart Aluminium/Stahl Elektrodenabhängig
24
6 Grundlagen zum Widerstandsverlauf
25
Abb. 4: Beispiel: Strom-, Spannungs- und Widerstandsverlauf
25
Normale" Schweißung
26
Abb. 5: Widerstandsverlauf einer Ungestörten Schweißung
26
Abb. 6: Korrekte Schweißung mit Vorimpuls
28
Schweißungen mit Isolierenden Materialien
30
Abb. 7: Widerstandsverlauf bei Schweißungen mit Kleber
30
Schweißungen mit Spritzer
31
Abb. 8: Widerstandsverlauf mit Spritzer bei 105 Ms
31
7 Inbetriebnahme der UI-Regelung
33
Grundvoraussetzungen
33
Ermittelung der Basis-Schweißparameter
34
Abb. 9: Beispiel: Kraftaufbau in der Vorhaltezeit
36
Tab. 7: Basis-Schweißparameter
37
Abb. 10: Beispiel: Widerstandsverlauf mit Richtiger und zu Kurzer VHZ
37
Generierung von Referenzkurven
41
Voraussetzungen
41
Widerstandsverlauf als Referenzkurve Definieren
43
Aufzeichnung Per Rekorder
45
Abb. 11: Fenster "UI Setup": Aufzeichnen Per Rekorder
45
Abb. 12: Löschen Überflüssiger Widerstandsverläufe
47
Abb. 13: Anzeige der Mittelwertskurve (Referenzkurve)
47
Abb. 14: Fenster „Löschen und Kurven Mitteln
48
Abb. 15: Mittelwertskurve an die SST Übertragen
49
Abb. 16: Fenster „Ref. Kurven (PC) -> SST
50
Abb. 17: Fenster „Einstellungen für Kurve Schreiben
51
Aktivieren der UI-Regelung
53
Erläuterungen zu den Wichtigsten UI-Parametern
54
Besonderheiten bei Aktivierter UI-Regelung
59
Deaktivieren der UI-Regelung
61
8 UI-Überwachung Parametrieren
63
Verfügbare Parameter
63
Abb. 18: Parametrierung der UI-Überwachung
63
Hinweise zum Einsatz von Überwachungsgrößen
67
Vorgehensweise zur Inbetriebnahme
69
Abb. 19: UIR Histogrammanzeige
71
UI-Überwachung Ausschalten
72
Dynamische Toleranzbandanpassung
76
Relevante Parameter
76
Ermittlung der Erforderlichen Parametrierung
78
9 Sich Schnell Informieren
81
Status der UI-Funktionalität
81
Themenbereich „Übersicht", Reiter „Übersicht
81
PSQ-Statusanzeige
82
Abb. 20: PSQ-Statusanzeige
82
Ermittelte Istwerte des Letzten Schweißablaufes
83
Kurvenverläufe der Letzten 64 Schweißungen einer SST
84
Punkt-/Spritzerübersicht
85
Anzeige der Prozessgrößen PSF, UIP und FQF
86
UIR-Prozessübersicht
89
10 Stopp (Qualitäts-Stopp)
91
Programmbezogener Q-Stopp
91
Bauteilbezogener Q-Stopp
92
Ausnahmen
93
Sonderpunkte
93
Parametrierung
93
Abb. 21: Parametrierung Q-Stopp
93
11 Kleber-Funktion
95
Abb. 22: Widerstandsverläufe IM Zusammenhang mit Kleber
95
Abb. 23: Widerstandsverlauf mit und ohne Klebstoffeinfluss
96
Erforderliche Parametrierung
97
Abb. 24: Stromverlauf mit und ohne Klebstoffeinfluss
97
Ein-/Ausschalten der Kleber-Funktion
98
Abb. 25: Ein-/Ausschalten der Kleber-Funktion
98
12 Statische Zangenwiderstands-Kompensation
99
Abb. 26: Abweichender Widerstandsverlauf zwischen Ur- und Ersatz-Zange
99
Einrichten der Zangenwiderstands-Kompensation
100
Abb. 27: Prinzip der Zangenwiderstands-Kompensation
100
Abb. 28: Widerstandsverlauf der Kurzschlussschweißung
101
Aktivierung der Zangenwiderstands-Kompensation
104
Vorgehensweise nach einem Zangenwechsel
104
Abb. 29: Visualisierung des Aktiven Zangenwiderstands-Kompensationswertes
104
Abb. 30: Widerstandsverlauf: Kurzschlussschweißung nach Zangenwechsel
105
Sonderfälle
107
13 Dünnblech-Funktion
111
Erforderliche Parametrierung
111
Ein-/Ausschalten der Dünnblech-Funktion
112
Abb. 31: Ein-/Ausschalten der Dünnblech-Funktion
112
Dünnblech mit Nachstellung
113
Abb. 32: Einstellung Dünnblech mit Nachstellung
113
14 Kraft-Überwachung
115
Abb. 33: Auswirkung der Thermischen Ausdehnung auf die Istkraft
115
Abb. 34: Beispiele von Kraftverlaufskurven
116
Erforderliche Parametrierung
117
Abb. 35: Themenbereich „Programmierung", Reiter „PSQ", Unterreiter „UIR-Elektrode" . 117 Abb. 36: Parametrierung der Toleranzdaten für die Kraft-Überwachung
119
Ein-/Ausschalten der Kraft-Überwachung
120
Abb. 37: Ein-/Ausschalten der Kraft-Überwachung
120
Kraftüberwachung IM Messkreistest (Ab UIR Version 414)
121
Abb. 38: Parameter Kraftüberwachung IM Messkreistest
121
Abb. 39: Meldung Elektrodenkraft Unterschritten
122
Abb. 40: Meldung Elektrodenkraft Überschritten
122
15 Betriebsart „Hot-Staking
123
Erforderliche Parametrierung
123
Ein-/Ausschalten der Betriebsart „Hot Staking
124
Abb. 41: Ein-/Ausschalten der Betriebsart „Hot-Staking
124
16 Sheet Thickness Combination (STC)
125
STC-Funktion Nutzen
125
17 Tabellenverzeichnis
127
Abbildungsverzeichnis
129
19 Abkürzungen
131
Tab. 8: Abkürzungen und Begriffserklärungen
131
20 Stichwortverzeichnis
135
Werbung
Verwandte Produkte
Bosch Rexroth VT-HNC100 3X Serie
Bosch Rexroth IndraControl L25
Bosch Rexroth IndraControl L45
Bosch Rexroth IndraControl L65
Bosch Rexroth IndraControl L75
Bosch Rexroth IndraControl L85
Bosch Rexroth PSI 6 757 Serie
Bosch REXROTH M1
Bosch REXROTH M4
Bosch REXROTH M6
Bosch Kategorien
Geschirrspüler
Waschmaschinen
Backöfen
Wäschetrockner
Staubsauger
Weitere Bosch Anleitungen
Anmelden
Anmelden
ODER
Mit Facebook anmelden
Mit Google anmelden
Anleitung hochladen
Von PC hochladen
Von URL hochladen