Herunterladen Inhalt Inhalt Diese Seite drucken
Videotec ULISSE MAXI NETCAM Bedienungsanleitung

Videotec ULISSE MAXI NETCAM Bedienungsanleitung

Full ip ptz einheit fuer netzwerk-kameras fuer die dynamische ueberwachung grosser aussenbereiche
Vorschau ausblenden Andere Handbücher für ULISSE MAXI NETCAM:
Inhaltsverzeichnis

Werbung

Verfügbare Sprachen
  • DE

Verfügbare Sprachen

  • DEUTSCH, seite 195
EN
English - Instructions manual
Italiano - Manuale di istruzioni
IT
Français - Manuel d'instructions
FR
Deutsch - Bedienungslanleitung
DE
Русский - Руководство по эксплуатации
RU
ULISSE MAXI NETCAM
Full IP PTZ unit for network cameras for dynamic
monitoring of large outdoor areas

Werbung

Inhaltsverzeichnis
loading

Inhaltszusammenfassung für Videotec ULISSE MAXI NETCAM

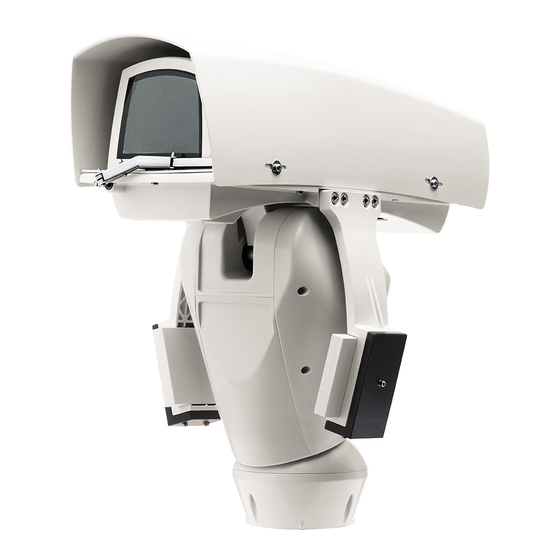
  • Seite 1 ULISSE MAXI NETCAM Full IP PTZ unit for network cameras for dynamic monitoring of large outdoor areas English - Instructions manual Italiano - Manuale di istruzioni Français - Manuel d’instructions Deutsch - Bedienungslanleitung Русский - Руководство по эксплуатации...
  • Seite 3 ENGLISH ULISSE MAXI NETCAM Full IP PTZ unit for network cameras for dynamic monitoring of large outdoor areas English - Instruction manual...
  • Seite 5: Inhaltsverzeichnis

    Contents E N G L I S H 1 About this manual ......................7 1.1 Typographical conventions ..........................7 2 Notes on copyright and information on trademarks ..........7 3 Safety rules........................7 4 Identification ........................ 10 4.1 Product description and type designation....................10 4.2 Product marking ..............................10 4.2.1 Checking the markings ...............................10 5 Versions ........................
  • Seite 6 8.7 Counterweights installation ..........................24 8.8 LED illuminators installation ..........................25 8.8.1 Counterweight removal ..............................25 8.8.2 Fitting the illuminator on the bracket ..........................25 8.9 Connection of the LED illuminators ........................26 8.10 Desiccant bag ...............................27 8.11 LED illuminator activation and adjustment instructions ..............27 8.11.1 Description of the LED illuminator ..........................27 8.11.2 Activation of the LED illuminator via an external dusk switch ................28 8.11.3 Activation of the LED illuminator via the integrated dusk sensor ..............28...
  • Seite 7 11.2 Wall mount bracket ............................44 11.3 Parapet bracket ..............................44 11.4 Power supply with illuminator control ......................44 12 Instructions for exceptional operation ..............45 12.1 How to switch from ONVIF communication mode to RS-485 (telemetry) mode ......45 12.1.1 Analogue Video connection............................46 12.1.2 Camera connection ................................46 12.1.3 Check communication in RS485 mode ........................49 12.1.4 Alarm status control ................................49...
  • Seite 8 MNVCUPTMAXIR_1625_EN...
  • Seite 9: About This Manual

    1 About this manual 3 Safety rules Read all the documentation supplied carefully before CAUTION! The electrical system to which installing and using this unit. Keep the manual in a the unit is connected must be equipped convenient place for future reference. with a 20A max automatic bipolar circuit breaker.
  • Seite 10 • Before starting any operation, make sure the • This device was designed to be permanently power supply is disconnected. secured and connected on a building or on a suitable structure. The device must be permanently • Be careful not to use cables that seem worn or old. secured and connected before any operation.
  • Seite 11 • Do not allow children or unauthorised people to • Take all necessary precautions to prevent the use the appliance. apparatus from being damaged by electrostatic discharge. • Only skilled personnel should carry out maintenance on the device. When carrying out •...
  • Seite 12: Identification

    Pan & tilt devices have a label complying with CE markings. designation ULISSE MAXI NETCAM is a powerful Full-IP PTZ for outdoor IP video surveillance, which can manage modern IP SD, HD and Megapixel cameras, with integration in a network system.
  • Seite 13: Versions

    The version with LED illuminators can only powered at 24Vac. The pan & tilt can be fitted with bracket for 2 VIDEOTEC LED illuminators for night surveillance (illuminators not included). Fig. 3 Fig. 2 For further information refer to the relative chapter (8.8 LED illuminators installation,...
  • Seite 14: Preparing The Product For Use

    6 Preparing the product for 6.3 Contents Check the contents to make sure they correspond with the list of materials as below: Any change that is not expressly approved • Positioning unit by the manufacturer will invalidate the • Power supply base guarantee.
  • Seite 15: Preparatory Work Before Installation

    6.5 Preparatory work before 6.5.2 Cables management installation The connection cables should not be accessible from the outside. It is necessary 6.5.1 Mounting the bracket to fasten the cables securely to the support in order to prevent excessive weight pulling For installations subject to vibrations, only them out accidentaly.
  • Seite 16: Assembly

    7 Assembly 7.2.1 Cameras features The correct operation of the equipment, Only network cameras with specific within the temperature range indicated, is technical characteristics can be installed ( guaranteed only if you use camera and lens 7.2.1 Cameras features, page 14). with temperature limits equal to at least -10°C and +60°C.
  • Seite 17: How To Open The Housing

    7.2.1 How to open the housing If necessary, use the additional spacers to correctly position the camera and lens. Loosen the leak-proof screws placed on the sides and lift the upper part of the housing. Fig. 7 Fig. 9 After installation and wiring, close the Fasten the aluminium plate (01) on the slide by product again.
  • Seite 18: Positioning Of The H-20 Spacer On The Inner Slide

    7.2.3 Positioning of the H-20 spacer on 7.2.4 Internal slide the inner slide Shift the inner slide with lens and camera already fastened into the wanted position and secure it by It is possible to fasten the H-20 spacer (02) to the lens. means of the washers and screws provided.
  • Seite 19: Housing Board Description

    7.3 Housing board description 7.3.1 Connection of the camera and motorised lens BOARD DESCRIPTION All connections illustrated below should Connector/Terminal Function be made only and exclusively by expert Not used installers who should comply with all the Motorised lens motor control wiring and power supply specifications for connector the devices.
  • Seite 20: Adjustment Of The Supply Voltage Of The Lens Motors

    7.3.2 Adjustment of the supply voltage Lenses with reverse polarity motors: Implement the connections, as shown in the figure.. of the lens motors Before powering the Pan & Tilt, select the lens power FOCUS + voltage using DIP1 (7.3 Housing board description, FOCUS - page 17).
  • Seite 21: Installation

    8 Installation 8.1 Connection of the cables to the base Never, under any circumstances, make any changes or connections that are not Insert the cables into the cable glands holding the shown in this handbook. Failure to follow base at about 20cm from the support. Tighten the the connection instructions that are given cable glands.
  • Seite 22: Fixing The Base To The Support

    8.2 Fixing the base to the support 8.3 Connector board description CONNECTOR BOARD DESCRIPTION Use the screws and the washers supplied with the base. Connector/ Function Component Once you have positioned the gasket (01), fix the Power supply for the board base (02) onto the bracket (03) with screws (04), Signal cables serrated washers (05) and screw rings (06).
  • Seite 23: Connection Of The Power Supply Line

    8.4 Connection of the power Earth cable should be about 10mm longer supply line than the other two, so that it will not be disconnected accidentally if pulled. Depending on the version, the device can be provided with different power supply voltages. The The power supply cable must be covered power supply voltage is indicated on the product by the silicone sheath (01) supplied.
  • Seite 24: 24Vac Power Line Connection

    8.4.1 24Vac power line connection 8.4.2 120Vac and 230Vac power line connection Cut the cables to the correct length and make the connections. Connect the power supply to the Cut the cables to the correct length and make the terminal: CN1. connections.
  • Seite 25: Connection Of The Alarm Inputs, Of The Twilight Switch And Of The Relays

    8.4.3 Connection of the alarm inputs, of Version with LED illuminators the twilight switch and of the relays CONNECTION OF THE ALARM INPUTS, OF THE TWILIGHT SWITCH AND OF THE RELAYS CAUTION! TNV-1 installation type. The AL1, AL2, AL3, Self-powered alarm inputs referring to the installation is type TNV-1, do not connect it AL4 e ALARMS ALARMS common terminal...
  • Seite 26: Fixing The Upper Body

    8.6 Fixing the upper body 8.7 Counterweights installation Fix the upper body (01) to the base (02) using the Fasten the counterweights to the housing using the fixing screws (03) equipped with gaskets (04). Make screws and washers supplied. sure the base seal is present and in good condition (05).
  • Seite 27: Led Illuminators Installation

    Place the fixings of the illuminator (01) on those of the bracket (02). To work properly both illuminators must be installed together. From Pan & Tilt, it is only possible to install VIDEOTEC illuminators. 8.8.1 Counterweight removal Undo the screws and remove the external counterweights. Fig. 39 Tighten the screws and the washers previously removed.
  • Seite 28: Connection Of The Led Illuminators

    8.9 Connection of the LED Connect the cables as shown in figure. illuminators Remove the 2 M12 caps. Tighten the 2 cable glands and relative O-rings supplied. Left illuminator Right illuminator Fig. 44 CONNECTION OF THE LED ILLUMINATORS Fig. 41 Left illuminator Right illuminator To ensure the safety and the correct...
  • Seite 29: Desiccant Bag

    8.10 Desiccant bag 8.11 LED illuminator activation and adjustment instructions Insert the desiccant bags (01) in the position indicated in the illustration, after having taken them Once the adjustment is done the illuminator on out from the transparent packaging and folding them the left (MASTER) synchronizes and controls the in half.
  • Seite 30: Activation Of The Led Illuminator Via An External Dusk Switch

    8.11.2 Activation of the LED illuminator • Adjustment of the the illuminator on the right (SLAVE): via an external dusk switch • Lighting threshold: Set the value to the Perform the following operations: maximum (8.11.5 LED illuminator switching on • Connect the twilight switch to the terminals: AL1/ threshold adjustment, page 29).
  • Seite 31: Led Illuminator Switching On Threshold Adjustment

    8.11.5 LED illuminator switching on 8.11.6 LED illuminator power threshold adjustment adjustment The illuminator on the right must always be The illuminator on the right must always be set to maximum brightness. set to minimum power. The illuminator is set in the factory to provide maximum power.
  • Seite 32: Fastening Of The Wiper Blade

    8.12 Fastening of the wiper blade Fasten the whole assembly by means of the washer and nut. Insert the blade on the wiper shaft. Position the blade in the stop position. Fig. 52 The correct adjustment must allow the return of the blade to the stop position Fig.
  • Seite 33: Hardware Configuration

    AMERICAN OFF OFF OFF OFF ON DYNAMICS VISTA OFF OFF OFF ON OFF OFF ON Tab. 10 Deafult configuration: MACRO (VIDEOTEC), 115200 baud, Address 1. This option does not require the setting of the DIP-switch (DIP1, DIP3). Fig. 55 MNVCUPTMAXIR_1625_EN...
  • Seite 34: Dip3 Configuration

    8.13.4 DIP3 configuration 8.13.5 DIP4 configuration When the switch rocker is up it represents This DIP is set following the inverse the value 1 (ON). When the dip-switch procedure compared to those previously rocker is down it represents the value 0 performed.
  • Seite 35: Switching On

    9 Switching on Make sure that all parts are fastened down firmly and safely. Make sure that the unit and other components of the installation are closed The automatic pre-heating (De-Ice) process so that it is impossible to come into contact could be started whenever the device is with live parts.
  • Seite 36: Configuration

    10 Configuration 10.1.1 Products equipped with firmware version prior to 2.1 10.1 Web interface During the first connection assign an address other than 192.168.0.100. The unit is configured to obtain an IP address from a DHCP server. In the predefined settings for the configured P&T, to automatically acquire an address through a DHCP Browsers supported: Microsoft Internet protocol, it is possible to detect the device through...
  • Seite 37: First Access To The Web

    10.1.2 First access to the web pages 10.1.3 Home Page For proper operation, the pan & tilt must be The product control interface is displayed if login is configured in relation to the installed camera. successful. The required parameters are: •...
  • Seite 38: User Controls Page

    10.1.4 User Controls page • Iris close/Iris open/Auto iris To control the device through the browser, select the User Control entry. A new window will open with a virtual keyboard to enter commands. Fig. 66 • Wiper/Washer Fig. 67 • Day: Activate the camera's IR filter. If available, it turns off the LED illuminators.
  • Seite 39: Device Parameters Page

    10.1.5 Device Parameters Page 10.1.7 Network Configuration page From menu entry Device Parameters it is possible to From menu entry Network it is possible to change set the name of the device and view other additional the setting of the Pan & Tilt network. It is possible information.
  • Seite 40: User Configuration Page

    10.1.9 Movement Parameters page NTP Server: It is also possible to specify if the device needs to be synchronised with an external NTP From menu entry Movement Parameters it is possible (Network Time Protocol) server. to control, via web, all Pan & Tilt parameters. •...
  • Seite 41: Autopan Page

    10.1.9.1 Autopan Page 10.1.10 Preset Parameters page From menu entry Autopan it is possible to specify the From menu entry Preset Parameters a number of preset autopan start and end. parameters relative to the presets can be configured: • Scan Speed: The speed, measured in degrees to the second, at which a preset is reached by explicit operator request.
  • Seite 42: Digital I/O Page

    10.1.12 Digital I/O Page 10.1.13 Washer page From menu entry Digital I/O it is possible to configure From the Wash System menu, it is possible to the digital channels available in the device. What configure the device wash system functions. follows is a brief description of the configurable parameters for each digital input.
  • Seite 43: Camera Settings Page

    10.1.14 Camera Settings page 10.1.15 Tools Page The parameters of the IP camera that were set at From menu entry Tools it is possible to re-set the first start up can be edited in the Camera Parameters predefined values for the entire configuration of section.
  • Seite 44: Factory Default

    10.1.16 Factory Default In order to connect the web camera you must use the program VTTunnel, available in the Tools menu. If the password is no longer available, you When the program starts, a list of networked devices can also restore the factory settings by will be shown.
  • Seite 45: Accessories

    11 Accessories 11.1.1 Washing system connection CAUTION! TNV-1 installation type. The For further details on configuration and installation is type TNV-1, do not connect it use, refer to the relative manual. to SELV circuits. 11.1 Washer CAUTION! In order to reduce the risk of fire, only use UL Listed or CSA certified cables The P&T can be equipped with an external pump that with sections greater than or equal to...
  • Seite 46: Wall Mount Bracket

    11.2 Wall mount bracket 11.4 Power supply with illuminator control Wall bracket with internal cable channel. Weather-proof box with power supply and control of the illuminators. Fig. 88 Fig. 90 Version of the standard box. 11.3 Parapet bracket Parapet bracket with internal cable channel. Fig.
  • Seite 47: Instructions For Exceptional Operation

    Ethernet For previous firmware versions, you need to update (ONVIF) the firmware before going any further with the procedure. Ask Videotec Technical Support how to Ethernet obtain the new firmware packages, the (ONVIF) Release Notes and the Upgrade Procedures. Fig. 92 For special projects, non-ONVIF cameras may be required.
  • Seite 48: Analogue Video Connection

    12.1.1 Analogue Video connection Modify the electrical connections of the camera as indicated in the following figures. Even if not strictly necessary to complete configuration, the procedure indicated below requires connection of a CCTV tester (or a standard monitor) for Video output of the Ulisse unit used to check correct setup.
  • Seite 49 Connect the lines according to the instructions in the If in the INFO panel "i3" is displayed, it means the following table. Ulisse unit is working in ONVIF mode (Fig. 100, page  47). RS485 SERIAL LINE CONNECTION RS485 Colour INFO RS485 A (+) Grey ------------------------...
  • Seite 50 If in the INFO panel "i2" is displayed, it means RS485 mode was set (Fig. 102, page 48). DIP2 DIP1 INFO ------------------------ Device ID : 00001 Type : Rs485 Tx-Rx Baud Rate : 38400-8N1 Protocol : MACRO Net Board : Ver 6.0.0 Mpp Board : Ver 6.0.0 Fig.
  • Seite 51: Check Communication In Rs485 Mode

    12.1.3 Check communication in RS485 12.1.4 Alarm status control mode To check the status of the alarm lines, you need to have a CCTV test or a monitor connected to the Video After configuration of RS485, access the camera output (12.1.1 Analogue Video connection, page 46). directly from the network, without any intervention on the Ulisse unit at IP level.
  • Seite 52: Reset The Onvif Mode

    12.1.5 Reset the ONVIF mode • Enable SW6 of the second dip-switch (DIP2) on OFF to enable ONVIF mode. To reset configuration of the ONVIF mode, you • Enable SW7 of the second dip-switch (DIP2) on can repeat the passages previously described by OFF to disable Alarms status inversion.
  • Seite 53: Maintenance

    13 Maintenance 14 Cleaning 14.1 Window and plastic cover Maintenance must be carried out by personnel trained to operate on electrical cleaning circuits. Avoid ethyl alcohol, solvents, hydrogenated 13.1 Fuses replacement hydrocarbide, strong acid and alkali. Such products may irreparably damage the Maintenance must be performed with the surface.
  • Seite 54: Troubleshooting

    16 Troubleshooting PROBLEM It is not possible to connect with the camera. CAUSE Incorrect camera connection. Contact an authorized support centre if the problems listed below persist or you have SOLUTION Check camera connections. any other issues that are not described here.
  • Seite 55: Technical Data

    17 Technical data 17.2 Mechanical Cable glands: 3xM16 17.1 General Horizontal rotation: 360°, continuous rotation Constructed from aluminium and tecnopolymer Vertical rotation: from -20° up to +45° Epoxypolyester powder painting, RAL9002 colour Horizontal speed (variable): from 0.02°/s up to 20°/s Top mount (OTT) Tilt speed (variable): from 0.02°/s up to 20°/s Transmission through toothed belt...
  • Seite 56: Electrical

    17.4 Electrical 17.7 Environment Suitable for use with network cameras Indoor/Outdoor Supply voltage/Current consumption: Operating temperature (with heater): from -10°C (14°F) up to +60°C (140°F) • 230Vac, 0.4A, 50/60Hz Surge immunity: up to 2kV line to line, up to 4kV line •...
  • Seite 57: Technical Drawings

    18 Technical drawings The dimensions of the drawings are in millimetres. USABLE AREA USABLE AREA A - A B - B Fig. 106 ULISSE MAXI NETCAM. MNVCUPTMAXIR_1625_EN...
  • Seite 58 USABLE AREA USABLE AREA A - A B - B Fig. 107 ULISSE MAXI NETCAM, version pre-arranged for the installation of two LED illuminators. MNVCUPTMAXIR_1625_EN...
  • Seite 59 USABLE AREA USABLE AREA A - A B - B Ø 70 Fig. 108 ULISSE MAXI NETCAM, version for thermal cameras. MNVCUPTMAXIR_1625_EN...
  • Seite 60: A Appendix - Address Table

    A Appendix - Address table When the switch rocker is up it represents the value 1 (ON). When the dip-switch rocker is down it represents the value 0 (OFF). All possible combinations are shown below. ADDRESS CONFIGURATION (DIP 3) SW 8 SW 7 SW 6 SW 5...
  • Seite 61 ADDRESS CONFIGURATION (DIP 3) SW 8 SW 7 SW 6 SW 5 SW 4 SW 3 SW 2 SW 1 Address Address 39 Address 40 Address 41 Address 42 Address 43 Address 44 Address 45 Address 46 Address 47 Address 48 Address 49 Address 50 Address 51...
  • Seite 62 ADDRESS CONFIGURATION (DIP 3) SW 8 SW 7 SW 6 SW 5 SW 4 SW 3 SW 2 SW 1 Address Address 83 Address 84 Address 85 Address 86 Address 87 Address 88 Address 89 Address 90 Address 91 Address 92 Address 93 Address 94 Address 95...
  • Seite 63 ADDRESS CONFIGURATION (DIP 3) SW 8 SW 7 SW 6 SW 5 SW 4 SW 3 SW 2 SW 1 Address Address 127 Address 128 Address 129 Address 130 Address 131 Address 132 Address 133 Address 134 Address 135 Address 136 Address 137 Address 138 Address 139...
  • Seite 64 ADDRESS CONFIGURATION (DIP 3) SW 8 SW 7 SW 6 SW 5 SW 4 SW 3 SW 2 SW 1 Address Address 171 Address 172 Address 173 Address 174 Address 175 Address 176 Address 177 Address 178 Address 179 Address 180 Address 181 Address 182 Address 183...
  • Seite 65 ADDRESS CONFIGURATION (DIP 3) SW 8 SW 7 SW 6 SW 5 SW 4 SW 3 SW 2 SW 1 Address Address 215 Address 216 Address 217 Address 218 Address 219 Address 220 Address 221 Address 222 Address 223 Address 224 Address 225 Address 226 Address 227...
  • Seite 66 Email: info@videotec.com Tel. +33 1 60491816 - Fax +33 1 69284736 Email: info.fr@videotec.com Asia Pacific Videotec (HK) Ltd Americas Videotec Security, Inc. Flat 8, 19/F. On Dak Industrial Building, No. 2-6 Wah Sing Street Gateway Industrial Park, 35 Gateway Drive, Suite 100 Kwai Chung, New Territories - Hong Kong Plattsburgh, NY 12901 - U.S.A.
  • Seite 67 ITALIANO ULISSE MAXI NETCAM Unità PTZ Full IP per telecamere network per il monitoraggio dinamico di ampie aree outdoor Italiano - Manuale di istruzioni...
  • Seite 69 Sommario I T A L I A N O 1 Informazioni sul presente manuale ................7 1.1 Convenzioni tipografiche ............................. 7 2 Note sul copyright e informazioni sui marchi commerciali ........7 3 Norme di sicurezza ......................7 4 Identificazione ......................10 4.1 Descrizione e designazione del prodotto .....................10 4.2 Marcatura del prodotto ............................10 4.2.1 Controllo della marcatura ..............................10...
  • Seite 70 8.7 Montaggio dei contrappesi ..........................24 8.8 Montaggio degli illuminatori a LED ........................25 8.8.1 Rimozione dei contrappesi ..............................25 8.8.2 Montaggio dell'illuminatore sulla staffa........................25 8.9 Collegamento degli illuminatori a LED ......................26 8.10 Sacchetto disidratante ............................27 8.11 Regolazione e modalità di attivazione degli illuminatori a LED ............27 8.11.1 Descrizione dell'illuminatore a LED ..........................27 8.11.2 Attivazione degli illuminatori a LED tramite un interruttore crepuscolare esterno........28 8.11.3 Attivazione degli illuminatori a LED tramite il sensore crepuscolare integrato ...........28...
  • Seite 71 11.2 Supporto da parete ............................44 11.3 Supporto da parapetto .............................44 11.4 Alimentatore con controllo degli illuminatori ..................44 12 Istruzioni di funzionamento eccezionale ..............45 12.1 Modifica della modalità di comunicazione (da protocollo ONVIF a telemetria seriale) ....45 12.1.1 Collegamento Video analogico ............................46 12.1.2 Connessione della telecamera ............................46 12.1.3 Controllo della comunicazione in modalità...
  • Seite 72 MNVCUPTMAXIR_1625_IT...
  • Seite 73: Informazioni Sul Presente Manuale

    1 Informazioni sul presente 3 Norme di sicurezza manuale ATTENZIONE! L’impianto elettrico al quale è collegata l’unità deve essere dotato di Prima di installare e utilizzare questa unità, leggere un interruttore di protezione bipolare attentamente tutta la documentazione fornita. Tenere automatico da 20A max.
  • Seite 74 • Prima di eseguire qualsiasi operazione assicurarsi • Questo dispositivo è stato progettato per essere di togliere tensione al prodotto. fissato e collegato in maniera permanente su un edificio o su una struttura adeguata. Il • Non utilizzare cavi con segni di usura o dispositivo deve essere fissato e collegato in invecchiamento.
  • Seite 75 • Non permettere l’uso dell’apparecchio a bambini o • Adottare le dovute precauzioni per evitare di personale non autorizzato. danneggiare l’apparecchiatura con scariche elettrostatiche. • La manutenzione del dispositivo deve essere eseguita solo da personale qualificato. Durante le • L’unità è stata realizzata per essere collegata operazioni di manutenzione l'operatore è...
  • Seite 76: Identificazione

    Sui brandeggi è applicata una etichetta conforme alla marcatura CE. del prodotto ULISSE MAXI NETCAM è un potente PTZ Full-IP per applicazioni in esterno di videosorveglianza IP, in grado di gestire le moderne telecamere IP SD, HD e Megapixel, integrandosi in un sistema network.
  • Seite 77: Versioni

    La versione con illuminatori a LED è alimentabile solamente in 24Vac. Il brandeggio può essere dotato di un supporto per montaggio di 2 illuminatori a LED VIDEOTEC per la visione notturna (illuminatori non inclusi). Fig. 3 Fig. 2 Per ulteriori informazioni fare riferimento al relativo capitolo (8.8 Montaggio degli...
  • Seite 78: Preparazione Del Prodotto Per L'utilizzo

    6 Preparazione del prodotto 6.3 Contenuto per l'utilizzo Controllare che il contenuto sia corrispondente alla lista del materiale sotto elencata: Qualsiasi intervento non espressamente • Unità di posizionamento approvato dal costruttore fa decadere la • Base di alimentazione garanzia. • Imballo degli accessori: •...
  • Seite 79: Lavoro Preparatorio Prima Dell'installazione

    6.5 Lavoro preparatorio prima 6.5.2 Passaggio cavi dell’installazione I cavi di collegamento non devono essere accessibili dall'esterno. I cavi devono essere 6.5.1 Fissaggio del supporto opportunamente fissati al sostegno per evitare che l'eccessivo peso ne comporti lo Per installazioni soggette a vibrazioni sfilamento accidentale.
  • Seite 80: Assemblaggio

    7 Assemblaggio 7.2.1 Caratteristiche delle telecamere Il corretto funzionamento Possono essere installate solamente dell’apparecchiatura, nel range di telecamere di rete con determinate temperatura indicato, é garantito solo se si caratteristiche tecniche (7.2.1 utilizzano telecamera ed ottica con limiti di Caratteristiche delle telecamere, pagina  temperatura pari ad almeno -10°C e +60°C.
  • Seite 81: Apertura Della Custodia

    7.2.1 Apertura della custodia Se necessario utilizzare i distanziali supplementari per posizionare in modo corretto telecamera e ottica. Svitare le viti antiperdita poste sui fianchi e sollevare la parte superiore della custodia. Fig. 7 Fig. 9 Al termine delle operazioni di installazione Fissare la piastra in alluminio (01) sulla slitta tramite le e cablaggio richiudere il prodotto.
  • Seite 82: Posizionamento Della Slitta Interna

    7.2.3 Posizionamento del distanziale 7.2.4 Posizionamento della slitta interna H-20 sulla slitta interna Far scorrere la slitta interna con ottica e telecamera già fissate nella posizione desiderata e fissarla tramite È possibile fissare un distanziale H-20 (02) all’ottica. le viti e le rondelle in dotazione. Connettere la telecamera e fissare la staffetta a L (Fig.
  • Seite 83: Descrizione Della Scheda Della Custodia

    7.3 Descrizione della scheda 7.3.1 Collegamento della telecamera e dell’ottica motorizzata della custodia Tutti i collegamenti illustrati di seguito DESCRIZIONE DELLA SCHEDA devono essere eseguiti solo da installatori Connettore/Morsetto Funzione esperti e devono essere rispettate tutte le Non utilizzato specifiche di cablaggio e di alimentazione dei dispositivi.
  • Seite 84: Regolazione Della Tensione Di Alimentazione Dei Motori Delle Ottiche

    7.3.2 Regolazione della tensione di Ottiche con motori ad inversione di polarità: Eseguire le connessioni come illustrato in figura. alimentazione dei motori delle ottiche Prima di alimentare il brandeggio, selezionare la FOCUS + tensione di alimentazione delle ottiche agendo sul FOCUS - DIP1 (7.3 Descrizione della scheda della custodia, pagina 17).
  • Seite 85: Installazione

    8 Installazione 8.1 Collegamento dei cavi alla base Non effettuare per nessun motivo alterazioni o collegamenti non previsti Introdurre i cavi all’interno dei pressacavi tenendo la in questo manuale. Il mancato rispetto base a circa 20cm dal supporto. Serrare i pressacavi. delle indicazioni fornite nel manuale in I pressacavi sono adatti per cavi con diametro merito ai collegamenti può...
  • Seite 86: Fissaggio Della Base Al Supporto

    8.2 Fissaggio della base al 8.3 Descrizione della scheda supporto connettori DESCRIZIONE DELLA SCHEDA CONNETTORI Utilizzare le viti e le rondelle fornite con la base. Connettore/ Funzione Componente Dopo aver posizionato la guarnizione (01), fissare la Alimentazione della scheda base (02) sul supporto (03) utilizzando le viti (04), le Cavi di segnale rondelle dentellate (05) e gli anelli per vite (06).
  • Seite 87: Collegamento Della Linea Di Alimentazione

    8.4 Collegamento della linea di Il cavo di terra deve essere più lungo degli alimentazione altri due di circa 10mm per prevenirne il distacco accidentale a causa dello A seconda della versione, al dispositivo possono stiramento. essere fornite diverse tensioni di alimentazione. Il valore di tensione di alimentazione è...
  • Seite 88: Collegamento Della Linea Di Alimentazione In 24Vac

    8.4.1 Collegamento della linea di 8.4.2 Collegamento della linea di alimentazione in 24Vac alimentazione in 120Vac e 230Vac Tagliare a misura i cavi e realizzare i collegamenti. Tagliare a misura i cavi e realizzare i collegamenti. Collegare la linea di alimentazione al seguente Collegare la linea di alimentazione al seguente morsetto: CN1.
  • Seite 89: Collegamento Degli Ingressi Di Allarme, Dell'interruttore Crepuscolare E Dei Relè

    8.4.3 Collegamento degli ingressi di Versione con illuminatori a LED allarme, dell'interruttore crepuscolare e COLLEGAMENTO DEGLI INGRESSI DI ALLARME, DELL'INTERRUTTORE CREPUSCOLARE E DEI RELÈ dei relè AL1, AL2, AL3, Ingressi di allarme auto-alimentati riferiti al ATTENZIONE! L'installazione è di tipo TNV-1. AL4 e ALARMS morsetto comune ALARMS Non collegare a circuiti SELV.
  • Seite 90: Fissaggio Del Corpo Superiore

    8.6 Fissaggio del corpo superiore 8.7 Montaggio dei contrappesi Fissare il corpo superiore (01) alla base (02) tramite Fissare i contrappesi alla custodia usando le viti e le le viti di fissaggio (03) dotate di guarnizioni (04). rondelle in dotazione. Controllare che sia presente e in buono stato la guarnizione della base (05).
  • Seite 91: Montaggio Degli Illuminatori A Led

    LED Per un corretto funzionamento si devono sempre installare entrambi gli illuminatori. Sul brandeggio è possibile installare esclusivamente illuminatori VIDEOTEC. 8.8.1 Rimozione dei contrappesi Svitare le viti e rimuovere i contrappesi esterni. Fig. 39 Avvitare le viti e le rondelle precedentemente rimosse.
  • Seite 92: Collegamento Degli Illuminatori A Led

    8.9 Collegamento degli Collegare i cavi come illustrato in figura. illuminatori a LED Rimuovere i 2 tappi M12. Avvitare i 2 pressacavi e i rispettivi O-ring forniti in dotazione. Illuminatore sinistro Illuminatore destro Fig. 44 COLLEGAMENTO DEGLI ILLUMINATORI A LED Fig.
  • Seite 93: Sacchetto Disidratante

    8.10 Sacchetto disidratante 8.11 Regolazione e modalità di attivazione degli illuminatori a Inserire i sacchetti disidratanti (01) nella posizioni indicate in figura, dopo averli tolti dalla confezione trasparente e piegati in due. Fissare i sacchetti tramite le piastrine (02) e le viti in dotazione (03). Una volta effettuata la regolazione, l'illuminatore di sinistra (MASTER) sincronizza e controlla l'illuminatore di destra (SLAVE).
  • Seite 94: Attivazione Degli Illuminatori A Led Tramite Un Interruttore Crepuscolare Esterno

    8.11.2 Attivazione degli illuminatori • Regolare l'illuminatore destro (SLAVE): a LED tramite un interruttore • Soglia di accensione: Impostare il valore al massimo (8.11.5 Regolazione della soglia di crepuscolare esterno accensione degli illuminatori a LED, pagina 29). Effettuare le seguenti operazioni: •...
  • Seite 95: Regolazione Della Soglia Di Accensione Degli Illuminatori A Led

    8.11.5 Regolazione della soglia di 8.11.6 Regolazione della potenza degli accensione degli illuminatori a LED illuminatori a LED L'illuminatore destro deve sempre essere L'illuminatore destro deve sempre essere impostato a luminosità massima. impostato a potenza minima. L'illuminatore è regolato in fabbrica per erogare la massima potenza.
  • Seite 96: Fissaggio Della Spazzola Del Tergicristallo

    8.12 Fissaggio della spazzola del Fissare il tutto tramite la rondella dentellata e il dado. tergicristallo Inserire la spazzola sull’albero del tergicristallo. Mettere la spazzola nella posizione di riposo. Fig. 52 La regolazione corretta deve permettere alla spazzola di ritornare nella posizione di riposo andando in battuta sulla piastra del corpo.
  • Seite 97: Configurazione Hardware

    Lo switch 1 è utilizzato per l’aggiornamento del DYNAMICS firmware. VISTA OFF OFF OFF ON OFF OFF ON Tab. 10 Configurazione di default: MACRO (VIDEOTEC), 115200 baud, Indirizzo 1. Questa opzione non richiede il settaggio dei DIP-switch (DIP1, DIP3). Fig. 55 MNVCUPTMAXIR_1625_IT...
  • Seite 98: Configurazione Del Dip3

    8.13.4 Configurazione del DIP3 8.13.5 Configurazione del DIP4 La levetta dello switch verso l'alto Il settaggio di questo DIP avviene in rappresenta il valore 1 (ON). La levetta maniera inversa dai precedenti. La levetta verso il basso rappresenta il valore 0 (OFF). dello switch verso l'alto rappresenta il valore 0 (OFF).
  • Seite 99: Accensione

    9 Accensione Accertarsi che tutte le parti siano fissate in maniera solida ed affidabile. Assicurarsi che l'unità e gli altri componenti dell’impianto siano chiusi in modo idoneo a La procedura di preriscaldamento impedire il contatto con componenti sotto automatico (De-Ice) si potrebbe attivare tensione.
  • Seite 100: Configurazione

    10 Configurazione 10.1.1 Prodotti dotati di firmware precedente alla versione 2.1 10.1 Interfaccia web Alla prima connessione assegnare un indirizzo diverso da 192.168.0.100. L'unità è configurata per ottenere l'indirizzo IP da un server DHCP. Nelle impostazioni predefinite il brandeggio è configurato per acquisire autonomamente un Browser supportati: Microsoft Internet indirizzo mediante protocollo DHCP ed è...
  • Seite 101: Primo Accesso Alle Pagine Web

    10.1.2 Primo accesso alle pagine web 10.1.3 Pagina Home Per un corretto funzionamento, il brandeggio deve Se il login viene effettuato con successo, verrà essere configurato in funzione della telecamera mostrata l'interfaccia di gestione del prodotto. installata. I parametri necessari sono: •...
  • Seite 102: Pagina Controlli Utente

    10.1.4 Pagina Controlli Utente • Iris close/Iris open/Auto iris Per controllare il dispositivo via browser, selezionare la voce Controlli Utente. Si aprirà una nuova finestra con una tastiera virtuale per inviare i comandi. Fig. 66 • Wiper/Washer Fig. 67 • Day: Attiva il filtro IR della camera. Se presenti, spegne gli illuminatori a LED.
  • Seite 103: Pagina Parametri Dispositivo

    10.1.5 Pagina Parametri Dispositivo 10.1.7 Pagina Configurazione Rete Alla voce del menu Parametri Dispositivo è possibile Alla voce del menu Rete è possibile cambiare impostare il nome del dispositivo e visualizzare altre l'impostazione di rete del brandeggio. È possibile informazioni aggiuntive. decidere se il dispositivo debba avere un indirizzo assegnato staticamente, dinamicamente con DHCP o autogenerato.
  • Seite 104: Pagina Configurazione Utenti

    10.1.9 Pagina Parametri Movimento Server NTP: È possibile inoltre specificare se il dispositivo debba sincronizzarsi con un server NTP Alla voce del menu Parametri Movimento è possibile (Network Time Protocol) esterno. controllare via web tutti i parametri del brandeggio. • DISABILITATO: Selezionare questa opzione se non •...
  • Seite 105: Pagina Autopan

    10.1.9.1 Pagina Autopan 10.1.10 Pagina Parametri Preset Alla voce del menu Autopan e possibile specificare il Alla voce del menu Parametri Preset sono preset di inizio e di fine dell'autopan. configurabili alcuni parametri relativi ai preset: • Velocità Scan: La velocità in gradi al secondo con cui viene raggiunto un preset su richiesta esplicita dell'operatore.
  • Seite 106: Pagina I/O Digitali

    10.1.12 Pagina I/O Digitali 10.1.13 Pagina Washer Alla voce del menu I/O Digitali è possibile configurare Alla voce del menu Impianto di lavaggio è possibile i canali digitali presenti nel dispositivo. Segue una configurare le funzionalità del sistema di lavaggio del breve descrizione dei parametri configurabili per dispositivo.
  • Seite 107: Pagina Parametri Telecamera

    10.1.14 Pagina Parametri Telecamera 10.1.15 Pagina Strumenti I parametri della camera IP che sono stato impostati Alla voce del menu Strumenti è possibile reimpostare al primo avvio sono modificabili alla voce del menu i valori predefiniti per tutta la configurazione del Parametri Camera.
  • Seite 108: Factory Default

    10.1.16 Factory Default Per potersi connettere all'interfaccia web della telecamera è necessario utilizzare l'applicativo Se la password di accesso non è più VTTunnel, avviabile dalla voce di menu Strumenti. disponibile, è possibile ripristinare le All'avvio dell'applicativo verrà mostrato un elenco di impostazioni di fabbrica tramite un tasto di dispositivi collegati in rete.
  • Seite 109: Accessori

    11 Accessori 11.1.1 Collegamento dell'impianto di lavaggio Per ulteriori dettagli sulla configurazione ATTENZIONE! L'installazione è di tipo TNV-1. e l’utilizzo fare riferimento al manuale del Non collegare a circuiti SELV. relativo accessorio. ATTENZIONE! Per ridurre il rischio di 11.1 Impianto di lavaggio incendio usare solamente cavi certificati UL Listed o CSA aventi sezioni maggiori o Il brandeggio può...
  • Seite 110: Supporto Da Parete

    11.2 Supporto da parete 11.4 Alimentatore con controllo degli illuminatori Supporto per montaggio a parete con passaggio interno cavi. Scatola stagna con alimentatore e controllo degli illuminatori. Fig. 90 Versione della scatola standard. Fig. 88 11.3 Supporto da parapetto Supporto per montaggio a parapetto con passaggio interno cavi.
  • Seite 111: Istruzioni Di Funzionamento Eccezionale

    VMS in grado di comunicare con dispositivi ONVIF profilo S. Il brandeggio è nativamente configurato per Il Supporto Tecnico di Videotec può fornire comunicare via protocollo ONVIF. la lista di telecamere ONVIF testate e VMS La procedura descritta in seguito spiega come ONVIF testati.
  • Seite 112: Collegamento Video Analogico

    12.1.1 Collegamento Video analogico Modificare i collegamenti elettrici della telecamera come indicato nelle figure seguenti. Sebbene non sia strettamente necessaria per completare la configurazione, la procedura sotto indicata richiede la connessione di un Tester CCTV (o un monitor standard) all’uscita Video dell'unità Ulisse utilizzata per verificare il setup corretto.
  • Seite 113 Collegare le linee secondo quanto indicato nella Se nel pannello INFO viene visualizzato "i3", significa seguente tabella. che l'unità Ulisse sta funzionando in modalità ONVIF ( Fig. 100, pagina 47). COLLEGAMENTO LINEA SERIALE RS485 RS485 Colore INFO RS485 A (+) Grigio ------------------------ Device ID : 00001 RS485 B (-)
  • Seite 114 Se nel pannello INFO viene visualizzato "i2", significa che è stata impostata la modalità RS485 (Fig. 102, DIP2 DIP1 pagina 48). INFO ------------------------ Device ID : 00001 Type : Rs485 Tx-Rx Baud Rate : 38400-8N1 Protocol : MACRO Net Board : Ver 6.0.0 Fig.
  • Seite 115: Controllo Della Comunicazione In Modalità Rs485

    12.1.3 Controllo della comunicazione in 12.1.4 Controllo stato allarmi modalità RS485 Per verificare lo stato delle linee di allarme è necessario avere un Tester CCTV o un Monitor Dopo la configurazione della modalità RS485, alla connesso all'uscita Video (12.1.1 Collegamento Video telecamera si accede direttamente dalla rete, senza analogico, pagina 46).
  • Seite 116: Ripristino Della Modalità Onvif

    12.1.5 Ripristino della modalità ONVIF • Mettere su OFF il SW6 del secondo dip-switch (DIP2) per abilitare la modalità ONVIF. Per riprestinare la configurazione alla modalità • Mettere su OFF il SW7 del secondo dip-switch ONVIF, è necessario ripetere i passaggi descritti (DIP2) per disabilitare l'inversione stato degli precedentemente impostando le configurazioni Allarmi.
  • Seite 117: Manutenzione

    13 Manutenzione 14 Pulizia 14.1 Pulizia del vetro e delle parti La manutenzione deve essere eseguita solo da personale qualificato ad intervenire su in plastica circuiti elettrici. Evitare alcool etilico, solventi, idrocarburi 13.1 Sostituzione dei fusibili idrogenati, acidi forti e alcali. L’utilizzo di detti prodotti danneggia in modo Eseguire la manutenzione in assenza irreparabile la superficie trattata.
  • Seite 118: Risoluzione Dei Problemi

    16 Risoluzione dei problemi PROBLEMA Non è possibile collegarsi alla telecamera. CAUSA Errato collegamento della telecamera. Per qualunque problematica non descritta o se i problemi elencati in seguito SOLUZIONE Verificare i collegamenti della dovessero persistere, contattare il centro di telecamera. assistenza autorizzato.
  • Seite 119: Dati Tecnici

    17 Dati tecnici 17.2 Meccanica Pressacavi: 3xM16 17.1 Generale Rotazione orizzontale: 360°, rotazione continua Costruzione in pressofusione di alluminio e Rotazione verticale: da -20° fino a +45° tecnopolimero Velocità orizzontale (variabile): da 0.02°/s fino a 20°/s Verniciatura a polveri di epossipoliestere, colore Velocità...
  • Seite 120: Elettrico

    17.4 Elettrico 17.7 Ambiente Adatto all’impiego con telecamere network Interno/Esterno Tensione di alimentazione/Corrente assorbita: Temperatura di esercizio (con riscaldamento): da -10°C fino a +60°C • 230Vac, 0.4A, 50/60Hz Immunità agli impulsi: fino a 2kV tra linea e linea, fino • 24Vac, 4A (8A, con illuminatori a LED), 50/60Hz a 4kV tra linea e terra (Classe 4) •...
  • Seite 121: Disegni Tecnici

    18 Disegni tecnici Le dimensioni dei disegni sono espresse in millimetri. AREA UTILE AREA UTILE A - A B - B Fig. 106 ULISSE MAXI NETCAM. MNVCUPTMAXIR_1625_IT...
  • Seite 122 AREA UTILE AREA UTILE A - A B - B Fig. 107 ULISSE MAXI NETCAM, versione con predisposizione per il montaggio di due illuminatori a LED. MNVCUPTMAXIR_1625_IT...
  • Seite 123 AREA UTILE AREA UTILE A - A B - B Ø 70 Fig. 108 ULISSE MAXI NETCAM, versione per telecamere termiche. MNVCUPTMAXIR_1625_IT...
  • Seite 124: A Appendice - Tabella Degli Indirizzi

    A Appendice - Tabella degli indirizzi La levetta dello switch verso l'alto rappresenta il valore 1 (ON). La levetta verso il basso rappresenta il valore 0 (OFF). Di seguito sono riportate tutte le combinazioni possibili. CONFIGURAZIONE DELL'INDIRIZZO (DIP 3) SW 8 SW 7 SW 6 SW 5...
  • Seite 125 CONFIGURAZIONE DELL'INDIRIZZO (DIP 3) SW 8 SW 7 SW 6 SW 5 SW 4 SW 3 SW 2 SW 1 Indirizzo Indirizzo 39 Indirizzo 40 Indirizzo 41 Indirizzo 42 Indirizzo 43 Indirizzo 44 Indirizzo 45 Indirizzo 46 Indirizzo 47 Indirizzo 48 Indirizzo 49 Indirizzo 50 Indirizzo 51...
  • Seite 126 CONFIGURAZIONE DELL'INDIRIZZO (DIP 3) SW 8 SW 7 SW 6 SW 5 SW 4 SW 3 SW 2 SW 1 Indirizzo Indirizzo 83 Indirizzo 84 Indirizzo 85 Indirizzo 86 Indirizzo 87 Indirizzo 88 Indirizzo 89 Indirizzo 90 Indirizzo 91 Indirizzo 92 Indirizzo 93 Indirizzo 94 Indirizzo 95...
  • Seite 127 CONFIGURAZIONE DELL'INDIRIZZO (DIP 3) SW 8 SW 7 SW 6 SW 5 SW 4 SW 3 SW 2 SW 1 Indirizzo Indirizzo 127 Indirizzo 128 Indirizzo 129 Indirizzo 130 Indirizzo 131 Indirizzo 132 Indirizzo 133 Indirizzo 134 Indirizzo 135 Indirizzo 136 Indirizzo 137 Indirizzo 138 Indirizzo 139...
  • Seite 128 CONFIGURAZIONE DELL'INDIRIZZO (DIP 3) SW 8 SW 7 SW 6 SW 5 SW 4 SW 3 SW 2 SW 1 Indirizzo Indirizzo 171 Indirizzo 172 Indirizzo 173 Indirizzo 174 Indirizzo 175 Indirizzo 176 Indirizzo 177 Indirizzo 178 Indirizzo 179 Indirizzo 180 Indirizzo 181 Indirizzo 182 Indirizzo 183...
  • Seite 129 CONFIGURAZIONE DELL'INDIRIZZO (DIP 3) SW 8 SW 7 SW 6 SW 5 SW 4 SW 3 SW 2 SW 1 Indirizzo Indirizzo 215 Indirizzo 216 Indirizzo 217 Indirizzo 218 Indirizzo 219 Indirizzo 220 Indirizzo 221 Indirizzo 222 Indirizzo 223 Indirizzo 224 Indirizzo 225 Indirizzo 226 Indirizzo 227...
  • Seite 130 Email: info@videotec.com Tel. +33 1 60491816 - Fax +33 1 69284736 Email: info.fr@videotec.com Asia Pacific Videotec (HK) Ltd Americas Videotec Security, Inc. Flat 8, 19/F. On Dak Industrial Building, No. 2-6 Wah Sing Street Gateway Industrial Park, 35 Gateway Drive, Suite 100 Kwai Chung, New Territories - Hong Kong Plattsburgh, NY 12901 - U.S.A.
  • Seite 131 FRANÇAIS ULISSE MAXI NETCAM Unité PTZ Full IP pour caméras réseau pour la surveillance dynamique de vastes zones extérieures Français - Manuel d’instructions...
  • Seite 133 Sommaire F R A N Ç A I S 1 À propos de ce mode d’emploi ..................7 1.1 Conventions typographiques ..........................7 2 Notes sur le copyright et informations sur les marques de commerce ..... 7 3 Normes de securité ......................7 4 Identification ........................
  • Seite 134 8.7 Montage du contrepoids ............................24 8.8 Montage des projecteurs à LED ........................25 8.8.1 Retrait des contrepoids ...............................25 8.8.2 Montage du projecteur sur l’étrier ..........................25 8.9 Branchement des projecteur à LED.........................26 8.10 Sachet déshydratant ............................27 8.11 Réglage et modalité d'activation des projecteurs à LED ..............27 8.11.1 Description du projecteur à...
  • Seite 135 11.2 Support fixation murale ............................44 11.3 Support fixation sol ............................44 11.4 Alimentateur avec contrôle des projecteurs.....................44 12 Instructions de fonctionnement exceptionnel ............45 12.1 Modification de la modalité de communication (depuis protocole ONVIF à télémétrie sérielle) .....................................45 12.1.1 Connexion vidéo analogique ............................46 12.1.2 Connexion de la caméra ..............................46 12.1.3 Contrôle de la communication en mode RS485 ......................49 12.1.4 Contrôle de l'état des alarmes ............................49...
  • Seite 136 MNVCUPTMAXIR_1625_FR...
  • Seite 137: Propos De Ce Mode D'emploi

    1 À propos de ce mode 3 Normes de securité d’emploi ATTENTION! Le circuit électrique auquel l'unité est reliée doit être équipé d'un Avant d'installer et d'utiliser cette unité, lire interrupteur de protection bipolaire attentivement toute la documentation fournie. automatique de 20A max. Cet interrupteur Garder le manuel à...
  • Seite 138 • Sectionner l'alimentation avant de procéder à • Cet appareil est conçu pour être fixé et relié de toute opération. manière permanente sur un bâtiment ou une structure adéquate. L'appareil doit être fixé et relié • Ne pas utiliser de câbles usés ou endommagés. de manière permanente avant d'effectuer toute •...
  • Seite 139 • Ne pas laisser l'appareil à portée des enfants ou de • Adopter les précautions utiles pour éviter personnes non autorisées. d'endommager l'appareil à la suite de décharges électrostatiques. • L'entretien du dispositif doit uniquement être effectué par un personnel qualifié. Durant les •...
  • Seite 140: Identification

    Les tourelles portent un étiquette conforme au marquage CE. produit ULISSE MAXI NETCAM est un puissant PTZ Full-IP pour des applications en extérieur de surveillance vidéo IP, à même de gérer les caméras modernes IP SD, HD et Mégapixel, en s'intégrant dans un système de réseau social.
  • Seite 141: Versions

    La version avec projecteurs à LED peut être alimentée uniquement en 24Vac. La tourelle peut être munie d’un support pour l’utilisation de 2 projecteurs à LED VIDEOTEC pour vision nocturne (projecteurs à prévoir en plus). Fig. 3 Fig. 2 Pour d'autres renseignements se référer...
  • Seite 142: Préparation Du Produit En Vue De L'utilisation

    6 Préparation du produit en 6.3 Contenu vue de l’utilisation Contrôler que le contenu correspond à la liste matériel indiquée ci-dessous: Toute modification non approuvée • Unité de positionnement expressément par le fabricant entraînera • Base d'alimentation l’annulation de la garantie. •...
  • Seite 143: Opérations À Effectuer Avant L'installation

    6.5 Opérations à effectuer avant 6.5.2 Passage des câbles l’installation Les câbles de connexion ne doivent pas être accessibles de l'extérieur. Les câbles 6.5.1 Fixation du support doivent être fixés au support pour éviter que le poids excessif n'entraîne leur sortie En cas d'installations soumises aux accidentelle.
  • Seite 144: Assemblage

    7 Assemblage 7.2.1 Caractéristiques des caméras Le bon fonctionnement de l'unité, à Seules les caméras de réseau ayant l'intérieur de l'intervalle de température des caractéristiques techniques indiqué, est garanti uniquement si la déterminées peuvent être installées (7.2.1 caméra et le système optique sont utilisés Caractéristiques des caméras, page 14).
  • Seite 145: Ouverture Du Caisson

    7.2.1 Ouverture du caisson Si nécessaire, utiliser les entretoises supplémentaires pour positionner correctement la caméra et l’optique. Dévisser les vis anti-fuite situées sur les côtés et soulever la partie supérieure du caisson. Fig. 7 Fig. 9 Au terme des opérations d'installation et de Fixer la plaque en aluminium (01) sur la glissière au câblage, refermer le produit.
  • Seite 146: Glissière Interne

    7.2.3 Positionnement de l’entretoise 7.2.4 Glissière interne H-20 sur la glissière interne Faire glisser la glissière interne avec l’optique et la caméra déjà fixées en position et la fixer avec les Il est possible de fixer une entretoise H-20 (02) au rondelles et les vis fournies.
  • Seite 147: Description De La Carte Du Caisson

    7.3 Description de la carte du 7.3.1 Branchement de la caméra et de l'optique motorisée caisson Tous les branchements illustrés ci-après DESCRIPTION DE LA CARTE doivent exclusivement être exécutés par Connecteur/Borne Fonction des installateurs experts et toutes les Non utilisé spécifications de câblage et d'alimentation des dispositifs doivent être respectées.
  • Seite 148: Réglage De La Tension D'alimentation Des Moteurs Des Optiques

    7.3.2 Réglage de la tension Objectifs avec moteurs à inversion de polarité: Effectuer les connexions comme montré sur la figure.. d'alimentation des moteurs des optiques FOCUS + Avant d'alimenter la tourelle, selectioner la tension FOCUS - d’alimentation des optiques en agissant sur le DIP1 ( IRIS + 7.3 Description de la carte du caisson, page 17).
  • Seite 149: Installation

    8 Installation 8.1 Connexion des câbles à la base Ne procéder sous aucun prétexte à des modifications ou des connexions non Passer les câbles dans les presse-câbles en prévues dans ce manuel. L’utilisation maintenant la base à environ 20cm du support. Serrer d’appareils inadéquats peut comporter les presse-étoupes.
  • Seite 150: Fixage De La Base Au Support

    8.2 Fixage de la base au support 8.3 Description de la carte de connexion Utiliser les vis et les rondelles fournies avec la base. DESCRIPTION DE LA CARTE DE CONNEXION Connecteur/ Fonction Après avoir positionné le joint (01), fixer la base (02) Composant au support (03) en utilisant les vis (04), les rondelles à...
  • Seite 151: Connexion De La Ligne D'alimentation

    8.4 Connexion de la ligne Le câble de terre doit être plus long des d'alimentation deux autres d'environ 10mm pour éviter tout détachement accidentel. Selon la version, différentes tensions d'alimentation peuvent être fournies au dispositif. La valeur de Le câble d'alimentation doit en outre être tension d'alimentation est reportée sur l'étiquette couvert de la gaine en silicone (01) fournie.
  • Seite 152: Connexion De La Ligne D'alimentation En 24Vac

    8.4.1 Connexion de la ligne 8.4.2 Raccordement de la ligne d'alimentation en 24Vac d'alimentation en 120Vac et 230Vac Couper les câbles à la longueur nécessaire et Couper les câbles à la longueur nécessaire et procéder aux connexions. Connecter la ligne procéder aux connexions.
  • Seite 153: Branchement Des Entrées D'alarme, De L'interrupteur Crépusculaire Et Des Relais

    8.4.3 Branchement des entrées Version avec projecteurs à LED d'alarme, de l'interrupteur crépusculaire BRANCHEMENT DES ENTRÉES D'ALARME, DE L'INTERRUPTEUR CRÉPUSCULAIRE ET DES RELAIS et des relais AL1, AL2, AL3, Entrées d'alarme à alimentation automatique se ATTENTION! L'installation est du type TNV- AL4 e ALARMS rapportant à...
  • Seite 154: Fixation Du Corps Supérieur

    8.6 Fixation du corps supérieur 8.7 Montage du contrepoids Fixer le corps supérieur (01) à la base (02) au moyen Fixer les contrepoids au caisson au moyen des vis et des vis de fixation (03) pourvues de joints (04). des rondelles fournies. Contrôler que le joint de la base est en place et en bon état (05).
  • Seite 155: Montage Des Projecteurs À Led

    Positionner les fixations du projecteur (01) sur celles de l'étrier (02). Pour en correct fonctionnement les deux projecteurs doivent toujours être montés ensemble. Seuls des projecteurs VIDEOTEC peuvent être installés sur la tourelle. 8.8.1 Retrait des contrepoids Dévisser les vis et retirer les contrepoids externes. Fig. 39 Visser les vis et les rondelles enlevées auparavant.
  • Seite 156: Branchement Des Projecteur À Led

    8.9 Branchement des projecteur Brancher les câbles comme illustré en figure. à LED Retirer les 2 bouchons M12. Visser les 2 presse- étoupes et les joints toriques correspondants, fournis avec l'appareil. Projecteur gauche Projecteur gauche Fig. 44 BRANCHEMENT DES PROJECTEUR À LED Projecteur gauche Projecteur gauche Fig.
  • Seite 157: Sachet Déshydratant

    8.10 Sachet déshydratant 8.11 Réglage et modalité d'activation des projecteurs à Introduire les sachets déshydratants (01) dans les positions indiquées sur la figure après les avoir retirés de leur emballage transparent et pliés en deux. Fixer les sacs au moyen des platines (02) et des vis fournies Une fois effectué...
  • Seite 158: Activation Des Projecteurs À Led À L'aide D'un Interrupteur Crépusculaire Externe

    8.11.2 Activation des projecteurs à LED • Réglage du projecteur de droite (SLAVE): à l'aide d'un interrupteur crépusculaire • Seuil d'allumage: Configurer la valeur au maximum (8.11.5 Réglage du seuil d'allumage externe des projecteurs à LED, page 29). Effectuer les opérations suivantes: •...
  • Seite 159: Réglage Du Seuil D'allumage Des Projecteurs À Led

    8.11.5 Réglage du seuil d'allumage des 8.11.6 Réglage de la puissance des projecteurs à LED projecteurs à LED Le projecteur de droite doit toujours être Le projecteur de droite doit toujours être configuré à la luminosité maximum. configuré à la puissance minimum. Le projecteur est réglé...
  • Seite 160: Fixation Du Balai Essuie-Glace

    8.12 Fixation du balai essuie- Fixer l’ensemble avec rondelle denté. glace Insérer le balai sur l’arbre de l’essuie-glace Placer le balai en position de repos. Fig. 52 Un réglage correct doit permettre au balai de revenir en position de repos en entrant en contact avec la plaque de la structure.
  • Seite 161: Configuration Du Matériel

    OFF OFF OFF OFF ON micrologiciel. DYNAMICS VISTA OFF OFF OFF ON OFF OFF ON Tab. 10 Configuration de défaut: MACRO (VIDEOTEC), 115200 baud, Adresse 1. Cette option ne nécessite pas le régla- ge du DIP-switch (DIP1, DIP3). Fig. 55 MNVCUPTMAXIR_1625_FR...
  • Seite 162: Configuration Du Dip3

    8.13.4 Configuration du DIP3 8.13.5 Configuration du DIP4 Le levier du switch vers le haut représente La configuration de ce DIP s'effectue à la valeur 1 (ON). Le levier du dip-switch vers l'inverse des DIP précédents. Le levier du le bas représente la valeur 0 (OFF). switch vers le haut représente la valeur 0 (OFF).
  • Seite 163: Allumage

    9 Allumage Ne pas stationner à proximité du dispositif sous tension. N'intervenir sur le dispositif S'assurer que l'unité et les autres qu'avec l'alimentation coupée. composants de l'installation soient fermés de façon à empêcher le contact avec les La procédure de préchauffage automatique composants sous tension.
  • Seite 164: Configuration

    10 Configuration 10.1.1 Produits avec firmware antérieur à la version 2.1 10.1 Interface web À la première connexion, donner une adresse différente de 192.168.0.100. L’appareil est configuré pour obtenir l’adresse IP depuis un serveur DHCP. Dans les configurations prédéfinies, la tourelle est configurée pour acquérir de façon autonome une Logiciels de navigation supportés: adresse par protocole DHCP et il est possible de...
  • Seite 165: Premier Accès Aux Pages Web

    10.1.2 Premier accès aux pages web 10.1.3 Page Home Pour un fonctionnement correct, la tourelle doit être Si le login est effectué avec succès, on pourra voir configurée en fonction la caméra installée. l'interface de gestion de le produit. Les paramètres nécessaires sont les suivants : •...
  • Seite 166: Page Contrôles Utilisateur

    10.1.4 Page Contrôles Utilisateur • Iris close/Iris open/Auto iris Pour contrôler la dispositif par browser, sélectionner la mention Contrôle Utilisateur. Une nouvelle fenêtre s'ouvrira, avec un clavier virtuel pour sélectionner les commandes. Fig. 66 • Wiper/Washer Fig. 67 • Day: Activer le filtre IR de la chambre. Si présents, éteint les projecteurs à...
  • Seite 167: Page Paramètres Dispositif

    10.1.5 Page Paramètres Dispositif 10.1.7 Page Configuration Réseau A la mention du menu Paramètres Dispositif il est A la mention du menu Réseau il est possible de possible de configurer le nom de le dispositif et changer la configuration de réseau de la tourelle. Il d'afficher d'autres informations supplementaire.
  • Seite 168: Page Configuration Utilisateurs

    10.1.9 Page Paramètres Mouvement Serveur NTP: Il est également possible de mentionner si le dispositif doit se synchroniser avec A la mention du menu Paramètres Mouvement il est un serveur NTP (Network Time Protocol) externe. possible de contrôler par web tous les paramètres de •...
  • Seite 169: Page Autopan

    10.1.9.1 Page Autopan 10.1.10 Page Paramètres Preset A la mention du menu Autopan il est possible A la mention du menu Paramètres Preset on peut d'indiquer le preset de début et de fin de l'autopan. configurer certains paramètres concernant les preset: •...
  • Seite 170: Page I/O Digitaux

    10.1.12 Page I/O Digitaux 10.1.13 Page Washer Dans la carte I/O Digitaux il est possible de configurer Dans le menu Installation de Lavage, on peut les canaux digitaux présents dans le dispositif. Il y a configurer les fonctionnalités du système de lavage ci-dessous une courte description des paramètres du dispositif.
  • Seite 171: Page Paramètres Caméra

    10.1.14 Page Paramètres Caméra 10.1.15 Page Instruments Les paramètres de la caméra IP qui ont été configurés A la mention du menu Instruments il est possible à la première mise en marche sont modifiables de reconfigurer les valeurs prédéfinies pour toute dans la section Paramètres Caméra.
  • Seite 172: Factory Default

    10.1.16 Factory Default Afin de connecter la caméra IP, vous devez utiliser le programme de VTTunnel, démarrable du menu Si le mot de passe ne est plus disponible, Instruments. il est possible de rétablir les paramétrages Au lancement du programme, sera montrée une d’usine à...
  • Seite 173: Accessoires

    11 Accessoires 11.1.1 Branchement du système de lavage Pour de plus amples informations sur la ATTENTION! L'installation est du type TNV- configuration et l'utilisation, consulter le 1. Ne pas la connecter à des circuits SELV. manuel de l'accessoire correspondant. ATTENTION! Pour réduire les risques 11.1 Système de lavage d’incendie, utiliser uniquement des câbles certifiés UL Listed ou CSA de sections égales...
  • Seite 174: Support Fixation Murale

    11.2 Support fixation murale 11.4 Alimentateur avec contrôle des projecteurs. Support mural avec passage interne des câbles. Boîte étanche avec alimentateur et contrôle des projecteurs. Fig. 88 Fig. 90 Version du boîtier standard. 11.3 Support fixation sol Support de fixation au sol avec passage interne des câbles.
  • Seite 175: Instructions De Fonctionnement Exceptionnel

    à n'importe quel type de VMS en mesure de sérielle) communiquer avec des dispositifs ONVIF Profil S. La tourelle est configurée à l'origine pour Le support technique de Videotec peut communiquer par protocole ONVIF. fournir la liste des caméras ONVIF testées La procédure décrite ci-dessous explique comment et des VMS ONVIF testés.
  • Seite 176: Connexion Vidéo Analogique

    12.1.1 Connexion vidéo analogique Modifiez les branchements électriques de la caméra comme indiqué dans les figures ci-dessous. Bien qu'elle ne soit pas strictement nécessaire pour effectuer la configuration, la procédure décrite ci- dessous exige la connexion d'un testeur CCTV (ou d'un moniteur standard) au niveau de la sortie vidéo de l'unité...
  • Seite 177 Branchez la ligne comme décrit dans le tableau Si « i3 » s'affiche sur le panneau INFO, cela signifie que suivant. l'unité Ulisse fonctionne en mode ONVIF (Fig. 100, page 47). BRANCHEMENT DE LA LIGNE SÉRIELLE RS485 RS485 Couleur REMARQUE RS485 A (+) Gris ------------------------ Device ID : 00001...
  • Seite 178 Si « i2 » s'affiche sur le panneau INFO, cela signifie que le mode RS485 a été défini (Fig. 102, page 48). DIP2 DIP1 REMARQUE ------------------------ Device ID : 00001 Type : Rs485 Tx-Rx Baud Rate : 38400-8N1 Protocol : MACRO Net Board : Ver 6.0.0 Mpp Board : Ver 6.0.0 Fig.
  • Seite 179: Contrôle De La Communication En Mode Rs485

    12.1.3 Contrôle de la communication en 12.1.4 Contrôle de l'état des alarmes mode RS485 Pour vérifier l'état des lignes d'alarme, vous devez disposer d'un testeur CCTV ou d'un moniteur Après avoir configuré le mode RS485, vous pouvez connecté à la sortie vidéo (12.1.1 Connexion vidéo accéder directement à...
  • Seite 180: Rétablissement Du Mode Onvif

    12.1.5 Rétablissement du mode ONVIF • Mettez sur OFF le SW6 du second DIP switch (DIP2) pour activer le mode ONVIF. Pour rétablir la configuration du mode ONVIF, • Mettez sur OFF le SW7 du second DIP switch (DIP2) il est nécessaire de répéter les étapes décrites pour désactiver l'inversion de l'état des alarmes.
  • Seite 181: Entretien

    13 Entretien 14 Nettoyage 14.1 Entretiens de la vitre et des L’entretien doit être uniquement effectué par un personnel qualifié en matière de parties en plastique circuits électriques. On doit éviter alcool éthylique, solvants, 13.1 Remplacement des fusibles hydrocarbures hydro-génés, acides forts et alcali.
  • Seite 182: Dépannage

    16 Dépannage PROBLÈME Il n'est pas possible de se brancher à la caméra. CAUSE Branchement erroné de la caméra. Pour toute problématique que ce soit non décrite ou si les problèmes énumérés SOLUTION Vérifier les branchements de la ci-après persistent, contacter le centre caméra.
  • Seite 183: Données Techniques

    17 Données techniques 17.2 Mécanique Presse-étoupes: 3xM16 17.1 Généralités Rotation horizontale: 360°, rotation continue Fabriqué en fonte d’aluminium et en technopolymère Rotation verticale: de -20° jusqu'à +45° Vernissage avec poudres époxypolyester, couleur Vitesse horizontale (variable): de 0.02°/s jusqu'à 20°/s RAL9002 Vitesse verticale (variable): de 0.02°/s jusqu'à...
  • Seite 184: Électrique

    17.4 Électrique 17.7 Environnement Compatible avec des caméras network Intérieur/Extérieur Tension d’alimentation/Courant absorbé: Température de fonctionnement (avec chauffage): de -10°C jusqu'à +60°C • 230Vac, 0.4A, 50/60Hz Protection contre les impulsions: jusqu’à 2kV entre • 24Vac, 4A (8A, avec projecteurs à LED), 50/60Hz ligne et ligne, jusqu’à...
  • Seite 185: Dessins Techniques

    18 Dessins techniques Les dimensions des dessins sont exprimées en millimètres. SURFACE UTILE SURFACE UTILE A - A B - B Fig. 106 ULISSE MAXI NETCAM. MNVCUPTMAXIR_1625_FR...
  • Seite 186 SURFACE UTILE SURFACE UTILE A - A B - B Fig. 107 ULISSE MAXI NETCAM, version avec prédisposition pour le montage des deux projecteurs à LED. MNVCUPTMAXIR_1625_FR...
  • Seite 187 SURFACE UTILE SURFACE UTILE A - A B - B Ø 70 Fig. 108 ULISSE MAXI NETCAM, version pour caméras thermiques. MNVCUPTMAXIR_1625_FR...
  • Seite 188: A Annexe - Tableau Des Adresses

    A Annexe - Tableau des adresses Le levier du switch vers le haut représente la valeur 1 (ON). Le levier du dip-switch vers le bas représente la valeur 0 (OFF). Ci-après, on reporte toutes les combinaisons possibles. CONFIGURATION DE L'ADRESSE (DIP 3) SW 8 SW 7 SW 6...
  • Seite 189 CONFIGURATION DE L'ADRESSE (DIP 3) SW 8 SW 7 SW 6 SW 5 SW 4 SW 3 SW 2 SW 1 Adresse Adresse 39 Adresse 40 Adresse 41 Adresse 42 Adresse 43 Adresse 44 Adresse 45 Adresse 46 Adresse 47 Adresse 48 Adresse 49 Adresse 50...
  • Seite 190 CONFIGURATION DE L'ADRESSE (DIP 3) SW 8 SW 7 SW 6 SW 5 SW 4 SW 3 SW 2 SW 1 Adresse Adresse 83 Adresse 84 Adresse 85 Adresse 86 Adresse 87 Adresse 88 Adresse 89 Adresse 90 Adresse 91 Adresse 92 Adresse 93 Adresse 94...
  • Seite 191 CONFIGURATION DE L'ADRESSE (DIP 3) SW 8 SW 7 SW 6 SW 5 SW 4 SW 3 SW 2 SW 1 Adresse Adresse 127 Adresse 128 Adresse 129 Adresse 130 Adresse 131 Adresse 132 Adresse 133 Adresse 134 Adresse 135 Adresse 136 Adresse 137 Adresse 138...
  • Seite 192 CONFIGURATION DE L'ADRESSE (DIP 3) SW 8 SW 7 SW 6 SW 5 SW 4 SW 3 SW 2 SW 1 Adresse Adresse 171 Adresse 172 Adresse 173 Adresse 174 Adresse 175 Adresse 176 Adresse 177 Adresse 178 Adresse 179 Adresse 180 Adresse 181 Adresse 182...
  • Seite 193 CONFIGURATION DE L'ADRESSE (DIP 3) SW 8 SW 7 SW 6 SW 5 SW 4 SW 3 SW 2 SW 1 Adresse Adresse 215 Adresse 216 Adresse 217 Adresse 218 Adresse 219 Adresse 220 Adresse 221 Adresse 222 Adresse 223 Adresse 224 Adresse 225 Adresse 226...
  • Seite 194 Email: info@videotec.com Tel. +33 1 60491816 - Fax +33 1 69284736 Email: info.fr@videotec.com Asia Pacific Videotec (HK) Ltd Americas Videotec Security, Inc. Flat 8, 19/F. On Dak Industrial Building, No. 2-6 Wah Sing Street Gateway Industrial Park, 35 Gateway Drive, Suite 100 Kwai Chung, New Territories - Hong Kong Plattsburgh, NY 12901 - U.S.A.
  • Seite 195 DEUTSCH ULISSE MAXI NETCAM Full IP PTZ Einheit für Netzwerk- Kameras für die dynamische Überwachung großer Aussenbereiche Deutsch - Bedienungsanleitung...
  • Seite 197 Inhaltsverzeichnis D E U T S C H 1 Allgemeines ........................7 1.1 Schreibweisen ................................7 2 Anmerkungen zum Copyright und Informationen zu den Handelsmarken ..... 7 3 Sicherheitsnormen ......................7 4 Identifizierung ......................10 4.1 Beschreibung und Bezeichnung des Produktes ..................10 4.2 Kennzeichnung des Produkts..........................10 4.2.1 Prüfung der Kennzeichnung .............................10 5 Versionen........................
  • Seite 198 8.7 Aufbau der Gegengewichte..........................24 8.8 Montage der Scheinwerfer mit LED ........................25 8.8.1 Entfernen der Gegengewichte............................25 8.8.2 Montage des Scheinwerfers auf den Bügel .........................25 8.9 Anschluss der LED-Scheinwerfer ........................26 8.10 Trockenmittelbeutel ............................27 8.11 Einstellung und Aktivierungsarten der LED-Scheinwerfer ..............27 8.11.1 Beschreibung des LED-Scheinwerfers .........................27 8.11.2 Aktivierung der LED-Scheinwerfer durch einen externen Dämmerungsschalter ........28 8.11.3 Aktivierung der LED-Scheinwerfer durch den integrierten Dämmerungssensor ........28 8.11.4 Manuelle Aktivierung der LED-Scheinwerfer......................28...
  • Seite 199 11.2 Wandhalterung ..............................44 11.3 Halterung für Brüstungsmontage .........................44 11.4 Netzteil mit Steuerung der Scheinwerfer ....................44 12 Anleitung für den Sonderbetrieb ................45 12.1 Den Datenübertragungsmodus bearbeiten (von ONVIF-Protokoll auf serielle Telemetrie) ..45 12.1.1 Anschluss Video analog ..............................46 12.1.2 Kameraanschluss .................................46 12.1.3 Steuerung der Kommunikation im Modus RS485 ....................49 12.1.4 Kontrolle Status Alarme ..............................49 12.1.5 Wiederherstellung des Modus ONVIF ..........................50...
  • Seite 200 MNVCUPTMAXIR_1625_DE...
  • Seite 201: Allgemeines

    1 Allgemeines 3 Sicherheitsnormen Vor Installation und Anwendung der Einheit ist die ACHTUNG! Die elektrische Anlage, an gesamte gelieferte Dokumentation aufmerksam zu der die Einheit angeschlossen ist, muss lesen. Zum späteren Nachschlagen das Handbuch in mit einem automatischen zweipoligen Reichweite aufbewahren. Schutzschalter 20A max ausgestattet sein.
  • Seite 202 • Unterbrechen Sie die Stromversorgung, bevor die • Die Einrichtung ist für die dauerhafte Befestigung beschriebenen Arbeiten durchgeführt werden. und Verbindung in ein Gebäude oder eine andere geeignete Struktur konzipiert. Vor jeder Operation • Es dürfen keine Kabel mit Verschleiß- oder muss die Einrichtung dauerhaft befestigt und Alterungsspuren verwendet werden.
  • Seite 203 • Kindern oder unbefugten Personen ist der • Vermeiden Sie durch gebotene Vorkehrungen, Gebrauch des Gerätes zu untersagen. dass das Gerät durch elektrostatische Entladungen beschädigt wird. • Die Wartung der Einrichtung ist Fachleuten vorbehalten. Während der Wartungsarbeiten ist die • Die Einheit ist dafür ausgelegt, über ein dreipoliges tätige Person der Gefahr von Stromschlägen und Kabel angeschlossen zu werden.
  • Seite 204: Identifizierung

    Mit einer einzigen Einheit kann auf diese Weise eine 360°-Deckung des Überwachungsbereichs garantiert werden. Abb. 1 Die Besonderheit von ULISSE MAXI NETCAM besteht Das Schildchen nennt: in der Möglichkeit, auf einfache Weise über das Netz • Identifizierungscode des Modells (Strichcode alle Funktionen der Videokamera und des Schwenk- Extended 3/9).
  • Seite 205: Versionen

    Die Version mit LED- Scheinwerfern Wärmebildkameras ausgelegt ist. kann nur mit einer Spannung von 24Vac betrieben werden. Der S-N-Kopf kann mit einer Halterung für 2 VIDEOTEC LED- Scheinwerfer für die Nachtüberwachung (Scheinwerfer nicht eingeschlossen). Abb. 3 Abb. 2 Für weitere Infos bitte entsprechendes Kapitel beachten (8.8 Montage der...
  • Seite 206: Vorbereitung Des Produktes Auf Den Gebrauch

    6 Vorbereitung des 6.3 Inhalt Produktes auf den Gebrauch Prüfen Sie, ob der Inhalt mit der nachstehenden Materialliste übereinstimmt: Jede vom Hersteller nicht ausdrücklich • Positionierungseinheit genehmigte Veränderung führt zum Verfall • Basis für Netzstromversorgung der Gewährleistungsrechte. • Zubehör Packung: •...
  • Seite 207: Auf Die Installation Vorbereitende Tätigkeiten

    6.5 Auf die Installation 6.5.2 Kabelführung vorbereitende Tätigkeiten Die Verbindungskabel dürfen von außen nicht zugänglich sein. Die Kabel mussen 6.5.1 Befestigung der Halterung gegen Lösen durch Abziehen sachgerecht am Träger fixiert werden, damit es Im Falle von Installationen, die verhindert wird, dass es durch das hohe Vibrationen ausgesetzt sind, nur die Gewicht unbeabsichtigt abgezogen wird.
  • Seite 208: Zusammenbau

    7 Zusammenbau 7.2.1 Eigenschaften der Kameras Der korrekte Betrieb des Gerätes innerhalb Nur Netzwerk-Kameras mit bestimmten des angezeigten Temperaturbereichs ist nur technischen Eigenschaften können garantiert, wenn die Temperaturschwellen installiert werden (7.2.1 Eigenschaften der der verwendeten Kamera und Optik Kameras, Seite 14). mindestens zwischen -10°C und +60°C liegen.
  • Seite 209: Öffnung Des Schutzgehause

    7.2.1 Öffnung des Schutzgehause Falls erforderlich, zur korrekten Positionierung von Kamera und Optik die zusätzlich vorhandenen Die lecksicheren Schrauben an den Seiten lösen, den Abstandhalter benutzen. oberen Teil des Gehäuses anheben. Abb. 7 Abb. 9 Nach Beendigung der Installation und der Verkabelung das Produkt wieder schließen.
  • Seite 210: Positionierung Des Abstandhalters

    7.2.3 Positionierung des Abstandhalters 7.2.4 Innenschlittens H-20 auf dem Innenschlitten Den Innenschlitten mit der Optik und der Kamera, beides bereits befestigt, in die gewünschte Position Es ist möglich einen H-20 Abstandhalter (02) an der gleiten lassen und dort mit den Unterlegscheiben Optik zu befestigen.
  • Seite 211: Beschreibung Der Karte Gehäuse

    7.3 Beschreibung der Karte 7.3.1 Anschluss der Kamera und der motorisch bewegten Optik Gehäuse Alle nachstehend erläuterten Anschlüsse BESCHREIBUNG DER KARTE dürfen nur von Fachleuten ausgeführt Verbinder/Klemme Funktion werden und müssen den Anforderungen Nicht verwendet. entsprechen, die hinsichtlich der Verdrahtung und Speisung der Steckverbinder Steuerung Motoren Einrichtungen bestehen.
  • Seite 212: Einstellung Der Versorgungsspannung Der Motoren Der Optiken

    7.3.2 Einstellung der Optiken mit Motoren mit umgekehrter Polarität: Den Anschluss wie in der Abbildung gezeigt Versorgungsspannung der Motoren der ausführen.. Optiken Bevor die Stromversorgung des Schwenk-Neige- FOCUS + Kopfes hergestellt wird, ist die Versorgungsspannung FOCUS - der Optiken mithilfe von DIP1 wählen (7.3 IRIS + Beschreibung der Karte Gehäuse, Seite 17).
  • Seite 213: Installation

    8 Installation 8.1 Anschließen der Kabel an die Basis Unter keinen Umständen dürfen Veränderungen oder Anschlüsse Die Kabel in den Kabelschellen einführen, während vorgenommen werden, die in diesem die Basis etwa 20cm von der Halterung entfernt Handbuch nicht genannt sind. Die gehalten wird.
  • Seite 214: Befestigung Der Basis An Der Halterung

    8.2 Befestigung der Basis an der 8.3 Beschreibung der Karte Halterung Anschlüsse BESCHREIBUNG DER KARTE ANSCHLÜSSE Verwenden Sie die mit der Basis gelieferten Schrauben und Unterlegscheiben. Verbinder/ Funktion Komponente Nach der Positionierung der Dichtung (01), die Basis Platinenversorgung (02) mit den Schrauben (04), den Zahnscheiben (05) Signalkabel und den Ringen für Schrauben (06) an der Halterung Ethernet...
  • Seite 215: Anschluss Der Stromversorgung

    8.4 Anschluss der Das Erdungskabel muss um etwa 10mm Stromversorgung länger sein, als die anderen beiden Kabel, um das ungewollte Lösen durch Ziehen des Je nach Version kann die Vorrichtung mit Kabels zu verhindern. unterschiedlichen Versorgungsspannungen geliefert werden. Der Wert der Versorgungsspannung ist Ferner muss das Versorgungskabel von auf dem Kenndatenschildchen des Produktes einer Silikonummantelung (01) überzogen...
  • Seite 216: Anschluss Der Stromversorgunglinie 24Vac

    8.4.1 Anschluss der 8.4.2 Anschluss der Versorgungsleitung Stromversorgunglinie 24Vac in 120Vac und 230Vac Die Kabel zuschneiden und die unten beschriebenen Die Kabel zuschneiden und die unten beschriebenen Anschlüsse vornehmen. Die Versorgungsleitung am Anschlüsse vornehmen. Die Versorgungsleitung am Klemmen anschließen: CN1. Klemmen anschließen: CN1.
  • Seite 217: Anschluss Der Alarmeingänge, Der Dämmerungsschalter Und Der Relais

    8.4.3 Anschluss der Alarmeingänge, der Version mit LED- Scheinwerfern Dämmerungsschalter und der Relais ANSCHLUSS DER ALARMEINGÄNGE, DER DÄMMERUNGSSCHALTER UND DER RELAIS ACHTUNG! Die Anlage gehört zum Typ TNV- AL1, AL2, AL3, Eigenbetriebene Alarmeingänge in Bezug auf 1. Nicht an Kreisläufe SELV anschließen. AL4 e ALARMS die gemeinsame Klemme ALARMS O1-C1 e O2-C2 Potentialfreie Ausgangskontakte, die durch...
  • Seite 218: Befestigung Des Oberen Körpers

    8.6 Befestigung des oberen 8.7 Aufbau der Gegengewichte Körpers Die Gegengewichte mit den Schrauben und den Unterlegscheiben aus dem Lieferumfang am Gehäuse Den oberen Körper (01) mit den Spannschrauben (03) befestigen. und Dichtungen (04) an der Basis (02) befestigen. Prüfen Sie, ob die Dichtung (05) der Basis vorhanden und in einwandfreiem Zustand ist.
  • Seite 219: Montage Der Scheinwerfer Mit Led

    Bügels (02) anbringen. mit LED Aus funktionstechnischen Gründen müssen stets beide Scheinwerfer zusammen montiert werden. Am Schwenk-Neige-Kopf dürfen nur Scheinwerfer von VIDEOTEC installiert werden. 8.8.1 Entfernen der Gegengewichte. Die Schrauben lösen und die externen Gegengewichte entfernen. Abb. 39 Die zuvor demontierten Schrauben und Unterlegescheiben wieder festziehen.
  • Seite 220: Anschluss Der Led-Scheinwerfer

    8.9 Anschluss der LED- Die Kabel so anschließen, wie in der Abbildung gezeigt. Scheinwerfer Die 2 Kappen M12 entfernen. Die 2 Kabelschellen und ihren jeweiligen mitgelieferten O-Ring festschrauben. Rechter Scheinwerfer Linker Scheinwerfer Abb. 44 Abb. 41 ANSCHLUSS DER LED-SCHEINWERFER Damit die Sicherheit und die gute Funktion Rechter Scheinwerfer Linker Scheinwerfer der Einheit nicht beeinträchtigt wird,...
  • Seite 221: Trockenmittelbeutel

    8.10 Trockenmittelbeutel 8.11 Einstellung und Aktivierungsarten der LED- Die Beutelchen (01) aus der Klarsichtverpackung Scheinwerfer entnehmen, durch Umknicken trennen und an den beiden abgebildeten Stellen einfügen. Die Beutelchen mit den beigefügten Plättchen (02) und Nach der Regelung synchronisiert und steuert Schrauben (03) fixieren.
  • Seite 222: Aktivierung Der Led-Scheinwerfer Durch Einen Externen Dämmerungsschalter

    8.11.2 Aktivierung der LED- • Regelung des rechten Scheinwerfers (SLAVE): Scheinwerfer durch einen externen • Einschaltschwelle: Wert auf Maximum einstellen (8.11.5 Einstellung der Dämmerungsschalter Einschaltschwelle der LED-Scheinwerfer., Seite  Die folgenden Arbeitsschritte ausführen: 29). • Anschluss des Dämmerungsschalters an die • Infrarotleistung: Wert auf Minimum einstellen Klemmen: AL1/ALARMS (8.4.3 Anschluss der (8.11.6 Einstellung der Leistung der LED- Alarmeingänge, der Dämmerungsschalter und der...
  • Seite 223: Einstellung Der Einschaltschwelle Der Led-Scheinwerfer

    8.11.5 Einstellung der Einschaltschwelle 8.11.6 Einstellung der Leistung der LED- der LED-Scheinwerfer. Scheinwerfer. Der rechte Scheinwerfer muss immer auf Der rechte Scheinwerfer muss immer auf die maximale Helligkeit eingestellt sein. die minimale Leistung eingestellt sein. Der Scheinwerfer wird im Werk zur Erbringung maximaler Leistung eingestellt.
  • Seite 224: Befestigung Des Wischerblattes

    8.12 Befestigung des Alles zusammen mit der Unterlegscheibe und der Mutter befestigen. Wischerblattes Das Wischerblatt auf die Welle des Scheibenwischers setzen. Das Wischerblatt in Ruhestellung bringen. Abb. 52 Das Wischerblatt ist dann richtig eingestellt, wenn das Blatt in die Ruhestellung zurückkehren kann und dabei an der Korpusplatte anschlägt.
  • Seite 225: Hardware Konfiguration

    Switch 1 wird für die Aktualisierung der Firmware AMERICAN OFF OFF OFF OFF ON benutzt. DYNAMICS VISTA OFF OFF OFF ON OFF OFF ON Tab. 10 Konfiguration: MACRO (VIDEOTEC), 115200 baud, Adresse 1. Diese Option benöigt keine Einstellung der DIP-switch (DIP1, DIP3). Abb. 55 MNVCUPTMAXIR_1625_DE...
  • Seite 226: Konfiguration Von Dip3

    8.13.4 Konfiguration von DIP3 8.13.5 Konfiguration von DIP4 Der nach oben zeigende Kipphebel des Die Einstellung dieses Dipschalters Schalters steht für den Wert 1 (ON). Der erfolgt in umgekehrter Reihenfolge wie nach unten zeigende Kipphebel des die vorherige. Der nach oben zeigende Dipschalters steht für den Wert 0 (OFF).
  • Seite 227: Einschaltung

    9 Einschaltung Vergewissern Sie sich, dass alle Teile fest und zuverlässig befestigt sind. Sicherstellen, das die Einheit und die anderen Bauteile der Anlage korrekt Der automatische Vorheizvorgang (De-Ice) geschlossen sind, um den Kontakt mit könnte immer dann aktiviert werden, wenn unter Spannung stehenden Bauteilen zu das Gerät bei einer Umgebungstemperatur verhindern.
  • Seite 228: Konfiguration

    10 Konfiguration 10.1.1 Produkte die mit 2.1 Version vorhergehender Firmware ausgerüstet 10.1 Web-Schnittstelle sind Beim ersten Anschluss eine Adresse Die Einheit ist konfiguriert, um eine zuweisen, die nicht 192.168.0.100 ist. IP-Adresse von einem DHCP-Server zu erhalten. In den Voreinstellungen ist der S-N-Kopf so konfiguriert, dass automatisch eine Adresse mit Unterstützte Browser: Microsoft Internet dem DHCP-Protokoll festgelegt wird und das Gerät...
  • Seite 229: Erster Webseitenaufruf

    10.1.2 Erster Webseitenaufruf 10.1.3 Home Seite Für einen korrekten Betrieb muss der Schwenk- Wenn der Login erfolgreich abgeschlossen wurde, Neige-Kopf gemäß der installierten Videokamera wird die Steuer-Schnittstelle des Produktes angezeigt. konfiguriert werden. Erforderliche Parameter: • Für den Datenaustausch mit der Kamera verwendetes IP-Protokoll.
  • Seite 230: Benutzersteuerung Seite

    10.1.4 Benutzersteuerung Seite • Iris close/Iris open/Auto iris Um die Einrichtung via Browser zu steuern, wählen Sie den Eintrag Benutzersteuerung. Es öffnet sich ein neues Fenster mit einer virtuellen Tastatur zum Absenden von Befehlen. Abb. 66 • Wiper/Washer Abb. 67 •...
  • Seite 231: Geräteparameter Seite

    10.1.5 Geräteparameter Seite 10.1.7 Netzwerk-Konfiguration Seite Im Menü-Eintrag Geräteparameter können der Im Menü-Eintrag Netzwerk kann die Netzwerk- Name der Einrichtung eingestellt und andere Einstellung des Schwenk-Neige-Kopfes geändert Zusatzinformationen angezeigt werden. werden. Es kann eingestellt werden, ob das Gerät eine statisch oder dynamisch mit DHCP zugewiesene oder eine selbstgenerierte Adresse haben muss.
  • Seite 232: Benutzer-Konfiguration Seite

    10.1.9 Bewegungsparameter Seite NTP-Server: Außerdem kann angegeben werden, ob das Gerät sich mit einem externen NTP (Network Im Menü-Eintrag Bewegungsparameter können via Time Protocol) Server synchronisieren muss. Internet alle Parameter des Schwenk-Neige-Kopfes • DEAKTIVIERT: Stellen Sie diese Option ein, wenn kontrolliert werden.
  • Seite 233: Autopan Seite

    10.1.9.1 Autopan Seite 10.1.10 Preset-Parameter Seite Im Menü-Eintrag Autopan können die Presets für Im Menü-Eintrag Preset-Parameter sind einige Beginn und Ende des Autopan angegeben werden. Parameter der Presets konfigurierbar: • Scan Geschwindigkeit: Geschwindigkeit in Grad pro Sekunde, mit der ein Preset auf ausdrückliche Aufforderung des Bedieners erreicht wird.
  • Seite 234: Digitale I/O Seite

    10.1.12 Digitale I/O Seite 10.1.13 Washer Seite Im Menü-Eintrag Digitale I/O können die digitalen Im Menü-Eintrag Scheibenwaschanlage kann der Kanäle der Einrichtung konfiguriert werden. Es Betrieb der Waschanlage konfiguriert werden. folgt eine kurze Beschreibung der konfigurierbaren Parameter für jeden Digitaleingang. •...
  • Seite 235: Kamera-Parameter Seite

    10.1.14 Kamera-Parameter Seite 10.1.15 Werkzeuge Seite Die Parameter der IP-Kamera, die beim ersten Start Im Menü-Eintrag Werkzeuge können die eingestellt wurden, können im Abschnitt Kamera- gesamte Konfiguration der Einrichtung oder nur Parameter geändert werden. Im Abschnitt Kamera- bestimmte Abschnitte auf die vordefinierten Werte Parameter können außerdem der Zoomfaktor und zurückgesetzt werden.
  • Seite 236: Factory Default

    10.1.16 Factory Default Um die IP-Kamera anzuschließen, müssen Sie das VTTunnel- Programm verwenden, aus dem Menü Falls das Kennwort nicht mehr verfügbar Werkzeuge bootfähig. ist, können mit einer Resettaste, die sich in Beim Start des Programmes,wird eine Liste von der Basis befindet, die Werkseinstellungen vernetzten Geräten angezeigt.
  • Seite 237: Zubehör

    11 Zubehör 11.1.1 Anschluss der Waschanlage. ACHTUNG! Die Anlage gehört zum Typ TNV- Für weitere Details zur Konfiguration und 1. Nicht an Kreisläufe SELV anschließen. zum Gebrauch beachten Sie bitte das Handbuch des entsprechenden Geräts. ACHTUNG! Zur Senkung der Brandgefahr dürfen nur UL Listed oder CSA zertifizierte 11.1 Waschanlage Kabel benutzt werden, die mindestens...
  • Seite 238: Wandhalterung

    11.2 Wandhalterung 11.4 Netzteil mit Steuerung der Scheinwerfer Wandhalterung mit interner Kabelführung. Dichtes Gehäuse mit Netzteil und Kontrolle der Scheinwerfer. Abb. 88 Abb. 90 Standardversion des Gehäuses. 11.3 Halterung für Brüstungsmontage Brüstunghalterung mit interner Kabelführung. Abb. 91 UL-zertifizierte Version des Gehäuses. Für weitere Infos bitte entsprechendes Kapitel beachten (8.4.3 Anschluss der Alarmeingänge, der Dämmerungsschalter...
  • Seite 239: Anleitung Für Den Sonderbetrieb

    Für ältere Firmware-Versionen ist es notwendig, ein Firmware-Update durchzuführen, bevor mit dem Ethernet (ONVIF) Verfahren fortgefahren wird. Den technischen Kundendienst von Videotec fragen, wie man die neuen Ethernet Firmware-Pakete, Release Notes und (ONVIF) Update-Verfahren erhalten kann. Abb. 92 Für Sonderprojekte besteht die Möglichkeit, Nicht-ONVIF Kameras anzufragen.
  • Seite 240: Anschluss Video Analog

    12.1.1 Anschluss Video analog Die elektrischen Anschlüsse der Kamera, wie in den folgenden Abbildungen angegeben, ändern. Wenn es auch nicht unbedingt notwendig ist, die Konfiguration zu vervollständigen, wird für das unten angegebene Verfahren eine Verbindung eines CCTV- Testers (oder eines Standardbildschirms) an den Videoausgang der Einheit Ulisse benötigt, um das +12V GND +12V...
  • Seite 241 Die Leitungen, wie in der folgenden Tabelle Wenn auf dem Bedienfeld INFO „i3“ angezeigt wird, angegeben, anschließen. bedeutet das, dass die Einheit Ulisse im Modus ONVIF funktioniert (Abb. 100, Seite 47). ANSCHLUSS SERIELLE LEITUNG RS485 RS485 Farbe ANMERKUNG RS485 A (+) Grau ------------------------ Device ID : 00001...
  • Seite 242 Wenn auf dem Bedienfeld INFO „i2“ angezeigt wird, bedeutet das, dass der Modus RS485 eingestellt ist ( DIP2 DIP1 Abb. 102, Seite 48). ANMERKUNG ------------------------ Device ID : 00001 Type : Rs485 Tx-Rx Baud Rate : 38400-8N1 Protocol : MACRO Net Board : Ver 6.0.0 Abb.
  • Seite 243: Steuerung Der Kommunikation Im Modus Rs485

    12.1.3 Steuerung der Kommunikation 12.1.4 Kontrolle Status Alarme im Modus RS485 Um den Status der Alarmleitungen zu überprüfen, wird ein an den Videoausgang angeschlossener Nach der Konfiguration des Modus RS485 kann auf CCTV-Tester oder Bildschirm benötigt (12.1.1 die Kamera direkt vom Netzwerk zugegriffen werden, Anschluss Video analog, Seite 46).
  • Seite 244: Wiederherstellung Des Modus Onvif

    12.1.5 Wiederherstellung des Modus • SW6 des zweiten Dipschalters (DIP2) auf OFF setzen, um den Modus ONVIF zu aktivieren. ONVIF • SW7 des zweiten Dipschalters (DIP2) auf OFF Um die Konfiguration des Modus ONVIF setzen, um die Umkehrung des Status der Alarme wiederherzustellen, müssen die vorher zu deaktivieren.
  • Seite 245: Wartung

    13 Wartung 14 Reinigung 14.1 Reinigung des Glases und Die Wartung darf nur von Fachleuten vorgenommen werden, die befähigt sind, der Kunststoffteile an elektrischen Schaltkreisen tätig zu werden. Zu vermeiden sind Äthylalkohol, Lösungsmittel, hydrierte 13.1 Wechsel der Sicherungen Kohlenwasserstoffe, starke Säuren und alkalische Lösungen.
  • Seite 246: Problemlösung

    16 Problemlösung PROBLEM Es kann keine Verbindung zur Kamera hergestellt werden. URSACHE Fehlerhafter Anschluss der Kamera. Kontaktieren Sie bitte das autorisierte Kundenzentrum bei jedem nicht LÖSUNG Prüfen Sie bitte die Kameraanschlüsse. beschriebenen Problem oder falls das aufgelistete Problem weiterhin bestehen PROBLEM Beim Einschalten bleibt die S-N- sollte.
  • Seite 247: Technische Daten

    17 Technische Daten 17.2 Mechanik Kabelverschraubungen: 3xM16 17.1 Allgemeines Horizontale Drehung: 360°, kontinuierliche Drehung Konstruktion aus Aluminiumdruckguss und Vertikale Drehung: von -20° bis zu +45° Technopolymer Schwenkgeschwindigkeit rechts - links (einstellbar): Pulverlackierung mit Epoxydpolyester, Farbe RAL9002 von 0.02°/s bis zu 20°/s Top mount (OTT) Neigegeschwindigkeit Auf-Ab einstellbar Zahnriemenantrieb...
  • Seite 248: Elektrik

    17.4 Elektrik 17.7 Umgebung Kompatibel mit Netzwerk-Kameras Innen/Außen Versorgungsspannung/Stromaufnahme: Betriebstemperatur (mit Heizung): von -10°C bis zu +60°C • 230Vac, 0.4A, 50/60Hz Impulsfestigkeit: bis zu 2kV zwischen zwei Leitungen, • 24Vac, 4A (8A, mit LED Scheinwerfern), 50/60Hz bis zu 4kV zwischen Leitung und Erde (Klasse 4) •...
  • Seite 249: Technische Zeichnungen

    18 Technische Zeichnungen Die Abmessungen der Zeichnungen sind in Millimeter angegeben. NUTZ- FLÄCHE NUTZFLÄCHE A - A B - B Abb. 106 ULISSE MAXI NETCAM. MNVCUPTMAXIR_1625_DE...
  • Seite 250 NUTZ- FLÄCHE NUTZFLÄCHE A - A B - B Abb. 107 ULISSE MAXI NETCAM, Version mit Vorrüstung für zwei LED-Scheinwerfer. MNVCUPTMAXIR_1625_DE...
  • Seite 251 NUTZ- FLÄCHE NUTZFLÄCHE A - A B - B Ø 70 Abb. 108 ULISSE MAXI NETCAM, Version für Wärmebildkameras. MNVCUPTMAXIR_1625_DE...
  • Seite 252: A Anhang - Adressentabelle

    A Anhang - Adressentabelle Der nach oben zeigende Kipphebel des Schalters steht für den Wert 1 (ON). Der nach unten zeigende Kipphebel des Dipschalters steht für den Wert 0 (OFF). Nachstehend sind alle Kombinationsmöglichkeiten aufgelistet. ADRESSEKONFIGURATION (DIP 3) SW 8 SW 7 SW 6 SW 5...
  • Seite 253 ADRESSEKONFIGURATION (DIP 3) SW 8 SW 7 SW 6 SW 5 SW 4 SW 3 SW 2 SW 1 Adresse Adresse 39 Adresse 40 Adresse 41 Adresse 42 Adresse 43 Adresse 44 Adresse 45 Adresse 46 Adresse 47 Adresse 48 Adresse 49 Adresse 50 Adresse 51...
  • Seite 254 ADRESSEKONFIGURATION (DIP 3) SW 8 SW 7 SW 6 SW 5 SW 4 SW 3 SW 2 SW 1 Adresse Adresse 83 Adresse 84 Adresse 85 Adresse 86 Adresse 87 Adresse 88 Adresse 89 Adresse 90 Adresse 91 Adresse 92 Adresse 93 Adresse 94 Adresse 95...
  • Seite 255 ADRESSEKONFIGURATION (DIP 3) SW 8 SW 7 SW 6 SW 5 SW 4 SW 3 SW 2 SW 1 Adresse Adresse 127 Adresse 128 Adresse 129 Adresse 130 Adresse 131 Adresse 132 Adresse 133 Adresse 134 Adresse 135 Adresse 136 Adresse 137 Adresse 138 Adresse 139...
  • Seite 256 ADRESSEKONFIGURATION (DIP 3) SW 8 SW 7 SW 6 SW 5 SW 4 SW 3 SW 2 SW 1 Adresse Adresse 171 Adresse 172 Adresse 173 Adresse 174 Adresse 175 Adresse 176 Adresse 177 Adresse 178 Adresse 179 Adresse 180 Adresse 181 Adresse 182 Adresse 183...
  • Seite 257 ADRESSEKONFIGURATION (DIP 3) SW 8 SW 7 SW 6 SW 5 SW 4 SW 3 SW 2 SW 1 Adresse Adresse 215 Adresse 216 Adresse 217 Adresse 218 Adresse 219 Adresse 220 Adresse 221 Adresse 222 Adresse 223 Adresse 224 Adresse 225 Adresse 226 Adresse 227...
  • Seite 258 Email: info@videotec.com Tel. +33 1 60491816 - Fax +33 1 69284736 Email: info.fr@videotec.com Asia Pacific Videotec (HK) Ltd Americas Videotec Security, Inc. Flat 8, 19/F. On Dak Industrial Building, No. 2-6 Wah Sing Street Gateway Industrial Park, 35 Gateway Drive, Suite 100 Kwai Chung, New Territories - Hong Kong Plattsburgh, NY 12901 - U.S.A.
  • Seite 259 РУССКИЙ ULISSE MAXI NETCAM PTZ-устройство с полным IP-управлением для сетевых камер и активного наружного наблюдения за большими территориями Русский - Руководство по эксплуатации...
  • Seite 261 Комплект оборудования Р У С С К И Й 1 О настоящем руководстве ..................7 1.1 Типографские условные обозначения ......................7 2 Примечания в отношении авторского права и информация о торговых марках ..........................7 3 Правила техники безопасности ................7 4 Обозначение...
  • Seite 262 8.6 Крепление верхней части кожуха ........................24 8.7 Установка противовесов ..........................24 8.8 Установка светодиодных осветителей .......................25 8.8.1 Снятие противовесов ................................25 8.8.2 Установка осветителя на кронштейне ........................25 8.9 Подключение светодиодных осветителей ....................26 8.10 Пакет с влагопоглотителем ...........................27 8.11 Регулировка и режим включения светодиодных осветителей ...........27 8.11.1 Описание...
  • Seite 263 11.1 Омыватель (Washer) ............................43 11.1.1 Подключение системы омывателя ..........................43 11.2 Кронштейн для крепления на стене ......................44 11.3 Кронштейн для крепления параллельно потолку ................44 11.4 Блок питания с функцией управления осветителями ..............44 12 Инструкции по работе в экстренных условиях ..............45 12.1 Переключение из режима связи ONVIF в режим RS-485 (телеметрия) ........45 12.1.1 Подключение...
  • Seite 264 MNVCUPTMAXIR_1625_RU...
  • Seite 265: О Настоящем Руководстве

    1 О настоящем 3 Правила техники руководстве безопасности Внимательно ознакомьтесь со всей документацией, ПРЕДУПРЕЖДЕНИЕ! Система электропитания, входящей в комплект поставки, перед тем как к которой подключается устройство, должна приступить к установке и эксплуатации данного иметь автоматический двухполюсный оборудования. Всегда держите руководство под рукой, выключатель...
  • Seite 266 • Перед тем как приступить к выполнению • Это устройство разработано для подключения любых операций, убедитесь в том, что источник и установки на здании или подходящей питания отключен. конструкции. Устройство следует надежно закрепить и подключить перед выполнением • Не используйте кабели, которые кажутся каких-либо...
  • Seite 267 • Не разрешайте детям или неуполномоченным • Предпринимайте все необходимые меры лицам использовать оборудование. предосторожности, чтобы предотвратить повреждение оборудования вследствие • Только опытные сотрудники должны проводить электрического разряда. техническое обслуживание устройства. При проведении технического обслуживания • Устройство предназначено для подключения оператор...
  • Seite 268: Обозначение

    4.2 Маркировка изделия 4.1 Описание и обозначение На поворотных устройствах присутствует этикетка, соответствующая маркировке типа устройства ULISSE MAXI NETCAM - мощное PTZ-устройство с полным IP-управлением для наружного IP-видеонаблюдения, которое способно управлять современными камерами IP SD, HD и мегапиксельными камерами с интеграцией в...
  • Seite 269: Модели

    Модель со светодиодными осветителями может работать только при напряжении в 24Vac. Поворотное устройство может быть оснащено кронштейном для 2 светодиодных осветителей VIDEOTEC для ночного наблюдения (осветители не входят в комплект оборудования). Рис. 3 Рис. 2 Более подробная информация представлена в соответствующей главе ( 8.8 Установка...
  • Seite 270: Подготовка Устройства К Использованию

    6 Подготовка устройства к 6.3 Комплект оборудования использованию Проверьте комплект оборудования на соответствие представленному ниже списку материалов: Любое изменение, которое выполняется без разрешения, явным образом • Устройство позиционирования предоставленного производителем, • Основание с подачей питания аннулирует гарантию. • Упаковка комплектующих: Не...
  • Seite 271: Подготовительные Работы Перед Установкой

    6.5 Подготовительные работы 6.5.2 Кабельная укладка перед установкой Соединительные кабели не должны быть доступны снаружи. Необходимо 6.5.1 Установка кронштейна надежно прикрепить кабели к опорной конструкции, чтобы предотвратить их Для подвергаемых вибрациям случайное вырывание под воздействием конструкций используйте только чрезмерно большого веса. кронштейн...
  • Seite 272: Монтаж

    7 Монтаж 7.2.1 Характеристики камер Правильная работа оборудования в Можно устанавливать только сетевые указанном температурном диапазоне камеры с особыми техническими гарантируется только в случае характеристиками (7.2.1 Характеристики использования камеры и объектива с камер, страница 14). диапазоном рабочей температуры по меньшей мере от -10°C до +60°C. 7.1 Установка...
  • Seite 273: Как Открыть Кожух

    7.2.1 Как открыть кожух При необходимости используйте дополнительные прокладки, чтобы правильно разместить камеру и Ослабьте винты с защитой от протечек, объектив. расположенные по бокам, и поднимите верхнюю часть кожуха. Рис. 7 Рис. 9 После завершения операций по Закрепите алюминиевую пластину (01) установке...
  • Seite 274: Размещение Прокладки H-20 На Внутренней Направляющей

    7.2.3 Размещение прокладки H-20 на 7.2.4 Внутренняя направляющая внутренней направляющей Переместите внутреннюю направляющую с уже закрепленными камерой и объективом в Можно прикрепить прокладку H-20 (02) к необходимое положение и зафиксируйте ее с объективу. Подключите камеру и закрепите помощью входящих в комплект шайб и винтов. Г-образный...
  • Seite 275: Описание Платы Кожуха

    7.3 Описание платы кожуха 7.3.1 Подключение камеры и объектива с приводом ОПИСАНИЕ ПЛАТЫ Все описываемые ниже подключения Разъем/Клемма Функция должны выполняться исключительно Не используется профессиональными установщиками, Разъем элемента управления которые должны соблюдать приводом объектива все требования спецификации Разъем потенциометра объектива с оборудования...
  • Seite 276: Регулирование Напряжения Питания Приводов Объективов

    7.3.2 Регулирование напряжения Объективы с приводом и обратной полярностью: Выполните подключение, как питания приводов объективов показано на рисунке.. Перед подключением поворотного устройства к сети питания выберите напряжение питания FOCUS + объектива с помощью DIP1 (7.3 Описание платы FOCUS - кожуха, страница 17). IRIS + РЕГУЛИРОВАНИЕ...
  • Seite 277: Монтаж

    8 Монтаж 8.1 Подключение кабелей к основанию Никогда и ни при каких обстоятельствах не выполняйте изменений или Вставьте кабели в кабельные сальники, удерживая подключений, не описываемых в основание на расстоянии около 20 см от опорной настоящем руководстве. Несоблюдение конструкции. Затяните кабельные сальники. изложенных...
  • Seite 278: Крепление Основания К Опорной Конструкции

    8.2 Крепление основания к 8.3 Описание платы разъемов опорной конструкции ОПИСАНИЕ ПЛАТЫ РАЗЪЕМОВ Разъем/ Функция Используйте винты и шайбы, Элемент поставляемые вместе с основанием. Питание платы Установите уплотнительное кольцо (01) и Сигнальные кабели закрепите основание (02) на кронштейне (03) с Ethernet Ethernet помощью...
  • Seite 279: Подключение Линии Питания

    8.4 Подключение линии Кабель заземления должен быть питания длиннее двух других кабелей примерно на 10mm, чтобы предотвратить В зависимости от модели на устройство может его случайное отсоединение при подаваться разное напряжение сети питания. натягивании. Значение напряжения питания указано на идентификационной этикетке устройства. (4.2 Силовой...
  • Seite 280: Подключение Линии Питания 24Vac

    8.4.1 Подключение линии питания 8.4.2 Подключение к линии питания 24Vac напряжением 120Vac и 230Vac Отрежьте кабели нужной длины и подсоедините Отрежьте кабели нужной длины и подсоедините их. Подключите питание к клемме: CN1. их. Подключите питание к клемме: CN1. 24Vac 24Vac Рис.
  • Seite 281: Подключение Входов Сигнала Тревоги, Сумеречного Выключателя И Реле

    8.4.3 Подключение входов сигнала модель со светодиодными осветителями тревоги, сумеречного выключателя ПОДКЛЮЧЕНИЕ ВХОДОВ СИГНАЛА ТРЕВОГИ, СУМЕРЕЧНОГО ВЫКЛЮЧАТЕЛЯ И РЕЛЕ и реле AL1, AL2, AL3, Входы сигнала тревоги с автономным ПРЕДУПРЕЖДЕНИЕ! Система типа НТС-1 AL4 и ALARMS питанием, связанные с общей клеммой Это...
  • Seite 282: Крепление Верхней Части Кожуха

    8.6 Крепление верхней части 8.7 Установка противовесов кожуха Прикрепите противовесы к кожуху с помощью предоставленных винтов и шайб. Установите верхнюю часть корпуса (01) на основании (02) с помощью крепежных винтов (03), укомплектованных прокладками (04). Проверьте наличие и хорошее состояние уплотнителя основания...
  • Seite 283: Установка Светодиодных Осветителей

    креплениях кронштейна (02). осветителей Для исправной работы необходимо всегда устанавливать оба осветителя. На поворотном устройстве можно устанавливать только осветители VIDEOTEC. 8.8.1 Снятие противовесов Выкрутите винты и снимите внешние противовесы. Рис. 39 Закрутите ранее извлеченные винты с шайбами. Рис. 37 8.8.2 Установка осветителя на...
  • Seite 284: Подключение Светодиодных Осветителей

    8.9 Подключение Подключите кабели, как показано на рисунке. светодиодных осветителей Снимите 2 колпачка М12. Затяните 2 кабельные муфты и соответствующие уплотнительные кольца, входящие в комплект оборудования. Осветитель левый Осветитель правый Рис. 44 ПОДКЛЮЧЕНИЕ СВЕТОДИОДНЫХ ОСВЕТИТЕЛЕЙ Осветитель левый Осветитель правый Рис. 41 Обозначение...
  • Seite 285: Пакет С Влагопоглотителем

    8.10 Пакет с влагопоглотителем 8.11 Регулировка и режим включения светодиодных Разместите пакеты с влагопоглотителем (01) в осветителей положении, указанном на рисунке, вынув их из прозрачной упаковки и согнув пополам. Закрепите пакеты с помощью пластин (02) и прилагающихся После завершения регулировки левый основной винтов...
  • Seite 286: Включение Светодиодных Осветителей С Помощью Внешнего Сумеречного Выключателя

    8.11.2 Включение светодиодных • Регулировка правого осветителя (SLAVE): осветителей с помощью внешнего • Порог включения: Установите максимальное значение (8.11.5 Регулировка порога сумеречного выключателя включения светодиодных осветителей, Выполните следующие действия: страница 29). • Подключите сумеречный выключатель к • Мощность инфракрасного излучения: клеммам: AL1/ALARMS (8.4.3 Подключение Установите...
  • Seite 287: Регулировка Порога Включения Светодиодных Осветителей

    8.11.5 Регулировка порога включения 8.11.6 Регулировка мощности светодиодных осветителей светодиодных осветителей Правый осветитель должен быть всегда Правый осветитель должен быть отрегулирован на максимальную яркость. всегда отрегулирован на минимальную мощность. Производитель настроил осветитель так, чтобы он выдавал максимальную мощность. Если нет необходимости...
  • Seite 288: Крепление Щетки Стеклоочистителя

    8.12 Крепление щетки Закрепите данный элемент в сборе с помощью шайбы и гайки. стеклоочистителя Наденьте щетку на ось щеткодержателя. Установите щетку в положение покоя. Рис. 52 Правильная настройка должна позволять щетке вернуться в исходное положение и прилегать к пластине Рис. 51 корпуса.
  • Seite 289: Конфигурация Аппаратного Обеспечения

    (Выкл.) (Выкл.) (Выкл.) (Выкл.) (Вкл.) (Вкл.) (Вкл.) (Выкл.) DYNAMICS VISTA (Выкл.) (Выкл.) (Выкл.) (Вкл.) (Выкл.) (Выкл.) (Вкл.) (Вкл.) Табл. 10 Конфигурация по умолчанию: MACRO (VIDEOTEC), 115200 бод, Адрес 1. Эта опция не требует установки Рис. 55 DIP-переключателя (DIP1, DIP3). MNVCUPTMAXIR_1625_RU...
  • Seite 290: Конфигурация Dip3

    8.13.4 Конфигурация DIP3 8.13.5 Конфигурация DIP4 Когда рычажок переключателя Настройка данного DIP-переключателя переведен в положение вверх, значение выполняется в обратном порядке по равно 1 (ON - Включен). Нижнее сравнению в предыдущими указаниями. положение рычажка DIP-переключателя Когда рычажок переключателя соответствует значению 0 (OFF (ВЫКЛ.)). переведен...
  • Seite 291: Включение

    9 Включение Убедитесь в том, что все детали надежно закреплены. Убедитесь в том, что устройство и прочие элементы системы снабжены защитными Процесс автоматического кожухами, исключающими возможность предварительного подогрева (De-Ice) контакта с токопроводящими активируется при каждом включении компонентами. устройства, если температура окружающей...
  • Seite 292: Конфигурация

    10 Конфигурация 10.1.1 Продукты с прошивкой вплоть до версии 2.1 10.1 Веб-интерфейс При первом включении присвойте адрес, отличный от 192.168.0.100. Устройство настроено таким образом, чтобы получить IP-адрес от сервера В соответствии с предварительными настройками, DHCP. поворотное устройство автоматически получает адрес через протокол DHCP, и устройство можно Поддерживаемые...
  • Seite 293: Первый Вход На Веб-Страницу

    10.1.2 Первый вход на веб-страницу 10.1.3 Начальная страница Чтобы обеспечить надлежащую работу, следует Если авторизация прошла успешно, отобразится настроить поворотное устройство в соответствии интерфейс управления устройства. с установленной камерой. Требуемые параметры: • IP-протокол, используемый для связи с камерой. • Тип установленных объективов (с приводом, стационарный...
  • Seite 294: Страница Пользовательских Элементов Управления

    10.1.4 Страница пользовательских • Открыть диафрагму (Iris close)/Закрыть диафрагму (Iris open)/Автоматическая элементов управления регулировка диафрагмы (Auto iris) Чтобы управлять устройством через браузер, выберите функцию User Control (Пользовательское управление). Откроется новое окно с виртуальной клавиатурой для ввода команд. Рис. 66 • Стеклоочиститель (wiper)/Омыватель (Washer) Рис.
  • Seite 295: Страница Параметров Устройства

    10.1.5 Страница параметров 10.1.7 Страница конфигурации сети устройства Пункт меню Cети (Network) позволяет изменить настройки сети поворотного устройства. Пункт меню Параметры устройства (Device Здесь можно принять решение, требуется ли Parameters) позволяет задать имя устройства устройству статический адрес, динамический и просмотреть другую дополнительную адрес, получаемый...
  • Seite 296: Страница Пользовательских Настроек

    10.1.9 Страница параметров NTP-сервер: Можно также указать, требуется ли синхронизировать устройство с внешним NTP-сервером движения (Сетевым протоколом времени). Пункт меню Movement Parameters (Параметры • ОТКЛЮЧЕН (DISABLED): Выберите эту опцию, движения) позволяет контролировать через если вы не хотите синхронизировать дату и время интернет...
  • Seite 297: Страница Автоматического Панорамного Наблюдения (Autopan Page)

    10.1.9.1 Страница автоматического 10.1.10 Страница предварительно панорамного наблюдения (Autopan Page) установленных параметров Пункт меню Автоматическое панорамное Пункт меню Preset Parameters (Предварительно установленные параметры) позволяет настраивать некоторые параметры, наблюдение (Autopan) позволяет указать относящихся к предварительным настройкам: предварительно установленные значения для • Scan Speed (Скорость сканирования): Скорость, включения...
  • Seite 298: Страница Цифрового Входа/Выхода

    10.1.12 Страница цифрового входа/ 10.1.13 Страница омывателя выхода Меню Омыватель (Wash System) позволяет настроить функции моющей системы устройства. Пункт меню Digital I/O (Цифровой вход/выход) позволяет выполнять настройку конфигурации имеющихся цифровых каналов устройства. Далее приводится краткое описание настраиваемых параметров каждого цифрового входа. •...
  • Seite 299: Страница Настроек Камеры

    10.1.14 Страница настроек камеры 10.1.15 Страница инструментов Параметры IP-камеры, установленные при первом Пункт меню Tools (Инструменты) позволяет запуске, можно отредактировать в разделе Camera изменять предварительно заданные значения Parameters (Параметры камеры). В разделе Camera всех параметров конфигурации устройства или Parameters (Параметры камеры) можно указать некоторых...
  • Seite 300: Factory Default

    10.1.16 Factory Default Чтобы подключить веб-камеру, необходимо использовать программу VTTUnnel, доступную в Если пароль более недоступен, вы меню Tools (Инструменты). также можете восстановить заводские Когда программа будет запущена, отобразится настройки, нажав расположенную в список сетевых устройств. Чтобы подключить основании кнопку Reset (Сброс). камеру, выберите...
  • Seite 301: Комплектующие

    11 Комплектующие 11.1.1 Подключение системы омывателя Дополнительная информация по ПРЕДУПРЕЖДЕНИЕ! Система типа НТС-1 конфигурации и использованию Это система типа НТС-1, не подключайте представлена в соответствующем ее к СНБН-схемам. руководстве. ПРЕДУПРЕЖДЕНИЕ! Для снижения риска 11.1 Омыватель (Washer) возникновения пожара используйте исключительно кабели UL или CSA, Поворотное...
  • Seite 302: Кронштейн Для Крепления На Стене

    11.2 Кронштейн для крепления 11.4 Блок питания с функцией на стене управления осветителями Настенный кронштейн с внутренним кабельным Защищенный от погодных условий корпус каналом. с блоком питания и пультом управления осветителями. Рис. 90 Модель стандартного корпуса. Рис. 88 11.3 Кронштейн для крепления параллельно...
  • Seite 303: Инструкции По Работе В Экстренных Условиях

    поддерживающими стандарт ONVIF Profile S. Поворотное устройство по умолчанию настроено Служба технической поддержки компании таким образом, чтобы связь осуществлялась по Videotec может предоставить список протоколу ONVIF. прошедших испытания камер и программ Описываемая ниже процедура разъясняет, как управления видео с поддержкой стандарта...
  • Seite 304: Подключение Аналогового Видео

    12.1.1 Подключение аналогового Измените электрические подключения камеры, как показано на следующих рисунках. видео Даже если это не является строго необходимым для завершения настройки, описываемая ниже процедура предусматривает подключение к выходу видеосигнала устройства Ulisse +12V GND +12V CCTV-тестера (или стандартного монитора), используемого...
  • Seite 305 Подключите линии согласно указаниям в Если на панели информации (INFO) отображается следующей таблице. "i3", это означает, что устройство Ulisse работает в режиме ONVIF (Рис. 100, страница 47). ПОДКЛЮЧЕНИЕ ПОСЛЕДОВАТЕЛЬНОЙ ЛИНИИ СВЯЗИ RS485 RS485 Цвет INFO RS485 A (+) Серый ------------------------ Device ID : 00001 RS485 B (-) Розовый...
  • Seite 306 Если на панели информации (INFO) отображается "i2", это означает, что включен режим RS485 (Рис. DIP2 DIP1 102, страница 48). INFO ------------------------ Device ID : 00001 Type : Rs485 Tx-Rx Baud Rate : 38400-8N1 Protocol : MACRO Net Board : Ver 6.0.0 Рис.
  • Seite 307: Проверка Связи В Режиме Rs485

    12.1.3 Проверка связи в режиме 12.1.4 Контроль статуса сигналов RS485 тревоги После настройки режима RS485 доступ к Для проверки статуса линий сигналов тревоги камере возможен непосредственно из сети без необходимо использовать CCTV-тестер или вмешательства в работу устройства Ulisse на IP- монитор, подключенный...
  • Seite 308: Восстановление Режима Onvif

    12.1.5 Восстановление режима ONVIF • Для того чтобы включать режим ONVIF, установите SW6 на втором DIP-переключателе Для того чтобы вернуться в режим ONVIF (DIP2) в положение OFF (Выкл.). необходимо повторить шаги, которые были • Для того чтобы выключать инверсию статуса указаны...
  • Seite 309: Техническое Обслуживание

    13 Техническое 14 Очистка обслуживание 14.1 Очистка окошка и пластиковой крышки Техническое обслуживание должно проводиться сотрудниками, Не используйте этиловый спирт, прошедшими курс обучения по растворители, галогенированные выполнению работ на электрических углеводороды, сильные кислоты и цепях. щелочи. Подобные вещества могут 13.1 Замена предохранителей необратимо...
  • Seite 310: Поиск И Устранение Неисправностей

    16 Поиск и устранение НЕИСПРАВНОСТЬ Невозможно подключиться к камере. неисправностей ПРИЧИНА Неверное подключение к камере. СПОСОБ УСТРАНЕНИЯ Проверьте В том случае, если перечисленные подключение к камере. ниже проблемы не удается устранить или если вы столкнулись с другими НЕИСПРАВНОСТЬ При запуске поворотное проблемами, описание...
  • Seite 311: Технические Характеристики

    17 Технические 17.2 Механические характеристики характеристики Кабельные муфты: 3xM16 17.1 Общие сведения Вращение по горизонтали: 360°, постоянным вращение Изготавливается из алюминия и технополимера Вертикальное перемещение: от -20° до +45° Эпоксиполиэстеровое порошковое покрытие, цвет RAL9002 Скорость горизонтального движения (регулирует ся): от 0.02°/s до 20°/s Верхнее...
  • Seite 312: Электрические Характеристики

    17.4 Электрические 17.7 Окружающая среда характеристики Внутреннее наблюдение (Indoor)/Наружное наблюдение (Outdoor) Подходит для использования с сетевыми Рабочая температура (с нагревателем): от -10°C до камерами +60°C Напряжение сети питания/Потребляемый ток: Невосприимчивость к выбросу напряжения: до 2 • 230Vac, 0,4 A, 50/60Hz кВ...
  • Seite 313: Технические Чертежи

    18 Технические чертежи Размеры на чертежах указаны в миллиметрах. A - A B - B Рис. 106 ULISSE MAXI NETCAM. MNVCUPTMAXIR_1625_RU...
  • Seite 314 A - A B - B Рис. 107 ULISSE MAXI NETCAM, модель, подготовленная для установки двух светодиодных осветителей. MNVCUPTMAXIR_1625_RU...
  • Seite 315 A - A B - B Ø 70 Рис. 108 ULISSE MAXI NETCAM, модель для тепловизоров. MNVCUPTMAXIR_1625_RU...
  • Seite 316: A Приложение - Таблица Адресов

    A Приложение - Таблица адресов Когда рычажок переключателя переведен в положение вверх, значение равно 1 (ON - Включен). Нижнее положение рычажка DIP-переключателя соответствует значению 0 (OFF (ВЫКЛ.)). Все возможные комбинации показаны ниже. КОНФИГУРАЦИЯ АДРЕСА (DIP 3) SW 8 SW 7 SW 6 SW 5 SW 4...
  • Seite 317 КОНФИГУРАЦИЯ АДРЕСА (DIP 3) SW 8 SW 7 SW 6 SW 5 SW 4 SW 3 SW 2 SW 1 Адрес OFF (Выкл.) OFF (Выкл.) ON (Вкл.) OFF (Выкл.) OFF (Выкл.) ON (Вкл.) ON (Вкл.) ON (Вкл.) Адрес 39 OFF (Выкл.) OFF (Выкл.) ON (Вкл.) OFF (Выкл.)
  • Seite 318 КОНФИГУРАЦИЯ АДРЕСА (DIP 3) SW 8 SW 7 SW 6 SW 5 SW 4 SW 3 SW 2 SW 1 Адрес OFF (Выкл.) ON (Вкл.) OFF (Выкл.) ON (Вкл.) OFF (Выкл.) OFF (Выкл.) ON (Вкл.) ON (Вкл.) Адрес 83 OFF (Выкл.) ON (Вкл.) OFF (Выкл.) ON (Вкл.)
  • Seite 319 КОНФИГУРАЦИЯ АДРЕСА (DIP 3) SW 8 SW 7 SW 6 SW 5 SW 4 SW 3 SW 2 SW 1 Адрес OFF (Выкл.) ON (Вкл.) ON (Вкл.) ON (Вкл.) ON (Вкл.) ON (Вкл.) ON (Вкл.) ON (Вкл.) Адрес 127 ON (Вкл.) OFF (Выкл.) OFF (Выкл.) OFF (Выкл.)
  • Seite 320 КОНФИГУРАЦИЯ АДРЕСА (DIP 3) SW 8 SW 7 SW 6 SW 5 SW 4 SW 3 SW 2 SW 1 Адрес ON (Вкл.) OFF (Выкл.) ON (Вкл.) OFF (Выкл.) ON (Вкл.) OFF (Выкл.) ON (Вкл.) ON (Вкл.) Адрес 171 ON (Вкл.) OFF (Выкл.) ON (Вкл.) OFF (Выкл.)
  • Seite 321 КОНФИГУРАЦИЯ АДРЕСА (DIP 3) SW 8 SW 7 SW 6 SW 5 SW 4 SW 3 SW 2 SW 1 Адрес ON (Вкл.) ON (Вкл.) OFF (Выкл.) ON (Вкл.) OFF (Выкл.) ON (Вкл.) ON (Вкл.) ON (Вкл.) Адрес 215 ON (Вкл.) ON (Вкл.) OFF (Выкл.) ON (Вкл.)
  • Seite 322 Email: info@videotec.com Тел.: +33 1 60491816 - факс: +33 1 69284736 Email: info.fr@videotec.com Asia Pacific Videotec (HK) Ltd. Americas Videotec Security, Inc. Flat 8, 19/F. On Dak Industrial Building, No. 2-6 Wah Sing Street Gateway Industrial Park, 35 Gateway Drive, Suite 100 Kwai Chung, New Territories - Hong Kong Plattsburgh, NY 12901 - U.S.A.
  • Seite 324 Email: info@videotec.com Tel. +33 1 60491816 - Fax +33 1 69284736 Email: info.fr@videotec.com Asia Pacific Videotec (HK) Ltd Americas Videotec Security, Inc. Flat 8, 19/F. On Dak Industrial Building, No. 2-6 Wah Sing Street Gateway Industrial Park, 35 Gateway Drive, Suite 100 Kwai Chung, New Territories - Hong Kong Plattsburgh, NY 12901 - U.S.A.

Inhaltsverzeichnis