Herunterladen Inhalt Inhalt Diese Seite drucken
Truma Diagnose Tool Gebrauchsanweisung
Vorschau ausblenden Andere Handbücher für Diagnose Tool:
Inhaltsverzeichnis

Werbung

Verfügbare Sprachen
  • DE

Verfügbare Sprachen

  • DEUTSCH, seite 1
Truma Diagnose Tool
Gebrauchsanweisung
Operating instructions
Mode d'emploi
Istruzioni per l'uso
Gebruiksaanwijzing
Seite 2
Bruksanvisning
Page 16
Käyttöohje
Page 30
Pagina 44
Pagina 58
Sida 72
Sivu 86

Werbung

Inhaltsverzeichnis
loading

Inhaltszusammenfassung für Truma Diagnose Tool

  • Seite 1 Truma Diagnose Tool Gebrauchsanweisung Gebruiksaanwijzing Seite 2 Pagina 58 Operating instructions Bruksanvisning Page 16 Sida 72 Mode d‘emploi Käyttöohje Page 30 Sivu 86 Istruzioni per l‘uso Pagina 44...
  • Seite 2: Inhaltsverzeichnis

    Truma Diagnose Tool Inhaltsverzeichnis Programm „ Error Explorer“ – VeGA Verwendete Symbole ............3 Programm starten ............... 12 Sicherheitshinweise ............3 Gerät suchen ............... 12 Menüpunkt VeGA ..............13 – Elektronik tauschen ............13 Interface „Diagnose Tool“ – Entschwefelungseinheit tauschen ........13 – Medienversorgungseinheit tauschen ....... 13 Lieferumfang .................
  • Seite 3: Verwendete Symbole

    Ausschluss von Haftungsansprüchen führen insbesondere: Systemvoraussetzungen – Veränderungen am Gerät (einschließlich Zubehörteilen), – Verwendung von anderen als Truma Originalteilen als Windows XP, Windows 10, 7, 8 (nicht Windows RT) Ersatz- und Zubehörteile, Speicherbedarf auf der Festplatte ca. 40 MB –...
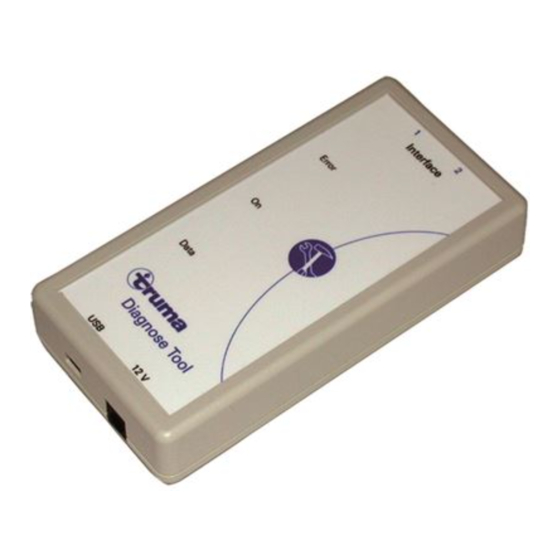
  • Seite 4: Computer Anschließen

    3 Data – gelbe LED * erforderlich bei Version der Software im Gerät < V 05.00.00 – Signalisiert den Datentrans- Bild 4 fer auf dem Bus. X1 Kupplung RJ12 zur Kabelverlängerung Fehlerspeicher auslesen – Programm „Truma Diagnose Tool / Error Explorer“ auf dem Computer starten.
  • Seite 5: Steuerung Separat Auslesen

    12 V 5 V -> 12 V Bild 9 Fehlerspeicher auslesen 5 V -> 12 V – Programm „Truma Diagnose Tool / Error Explorer“ auf dem Bild 7 Computer starten. Anschluss Combi D Steuerung separat auslesen X2 Anschluss an Uhr (ZSU) – Combi D –...
  • Seite 6: Mover® Xt

    – 13- oder 7-poligen Stecker des Wohnwagens in die Sicher- heitssteckdose einstecken. – „Diagnose Tool“ mit Kabel (RJ12 – RJ12) an der Zentralein- heit anschließen. Anschluss RJ12 Interface Diagnose Tool 12 V 5 V -> 12 V Interface Bild 12 Diagnose Tool Steuerung separat auslesen 12 V 5 V ->...
  • Seite 7: Brennstoffzellensystem Vega

    Truma Diagnose Tool / Error Explorer Datei Tools Start Fehlerspeicher auslesen 2 „Sprache wählen“ Stop Eigenschaften – Programm „Truma Diagnose Tool / Error Explorer“ auf dem klicken Mehr... Sprache wählen Computer starten. 3 Sprache klicken Elektronik separat auslesen Bild 21 4 „OK“ oder „Abbrechen“...
  • Seite 8: Programm „ Error Explorer" - Combi, Mover

    1 Suche des Geräts. 2 Fehlerspeicher wird ausgelesen. 3 Inhalt des Fehlerspeichers wird für die Anzeige aufbereitet. Zur Kommunikation mit Truma kann die Fehlerliste gespei- 4 Statusbalken. chert und mit Email versendet werden. 5 Gerät, das mit dem „Diagnose Tool“ verbunden ist.
  • Seite 9: Fehlerliste Ausgeben (Pdf)

    Fehlerliste ausgeben (PDF) Elektronik tauschen – Combi 1 „Datei“ klicken Auf der Heizung Combi steht auf dem Typenschild eine 8-stel- Truma Diagnose Tool / Error Explorer ligen Seriennummer (SN). Diese SN ist zusätzlich in der Elekt- Datei Tools Combi Öffnen ...
  • Seite 10: Wechsel Zu „Livedisplay

    Programm „ Live Display“– Combi Wechsel zu „LiveDisplay“ Betriebszustände und Parameter darstellen oder ändern 1 „Datei“ klicken Truma Diagnose Tool / Error Explorer Datei Tools Voraussetzung für den Betrieb: Öffnen ... Öffnen ... 2 „ Live Display“ aktivieren Speichern unter ... Speichern unter ...
  • Seite 11: Fehlerdetail Anzeigen

    Beispiel zeigt das Gerät – Combi (Gas). 5 Bedienteil – Modus und Sollwert der Raumtemperatur vorwählbar 1 Details des aktuellen 6 Parameter mit „Senden“ zur Steuerung übertragen. Truma Diagnose Tool / Live Display Datei Tools Fehlers durch Klick auf das rot markierte Das Fenster „Control“...
  • Seite 12: Wechsel Zu „ Error Explorer

    Programm „ Error Explorer“ – VeGA Wechsel zu „ Error Explorer“ Voraussetzung für den Betrieb: 1 „Datei“ klicken Truma Diagnose Tool / Live Display Datei Error Explorer 2 „ Error Explorer“ Gerät Version der Software im Gerät Beenden aktivieren VeGA alle Bild 47 –...
  • Seite 13: Menüpunkt Vega

    Menüpunkt VeGA Wechsel zu „ Live Display" – Elektronik tauschen 1 „Datei“ klicken Truma Diagnose Tool / Error Explorer Datei Tools VeGA Seriennummer / Betriebsdaten von einer alten Elektronik lesen Öffnen ... 2 „ Live Display“ aktivieren Öffnen ... Speichern unter ...
  • Seite 14: Programm „ Live Display" - Vega

    Icon „Truma Diagnose Tool“ im Desktop starten 2 Im Auswahlfenster „ Live Display“ starten Bild 60 Gerät suchen 1 „Tools“ klicken Bild 63 Truma Diagnose Tool / Livwe Display Datei Tools Start 2 „Start“ klicken Stop Eigenschaften Funktionen für Service Sprache wählen 1 Funktionen für Service durch Klick auf den Reiter...
  • Seite 15: Wechsel Zu „ Error Explorer

    Ergebnisse am CP plus abstecken. Das Diagnose Tool startet einen automatischen Testlauf. Bei 2. Diagnose Tool mit einem TIN-BUS Kabel am CP plus (Buch- erfolgreichem Test wird ein „grüner Haken“ dargestellt se „CI-BUS“) anschließen. 3. Diagnose Tool mit 12 Volt Gleichspannung versorgen (siehe Anschlussbilder).
  • Seite 16 Safety instructions ............17 Device search ..............26 VeGA menu item ..............27 – Electronics replacement ........... 27 “Diagnose Tool” interface – Replace the sulphur removal unit ........27 – Replace the media supply unit ......... 27 Purchased parts package ........... 17 –...
  • Seite 17: Symbols Used

    Symbols used “Diagnose Tool” interface Symbol indicates a possible hazard. Purchased parts package Note containing information and tips. 1 Diagnose Tool interface / hardware Observe the ESD regulations! Electrostatic charge can 1 CD-ROM incl. software for destroy the electronics. Ensure potential equalisation –...
  • Seite 18: Computer Connection

    Interface The current software can be downloaded from the section for dealers (see www.truma.com). Diagnose Tool Each time it is started, the “Diagnose Tool” searches for 12 V Combi 5 V -> 12 V current software. A message is displayed if an error oc- curs (e.g.
  • Seite 19: Separate Control Unit Export

    – Supply control unit with power (12 V DC / min. 0.2 A). Interface – Simulate the connection of the safety socket with a bridge (W1). Diagnose Tool – Connect the “Diagnose Tool” to X1 or X2 with the Mover® 12 V adapter cable (W2). 5 V -> 12 V Fig. 8 Error memory export –...
  • Seite 20: Mover® Xt

    Control unit installed in the vehicle – Supply control unit with power (12 V DC). – Connect the “Diagnose Tool” to the central unit with the Central unit error memory export Mover® adapter cable (W3). – Remote control must be switched off.
  • Seite 21: Vega Fuel Cell System

    Truma Diagnose Tool / Error Explorer File Tools Start Error memory export 2 Click on “Select Stop Properties – Start “Truma Diagnose Tool / Error Explorer” program on language”. More ... Select language the computer. 3 Click on language. Separate electronics export Fig. 21 4 Click “OK”...
  • Seite 22: Error Explorer" Program - Combi, Mover

    The error list can be saved and emailed for reference when 3 Error memory content will be prepared for display communicating with Truma. 4 Status bar 5 Device which is connected to the “Diagnose Tool” 1 Click on “File”. Truma Diagnose Tool / Error Explorer 6 Information on the device...
  • Seite 23: Error List Printout (Pdf)

    File Tools Combi Open ... Open ... 2 Click on “Print”. system of the heater. The “Diagnose Tool” can be used to re- Save as ... Save as ... Print Print trieve the SN from the old electronic system. Live Display...
  • Seite 24: Changing To "Livedisplay

    “Live Display” program – Combi Changing to “LiveDisplay” Display or change of operating states and parameters 1 Click on “File”. Truma Diagnose Tool / Error Explorer Requirements for operation: File Tools Open ... Open ... 2 Select “Live Display”. Save as ...
  • Seite 25: Error Details

    5 Control panel – Mode and set room temperature value can 1 Click on the field be preselected. Truma Diagnose Tool / Live Display File Tools highlighted in red for 6 Click on “Send“ to transfer parameters to control unit.
  • Seite 26: Changing To "Error Explorer

    Screen displaying current action 1 Device search 2 Error memory readout 3 Error memory content will be prepared for display. 4 Status bar 5 Device which is connected to the “Diagnose Tool“ 6 Information on the device Field Meaning Master...
  • Seite 27: Vega Menu Item

    VeGA menu item Changing to “Live Display“ – Electronics replacement 1 Click on “File“. Truma Diagnose Tool / Error Explorer File Tools VeGA Import the serial number / operating data from an old elec- 2 Select “Live Display“. Open ... Open ...
  • Seite 28: Live Display" Program - Vega

    “Truma Diagnose Tool“ icon on the desktop. 2 Select “Live Display“ to start the program. Fig. 60 Device search 1 Click on “Tools“. Fig. 63 Truma Diagnose Tool / Livwe Display File Tools Start 2 Click on “Start“. Stop Properties Service functions Select language 1 Click on the “Service functions“...
  • Seite 29: Changing To "Error Explorer

    Changing to “Error Explorer“ The Diagnose Tool will now search the CP plus. After a suc- cessful search, the CP plus is displayed on the screen. 1 Click on “File“. Truma Diagnose Tool / Live Display File 2 Select “Error Explorer“. Error Explorer Exit –...
  • Seite 30 Truma Diagnose Tool Table des matières Programme « Error Explorer » – VeGA Symboles utilisés ..............31 Démarrage du programme ..........40 Informations concernant la sécurité ......31 Recherche de l'appareil ............40 Commande VeGA ............... 41 – Remplacement de l'électronique ........41 Interface « Diagnose Tool »...
  • Seite 31: Symboles Utilisés

    Interface « Diagnose Tool » Ce symbole indique des risques possibles. Lot de pièces achetées Remarque avec informations et conseils. 1 Interface/matériel Diagnose Tool 1 CD-ROM avec logiciel pour Respecter les prescriptions ESD. Une charge élec- – « Error Explorer » trostatique peut provoquer la destruction de l'électro- –...
  • Seite 32: Raccordement À L'ordinateur

    5 V -> 12 V) ≥ V 05.00.00 – Déconnecter la pièce de commande numérique/analogique. – Déconnecter le système de climatisation – Raccorder le « Diagnose Tool » à l'aide du câble adaptateur Combi. Raccordement 5 V -> 12 V 12 V Fig. 3 Mise à...
  • Seite 33: Exportation De La Commande À Part

    – Simuler le raccordement de la prise de courant de sécurité à l'aide d'un pont (W1). Diagnose Tool – Raccorder le « Diagnose Tool » à X1 ou X2 avec le câble 12 V adaptateur Mover® (W2). 5 V -> 12 V Fig. 8...
  • Seite 34: Mover® Xt

    – Brancher la commande à du courant (12 V CC) Exportation de la mémoire d'erreurs de l'unité centrale – Raccorder le « Diagnose Tool » à l'unité centrale avec le – La télécommande doit être désactivée. câble adaptateur Mover® (W3).
  • Seite 35: Système De Piles À Combustible Vega

    – Débrancher la pièce de commande numérique. importés, ou la mémoire d'erreurs peut être effacée. Il permet – Raccorder le « Diagnose Tool » avec le câble adaptateur et également, au besoin, de déverrouiller un circuit électronique la fiche X1 le cas échéant.
  • Seite 36: Programme « Error Explorer » - Combi, Mover

    (voir « Fenêtre des détails ») 3 Code de clignotement 1 Cliquer sur « Outils ». 4 Une ou plusieurs actions nécessaires pour corriger l'erreur Truma Diagnose Tool / Error Explorer 5 Regroupement d'erreurs avec « ] » - signification en fonc- Fichier Outils 2 Cliquer sur « Démarrer ».
  • Seite 37: Impression De La Liste D'erreurs (Pdf)

    2 Cliquer sur « Imprimer ». également stocké dans le système électronique du chauffage. Enregistrer sous ... Imprimez Le « Diagnose Tool » peut être utilisé pour extraire le numéro Live Display Terminer 3 La liste d'erreurs s'af- de série de l'ancien système électronique.
  • Seite 38: Passage À « Live Display

    Programme « Live Display » – Combi Passage à « Live Display » Afficher ou modifier les états d'exécution et les paramètres. 1 Cliquer sur « Fichier ». Truma Diagnose Tool / Error Explorer Fichier Outils Conditions d'utilisation : Ouvrir ... 2 Sélectionner « Live Enregistrer sous ...
  • Seite 39: Détails De L'erreur

    3 Le commutateur d'énergie peut être réglé sur fonction électrique/ L'exemple montre l'appareil Combi (gaz). mixte. 4 Combi (Gaz) uniquement – la valeur de température ambiante ac- Truma Diagnose Tool / Live Display 1 Cliquer sur le champ tuelle peut être présélectionnée. Fichier Outils surligné...
  • Seite 40: Passage À « Error Explorer

    1 Démarrer le programme en double-cliquant sur Passage à « Error Explorer » l'icône « Truma Diagnose Tool » du bureau. 1 Cliquer sur « Fichier ». 2 Sélectionner Truma Diagnose Tool / Live Display « Error Explorer » pour Fichier Error Explorer 2 Sélectionner démarrer le programme. Terminer « Error Explorer ».
  • Seite 41: Commande Vega

    Commande VeGA Passage à « Live Display » – Remplacement de l'électronique 1 Cliquer sur « Fichier ». Truma Diagnose Tool / Error Explorer Fichier Outils VeGA Importer le numéro de série / les données de fonctionnement Ouvrir ... 2 Sélectionner « Live Enregistrer sous ...
  • Seite 42: Programme « Live Display » - Vega

    Tool » du bureau. 2 Sélectionner « Live Display » pour dé- Fig. 60 marrer le programme. Recherche de l'appareil 1 Cliquer sur « Outils ». Fig. 63 Truma Diagnose Tool / Livwe Display Fichier Outils Démarrer Arrêter 2 Cliquer sur « Démarrer ». Propriétés Choisir une langue Fonctions de service 1 Cliquer sur l'onglet « Fonctions de service »...
  • Seite 43: Passage À « Error Explorer

    OEM sur la prise « CI-BUS » du CP plus. 2. Raccorder le « Diagnose Tool » au CP plus (prise « CI- BUS ») à l’aide d’un câble TIN-BUS. 3. Brancher le « Diagnose Tool » à un courant de 12 V CC (voir schémas de branchement). Pièce de commande...
  • Seite 44 Ricerca dispositivo .............. 54 Voce di menu VeGA ............55 – Sostituzione centralina elettronica ........55 Interfaccia di "Diagnose Tool" – Sostituire l'unità di rimozione dello zolfo ......55 – Sostituire l'unità di alimentazione mezzi ......55 Contenuto della confezione acquistata ....... 45 –...
  • Seite 45: Simboli Utilizzati

    – modifiche apportate al dispositivo (compresi gli accessori); Windows XP, Windows 10, 7, 8 (non Windows RT) – uso di parti di ricambio e di accessori non originali Truma; Memoria richiesta su disco rigido: circa 40 MB (è necessario – mancato rispetto delle istruzioni di installazione e disporre di circa 275 MB di memoria aggiuntiva sul disco funzionamento;...
  • Seite 46: Collegamento Del Computer

    ≥ V 05.00.00 – Scollegare il pannello di comando digitale/analogico. – Scollegare l'impianto di condiziona- mento aria. – Collegare il "Diagnose Tool" utilizzando il cavo adattatore Combi. Collegamento 5 V -> 12 V 12 V Figura 3 Aggiornamento del software Interface Il software più...
  • Seite 47: Esportazione Separata Della Centralina

    – Fornire l'alimentazione alla centralina (12 V CC/min 0,2 A). Interface – Simulare il collegamento della presa di sicurezza con un ponte (W1). Diagnose Tool – Collegare il "Diagnose Tool" a X1 o X2 con il cavo adattatore 12 V Mover® (W2). 5 V -> 12 V Figura 8 Esportazione memoria errori –...
  • Seite 48: Mover® Xt

    – Rimuovere la spina a 13 o 7 piedini del caravan dalla presa di sicurezza. Centralina installata nel veicolo – Fornire l'alimentazione alla centralina (12 V CC). – Collegare "Diagnose Tool" all'unità centrale con il cavo Esportazione memoria errori unità centrale adattatore Mover® (W3). – Il telecomando deve essere spento.
  • Seite 49: Sistema Di Alimentazione Celle A Combustione Vega

    2 Fare clic su "Seleziona Stop Proprietà lingua". Di più... Seleziona lingua Esportazione memoria errori – Avviare il programma "Truma Diagnose Tool/Error Explorer" 3 Fare clic sulla lingua sul computer. desiderata. Figura 21 4 Fare clic su "OK" o Esportazione separata della centralina "Cancella".
  • Seite 50: Programma "Error Explorer" - Combi, Mover

    2 Descrizione errore – informazioni dettagliate relative all'errore (vedere "Finestra dettagli"). 1 Fare clic su "Strumenti". 3 Codice flash. Truma Diagnose Tool / Error Explorer 4 Una o più azioni necessarie per rimediare all'errore. File Strumenti 2 Fare clic su "Start".
  • Seite 51: Stampa Dell'elenco Errori (Pdf)

    In caso di installazione di una nuova centralina elettroni- za nel file system (utilizzando Salva elenco errori). ca nella stufa, "Diagnose Tool" rileverà l'assenza del nu- mero di serie nella centralina elettronica. Il numero di serie 1 Fare clic su "Nome della stufa deve essere immesso in una finestra di dialogo.
  • Seite 52: Passaggio Alla Modalità "Livedisplay

    Programma "Live Display" – Combi Passaggio alla modalità "LiveDisplay" Visualizzare o modificare gli stati di funzionamento e i 1 Fare clic su "File". parametri. Truma Diagnose Tool / Error Explorer File Strumenti Apri ... 2 Selezionare "Live Requisiti per il funzionamento Salva con ...
  • Seite 53: Dettagli Errore

    4 Solo Combi (gas) – il valore della temperatura ambiente effettiva 1 Fare clic sul campo può essere preimpostato. Truma Diagnose Tool / Live Display File Strumenti evidenziato in rosso per 5 Pannello di comando – i valori per Modalità e Impostazione della visualizzare i dettagli temperatura ambiente possono essere preimpostati.
  • Seite 54: Passaggio Alla Modalità "Error Explorer

    Passaggio alla modalità "Error Explorer" cona "Truma Diagnose Tool" sul desktop. 1 Fare clic su "File". 2 Selezionare "Error Truma Diagnose Tool / Live Display Explorer" per avviare il File Error Explorer 2 Selezionare "Error programma.
  • Seite 55: Voce Di Menu Vega

    Voce di menu VeGA Passaggio alla modalità "Live Display" – Sostituzione centralina elettronica 1 Fare clic su "File". Truma Diagnose Tool / Error Explorer File Strumenti VeGA Importare il numero di serie/i dati operativi dalla vecchia cen- Apri ... 2 Selezionare "Live Salva con ...
  • Seite 56: Programma "Live Display" - Vega

    "Truma Diagnose Tool" sul desktop. 2 Selezionare "Live Display" per avviare il programma. Figura 60 Ricerca dispositivo Figura 63 1 Fare clic su "Strumenti". Truma Diagnose Tool / Livwe Display File Strumenti Start Funzioni di servizio Stop 2 Fare clic su "Start". Proprietà...
  • Seite 57: Passaggio Alla Modalità "Error Explorer

    Passaggio alla modalità "Error Explorer" Il Diagnose Tool avvierà così la ricerca del CP plus. Se la ricer- ca è riuscita, il CP plus verrà visualizzato sullo schermo. 1 Fare clic su "File". Truma Diagnose Tool / Live Display File 2 Selezionare "Error...
  • Seite 58 Truma Diagnose Tool Inhoudsopgave Het programma 'Error Explorer' – VeGA Gebruikte symbolen ............59 Opstarten van het programma ........... 68 Veiligheidsaanwijzingen ..........59 Apparaten zoeken ............... 68 Het menu-item VeGA ............69 – Vervangen elektronica ............. 69 Interface 'Diagnose Tool' –...
  • Seite 59: Gebruikte Symbolen

    Truma-software. Systeemvoorwaarden Enige claims met betrekking tot de garantie worden niet ge- honoreerd en Truma stelt zich niet aansprakelijk in de volgen- de gevallen: Windows XP, Windows 10, 7, 8 (niet Windows RT) Benodigd geheugen op de harde schijf: ong. 40 MB (ong.
  • Seite 60: Computerverbinding

    * Vereist voorVersie van software in het apparaat < V 05.00.00 3 Data – amberkleurige LED X1 RJ12 koppeling kabelverlenging Fig. 4 – Signaal geeft dataover- dracht weer op bus Uitlezen foutgeheugen – Programma 'Truma Diagnose Tool / Error Explorer' op de computer starten.
  • Seite 61: Apart Uitlezen Besturing

    12 V 5 V -> 12 V Fig. 9 Uitlezen foutgeheugen 5 V -> 12 V – Programma 'Truma Diagnose Tool / Error Explorer' op de Fig. 7 computer starten. Aansluiting CombiD Apart uitlezen besturing X2 Aansluiting op klok (tijdschakelaar) – Combi (Gas) –...
  • Seite 62: Mover® Xt

    – Besturing van spanning voorzien (12 V DC). Aansluiting – 13- of 7-polige stekker van de caravan in de veiligheidsstek- kerdoos steken. – De 'Diagnose Tool' op de centrale unit aansluiten met be- hulp van kabel (RJ12 – RJ12). Aansluiting RJ12...
  • Seite 63: Vega Brandstofcelsysteem

    – Het digitaal bedieningspaneel ontkoppelen. maken en in te lezen, of om het foutgeheugen te verwijderen. – Sluit de 'Diagnose Tool' aan met behulp van de adapterka- Een vergrendeld elektronisch circuit kan indien nodig ontgren- bel en een X1-connector, indien van toepassing.
  • Seite 64: Het Programma 'Error Explorer' - Combi, Mover

    Opslag foutenlijst 2 Uitlezen foutgeheugen 3 Inhoud van het foutgeheugen wordt voorbereid voor weergave Tijdens de communicatie met Truma kan de foutenlijst als re- 4 Statusbalk ferentie worden opgeslagen en doorgemaild. 5 Apparaat dat op de 'Diagnose Tool' is aangesloten 6 Gegevens over het apparaat 1 'Bestand' aanklikken.
  • Seite 65: Geprinte Foutenlijst (Pdf)

    Openen... 2 'Afdrukken' aanklikken. het elektronische systeem van de verwarming. Om het SN Opslaan als ... Afdrukken van de oude elektronica op te halen, kunt u de 'Diagnose Tool' Live Display Beëindigen 3 De foutenlijst wordt gebruiken. in een pop-upscherm weergegeven.
  • Seite 66: Overstappen Op 'Livedisplay

    Programma 'Live Display' - Combi Overstappen op 'LiveDisplay' Bedrijfsstadia en parameters weergeven of wijzigen. 1 'Bestand' aanklikken. Truma Diagnose Tool / Error Explorer Voorwaarden voor het gebruik: Bestand Tools ? Openen ... 2 'Live Display' selecteren. Opslan als ... Afdrucken Live Display...
  • Seite 67: Foutgegevens

    Het voorbeeld toont het Combi (Gas)-apparaat. versturen. 1 Het veld dat met rood Het 'Bediening'-scherm - Fig. 45 - verschijnt wanneer u het tabblad Truma Diagnose Tool / Live Display gemarkeerd is aanklikken 'CP classic + Handmatig' aanklikt. Bestand Tools...
  • Seite 68: Overstappen Naar 'Error Explorer

    Het scherm geeft de huidige handeling weer 1 Apparaten zoeken 2 Uitlezen foutgeheugen 3 Inhoud van het foutgeheugen wordt voorbereid voor weergave 4 Statusbalk 5 Apparaat dat op de 'Diagnose Tool' is aangesloten 6 Gegevens over het apparaat Veld Betekenis Master M(aster) / S(lave)
  • Seite 69: Het Menu-Item Vega

    Het menu-item VeGA Overschakelen naar 'Live Display' – Vervangen elektronica 1 'Bestand' aanklikken. Truma Diagnose Tool / Error Explorer Bestand Tools VeGA ? Het serienummer/ de bedrijfsdata van het oude elektronische 2 'Live Display' selecteren. Openen ... Opslan als ... systeem importeren en overzetten naar een nieuwe elektroni-...
  • Seite 70: Programma 'Live Display' - Vega

    Diagnose Tool' op het bureaublad. 2 'Live Display' selecteren Fig. 60 om het programma op te starten. Apparaten zoeken 1 'Tools' aanklikken. Fig. 63 Truma Diagnose Tool / Livwe Display Bestand Tools Start Stop 2 'Start' aanklikken. Eigenschappen Tall selecteren Onderhoudsfuncties 1 Het tabblad 'Onderhoudsfuncties' aanklikken om deze functies in te schakelen.
  • Seite 71: Schakelen Naar 'Error Explorer

    Schakelen naar 'Error Explorer' De Diagnose Tool zoekt nu de CP plus. Na een succesvolle zoekopdracht, wordt CP plus op het scherm weergegeven. 1 'Bestand' aanklikken. Truma Diagnose Tool / Live Display Bestand 2 'Error Explorer' Error Explorer Beëindigen selecteren. Fig. 65 –...
  • Seite 72 Säkerhetsföreskrifter ............73 Enhetssökning ..............82 Menyalternativet VeGA ............83 – Byte av elektronik ............. 83 Användargränssnittet i "Diagnose Tool" – Byt avsvavlingsenhet ............83 – Byt mediaförsörjningsenhet ..........83 Det inköpta paketets delar ..........73 – Visning av parametrar för mediaförsörjningsenhet ..83 Systemkrav ................
  • Seite 73: Använda Symboler

    Under följande omständigheter upphör garantin att gälla och inga ersättningsanspråk kan ställas: Systemkrav – Om enheten (inklusive tillbehör) modifieras. – Om andra reservdelar och tillbehör än Truma-originaldelar Windows XP, Windows 10, 7, 8 (inte Windows RT) används. Erfordrat hårddiskutrymme: ca 40 MB (om Microsoft.NET –...
  • Seite 74: Datoranslutning

    Diagnose Tool (se www.truma.com). Combi 12 V 5 V -> 12 V Varje gång "Diagnose Tool" startas undersöker program- met om det finns någon ny uppdatering. Ett meddelande visas om ett fel inträffar (t.ex. ingen Internet-anslutning). Fig. 5 LED-indikatorer 1 Error (fel) – röd lysdiod –...
  • Seite 75: Separat Export Av Kontrollenhet

    – Anslut kontrollenheten till en 12 V DC spänningskälla / mini- mum 0,2 A). Interface – Simulera anslutning av säkerhetsuttaget med en brygga (W1). Diagnose Tool – Anslut "Diagnose Tool" till X1 eller X2 med Mover®-adapter- 12 V kabeln (W2). 5 V -> 12 V Fig. 8 Export av felminnet –...
  • Seite 76: Mover® Xt

    – Koppla ur husvagnens 13- eller 7-poliga kontakt från säkerhetsuttaget. Kontrollenhet inbyggd i fordonet – Anslut kontrollenheten till en 12 V DC spänningskälla. – Anslut "Diagnose Tool" till centralenheten med Mover®- Export av centralenhetens felminne adapterkabel (W3). – Fjärrkontrollen måste vara avstängd.
  • Seite 77: Vega Bränslecellsystem

    Combi (gas), Combi D eller Anslutning VeGA. X1 RJ12-kabelförlängningskoppling Arbetsytan – Programmen hanteras med hjälp av mus. – Inmatning sker via tangentbord. Truma Diagnose Tool / Error Explorer 1 Menyfält Arkiv Verktyg Produkt(er) 2 Flikar Master...
  • Seite 78: Error Explorer" - Combi, Mover

    Enhetssökning (se "Detaljfönster"). 3 Lysdiodskod (blinkningar). 1 Klicka på "Verktyg". 4 En eller flera åtgärder krävs för att åtgärda felet. Truma Diagnose Tool / Error Explorer 5 Gruppering av fel med "]" – betydelsen beroende på enhe- Arkiv Verktyg Start 2 Klicka på...
  • Seite 79: Utskrift Av Fellistan (Pdf)

    Serienumret finns även lagrat i värmaren elektro- Arkiv Verktyg Combi Öppna ... 2 Klicka på "Skriv ut". niska system. "Diagnose Tool" kan läsa serienumret från den Spara som ... Skriv ut gamla elektroniken. Live Display Stäng 3 Fellistan visas i ett popup-fönster.
  • Seite 80: Byta Till "Livedisplay

    Programmet "Live Display" – Combi Byta till "LiveDisplay" Visa eller ändra driftstatus och parametrar. 1 Klicka på "Arkiv". Truma Diagnose Tool / Error Explorer Driftförutsättningar: Arkiv Verktyg Öppna ... 2 Välj "Live Display". Spara som ... Skriv ut Live Display Enhet Version av enhetens programvara Stäng...
  • Seite 81: Detaljerad Information Om Fel

    Exemplet avser Combi-enheten (gas). manöverenheten. 1 Klicka på det röda fältet Skärmen "Kontroll" – Fig. 45 – visas när du klickar på fliken Truma Diagnose Tool / Live Display Arkiv Verktyg om du vill se detaljerad "CP classic + Manual".
  • Seite 82: Byta Till "Error Explorer

    "Error Explorer" – VeGA Byta till "Error Explorer" Driftförutsättningar: 1 Klicka på "Arkiv". Truma Diagnose Tool / Live Display Arkiv Enhet Version av enhetens programvara Error Explorer 2 Välj "Error Explorer". Stäng Alla VeGA – "Live Display" stängs. Fig. 47 – "Error Explorer" startas.
  • Seite 83: Menyalternativet Vega

    Menyalternativet VeGA Byta till "Live Display" 1 Klicka på "Arkiv". – Byte av elektronik Truma Diagnose Tool / Error Explorer Arkiv Verktyg VeGA ? 2 Välj "Live Display". Öppna ... Spara som ... Importera serienummer och driftdata från ett gammalt elek- Skriv ut Live Display troniksystem och överför dem till ett nytt elektroniksystem.
  • Seite 84: Live Display" - Vega

    "Truma Diagnose Tool" på skrivbordet. 2 Välj "Live Display" för att starta programmet. Fig. 60 Enhetssökning 1 Klicka på "Verktyg". Truma Diagnose Tool / Livwe Display Fig. 63 Arkiv Verktyg Start Stop 2 Klicka på "Start". Egenskaper Välj språk...
  • Seite 85: Byta Till "Error Explorer

    Byta till "Error Explorer" Diagnose Tool söker nu CP plus. Efter avslutad sökning visas CP plus på skärmen. 1 Klicka på "Arkiv". Truma Diagnose Tool / Live Display Arkiv 2 Välj "Error Explorer". Error Explorer Stäng – "Live Display" stängs. Fig. 65 –...
  • Seite 86 Truma Diagnose Tool Sisällysluettelo Error Explorer -ohjelma – VeGA Käytetyt symbolit ..............87 Ohjelman käynnistäminen ..........96 Turvallisuusohjeita ............87 Laitteen haku ..............96 VeGA-valikkokohta .............. 97 – Elektroniikan vaihtaminen ..........97 Diagnose Tool -käyttöliittymä – Rikinpoistoyksikön vaihtaminen ........97 –...
  • Seite 87: Käytetyt Symbolit

    Käytetyt symbolit Diagnose Tool -käyttöliittymä Symboli varoittaa mahdollisesta vaarasta. Pakkauksen sisältö Tietoja ja vinkkejä sisältävä huomautus. 1 Diagnose Tool -käyttöliittymä/-laitteisto 1 CD-ROM, jossa ohjelmisto Noudata ESD-määräyksiä! Sähköstaattinen varaus voi – Error Explorer vahingoittaa elektroniikkaa. Ennen elektroniikan kosket- – Live Display tamista huolehdi potentiaalin tasauksesta.
  • Seite 88: Tietokoneliitäntä

    Ei USB-yhteyttä (yhdistä/tarkista kaapeli) Kuva 6 3 Data – keltainen LED – Osoittaa tiedonsiirron * vaaditaan Laitteessa oleva ohjelmistoversio < V 05.00.00 Kuva 4 väylässä X1 RJ12-kaapelin jatkoliitin Virhemuistin lukeminen – Käynnistä Truma Diagnose Tool / Error Explorer -ohjelma tietokoneessa.
  • Seite 89: Ohjausyksikön Lukeminen Erikseen

    Diagnose Tool Mover® 5 V -> 12 V 12 V Kuva 9 Virhemuistin lukeminen – Käynnistä Truma Diagnose Tool / Error Explorer -ohjelma 5 V -> 12 V tietokoneessa. Kuva 7 Ohjausyksikön lukeminen erikseen Combi D -liitäntä X2 liitäntä kelloon (aikakytkin) – Combi D –...
  • Seite 90: Mover® Xt

    – Mover® XT:n ohjausyksikön on oltava ohjeiden mukaisesti (W1 tai W2). asennettu ja käyttövalmis. – Syötä ohjausyksikköön virtaa (12 V DC). Liitäntä – Yhdistä matkailuvaunun 13- tai 7-napainen pistoke turvapistorasiaan. – Yhdistä Diagnose Tool keskusyksikköön kaapelilla (RJ12 – RJ12). Liitäntä RJ12 Interface Diagnose Tool 12 V 5 V ->...
  • Seite 91: Vega-Polttokennojärjestelmä

    Truma Diagnose Tool / Error Explorer Tiedosto Työkalut Käynnistä Virhemuistin lukeminen 2 Napsauta Valitse kieli. Pysäytä Omninaisuudet – Käynnistä Truma Diagnose Tool / Error Explorer -ohjelma Lisää... Valitse Kieli tietokoneessa. 3 Napsauta kieltä. 4 Napsauta OK tai Peruuta. Elektroniikan lukeminen erikseen Kuva 21 Irti kytketyn elektroniikan lukeminen ei ole mahdollista.
  • Seite 92: Error Explorer -Ohjelma - Combi, Mover

    2 Virheen kuvaus – virheen yksityiskohtaiset tiedot Laitteen haku (katso Tiedot-ikkuna) 3 Vilkkukoodi 1 Napsauta Työkalut. 4 Yksi tai useampi toimenpide tarpeen virheen korjaamiseksi Truma Diagnose Tool / Error Explorer 5 Virheiden ryhmitys käyttäen merkkiä "]" – merkitys riippuu Tiedosto Työkalut Käynnistä 2 Napsauta Käynnistä.
  • Seite 93: Virheluettelon Tulostus (Pdf)

    Virheluettelon tulostus (PDF) Elektroniikan vaihtaminen – Combi 1 Napsauta Tiedosto. 8-numeroinen sarjanumero (SN) on ilmoitettu Combi-lämmitti- Truma Diagnose Tool / Error Explorer men tyyppikilvessä. Sarjanumero on tallennettu myös lämmit- Tiedosto Työkalut Combi Avaa... 2 Napsauta Tulosta. timen elektroniikkajärjestelmään. Diagnose Toolin avulla sarja- Tallenna nimellä...
  • Seite 94: Siirtyminen Livedisplayhin

    Live Display -ohjelma – Combi Siirtyminen LiveDisplayhin Näytä tai muuta toimintatiloja ja -parametreja. 1 Napsauta Tiedosto. Truma Diagnose Tool / Error Explorer Toimintaedellytykset: Tiedosto Työkalut ? Avaa... 2 Valitse Live Display. Tallenna nimellä... Tulostaa Live Display Laite Laitteessa oleva ohjelmistoversio Lopeta –...
  • Seite 95: Virhetiedot

    Esimerkissä on Combi (Gas) -laite. valita etukäteen. 5 Ohjauspaneeli – tilan ja asetetun huonelämpötilan arvo voi- 1 Napsauta punaisella daan valita etukäteen. Truma Diagnose Tool / Live Display Tiedosto Työkalut korostettua kenttää 6 Napsauta Lähetä parametrien siirtämiseksi ohjausyksikköön. nähdäksesi valitun...
  • Seite 96: Siirtyminen Error Exploreriin

    7 Napsauta Lähetä parametrien siirtämiseksi ohjausyksikköön. Laite Laitteessa oleva ohjelmistoversio Siirtyminen Error Exploreriin VeGA Kaikki 1 Napsauta Tiedosto. Truma Diagnose Tool / Live Display Ohjelman käynnistäminen Tiedosto Error Explorer 2 Valitse Error Explorer. Lopeta 1 Käynnistä ohjelma kak- – Live Display sulkeutuu.
  • Seite 97: Vega-Valikkokohta

    VeGA-valikkokohta Siirtyminen Live Displayhin Truma Diagnose Tool / Error Explorer 1 Napsauta Tiedosto. Tiedosto Työkalut VeGA ? – Elektroniikan vaihtaminen Avaa... Tallenna nimellä... 2 Valitse Live Display. Tulostaa Live Display Tuo sarjanumero / toimintatiedot vanhasta elektroniikkajärjes- Lopeta telmästä ja siirrä ne uuteen elektroniikkajärjestelmään.
  • Seite 98: Live Display -Ohjelma - Vega

    1 Käynnistä ohjelma kak- soisnapsauttamalla työ- pöydän kuvaketta Truma Diagnose Tool. 2 Valitse Live Display oh- jelman käynnistämiseksi. Kuva 60 Laitteen haku 1 Napsauta Työkalut. Truma Diagnose Tool / Livwe Display Kuva 63 Tiedosto Työkalut Start 2 Napsauta Käynnistä. Stop Omninaisuudet Valitse kieli Huoltotoiminnot 1 Napsauta Huoltotoiminnot-välilehteä...
  • Seite 99: Siirtyminen Error Exploreriin

    Siirtyminen Error Exploreriin Diagnose Tool hakee nyt CP plus -laitteen. Onnistuneen haun jälkeen näytöllä näkyy CP plus. 1 Napsauta Tiedosto. Truma Diagnose Tool / Live Display Tiedosto 2 Valitse Error Explorer. Error Explorer Lopeta – Live Display sulkeutuu. Kuva 65 – Error Explorer käynnistyy.
  • Seite 100 Bei Störungen wenden Sie sich bitte an das Truma Servicezentrum oder an einen unserer autorisierten Servicepartner (siehe www.truma.com). Für eine rasche Bearbeitung halten Sie bitte Gerätetyp und Seriennummer (siehe Typenschild) bereit. Should problems occur, please contact the Truma Service Centre or one of our authorised service partners (see www.truma.com).

Inhaltsverzeichnis