Inhaltszusammenfassung für Heidolph Hei-VOLUME Distimatic Pro
Seite 1
Automatikmodul für Rotationsverdampfer Automatic module for rotary evaporators Betriebsanleitung Operating instructions Notice d'instructions Hei-VOLUME Distimatic Pro...
Seite 2
Originalbetriebsanleitung Seite 6 – 79 Translation of the original instructions Page Page 84 – 157 Traduction de la notice originale Page 162 – 235 Zertifikate/Certifications Seite/page 236 – 241...
Verwendung durch den Käufer des Produkts bestimmt. Jedwede Überlassung an Dritte, Vervielfältigung in jeglicher Art und Form – auch auszugsweise – sowie die Verwertung und/oder Mitteilung des Inhalts sind ohne schriftliche Genehmigung der Heidolph Instruments GmbH & Co. KG nicht gestattet. Zuwiderhandlungen verpflichten zu Schadenersatz.
Diese werden an entsprechender Stelle im vorliegenden Dokument ausgewiesen und beschrieben. Bestimmungsgemäße Verwendung Das Automatikmodul Hei-VOLUME Distimatic Pro wurde speziell für die automatische Befüllung und Entleerung von Heidolph Rotationsverdampfern entwickelt. Es handelt sich um eine unvollständige Maschine im Sinne der Maschinenrichtlinie 2006/42/EG.
Allgemeine Hinweise Das Gerät darf ausschließlich von autorisiertem und unterwiesenem Personal betrieben werden. Die Schulung und Qualifizierung des Bedienpersonals sowie die Sicherstellung verantwortungsvollen Handelns beim Umgang mit dem Gerät liegen ausschließlich im Verantwortungsbereich des Betreibers! Transport Vermeiden Sie beim Transport starke Erschütterungen und mechanische Belastungen, die zu Schäden am Gerät führen können.
Stellen Sie vor jeder Inbetriebnahme sicher, dass weder das Gerät noch die Netzanschlussleitung sichtbare Schäden aufweisen. ➜ Lassen Sie Reparaturen und/oder Wartungsarbeiten am Gerät ausschließlich von einer autorisierten Elektrofachkraft oder vom technischen Service der Fa. Heidolph Instruments durchführen. ➜ Schalten Sie das Gerät vor der Durchführung von Wartungs-, Reinigungs- oder Reparaturarbeiten grundsätzlich AUS und trennen Sie das Gerät vom Netz.
Insbesondere bei der Verarbeitung toxischer oder ätzender Stoffe besteht zudem ein hohes Verletzungsrisiko! Verwenden Sie ausschließlich die von Heidolph empfohlenen (siehe Abschnitt „Lieferumfang“ auf Seite 75) bzw. solche Destillats- bzw. Rückstandsbehälter, die ausreichend druckstabil ausgelegt und mit einem ausreichend dimensionierten Überdruckventil ausgestattet sind.
Achten Sie auch bei Produkten, die zur einmaligen Nutzung bestimmt sind, auf ausreichende Reinheit. ➜ Verwenden Sie keine offenen Behälter. ➜ Vermeiden Sie Kontamination durch unbedachten Umgang mit belasteten Gefäßen, Apparaturen oder Hilfsmitteln. Kontakt Für weiterführende Auskünfte steht Ihnen unsere Kundenbetreuung jederzeit gerne zur Verfügung. Tel.: +49-9122-9920-0 Mail: sales@heidolph.de...
Gefahrstoffverordnungen, anerkannte Regeln der Sicherheitstechnik und der Arbeitsmedizin sowie besondere örtliche Bestimmungen zwingend zu beachten! Im Falle von Zuwiderhandlungen erlischt jeglicher Garantieanspruch gegenüber Heidolph Instruments. Für sämtliche Schäden, die aus eigenmächtigen Änderungen oder Umbauten am Gerät, aus der Verwendung nicht zuge- lassener oder nicht originaler Ersatz- und Zubehörteile bzw.
Aufbau/Montage Montage Aufbau/Montage Bei Bedarf bietet Heidolph einen professionellen Aufbau/Montagedienst für das Gerät einschließlich aller mitgelieferten Komponenten und einschließlich der Inbetriebnahme. Die Mehrzahl der Sensoren und Ventile des Automatikmoduls werden an die codierten Anschlussstecker auf der Rückseite der Distimatic Pro gesteckt (Sensorkarten).
Gerätebeschreibung Gerätebeschreibung Funktionsprinzip Das Automatikmodul Hei-VOLUME Distimatic Pro wurde speziell für den Einsatz in Kombination mit Rotationsverdampfern entwickelt. Das Automatikmodul ermöglicht das automatisierte Befüllen und Entleeren des Systems im Dauerbetrieb. Folgende Prozesse werden mit dem Automatikmodul Hei-VOLUME Distimatic Pro gesteuert: –...
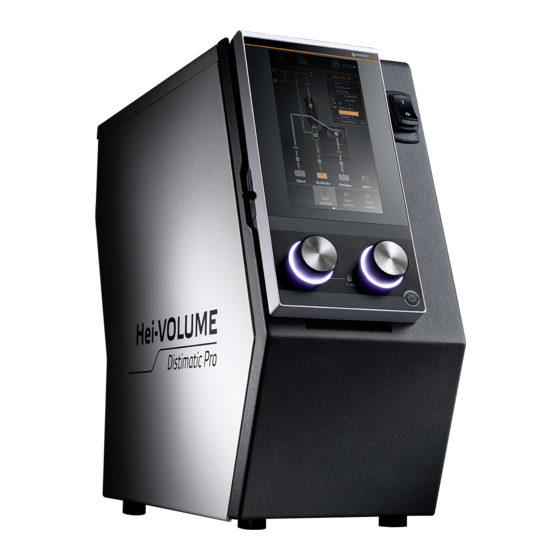
Gerätebeschreibung Mechanischer Aufbau Dieser Abschnitt bietet einen Überblick über den mechanischen Aufbau des Automatikmoduls Hei-VOLUME Distimatic Pro. Die weiteren Lieferbestandteile variieren je nach Ausstattungsvariante und werden in der jeweils mitgelieferten Montageanleitung näher beschrieben. Die Distimatic Pro besteht aus einem Stahlblechgehäuse in Schutzart IP 42 mit abnehmbaren Seitenabdeckungen und einem abnehmbaren Bedienpanel.
Gerätebeschreibung Anschlüsse Rückseite Distimatic Pro Die folgende Abbildung zeigt die Rückseite der Distimatic Pro mit Standard- Einsteckkarten und optionalen Erweiterungskarten. Die tatsächliche Belegung ist abhängig vom Bestellumfang! Die Sensoren und Ventile des Systems werden an die codierten Anschlussbuchsen der Sensorkarten gesteckt. Durch die Codierung der Anschlussbuchsen werden alle Einheiten automatisch erkannt und in der Geräte-Software zugewiesen.
Gerätebeschreibung Glassatz Der Einsatz des Automatikmoduls Hei-VOLUME Distimatic Pro erfordert einen speziellen Glassatz bestehend aus Woulfescher Flasche, Kollektor- und Vorlagesensorgefäß. Der erforderliche Glassatz ist im Lieferumfang enthalten, siehe Abschnitt „Lieferumfang“ auf Seite 75. bzw. Lieferdokumente. Die folgende Abbildung zeigt die Maximalausstattung mit Woulfescher Flasche, Kollektor und Vorlagesensorgefäß...
Gerätebeschreibung Schlauchheizung (Option) Bei Bedarf kann das Automatikmodul Hei-VOLUME Distimatic Pro mit einer Schlauchheizung betrieben werden (nicht im Standard-Lieferumfang enthalten, siehe Abschnitt „Lieferumfang“ auf Seite 75, Erweiterungskarte Heat Control). Funktionsprinzip Die Schlauchheizung umwickelt die Schlauchleitung und wärmt diese im Betrieb soweit vor, dass zähflüssige Medien zuverlässig aus dem System geleitet werden.
Gerätebeschreibung Signalisierung der Betriebszustände (Option) Mit einer optionalen Signalsäule und der zugehörigen Erweiterungskarte Signal Light (Zubehör Set Signalsäule, Artikelnummer 591-66000-00) können die verschiedenen Betriebszustände des Automatikmoduls auch über große Distanzen sichtbar gemacht werden. Die Montage der Zusatzkarte wird im mitgelieferten Beilegeblatt detailliert beschrieben. Die folgenden Betriebszustände werden angezeigt: Farbcode/Zustand Bedeutung...
Gerätebeschreibung Bedienpanel Die folgende Abbildung zeigt das abnehmbare Bedienpanel des Automatikmoduls Hei-VOLUME Distimatic Pro. Die Bedienelemente des zentralen Displays sind berüh- rungssensitiv (Touchscreen) und können per Finger oder mit einem geeigneten Eingabestift bedient werden. VORSICHT: Schäden am Bedienpanel Spitze oder scharfkantige Gegenstände können die Oberfläche des Displays am Bedienpanel beschädigen!
Gerätebeschreibung Aufbau der Benutzeroberfläche Alle Gerätefunktionen werden über das integrierte Bedienpanel und die grafische Benutzeroberfläche gesteuert. Nach dem Einschalten des Geräts und dem Initialisieren der Gerätesteuerung erscheint auf dem Display das Startfenster des zuletzt aktiven Betriebsmodus (im Beispiel: Sensormodus): Vom Startfenster aus erfolgen der Zugriff auf das Hauptmenü, die Direktauswahl eines Betriebsmodus sowie die Auswahl der Zeitanzeige, siehe auch „Bedien- und Anzeigeelemente“...
Gerätebeschreibung Bedien- und Anzeigeelemente Bedienelement Funktion Berühren Sie diese Funktionsschaltfläche, um das Hauptmenü mit folgenden Optionen zu öffnen: Anwendungen ▪ Betriebsmodus Einstellungen ▪ Systemparameter Sprachen ▪ Menüsprache Funktionsschaltfläche Formate Hauptmenü ▪ Systemkonfiguration und Anzeige- formate Datalogging ▪...
Seite 23
Gerätebeschreibung In geöffneten Listen kann durch Drehen des linken DDR zwischen den Einträgen gewechselt werden. Ein angewählter Wert (orangefarben hinterlegt) kann durch Drücken des DDR übernommen werden (analog zum Antippen des Eintrags auf dem Display). Drück-Drehrad links Die Farbe des LED-Rings zeigt Prozessstatus an: ▪...
Gerätebeschreibung Systemzeit, Timer, Stoppuhr Auswahl Systemzeit/Timer/Stoppuhr Systemzeit Timer Berühren Sie die Funktionsschaltfläche in der Kopfzeile der Startseite kurz, um das Auswahlmenü (siehe folgende Abbildung) mit den folgenden Optionen zu öffnen: ➜ Anzeige aktuelle Uhrzeit (12- bzw. 24-Stundenanzeige, je nach Auswahl im Menü Einstellungen ➜...
Gerätebeschreibung Farbcodierung In der Prozessvisualisierung (siehe Abschnitt „Aufbau der Benutzeroberfläche“ auf Seite 21) werden zur Veranschaulichung der Betriebszustände alle Prozessstrecken und Funktionselemente farblich markiert: Farbe Bedeutung Zustand PASSIV bzw. aus (z.B. nicht aktive/geschlossene Leitung, Grau nicht geschaltetes Ventil, Sensor Zustand AKTIV bzw. ein (z.B. aktive/geöffnete Leitung, geschal- Orange high tetes Ventil, Sensor...
Gerätebeschreibung Eingabetasten Menüübergreifend stehen die folgenden Eingabetasten zur Verfügung: Symbol Bedeutung löschen Taste . Betätigen Sie diese Taste, um einen eingegebenen numerischen oder alphanumerischen Wert zu korrigieren. bestätigen Taste . Betätigen Sie diese Taste, um eine Auswahl oder einen Eingabewert zu bestätigen und zu übernehmen. verwerfen Taste .
Inbetriebnahme Inbetriebnahme Inbetriebnahme Beachten Sie die folgenden Schritte bei der Inbetriebnahme des Automatikmoduls Hei-VOLUME Distimatic Pro. Gerät ein-/ausschalten Benutzen Sie zum Ein- und Ausschalten den Hauptschalter auf der Frontseite der Distimatic Pro des Automatikmoduls (siehe Abschnitt „Frontseite Distimatic Pro mit Bedienpanel“...
Inbetriebnahme Füllstandssensor kalibrieren Bei der ersten Inbetriebnahme und bei jedem Wechsel des Lösungsmittels muss der Füllstandssensor (S4) kalibriert werden. WARNUNG: Personen- und/oder Sachschäden, Produktions- ausfall Bei unzureichender Kalibrierung bzw. bei einem Ausfall des Füllstandssensors (S4) wird ein Überlaufen/Auslaufen des Kolbeninhalts wird durch den Not-Halt-Sensor (S3) verhindert! Sobald dieser Sensor im Kühler anspricht, wird die Distimatic Pro und die angeschlossenen Peripheriegeräte in einen betriebssicheren Zustand versetzt und es wird kein weiteres Medium zugeführt.
Seite 29
Inbetriebnahme Einstellungen Füllstand – Öffnen Sie das Menü und wählen Sie die Option kalibrieren (siehe auch „Hauptmenü“ auf Seite 32). – Folgen Sie den Anweisungen auf dem Display. ODER Kalibrierung auf hochpolare Lösungsmittel und Gemische: ➜ Stellen Sie sicher, dass sich der Sensor im Kolben befindet. ➜...
Seite 30
Inbetriebnahme ➜ Starten Sie den Kalibriervorgang mit verwerfen ➜ Der Kalibriervorgang kann jederzeit mit abgebrochen werden. ➜ Der Fortschritt wird durch die Ampelanzeige visualisiert. Sobald die Kalibrierung abgeschlossen ist, leuchtet der grüne Punkt rechts auf. ➜ Bestätigen Sie den Abschluss des Kalibriervorgangs mit...
Inbetriebnahme Erstbefüllung des Verdampfungskolbens Beachten Sie die folgenden Schritte zur Befüllung des Verdampfungskolbens, um eine kontinuierliche Zuführung der Vorlage im Betrieb zu gewährleisten: ➜ Schalten Sie den Rotationsverdampfer ein und warten Sie, bis die Software initiali- siert ist (Startbildschirm erscheint auf dem Bedienpanel). ➜...
Inbetriebnahme Gerätekonfiguration Die Grundeinstellungen für den Betrieb werden im Hauptmenü vorgenommen. Nach dem Einschalten der Distimatic Pro und dem Initialisieren der Software erscheint die Startseite des zuletzt aktiven Modus. Berühren Sie zum Öffnen des Hauptmenüs die Hauptmenü Funktionsschaltfläche in der Kopfzeile des Displays: Hauptmenü...
Seite 33
Inbetriebnahme Schaltfläche Funktion/Bedeutung Home Taste . Berühren Sie diese Funktionsschaltfläche, um in die zuvor geöffnete Prozessansicht zurückzukehren (Startfenster). Berühren Sie diese Funktionsschaltfläche, um das Menü Anwendungen Anwendungen zu öffnen und einen Betriebsmodus anzuwählen, siehe Abschnitt „Menü Anwendungen“ auf Seite 34. Berühren Sie diese Funktionsschaltfläche, um das Menü...
Inbetriebnahme Menü Anwendungen Anwendungen Hauptmenü Anwendungen In Menü ) kann die gewünschte Betriebsart ausgewählt werden. Gehen Sie zum Anwählen und Aktivieren einer Betriebsart wie folgt vor: ➜ Beenden Sie vor einem Wechsel der Betriebsart alle laufenden Prozesse. ➜ Berühren Sie den Eintrag des gewünschten Betriebsmodus. Die Hintergrundfarbe des markierten Eintrags wechselt wie dargestellt auf orange.
Inbetriebnahme Menü Geräteeinstellungen Einstellungen Hauptmenü Einstellungen Im Menü ) können verschiedene Geräteeinstellungen angepasst werden: Die verschiedenen Optionen werden in den folgenden Abschnitten detailliert beschrieben.
Inbetriebnahme Bildschirmsperre Bildschirmsperre Hauptmenü Einstellungen Über den Menüpunkt ) kann die Bildschirmsperre aktiv automatische Bildschirmsperre für das Display aktiviert ( Bildschirmsperre inaktiv bzw. deaktiviert werden ( Bei aktiver Bildschirmsperre wird nach einer bestimmten Zeit der Inaktivität (keine Bedienhandlungen am Bedienpanel) das Display gesperrt. Im Sperrbildschirm wird das Prozessfortschrittsfenster eingeblendet.
Inbetriebnahme PIN für Bildschirmsperre ➜ Berühren Sie die Funktionsschaltfläche erneut, um PIN für Bildschirmsperre inaktiv den Sicherheitscode zu deaktivieren Der Sicherheitscode wird automatisch deaktiviert, wenn die Bildschirmsperre deaktiviert wird. Anzeigehelligkeit Helligkeit Hauptmenü Einstellungen Über den Menüpunkt ) kann die ...
Inbetriebnahme Automatische Rückstandsabsaugung Formate Im Menü wird softwareseitig definiert, ob der Rückstand automatisch aus dem Verdampfungskolben geleert wird (ausblasen im Überdruckbetrieb), oder ob der Verdampfungskolben per Hand geleert wird. mit automatischer Rückstandabsaugung Im Betrieb kann das Gerät im Sensor- bzw. Zeitmodus vollautomatisch im Dauerbetrieb betrieben werden (Bedingung: kontinuierliche Versorgung mit Vorlage!).
Inbetriebnahme Datenaufzeichnung Datalogging Mit der Funktion können die einzelnen Schritte eines Prozesses aufge- zeichnet werden. Die Datenaufzeichnung erfasst jeden Einzelschritt mit Start- und Endezeit und hinterlegt diese Information im Datalogging-Speicher. Die Funktion muss vor dem Prozessstart aktiviert werden: ➜ Wechseln Sie zum Aktivieren der Datenaufzeichnung von der Start-/Übersichtsseite des aktiven Modus auf die Parameter-Seite.
Seite 41
Inbetriebnahme Im Falle einer Netzspannungsunterbrechung bzw. beim Ausschalten des Geräts während der laufenden Datenaufzeichnung wird der Aufzeichnungsprozess abgebrochen und der entsprechende Eintrag mit „(!)“ markiert. Der angezeigte Datensatz beinhaltet die aufge- zeichneten Prozessdaten, die bis zur Spannungsunterbrechung aufgezeichnet wurden: Im Datalog-Exportfile erhalten die entsprechenden Dateinamen ebenfalls den Zusatz „(!)“...
Inbetriebnahme Konnektivität Hei-CONTROL Pro Im Menü können alle notwendigen Netzwerkparameter sowie grundlegende Einstellungen für die Zeitsynchronisation festgelegt werden: ➜ Im Feld [Status] wird der Verbindungsstatus der Anwendung Hei-CONTROL Pro angezeigt. Die volle Funktionalität der Hei-CONTROL Pro-Anwendung steht in der aktuellen Geräteversion nicht zur Verfügung. ➜...
Inbetriebnahme Systemcheck Systemcheck Im Menü werden alle angeschlossenen Sensoren und Aktoren bzw. Systemtest Peripheriegeräte angezeigt. Über das zugehörige Untermenü können verschiedene Tests durchgeführt werden, um die Funktions- und Betriebssicherheit des Systems zu gewährleisten: Hauptmenü ➜ Öffnen Sie das und berühren Sie die Funktionsschaltfläche Systemcheck Systemcheck in der Fußzeile.
Inbetriebnahme Ventile und Signalisierung testen Alle Aktoren testen Mit der Testfunktion kann die Funktion aller angeschlossenen Ventile und Signallichter getestet werden. Systemtest ➜ Öffnen Sie das Menü Alle Ventile und Signallichter testen Systemtest ➜ Berühren Sie in der Fußzeile der Übersicht die Funktionsschaltfläche Alle Aktoren testen , um die Testfunktion zu aktivieren (das...
Inbetriebnahme Überdrucktest durchführen Mit dieser Testfunktion kann das System auf Dichtheit geprüft werden. Systemtest ➜ Öffnen Sie das Menü Überdruck ➜ Berühren Sie in der Fußzeile die Funktionsschaltfläche , um die Testfunktion zu aktivieren (Schaltfläche wechselt auf Orange).
Inbetriebnahme WARNUNG: Verletzungsgefahr, Sachschäden Durch fehlerhafte Komponenten, fehlerhafte Montage von Komponenten oder fehlerhafte Anschlüsse besteht die Gefahr, dass sich druckbeaufschlagte Bauteile während eines Überdrucktests schlagartig lösen oder bersten! ➜ Stellen Sie vor der Durchführung eines Überdrucktests sicher, dass alle Komponenten ordnungsgemäß montiert sind. ➜...
Inbetriebnahme Sicherheitsschalter testen Sicherheitsschalter Mit der Testfunktion kann die Funktion des integrierten Sicherheitsschalters getestet werden. Der Sicherheitsschalter spricht an, wenn ein definierter Systemüberdruck im Kompressorbetrieb erreicht wird. Durch das Ansprechen des Sicherheitsschalters wird der Kompressor abgeschaltet, sodass der anstehende Systemdruck abgebaut werden kann.
Bedienung Bedienung Betriebsart auswählen Nach dem Einschalten des Geräts und dem Initialisieren der Gerätesteuerung erscheint auf dem Display das Startfenster des zuletzt aktiven Betriebsmodus. Berühren Sie die Mode Anwendungen Funktionsschaltfläche , um das Menü zu öffnen und aktivieren Sie die gewünschte Betriebsart (siehe Abschnitt „Menü Anwendungen“ auf Seite 34). Sensormodus Sensormodus aktivieren Anwendungen...
Seite 49
Bedienung ➜ Der Befüllvorgang wird gestartet und läuft, solange der Sensor keine Medienberührung signalisiert S4 im Status ➜ Der Befüllvorgang wird gestoppt, wenn der Sensor Medienberührung signali- high siert S4 im Status Vorbedingungen Für den Betrieb im Sensormodus müssen folgende Bedingungen erfüllt sein: –...
Bedienung ➜ Nach Ablauf der Vorwärmzeit bzw. nach dem Überspringen des Schritts wird der Befülldruck automatisch auf den eingestellten Prozessdruck reguliert. Auf dem Display erscheint die folgende Meldung: ➜ Starten Sie den Automatikbetrieb mit , sobald der Verdampfungsprozess einsetzt (Destillat schlägt sich im Glaskühler nieder). Automatikbetrieb Mit dem Start des Automatikbetriebs läuft die Prozesszeit an.
Seite 51
Bedienung Befüllzeit definiert den Zeitraum bis zur nächsten Befüllung des Verdampfungskolbens und somit die Menge an Vorlage, die bis zur erneuten Befüllung verdampft wird. Stagnationszeit läuft sobald der Füllstandsensor S4 high nach der Befüllung in den Status wechselt. Läuft die Stagnationszeit komplett ab, wird die automatische Rückstandsentleerung eingeleitet (abhängig vom Glassatz und der Parametrierung) bzw.
Bedienung Parameter Sensormodus Allgemeine Parameter allgemeinen Parameter ➜ Wechseln Sie zum Anpassen der von der Startseite des Sensormodus in die zugehörige Parameter-Maske (Parameter-Übersicht antippen oder Wischbewegung von rechts nach links): ➜ Mit den beiden Navigationstasten gelangen Sie zurück zur Startseite bzw. weiter in Rezepturen die Ansicht Die folgenden Parameter können angepasst werden:...
Seite 53
Bedienung Parameter Funktion Maximale Anzahl an Verdampfungszyklen ▪ Auswahlschalter in Position keine Begrenzung. ▪ Auswahlschalter in Position legen Sie im Zyklen Auswahlfeld eine bestimmte Anzahl an Zyklen fest (Anpassung über Plus-/Minus-Tasten bzw. antippen/ Bildschirmtastatur). Berühren Sie das Symbol , um zwischen den beiden Optionen zu wechseln.
Seite 54
Bedienung Übernehmen Abbruch ➜ Bestätigen oder verwerfen Sie alle Änderungen mit bzw. Prozessparameter Prozessparameter ➜ Berühren Sie zum Öffnen des Menüs die Taste in der Fußzeile. ➜ Tippen Sie im Menü auf die Funktionsschaltfläche des gewünschten Parameters und passen Sie den Wert über die Bildschirmtastatur an, siehe auch „Benutzereingaben“ auf Seite 26.
Bedienung Anwählbar, wenn im Startfenster eine bestimmte Anzahl an Destillatentleerungen festgelegt wird: max. Destillat leeren: zusätzl. Verdampfungszeit Im Beispiel: sechsmal Destillat leeren, anschließend läuft optional die zusätzliche Verdampfungszeit ab. Hierdurch kann eine gewünschte Konzentration erreicht werden! max. Befüllen: zusätzl. Die Parameter Verdampfungszeit max.
Bedienung Rezepturen Speichern können die gewählten Einstellungen und hinterlegten Werte als Rezeptur im System hinterlegt werden. Speichern ➜ Berühren Sie die Taste , um die Bildschirmtastatur zu öffnen (siehe auch Abschnitt „Benutzereingaben“ auf Seite 26): ➜ Geben Sie über die Bildschirmtastatur eine beliebige Rezeptbezeichnung ein. Eine doppelte Vergabe von Rezeptbezeichnungen ist nicht möglich! Wenn eine gewünschte Rezeptbezeichnungen bereits im System hinterlegt ist, erscheint eine entsprechende Warnmeldung.
Bedienung Rezeptliste Wechseln Sie zum Öffnen der Rezeptliste von der Startseite in die zugehörige Ansicht Rezepturen (zweimal Wischbewegung von rechts nach links bzw. Navigationstaste aus dem Parameter-Fenster). Hier können neue Rezepte angelegt (Taste ) und bestehende Rezepte geladen Laden Löschen (Taste ) bzw.
Bedienung Zeitmodus Zeitmodus aktivieren Anwendungen ➜ Öffnen Sie das Menü und berühren Sie die Funktionsschaltfläche Zeitmodus . Der Eintrag wird orange hinterlegt. ➜ Bestätigen Sie die Auswahl mit , um den Modus zu aktivieren und das Startfenster des Zeitmodus zu öffnen: Im Zeitmodus erfolgen die Befüllung des Verdampfungskolbens, die Destillation und die Entleerung von Destillat und Rückstand rein zeitgesteuert: ➜...
Seite 59
Bedienung Vorbedingungen Für den Betrieb im Zeitmodus müssen folgende Bedingungen erfüllt sein: – Heizbadheizung am Rotationsverdampfer eingeschaltet – Umlaufkühler eingeschaltet – Vakuumpumpe eingeschaltet – Rotationsverdampfer unter Befüllvakuum – Prozessparameter am Rotationsverdampfer korrekt eingestellt – Füllstandssensor S4 kalibriert Vor einer Erstbefüllung des Verdampfungskolbens bzw. vor dem ersten Prozessschritt ist im Zeitmodus sicherzustellen, dass am Rotationsverdampfer alle Prozessparameter (Vakuum, Temperatur, Drehzahl, Kühlung) korrekt eingestellt sind.
Bedienung Parameter Zeitmodus Allgemeine Parameter allgemeinen Parameter ➜ Wechseln Sie zum Anpassen der von der Startseite des Zeitmodus in die zugehörige Parameter-Maske (Parameter-Übersicht antippen oder Wischbewegung von rechts nach links): ➜ Mit den beiden Navigationstasten gelangen Sie zurück zur Startseite bzw. weiter in Rezepturen die Ansicht Die folgenden Parameter können angepasst werden:...
Seite 61
Bedienung Parameter Funktion Einstellbare Zeit für die Phase des Vorevakuierens Vorevakuieren Das System wird vor dem Start der Prozessschleifen aus Verdampfen, Befüllen und Entleeren für die hier eingestellte Zeit vorevakuiert. Einstellbare Zeit für die Erstbefüllung Das System kann vor dem Start der Prozessschleifen aus Verdampfen, Befüllen und Entleeren initial befüllt werden.
Seite 62
Bedienung Entleerzeit Destillat Destillat leeren ▪ Legen Sie im Auswahlfeld eine Entleerzeit für das Destillat fest (Anpassung über Plus-/Minus-Tasten bzw. antippen/Bildschirmtastatur). Legen Sie hier fest, ob am Prozessende das Destillat und/ oder der Rückstand geleert werden. Berühren Sie das Prozessende zugehörige Kontrollkästchen, um die Auswahl zu aktivieren (Häkchen gesetzt) oder zu deaktivieren ( Übernehmen...
Bedienung Spülmodus Spülmodus aktivieren Anwendungen ➜ Öffnen Sie das Menü und berühren Sie die Funktionsschaltfläche Spülmodus . Der Eintrag wird orange hinterlegt. ➜ Bestätigen Sie die Auswahl mit , um den Modus zu aktivieren und das Startfenster des Spülmodus zu öffnen: Der Spülmodus ermöglicht das Spülen der Zu- und Konzentratleitung mit einem geeigneten Lösungsmittel.
Seite 64
Bedienung PRAXISTIPP ➜ Wählen Sie einen Vakuumwert analog zum Lösungsmittel und stellen Sie die Hysterese auf 50 mbar ein. ➜ Durch die große Hysterese wird ein großer Druckbereich durchfahren. ➜ Dabei werden alle Glasteile zunächst benetzt, danach bilden sich Tropfen, die anschließend ablaufen. ➜...
Bedienung Parameter Spülmodus Allgemeine Parameter allgemeinen Parameter ➜ Wechseln Sie zum Anpassen der von der Startseite des Spülmodus in die zugehörige Parameter-Maske (Parameter-Übersicht antippen oder Wischbewegung von rechts nach links): ➜ Mit den beiden Navigationstasten gelangen Sie zurück zur Startseite bzw. weiter in Rezepturen die Ansicht...
Seite 66
Bedienung Die folgenden Parameter können angepasst werden: Parameter Funktion Einstellbare Zeit für die Phase des Vorevakuierens Vorevakuieren Das System wird vor dem Start der Prozessschleifen aus Verdampfen, Befüllen und Entleeren für die hier eingestellte Zeit vorevakuiert. Einstellung Füllzeit Füllen Passen Sie die Befüllzeit über die Plus-/Minus-Tasten wie gewünscht an.
Seite 67
Bedienung Prozessparameter Prozessparameter Tippen Sie in der Fußzeile auf die Taste – Das Menü Prozessparameter wird geöffnet. ➜ Berühren Sie die Funktionsschaltfläche des gewünschten Parameters und passen Sie den Wert über die Bildschirmtastatur an, siehe hierzu auch „Benutzereingaben“ auf Seite 26. Parameter Funktion Leistung der Schlauchheizung im Betrieb.
Bedienung Manueller Modus Manuellen Modus aktivieren Anwendungen ➜ Öffnen Sie das Menü und berühren Sie die Funktionsschaltfläche Manueller Modus . Der Eintrag wird orange hinterlegt. ➜ Bestätigen Sie die Auswahl mit , um den Modus zu aktivieren und das Startfenster des manuellen Modus zu öffnen: Im manuellen Modus können Einzelproben verdampft werden (Batch-Betrieb).
Seite 69
Bedienung Ablauf Prozess starten ➜ Berühren Sie die Taste – Vakuumpumpe wird zugeschaltet, Druck im Verdampfungskolben wird auf Prozessdruck abgesenkt. Vorlage füllen Prozess stoppen – In der Fußzeile werden die Tasten eingeblendet Vorlage füllen ➜ Berühren Sie die Taste , um die automatische Befüllung des Verdampfungskolbens zu starten.
Bedienung Fehlerliste aufrufen Hauptmenü ➜ Öffnen Sie zum Anzeigen der Fehlerliste das und berühren Sie die Fehlerliste Funktionsschaltfläche in der Fußzeile. ➜ Tippen Sie zum Anzeigen einer Fehlermeldung auf den entsprechenden Eintrag: – Die Fehlermeldung wird im Klartext auf dem Display angezeigt. –...
Bedienung Systeminformation aufrufen Information In der Ansicht werden alle Versions- und Lizenzinformationen zu ihrem Automatikmodul angezeigt. Hauptmenü ➜ Öffnen Sie zum Anzeigen der Systeminformationen das und berühren Info Sie die Funktionsschaltfläche in der Fußzeile. Versionen Lizenzen ➜ Rufen Sie über die Funktionsschaltflächen gewünschten Informationen zur Software und Firmware ihres Produkts auf.
Störungsbeseitigung Störungsbeseitigung Störungsbeseitigung Fehlermeldung mögliche Abhilfe Kabelbruch oder Defekt Kabel der angezeigten Komponente prüfen. Kabelverbindungen der angezeigten Kurzschluss Komponente prüfen. Werte ausserhalb des Werte des angezeigten Parameters Bereichs! korrigieren. Zu hoher Druck von Kompressor, Druck Kompressor wurde gestoppt reduzieren. Drucksensor auf Funktion prüfen, Drucksensor defekt! Systemcheck.
Seite 73
Störungsbeseitigung Identische Sensoren bzw. Aktoren gesteckt, ... doppelt eingesteckt eine Einheit entfernen. Schaltpunkt setzten Schaltfehler, technischen Service fehlgeschlagen! kontaktieren! Kalibration fehlgeschlagen! Kalibriervorgang wiederholen. Aktualisierung USB-Stick auf korrekten Anschluss prüfen, fehlgeschlagen! Aktualisierung erneut starten. Alle Fehlermeldungen und Warnhinweise werden im Klartext auf dem Display angezeigt.
Rückstandsabsaugung Automatikmodul Distimatic Pro Industrial, einschließlich 591-61212-00-0 Glassatz, ohne automatische Rückstandsabsaugung Bedienungsanleitung 01-005-006-51 Aufbauanleitung 01-001-009-12 Safety guide 01-005-006-53 Garantieregistrierung / Unbedenklichkeitserklärung 01-006-002-78 Weitere Informationen, insbesondere zu den erhältlichen Erweiterungsbaugruppen und zum erhältlichen Zubehör finden Sie auf unserer Internetpräsenz unter www.heidolph.com!
Anhang Geräteservice Beachten Sie bei allen Servicearbeiten am Gerät (Reinigung, Wartung, Reparatur) die in diesem Abschnitt beschriebenen allgemeinen Anweisungen und Sicherheitshinweise. WARNUNG: Stromschlaggefahr Im Inneren des Geräts sind spannungsführende Komponenten verbaut. Beim Öffnen des Geräts besteht die Gefahr, spannungsführende Komponenten zu berühren. ➜...
Anhang Wartung Das Gerät enthält keine vom Benutzer zu wartenden Komponenten. Wenden Sie sich im Bedarfsfall (auffälliges Betriebsverhalten wie z.B. übermäßige Geräusch- oder Hitzeentwicklung) bitte an einen autorisierten Händler oder an unseren technischen Service, siehe „Kontaktdaten Deutschland – Österreich – Schweiz“ auf Seite 78. Demontage Beachten Sie bei der Demontage die in der mitgelieferten Montageanleitung enthal- tenen Hinweise und Anweisungen.
D-91126 Schwabach/Deutschland Tel.: +49 – 9122 - 9920-0 Fax: +49 – 9122 - 9920-84 E-Mail: service@heidolph.de Vertretungen Sie finden die Kontaktdaten Ihres lokalen Heidolph Händlers unter www.heidolph.com Garantieerklärung Heidolph Instruments gewährt eine Garantie von drei Jahren auf Material- und Herstellungsfehler.
Seite 80
Translation of the original instructions Page Page 84 – 157 Zertifikate/Certifications Seite/page 236 – 241...
Seite 81
Contents Introduction About this document ................84 Typographic conventions ..................84 Copyright protection ................... 84 General information Notes on the product ................85 Directives applied, product certification ..............85 California Residents .................... 85 Residual risk ...................... 85 Intended use ..................... 85 Reasonably foreseeable misuse ................
Seite 82
Device description Principle of operation ................92 Mechanical design ................. 93 Front of Distimatic Pro with control panel .............. 93 Connections rear side Distimatic Pro ..............94 Glassware ......................95 Heating tape (optional) ..................96 Signaling of the operating states (optional) ............97 Control panel .....................
Seite 83
Troubleshooting ..................150 Appendix Technical specifications ................152 Scope of delivery ..................153 Device service ..................154 General cleaning instructions ................154 Repairs ......................154 Maintenance ....................155 Dismantling ..................... 155 Disposal......................155 Heidolph International contact information ..........156 Warranty Statement ................156 Certificate of decontamination ..............157...
No transfer to third parties, reproduction in any form, including excerpts, and by any means, and utilization and/or disclosure of the contents is permitted without the prior written consent of Heidolph Instruments GmbH & Co. KG. Any violation is subject to compensation for damages.
Intended use The automatic Hei-VOLUME Distimatic Pro module has been specially developed for the automatic filling and draining of Heidolph rotary evaporators. It is partly completed machinery as defined by the Machinery Directive 2006/42/EC. The following processes can be controlled with the automatic module: –...
General information Compliance with and implementation of all relevant directives and safety measures for the respective field of application is the sole responsibility of the operator. All risks resulting from improper use are borne solely by the operator. The device may only be operated by authorized and instructed personnel. Training and qualification of the operating personnel as well as ensuring that the device is handled responsibly are the sole responsibility of the operator! Transportation...
➜ Have repairs and/or maintenance work on the device carried out exclusively by an authorized electrician or by the technical service department of Heidolph Instruments. ➜ Always switch the device OFF and disconnect it from the power supply before carrying out maintenance work, cleaning, or repairs.
There is also a high risk of injury, especially when processing toxic or corrosive substances! Only use the distillate and residue containers recommended by Heidolph (see section “Scope of delivery” on page 153) or others that are sufficiently pressure resistant and equipped with an adequately dimensioned pressure relief valve.
Make sure that even products that are intended for single use only are of sufficient purity. ➜ Do not use open containers. ➜ Avoid contamination caused by careless handling of contaminated vessels, apparatus or aids. Contact information For further information, please contact our after sales service at any time. Phone: +49-9122-9920-0 Email: sales@heidolph.de...
Assembly Assembly Assembly If required, Heidolph offers a professional assembly service for the mechanical setup and installation of the device, including all accessories supplied and commissioning . The majority of the sensors and valves of the automatic module are plugged into the coded connectors on the back of the Distimatic Pro (sensor cards).
Device description Device description Principle of operation The automatic Hei-VOLUME Distimatic Pro module has been specially developed for use in combination with rotary evaporators. The automatic module enables the automatic filling and draining of the system in continuous operation. The following processes are controlled with the automatic Hei-VOLUME Distimatic Pro module: –...
Mechanical design This section provides an overview of the mechanical design of the automatic Hei-VOLUME Distimatic Pro module. All other components of the delivery vary depending on the product variant and are described in more detail in the respective assembly instructions supplied.
Device description Connections rear side Distimatic Pro The following figure shows the rear side of the Distimatic Pro with standard plug-in cards and optional expansion cards. The actual assignment depends on the scope of the order! The sensors and valves of the system are plugged into the coded connection sockets of the sensor cards.
Device description Glassware Use of the automatic Hei-VOLUME Distimatic Pro module requires a special set of glassware consisting of a Woulff bottle, a collector vessel and an educt sensor vessel. The required set of glassware is included in the scope of delivery, see section “Scope of delivery”...
Device description Heating tape (optional) If necessary, the automatic Hei-VOLUME Distimatic Pro module can be operated with a heating tape (not included in the standard scope of delivery, see section “Scope of delivery” on page 153, Heat control expansion card).
Device description Signaling of the operating states (optional) The different operating states of the automatic module can also be made visible over large distances by an optional signal tower and the associated signal light expansion card (signal tower accessories set, article number 591-66000-00). The installation of the additional card is described in detail in the enclosed sheet supplied.
Control panel The following figure shows the removable control panel of the automatic Hei-VOLUME Distimatic Pro module. The control elements of the central display are touch-sensitive and can be operated by finger or with a suitable stylus. CAUTION: Damage to the control panel...
Device description Structure of the user interface All device functions are controlled via the integrated control panel and the graphical user interface. After switching on the device and initializing the device control, the Start window of the last active operating mode appears on the display (in the example: Sensor mode): From the start window, you can access the main menu, select an operating mode directly, and select the time display, see also “Control and display elements”...
Device description Control and display elements Control element Function Touch this function button to open the main menu with the following options: Applications ▪ operating mode Settings ▪ system parameters Languages ▪ menu language Main menu Formats function button ▪...
Seite 101
Device description In open lists, you can switch between entries by turning the left push-and-rotary control. A selected value (highlighted in orange) can be accepted by pressing the push-and-rotary control (similar to touching the entry on the display). Left push-and-rotary control The color of the LED ring indicates process status: ▪...
Device description System time, timer, stopwatch System time/timer/stopwatch selection System time Timer Briefly touch the function button in the header of the start page to open the selection menu (see following figure) with the following options: ➜ Display of current time (12 or 24-hour display, depending on the selection in the Settings menu).
Device description Color coding In the process visualization area (see section “Structure of the user interface” on page 99), all process lines and function elements are color-coded to illustrate the operating states: Color Meaning PASSIVE or off state (e.g. non-active/closed line, non-switched Gray valve, sensor ACTIVE or on state (e.g.
Device description Input keys The following input keys are available in any menu: Symbol Meaning Delete button. Press this button to correct a numeric or alphanu- meric value entered. confirm button. Press this button to confirm and accept a selection or input value. Discard button.
Commissioning Commissioning Observe the following steps when commissioning the automatic Hei-VOLUME Distimatic Pro module. Switch the device on/off To switch on and off the automatic module, use the main switch on the front of the Distimatic Pro (see section “Distimatic Pro with control panel” on page 93).
If you change to such a medium, contact our application specialists if necessary (see “Heidolph International contact informa- tion” on page 156). CAUTION: Loss of production The function of the level sensor in the evaporation flask (S4) may be affected by electromagnetic fields.
Seite 107
Commissioning Settings Calibrate filling level – Open the menu and select (see also “Main menu” on page 110). – Follow the instructions on the display. Calibration on high-polar solvents and mixtures: ➜ Make sure the sensor is in the flask. ➜...
Seite 108
Commissioning ➜ Start the calibration process with discard ➜ The calibration process can be canceled at any time with ➜ The progress is visualized by the traffic light display. When the calibration is complete, the green dot on the right lights up. ➜...
Commissioning Initial filling of the evaporation flask Complete the following steps for filling the evaporation flask to ensure continuous supply of the educt during operation: ➜ Turn on the rotary evaporator and wait for the software to initialize (start screen appears on the control panel).
Commissioning Device configuration The basic settings for operation are made in the main menu. After switching on the Distimatic Pro and initializing the software, the start page of the last active mode Main menu appears. To open the main menu, touch the function button in the header of the display: Main menu...
Seite 111
Commissioning Button Function/Meaning Home button. Touch this function button to return to the previously opened view (start window). Applications Touch this function button to open the menu and Operating select an operating mode, see section “Applications menu” on page modes 112.
Commissioning Applications menu Applications Main The desired operating mode can be selected in the menu ( menu Applications To select and activate an operating mode, proceed as follows: ➜ Complete all running processes before changing the operating mode. ➜ Touch the entry of the desired operating mode.
Commissioning Settings menu Settings Main menu Settings In the menu ( ), various device settings can be adjusted: The various options are described in detail in the following sections.
Commissioning Screen lock Screen lock Main menu Settings menu item ( ) can be used to acti- Screen locked vate the automatic screen lock for the display ( ) or to deactivate it Screen unlocked When the screen lock is active, the display locks after a certain period of inactivity (no operator actions on the control panel).
Commissioning The security code is automatically disabled when the screen lock is disabled. Display brightness Brightness Main The brightness of the display can be adjusted via the menu item menu Settings Brightness ➜ Touch the function button to open the on-screen numeric keyboard. ➜...
Commissioning Select formats Formats Main menu The following system settings can be made in the menu ( Formats – Set date format (US or EU) – Set time format (12/24-hour) – Set number separator (US or EU) – Set temperature unit (degrees Celsius, Fahrenheit, Kelvin) ➜...
Commissioning Automatic drainage of residue Formats In the menu, you can define whether the residue is automatically drained from the evaporation flask (blowing out in overpressure operation), or whether the flask is drained by hand. with automatic drainage of residue A system , in sensor or time mode can be operated automatically in continuous operation (condition: continuous supply with...
Commissioning Data recording Data logging function can be used to record the individual steps of a process. The function records each individual step with start and end time and stores this infor- mation in the Data logging memory. The function must be activated before the process starts: ➜...
Seite 119
Commissioning In the event of a power interruption or when the device is switched off during the current data recording, the recording process is aborted and the corresponding entry marked with "(!)". The displayed data set contains the recorded process data that was recorded up to the power interruption: In the data log export file, the corresponding file names are also given the addition "(!)"...
Commissioning Connectivity All necessary network parameters and basic settings for time synchronization can be Hei-CONTROL Pro defined in the menu: ➜ The connection status of the Hei-CONTROL Pro application is displayed in the [Status] field. The full functionality of the Hei-CONTROL Pro application also requires the Hei-CONTROL Pro server.
Leaks reduce the performance of the entire system. ➜ Correct any indicated errors and/or detected malfunctions immediately. ➜ In the event of a continued fault indication/malfunction, contact your local sales representative or our technical service department, see “Heidolph International contact information” on page 156.
Commissioning Testing valves and signaling Test all actuators function can be used to test the function of all connected valves and signal lights. System check ➜ Open the menu: Test all valves and signal lights System check Test all actuators ➜...
Commissioning Perform overpressure test With this test function, the system can be tested for leaks. System check ➜ Open the menu. Overpressure ➜ Touch the function button in the footer to activate the test function (button changes to orange).
Seite 124
Commissioning WARNING: Risk of injury, damage to property Due to faulty components, faulty assembly of components or faulty connections, there is a risk that pressurized components will suddenly loosen or rupture during an overpressure test! ➜ Before performing an overpressure test, ensure that all compo- nents are properly installed.
Commissioning Testing the safety switch The function of the integrated safety switch can be tested with the test function Safety switch The safety switch is activated when a defined system overpressure is reached during compressor operation. When the safety switch is activated, the compressor is shut down so that the system pressure can be released.
Operation Operation Selecting the operating mode After switching on the device and initializing the device control, the start window of Mode the last active operating mode appears on the display. Touch the function button Applications to open the menu and to activate the desired mode (see section “Applications menu”...
Seite 127
Operation ➜ The filling process is started and runs as long as the sensor does not have contact with the medium S4 in the status ➜ The filling process is stopped when the sensor comes into contact with the medium high S4 in the state Preconditions...
Seite 128
Operation ➜ After the pre-heating time has elapsed or after the step has been skipped, the filling pressure is automatically regulated to the set process pressure. The following message appears on the display: ➜ Start automatic mode with as soon as the evaporation process begins (distillate precipitates in the condenser).
Seite 129
Operation filling time defines the time until the next filling of the evaporation flask and thus the amount of educt that is evaporated until the next refilling. stagnation time runs as soon as the level sensor S4 changes to the high status after filling . If the stagnation time expires completely, the automatic residue emptying is initiated (depending on the set of glassware and the parameterization) or the flask must be emptied manually.
Operation Parameter sensor mode General parameters general parameters ➜ To adjust the , switch from the start page of sensor mode to the corresponding parameters screen form (tap the parameters overview or swipe from right to left): ➜ Use the two navigation keys to return to the start window or to continue to the Recipes view: The following parameters can be adjusted:...
Seite 131
Operation Parameters Function Maximum number of evaporation cycles ▪ Selection switch in position no limit. Cycles ▪ Selection switch in position Define a certain number of cycles in the selection field (adjustment via plus/minus buttons or tap/on-screen keyboard). Touch the icon to switch between the two options.
Seite 132
Operation Accept Cancel ➜ Confirm or discard all changes with Process parameters Process parameters ➜ Touch the button in the footer to open the menu. ➜ Tap the button of the desired parameter in the menu and adjust the value using the on-screen keyboard, see also “User input”...
Operation Selectable if a specific number of distillation drainage steps is specified in the start window: Max. drain distillate: Additional evap- oration time In the example: drain distillate six times, then the optional additional evaporation time runs. This allows a desired concentration to be achieved! max.
Operation Recipes Save By touching the button, the actual settings and values can be stored in the system as a recipe. Save ➜ Touch the button to open the on-screen keyboard (see also section “User input” on page 104): ➜ Use the on-screen keyboard to enter any recipe name.
Operation Recipe list To open the recipe list, switch from the start window of sensor mode to the corre- Recipes sponding view (two swipes from right to left, or use the navigation button from the parameters window). Here, new recipes can be created ( button) and existing recipes can be loaded Load Delete...
Operation Time mode Activating time mode Applications Time mode ➜ Open the menu and touch the function button . The entry is highlighted in orange. ➜ Confirm the selection with to activate the mode and open the time mode start window: In the time mode, the filling of the evaporation flask, the distillation and the draining of the distillate and residue are carried out in a purely time-controlled manner:...
Seite 137
Operation Preconditions The following conditions must be met for operation in time mode: – Heating bath heater of the rotary evaporator is switched on – Recirculation chiller is switched on – Vacuum pump is switched on – Rotary evaporator is under filling vacuum –...
Operation Time mode parameters General parameters general parameters ➜ To adjust the , switch from the time mode start page to the corresponding parameters screen form (tap parameters overview or swipe from right to left): ➜ Use the two navigation keys to return to the start window or to continue to the Recipes view: The following parameters can be adjusted:...
Seite 139
Operation Parameters Function Adjustable time for the pre-evacuation phase Pre-evacuation Before starting the process loops evaporation – filling – draining, the system is pre-evacuated for the time set here. Adjustable time for the initial filling Before starting the process loops consisting of evaporation –...
Seite 140
Operation Distillate draining time Drain distillate ▪ In the selection field, define a distillate draining time (adjustment via plus/minus buttons or tap/on-screen keyboard). Specify here whether the distillate and/or residue are drained at the end of the process. Touch the corresponding End of process checkbox to activate (checkmark) or deactivate the selection.
Operation Rinse mode Activating rinse mode Applications Rinse mode ➜ Open the menu and touch the function button. The entry is highlighted in orange. ➜ Confirm the selection with to activate the mode and to open the rinse mode start window: The rinse mode allows the fill and concentrate line to be flushed with a suitable solvent.
Seite 142
Operation PRACTICAL TIP ➜ Select a vacuum value adequate for the solvent and set the hysteresis to 50 mbar. ➜ A large pressure range is passed through by the large hysteresis. ➜ All glass parts are first wetted, after which drops are formed, which then run off.
Operation Rinse mode parameters General parameters general parameters ➜ To adjust the , switch from the rinse mode start page to the corresponding parameters screen form (tap the parameters overview or swipe from right to left): ➜ Use the two navigation keys to return to the start window or to continue to the Recipes view:...
Seite 144
Operation The following parameters can be adjusted: Parameters Function Adjustable time for the pre-evacuation phase Pre-evacuation Before starting the process loops evaporation – filling – draining, the system is pre-evacuated for the time set here. Filling time setting Fill Adjust the filling time as required using the plus/minus buttons.
Seite 145
Operation Process parameters Process parameters Tap the button in the footer. – The process parameters menu opens. ➜ Touch the function button of the desired parameter and adjust the value using the screen keyboard, see also “User input” on page 104. Parameters Function Performance of the heating tape during operation.
Operation Manual mode Activating manual mode Applications Manual mode ➜ Open the menu and touch the function button. The entry is highlighted in orange. ➜ Confirm the selection with to activate the mode and to open the manual mode start window: In manual mode, single batches can be processed.
Seite 147
Operation Procedure Start process ➜ Touch the button. – The vacuum pump is switched on, the pressure in the evaporation flask is lowered to process pressure. Fill educt Stop process – In the footer, the buttons are displayed Fill educt ➜...
Operation Opening the error list Main menu Error List ➜ To display the error list, open the and touch the function button in the footer. ➜ To view an individual error message, tap the corresponding entry: – The error message appears in plain text on the display. –...
Operation Opening system information Information view displays all version and license information for your automatic module. Main menu Info ➜ To view system information, open the and touch the function button in the footer. Versions Licenses ➜ Use the buttons to access the desired information about the software and firmware for your product.
Troubleshooting Troubleshooting Troubleshooting Error message Possible remedy Cable breakage or sensor Check the cable of the displayed component. defect Check the cable connections of the displayed Short circuit component. Correct the values of the displayed Values out of range parameter. Compressor has been Excessive pressure from compressor, reduce stopped...
Seite 151
All error messages and warning messages are shown in plain text on the display. Follow the instructions on the display. In case of recurring errors, please contact the responsible sales department or our technical service. Contact address see “Heidolph International contact information” on page 156.
Appendix Appendix Technical specifications General device data Model Automatic Hei-VOLUME Distimatic Pro module Dimensions (W × H × D) 186 × 429 × 521 mm, including control panel Weight approx. 17 kg Housing degree of protection IP42 Control panel degree of...
Operating instructions 01-005-006-51 Assembly instructions 01-001-009-12 Safety guide 01-005-006-53 Guarantee registration / Certificate of decontamination 01-006-002-78 Further information, in particular about the available expansion modules and the available accessories, can be found on our website at www.heidolph.com!
The owner is solely liable for damage caused by unauthorized repairs. In case of a need for repair, contact an authorized dealer or our technical service, see “Heidolph International contact information” on page 156. Include the completed certificate of decontamination with every device return, see...
Maintenance The device contains no user-serviceable components. If necessary (in the event of abnormal operating behavior such as excessive noise or heat generation, for example), contact our technical service, see “Heidolph International contact information” on page 156. Dismantling Observe the instructions contained in the assembly instructions supplied when dismantling.
Phone: +44 (0) 1799- 5133-20 Email: service@radleys.co.uk www.heidolph-instruments.co.uk Local distributors To find your local distributor please visit www.heidolph.com Warranty Statement Heidolph Instruments provides a three-year warranty for material and manufacturing defects. The warranty does not cover glass and wear parts, transportation damage and damage resulting from improper handling or non-in- tended use of the product.
Submissions without a declaration of no objection cannot be processed! Certificate of decontamination IN CASE OF RETURNS Please fill in the required fields. Heidolph Instruments GmbH & Co. KG Note: The sender must package the goods Walpersdorfer Straße 12 properly and appropriately for transport. 91126 Schwabach, Germany...
Seite 158
Traduction de la notice originale Page 162 – 235 Zertifikate/Certifications Seite/page 236 – 241...
Seite 159
Contenu Introduction Concernant ce document ...............162 Conventions typographiques ................162 Droits d’auteur ....................162 Remarques générales Indications relatives au produit ...............163 Directives appliquées, certification des produits ............ 163 Risques résiduels ..................... 163 Utilisation conforme ..................163 Mauvais usage raisonnablement prévisible ............163 Transport.....................164 Stockage .....................164 Acclimatation ..................164...
Seite 160
Description de l’appareil Principe de fonctionnement ..............170 Structure mécanique ................171 Face avant du Distimatic Pro avec panneau de commande ........171 Raccords à l’arrière du Distimatic Pro ..............172 Verrerie ......................173 Ruban chauffant (option) .................. 174 Signalisation des états de fonctionnement (option) ..........175 Panneau de commande ..................
Seite 161
Utilisation Sélectionner le mode de fonctionnement..........204 Mode Capteur ..................204 Paramètres du mode Capteur ..............208 Paramètres Hei-VAP ..................211 Journal des données (Datalogging) ..............211 Formule ......................212 Liste des formules .................... 213 Mode Temps ..................214 Paramètres du mode Temps ................216 Mode Rinçage ..................219 Paramètres du mode Rinçage................
Toute cession à des tiers, reproduction sous quelque forme que ce soit – même d’ex- traits – ainsi que l’utilisation et/ou la communication du contenu ne sont pas autorisées sans accord écrit préalable de Heidolph Instruments GmbH & Co. KG. Toute violation de ces règles expose à des dommages et intérêts.
Ces risques sont mentionnés et décrits à l’endroit correspondant du présent document. Utilisation conforme Le module automatique Hei-VOLUME Distimatic Pro a été spécialement conçu pour le remplissage et le vidage automatiques des évaporateurs rotatifs Heidoph. Il s’agit d'une machine complète au sens entendu par la directive Machines 2006/42/CE.
Remarques générales Seul du personnel habilité et ayant reçu les instructions correspondantes est autorisé à faire fonctionner l’appareil. La formation et la qualification du personnel qui utilise l’appareil ainsi que la garantie d’un comportement responsable lors de sa manipulation relèvent de la responsabilité exclusive de l’exploitant ! Transport Pendant le transport, évitez les vibrations fortes et les sollicitations mécaniques, qui peuvent endommager l’appareil.
➜ Faites impérativement effectuer les réparations et/ou les travaux de maintenance de l’appareil par un électricien qualifié agréé ou par le service technique de l’entre- prise Heidolph Instruments. ➜ Éteignez toujours l’appareil et débranchez-le avant d’effectuer des travaux de maintenance, de nettoyage ou de réparation.
Cela entraîne également un risque élevé de blessure, particulièrement lors du traite- ment de substances toxiques ou irritantes ! Utilisez uniquement les récipients à distillat et à résidu conseillés par Heidolph (voir section « Volume de livraison» à la page 231) ou des récipients qui présentent une résistance à...
Évitez toute contamination due à une manipulation inconsidérée avec des récipients, des appareils ou des ustensiles souillés. Contact Si vous avez besoin d’autres renseignements, notre service clientèle se tient à tout moment à votre disposition. Tél. : +49-9122-9920-0 E-mail : sales@heidolph.de...
être respectées ! En cas de non-respect, tout droit à la garantie vis-à-vis de la société Heidolph Instruments sera annulé. L'exploitant est le seul responsable de tous les dommages résultant de modifications ou de transformations non autorisées de l’appareil, de l’utilisation de pièces de rechange et d’accessoires non homo-...
Montage Montage Montage Si nécessaire, Heidolph propose un service de montage professionnel pour l’assemblage mécanique et l’installation de l’appareil et de tous les composants fournis et pour la mise en service. La majorité des capteurs et des soupapes du module automatique sont branchés aux connecteurs codés au dos du Distimatic Pro...
Description de l’appareil Principe de fonctionnement Le module automatique Hei-VOLUME Distimatic Pro a été spécialement conçu pour être utilisé en combinaison avec des évaporateurs rotatifs. Le module automatique permet le remplissage et le vidage automatiques du système en mode de fonctionnement continu.
Structure mécanique Cette section présente la structure mécanique du module automatique Hei-VOLUME Distimatic Pro. Les autres composants fournis varient en fonction de l'équi- pement choisi et sont décrits plus en détail dans la notice de montage fournie. Le Distimatic Pro est composé d’un carter en tôle d’acier avec un indice de protection IP 42, de caches latéraux amovibles et d’un panneau de commande amovible.
Description de l’appareil Raccords à l’arrière du Distimatic Pro La figure suivante montre l’arrière du Distimatic Pro avec des cartes d’extension stan- dards et des cartes d’extension en option. L’assignation réelle dépend de l'étendue de la commande ! Les capteurs et les soupapes du système sont raccordés aux connecteurs codés des cartes de capteurs.
Description de l’appareil Verrerie L’utilisation du module automatique Hei-VOLUME Distimatic Pro nécessite une verrerie spéciale composée d’une bouteille de Woulff, d’un récipient collecteur et d'un récipient à capteur. La verrerie nécessaire est fournie avec le module, voir section « Volume de livraison»...
Description de l’appareil Ruban chauffant (option) Si nécessaire, le module automatique Hei-VOLUME Distimatic Pro peut être utilisé avec un ruban chauffant (non compris dans l’équipement standard, voir section « Volume de livraison» à la page 231, carte d’extension Heat Control).
Description de l’appareil Signalisation des états de fonctionnement (option) Une colonne de signalisation disponible en option et la carte d’extension Signal Light correspondante (accessoire Set de colonne de signalisation, référence 591-66000-00) permettent de rendre visibles à grande distance les différents états de fonctionnement du module automatique.
Panneau de commande La figure suivante montre le panneau de commande amovible du module automatique Hei-VOLUME Distimatic Pro. Les éléments de commande de l’écran central sont tactiles (écran tactile) et peuvent être utilisés avec le doigt ou un stylet adapté.
Description de l’appareil Structure de l’interface Toutes les fonctions de l’appareil sont commandées via le panneau de commande intégré et l’interface graphique. Après la mise en marche de l’appareil et l’initialisation de la commande de l’appareil, la fenêtre de démarrage du dernier mode de fonctionnement actif apparaît sur l’écran (dans l’exemple : mode Capteur) : La fenêtre de démarrage permet d’accéder au menu principal, à...
Description de l’appareil Éléments de commande et d’affichage Élément de commande Fonction Appuyez sur ce bouton de fonction pour ouvrir le menu principal avec les options suivantes : Applications ▪ Mode de fonctionnement Réglages ▪ Paramètres du système Langues ▪...
Seite 179
Description de l’appareil Lorsque des listes sont ouvertes, tourner le bouton-poussoir rotatif gauche permet de passer d’une entrée à l’autre. Une valeur sélectionnée (surli- gnée en orange) peut être validée en appuyant sur le bouton-poussoir rotatif (équivaut à toucher l’entrée Bouton-poussoir rotatif sur l'écran).
Description de l’appareil Heure du système, minuterie, chronomètre Sélection de l’heure du système/de la minuterie/du chronomètre Heure du système Minuterie Touchez brièvement le bouton dans le haut de la page d’accueil pour ouvrir le menu de sélection (voir figure suivante) avec les options suivantes : ➜...
Description de l’appareil Code couleur Dans la visualisation du processus (voir section « Structure de l’interface» à la page 177), toutes les étapes du processus et les éléments de fonction sont identifiés par des couleurs : Couleur Signification État PASSIF ou éteint (par ex. conduite non active/fermée, Gris soupape non activée, capteur État ACTIF ou en marche (par ex.
Description de l’appareil Boutons de saisie Quel que soit le menu, les boutons de saisie suivants sont disponibles : Symbole Signification Supprimer Bouton . Appuyez sur ce bouton pour corriger la valeur numérique ou alphanumérique saisie. Confirmer Bouton . Appuyez sur ce bouton pour confirmer et valider la sélection ou la valeur saisie.
Mise en service Mise en service Suivez les étapes suivantes lors de la mise en service du module automatique Hei-VOLUME Distimatic Pro. Mettre en marche /arrêter l’appareil Utilisez l’interrupteur principal à l’avant du Distimatic Pro pour le mettre en marche/l’ar- rêter (voir section «...
Mise en service Calibrer le capteur de niveau de remplissage Lors de la première mise en service et lors de chaque changement de solvant, le capteur de niveau de remplissage (S4) doit être calibré. AVERTISSEMENT : Dommages physiques et/ou matériels, arrêt de la production En cas de mauvais calibrage ou de défaillance du capteur de niveau de remplissage (S4), un débordement/écoulement du contenu du...
Seite 185
Mise en service Réglages Calibrer le niveau – Ouvrez le menu et sélectionnez l’option de remplissage (voir également « Menu principal» à la page 188). – Suivez les instructions sur l’écran. Calibrage pour des solvants et mélanges à haute polarité : ➜...
Seite 186
Mise en service ➜ Démarrez le processus de calibrage en appuyant sur ➜ Le processus de calibrage peut être interrompu à tout moment à l’aide du bouton Annuler ➜ L’avancement peut être visualisé grâce au feu tricolore. Dès que le calibrage est terminé, le point vert à...
Mise en service Premier remplissage du ballon d'évaporation Suivez les étapes suivantes pour le remplissage du ballon d'évaporation. Afin d’assurer une alimentation continue du collecteur pendant le fonctionnement : ➜ Mettez l’évaporateur rotatif en marche et attendez l’initialisation du logiciel (l'écran de démarrage apparaît sur le panneau de commande).
Mise en service Configuration de l’appareil Les réglages de base pour le fonctionnement s’effectuent dans le menu principal. Après la mise en marche du Distimatic Pro et l’initialisation du logiciel, la page d’accueil du dernier mode activé apparaît. Pour ouvrir le menu principal, appuyez sur le bouton de Menu principal fonction dans le haut de l’écran :...
Seite 189
Mise en service Bouton Fonction/Signification Home Bouton . Appuyez sur ce bouton de fonction pour retourner à la page de processus ouverte précédemment (fenêtre de démarrage). Appuyez sur ce bouton de fonction pour ouvrir le menu Applications Applications et choisir un mode de fonctionnement, voir section «...
Mise en service Menu Applications Applications Menu principal Applications Dans le menu ), il est possible de choisir le mode de fonctionnement souhaité. Procédez comme suit pour sélectionner et activer un mode de fonctionnement : ➜ Avant de changer de mode de fonctionnement, arrêtez tous les processus en cours. ➜...
Mise en service Menu Réglages de l’appareil Réglages Menu principal Réglages Le menu ) permet d’adapter différents réglages de l’appareil : Les différentes options sont décrites de manière détaillée dans les sections suivantes.
Mise en service Verrouillage de l'écran Verrouillage de l’écran Menu principal Le point de menu Réglages Verrouillage de l'écran actif ) permet d'activer ( ) ou de désac- Verrouillage de l'écran inactif tiver ( ) le verrouillage automatique de l’écran.
Mise en service PIN pour le verrouillage ➜ Touchez une nouvelle fois le bouton de fonction de l’écran PIN pour le déver- pour désactiver le code de sécurité rouillage de l’écran inactif Le code de sécurité est automatiquement désactivé lorsque le verrouillage de l’écran est désactivé.
Mise en service Choisir les formats Formats Menu principal Formats Le menu ) permet d’effectuer les réglages du système suivants : – Définir le format de la date (format US ou UE) – Format de l’heure (12/24 heures) – Définir le séparateur des chiffres (format US ou UE) –...
Mise en service Aspiration automatique du résidu Formats Dans le menu , le logiciel définit si le résidu doit être évacué automati- quement du ballon d'évaporation (soufflage en mode Surpression) ou si le ballon d'évaporation doit être vidé manuellement. avec aspiration automatique du résidu En cas de fonctionnement , l’appa- reil peut fonctionner de manière totalement automatique en continu en mode Capteur...
Mise en service Enregistrement des données Datalogging La fonction permet d’enregistrer les différentes étapes d'un processus. L’enregistrement des données enregistre chaque étape avec l’heure de début et de fin dans la mémoire du journal des données. Cette fonction doit être activée avant le démarrage du processus : ➜...
Seite 197
Mise en service En cas de coupure de courant ou lors de l’arrêt de l’appareil durant l’enregistrement des données, le processus d’enregistrement est interrompu et l’entrée correspondante est marquée d’un « (!) ». L’ensemble de données affiché comprend les données de processus enregistrées jusqu’à...
Mise en service Connectivité Hei-CONTROL Pro Le menu permet de définir tous les paramètres de réseau néces- saires ainsi que les réglages de base pour la synchronisation : ➜ Dans le champ [Statut], vous trouverez le statut de connexion de l’application Hei-CONTROL Pro.
Mise en service Contrôle du système Tous les capteurs et les acteurs/appareils périphériques raccordés sont affichés dans le Contrôle du système Contrôle du système menu . Le sous-menu permet d’effectuer plusieurs tests pour garantir le bon fonctionnement et la sécurité de fonc- tionnement du système : menu principal Test du...
Mise en service Tester les soupapes et la signalisation Tester tous les acteurs La fonction de test permet de tester toutes les soupapes et tous les témoins lumineux raccordés. Test du système ➜ Ouvrez le menu Tester toutes les soupapes et tous les témoins lumineux Test du système Tester ➜...
Mise en service Tester la surpression Cette fonction de test permet de tester l’étanchéité du système. Test du système ➜ Ouvrez le menu Surpression ➜ Appuyez sur le bouton de fonction dans le bas de l’écran pour activer la fonction de test (le bouton devient orange).
Seite 202
Mise en service AVERTISSEMENT : risque de blessure, de dommages maté- riels Si des composants sont défectueux ou en cas de montage ou de raccordement erroné des composants, les pièces sous pression risquent de se détacher soudainement ou d’exploser durant le test de surpression ! ➜...
Mise en service Tester le contacteur de sécurité Contacteur de sécurité La fonction de test permet de tester le fonctionnement du contacteur de sécurité intégré. Le contacteur de sécurité se déclenche lorsqu’une surpression définie du système est atteinte avec le compresseur. Lorsque le contacteur de sécurité se déclenche, le compresseur s’arrête de manière à...
Utilisation Utilisation Sélectionner le mode de fonctionnement Après la mise en marche de l’appareil et l’initialisation de la commande de l’appareil, la fenêtre de démarrage du dernier mode de fonctionnement actif apparaît sur l’écran. Mode Applications Appuyez sur le bouton de fonction pour ouvrir le menu activez le mode de fonctionnement souhaité...
Seite 205
Utilisation ➜ Le processus de remplissage démarre et se poursuit tant que le capteur ne signale pas de contact avec le liquide S4 sur statut ➜ Le processus de remplissage s’arrête lorsque le capteur signale un contact avec le high liquide ...
Seite 206
Utilisation ➜ Au terme de la durée de préchauffage ou lorsque cette étape a été passée, la pression de remplissage est automatiquement réglée sur la pression de processus programmée. Le message suivant apparaît sur l’écran : ➜ Démarrez le mode Automatique à l'aide du bouton dès que le processus d'éva- poration se met en marche (le distillat se condense dans le condenseur).
Seite 207
Utilisation durée de remplissage définit le laps de temps jusqu’au prochain remplissage du ballon d'évaporation et donc la quantité de liquide évaporée jusqu’au prochain remplissage. durée de stagnation démarre dès que le capteur de high niveau de remplissage S4 passe en statut après le remplis- sage.
Utilisation Paramètres du mode Capteur Paramètres généraux paramètres généraux ➜ Pour adapter les , passez de la page d’accueil du mode Capteur au masque de paramétrage (appuyez sur la liste des paramètres ou effectuez un mouvement de balayage de droite à gauche) : ➜...
Seite 209
Utilisation Paramètre Fonction Nombre maximal de cycles d'évaporation ▪ Bouton de sélection en position pas de limitation. ▪ Bouton de sélection en position définissez un Cycles nombre de cycles dans le champ de sélection (adaptation à l’aide des boutons plus/moins ou en tapotant/à l’aide du clavier qui apparaît sur l’écran).
Utilisation Valider ➜ Confirmez ou annulez toutes les modifications avec les boutons Arrêter Paramètres du processus Paramètres du processus ➜ Pour ouvrir le menu, appuyez sur le bouton dans le bas de l'écran. ➜ Dans le menu, appuyez sur le bouton de fonction du paramètre souhaité et adaptez la valeur à...
Utilisation Disponible si un nombre de vidages de distillat est défini dans la fenêtre de démarrage : Vidage du distillat max. : durée d’évaporation supplémentaire Dans l’exemple : six vidages de distillat, ensuite la durée d'évaporation supplémentaire activée en option s'écoule. Cela permet d’atteindre une concentration souhaitée ! Remplissage max.
Utilisation Formule Enregistrer Le bouton permet d’enregistrer les réglages sélectionnés et les valeurs saisies comme formule dans le système. Enregistrer ➜ Appuyez sur le bouton pour ouvrir le clavier sur l’écran (voir également section « Saisies de l’utilisateur» à la page 182): ➜...
Utilisation Liste des formules Formules Pour ouvrir la liste des formules, passez de la page d’accueil à la page (deux mouvements de balayage de droite à gauche ou bouton de navigation dans la fenêtre de paramétrage). Nouveau Vous pouvez ici créer de nouvelles formules (bouton ) et charger des formules Charger Supprimer...
Utilisation Mode Temps Activer le mode Temps Applications Mode ➜ Ouvrez le menu et appuyez sur le bouton de fonction Temps . L’entrée est surlignée en orange. ➜ Confirmez votre choix à l’aide du bouton pour activer le mode et ouvrir la fenêtre de démarrage du mode Temps : en mode Temps, le remplissage du ballon d'évaporation, la distillation et le vidage du distillat et du résidu sont purement commandés par temporisation :...
Utilisation Conditions préalables Pour le fonctionnement en mode Temps, les conditions suivantes doivent être remplies : – Chauffage du bain de chauffe sur l'évaporateur rotatif en marche – Refroidisseur à recirculation en marche – Pompe à vide en marche – Évaporateur rotatif sous vide pour le remplissage –...
Utilisation Paramètres du mode Temps Paramètres généraux paramètres généraux ➜ Pour adapter les , passez de la page d’accueil du mode Temps au masque de paramétrage (appuyez sur la liste des paramètres ou effectuez un mouvement de balayage de droite à gauche) : ➜...
Seite 217
Utilisation Paramètre Fonction Durée réglable pour la phase de pré-évacuation Pré-évacuation Avant le début de la boucle de processus composée de l’évaporation, du remplissage et du vidage, le système est pré-évacué pendant la durée réglée ici. Durée réglable pour le premier remplissage Avant le début de la boucle de processus composée de l’évaporation, du remplissage et du vidage, le système peut être rempli une première fois.
Seite 218
Utilisation Durée de vidage du distillat Vidage du ▪ Définissez une durée de vidage pour le distillat dans le distillat champ de sélection (adaptation à l’aide des boutons plus/ moins ou en tapotant/à l’aide du clavier qui apparaît sur l’écran). Définissez ici si le distillat et/ou le résidu doivent être vidés à...
Utilisation Mode Rinçage Activer le mode Rinçage Applications Mode ➜ Ouvrez le menu et appuyez sur le bouton de fonction Rinçage . L’entrée est surlignée en orange. ➜ Confirmez votre choix à l’aide du bouton pour activer le mode et ouvrir la fenêtre de démarrage du mode Rinçage : Le mode Rinçage permet le rinçage de la conduite d’alimentation et de la conduite de concentré...
Seite 220
Utilisation CONSEIL PRATIQUE ➜ Choisissez une valeur de vide analogue à celle du solvant et réglez l’hystérèse sur 50 mbars. ➜ L’hystérèse élevée permet de passer par une large plage de pressions. ➜ Dans un premier temps, cela permet de recouvrir toute la verrerie.
Utilisation Paramètres du mode Rinçage Paramètres généraux paramètres généraux ➜ Pour adapter les , passez de la page d’accueil du mode Rinçage au masque de paramétrage (appuyez sur la liste des paramètres ou effectuez un mouvement de balayage de droite à gauche) : ➜...
Seite 222
Utilisation Les paramètres suivants peuvent être adaptés : Paramètre Fonction Durée réglable pour la phase de pré-évacuation Pré-évacuation Avant le début de la boucle de processus composée de l’évaporation, du remplissage et du vidage, le système est pré-évacué pendant la durée réglée ici. Réglage de la durée de remplissage Remplissage Adaptez la durée de remplissage souhaitée à...
Seite 223
Utilisation Paramètres du processus Paramètres du processus Appuyez sur le bouton dans le bas de l’écran. – Le menu Paramètres du processus s’ouvre. ➜ Appuyez sur le bouton de fonction du paramètre souhaité et adaptez la valeur à l’aide du clavier qui apparaît sur l’écran, voir également « Saisies de l’utilisateur» à la page 182.
Utilisation Mode Manuel Activer le mode Manuel Applications Mode ➜ Ouvrez le menu et appuyez sur le bouton de fonction Manuel . L’entrée est surlignée en orange. ➜ Confirmez votre choix à l’aide du bouton pour activer le mode et ouvrir la fenêtre de démarrage du mode Manuel : en mode Manuel, il est possible d'évaporer des échantillons individuels (mode Batch).
Seite 225
Utilisation Déroulement Démarrer le processus ➜ Appuyez sur le bouton de fonction – La pompe à vide est activée, la pression dans le ballon d'évaporation est réduite à la pression du processus. Remplir le collecteur Arrêter le processus – Les boutons apparaissent dans le bas de l’écran Remplir le collecteur ➜...
Utilisation Afficher la liste des erreurs menu principal ➜ Pour afficher la liste des erreurs, ouvrez le et appuyez sur le Liste des erreurs bouton de fonction dans le bas de l’écran. ➜ Pour afficher un message d’erreur, appuyez sur l’entrée correspondante : –...
Utilisation Afficher les informations sur le système Information La page affiche toutes les informations relatives à la version et à la licence de votre module automatique. menu principal ➜ Pour afficher les informations sur le système, ouvrez le Info appuyez sur le bouton de fonction dans le bas de l’écran.
Dépannage Dépannage Dépannage Message d’erreur Dépannage Rupture de câble ou défaut Vérifier le câble du composant indiqué. Court-circuit Vérifier le câblage du composant indiqué. Valeurs en dehors de la Corriger les valeurs du paramètre affiché. plage ! Le compresseur s’est Pression trop élevée du compresseur, réduire arrêté...
Seite 229
Dépannage Capteurs ou acteurs identiques branchés, ... double branchement éliminer une unité. Activation du point de Erreur de commutation, contacter le service commutation échouée ! technique ! Calibration échouée ! Répéter le processus de calibrage. Vérifier si la clé USB est correctement bran- Mise à...
Annexe Annexe Caractéristiques techniques Données générales de l’appareil Module automatique Hei-VOLUME Distimatic Pro Modèle 186 × 429 × 521 mm, panneau de commande Dimensions (l × h × p) compris Poids env. 17 kg Indice de protection du carter IP42...
Notice d’instructions 01-005-006-51 Instructions d’assemblage 01-001-009-12 Guide de sûreté 01-005-006-53 Enregistrement de la garantie 01-006-002-78 Vous trouverez de plus amples informations, notamment sur les sous-groupes d’extension et les accessoires disponibles, sur notre site Internet : www.heidolph.com !
Annexe Entretien de l’appareil Lors de tous les travaux de service sur l’appareil (nettoyage, maintenance, réparation), respectez les instructions générales et les consignes de sécurité décrites dans cette section. AVERTISSEMENT : Risque d’électrocution Des composants sous tension sont montés à l’intérieur de l’appareil. Lors de l’ouverture de l’appareil, il y a un risque de contact avec des composants sous tension.
Annexe Maintenance L’appareil ne contient aucun composant devant être entretenu par l’utilisateur. Si nécessaire (comportement de fonctionnement perturbé, par ex. émission de bruit ou dégagement de chaleur excessifs), veuillez contacter un revendeur agréé ou notre service technique, voir « Coordonnées en Allemagne – Autriche – Suisse» à la page 234.
Vous trouverez les coordonnées de votre revendeur Heidolph local sous www.heidolph.com Déclaration de garantie Heidolph Instruments accorde une garantie de trois ans sur les vices de matériau et de fabrication. Les pièces en verre et d’usure, les dommages survenus lors du transport ainsi que les dommages dus à...
Zertifikate – Certifications EU-Einbauerklärung EU-Einbauerklärung Automatikmodul – Distimatic Wir, die Heidolph Instruments GmbH & Co. KG, Heidolph Instruments GmbH & Co. KG Walpersdorfer Straße 12 91126 Schwabach / Deutschland erklären, dass nachstehend bezeichnete Geräte in Konzeption und Bauart sowie in der von uns in Verkehr gebrachten Ausführung den grundlegenden Anforderungen der...
Seite 237
Zertifikate– Certifications EU Declaration of Incorporation EU-Declaration of Incorporation Automatic Module – Distimatic We, Heidolph Instruments GmbH & Co. KG, Heidolph Instruments GmbH & Co. KG Walpersdorfer Straße 12 91126 Schwabach / Deutschland hereby declare, that the product designated below is in compliance with the basic requirements of all applicable EU-directives stated below with regard to design, type of model sold and manufactured by us.
Seite 238
UK Authorised Representative (for authorities only): ProductIP ( UK ) Ltd. 8. Northumberland Av. London WC2N 5BY Signed for and on behalf of Heidolph Instruments GmbH & Co. KG Walpersdorfer Straße 12, 91126 Schwabach / Germany Schwabach, 17.08.2021 Jörg Ziel...
Seite 239
Zertifikate– Certifications RoHS-Konformitätserklärung - RoHS Declaration of Conformity...
Seite 240
China RoHS DECLARATION OF CONFORMITY Heidolph Instruments GmbH & Co.KG has made reasonable efforts to ensure that hazardous materials and substances may not be used in its products In order to determine the concentration of hazardous substances in all homogeneous materials of the subassemblies, a “Product Conformity Assessment”...
Seite 241
(Pb), mercury (Hg), cadmium (Cd), hexavalent chromium (CrVI), polybrominated biphenyls (PBB), and polybrominated diphenyl ethers (PBDE). Products manufactured by Heidolph Instruments GmbH & Co.KG may enter into further devices or can be used together with other appliances .