Inhaltsverzeichnis
Werbung
Quicklinks
4 4 0 0 S S L L i i
4 4 0 0 S S L L i i
I I N N T T E E N N S S I I V V E E
4 4 0 0 S S L L i i
H H I I G G H H I I N N T T E E N N S S I I V V E E
10661 /r07
4 4 0 0 X X L L c c
4 4 0 0 X X L L c c
I I N N T T E E N N S S I I V V E E
4 4 0 0 X X L L c c
H H I I G G H H I I N N T T E E N N S S I I V V E E
O O w w n n e e r r ' ' s s m m a a n n u u a a l l
A A n n l l e e i i t t u u n n g g
H H a a n n d d l l e e i i d d i i n n g g
M M o o d d e e d d ' ' e e m m p p l l o o i i
I I n n s s t t r r u u z z i i o o n n i i p p e e r r l l ' ' u u s s o o
M M o o d d o o d d e e e e m m p p l l e e o o
Werbung
Inhaltsverzeichnis

Verwandte Anleitungen für HAPRO lumina E


Inhaltszusammenfassung für HAPRO lumina E
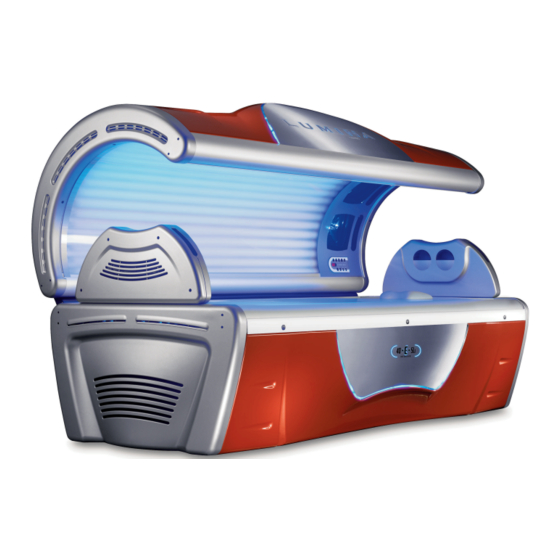
- Seite 1 O O w w n n e e r r ’ ’ s s m m a a n n u u a a l l A A n n l l e e i i t t u u n n g g 4 4 0 0 S S L L i i 4 4 0 0 X X L L c c H H a a n n d d l l e e i i d d i i n n g g...
- Seite 2 Warning Attention Before obtaining access to terminals, all supply circuits Débranchez l'appareil avant de procéder à son entretien must be disconnected Achtung Attenzione Vor allen Wartungsarbeiten, das Gerät vom Netz trennen Prima della manutenzione, scollegare l'apparecchio dalla corrente Let op Atención Alvorens onderhoud te plegen, het toestel spanningsvrij Antes de realizar el mantenimiento, desconecte el aparato...
-
Seite 3: Inhaltsverzeichnis
Contents Inhalt Inhoud Table des matières Indice Contenido Warranty policy Garantiebepalingen Garantie Polizza di garanzia Póliza de garantía Garantiebestimmungen Read this first Lees dit eerst A lire préalablement Leggere questa sezione prima di Lea esto primero Bitte zuerst lesen cominciare 10 Golden rules for sensible tanning in the 10 Gouden regels voor verstandig 10 règles d’or pour un bronzage... -
Seite 4: Warranty Policy
Lumina Bräunungsgerätes. Danke für das Lumina bruiningsapparaat, en dank voor het de votre unité de bronzage Lumina et vous nità abbronzante Lumina e vi ringraziamo bronceado Lumina y agradecemos la confian- you for placing your trust in us. Vertrauen das Sie Hapro, als Hersteller dieses vertrouwen dat u in ons hebt gesteld. - Seite 5 • Daños debidos a la instalación, reparación assembly not done by Hapro authorised von einem durch Hapro nicht anerkannten latie en montage door een niet door Hapro réparation ou un assemblage n'ayant pas montaggio non eseguiti da personale o montaje que no haya sido efectuado por personnel.
-
Seite 6: Read This First
Read this first Bitte zuerst lesen 1 Contact your authorised Hapro dealer 9 This unit may not be operated if: 16 The UV-type of the tanning unit is indica- 1 Falls Sie Beanstandungen an Ihrem Gerät 9 Das Gerät darf nicht betrieben werden,... - Seite 7 15 Nettoyez les filtres à poussière toutes les neemt u dan contact op met uw dealer. indien: Controleer de stoffilters regelmatig. revendeur agréé Hapro si l'unité ne fonc- contact avec des objets tranchants. 50 heures d’utilisation. Vérifier réulière- • tde gebruiker geen beschermende UV-bril tionne pas tel que décrit dans ce manuel.
- Seite 8 Hapro, qualora questa unità venga a contatto con oggetti acuminati. 16 Il tipo di UV del vostro apparecchio or autorizado de Hapro en caso de que esta • el usuario no lleva unas gafas protectoras escrito en la ilustración del tipo.
-
Seite 9: Golden Rules For Sensible Tanning In The
10 Golden rules for sensible tanning 10 Goldene Regeln für verantwortungsvolles Sonnen mit einem Bräunungsgerät These rules are in accordance with the • Chlorothiazide - in diuretics 8 If the skin is red and taut a short time after Informationen entsprechend der europäischen Mitteln nation mit ultraviolettem Licht kann durch European regulations concerning safe use... -
Seite 10: Gouden Regels Voor Verstandig
10 Gouden regels voor verstandig zonnen in een bruiningsapparaat 10 Règles d'or pour un bronzage raisonnable De ondergenoemde punten bevatten informa- tegen suikerziekte 8 Als de huid enige tijd na het zonnebad rood Ces règles sont en accord avec les règlements dont les antibiotiques bronzage. -
Seite 11: Regole D'oro Per Un'abbronzatura
10 regole d'oro per un'abbronzatura consapevole 10 reglas de oro para un bronceado acertado. Queste regole sono conformi alla normativa • Clorotiazide - nei diuretici 8 Se qualche tempo dopo la seduta abbron- Estas normas se ajustan a las Regulaciones •... -
Seite 12: Tanning Tables
B B r r ä ä u u n n u u n n g g s s t t a a b b e e l l l l e e n n B B r r u u i i n n i i n n g g s s t t a a b b e e l l l l e e n n T T a a n n n n i i n n g g t t a a b b l l e e s s T T a a b b l l e e s s d d e e b b r r o o n n z z a a g g e e L L e e t t t t i i n n i i a a b b b b r r o o n n z z a a n n t t i i... -
Seite 13: Users Instructions
Users Instructions Control display Buttons: c: Start h: Face/ /body i: Led display step3: wait for 15 seconds after setting the a head fan - 1 Starts the tanning unit in stand-alone 1 For switching the outermost face tanners 1 Control panel display. tanning time b head fan + mode (also quick start at external timer... - Seite 14 Benutzer Anleitung Bedienungsfeld Tasten: c: Start h: Face/Body i: LED-Fenstern Achtung: Gelangt ein externer Zeitgeber oder a Kopflüfter - 1 Einschalten des Bräunungsgerätes im 1 Ein- und ausschalten der äußeren 1 Display des Bedienungspanels. ein Münzautomat zum Einsatz, b Kopflüfter+ stand-alone Modus (und fernstart in Gesichtsbräuner oder der Soft-lampen im stellt man die Stand-Alone-Zeit auf...
- Seite 15 Gebruikers instructies Bedieningsdisplay Knoppen: c: Start h: Face/ /body i: Led-venster stap3: na het instellen van de bruiningstijd, a head fan - 1 Het starten van het bruiningsapparaat, in 1 Aan- en uitzetten van de buitenste 1 Display van het bedieningspaneel. 15 seconden wachten b head fan + stand-alone modus (en snelstart bij exter-...
-
Seite 16: Instructions Aux Utilisateurs
Instructions aux utilisateurs Console d'affichage de commandes Boutons : 2 Augmenter la durée du bronzage en h: Face / body i: Écran led étape3:Attendez 15 secondes après avoir a ventilateur tête - mode autonome (voir "k"). 1 Allumer et éteindre le bronzeur extérieur 1 Écran du panneau de commande. - Seite 17 Istruzioni per l’uso Display dei comandi Pulsanti: 2 Aumentare il tempo di stand-alone h. Lampade abbronzanti esterne del viso * Se la lampada ”lampade abbronzanti * ”ventola testa +” per allungare il Dopo ogni seduta di abbronzatura è pre- a ventola testa - (vedi ”k”).
-
Seite 18: Instrucciones Para Los Usuarios
Instrucciones para los usuarios Display de mandos Botones: 2 Aumentar el tiempo de funcionamiento h: Bronceador facial exterior * En caso de que se apriete el botón de paso2:ajustar el tiempo de bronceado en la máquina se encuentra en el modo de a ventilador para la cabeza - independiente (véase ”k”). - Seite 19 Disassembling/ cleaning Ausbau/ reinigung der Demonteren/ reiningen Démontage/ nettoyez de la Smontare/ pulizia la El desmontaje/ limpiar the bench acrylic sheet Bankscheibe van de acrylplaat van de plaque acrylique du banc lastra in materiale acrilico de la placa acrílica del bank dal lettino banco...
- Seite 20 Assembling the bench Einbau der Bankscheibe Monteren van de Montage de la plaque Montare la lastra in mate- El montaje de la placa acrylic sheet acrylplaat van de bank acrylique du banc riale acrilico sul lettino acrílica del banco 1,2 Place the back of the acrylic sheet on 1,2 Die Rückseite der Acrylscheibe auf 1,2Plaats de achterzijde van de acryl- 1,2Placez l'arrière de la plaque acryli-...
- Seite 21 Disassembling/ cleaning Ausbau/ reinigung der Demonteren/ reinigen van Démontage/ nettoyez la Smontare/ puliza la lastra in El desmontaje/ limpiar de the acrylic sheet from the Himmelscheibe de acrylplaat van de hemel plaque acrylique du toit materiale acrilico dalla parte la placa acrílica del cielo upper part superiore 1.
-
Seite 22: Monteren Van De Acrylplaat
Assembling the acrylic Einbau der Himmelscheibe Monteren van de acrylplaat Montage de la plaque Montare la lastra in mate El montaje de la placa sheet to the upper part van de hemel acrylique du toit riale acrilico sulla parte acrílica del cielo superiore 1. -
Seite 23: Verwisselen Van De Stoffilters
Replacing the dust filters Verwisselen van de Die Staubfilter auswech Changez les filtres à pous Sostituzione dei filtri anti Cambiar los filtros antipol- stoffilters seln sière polvere 1. Push the holder out of the ventilator box. 1. Schieben Sie den Filterhalter aus der 1. -
Seite 24: Technical Data
Technical data Technische Daten Technische gegevens Données techniques Dati techniques Ficha técnica 40 SLi 40 XLc Voltage (Fuse) Wattage (kW) Voltage (Fuse) Wattage (kW) 400V/3~N/50Hz 3x16 A 6,81 400V/3~N/50Hz 3x16 A 5,36 230V/3~/50Hz 3x16 A 230V/3~/50Hz 3x16 A 230V/2~/50Hz 1x32 A 230V/2~/50Hz 1x32 A For UK only! -
Seite 25: Line-Up / Dimensions
L L i i n n e e - - u u p p / / D D i i m m e e n n s s i i o o n n s s A A b b m m e e s s s s u u n n g g e e n n / / A A u u f f s s t t e e l l l l u u n n g g A A f f m m e e t t i i n n g g e e n n / / O O p p s s t t e e l l l l i i n n g g A A l l i i g g n n e e m m e e n n t t / / D D i i m m e e n n s s i i o o n n s s A A l l l l i i n n e e a a m m e e n n t t o o / / D D i i m m e e n n s s i i o o n n i i... -
Seite 26: Assembly Tanning Unit
Assembly Montage Montage Assemblage Assemblaggio Montaje 50 cm Caution: The machine is supplied Achtung: Das Gerät wird abriks- Let op: het apparaat wordt af Attention: l'appareil est livré d'u- Attenzione: l'apparecchio è pre- Atención: el aparato se entrega de by the factory operating at 400 seitig für einen Stromanschluß... -
Seite 27: Montaje De La Unidad De Bronceado
Assembly Montage Montage Assemblage Assemblaggio Montaje 4. Mount the fan exit on the blower 4. Befestigen Sie die Gebläsehaube 4. Monteer de blowerkap op de 4. Montez la sortie ventilation sur 4. Montare la bocca di ventilazione 4. Monte la campana del soplador using 4 screws 4.2x13. - Seite 28 Assembly Montage Montage Assemblage Assemblaggio Montaje 7. Slide the ballast plates between the 7. Die VSA-Platten zwischen die 7. Schuif de V.S.A. platen tussen de 7. Faites glisser les plaques de l’appareil 7. Fare scorrere i pannelli ballast fra i 7.
- Seite 29 Assembly Montage Montage Assemblage Assemblaggio Montaje inside unit outside unit 10,11. Mount the plastic back plate, star- 10, 11.Die Kunststoff-Rückplatte befesti- 10,11. Monteer de kunststof achterplaat, in 10,11. Monter la plaque arrière en plasti- 10,11. Montare il pannello posteriore in 10,11.
- Seite 30 Assembly Montage Montage Assemblage Assemblaggio Montaje 13.Screw the cover plate to the end 13.Die Abdeckplatte mit 4 13. Schroef de afdekplaat op de ein- 13. Vissez la plaque de recouvre- 13.Fissare il pannello di copertu 13. Sujete la placa de cubierta a la cover with 4 4.8x25 screws.
- Seite 31 Assembly Montage Montage Assemblage Assemblaggio Montaje switch wire remote start remote start 19.Attach the mains lead plate to 19. Die Netzkabelplatte mit 4 19.Monteer de netsnoerplaat op de 19.Montez la plaque du câble d'ali- 19. Montare il pannello del cavo di 19.Sujete la placa del cable de red the rear plate with 4 4.2x13 Schrauben 4,2x13) an der...
- Seite 32 Assembly Montage Montage Assemblage Assemblaggio Montaje 16.Screw the blower tray to the end 16.Den Gebläsekasten mit 5 16. Schroeft u de blowerbak op de 16. Vissez le bac du ventilateur sur 16. Avvitare la scatola del soffiatore 16. Coloque la caja del soplador cover with 5 4.8x25 screws (see Schrauben 4,8x25 (siehe ‘a’) an eindkap, met 5 schroeven 4.8x25...
- Seite 33 Assembly Montage Montage Assemblage Assemblaggio Montaje PE N3 N 2 N1 14 13 12 11 N 1N 1N 2 22. Attach the decoration shield to 22. Das Decor-Schild mit 6 22.Monteer het decoration shield op 22.Montez le bouclier de décoration 22.
- Seite 34 Assembly tanning unit Montage Montage Assemblage de l'unité Assemblaggio dello Montaje de los de bronzage spogliatoio cambiadores 25.Attach the mains cable plate to 25. Die Netzkabelplatte auf der 25. Monteer de kabelplaat op de 25. Installez la plaque du cordon 25.
-
Seite 35: Assembly Tanning Unit
Assembly tanning unit Montage Montage Assemblage de l'unité Assemblaggio dello Montaje de los de bronzage spogliatoio cambiadores 28. Lift up the canopy. Attach the 28. Den Himmel hochstellen. Das 28.Zet de hemel omhoog. Monteer 28. Relevez le ciel. Montez le venti- 28. - Seite 36 Assembly tanning unit Montage Montage Assemblage de l'unité Assemblaggio dello Montaje de los de bronzage spogliatoio cambiadores Footblower Headblower 31.Connect the head and foot blo- 31. Die Kopf- und Fußgebläse elek- 31. Sluit de hoofd- en voetblowers 31. Effectuer la connexion électrique 31.
-
Seite 37: Electrical Diagrams
Assembly tanning unit Montage Montage Assemblage de l'unité Assemblaggio dello Montaje de los de bronzage spogliatoio cambiadores 34. Connect the front plate cabling to 34. Schließen Sie das Kabel der 34.Sluit de kabel van het voorpa- 34.Raccordez le câblage du plaque 34. -
Seite 38: Diagrama Eléctricas
Electrical diagrams Schaltpläne Electrische schema´s Schéma électrique Diagramma elettrico Diagrama eléctricas Ballast nr. Ballast nr. Ballast nr. Ballast nr. HF ballast Level 1 Level 2 Level 3 Level 2 X20v X26v X25v X23v X20m X26m X25m X23m Tube nr. Light effect 18W Snap-on Snap-on Snap-on... - Seite 39 Electrical diagrams Schaltpläne Electrische schema´s Schéma électrique Diagramma elettrico Diagrama eléctricas X14v X14m HF ballast Ballast nr. Ballast nr. Ballast nr. Level 3 Level 4 Level 4 X22v X24v X21v X21v X22m X24m X21m X21m Tube nr. Tube nr. Light effect 18W Snap-on Snap-on Snap-on...
- Seite 40 Electrical diagrams Schaltpläne Electrische schema´s Schéma électrique Diagramma elettrico Diagrama eléctricas facials & capacitors 10370 r03...
- Seite 41 E E l l e e c c t t r r i i c c a a l l d d i i a a g g r r a a m m s s S S c c h h a a l l t t p p l l ä ä n n e e E E l l e e c c t t r r i i s s c c h h e e s s c c h h e e m m a a ´...
- Seite 42 Electrical diagrams Schaltpläne Electrische schema´s Schéma électrique Diagramma elettrico Diagrama eléctricas Control 2 10597 r02...
- Seite 43 C C o o n n v v e e r r s s i i o o n n o o f f v v o o l l t t a a g g e e s s U U m m s s c c h h a a l l t t p p l l a a n n f f ü...
- Seite 44 B B 1 1 , , … … ( ( n n r r ) ) Spanning op apparaat , display geeft software versie weer van de display print Power on unit, display shows software version of the display print Spannung auf Gerat, bedienung gibt software version von die Anzeige-platine S S 1 1 , , …...
- Seite 45 Spare parts Ersatzteilkatalog 1: Canopy Oberteil 2: Bench Bank 3: Electric components Elektrische Komponenten 4: Miscellaneous parts Ersatzteile Spare parts Ersatzteilkatalog Lumina E 10662/versie 04...
-
Seite 46: Spare Parts / Ersatzteilkatalog Lumina E
Lamp light effect Lampe Lichteffekt 10605 Insert part canopy Einsetzteil Oberteil 11906 Sticker "Lumina" Aufkleber "Lumina" 11835 Sticker "by hapro" Aufkleber "by hapro" 11852 Control display Bedienungsfeld 13305 Grid acrylic sheet Giiter Acrylglasscheibe 09804 Spare parts / Ersatzteilkatalog Lumina E 10662/versie 04... - Seite 47 Base front panel meteor black Frontblende Unterteil meteor black 10714 Base front panel warm silver Frontblende Unterteil warm silver 10303 Insert part bench Einsetzteil Unterteil 11910 Dustfilter Stoffilter 09818 Filterholder Filterhalter 10818 Spare parts / Ersatzteilkatalog Lumina E 10662/versie 04...
-
Seite 48: Elektrische Komponenten
Connectionblock lamps Umbausatz Röhren 10279 Ballast 160 W VSG 160 W 07565 Ventilator 10395 Ballast 100 W VSG 100 W 01612 Air flow switch Windschalter 07298/07299 Ballast 400 W VSG 400 W 10280 Spare parts / Ersatzteilkatalog Lumina E 10662/versie 04... -
Seite 49: Ersatzteile
Type sticker Pillow silver Tool Set fixing materials Fixingset end caps Verschlusschraube Griff Schnellverschluss Lumina E Kissen silber Werkzeug Befestigungset Kappen Set Befestigungsmaterial Lumina E 10879 11273 09583 08796 09552 10670 09466 Spare parts / Ersatzteilkatalog Lumina E 10662/versie 04...