Garbin PICCOLO Betriebs- Und Wartungsanleitung
Heissluftofen
Inhaltsverzeichnis
Verfügbare Sprachen
Verfügbare Sprachen
Quicklinks
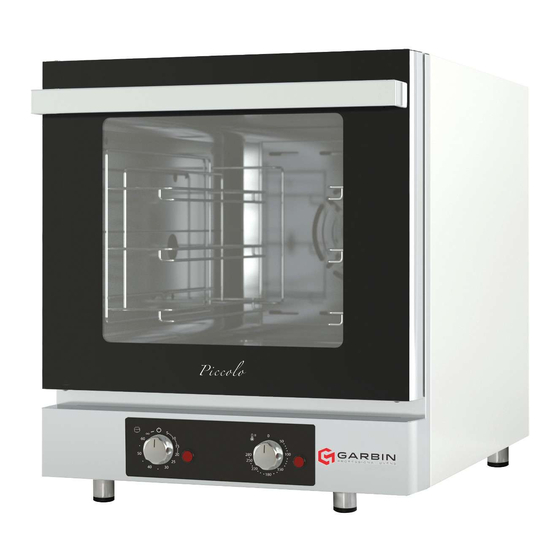
PICCOLO
BRAVO
FORNI A CONVEZIONE ELETTRICI
ELECTRIC CONVECTION OVENS
FOURS À CONVECTION ÉLECTRIQUES
ELEKTRISCHE HEISSLLUFTÖFEN
HORNOS A CONVECCIÓN ELÉCTRICA
DELIZIOSO
SUPERIORE
Leggere attentamente le seguenti istruzioni prima di installare ed avviare le apparecchiature.
Carefully read the following instructions before installing and starting the equipment.
i
Lire attentivement les instructions suivantes avant d'installer et de démarrer les appareillages.
Bitte lesen Sie die folgenden Hinweise vor der Installation und Inbetriebnahme der Backöfen.
Leer atentamente las siguientes instrucciones antes de instalar y poner en marcha el equipo.
G STARTER
ISTRUZIONI PER L'INSTALLAZIONE,
L'USO E LA MANUTENZIONE
INSTRUCTIONS FOR THE INSTALLATION,
USE AND MAINTENANCE
INSTRUCTIONS POUR L'INSTALLATION,
L'EMPLOI ET LA MAINTENANCE
BETRIEBS- UND
WARTUNGSANLEITUNG
INSTRUCCIONES PARA LA INSTALACIÓN,
EMPLEO Y MANUTENCIÓN
IT
EN
FR
DE
ES
Inhaltsverzeichnis

Verwandte Anleitungen für Garbin PICCOLO

Inhaltszusammenfassung für Garbin PICCOLO
- Seite 1 ELEKTRISCHE HEISSLLUFTÖFEN HORNOS A CONVECCIÓN ELÉCTRICA ISTRUZIONI PER L’INSTALLAZIONE, L’USO E LA MANUTENZIONE INSTRUCTIONS FOR THE INSTALLATION, USE AND MAINTENANCE INSTRUCTIONS POUR L’INSTALLATION, L’EMPLOI ET LA MAINTENANCE PICCOLO BRAVO DELIZIOSO SUPERIORE BETRIEBS- UND WARTUNGSANLEITUNG INSTRUCCIONES PARA LA INSTALACIÓN, EMPLEO Y MANUTENCIÓN Leggere attentamente le seguenti istruzioni prima di installare ed avviare le apparecchiature.
-
Seite 69: Inhaltsverzeichnis
1 - INHALTSVERZEICHNIS 1 - Einführung 4.2 Manueller Garbetrieb 4.2.1 Einstellen eines Temperaturwerts 1.1 Gebrauchsleitfaden 4.2.2 Einstellen eines Gar-/Backwerts 1.2 Allgemeine Informationen 4.2.3 Manuelle Beschwadung während des Garens/Backens 1.3 Technische Daten 4.2.4 Durchführung eines manuellen Gar-/Backprogramms 1.4 Handling, Transport und Abladen 4.3 Betrieb mit Programmen 1.5 Übereinstimmung mit Normen und Richtlinien 4.3.1 Speicherung eines neuen Programms... -
Seite 70: Einführung
1 - EINFÜHRUNG 1.1 Gebrauchsleitfaden Wir danken Ihnen für Ihr Vertrauen, das Sie mit dem Kauf eines un- serer Produkte bewiesen haben und wir empfehlen Ihnen vor der Inbetriebnahme des Backofens diese Bedienungsanleitung sorgfältig Legen Sie besonderes Augenmerk auf Texte, die fett, in GROSSBUCH- durchzulesen. - Seite 71 1 - EINFÜHRUNG • Die Installation und/oder Reparatur oder Einstellungen, die später • Fordern Sie beim Hersteller die Bedienungsanleitung für die ordnung- erforderlich sein können, müssen mit größter Sorgfalt und Aufmer- sgemäße Verwendung eines Wasserenthärters / Wasserweichmachers ksamkeit von qualifiziertem Personal durchgeführt werden. an.
-
Seite 72: Technische Daten
1.3 Technische Daten Das gelieferte Material wird vor der Au- slieferung an den Kurier sorgfältig über- prüft. Bei der Anlieferung des Geräts Ofenmodell PICCOLO BRAVO DELIZIOSO SUPERIORE stellen Sie bitte sicher, dass es während Abmessungen HXTXB 550 x 600 x 640 mm 640 x 600 x 640 mm 540 x 720 x 780 mm 650 x 720 x 780 mm des Transports nicht beschädigt oder... -
Seite 73: Installation Und Wartung
2 - HINWEISE ZUR INSTALLATION UND WARTUNG 2.1 Ort der Installation und Positionierung 2.2 Anschluss von Elektrik und Wasser Verbindung mit dem Stromnetz HINWEIS Der Anschluss an das Stromnetz muss nach den aktuellen internationa- Die Installation sowie die normale und außerordentliche War- len, nationalen und lokalen Standards erfolgen. -
Seite 74: Sicherheitsvorrichtungen
2 - HINWEISE ZUR INSTALLATION UND WARTUNG Wasseranschluss Dieser Schalter muss in der dauerhaften elektrischen Anlage der lo- kalen Installation und in der unmittelbaren Umgebung des Geräts mit einfachem Zugang für die Betreiber installiert werden. Die Wasserleitung (X- Abb. 4) an den 3/4” Anschluss des Geräts an- Für die Dimensionierung der Stromleitung, des Generalschutzschal- schließen. -
Seite 75: Analyse Einiger Fehler
2 - HINWEISE ZUR INSTALLATION UND WARTUNG 2.4 - Analyse einiger Fehler Art des Fehlers Mögliche Ursache • Das Thermostat funktioniert nicht richtig. • Maßnahme beim, falls vorhanden, Sicherheitsthermostat (F1). Abb. 4 • Regulierthermostat ist defekt. Die Heizung des Garraums ist •... -
Seite 76: Austausch Bestimmter Komponenten
2 - HINWEISE ZUR INSTALLATION UND WARTUNG 2.5 Austausch bestimmter Komponenten Ofengebläse Die Rückseite des Ofens im Garraum, die Laufschienen und die Gebläsehaube HINWEIS! entfernen. Die Zentralmutter, möglicherweise auch die seitlichen Schrauben Der Austausch von Komponenten und ihre Einstellung sind au- auf der Motorwelle lösen. -
Seite 77: Bedienung
3 - BEDIENUNG 3.1 Vorbemerkungen Achten Sie darauf und benutzen Sie gegebenenfalls Handschuhe. • Das Gerät ist für den professionellen Einsatz konzipiert und sollte von geschultem Personal verwendet werden. Abb. 8 • Das Gerät ist ausschließlich zum Garen und Backen von Speisen zu ver- wenden, jede andere Verwendung gilt als nicht bestimmungsgemäß. -
Seite 78: Einstellen Der Gartemperatur
3 - BEDIENUNG Einstellen der Gartemperatur wasser oder entsprechenden Reinigungsmitteln, spülen gründlich nach und trocken sie gut. Verwenden Sie keine Reinigungsmittel mit Mit dem Regler (M2) können Sie die gewünschte Gartemperatur ein- Chlor (Bleichmittel, Salzsäure, etc.) und vermeiden Sie die Reinigung stellen. -
Seite 79: Tipps Zum Garen
3 - BEDIENUNG 3.4 - Tipps zum Garen Die folgende Tabelle zeigt die wichtigsten Angaben für das Garen einiger Gerichte. Die Garzeiten in dieser Tabelle sind nur Richtzeiten. Speisen °C Minuten Gewicht (Kg) Speisen °C Minuten Gewicht (Kg) Primi piatti Fisch 160-180 Lasagne aus dem... -
Seite 80: Programmierung Des Digitalen Ofens
4 - PROGRAMMIERUNG DES DIGITALEN OFENS 4.1 - Schnittstelle Benutzer 4.1.1 - Tastenfunktionen °C °F START STOP 1) Taste ON/OFF 6) Taste DAMPF Im Programmiermodus kann das Niveau des Direktdampfs eingestellt Zum Bedienen der Tasten ON oder OFF genügt ein einfacher Tasten- druck. -
Seite 81: Displaysymbole
4 - PROGRAMMIERUNG DES DIGITALEN OFENS 4.1.2 - Displaysymbole 13) Symbol FEUCHTIGKEIT - Drückt man im MANUELLEN Modus die Taste Beschwadung, so leuchtet diese rot auf, bis die Taste wieder losgelassen wird. Wenn beim Garen/ Backen mit Gar-/Backprogrammen ein Feuchtigkeitswert (20, 40 usw.) ausgewählt ist, dann blinkt dieser (0.5 on, 0.5 off ) in der Zeit, in der das °C Magnetventil inaktiv (off ) ist rot. -
Seite 82: Werte Im Display
4 - PROGRAMMIERUNG DES DIGITALEN OFENS 4.1.3 Werte im Display 18) Display ZEIT / LUFTFEUCHTIGKEIT Bei eingeschaltetem Symbol ZEIT wird die eingestellte Dauer und die verbleibende Garzeit angezeigt. °C Bei eingeschaltetem Symbol FEUCHTIGKEIT wird der Wert der FEUCHTI- °F GKEIT während des Garen angezeigt. Bei ausgeschaltetem Symbol ZEIT UND LUFTFEUCHTIGKEIT wird der AlarmArt.-Nr. -
Seite 83: Einstellen Eines Temperaturwerts
4 - PROGRAMMIERUNG DES DIGITALEN OFENS 4.2 MANUELLER GAR-/BACKBETRIEB Ein Timeout von fünf Sekunden oder das Drücken der Taste P3 (ZEIT) bestätigt die Einstellung und das Display zeigt wieder die momentane Temperatur im Gar-/Backraum (Symbol TEMPERATUR blinkt) an. Wenn sich der Backofen im OFF Modus befindet zeigt das Display GAR-/ Nach Bestätigung der Daten werden die Werte im Display dauerhaft BACKRAUM OFF an, alles andere ist ausgeschaltet. -
Seite 84: Manuelle Beschwadung Während Des Garens/Backens
4 - PROGRAMMIERUNG DES DIGITALEN OFENS 4.2.3 Manuelle Beschwadung während des Garens/Ba- Während des Garens/Backens: ckens Das Display GAR-/BACKRAUM zeigt 4 Sekunden lang die eingestellte Temperatur (Symbol TEMPERATUR leuchtet) und 4 Sekunden lang die Beim Garen/Backen im manuellen Modus, aktiviert das anhaltende momentane Temperatur im Gar-/Backraum (von der Sonde erhobe- Drücken der Taste FEUCHTIGKEIT die manuelle Beschwadung für die ner Wert, Symbol TEMPERATUR blinkt) an. -
Seite 85: Betrieb Mit Programmen
4 - PROGRAMMIERUNG DES DIGITALEN OFENS Temperatur fort, alternativ kann durch Drücken der Taste START/STOPP Hält man Taste WERT VERRINGERN anhaltend gedrückt, so erscheinen der Signalton abgeschaltet werden und das Display kehrt zur norma- alle darunter liegende Programme im Schnelldurchgang bis zum Ende len Anzeige zurück: Das Display GARRAUM zeigt den Wert der mo- MAN. -
Seite 86: Einstellen Eines Temperaturwerts
4 - PROGRAMMIERUNG DES DIGITALEN OFENS 4.3.4 Einstellung des Dampfwertes ACHTUNG! - Durch einfaches Drücken der Taste REZEPTE wird der Program- Drückt man im Programmiermodus die Taste Dampf kann für jede miermodus verlassen und das Programm kehrt zum MANUEL- Phase das Feuchtigkeitsniveau im Gar-/Backraum eingestellt werden LEN Modus zurück. -
Seite 87: Gar-/Backphasen Eines Programms
4 - PROGRAMMIERUNG DES DIGITALEN OFENS Im Falle eines Rotationswechsels des Gebläses/Reversmotors wird die - Durch einmaliges Drücken der Taste REZEPTE gelangt man in den Beschwadung vorübergehend unterbrochen, die dann, wenn beide Programmiermodus. Im Display GARRAUM/PROGRAMME (Symbol Tasten noch gedrückt sind, fortgesetzt wird. PROGRAMMINHALTE leuchtet) erscheint ‘‘P1’’... -
Seite 88: Automatisches Vorheizen
4 - PROGRAMMIERUNG DES DIGITALEN OFENS 4.4 Automatisches Vorheizen 4.5 Verschiedene Tastenfunktionen 4.5.1 Backofentür Das Gerät heizt nur dann automatisch vor, wenn unter den gespei- cherten Programmen welche aufgerufen werden. Unter Vorheizen ist das Erwärmen des Backofens auf eine Temperatur mit 30 °C über Beim Öffnen der Tür wird ein Unterbrecher aktiv, der den Backofen in der eingestellten Temperatur in der Programmphase zu verstehen. -
Seite 89: Meldungen Und Alarm
4 - PROGRAMMIERUNG DES DIGITALEN OFENS 4.6 Meldungen und Alarm 4.7 Stromausfall Die Alarmzeichen erscheinen auf dem Display ZEIT/ FEUCHTIGKEIT, Wenn während eines Gar-/Backvorgangs kein Strom vorhanden ist während alles andere ausgeschaltet ist. versetzt sich der Backofen in den OFF Modus. Ein Signalton (Summer) ertönt, um eine Störung zu melden.