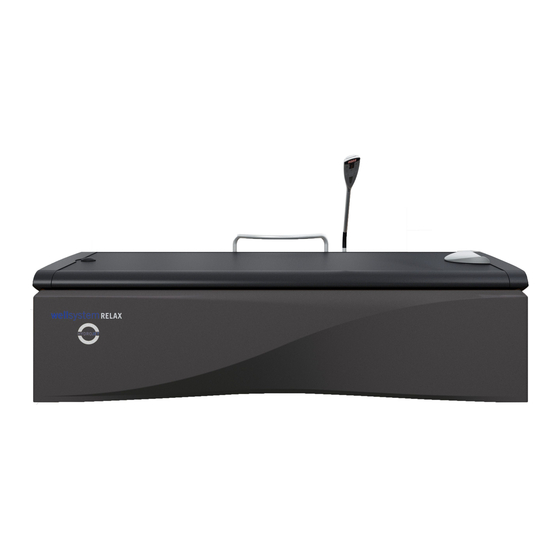
Wellsystem Relax Montageanweisung
Vorschau ausblenden
Andere Handbücher für Relax:
- Gebrauchsanweisung (96 Seiten) ,
- Fehlercodes (44 Seiten) ,
- Montageanweisung (50 Seiten)
Inhaltsverzeichnis
Verfügbare Sprachen
Verfügbare Sprachen
Quicklinks
Kapitel
Inhaltsverzeichnis

Verwandte Anleitungen für Wellsystem Relax


Inhaltszusammenfassung für Wellsystem Relax
- Seite 3 Montageanweisung Ausgabedatum 27.10.2017 1009892-04 / de / 10.2017...
- Seite 4 Fax: +49 (0) 22 24 / 818-205 E-Mail: service@jk-globalservice.de HINWEIS: Wenn nicht ausdrücklich zwischen wellsystem MEDICAL / MEDICAL_PLUS und wellsystem RELAX / RELAX_PLUS unter- schieden wird, gelten die Abbildungen und Texte für alle Geräte, auch wenn jeweils nur eines dargestellt ist. HINWEIS: Gegenüber Darstellungen und Angaben dieser Montageanwei-...
-
Seite 5: Inhaltsverzeichnis
Allgemeines Inhaltsverzeichnis 1 Allgemeines ................... 5 1.1 Symbolerklärung ................5 2 Sicherheitshinweise für die Demontage und Montage ....6 3 Informationen für das Service-Personal ........8 3.1 Transport und Transportschäden ............ 8 3.2 Aufstellort ..................9 3.3 Elektroanschluss ................11 3.4 ... - Seite 6 Kühlung anschließen ..............48 6.10 Rahmen montieren ................ 49 6.11 Griff montieren ................50 6.12 Bedienteil montieren (wellsystem RELAX / RELAX_PLUS) ..........51 6.13 Bedienteil montieren (wellsystem MEDICAL / MEDICAL_PLUS) ........52 6.14 Verkleidung anbringen ..............54 7 Technische Daten ................ 57 ...
-
Seite 7: Allgemeines
Allgemeines Allgemeines Symbolerklärung Folgende Arten von Sicherheitshinweisen werden in der vorliegenden Montageanweisung verwendet: GEFAHR! Art und Quelle der Gefahr Dieser Sicherheitshinweis bedeutet, dass unmittelbare Ge- fahr für Leib und Leben besteht. GEFAHR! Art und Quelle der Gefahr Dieser Sicherheitshinweis warnt vor Gefahren für Leib und Leben, die durch Elektrizität verursacht werden. -
Seite 8: Sicherheitshinweise Für Die Demontage Und Montage
Elektrische Spannung im gesamten Gerät! Die Montage und der Elektroanschluss müssen den nationalen Vorschriften entsprechen, in Deutschland den VDE-Vorschriften. wellsystem MEDICAL / MEDICAL_PLUS unterliegt be- sonderen Vorsichtsmaßnahmen hinsichtlich der elektro- magnetischen Verträglichkeit und muss gemäß der im Anhang enthaltenen EMV-Hinweise installiert und in Betrieb genommen werden –... - Seite 9 Sicherheitshinweise für die Demontage und Montage GEFAHR! Elektrische Spannung im gesamten Gerät! wellsystem RELAX / RELAX_PLUS: Ziehen Sie zu Beginn der Arbeiten den Netzstecker oder schalten Sie alle spannungsführenden Leitun- gen frei. Elektrische Spannung im gesamten Gerät! – Hochfrequente mobile Kommunikationsanlagen können die Funktion des Gerätes beeinträchtigen.
-
Seite 10: Informationen Für Das Service-Personal
Informationen für das Service-Personal Informationen für das Service-Personal Transport und Transportschäden ACHTUNG! Geräteschäden durch fehlende Transportsicherung! Wenn das Massagegerät mit eingebauter Pumpe transpor- tiert wird, muss die Transportsicherung (1) an der Pumpe montiert sein. Wenn Sie beim Auspacken und Aufstellen des Gerätes Transportschäden feststellen, informieren Sie bitte den Betreiber. -
Seite 11: Aufstellort
Informationen für das Service-Personal Aufstellort ACHTUNG! Überhitzung durch nicht ausreichende Kühlung! Schäden am Gerät sind möglich. – Halten Sie die Mindestabstände zu den Wänden ein. Abmessungen siehe Seite 58. – Luft- Zu- und Abströmbereich zum Gerät nicht ver- ändern, verbauen oder zustellen, keine eigenmäch- tigen Veränderungen am Gerät vornehmen. -
Seite 12: Umgebungsbedingungen
Informationen für das Service-Personal Um den Druck der Stellfüße auf den Fußboden besser zu verteilen, kann das Massagegerät optional auf einer Montageplatte aufgestellt werden. 2150 mm 1000 mm Setzen Sie sich bitte unbedingt vor der Montage mit dem Kundendienst in Verbindung! Umgebungsbedingungen ... -
Seite 13: Elektroanschluss
An jedem Fehlerstromschutzschalter sollte nur ein Massagegerät ange- schlossen werden. wellsystem MEDICAL / MEDICAL_PLUS: Für die Impulsmassage muss eine Netzimpedanz von maximal 0,14 Ohm gewährleistet sein. Die Elektroinstallation ist bauseitig mit einer frei zugänglichen allpoligen Trennvorrichtung (Hauptschalter mit einer eindeutigen Ein-/ Aus- Kennzeichnung, z.B. -
Seite 14: Wasseranschluss
Informationen für das Service-Personal Wasseranschluss Das Massagegerät wird mit normalem Leitungswasser ohne Zusätze gefüllt. Beim Anschluss an das öffentliche Wasserversorgungsnetz sind die jeweili- gen örtlichen Bestimmungen zu beachten. Wasser- und Kühlbedingungen Erlaubter Wasserdruck (Wasserzulauf): 0,8 MPa (8 bar) ... -
Seite 15: Probelauf / Inbetriebnahme
Informationen für das Service-Personal Probelauf / Inbetriebnahme Ausreichend Wasser eingefüllt? Bei einer täglichen Betriebszeit von mehr als 1 Stunde bei maximalem Druck: Kühlung angeschlossen? Heizung angeschlossen? Keine Leckagen an Wanne oder Pumpe? Wenn alle Fragen mit 'Ja' beantwortet wurden, können Sie einen Probelauf durchführen bzw. -
Seite 16: Gerät Spannungsfrei Schalten Und Gegen Wiedereinschalten Sichern
MEDICAL / MEDICAL_PLUS: Bei Wartungsarbeiten, die das Öffnen des Geräts erfor- dern, ist das Gerät spannungsfrei zu schalten. wellsystem RELAX / RELAX _PLUS: Ziehen Sie zu Beginn der Arbeiten den Netzstecker oder schalten Sie alle spannungsführenden Leitungen frei. Nur das Ausschalten des Gerätes ist unzureichend, da an bestimmten Stellen noch Spannung anstehen kann. -
Seite 17: Entsorgung
Informationen für das Service-Personal Entsorgung 3.8.1 Umweltbestimmungen – Entsorgung von Batterien Batterien enthalten Schwermetallverbindungen. Innerhalb der Europäischen Union gilt die nationale Umsetzung der Abfall- rahmenrichtlinie 2008/98/EG. Gemäß dem nationalen Abfallgesetz und ent- sprechend den kommunalen Abfallsatzungen sind Batterien zu entsorgen. 3.8.2 Entsorgung von Betriebswasser Das Massagegerät wird mit normalem Leitungswasser ohne Zusätze gefüllt. -
Seite 18: Hinweise Für Die Demontage Und Montage
Hinweise für die Demontage und Montage Hinweise für die Demontage und Montage Für die Demontage und Montage werden mindestens 2 Monteure benötigt. Werkzeug und Ausrüstung GEFAHR! Durch Hautkontakt können Infektionen übertragen werden! – Schutzhandschuhe tragen, wenn bei Arbeiten an Massagegeräten, die bereits in Betrieb waren, Kontakt mit dem benutzten Wasser möglich ist (z. -
Seite 19: Lieferumfang
Hinweise für die Demontage und Montage Lieferumfang 4.2.1 Mitgeliefertes Zubehör Technische Dokumentation (Ordner mit Gebrauchsanweisung, Broschüren für Fehlercodes und weiteren Unterlagen) Service-Karte 12668-.. Kopfpolster 801091-.. Druckschlauch 90906-.. (10 m, 3/8"); Zulauf: 1,5 MPa (15 bar) Betriebsdruck ... -
Seite 20: Verpackungseinheiten Und Anordnung Der Baugruppen
Hinweise für die Demontage und Montage Verpackungseinheiten und Anordnung der Baugruppen 18/72 1009892-04 10/2017... -
Seite 21: Demontage
Bei Wartungsarbeiten, die das Öffnen des Geräts erfor- dern, ist das Gerät spannungsfrei zu schalten. Siehe Seite 14. wellsystem RELAX / RELAX_PLUS: Ziehen Sie zu Beginn der Arbeiten den Netzstecker oder schalten Sie alle spannungsführenden Leitungen frei. Montage, Aufstellung, Erweiterung, wiederkehrende Prü- fungen oder Instandsetzung des Gerätes dürfen nur... -
Seite 22: Verkleidung Und Rahmen Demontieren
Demontage Verkleidung und Rahmen demontieren – Verpackung entfernen. – Frontblende aus der Halterung lösen. Werkzeug: Kreuzschlitzschraubendreher Nr. 2 – Bedienteil, Griff, Kopfpolster und Schläuche aus dem Gerät nehmen und zur Seite legen. 2 Druckschläuche (90906-.. und 50909-..) 20/72 1009892-04 10/2017... - Seite 23 Demontage – Schlauchschelle lösen und Schlauch abziehen. – Blende an der Rückseite aus der Halterung lösen und mit dem Schlauch zur Seite legen. Werkzeug: Kreuzschlitzschraubendreher Nr. 2 oder Akku-Schrauber mit PHZ-Bit 2 Rahmenblende abnehmen – Schrauben herausdrehen. Werkzeug: Kreuzschlitzschraubendreher Nr. 2 oder Akku-Schrauber mit PHZ-Bit 2 –...
- Seite 24 Demontage Verkleidung abnehmen – 6 Schrauben am Kopfende herausdrehen und Blende abnehmen. – Am Fußende müssen 4 Schrauben herausgedreht werden. Anschließend die Blende seitlich herausziehen. Werkzeug: Kreuzschlitzschraubendreher Nr. 2 oder Akku-Schrauber mit PHZ-Bit 2 – Je 2 Schrauben herausdrehen. Werkzeug: Kreuzschlitzschraubendreher Nr. 2 oder Akku-Schrauber mit PHZ-Bit 2 22/72 1009892-04...
- Seite 25 Demontage – Eingerastete Blenden aus der Schiene herausziehen. Transportsicherung abnehmen – Transportsicherung lösen. Dazu die Schrauben herausdrehen. – Anschließend die Schrauben an Kopf- und Fußende herausdrehen und Blech abnehmen. Werkzeug: Kreuzschlitzschraubendreher Nr. 2 oder Akku-Schrauber mit PHZ-Bit 2 und Innensechskantschlüssel 4 mm –...
-
Seite 26: Steuerung Ausbauen
Demontage Steuerung ausbauen – Stecker ST17 und ST6 ausstecken. – Stecker ST18 und ST20 ausstecken. 24/72 1009892-04 10/2017... - Seite 27 Demontage – Schrauben herausdrehen. Werkzeug: Kreuzschlitzschraubendreher Nr. 2 oder Akku-Schrauber mit PHZ-Bit 2 – Abdeckblech der Steuerbox abnehmen. – Stecker X018-1 und X019-1 ausstecken. – Kabel durch die Öffnung der Steuerbox schieben. 10/2017 Montageanweisung 25/72...
- Seite 28 Demontage – Stecker X01-1, X02-1 und X03-1 ausstecken. – Kabel durch die Öffnungen der Steuerbox schieben. – Zuerst die Schraube [1] in der Mitte herausdrehen. – Anschließend die oberen Schrauben [2] lösen. Werkzeug: Kreuzschlitzschraubendreher Nr. 2 oder Akku-Schrauber mit PHZ-Bit 2 –...
-
Seite 29: Antriebsmotoren Demontieren
Demontage Antriebsmotoren demontieren – Stecker ausstecken. – Kabelbinder lösen. – Muttern abschrauben. Werkzeug: Ratschenschlüssel mit Sechskant-Steckschlüssel 10 mm oder Maulschlüssel SW 10 mm – Antriebsmotoren abnehmen. 10/2017 Montageanweisung 27/72... -
Seite 30: Pumpe Ausbauen
Demontage Pumpe ausbauen – Schlauchschellen an der Pumpe lösen und Schläuche abziehen. – Schrauben herausdrehen. Werkzeug: Ratschenschlüssel mit Sechskant-Steckschlüssel 8 mm und Innensechskantschlüssel 4 mm Wanne ausbauen – Schlauchschelle lösen und Schlauch abziehen. Werkzeug: Ratschenschlüssel mit Sechskant-Steckschlüssel 8 mm oder Maulschlüssel SW 8 mm 28/72 1009892-04... - Seite 31 Demontage – Stecker ausstecken. – Schrauben herausdrehen. Werkzeug: Innensechskantschlüssel 4 mm – Platte mit Antriebsmotor abnehmen. 10/2017 Montageanweisung 29/72...
- Seite 32 Demontage Steckverbindungen zur Heizung lösen – Stecker ausstecken. – Schrauben herausdrehen. Werkzeug: Ratschenschlüssel mit Innensechskantschlüssel 4 mm – Wanne abnehmen. – Gestell von der Transportpalette heben. – Transportpalette entsorgen, siehe Seite 15. 30/72 1009892-04 10/2017...
-
Seite 33: Gestell Demontieren
Demontage Gestell demontieren – Schrauben herausdrehen. Werkzeug: Kreuzschlitzschraubendreher Nr. 2 oder Akku-Schrauber mit PHZ-Bit 2 – Gestell zerlegen. 10/2017 Montageanweisung 31/72... -
Seite 34: Montage
6.10 Rahmen montieren ..............49 6.11 Griff montieren ................50 6.12 Bedienteil montieren (wellsystem RELAX / RELAX_PLUS) ......... 51 6.13 Bedienteil montieren (wellsystem MEDICAL / MEDICAL_PLUS) ......... 52 6.14 Verkleidung anbringen ............... 54 In diesem Kapitel wird die Montage vollständig beschrieben. -
Seite 35: Gestell Montieren
Montage Gestell montieren 13008 / 0 – Optional: Multiplexplatte unter das Gerät legen, siehe Seite 9. – Gestell zusammensetzen. – 16 Schrauben (4,2 x 9,5) festdrehen. Werkzeug: Kreuzschlitzschraubendreher Nr. 2 oder Akku-Schrauber mit PHZ-Bit 2 10/2017 Montageanweisung 33/72... -
Seite 36: Wanne Montieren
Montage Wanne montieren – Wanne aufsetzen. – 24 Schrauben (M6 x 20) einsetzen und festdrehen. Werkzeug: Ratschenschlüssel mit Innensechskantschlüssel 4 mm Steckverbindungen zur Heizung anbringen – Stecker einstecken. 34/72 1009892-04 10/2017... - Seite 37 Montage Antriebsmotor 1 (Wanne) montieren – Platte mit Antriebsmotor am Gerät anbringen. – 4 Schrauben (M6 x 16) einsetzen und festdrehen. Werkzeug: Innensechskantschlüssel 4 mm Buchsen einstecken. – 2-pol. BU13 – 4-pol. BU23 10/2017 Montageanweisung 35/72...
-
Seite 38: Pumpe Einbauen Und Anschließen
Montage – Schlauch ansetzen und Schlauchschelle festdrehen. Werkzeug: Ratschenschlüssel mit Sechskant-Steckschlüssel 8 mm oder Maulschlüssel SW 8 mm Pumpe einbauen und anschließen – Pumpe ansetzen. – 2 Schrauben (M6 x 20) mit Federring und Scheibe einsetzen und festdrehen. – Schläuche ansetzen und Schlauchschellen mit 10 Nm festdrehen. Werkzeug: Ratschenschlüssel mit Sechskant-Steckschlüssel 8 mm, Innensechskantschlüssel 4 mm und Drehmomentschlüssel (15720612) 36/72... -
Seite 39: Steuerung Montieren
Montage Steuerung montieren – Steuerbox in die oberen Schrauben einhängen. – Schrauben festdrehen. – Mittlere Schraube (4,2 x 9,5) einsetzen und festdrehen. Werkzeug: Kreuzschlitzschraubendreher Nr. 2 oder Akku-Schrauber mit PHZ-Bit 2 – Kabel durch die Öffnungen der Steuerbox schieben. – Stecker X01-1, X02-1 und X03-1 einstecken. - Seite 40 Montage – Kabel durch die Öffnung der Steuerbox schieben. – Stecker X018-1 und X019-1 einstecken. – Stecker ST18 und ST20 einstecken. 38/72 1009892-04 10/2017...
-
Seite 41: Massagegerät Ausrichten (Leere Wanne)
Montage – Stecker ST17 und ST6 einstecken. Massagegerät ausrichten (leere Wanne) – Mit einer Wasserwaage prüfen, ob das Gerät waagerecht steht. – Falls es nicht waagerecht steht, Schrauben an den Füßen drehen, bis das Gerät korrekt ausgerichtet ist. Werkzeug: Maulschlüssel SW 17 mm (Kontermutter) 10/2017 Montageanweisung 39/72... -
Seite 42: Düsenwagen Auf Leichtgängigkeit Prüfen
Montage Düsenwagen auf Leichtgängigkeit prüfen – Schrauben lösen und Halter abnehmen. – Alu-Leisten abnehmen und Gummituch nach hinten klappen. Werkzeug: Ratschenschlüssel mit Sechskant-Steckschlüssel 10 mm oder Maulschlüssel SW 10 mm – Schrauben herausdrehen. Werkzeug: Ratschenschlüssel mit Sechskant-Steckschlüssel 10 mm 40/72 1009892-04 10/2017... - Seite 43 Montage – Prüfen, ob der Düsenwagen leichtgängig ist. Dazu den Düsenwagen hin und her bewegen. Wenn sich der Düsenwagen problemlos hin und her bewegen lässt, kann die Montage fortgesetzt werden, siehe Zusammenbau auf Seite 44. Lässt sich der Düsenwagen nur schwer bewegen, müssen die folgenden Schritte durch- geführt werden.
- Seite 44 Montage – Schrauben 2-3 mm lösen. Werkzeug: Ratschenschlüssel mit Sechskant-Steckschlüssel 10 mm – Schrauben festdrehen. Werkzeug: Ratschenschlüssel mit Sechskant-Steckschlüssel 10 mm 42/72 1009892-04 10/2017...
- Seite 45 Montage – Düsenwagen zum Kopfende schieben. – Schrauben 2-3 mm lösen. Werkzeug: Ratschenschlüssel mit Sechskant-Steckschlüssel 10 mm 10/2017 Montageanweisung 43/72...
- Seite 46 Montage – Schrauben festdrehen. Werkzeug: Ratschenschlüssel mit Sechskant-Steckschlüssel 10 mm Zusammenbau – Düsenwagen (1) über den unteren Halter positionieren. – Schrauben einsetzen und festdrehen. Werkzeug: Ratschenschlüssel mit Sechskant-Steckschlüssel 10 mm 44/72 1009892-04 10/2017...
- Seite 47 Montage – Gummituch nach vorne klappen. – Alu-Leisten einsetzen. – 8 Halter anbringen und mit Schrauben besfestigen. Werkzeug: Ratschenschlüssel mit Sechskant-Steckschlüssel 10 mm oder Maulschlüssel SW 10 mm 10/2017 Montageanweisung 45/72...
-
Seite 48: Wanne Füllen
Montage Wanne füllen Ungefähr 3 Tage nach dem Füllen muss die Wanne entlüftet werden (siehe Gebrauchsanweisung des Geräts). – Wasserschlauch anschließen und Wasserhahn öffnen. ACHTUNG! Geräteschäden durch falsche Füllmenge! – Beachten Sie die maximale Füllmenge. – Wasserhahn schließen und Wasserschlauch abziehen. –... -
Seite 49: Antriebsmotoren Montieren
Montage Antriebsmotoren montieren – Antriebsmotoren anbringen. – 8 Muttern (M6) festschrauben. Werkzeug: Ratschenschlüssel mit Sechskant-Steckschlüssel 10 mm oder Maulschlüssel SW 10 mm – Kabel mit Kabelbinder befestigen. Buchsen einstecken: Antriebsmotor 2 Antriebsmotor 3 – 2-pol. BU14 – 2-pol. BU15 –... -
Seite 50: Kühlung Anschließen
Montage Kühlung anschließen ACHTUNG! – Das Gerät darf nur mit den mitgelieferten Druck- schläuchen betrieben werden. – Schläuche montieren. – Nachkühlzeit einstellen (siehe Gebrauchsanweisung des Geräts). 48/72 1009892-04 10/2017... -
Seite 51: Rahmen Montieren
Montage 6.10 Rahmen montieren – Blenden von oben auf die Aufnahmestücke legen und an den Schrauben- löchern ausrichten. – Blenden nach unten drücken, bis sie in der Nut hörbar einrasten. – 4 Schrauben (4,2 x 13) einsetzen und festdrehen. Werkzeug: Kreuzschlitzschraubendreher Nr. 2 oder Akku-Schrauber mit PHZ-Bit 2 10/2017 Montageanweisung 49/72... -
Seite 52: Griff Montieren
Montage 6.11 Griff montieren 10 Nm – Griff anhalten und mit 4 Schrauben (M6 x 20) befestigen. Werkzeug: Innensechskantschlüssel 4 mm 50/72 1009892-04 10/2017... -
Seite 53: Bedienteil Montieren (Wellsystem Relax / Relax_Plus)
Montage 6.12 Bedienteil montieren (wellsystem RELAX / RELAX_PLUS) – Bedienteil anbringen und mit 2 Schrauben (M6 x 20) befestigen. Werkzeug: Innensechskantschlüssel 4 mm – Kabel durch die Öffnung der Steuerbox schieben. – Stecker X016-1 einstecken. – Probelauf durchführen, siehe Seite 13. -
Seite 54: Bedienteil Montieren (Wellsystem Medical / Medical_Plus)
Montage 6.13 Bedienteil montieren (wellsystem MEDICAL / MEDICAL_PLUS) – Bedienteil anbringen und mit 2 Schrauben (M6 x 20) befestigen. Werkzeug: Innensechskantschlüssel 4 mm – Kabel durch die Öffnung der Steuerbox schieben. – Stecker X016-1 einstecken. – Probelauf durchführen, siehe Seite 13. - Seite 55 Montage – Abdeckblech mit Laschen in die Führung der Steuerbox einsetzen. – Abdeckblech oben anhalten und 2 Schrauben (M6 x 20) festdrehen. Werkzeug: Kreuzschlitzschraubendreher Nr. 2 oder Akku-Schrauber mit PHZ-Bit 2 10/2017 Montageanweisung 53/72...
-
Seite 56: Verkleidung Anbringen
Montage 6.14 Verkleidung anbringen – Blende an Kopfende ansetzen und mit 6 Schrauben (M6 x 16) fest- schrauben. – Blende am Fußende seitlich in die Führung schieben. 4 Schrauben (M6 x 16) festdrehen. Werkzeug: Kreuzschlitzschraubendreher Nr. 2 und Ratschenschlüssel mit PHZ-Bit 2 –... - Seite 57 Montage – Blende an der Rückseite in der Halterung einsetzen. – Schlauch an Pumpe ansetzen und Schlauchschelle befestigen. Werkzeug: Schlitzschraubendreher Größe 4 (5/32"), Kreuzschlitzschrauben- dreher Nr. 2 oder Akku-Schrauber mit PHZ-Bit 2 – Frontblende in der Halterung einsetzen. Werkzeug: Schlitzschraubendreher Größe 4 (5/32") 10/2017 Montageanweisung 55/72...
- Seite 58 Montage – Kopfpolster auflegen. – Probelauf / Inbetriebnahme siehe Seite 13. 56/72 1009892-04 10/2017...
-
Seite 59: Technische Daten
Technische Daten Technische Daten Abmessungen wellsystem RELAX A1 = 150 mm A2 = 100 mm BK = 2450 mm TK = 1900 mm 2150 mm 1060 mm 570 mm 10/2017 Montageanweisung 57/72... -
Seite 60: Abmessungen Wellsystem Relax_Plus
Technische Daten Abmessungen wellsystem RELAX_PLUS A1 = 70 mm A2 = 70 mm BK = 2450 mm TK = 1900 mm 2150 mm 1060 mm 570 mm 58/72 1009892-04 10/2017... -
Seite 61: Abmessungen Wellsystem Medical
Technische Daten Abmessungen wellsystem MEDICAL A1 = 150 mm A2 = 100 mm BK = 2450 mm TK = 1900 mm 2150 mm 1100 mm 570 mm 10/2017 Montageanweisung 59/72... -
Seite 62: Abmessungen Wellsystem Medical_Plus
Technische Daten Abmessungen wellsystem MEDICAL_PLUS A1 = 70 mm A2 = 70 mm BK = 2450 mm TK = 1900 mm 2150 mm 1100 mm 570 mm 60/72 1009892-04 10/2017... -
Seite 63: Leistung, Anschlusswerte
Technische Daten Leistung, Anschlusswerte Gerätetyp: wellsystem RELAX Nennleistungsaufnahme: 2600 W Nennspannung: 230-240V ~ Anschlussart: Schutzkontaktstecker Nennfrequenz: 50 Hz Nennabsicherung: Extern: 16A Gerätetyp: wellsystem RELAX_PLUS Nennleistungsaufnahme: 2600 W Nennspannung: 230-240V ~ Anschlussart: Schutzkontaktstecker Nennfrequenz: 50 Hz Nennabsicherung: Extern: 16A Gerätetyp: wellsystem MEDICAL... -
Seite 64: Wasser/Kühlbedingungen
Technische Daten Wasser/Kühlbedingungen Das Massagegerät wird mit normalem Leitungswasser ohne Zusätze gefüllt. Das Wasser kann nach Gebrauch in der öffentlichen Kanalisation entsorgt werden. Erlaubter Wasserdruck (Wasserzulauf): 0,8 MPa (8 bar) Maximale Kühlwasser- 16 °C > Solltemperatur und temperatur: voreingestellter Zeit. Das Gerät darf nur mit den mitgelieferten Druckschläuchen betrieben werden. -
Seite 65: Anhang
Anhang Anhang Warnaufkleber 10/2017 Montageanweisung 63/72... -
Seite 66: Übersicht Steuerung
Anhang Übersicht Steuerung Bezeichnung Information BU21 JK-Münzer- / Fremdmünzeranschluss SD-Karte Aufnahmeslot für die SD-Karte (Software-Update) LAN-Anschluss (nur für Kundendienst) Lüfter am Frequenzumrichter ST17 Frequenzumrichter an der Wasserpumpe ST18 Heizung ST20 Endschalter, Magnetventil X01-1 Antriebsmotor (1) unter der Wanne (Düsenwagen) X02-1 Antriebsmotor (2) Fußseite (Düse vorne) X03-1 Antriebsmotor (3) Fußseite (Düse hinten) - Seite 67 Anhang Bezeichnung Information X016-1 Anschluss Bedieneinheit X018-1 Endschalter für Antriebsmotoren (1)-(3) X019-1 Ansteuerung Frequenzumrichter X020-1 Sicherheitskette und Relaisansteuerung X021-1 JK-Münzer- und Fremdmünzeranschluss X024-1 Spannungsversorgung Antriebsmotor (1) X025-1 Spannungsversorgung Antriebsmotor (2) Ohne Abbildung: BU13 2-pol. Spannungsversorgung Antriebsmotor (1) BU23 4-pol. Ansteuerung Antriebsmotor (1) BU14 2-pol.
-
Seite 68: Wellsystem Medical / Medical_Plus: Emv-Informationen
Anhang wellsystem MEDICAL / MEDICAL_PLUS: EMV-Informationen 8.3.1 Tabelle 201: Leitlinien und Herstellererklä- rung – Elektromagnetische Aussendung Das Massagegerät ist für den Betrieb in der unten angegebenen elektromag- netischen Umgebung bestimmt. Der Betreiber dieses Gerätes sollte sicher- stellen, dass es in einer solchen Umgebung benutzt wird. - Seite 69 Anhang 8.3.2 Tabelle 202: Leitlinien und Herstellererklä- rung – Elektromagnetische Störfestigkeit Das Massagegerät ist für den Betrieb in der unten angegebenen elektromag- netischen Umgebung bestimmt. Der Betreiber dieses Gerätes sollte sicher- stellen, dass es in einer solchen Umgebung benutzt wird. Störfestigkeitsprüfungen IEC 60601 - Prüfpegel Übereinstimmungspegel...
- Seite 70 Anhang 8.3.3 Tabelle 204: Leitlinien und Herstellererklä- rung – Elektromagnetische Störfestigkeit Das Massagegerät ist für den Betrieb in der unten angegebenen elektromag- netischen Umgebung bestimmt. Der Betreiber dieses Gerätes sollte sicher- stellen, dass es in einer solchen Umgebung benutzt wird. Übereinstim- Elektromagnetische Umgebung –...
- Seite 71 Anhang 8.3.4 Tabelle 206: Empfohlene Schutzabstände zwischen tragbaren und mobilen HF-Kommunikationsgeräten und dem Massagegerät Das Massagegerät ist für den Einsatz in einer elektromagnetischen Umge- bung bestimmt, in der abgestrahlte HF-Störgrößen kontrolliert werden. Der Betreiber des Massagegeräts kann helfen, elektromagnetische Störungen dadurch zu verhindern, dass er Mindestabstände zwischen tragbaren und mobilen HF-Kommunikationseinrichtungen (Sendern) und dem Gerät einhält, wie unten entsprechend der maximalen Ausgangsleistung der Kommunikati-...
-
Seite 72: Index
Aufkleber am Gerät ..................63 Aufstellort ......................9 Ausrüstung ....................16 B Bedienteil montieren MEDICAL / MEDICAL_PLUS ..............52 RELAX / RELAX_PLUS ................51 D Düsenwagen Leichtgängigkeit prüfen ................40 E Elektroanschluss ................... 11 EMV-Informationen (MEDICAL / MEDICAL_PLUS) ........66 Entsorgung .................... - Seite 73 Index G Gerät ausrichten Leere Wanne ..................... 39 Gerät spannungsfrei schalten ................ 14 Gestell demontieren ..................31 Gestell montieren ................... 33 Gewichte ......................61 Griff montieren ....................50 I Inbetriebnahme ....................13 Informationen für das Service-Personal ............8 Inhaltsverzeichnis .................... 3 K ...
- Seite 74 Index S Sicherheitshinweise..................6 Steuerung ...................... 64 Steuerung demontieren ................. 24 Steuerung montieren ..................37 Symbole ......................5 T Technische Daten ..................57 Transport und Transportschäden ..............8 V Verkleidung anbringen .................. 54 Verkleidung demontieren ................20 Verpackung ....................15 Verpackungseinheiten ...................