Datalogic F732 WIZARD Bedienungsanleitung
Inhaltsverzeichnis
Kapitel
Inhaltsverzeichnis
Fehlerbehebung

Verwandte Anleitungen für Datalogic F732 WIZARD


Inhaltszusammenfassung für Datalogic F732 WIZARD
- Seite 1 F732- WIZARD Bedienungsanleitung © 2000 by DATALOGIC GmbH...
- Seite 2 Umfang, der in den Verkaufs- und Lieferbedingungen festgelegt ist. Weitergabe und Vervielfältigung der zu diesem Produkt gehörenden Dokumentation und Software und die Verwendung ihres Inhalts sind nur mit schriftlicher Erlaubnis von DATALOGIC GmbH gestattet. Änderungen, die dem Technischen Fortschritt dienen, bleiben vorbehalten.
-
Seite 3: Ein Wort Vorab
Hilfe benötigen, wenden Sie sich bitte direkt an den an den Händler, bei dem Sie das Produkt gekauft haben. Haben Sie das Produkt direkt von DATALOGIC GmbH bezogen, steht Ihnen unser Online- Dienst werktags zur Verfügung. Bitte halten Sie in diesem Fall Ihre Kundennummer bereit. -
Seite 4: Inhaltsverzeichnis
INHALTSVERZEICHNIS F732 „WIZARD“ SEITE 1 ALLGEMEINE INFORMATIONEN ___________________________________ 2 1.1 EINLEITUNG - TERMINAL BESCHREIBUNG ___________________________________2 1.2 SICHERHEITSHINWEISE______________________________________________________4 1.3 WARNSCHILDER AM GERÄT__________________________________________________5 1.4 LIEFERUMFANG _____________________________________________________________6 2 SCHNELLSTART ____________________________________________________ 7 2.1 INBETRIEBNAHME - ANSCHLUSS _____________________________________________7 2.1.1 INBETRIEBNAHME - ÜBERSICHT ____________________________________________9 2.2 INTERPRETER LADEN ______________________________________________________10 2.3 ANWENDERPROGRAMM LADEN _____________________________________________12 2.4 PROGRAMMSTART__________________________________________________________14 2.5 INTERPRETER LÖSCHEN ____________________________________________________15... -
Seite 5: Allgemeine Informationen
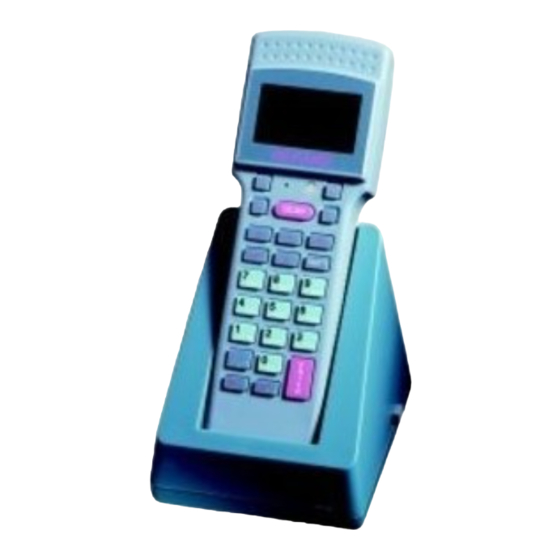
1.1 EINLEITUNG: TERMINAL BESCHREIBUNG Das Laser Terminal „Formula 732“ ist ein Barcodescanner zur mobilen Datenerfassung, d.h. die Erfassung von Informationen über die Tastatur sowie das Erkennen, Entschlüsseln, Speichern und Weiterleiten von Informationen, die einem Strichcode entnommen werden. Der mobile Barcodescanner hat einen internen Speicher für eine Applikationssoftware sowie einen Datenspeicher, ein Display mit der Größe von 16 Zeichen x 4 Zeilen sowie einer Symbolleiste für Statusanzeigen, eine multifunktionelle Tastatur und einen integrierten Barcode- Laserscanner. - Seite 6 1.1 EINLEITUNG: TERMINAL BESCHREIBUNG Das Display hat eine Größe von 16 Zeichen x 4 Zeilen sowie eine Symbolleiste für Statusanzeigen. Diese Symbole werden vom Betriebssystem Akku-Zustandsanzeige (Interpreter) verwaltet. Uhrzeit Typenschild: Seriennummer Modellkennzeichnung Produktionsnummer Seite 3...
-
Seite 7: Sicherheitshinweise
1.2 SICHERHEITSHINWEISE Lesen Sie vor allen Tätigkeiten am und mit dem WIZARD-Terminal sowie dessen Zubehör, die entsprechenden Abschnitte in dieser Bedienungsanleitung aufmerksam durch ! Beachten Sie insbesondere die Sicherheitshinweise ! Achtung ! Vermeiden Sie es, in den Laserstrahl zu schauen ! Der Laserstrahl des Scanners ist sehr schwach. -
Seite 8: Sicherheit Bei Der Wartung
1.2.4 SICHERHEIT BEI DER WARTUNG • Das Terminal braucht nur dann geöffnet zu werden, wenn der Akku ausgetauscht werden muß (nur durch Fachpersonal durchzuführen; siehe Kapitel 5.3). Versuchen Sie nicht das Terminal auseinander zu montieren, es enthält keine Teile, die vom Benutzer repariert werden können. -
Seite 9: Lieferumfang
1.4 LIEFERUMFANG Das WIZARD- Paket Europa enthält folgende Komponenten: ! ! ! ! Terminal F732 mit Akku; der Interpreter „PWG732.HEX“ (PowerGen 2000- Interpreter Program) ist bereits installiert. ! ! ! ! Lade- Übertragungsstation F952. ! ! ! ! Netzteil. ! ! ! ! Anschlußkabel für serielle Schnittstelle (RS-232). -
Seite 10: Schnellstart
2. SCHNELLSTART 2.1 INBETRIEBNAHME ANSCHLUSS DES TERMINALS AN DEN HOST COMPUTER Bevor Sie diesen Arbeitsschritt durchführen, versichern Sie sich, daß der Computer und das Terminal abgeschaltet sind. Bitte versichern Sie sich, daß die auf dem Netzteil angegebene Netzspannung Ihrem Stromnetz übereinstimmt. - Seite 11 A) Haupt-Schalter (Ein/Aus) B) Anzeige LED, zweifarbig: Grünes Licht = Terminal nicht eingesetzt oder Ladevorgang abgeschlossen Rotes Licht = Ladevorgang läuft C) Steckverbindung für Anschlußkabel zum Computer (RS-232 Schnittstelle) D) Netzteilbuchse E) Typenschild A) Host Computer B) Lade- und Übertragungsstation F952 C) Netzteil VORSICHT: Verwenden Sie für das Terminal F732 ausschließlich nur die Lade- und Übertragungs-...
-
Seite 12: Inbetriebnahme - Übersicht
2.1.1 INBETRIEBNAHME - ÜBERSICHT Folgende Grafik veranschaulicht die notwendigen Schritte zur Inbetriebnahme des Terminals, je nach Status. Bei der ersten Inbetriebnahme ist das Umsetzungsprogramm (Interpreter) bereits auf dem Terminal installiert (b). Wurde dieses gelöscht, oder ist es nicht vorhanden, muß es vor dem Laden der Anwendersoftware installiert werden (a). Ist ein anders Anwenderprogramm bereits geladen, so muß... -
Seite 13: Interpreter Laden
2.2 INTERPRETER LADEN Dieses Kapitel beschreibt das Laden des Umsetzungsprogramms (Interpreter). Es gibt verschiedene Möglichkeiten zum Laden des „Interpreters“. Wenn sie den Programm- Generator „PowerGen 2000“ zur Verfügung haben, können Sie direkt von dort aus den „Interpreter“ einladen (über die Schaltfläche „Utility“ und dann „Initiate...“ ; genaue Informationen hierzu entnehmen Sie bitte dem Handbuch „PowerGen 2000 for Formula“). - Seite 14 Nachdem des Terminal über die seriellen Schnittstelle (RS232) an den PC angeschlossen worden ist (Kapitel 2.1), kann das Umsetzungsprogramm (Interpreter) installiert werden. Gehen Sie dabei wie folgt vor: Schieben Sie dazu die Diskette mit dem Programm ‘DOSDL.EXE’ in das Laufwerk A. Das „Down- Load“...
-
Seite 15: Anwenderprogramm Laden
Nach Auswahl des Interpreters „PWG732.HEX“ und Bestätigung mit <ENTER> erscheint auf dem Bildschirm eine Anzeige des Ladefortschrittes: Zeichenerklärung: A) Name und Größe der Datei B) Balkenanzeige für Übertragungsvorgang C) Antwort / Meldung vom Übertragungsprogramm Nach erfolgreicher Übertragung des Interpreters erscheint folgende Anzeige auf dem Display (siehe Abb.): 2.3 ANWENDERPROGRAMM LADEN Dieses Kapitel beschreibt das Laden des Anwenderprogramms. - Seite 16 Nachdem das Terminal F732 über die seriellen Schnittstelle (RS232) an den PC angeschlossen und der Interpreter „PWG732.HEX“ in das Terminal F732 geladen worden ist (Kapitel 2.2), kann das Anwenderprogramm mittels der Übertragungssoftware „DOSDL“ mit der Auswahl „Application Program“ aus dem Menü „Choice“ geladen werden. Gehen Sie dabei wie folgt vor: Schieben Sie dazu die Diskette mit dem Programm ‘DOSDL.EXE’...
-
Seite 17: Programmstart
Nach Auswahl des Anwenderprogramm und Bestätigung mit <ENTER> erscheint auf dem Bildschirm eine Anzeige des Ladefortschrittes: Zeichenerklärung: A) Name und Größe der Datei B) Balkenanzeige für Übertragungsvorgang D) Antwort / Meldung vom Übertragungsprogramm HINWEIS: Das Anwenderprogramm kann mit DOSDL.EXE auch direkt geladen werden, ohne daß dazu das Menü... -
Seite 18: Interpreter Löschen
2.5 INTERPRETER LÖSCHEN Dieses Kapitel beschreibt das Löschen des Interpreters. Durch das im folgenden beschriebenen Verfahren werden die erfaßten VORSICHT: Daten und das Anwenderprogramm gelöscht, auch wenn das Verfahren vorzeitig abgebrochen wird. Wenn der aktuelle Interpreter gelöscht werden soll, gehen Sie bitte folgendermaßen vor: 1.) Drücken Sie die <SCAN>... -
Seite 19: Anwenderprogramm Löschen
2.6 ANWENDERPROGRAMM LÖSCHEN Dieses Kapitel beschreibt das Löschen des Anwenderprogramms. Durch das im folgenden beschriebenen Verfahren werden die erfaßten VORSICHT: Daten und das Anwenderprogramm gelöscht, auch wenn das Verfahren vorzeitig abgebrochen wird. Wenn das aktuelle Anwenderprogramm gelöscht werden soll, gehen Sie bitte folgendermaßen vor: 1.) Drücken Sie die <SCAN>... -
Seite 20: Tabellen Laden
2.7 TABELLEN LADEN Dieses Kapitel beschreibt das Laden von Tabellen in das Terminal F732 (Optional). Auch für das Laden von Tabellen für ein Anwenderprogramm in das Terminal F732 gibt es verschiedene Möglichkeiten. Wenn sie den Programm-Generator „PowerGen 2000“ zur Verfügung haben, können Sie direkt von dort aus Tabellen für ein Anwenderprogramm einladen (über die Schaltfläche „Send“... - Seite 21 HINWEIS: Eine Tabelle kann mit DOSDL.EXE auch direkt geladen werden, ohne daß dazu das Menü „Choice“ aufgerufen werden muß, und zwar mit dem Befehl: A:\>DOSDL /ftable_name.INP <ENTER> (wenn der serielle Anschlußport COM1 verwendet wird) A:\>DOSDL /ftable_name.INP /L2 <ENTER> (wenn der serielle Anschlußport COM2 verwendet wird) INFO: Weitere Parameter erhalten Sie, wenn Sie das Programm mit der Option –h aufrufen (DOSDL -h).
-
Seite 22: Benutzung /Betrieb
3 BENUTZUNG / BETRIEB Terminal F732 laufen ausschließlich Anwenderprogramme, Programmgenerator „PowerGen 2000“ erstellt worden sind. Ein Anwenderprogramm läuft nur dann auf dem Terminal F732, wenn der Interpreter „PWG732.HEX“ geladen worden ist. Bei Auslieferung ist der Interpreter „PWG732.HEX“ bereits im Terminal geladen. Zum Laden des Interpreters „PWG732.HEX“... -
Seite 23: Beschreibung Der Tastatur
3.2 BESCHREIBUNG DER TASTATUR Mit dem Programmgenerator „PowerGen 2000“ ist es zwar möglich, den Funktionstasten spezifische Funktionen zuzuordnen, es gibt aber bereits eine Reihe Standardfunktionen, die für alle Anwendungsprogramme gelten, Interpreter gehören. diesen Standardfunktionen gehören: „Datei auswählen“, „Anzeige der Daten“ , „Löschen von Daten“ und „Datensuche“. - Seite 24 ! > - Taste: Das Drücken der <SHIFT> - Taste gefolgt <SHIFT>+<! von der <Pfeil rechts> - Taste erhöht den Kontrast vom graphischen Display bis zum vorgegebenen Höchstwert. Anschießend beginnt der Wert wieder mit der schwächsten Kontrast-Einstellung. Drücken Sie diese Tasten-Kombination solange, bis der gewünschte Kontrastwert erreicht ist.
-
Seite 25: Standardfunktionen
3.2.1 STANDARDFUNKTION: Datei auswählen Durch drücken der <SHIFT> - Taste gefolgt von <F1> wird in einem geladenen Anwenderprogramm der Modus „Datei auswählen“ (Select) aufgerufen. Auf dem Display vom Terminal F732 werden alle vorhandenen Dateien angezeigt: Zeichenerklärung: A.) Dateiname B.) Dateinummer (00 .. 15) C.) aktivierter Modus Mit den Tasten <">... - Seite 26 3.2.2 STANDARDFUNKTION: Anzeige der Daten Nachdem der Modus „Datei auswählen“ (Select) aufgerufen und eine Datei-Tabelle gewählt wurde, kann der Inhalt auf dem Display vom Terminal F732 angezeigt werden. Dazu die <SHIFT> - Taste gefolgt von <F4> drücken. Auf dem Display vom Terminal F732 erscheint folgende Anzeige: Zeichenerklärung: A.) Name vom Feld...
- Seite 27 3.2.3 STANDARDFUNKTION: Löschen von Daten Nachdem der Modus „Datei auswählen“ (Select) aufgerufen und eventuell eine Datei-Tabelle gewählt wurde (Modus „Anzeige der Daten“), kann durch drücken der <SHIFT> - Taste gefolgt von der <F3> - Taste: der Inhalt eines Feldes gelöscht werden; eine Datei mit Daten gelöscht werden.
-
Seite 28: Datenübertragung
4. DATENÜBERTRAGUNG Dieses Kapitel beschreibt die Konfigurations- und Datenempfangssoftware „SysTools“ (Lieferumfang) die unter Windows 95/98 und NT läuft. Diese Software empfängt die gespeicherten Daten vom Terminal F732 und speichert diese Daten in eine ASCII- Datei ab. Bitte halten Sie sich genau an die folgenden Schritte, da „SysTools“ auch noch für andere Geräte der FORMULA- Serie eingesetzt wird und es somit in dieser Software weitere Einstellungen gibt, die mit dem Terminal F732 nicht notwendig , bzw. -
Seite 29: Terminal Anmelden
4.2 TERMINAL ANMELDEN Im nächsten Schritt muß das Terminal dem Empfangsprogramm bekanntgegeben werden. Dazu klicken Sie auf die Schaltfläche ‘Terminals’ - ‘Insert Terminal’. Es wird ein neuer Eintrag mit Standardvorgaben angelegt. Bei Bedarf können Sie den „Default“- Eintrag des Datei- Namen abändern, wo die empfangenen Daten gespeichert werden sollen (Default: TERM001.DAT). -
Seite 30: Instandhaltung
5. INSTANDHALTUNG 5.1 AKKU LADEHINWEISE Die Akkuladung hängt von vielen Faktoren ab, in der Regel kann aber davon ausgegangen werden, daß der Akku dem Terminal F732 unter normalen Betriebsbedingungen eine Autonomie von einem Arbeitstag garantiert. Der Zustand der Akkuladung wird von einem Symbol auf dem Display in vier Stufen angezeigt. -
Seite 31: Akku Austausch
5.2 AKKU AUSTAUSCH ACHTUNG: Die Akkus dürfen nur von Fachpersonal ausgewechselt werden. Versichern Sie sich vor dem Öffnen, daß das Terminal abgeschaltet ist und Daten die sich noch im Speicher befinden übertragen worden sind. gibt zwei verschiedene Gehäusebauformen Terminal F732. Eine Bauform (Kennzeichnung Typenschild: F732/B) hat ein separates Akkufach, die andere keines (F732). - Seite 32 Hinweis: Verschiedene Halteklammern! Halteklammern, die in die beiden Führungen im unteren Teil des Terminals eingesetzt werden müssen. Halteklammern, die in die beiden Führungen Kopfteil Terminals eingesetzt werden müssen. Schließen Sie dann das Terminal wieder und gehen Sie dabei in umgekehrter Reihenfolge wie beim Öffnen vor.
-
Seite 33: Reinigung Des Terminals
Setzen Sie den neunen Akku-Pack ein unter Beachtung der Polarisation, die im Gehäuse abgebildet ist. Schließen Sie dann den Akkufachdeckel und bringen die Befestigungsschrauben wieder an. ACHTUNG: Die Entsorgung der Akkus muß gemäß der geltenden Gesetze erfolgen! 5.3 REINIGUNG DES TERMINALS Zum Reinigen verwenden Sie bitte ein feuchtes, weiches Tuch. -
Seite 34: Anhang
6. ANHANG 6.1 FEHLERMELDUNGEN Anhang Wenn der Interpreter „PWG732.HEX“ beim laufenden Anwenderprogramm einen Fehler ermittelt, erscheint folgende Abbildung auf dem Display vom Terminal 732 (siehe Abb.): Der Interpreter „PWG732.HEX“ kann 8 verschiedene Fehlertypen ermitteln und anzeigen: FEHLERTYP FEHLERBESCHREIBUNG DBASE FULL Speicher voll. - Seite 35 TABELLE: FEHLERMELDUNGEN „S“ Anhang FEHLERFUNKTION FEHLERURSACHE Erfassung Mögliche Fehlerursachen: 1) Versuch, eine nicht erlaubte Erfassung auszuführen. 2) Versuch, eine Felderfassung einer nicht vorhandenen Tabelle auszuführen. 3) Die nächste Anweisung existiert nicht Prüfung Die zu prüfende Tabelle existiert nicht. Decodierung Dem Terminal wurde ein Befehl mit einer nicht vorhandenen Decodierung zugesandt.
-
Seite 36: Störungssuche
6.2 STÖRUNGSBEHEBUNG Anhang Sollten an Ihrem System Probleme auftreten oder sollten Sie Fragen haben, die im folgenden nicht behandelt werden, wenden Sie sich bitte an Ihren Händler. Symptom Ursache Behebung Beim Drücken der <SCAN> Taste Akku leer. Laden Sie die Akkus. schaltet das Terminal nicht ein. - Seite 37 -Fortsetzung- Symptom Ursache Behebung Es wird keine Verbindung Lade- u. Übertragungsstation Netzteil anschließen und mit dem Datenempfangs- ist ohne Stromversorgung. Station einschalten. programm „SysTools“ auf- gebaut. Serielles Kabel ist nicht Überprüfen Sie den Anschluß korrekt angeschlossen. an der Station und an der seriellen Schnittstelle am PC.
-
Seite 38: Produkte Und Zubehör
6.3 ANSCHLUßKABEL / PINBELEGUNG Anhang Je nach Computertyp und Anschluß, die verwendet werden, sind verschiedene Kabel verfügbar. Die Kabel sind unten aufgelistet und zwar unter Angabe des Handelscodes (C...) und des Produktionscodes (#...), die auch auf dem Kabel stehen. " " " " Kabelbelegung RS-232 Kabel Typ C407900330 (# 404682100) an PC/AT oder kompatible: (dieses Kabel ist im Lieferumfang „Wizard“- Paket enthalten) P I N P I N... -
Seite 39: Technische Daten
Technische Daten Anhang ! ! ! ! Optische Daten ! ! ! ! Physikalische Daten Lichtquelle Technologie VLD Laser Scanner, 680nm, Rotlicht (SURFACE MOUNTING TECHNOLOGY) Scannen Abmessungen (LxBxH) 36+/-3 scan/sec 165 x 56 x 32 mm Mindestauflösung Akustischer Signalgeber 0.15 mm Piezoelektrischer Summer, Frequenz und Dauer programmierbar Schrägwinkel (skew) - Seite 40 WIZARD INVENT F Inventurlösung mit mobiler Datenerfassung Version: Stand vom: 18.03.2003 KUMAident GmbH Dieselstrasse 18 70771 Leinfelden-Echterdingen Telefon 0711/160 69 60 Telefax 0711/160 69 66 www.kumaident.de...
- Seite 41 Inventurlösung WIZARD INVENT F Inhaltsverzeichnis Einleitung............................3 Voraussetzungen für den Einsatz des Paketes „Wizard / Invent F“ ..........3 2.1.1 Hardware: .......................... 3 2.1.2 Betriebssystem: ......................... 3 2.1.3 Software:..........................3 Inbetriebnahme des Terminals und der Empfangssoftware ............4 PC Software ..........................
-
Seite 42: Einleitung
Inventurlösung WIZARD INVENT F Einleitung Durch das Paket WIZARD INVENT F haben Sie die Möglichkeit Ihre Inventur- bzw. Erfassungsaufgaben sehr einfach, effizient und kostengünstig zu lösen. Mit dem mobilen Terminal „Wizard“ erfassen Sie Artikel, Mengen, Lagerorte, beteiligte Personen und das Datum der Eingaben. Die Eingaben können wahlweise über die alphanumerische Tastatur oder den integrierten Scanner erfolgen. -
Seite 43: Inbetriebnahme Des Terminals Und Der Empfangssoftware
Inventurlösung WIZARD INVENT F Inbetriebnahme des Terminals und der Empfangssoftware 3.1 PC Software Installieren Sie die EasyGen Software auf Ihrem PC. Durch diese Installation werden folgende Programme in Ihren PC geladen. • EasyGen: Programmgenerator zur Erstellung von Anwendungsprogrammen. • SysTools: Tool zum Laden von System- und Anwendungsprogrammen •... - Seite 44 Inventurlösung WIZARD INVENT F Das Terminal benötigt für seine Funktion zwei Software Teile. Zum einen seinen gerätespezifischen Interpreter „EI732_101.HEX“ (bei Neugeräten bereits vorhanden) und zum anderen die Anwendungssoftware „ Invent F V 1 2.app“. Das Installieren des Interpreters ist nur notwendig wenn dieser auf dem Terminal gelöscht worden ist. Auf dem Display sehen Sie folgende Meldung wenn kein Interpreter geladen ist: Die Installation wird folgendermaßen durchgeführt.
- Seite 45 Inventurlösung WIZARD INVENT F Das Installieren der Anwendungssoftware ist notwendig, wenn Sie das Terminal neu in Betrieb nehmen, wenn Sie die Anwendungssoftware gelöscht haben oder die Akkus über einen längeren Zeitraum entladen waren. Auf dem Display sehen Sie diese Meldung, wenn der Interpreter geladen ist, aber die Anwendungssoftware fehlt.
- Seite 46 Inventurlösung WIZARD INVENT F Beschreibung der Terminal Anwendungssoftware Invent F V 1 2.app Wenn das Terminal „Wizard“ erstmals seine Anwendungssoftware erhalten hat, müssen Sie nach der Entnahme aus dem Cradle die Enter Taste betätigen um das Programm zu starten. Auf dem Display erscheint „PERSONAL:“. Geben Sie die Bezeichnung , den Namen oder den Code für die Person ein, welche mit dem Terminal arbeitet.
-
Seite 47: Datensätze
Inventurlösung WIZARD INVENT F Die Eingabepositionen auf einen Blick mit allen Details Eingabeposition max.Stellen Tastatureingabe Barcode Scannen Optionen PERSONAL Alphanumerisch F3 = Löschen Enter = Weiter LAGER Alphanumerisch F3 = Löschen Enter = Weiter ARTIKEL Alphanumerisch F1 = Sprung in Auswahlmenü... -
Seite 48: Einstellen Der Parameter Im Übertragungsmodul
Inventurlösung WIZARD INVENT F Funktionen der PC Empfangssoftware Invent.xls Für die Funktion ist wie bereits beschrieben, die vorherige Installation der EasyGen Software notwendig. Öffnen Sie durch einen Doppelklick auf „Invent F.xls“ die Empfangssoftware. Ist bei Ihnen der Makrovirusschutz aktiviert, so erscheint diese Meldung: Wenn das Häkchen aktiviert ist, erhalten Sie diese Meldung immer, wenn in einem Dokument ein VBA Code (Visual Basic for Applications) verwendet wird. -
Seite 49: Überprüfen Sie Die Verbindung Zum Terminal
Inventurlösung WIZARD INVENT F In diesem Fenster sollten die Einstellungen wie folgt gesetzt werden. Bitte überprüfen Sie diese. Im Fenster „Satellites“ sind keine Einstellungen notwendig. (wird nicht verwendet) Übernehmen Sie gegebenenfalls Ihre Änderungen und schließen Sie das Fenster mit OK. Das Übertragungsmodul ist hiermit konfiguriert. -
Seite 50: Empfangen Der Datensätze
Inventurlösung WIZARD INVENT F Sie können nun mit dem Terminal arbeiten und Ihre Inventur durchführen oder Artikeldaten sammeln. Die gesammelten Daten können wie folgt in die Excel Tabelle übertragen werden. Stellen Sie das Terminal in das Cradle, und führen Sie die folgenden Anweisungen durch. 3.2.1.7 Empfangen der Datensätze Klicken Sie auf „Übertragung Start“. - Seite 51 Inventurlösung WIZARD INVENT F Sollten Sie aber die „Übertragung Starten“ Taste betätigt haben ohne daß sich das Terminal im Cradle befindet, so bleibt die Verbindung solange aktiv, bis das Terminal in das Cradle gestellt wird und durch die Übertragung von Daten die Verbindung schließt oder Sie den „Übertragung Stop“ Taster betätigen. Seite 12...
-
Seite 52: Datenspeicherung
Inventurlösung WIZARD INVENT F Die empfangenen Datensätze werden wie im folgenden Beispiel in die Excel Tabelle geschrieben Laufende Nummer der Datensätze LAGER Lagerbezeichnung Eingabe durch Bediener ARTIKEL Artikelbezeichnung Eingabe durch Bediener MENGE Mengeneingabe Eingabe durch Bediener PERSONAL Bedienerbezeichnung Eingabe durch Bediener DATUM Wird durch das Terminal zum Zeitpunkt der Speicherung der Datensätze automatisch generiert. - Seite 53 Inventurlösung WIZARD INVENT F Kundenwünsche Sehr geehrter Kunde, sollten Sie Anpassungen der Empfangssoftware oder der Terminal Anwendungssoftware wünschen, um diese für Ihre spezielle Situation optimaler verwenden zu können, so setzen Sie sich mit uns in Verbindung. Änderungen können wir gerne für Sie umsetzen. Wir, die Mitarbeiter der KUMAident, beraten Sie gern.
- Seite 54 EasyGen™ User’s Manual Wird nur in englischer Sprache zur Verfügung gestellt!
- Seite 56 EasyGen™ USER'S MANUAL...
-
Seite 57: All Rights Reserved
Ed.: 04/01 Code: 820042310 ALL RIGHTS RESERVED Datalogic reserves the right to make modifications and improvements without prior notification. Product names mentioned herein are for identification purposes only and may be trademarks and or registered trademarks of their respective companies. - Seite 58 (90) days from the date of delivery as evidenced by a copy of your receipt. DATALOGIC's entire liability and your exclusive remedy shall be at DATALOGIC's option, replacement of the CD-Rom which shall be returned to DATALOGIC with a copy of your receipt.
- Seite 59 CONTENTS GENERAL INFORMATION ................1 Scope of this Manual ..................1 Description of the Applications Package............1 Package Contents..................2 Minimum Configuration Required..............2 INSTALLATION.................... 3 Installing EasyGen ..................3 Connecting the Terminal to the Host Computer via RS-232 ......4 Loading EasyGen™...
- Seite 60 Utility Menu ....................38 Window Menu ..................... 39 INSERT MENU FUNCTIONS ..............40 Remark Function..................40 Beep Function..................... 41 Clear Display Function................42 Input Barcode Function................43 Input Text Function ..................47 Input Number Function ................49 Input Date Function..................51 Input Time Function ..................
- Seite 61 COMMUNICATION PROTOCOL.............. 106 C.1. Communications frame ................106 Data Transmission ..................109 C2.1 RS-232 and RS-485 Interfaces ..............109 C.2.2 Eavesdrop Connection Interface............... 109 Host Computer Commands............... 110 Configuring the Terminal (Serial Command “S”) ........115...
-
Seite 62: General Information
1 GENERAL INFORMATION SCOPE OF THIS MANUAL This manual was created by Datalogic S.p.A. and accompanies the EasyGen, Easy Application Generator Package, CD-Rom for Windows 95/98/2000/ME and NT. The manual describes the methods for installation and use of both EasyGen and its relative interpreter program. -
Seite 63: Package Contents
EASYGEN™ PACKAGE CONTENTS The EasyGen package includes: • 1 CD-Rom containing the following programs: − EasyGen™ with example programs − EasyGen™ Interpreter − SysTools™2001 − OLE for Formula − DOSDL program • The following manuals: − EasyGen™ (this manual) − SysTools™2001 −... -
Seite 64: Installation
INSTALLATION 2 INSTALLATION INSTALLING EASYGEN Once the CD is inserted, launch the Windows software application EasyGen for WIN 95/98/2000/ME/NT by pressing the Setup button. Through this procedure the following programs will be installed: − Permits the creation and modification of personalized EASYGEN.EXE application programs and their loading onto a Formula batch terminal. -
Seite 65: Connecting The Terminal To The Host Computer Via Rs-232
EASYGEN™ − is for very skilled users only. It can be used to load OLE for Formula applications and collect data from the Formula batch terminals from within your own application, using any Development System for Windows that supports the “Microsoft OLE”... - Seite 66 INSTALLATION To connect the Formula cradle to the host computer, proceed as indicated below: connect the serial port of the host computer to cable 94A054000 for 9-pin connections or to cable 94A054010 for 25-pin connections; connect the other end of the same cable (RJ connector) to the RS-232 port of the cradle;...
-
Seite 67: Loading Easygen™ Interpreter
EASYGEN™ LOADING EASYGEN™ INTERPRETER Load the EasyGen Interpreter Program EIXXX_YYY.HEX onto the Formula terminal with the EasyGen command “INITIATE” (see par. 4.7). You can also load the EasyGen™ Interpreter Program with a DOS system using the DOSDL.EXE program (see Appendix B). Before proceeding with this operation verify if another interpreter program has been previously loaded. -
Seite 68: Use Of Easygen
3 USE OF EASYGEN INTRODUCING EASYGEN EasyGen is the fastest and easiest way to create applications for many Datalogic hand held terminals. Whether you are an experienced professional or brand new to hand held scanner programming, EasyGen provides you with a tool to simplify rapid application development. - Seite 69 EASYGEN™ A full list of available functions is: − to write text on the display; Remark − to make a sound; Beep − Clear display − define the scanner barcode reading; Input barcode − to key in or read with the scanner alphanumeric text; Input text −...
- Seite 70 USE OF EASYGEN™ To develop a new program with EasyGen we suggest that you proceed with the following steps: perform an analysis of the application and build a flow chart using the available functions; open a new program [File menu - New] see par. 4.2.1; choose the type of Formula terminal to be used;...
-
Seite 71: Starting Easygen
EASYGEN™ STARTING EASYGEN To start EasyGen proceed as follow: Click “Start” on the task bar, Select “Programs”, “Datalogic", "EasyGen" and then "EasyGen™" (this path corresponds to the default installation); - or- Use the Windows Explorer to find the “EasyGen" executable file (Setup.EXE);... - Seite 72 USE OF EASYGEN™ The development environment interface of EasyGen™ is similar to other programs for Windows 95/98/2000/ME/NT. The main elements are: − displays the commands you use to work with Menu bar EasyGen™; − Provides quick access to commonly used Tool bar Button commands in the programming environment;...
- Seite 73 EASYGEN™ LIMITS OF EASYGEN Message/Comment: This is a sequence of a maximum of 32 alphanumeric characters; Number: is formed by a maximum of 7 integers and two decimal numbers in the format ±XXXXXXX.YY The programmer is responsible to ensure that all numerical operations do not exceed this limit;...
-
Seite 74: Error Reporting
USE OF EASYGEN™ ERROR REPORTING The “Error Variable” reports these possible error conditions: Error type Variable value No error <F1> button has been pressed Division by zero Table limit reached Data code not suitable for destination field It is the responsibility of the programmer to make sure that the inserted function does not generate one of these errors by using the comparison function. -
Seite 75: Menu Description
EASYGEN™ 4 MENU DESCRIPTION DESCRIPTION OF THE MAIN MENU In this chapter we will describe the functionality of each item of the menu bar and the corresponding toolbar button available for it. Instead of using the menu bar, it is possible to make the same actions by clicking the buttons. -
Seite 76: File Menu
MENU DESCRIPTION FILE MENU Manage application file, printing and loading to the Formula terminal. 4.2.1 Choosing this command allows you to create a new application program. An Empty Application Window (ApWin) appears on the screen: ApWin... -
Seite 77: Open
EASYGEN™ The upper part of the ApWin shows the type of Formula terminal the program is to run on. With the down arrow, it is possible to choose the terminal type and EasyGen adapts the base program to the model of the Formula terminal chosen. Below the Formula terminal name there is row with 4 cells under which you can insert functions using the Insert command or function tool bar button. - Seite 78 MENU DESCRIPTION The ApWin that appears contains the application program - that is, the sequence of functions that must be sent to the Formula terminal: ApWin In the ApWin there is the list of functions that are performed by the application in the Formula terminal.
- Seite 79 EASYGEN™ − Mark cell, with an arrow, points to the selected function in editing mode; − Skip function cell, with multiple red arrows to one point, shows that this function is connected by a jump or a loop (see par. 5.10). The little arrow button on the cell can be used, if selected with the pointing device, to see the name of the calling function.
-
Seite 80: Save
MENU DESCRIPTION 4.2.3 Save This choice allows you to save an application program which you have created. This command saves immediately the currently open application. Note that it will not prompt for a name. If the open program is not already named, EasyGen... -
Seite 81: Print
EASYGEN™ 4.2.6 Print This command allows you to print the current application program. The following dialogue box appears on the screen: It is possible to choose which portions of the application program to print: Options/Tables/Variables: The information defined with the Tools menu is printed; Functions: The program is printed with the functions defined by the Insert menu. -
Seite 82: Export
MENU DESCRIPTION It is necessary to indicate which port the Formula terminal is connected to. At the end of the transmission, the date and time of the terminal will be the current date and time you have in the PC. This operation is also possible in a DOS environment using the DOSDL.EXE command (See Appendix B). -
Seite 83: Exit
EASYGEN™ DOSDL recognizes application filenames having a maximum of 8 characters. It is advised to select filenames that respect this limit before Exporting them from EasyGen . NOTE The application program and the tables assigned to it must be loaded onto the Formula terminal in compliance with the communication frame described in Appendix C. -
Seite 84: Edit Menu
MENU DESCRIPTION EDIT MENU The commands of this menu allow you to copy, insert, delete and search for program functions. The command Paste inserts a previously copied function, below the current line. If more than one program is opened, it is possible to copy or move a group of functions from one program to another. -
Seite 85: Search
EASYGEN™ 4.3.1 Search This command allows the user to search for a function inserted in the program. In this case the following window appears: Once a function name has been chosen from the pull-down list, in the "Results" area you will be presented with a list of the occurrences of that function in the program you are working with. -
Seite 86: Insert Menu
MENU DESCRIPTION INSERT MENU This menu shows the list of all the available functions for creating the program. Each function can be inserted into the program by selecting the choice from the menu, or by selecting its corresponding icon. Remark Input time Beep Menu... -
Seite 87: Run Menu
EASYGEN™ RUN MENU This function will simulate the execution of the application program. 4.5.1 Compile This command allows checking the correct syntax of each function. The compilation is followed by a message. If an error has occurred, the message reports its type, while the arrow in the program ApWin will signal the cell containing the wrong function. -
Seite 88: Start
MENU DESCRIPTION 4.5.2 Start This function allows the user to start the simulation of the application program which runs until there is an acquisition function. In this case a window appears in which you can insert the requested information. In this operation, if you press the <Watch> button, you can see the tables and variables contents. -
Seite 89: Stop
EASYGEN™ 4.5.3 Stop This function stops the simulation of the application program. 4.5.4 Step This function will force the simulation to go step by step. -
Seite 90: Tools Menu
MENU DESCRIPTION TOOLS MENU When a EasyGen program is open, the Tools menu is activated in order to configure tables, variables, and the terminal. -
Seite 91: Editor Tables
EASYGEN™ 4.6.1 Editor Tables Choosing this command causes a window of the following type to be displayed: The programmer may define up to 15 General type tables which may be used for reading or writing. Each table may be associated with a .DAT file which has the same name as the table and which contains its data. - Seite 92 MENU DESCRIPTION When the program created with EasyGen is sent to a Formula terminal, if files with the extension .DAT (having the same names as tables used within the program itself) are found within the same directory where the program is stored, EasyGen loads these data files onto the terminal as well.
- Seite 93 EASYGEN™ Add a table Delete a table. It is not possible to remove tables which have already been called by one or more program functions. ATTENTION There is an index for each table which identifies the record where the variable or the result of an acquisition will be stored.
- Seite 94 MENU DESCRIPTION Each field is distinguished by: Number The number is a progressive number which uniquely identifies a field and corresponds to the order in which it is sent to the Formula terminal. Name The name of the field is an alphanumeric field with a maximum length of 10 characters.
- Seite 95 EASYGEN™ − Check characters from…to By defining a range of characters, it is possible to enable a control on the type of characters which will be inserted into the field. By default, character control is between the character “space” and the character “z”.
-
Seite 96: Editor Variables
MENU DESCRIPTION 4.6.2 Editor Variables Choosing this command causes a window of the following type to be displayed: The variables are used by the application to store temporary data. There are 7 temporary variables of 32 characters available. Each variable is distinguished by a name which enables recognition. To change the name of a variable it is only necessary to select it, modify the name, and press the <Tab>... -
Seite 97: Options
EASYGEN™ 4.6.3 Options Choosing this command causes a window of the following type to be displayed: In this window it is possible to define the communications parameters between the Formula terminal and the host computers. In the General option the user must enter the speed used by the Formula terminal for communicating with host computer, the number of data bits, the parity, mode, and type of communication (RS-232, RS-485, and Eavesdrop). - Seite 98 The suggested values are those required to communicate with the Formula terminal using the Datalogic S.p.A programs such as SysTools™2001. If you use Eavesdrop communication (Interface), you have to set: Checksum = none and Start of block/End of block = none.
-
Seite 99: Utility Menu
EASYGEN™ UTILITY MENU The Utility menu contains two options, “Initiate...”, and "Communication...". Initiate can be used for updating the interpreter program on the Formula terminal. It allows the user to find the file with a .HEX or a .H00 extension in the current directory or in the entire disk. -
Seite 100: Window Menu
MENU DESCRIPTION WINDOW MENU The menu option is absolutely Windows standard and allows the user to choose the most convenient display mode when more than one window is opened at the same time: − Cascading, the windows are displayed with standard dimensions, one on top of the other, but slightly displaced so that each one can be seen. -
Seite 101: Insert Menu Functions
EASYGEN™ 5 INSERT MENU FUNCTIONS REMARK FUNCTION Allows you to display on the Formula terminal up to four different comments in four locations. DiWin ApWin PrWin PrWin has four tabs, Remark1, Remark2 ... Remark4, for four comments. DiWin shows the display status with the four comments. -
Seite 102: Beep Function
INSERT MENU FUNCTIONS The comment can be specified as a message from the programmer, a table field or the value of a variable. Acting upon (X) and (Y) it is possible to position the initial coordinates of the comment. The result of the comment function is visible in the window that simulates the display of the Formula terminal. -
Seite 103: Clear Display Function
EASYGEN™ CLEAR DISPLAY FUNCTION Completely clears the display of the Formula terminal. PrWin and DiWin are not necessary. ApWin... -
Seite 104: Input Barcode Function
INSERT MENU FUNCTIONS INPUT BARCODE FUNCTION Allows you to read a bar code and save the information in the field of a table or in a variable. It is possible to display a predefined comment in any position on the screen. The code when read or keyed will be displayed after the last characters of the comment. - Seite 105 EASYGEN™ A value of 0 will accept any length. When there are only one or two acceptable lengths, it is necessary to fill the remaining boxes with the same value. In addition, it is possible to handle the control digit or not, as desired. The <Other>...
- Seite 106 INSERT MENU FUNCTIONS The available exit keys for the Formula 734 terminal are: Other available Formula terminals may have more or less keys. See the relevant Formula terminal User's Manual. It is only possible to jump to functions which are already defined in the application.
- Seite 107 EASYGEN™ − EAN128 & CODE 128 By enabling CODE 128 codes, it is possible to read, not only normal CODE 128 barcodes, but also single field EAN 128 codes. By enabling EAN 128 codes, it is possible to read, not only single field EAN 128 barcodes, but also CODE 128 codes.
-
Seite 108: Input Text Function
INSERT MENU FUNCTIONS INPUT TEXT FUNCTION This function allows you to enter a sequence of characters from the Formula terminal keyboard and to save the information in a table field or in a variable. It is possible to display a fixed comment in a pre-defined position. To set the maximum number of acceptable characters, just click the Limits tab and enter the value. - Seite 109 EASYGEN™ With the Exception tab, you can define an exit from the text acquisition mode by pressing a particular button, and continue with the program by jumping to a specified function. The available exit keys for the Formula 734 terminal are: Other available Formula terminals may have more or less keys.
-
Seite 110: Input Number Function
INSERT MENU FUNCTIONS INPUT NUMBER FUNCTION This function allows the user to insert a number and to save the information in a table field or in a variable. It is possible to display a fixed comment in a predefined position. To set the maximum number of acceptable digits, just click the Limits tab and enter the value. - Seite 111 EASYGEN™ With the Exception tab, you can define an exit from the number acquisition mode by pressing a particular button, and continue with the program by jumping to a specified function. The available exit keys for the Formula 734 terminal are: Other available Formula terminals may have more or less keys.
-
Seite 112: Input Date Function
INSERT MENU FUNCTIONS INPUT DATE FUNCTION This function allows the user to save the system date in a table field or in a variable. To avoid possible errors, it is recommended that the field in which you wish to save the date be defined as a “date”... -
Seite 113: Input Time Function
EASYGEN™ INPUT TIME FUNCTION This function allows the user to save the system time (handled by an internal clock in the terminal) in a table field or in a variable. To avoid possible errors, it is recommended that the field in which you wish to save the time be defined as a “time”... -
Seite 114: Menu Function
INSERT MENU FUNCTIONS MENU FUNCTION Allows the creation of a menu with a maximum of 4 choices. For each choice it is possible to define the position, the key to press, the text, and the function to be executed. The menu always uses a numerical key for the choice options. It is only possible to jump to functions which are already defined in the application. -
Seite 115: Loop Function
EASYGEN™ 5.10 LOOP FUNCTION This function allows the user to increment the index of three tables and define a function loop which repeats until a specified condition is met. ApWin PrWin The loop begins with the function defined with the parameters in the PrWin and ends with the function “Loop”. -
Seite 116: Comparison Function
INSERT MENU FUNCTIONS 5.11 COMPARISON FUNCTION The first element is compared with the second, and based on the result (true or false) a decision is made as to where the program continues. The comparison can be made between numbers or character strings. Both the first and second elements may be constants or a table field. -
Seite 117: Go To Function
EASYGEN™ 5.12 GO TO FUNCTION This function causes the program execution to jump to a pre-defined function. By using the down arrow in the PrWin , one obtains a list of all available functions. ApWin PrWin It is only possible to jump to functions which are already defined in the application. -
Seite 118: Mathematical Operation Function
INSERT MENU FUNCTIONS 5.13 MATHEMATICAL OPERATION FUNCTION This function allows the execution of arithmetic operations or string operations, and assignments. ApWin PrWin The “Mathematical operation” PrWin is composed of four tabs: − The result can be saved in: Result= a table field, in a variable, in the index of a table. - Seite 119 EASYGEN™ − Operation It’s possible to define operations between number, string or none: − the arithmetic operations are the four base operations, addition, subtraction, multiplication, and division, and also percentage; − the available string operations are concatenation or substring. The concatenation is the union between the string contained in the first element with the string contained in the second element.
- Seite 120 INSERT MENU FUNCTIONS − The second element of an operation between numbers or strings 2° element may be: a constant, a table field, the value of a variable, the index of a table. In the case where the arithmetic operation is an assignment (operation = none), the second element must not be defined.
-
Seite 121: Find Function
EASYGEN™ 5.14 FIND FUNCTION This function allows the user to search for a constant, the value of a table field or the value of a variable, within a table. The Information option allows the user to define the type of search which can be sequential, or in the case of an ordered table, according to the field to be searched, with the binary method (also called “dichotomous”) and may begin with the first record or with the current record (index value). - Seite 122 INSERT MENU FUNCTIONS The Go to option defines the function to execute after the search. Based on the results of the search, the program will jump to one of two functions specified. The result of the search positions the table index at the record containing the field searched for if the search is of the equivalence type, or at the first record which satisfies the requested comparison.
-
Seite 123: Easygen Interpreter Program
EASYGEN™ 6 EASYGEN INTERPRETER PROGRAM In this chapter the images representing the Formula terminal are only used as examples to demonstrate use of the keys and messages appearing on the display. NOTE INTERPRETER PROGRAM USE Application programs created by EasyGen™ can be run on the Formula terminal only if the EIxxx_yyy.HEX interpreter program has been previously loaded onto the terminal. -
Seite 124: Description Of Keys
EASYGEN™ INTERPRETER 6.2.1 Description of Keys Although EasyGen™ allows assigning customized functions to function keys, there are some standard functions common to all applications because they are implemented in the interpreter software. Every time a key is pressed, the Formula terminal remains turned on for a maximum of 20 seconds. - Seite 125 EASYGEN™ ESC KEY: used in the “Data display” mode (see 6.2.3). SHIFT KEY: Enables the entry of alphabetical characters (written in white on the keyboard) when followed by the pressing of a numeric key: for example if you want to enter the alphabetical character “A”, you have to press <SHIFT>+<7>.
-
Seite 126: Select Table
EASYGEN™ INTERPRETER SHIELDED RESET KEY: it is activated by inserting a blunt object in the slot while simultaneously pressing the <SCAN> key (see par. 6.3). 6.2.2 Select Table To activate the "Select" table function press the keys according to the Formula terminal in use as suggested in the following table: Select Table F734... -
Seite 127: Data Display
EASYGEN™ 6.2.3 Data Display Once a table is selected, it is possible to view its contents on the Formula terminal display screen by pressing the keys according to the Formula terminal in use as suggested in the following table: <F8> = <SHIFT> <F4> Data Display F734 F732... -
Seite 128: Data Deletion
EASYGEN™ INTERPRETER 6.2.4 Data Deletion Two types of deletions are possible while using the Formula terminal: − the deletion of the contents of a field − the deletion of a data table. To activate this function press the keys according to the Formula terminal in use as suggested in the following table: <F7>... -
Seite 129: Data Search
EASYGEN™ The deleted file will not be eliminated from the Formula terminal; all field contents are deleted and file pointer is set to the first record. NOTE 6.2.5 Data Search To activate this function press the keys according to the Formula terminal in use as suggested in the following table: <F6>... - Seite 130 EASYGEN™ INTERPRETER The figure indicates what appears on the display. It is necessary to insert the code to be searched for and to press <ENTER>; what is shown in the figure will appear on the display screen. If the code is found, what is shown in the figure will appear...
- Seite 131 EASYGEN™ Once a code is found, it is possible to continue searching toward the beginning of the data table <UP ARROW> or toward the end of the data table <DOWN ARROW>. If other fields with that code are present, they will be displayed. Once the code searched for is found, it is possible to modify its contents simply by inserting a new value and confirming it...
-
Seite 132: Error Messages
EASYGEN™ INTERPRETER 6.2.6 Error Messages If the EIxxx_yyy.HEX program detects an error during execution application, the figure indicates what appears on the Formula terminal display. EIxxx_yyy.HEX can detect eight possible types of errors: ERROR TYPE DESCRIPTION DBASE FULL Database full. During a SAVE or CHECK operation the data could not be written to the database or the record pointer reached its maximum limit. - Seite 133 EASYGEN™ The possible values of the “S” variable and the corresponding error causes are indicated in the following table. FUNCTION WITH ERROR REMEDY Acquisition The causes of this error could be: Non-permissible acquisition executed Field acquisition of a non existent table executed.
- Seite 134 EASYGEN™ INTERPRETER FUNCTION WITH ERROR REMEDY Save Two types of errors are possible: Table does not exist. Tried to save a data item in a non existent location. Divisible Data Item Next instruction does not exist. Operation on Index Four types of errors are possible: Non existent table.
-
Seite 135: Deletion Of The Application Program
EASYGEN™ DELETION OF THE APPLICATION PROGRAM The procedure described below will entail the deletion of the data acquired and of the application software even if the procedure is not completed. CAUTION If the application is to be changed, it is necessary to first delete the application currently in use as indicated below. -
Seite 136: Erase All
EASYGEN™ INTERPRETER The deletion of the application program can be also obtained by reading the following ERASE ALL code: ERASE ALL -$%+ By responding with a ▼, the interpreter software will also be deleted as indicated in par. 6.4. NOTE DELETION OF THE INTERPRETER PROGRAM If it is necessary to delete the interpreter software currently in use, proceed as follows:... - Seite 137 EASYGEN™ The terminal’s LED will remain red until the end of the deletion operation. The terminal’s display screen will show below. When the terminal is inserted in the Pressing the <SCAN> button when the cradle. terminal is not inserted in the cradle. You can reload the interpreter program using either EasyGen™...
-
Seite 138: Programming Examples
The message can be set from the Option item in the Tools menu and it must have a maximum length of 4 lines, where each line can contain up to 16 characters (see below): 1234567890ABCDEF Datalogic EASYGEN Then, you can load the following examples describing standard applications for portable Formula terminals: −... -
Seite 139: Example 1: Code+Quantity
EASYGEN™ For each example, the "new" functions will be explained in detail, leaving out the explanations for the more familiar and more often-used ones. It is advised that these pages should be at hand when studying the applications directly. EXAMPLE 1: CODE+QUANTITY The first simple example, for inventory applications, allows the acquisition of barcodes, the setting of a quantity per code and the saving of everything inside the Formula terminal in a table. - Seite 140 PROGRAMMING EXAMPLES Logic flow description START Clear Display Input Barcode Store Barcode Input Quantity Store Quantity Store Date Store Time Next Record Here is a list of all messages which can be displayed on the Formula terminals: Start & Clear Display deletes the entire display so that each time the program starts anew, there is no leftover data from previous use that might disturb normal viewing.
- Seite 141 EASYGEN™ Input Barcode & Store it in “Code” Field stands by for the scanning of a barcode whose specifications are indicated between configurable parameters. After the scan, the data is saved in TABLE1 in the Code field. Beep for OK code emits an acoustic signal to confirm the code scanning. Input Quantity &...
- Seite 142 PROGRAMMING EXAMPLES Sample barcodes Type: code 39 Type: Interleaved 2/5 7 6 8 9 6 7 Type: Code 128 7 6 8 9 6 7 Type: Ean 13 1 2 3 4 5 6 7 8 9 0 1 2 8...
-
Seite 143: Example 2: Ean128 3 Fields
EASYGEN™ EXAMPLE 2: EAN128 3 FIELDS This is a special version of EXAMPLE 1 so please refer to that example for general specifications. The example demonstrates how the use of code EAN128 can simplify repetitive operations which often take place in the warehouses. This code gives information about the article, its producer and its quantity, which the user can get through a single read of the barcode label. - Seite 144 PROGRAMMING EXAMPLES Logic flow description Start Start & Clear Display Reset Error Variable Input Barcode False True Error = 00 ? Copy Field Article from EAN128tb table to Table1 Copy Field Quantity from EAN128tb table to Table1 Copy Field Producer from EAN128tb table to Table1 Read &...
- Seite 145 EASYGEN™ Reset error sets the error variable to zero to check that the scanned code is correct. Error = 00? compares the error variable to the value 00 to check if it is correct. Input barcode & store it in EAN128tb saves the data in the EAN128tb table. Store code in "Table1"...
- Seite 146 PROGRAMMING EXAMPLES Sample barcodes 1 0 0 0 I T A L Y 2 0 0 0 G E R M A N Y 1 0 0 0 G E R M A N Y 3 0 0 0 5 0 0 F R A N C E 3 0 0 0 2 0 0...
-
Seite 147: Example 3: Assisted Sales
EASYGEN™ EXAMPLE 3: ASSISTED SALES This example shows how all EasyGen™ options work. The idea is to assist sales by referring to an item database inside the Formula terminal. Thanks to a customized menu, it is possible to organize the client management and get an on-line total cost for him. - Seite 148 PROGRAMMING EXAMPLES Logic flow description Start Main Menu Input Input F1 Exception Client Article Found Found Not Found Search Search Client Article Found Display Display Display Client Not Found Client description Description & New Client Price Input Quantity Store all Data Calculate Total (Quantity * Price) Calculate...
- Seite 149 EASYGEN™ Menu prompts the "define client" option OR the "shopping" (article) one. Input barcode article stands by for the scanning of a barcode whose specifications are indicated between configurable parameters. After the scan, the data is recorded in the Article variable. The choice of the variable originates from the fact that before saving it in the INPUT table, it is necessary to check that the code scanned is present in the codes reference table.
- Seite 150 PROGRAMMING EXAMPLES Sample barcodes ARTICLE CLIENT F734 DATALOGIC QP NETWORK ITALY F732 DATALOGIC QP NETWORK FRANCE F725 DATALOGIC QP NETWORK SPAIN...
- Seite 151 EASYGEN™ ARTICLE CLIENT F660 DATALOGIC QP NETWORK GERMANY F630 DATALOGIC QP NETWORK U.K. MW25...
-
Seite 152: Example 4: Listed Picking
PROGRAMMING EXAMPLES EXAMPLE 4: LISTED PICKING This example demonstrates that the INPUT files can also be used as OUTPUT files after processing by the terminal. A LIST table is loaded that refers to the LIST.DAT ASCII file containing a series of articles to be taken. - Seite 153 EASYGEN™ Logic flow description START Is the Display End of Table? End Message (code=END!) Clear Display Display Information Input Code Is It the right code? Display Flag the "Wrong Code" Record Display Code Input Real Quantity Store it in Real Quantity Field Point to Next Record...
- Seite 154 PROGRAMMING EXAMPLES Sample barcodes...
-
Seite 155: Example 5: Inventory
EASYGEN™ EXAMPLE 5: INVENTORY This example allows the creation of an inventory of the articles and their relative quantity. When entering an article code, the program EasyGen™ will automatically search for this article in the database. If the article is found, its quantity will be increased by 1; if it is not found, it is recognized as a new article and recorded in a new position. - Seite 156 PROGRAMMING EXAMPLES Logic flow description START Input Article Is a valid Article ? Found Not Found Search Article Increment Quantity Input Quantity False True Quantity = 0 ? Found Not Found Search Free Store Article Display Database Full...
- Seite 157 EASYGEN™ Sample barcodes...
-
Seite 158: Bdosdl
DOSDL B DOSDL B.1. LOADING FILES USING DOSDL.EXE DOSDL.EXE is a utility program that allows the loading of files to the Formula terminal under the DOS environment (DOS 5.0 or higher). The following files can be loaded: − EasyGen™ Interpreter program −... -
Seite 159: B1.1. Dosdl.exe - Interpreter Program
EASYGEN™ The DOSDL “Choice” menu appears on the host computer monitor: From this menu it is possible to select the item relevant to the file that is to be loaded onto the Formula terminal. B1.1. DOSDL.EXE - Interpreter Program To load the Interpreter Program in the Formula terminal, the item “Utilities - Initiate…” in EasyGen™... - Seite 160 DOSDL Select EIXXX_YYY.HEX and press <ENTER>, and the following appears on the monitor: Key: File name and size Loading status bar Reply message To interrupt the installation of the EasyGen™ Interpreter Program at any time, just press <CTRL>+<BREAK> from the computer keyboard. It is also possible to load the EasyGen™...
-
Seite 161: B1.2. Dosdl.exe - Application Program
EASYGEN™ If no errors are detected during the running of the test, the Formula terminal is able to interpret the application commands created with EasyGen™ and display screen shows what indicated in the figure. The interpreter program EIXXX_YYY.HEX can be deleted just like any other application. - Seite 162 DOSDL A list of all applications (“EXP” extension) present in the current directory appears on the monitor (it is possible to change directories): DOSDL.EXE recognizes application filenames having a maximum of 8 characters. It is advised to select filenames that respect this limit before exporting them from EasyGen™.
-
Seite 163: B1.3. Dosdl.exe - Tables
EASYGEN™ Choose one application program and press <ENTER>. The screen displays the following: Key: File name and size Loading status bar Reply message To interrupt the installation of the application at any time, just press <CTRL>+<BREAK> via the computer keyboard. It is also possible to load the application using DOSDL.EXE directly from the DOS prompt. - Seite 164 DOSDL A list of all application tables (“INP” extension) present in the current directory appears on the monitor (it is possible to change directories): Select the desired table and press <ENTER>; the following appears on the monitor: Key: A) File name and size B) Loading status bar C) Reply message To interrupt the installation of a table at any time, just press <CTRL>+<BREAK>...
-
Seite 165: Alternative File Loading Method
EASYGEN™ B.2. ALTERNATIVE FILE LOADING METHOD Application programs and tables "Exported" (see par. 4.2.8) from EasyGen™ can be sent to the Formula terminal using a serial port under a different operating system than Windows 95/98/2000/ME or NT. Loading an application program To load the application program in a Formula terminal, in which the interpreter is already loaded, you must use the default protocol with the serial port set to 9600 baud, 8 bits and MARK parity. - Seite 166 DOSDL Loading a single table Similarly, it is possible to send the data of an individual table to the Formula terminal. This means that a table from an already loaded application program can be changed and the terminal file can be updated without reloading the program. Using the definition of a table.INP file created with “Export”, you can send the new table.DAT file directly to the Formula terminal using the fixed sequence and format described in points 2) and 3) of the previous paragraph, “Loading an Application...
-
Seite 167: Ccommunication Protocol
EASYGEN™ C COMMUNICATION PROTOCOL C.1. COMMUNICATIONS FRAME To receive and/or send data or commands, EasyGen™ uses the following communications frame: The figure shows the position of each character constituting the communications frame of the information to be transmitted or received. It is possible to configure each character using the "S"... - Seite 168 COMMUNICATION PROTOCOL The Formula terminal can use two different Block check characters (BCC). These can be set by using the serial command "S" described in Appendix C: − LRCC = Longitudinal Redundancy Check Character − Checksum 256 The use of any type or other is completely arbitrary. The only existing limitation regards the specifications of the management program residing in the host computer.
- Seite 169 EASYGEN™ EXAMPLE Let us imagine that you have to send the message <ESC>7CKSUM<ESC><CR> using BCC=Checksum module 256. The Block Check Characters value must be calculated as follows: ASCII Hexadecimal Binary 00011011 "7" 00110111 "C" 01000011 "K" 01001011 "S" 01010011 "U" 01010101 "M"...
-
Seite 170: Data Transmission
COMMUNICATION PROTOCOL DATA TRANSMISSION The transmission of data from the Formula terminal towards the host computer depends on the interface used. C2.1 RS-232 and RS-485 Interfaces Data transmission for both of these interfaces is virtually identical. To receive and/or send data in this mode every unit of information must have the following structure: C.2.2 Eavesdrop Connection Interface... -
Seite 171: Host Computer Commands
EASYGEN™ HOST COMPUTER COMMANDS Using a serial line you can handle the data stored in a Formula terminal directly from the host computer. The data handling commands are sent to the Formula terminal as groups of characters having the character <ESC> (ASCII 1B ) at the beginning and end. - Seite 172 COMMUNICATION PROTOCOL 0 - Download data Use this command when you want to download a data file or program file. Command data can take the following values: filename request all records of specified file, if it exists. The filename must always consist of 8 characters;...
- Seite 173 EASYGEN™ 1 - Delete This command deletes/clears one or more data or program files. Command data can take the following values: filename the specified file is deleted, whether it is a data file or a program file; all output file records are deleted; deletes the current record and moves the pointer by one position.
- Seite 174 COMMUNICATION PROTOCOL 8 - Terminal information This command allows the host computer to identify the type of Formula terminal. Command data can take the following values: no value Formula terminal transmits its name to the host computer. Formula terminal sends version and firmware release to the host computer in the format v.x/r.y;...
- Seite 175 EASYGEN™ S - Serial programming This command allows you to configure the Formula terminal from the host computer via serial line. Due to the complexity of the topic, refer to the par. C.4 “Configuring the terminal (serial command “S”)”. Z - Clock tasks This command allows the host computer to carry out special tasks on the internal clock of the Formula terminal.
-
Seite 176: Configuring The Terminal (Serial Command "S")
COMMUNICATION PROTOCOL CONFIGURING THE TERMINAL (SERIAL COMMAND “S”) Configure Formula terminal communication parameters by choosing the items Tools - Options from the main menu of the EasyGen™. You can edit the configuration by using the serial command “S”. Command data must have the following structure: The parameters that must not be edited, must in any case be included in the command data with the value unchanged. - Seite 177 EASYGEN™ Parity VALUE SERIAL COMMAND 0 = 30 Even 1 = 31 2 = 32 Mark Space 3 = 33 None 4 = 34 Allows you to set parity check Data Bit VALUE SERIAL COMMAND 0 = 30 1 = 31 The instrument uses ASCII code exclusively, so 7 bits are sufficient for communication.
- Seite 178 COMMUNICATION PROTOCOL Block Check Characters VALUE SERIAL COMMAND LRCC 0 = 30 1 = 31 Checksum 256 Disable none = 20 When this parameter is enabled all data transmitted to host computer or Formula terminal is completed by Block Check Characters that carry out a transmission check. If transmission is successful the receiving instrument sends an ACK character.
- Seite 179 EASYGEN™ Reception Mode VALUE SERIAL COMMAND Half Duplex 0 = 30 1 = 31 Full Duplex This parameter allows you to set the type of communication. In Full Duplex mode the Formula terminal can transmit and receive data simultaneously; in Half Duplex mode the Formula terminal cannot receive data while it is transmitting, so the transmitted data is lost.
- Seite 180 SysTools™2001 User’s Manual Wird nur in englischer Sprache zur Verfügung gestellt!
- Seite 182 SysTools™2001 USER'S MANUAL...
- Seite 183 Vers.: 2.10 and later Code: 820042320 ALL RIGHTS RESERVED Datalogic reserves the right to make modifications and improvements without prior notification. Product names mentioned herein are for identification purposes only and may be trademarks and or registered trademarks of their respective companies.
- Seite 184 (90) days from the date of delivery as evidenced by a copy of your receipt. DATALOGIC's entire liability and your exclusive remedy shall be at DATALOGIC's option, replacement of the CD-Rom which shall be returned to DATALOGIC with a copy of your receipt.
- Seite 185 CONTENTS GENERAL INFORMATION ................1 Program Description ..................1 CONNECTION ....................3 Connecting the Terminal to the Host Computer ..........3 2.1.1 RS-232 Connection..................3 2.1.2 RS-485 Connection..................5 MENU DESCRIPTION .................. 7 General Menu Descriptions................7 Menu File ...................... 9 3.2.1 EasyGen™...
-
Seite 186: General Information
GENERAL INFORMATION 1 GENERAL INFORMATION This manual describes the installation and use of SysTools™2001 and is intended for those who are already familiar with the MS Windows operating systems. PROGRAM DESCRIPTION SysTools™2001 is a program for Windows 95/98/2000/ME and Windows NT, capable of managing Formula terminals either via an RS-232 connection or via an RS-485 Sysnet network. - Seite 187 SYSTOOLS™2001 For Standard/Enhanced Mode SysTools™2001 enables: application programs to be loaded onto terminals (.HEX, .H00 files); the record layout from terminals to be configured; collected data to be transferred to the host computer.
-
Seite 188: Connection
CONNECTION 2 CONNECTION CONNECTING THE TERMINAL TO THE HOST COMPUTER Before continuing with this phase, ensure that both the computer and terminal are switched off. ATTENTION 2.1.1 RS-232 Connection To load the program onto the Formula terminal it is necessary to insert it in the Formula Transceiver Charger cradle which has previously been connected to the power supply and to a host computer with an available RS-232 serial line. - Seite 189 SYSTOOLS™2001 Carry out the physical connections as described below: connect the serial port of the host computer to cable 94A054000 for 9-pin connections or to cable 94A054010 for 25-pin connections; connect the other end of the same cable (RJ connector) to the RS-232 port of the cradle;...
-
Seite 190: Rs-485 Connection
CONNECTION 2.1.2 RS-485 Connection RS-485 allows the connection of several terminals on a single RS-232 line through the installation of a Sysnet network (see the “Formula 904/N User's Manual”). A simplified Sysnet network allows up to 5 different types of Formula cradles to be connected;... - Seite 191 SYSTOOLS™2001 94A054000 Power Supply (94A054010) 94A054020 RS-485 RS-485 RS-232 94A054020 Power Supply RS-485 RS-485 RS-232 94A054020 Power Supply Key: A) Host computer B) Formula 902 T-box C) Single cradle F951 D) Multi-cradle F950/4 E) Formula 904/N Interconverter Power supply *) Telephone pair (max. 125 m)
-
Seite 192: Menu Description
GENERAL MENU DESCRIPTIONS To start SysTools™2001 from Windows, press the <Start> button, select Programs, Datalogic, EasyGen™ then select SysTools™2001 from the list. The first time the program is run it will start in EasyGen™ Mode and you will then be presented with the following display. - Seite 193 SYSTOOLS™2001 MENU BAR Menu Bar The menus in this area enable you to program the terminal, thus preparing it for operation. File The options presented in the File menu are enabled depending on the Startup Mode, for this reason options and icons displayed while working in one of the communication environments will not appear while working in the other one.
-
Seite 194: Menu File
Standard/Enhanced Mode) Help Displays the program help file, provides information about the software and enables connection to the Datalogic web site. MENU FILE 3.2.1 EasyGen™ Mode In EasyGen™ Mode, the File Menu and relative Toolbar icons allow selecting,... - Seite 195 SYSTOOLS™2001 The first two entries in the submenu are used to load data from one or more .DAT files onto a Formula terminal. They differ in the way the data files are selected Send set of tables… By selecting the EasyGen™ application (.APP, .POW), SysTools™2001 is able to identify all its associated tables, listing them as in the following figure.
- Seite 196 MENU DESCRIPTION Row: contains the maximum number of records that the table may hold. This value does not necessarily coincide with the actual number of records in the .DAT file. Col. (Columns): contains the number of fields defined in the corresponding table.
- Seite 197 SYSTOOLS™2001 Send table… As in the case above, it is possible to directly select a data file (.DAT) to be sent to the Formula terminal. It is not necessary to specify the relative application (.APP or .POW file) if it is present in the same directory as the .DAT file.
- Seite 198 MENU DESCRIPTION Receive table… This selection downloads data from a EasyGen™ table contained in a Formula terminal memory into a .DAT file on the PC. The following template appears: Terminal: the ID number of the terminal (among those present in the system) from which the download is to be made Table name: The name of the table in the Formula terminal memory...
- Seite 199 SYSTOOLS™2001 Set current table… With this command, you can specify the current EasyGen™ table for a Formula terminal. This table can then be uploaded from the terminal using the Data Collection window by pressing the <Start> button. You can also set the current EasyGen™ table using the function keys on the terminal.
-
Seite 200: Standard/Enhanced Mode
MENU DESCRIPTION 3.2.2 Standard/Enhanced Mode The File menu options can only be used with the Enhanced application and not with the Standard one since only the Enhanced application allows you to define table configurations for the data records to be acquired. The Standard application allows you to receive barcodes, the quantity, date and time and to start RS-232 and RS-485 connection. - Seite 201 SYSTOOLS™2001 Open… Allows you to locate a previously defined table configuration. When the command New... is selected or a pre-existing table configuration is opened by the command Open... the following dialog box will appear. The General folder allows you to define the table configuration file as follows: Name The filename must be no more than 10 characters long.
- Seite 202 MENU DESCRIPTION EXAMPLE For a terminal with 128 Kbyte memory size, a table configuration (.PRG file) is defined declaring 5 fields for each record. To calculate the maximum number of records employing the entire memory: 131072 – 32768 bytes = 595 33 X 5 The maximum number of records is 595.
- Seite 203 SYSTOOLS™2001 The Fields folder (see below) allows you to define the specifications of every field making up the record transmitted from the terminals. This record should be no more than 256 characters long. Number number given to current field and total field number. buttons allow you to scroll the list of fields forward and back.
- Seite 204 MENU DESCRIPTION Fixed: once defined it is always repeated exactly in every file. It’s possible to change this field only deleting and recreating the file. FIXED STORE NORMAL NORMAL 1625897 PENCIL 1526897 1541127 RUBBER In the “Normal field” box you can select: Enable search If selected, this enables the search for a field, using the appropriate bar codes in the Menu &...
- Seite 205 SYSTOOLS™2001 Max len. Defines the maximum length of the field. Verify Characters If this is selected, it enables a check on the type of characters the received data is composed of, also checking that these characters are within the defined limits (0 to 9 for numerical digits and A to Z for alphabetical characters).
-
Seite 206: Menu Utility
MENU DESCRIPTION MENU UTILITY 3.3.1 EasyGen™ Mode To initialize the terminals to be used with EasyGen™ applications it is necessary to send the EasyGen™ interpreter program. Then it is possible to send the EasyGen™ application. Two specific options are available in the menu Utility:... - Seite 207 SYSTOOLS™2001 Send EasyGen™ Application… This allows an application (a file with an .APP or .POW extension) to be loaded onto the terminal. When the Send EasyGen™ Application command is selected the following dialog box appears. Look in the file containing the application program can be searched for in the current directory.
- Seite 208 MENU DESCRIPTION Send EasyGen™ Interpreter This allows an interpreter program (a file with a .HEX or H00 extension) to be loaded onto the terminal. When the Send EasyGen™ Interpreter command is selected the following dialog box appears. Look in The file containing the application program can be searched for in the current directory.
-
Seite 209: Standard/Enhanced Mode
SYSTOOLS™2001 3.3.2 Standard/Enhanced Mode Standard and Enhanced mode allows just one option to initiate the terminals to be used with their respective applications. Before proceeding with this phase, ensure that the terminal to be initialized is the only one accessible in the network and has been configured with the default values. - Seite 210 MENU DESCRIPTION Send Application This allows an application (a file with a .HEX or H00 extension) to be loaded onto the terminal. When the Send Application command is selected the following dialog box appears. Look in the file containing the application program can be searched for in the current directory.
-
Seite 211: Startup Mode
SYSTOOLS™2001 3.3.3 Startup Mode This allows you to choose one of the two types of communication environments (EasyGen™ Mode or Standard/Enhanced Mode): Once the type of communication is selected, it is necessary to restart the program to enable it. -
Seite 212: Menu Window
MENU DESCRIPTION MENU WINDOW This menu is only available in Standard/Enhanced Mode. Allows you to select different arrangements for multiple windows displayed on the screen. Cascade Displays the windows in standard dimensions, one on top of the other, but arranged so that each heading is visible. -
Seite 213: Menu Help
SYSTOOLS™2001 MENU HELP Allows you to display the program help file and to be connected to the Datalogic web site. It also provides information about the software. -
Seite 214: Use And Operation
USE AND OPERATION 4 USE AND OPERATION USING THE DATA COLLECTION WINDOW When running SysTools™2001, once it has been configured and connected to the terminal(s), the program displays the status of each individual device in the Data Collection window defining the Device, State and Information. For Standard/Enhanced Mode, terminals and/or satellites for RF communications can be defined. - Seite 215 Error indicates a malfunction. Check the device’s physical connections and retry. If the error message persists, contact the Datalogic technical assistance service or the supplier. Information Indicates the specific type of terminal or satellite configured and the version of the firmware.
-
Seite 216: Network Setup
USE AND OPERATION allows you to configure the transmission parameters (see par. 4.2). allows you to select the options for data collection (see par. 4.3) NETWORK SETUP SysTools™2001 is able to manage up to 99 terminals and 99 satellites simultaneously since they have different identifying number systems (Station Addresses). -
Seite 217: On-Line Configuration
SYSTOOLS™2001 4.2.1 On-Line Configuration Before starting the configuration, the Formula terminal must be initialized to the default parameters (scan the RETURN TO DEFAULT PARAMETERS barcode) and must be inserted in the cradle. NOTE The configuration process is started by pressing the Network Setup...button in the Data Collection window. -
Seite 218: General Properties
USE AND OPERATION Satellites Properties: allows you to define the networked satellites and their transmission mode, only available Standard/Enhanced mode. Allows you to save the properties selected in the file Formula3.cfg and quit the open dialog box. Allows you to quit the open dialog box without saving the properties selected. - Seite 219 SYSTOOLS™2001 Port Host serial port used to connect the terminals. Baud Rate Transmission speed between host computer and terminals. Data bits Number of bits making up the transmitted data. Parity Type of control parity. Sleep The waiting time (expressed in milliseconds) for communication between one terminal and the next.
- Seite 220 USE AND OPERATION TERMINALS PROPERTIES Allows you to define the networked terminals and their transmission mode. Index Shows the terminal that the displayed data refer to. buttons allow you to scroll the list of the networked terminals. Enable you to update the list of programmed terminals. Protocol Identifying number (from 1 to 99) given to each terminal.
- Seite 221 SYSTOOLS™2001 File It allows to define the way to save the data received from each terminal. Name enables you to define the filename. Path enables you to define the folder where the file will be saved. append allows you to add new data to the file without having to remove the data already saved.
- Seite 222 USE AND OPERATION The Barcode Type & Symbology window allows you to define: Barcode type types of codes used for receiving data. Check digit only available for some types of code. It checks the correct reading of the code’s constituent characters. Size limits the readable codes to their fixed dimensions.
- Seite 223 SYSTOOLS™2001 This option is only available in Standard/Enhanced mode. This button allows the terminal initial Setup. Once the terminal configuration is set in the "Terminals" folder, this button allows to send it to the relative terminal. Together with this configuration the transmission parameters are configured again in the terminal by referring to the "General"...
- Seite 224 USE AND OPERATION SATELLITES PROPERTIES The following folder is enabled only in Standard/Enhanced mode. It allows to define the networked satellites and their transmission mode. Index It shows the satellites that the displayed data refer to . buttons allow you to scroll the list of the networked satellites. Enable you to update the list of programmed satellites.
- Seite 225 SYSTOOLS™2001 Protocol Identifying number (from 101 to 199) given to each satellite. Mode Allows you to define the method of connection to the system: 0 - Network = RS-485 connection with Sysnet network; 1 - Transmit Immediate = Single RS-232 connection without support...
- Seite 226 USE AND OPERATION EXAMPLE The following example shows, in a simplified form, how the Group command can be usefully carried out. ¥ ¥ $ %: GROUP 2 GROUP 1 Fo rm u la Fo rm u la SAT ELLITE RF SAT ELLITE RF Fo rm u la Fo rm u la...
- Seite 227 SYSTOOLS™2001 Polling Allows the satellites polling. To receive data, either the transmission between the host computer and the satellite (pc - sat.) or between the satellite and terminals (sat. - term.) must be initiated. File It allows to define the way to save the data received through each satellite. When the same satellite receives different data, it is not possible to identify the terminal they have been sent from.
- Seite 228 USE AND OPERATION It enables the properties defined in the Satellites Properties file to be sent to the terminal. When this button is selected the following dialog box will appear, requiring you to insert the confirm the transmission parameters defined in the General Properties file. If the same properties have to be given to several satellites, this button initiates a sequential search for an identifying number from 101 to 199.
- Seite 229 When this button is selected, the following dialog box will appear. This window lists the hardware parameters pre-set by the radio frequency satellite (Default RF) and by the infrared satellite (Default IR). The values of these parameters can only be altered on special instruction from Datalogic or the distributor. ATTENTION...
-
Seite 230: Off-Line Configuration
USE AND OPERATION 4.2.2 Off-Line Configuration An alternative method of configuring the terminals is by reading barcodes in the “Menu & Command Booklet” or in the “STANDARD MODE & ENHANCED MODE” manual of the specific terminal. The following example provides configuration for a F734 terminal if you are using SysTools™2001. - Seite 231 SYSTOOLS™2001 END OF BLOCK END OF TEXT CHECKSUM 256 RS-485...
- Seite 232 USE AND OPERATION Verify that the following parameters of this example are correct for your application. They must correspond to those defined in the General folder of the “Formula Control Properties” window. CAUTION BAUD RATE 9600 EVEN PARITY DATA BITS 7 SET-UP IN/OUT Once procedure is loaded, you must depress the associated function key before starting to work.
-
Seite 233: Options
SYSTOOLS™2001 OPTIONS Data Collection Settings This allows you to choose the method of data collection. Manual: allows data collection to take place using the start and stop buttons in the Data Collection window. Automatic at startup: enables data collection immediately when SysTools™2001 is started. - Seite 234 USE AND OPERATION For EasyGen™ Mode, the data table(s) to receive from the terminal can be predefined. Receive all the tables collects all the data tables specified in the EasyGen™ from the terminal: application running on the terminal. Receive the current collects the active data table from the terminal without table from terminal: reference to its name.
-
Seite 235: Troubleshooting
SYSTOOLS™2001 5 TROUBLESHOOTING PROBLEM CAUSE REMEDY Incorrect connection of the Check physical system components. connections system. The terminal is not in Free the terminal memory Terminal doesn’t bootstrap mode, i. e. it PROTECT RESET initialize. already has a program BUTTON. loaded in memory. - Seite 236 TROUBLESHOOTING PROBLEM CAUSE REMEDY The serial port is used by Quit the program that is The Start command of the another program. using the same serial Data Collection window port. fails and the message A serial port has been Re-set to the right serial open “Unable communication...