HP Designjet Z5400 PostScript Anleitung Zur Produktmontage
Eprinter
HP Designjet Z5400
PostScript® ePrinter
Product Assembly
EN
Instructions
Instructions d'assemblage
FR
du produit
Anleitung zur
DE
Produktmontage
Istruzioni per l'installazione
IT
del prodotto
Instrucciones de montaje
ES
del producto
Instruções de montagem do
PT
produto
Инструкции по сборке
RU
продуктов
өнім жинағы
KK
нұсқаулары
© 2013 Hewlett-Packard Company
Large Format Division
Camí de Can Graells 1-21 · 08174
Sant Cugat del Vallès
Barcelona · Spain
All rights reserved
Printed in XXX
Hardware Setup:
EN
1- open the printer box
2- Stand assembly
3- Unpack more components
4- Power and network configuration
5- Printhead and cartridge setup
Software setup:
Now, it's easy to print large-format documents from virtually
anywhere, using your laptop, printer touchscreen, iPhone®, or
iPad®.
Installation du matériel :
FR
1- Ouverture du carton de l'imprimante
2- Assemblage du support
3- Déballage des autres composants
4- Configuration réseau et alimentation
5- Installation des têtes d'impression et des cartouches
Installation du logiciel :
Il est désormais facile d'imprimer des documents grand
format depuis quasiment n'importe où à l'aide d'un ordinateur
portable, de l'écran tactile de l'imprimante, d'un iPhone® ou
d'un iPad®.
Hardware-Setup:
DE
1: Öffnen des Druckerkartons
2: Zusammenbauen des Standfußes
3: Auspacken weiterer Komponenten
4: Stromversorgungs- und Netzwerkkonfiguration
5: Einrichten von Druckköpfen und Patronen
Software-Setup:
Das Drucken großformatiger Dokumente von nahezu jedem
Standort aus mit Ihrem Notebook, Drucker-Touchscreen,
iPhone® oder iPad® ist nun einfacher denn je.
Installazione dell'hardware:
IT
1 - Apertura della scatola della stampante
2 - Assemblaggio del piedistallo
3 - Disimballaggio di altri componenti
4 - Configurazione dell'alimentazione e della rete
5 - Installazione delle cartucce e delle testine di stampa
Impostazione del software:
Ora è semplice stampare documenti di grande formato da
praticamente qualsiasi posizione utilizzando il laptop, lo
schermo a sfioramento della stampante, l'iPhone® o l'iPad®.
Instalación del hardware:
ES
1- Apertura de la caja de la impresora
2- Montaje del soporte
3- Desembalaje de más componentes
4- Configuración de red y alimentación
5- Instalación del cabezal de impresión y el cartucho
Instalación del software:
Ahora resulta muy fácil imprimir documentos de gran formato
desde prácticamente cualquier lugar mediante un portátil, la
pantalla táctil de la impresora, un iPhone® o un iPad®.
Configuração de hardware:
PT
1- Abra a caixa da impressora
2 - Levante a montagem
3 - Retire mais componentes da embalagem
4 - Configuração de rede e energia
5 - Configuração de cartucho de tinta e cabeçotes de impressão
Configuração de software:
Agora, é fácil imprimir documentos em grandes formatos de
praticamente qualquer lugar usando olaptop, a tela sensível ao
toque da impressora, o iPhone® ou o iPad®.
Настройка оборудования:
RU
1. Откройте коробку с принтером.
2. Сборка основания.
3. Распаковка других компонентов.
4. Настройка питания и сети.
5. Настройка печатающих головок и картриджей.
Настройка программного обеспечения:
Теперь можно легко печатать крупноформатные
документы практически в любом месте, используя ноутбук,
сенсорный экран принтера, приложение для iPhone® или
iPad®.
Аппаратты орнату:
KK
1- принтер қорабын ашу
2- Блокты жинау
3- Өзге құрамдастарды ашу
4- Қуат және желі конфигурациясы
5- Баспа басы және картридж параметрлері
Бағдарламалық жасақтаманы орнату:
Енді,
кез келген жерден, өзіңіздің ноутбук, сенсорлық экранды
принтеріңізді, iPhone® немесе iPad® қолдана отырып, кең
форматты құжаттарды басып шығару өте оңай.

Verwandte Anleitungen für HP Designjet Z5400 PostScript


Inhaltszusammenfassung für HP Designjet Z5400 PostScript
- Seite 1 HP Designjet Z5400 PostScript® ePrinter Hardware Setup: Instalación del hardware: 1- open the printer box 1- Apertura de la caja de la impresora 2- Stand assembly 2- Montaje del soporte Product Assembly 3- Unpack more components 3- Desembalaje de más componentes...
- Seite 2 Read these instructions carefully...What you will need for this procedure • Because the product is heavy, you may need three people to unpack it. When more than one person is needed, this Product working area symbol is displayed. Before you start unpacking, consider where you are going to put the assembled product.
-
Seite 3: Apertura Della Scatola
Open the box HP Designjet Z5400 Ouverture du carton PostScript® ePrinter Start Up Öffnen des Kartons Apertura della scatola Apertura de la caja Abra a caixa Откройте коробку Қорапты ашу © 2013 Hewlett-Packard Development Company, L.P. Remove the accessories from the printer box. - Seite 4 Lift up the sides and top of the printer box, and remove Dismantle the bottom of the printer box by disengaging Cut and remove the straps around the stand box. Remove the pieces of cardboard. them from the printer. each corner and then folding down the sides so that they Do not remove the white protective material until are out of the way.
- Seite 5 Stand assembly Assemblage du support Zusammenbauen des Standfußes Assemblaggio del piedistallo Montaje del soporte Levante a montagem Сборка основания Блокты жинау Open the stand box. Remove the cross-brace and the two pieces of packaging Place the two pieces of packaging material on the floor, material from each end of the stand box.
- Seite 6 4+4=8 A screwdriver and 22 screws are provided in the stand Attach each leg of the stand to the cross-brace, using two Make sure you have used 4 screws in each leg. Attach a foot to each leg, using four screws in each foot. box: 16 screws to assemble the stand, 4 to attach it to the screws on the outside of the leg and then two on the inside.
- Seite 7 180° Return to the main body of the product, carefully turn Remove the small flaps from each of the foam Remove the orange tape from the transparent covering Open the transparent covering and remove the desiccant the product upside down in order to attach the legs. You end pieces.
- Seite 8 Place the stand on the product slowly and carefully, When the legs are correctly located on the product, attach Lift the stand, keeping it upside down. There is a round yellow button protruding from the top so that the colored buttons on the legs fit into the them to the product using two screws for each leg.
- Seite 9 90° 101.2kg Check that the wheels on the stand are locked. Rotate the product 90 degrees. IMPORTANT:make sure Hold the product by the foam end pieces and by the Remove the foam end pieces. At this point you will have two spare screws. that the roll feeds are facing downwards.
- Seite 10 Remove the transparent covering from the product. Unlock the brake lever on each of the four wheels by lift- Lay out the components of the basket. Fit the basket supports to the stand legs, one to each leg. ing the lever. Déposez par terre les composants du bac de réception. Fixez les supports du bac de réception aux montants du Retirez le couvercle transparent du produit.
- Seite 11 Fit the two short tubes to the product’s feet, one on the Attach the basket’s front tube to the two short tubes on Rest the basket’s rear tube on the supports that you The basket is now complete. front of each foot. Each tube should click into place. each foot.
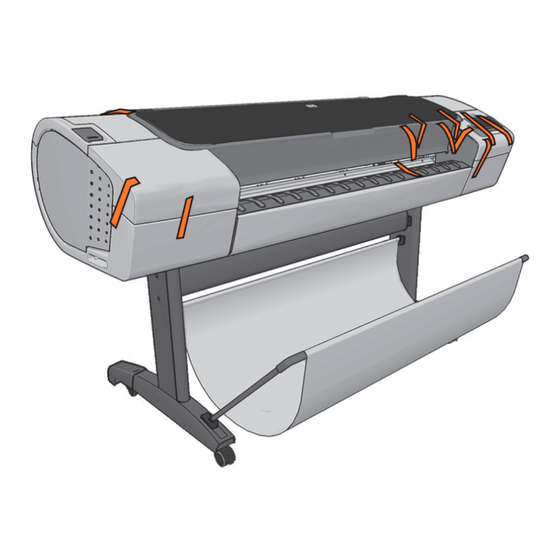
- Seite 12 Unpack more components Déballage des autres composants Auspacken weiterer Komponenten Disimballaggio di altri componenti Desembalaje de más componentes Retire mais componentes da embalagem Remove all the orange tape pieces from the product, Open the Window. You will see a cardboard support attached to the product except for the ones coming from inside the product.
- Seite 13 Carefully lift the cardboard support up and out of the Inside the right-hand side of the product, you will see a Turn the cardboard support 90° to the right. Remove the cardboard carefully. product. It will not be needed again; you can discard it. piece of cardboard.
- Seite 14 Power and network configuration Configuration réseau et alimentation Stromversorgungs- und Netzwerkkonfiguration Configurazione dell’alimentazione e della rete Configuración de red y alimentación Configuração de rede e energia Настройка питания и сети If you find a USB flash drive in a plastic bag inside the Connect the power cable to the product’s power socket.
- Seite 15 Configuração de cartucho de tinta e cabeçotes de impressão On the front panel, the HP logo appears. Please wait a Switch on power to the product using the switch just The product checks for the presence of ink cartridges.
- Seite 16 Press the ink cover firmly into place until you hear Check that the ink cover is properly placed. Open the cover on the left-hand side of the product. Insert the ink cartridges one by one. Each cartridge is that it clicks. marked with its own color, and should be inserted only Vérifiez que le capot de l’encre est correctement Ouvrez le capot sur le côté...
- Seite 17 When you have inserted all of the ink cartridges correctly, the product Open the window and grasp the blue handle of the Pull the blue handle towards you as far as it will go. The cartridges must be inserted the right way around: the must prepare the ink system for its first use.
- Seite 18 Press the OK key on the front panel when you have re- Lift the handle up to open the printhead cover. The setup printheads exist only to prevent the escape of Remove and discard all orange setup printheads. You may The front panel prompts you for the next step: ink during ink cartridge installation.
- Seite 19 Unwrap each printhead and remove all orange parts. Insert the printheads one by one. Each printhead Push each printhead into the slot until it clicks into Pull the blue handle towards you as far as it will go, pick- is marked with its own colors, and should be in- place.
- Seite 20 HP Designjet Z5400 PostScript® ePrinter Start Up © 2013 Hewlett-Packard Development Company, L.P. Push the handle down on top of the printhead cover. While the product is preparing the printheads, you could spend the time installing the product software on your computer.
- Seite 21 When the front panel prompts you to load paper for If the blue removable stop is on the spindle, remove it. Put the Push the removable stop towards the roll as far as it will From the front of the product, place the spindle into the roll onto the spindle, making sure to put it on the right way printhead alignment: Take the spindle which comes in a product.
- Seite 22 Feed the leading edge of the paper into the product until the Media load for lower roll Go to the rear of the product, and Remove the spindle by lifting out first the right-hand If the blue removable stop is on the spindle, remove it. Put remove the orange stoppers from each end of the spindle.
- Seite 23 Push the removable stop towards the roll as far as it will The product will proceed to align the printheads. This process From the back of the product, place the spindle into the Feed the leading edge of the paper into the product until the product takes hold of it.
- Seite 24 HP ePrint: 1 - HP ePrint is a HP web service that allows you to print by simply attaching a PDF, or other print-ready file, to an email and send it to your printer’s dedicated address. To start printing by email you need the printer’s email address and printer code.
- Seite 25 Nutzen Sie die Vorteile von Cloud Printing mit Ihrem internetbasierten Drucker: 1 - Mit HP ePrint können Sie PDFs oder andere druckbare Dateien einfach als E-Mail-Anhang an Ihre Druckeradresse senden und auf diese Weise ausdrucken. Um diese Funktion nutzen zu können, benötigen Sie die E-Mail-Adresse des Druckers und den Druckercode.
- Seite 26 Install the product software from the DVD that came with your printer onto your computer. Be sure to follow the software ändern und die ePrinter-Sicherheitseinstellungen verwalten (dazu benötigen Sie den Druckercode und ein HP ePrint installation instructions. For USB connections: Connecting your product before installing the software can lead to product Center-Konto).
- Seite 27 1. Return to home screen *Месяц и год выпуска You can now, or at some later time, color-calibrate the paper type that you intend to use in the product. Color calibration 2. Go back to previous screen is recommended for accurate color printing. It can be started from the Product Utility program installed as part of your 3.
- Seite 28 Anleitung auf dem Bildschirm. Per Mac: * Si le DVD ne s’exécute pas automatiquement, ouvrez * Open the Mac OS X HP Designjet Installer icon and fol- l’icône du DVD sur votre Bureau. Mac: * se il DVD non si avvia automaticamente aprire l’icona low the instructions on your screen.
- Seite 29 DVD del escritorio. экране. * Егер DVD автоматты түрде қосылмаса, жұмыс * Abra o ícone Instalador da HP Designjet para Mac OS X e * Abra el icono de Mac OS X HP Designjet Installer y siga үстеліндегі DVD белгісін ашыңыз.
- Seite 32 The only warranties for HP products and services are set forth in the express warranty statements accompanying such products and services. Nothing herein should be construed as constituting an additional warranty. HP shall not be liable for technical or editorial errors or omissions contained herein.