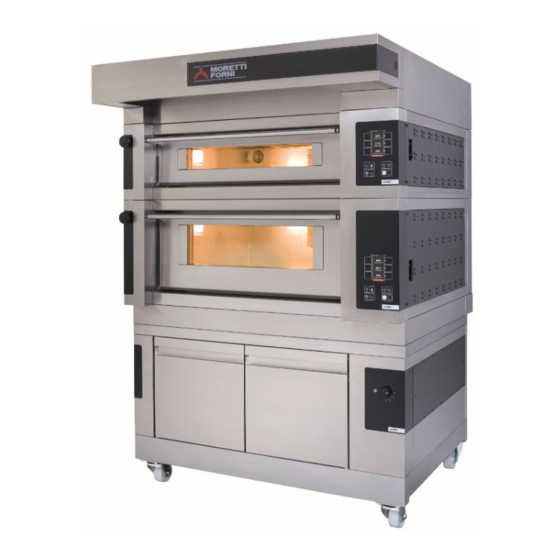
Seite 1
Manuale di istruzioni Instructions manual Manual d’instructions Bedienungsanleitung Manual instrucciones S100E-S120E Forno elettrico Electric oven Four electrique Elektrische Ofen Horno Eléctrico Numeri di matricola / Serial numbers: Cod.73302740 Ver.: A01...
Seite 3
AHKX MHKX RHKX AMALFI A-B-C-D AMALFI L-P60L-P80L-P120L P110L-P150L T64E - T75E – T97E – TT98E S100E – S120E S100L – S120L S100KX – S120KX sono conformi alle seguenti direttive Direttiva Bassa Tensione 2006/95/CE e successive modifiche Direttiva Compatibilità Elettromagnetica 2004/108/CE e successive modifiche...
Seite 4
We declare under sole responsability that the products to which this declaration relates is in conformity with the following standards <> following the provisions of the directives<>.
Seite 5
INDICE SPECIFICHE TECNICHE INSTALLAZIONE FUNZIONAMENTO MANUTENZIONE ORDINARIA MANUTENZIONE STRAORDINARIA CATALOGHI RICAMBI Nota: Il presente catalogo é predisposto per la lettura in cinque lingue. Istruzioni originali in Italiano e traduzioni delle istruziuoni originali in Inglese, Francese, Tedesco e Spagnolo. GARANZIA Norme e regolamentazione La garanzia è...
La cella di lievitazione è costituita da una struttura di acciaio, è Modello Accessorio pannellata, ha guide portateglie ed è dotata di termostato per il riscaldamento. S100E-S120E (camera cottura) vaporiera S100L-S120L (cella) porta attrezzi DIRETTIVE APPLICATE S100KX-S120KX (cappa) aspirazione Questa apparecchiatura è...
COLLEGAMENTI ATTENZIONE! E’ necessario installare per la cella, un interruttore generale bipolare con fusibili o un interruttore 2.5.1 COLLEGAMENTO SCARICO VAPORI automatico idonei ai valori riportati sulla targhetta. ATTENZIONE! Il collegamento dello scarico vapori deve essere NOTA: Il dispositivo scelto dovrebbe trovarsi nelle immediate effettuato esclusivamente da personale qualificato.
FUNZIONAMENTO NOTA: LCD non TOUCH SCREEN. Eventuali pressioni sul display possono danneggiarlo irreversibilmente compromettendo il OPERAZIONI PRELIMINARI DI CONTROLLO corretto funzionamento dell’intera attrezzatura. ATTENZIONE! Prima di iniziare le fasi di avviamento e Una volta acceso l’interruttore generale 0/1 sia il display grafico che programmazione dell’apparecchiatura si deve verificare che: l’interruttore generale si illuminano.
3.2.2 MESSA IN FUNZIONE CAMERA DI COTTURA: Lo stato dell’apparecchiatura in modalità Programmi è confermato a MODALITA’ ECO SMART BAKING questo punto dalla presenza del nome del programma nella status bar La modalità SMART BAKING è la modalità standard di gestione del che si alterna alla dicitura PREMERE START.
Per disattivare la modalità di visualizzazione TIMERS e tornare alla L’operazione sopra indicata può essere effettuata anche durante la fase visualizzazione STANDARD premere il tasto “MENU”, selezionare la di cottura. voce VISUALIZZAZIONE con i tasti “SELEZIONE” quindi premere La gestione della temperatura viene effettuata elettronicamente “OK”...
Seite 11
durata vapore”) (fig. 20d-e). Il tempo è espresso MM:SS. L’intervallo Scorrere la lista con i tasti “SELEZIONE” fino alla voce desiderata e tra una vaporizzazione e la successiva non può essere inferiore a 15 confermare con il tasto “OK”. minuti. I tempi delle vaporizzazioni hanno come inizio il termine della Per la voce “Durata vapore”...
termine è consigliato riaprirla per permettere l’evacuazione dei acustica) stessa cosa se, all’orario impostato come spegnimento il vapori. forno si trova già spento. NOTA: Se avviene un’interruzione di energia elettrica a timer 3.5.3 HOTKEY inserito, (Black-out) non si modifica alcun parametro l’importante La funzione “Hotkey”...
fintanto che l’anomalia non viene risolta. In caso di anomalia pendente ATTENZIONE! Non lavare l’apparecchiatura con getti d’acqua è sempre possibile visualizzare il tipo di anomalia accendendo alla voce diretti o in pressione. Evitare che l'acqua o eventuali prodotti ALLARMI dal menu ASSISTENZA (vedere 3.5.8). utilizzati, vengano a contatto con le parti elettriche.
ATTENZIONE ISTRUZIONI SEGUENTI RELATIVE ALLA “MANUTENZIONE STRAORDINARIA” SONO STRETTAMENTE RISERVATE PERSONALE TECNICO SPECIALIZZATO MUNITO DI REGOLARE LICENZA, RICONOSCIUTO ED ABILITATO DALLA DITTA COSTRUTTRICE. MANUTENZIONE STRAORDINARIA - Scollegare i due cavi di alimentazione della termocoppia; - Sostituire la termocoppia (part.8 tav.A); OPERAZIONI PRELIMINARI DI SICUREZZA - Eseguire le operazioni inverse per il rimontaggio, facendo attenzione ATTENZIONE! Tutte le operazioni di manutenzione e di...
Seite 15
- Riavvitare la calotta. 5.4.2 SOSTITUZIONE DEL TERMOSTATO Eseguite le operazioni al punto 5.1, per la sostituzione del termostato di sicurezza procedere come segue: - Dalla parte interna rimuovere carter accesso alla componentistica; - Scollegare i faston del termostato; - Togliere la manopola (part.2 tav.B) del termostato; - Svitare le viti di fissaggio del termostato;...
Seite 17
INDEX TECHNICAL DATA INSTALLATION OPERATION ORDINARY MAINTENANCE SPECIAL MAINTENANCE LIST OF SPARE PARTS Note: This catalogue is printed in five different languages. Original instructions in Italian and translations of the original instructions in English, French, German and Spanish. WARRANTY Standards and rules Warranty only covers the replacement free to factory of pieces eventually broken or damaged because of faulty materials or manufacture.
The support element comprises a steel structure fitted with tray holder guides. Model Accessories The leavening compartment comprises a steel structure which is panelled, has tray holder guides and is fitted with a thermostat for S100E-S120E (baking chamber) Steamer heating. S100L-S120L (leavening) Tool-holder S100KX-S120KX (hood)
CONNECTIONS The leavening compartment is delivered with a voltage of 230Vac. 1N 50/60 Hz, as indicated on the rating plate at the side (fig. 1). 2.5.1 VAPOUR EXHAUST CONNECTION To carry out electrical connection, remove the protective cover located WARNING! Connection of the vapour exhaust must only be on the rear side of the compartment (fig.12).
All control operations must be carried out by experienced L) Indication of “Steamer” status technicians with the proper permits. M) Indication of “Buzzer” disabled status WARNING! N) Indication of “Anomaly present” status - The oven must always be under surveillance when in operation. NOTE: The electronic controls allow more precise and rapid - During operation the oven surfaces, and in particular the glass, regulation of the oven.
real time, when the corresponding “+” and/or “-“ key is pressed, the The oven has 2 independent “baking timers” which can be controlled current setting will be shown in red (“Set temperature”). Pressing the by direct access, using the dedicated keys on the control panel (fig.16 keys again will change the parameter.
Seite 22
Press the “BOOSTER” key to enable/disable the function. Once alphabetical order, starting with the letter chosen with the enabled, the screen will become ORANGE and a specific icon appears “SELECTION” key and confirmed with “OK”. Select the program to the left of the cooking parameters. required with the “SELECTION”...
Seite 23
NOTE: the <NO DIRECTORY> message means that there is no sound to warn the operator that the cleaning program is complete. The USB or that it has not been correctly inserted into the slot display will read “Cleaning program completed”. Press “OK” to quit and proceed to switch off the appliance ass described in 3.9.
Seite 24
genenerale switch in position "1" and the display is off make sure Always use suitable protective equipment (gloves, eyewear... ). All that the unit does not enter into this state before turning off the operations must be performed by qualified technicians and using circuit breaker.
WARNING FOLLOWING INSTRUCTIONS, WHICH CONCERN “SPECIAL MAINTENANCE” ARE STRICTLY RESERVED TO SPECIALIST TECHNICIANS WITH THE RELEVANT LICENSE AS WELL AS BEING APPROVED BY THE MANUFACTURER. SPECIAL MAINTENANCE 5.3.4 TRANSFORMER / CIRCUIT BOARD / CONTACTOR REPLACEMENT PRELIMINARY SAFETY OPERATIONS After carrying out the operations described in 5.1 above, to replace the WARNING! All maintenance operations and repairs must be transformer / circuit board / contactor proceed as follows: carried out using suitable accident prevention equipment, by...
- Disconnect the thermostat faston connectors; - Remove the thermostat dial (item 2 plate B); - Unfasten the fixing screws of the heating element support; - Remove the thermostat sensor located inside the compartment; - Replace the thermostat (item 3 plate B) and the respective sensor. - Perform the above operations in reverse order to reassemble.
TABLE DES MATIÈRES SPECIFICATIONS TECHNIQUES INSTALLATION FONCTIONNEMENT ENTRETIEN ORDINAIRE ENTRETIEN EXTRAORDINAIRE LISTE DES PIECES DE RECHANGE Remarque: Ce catalogue a été rédigé pour la lecture en cinq langues. Instructions originales en italien et traduction des instructions en Anglais, Français, Allemand et Espagnol.
Les fours sont dotées des accessoires suivants: des glissières porte-plateaux et est dotée d’un thermostat pour le chauffage. Modèle Accessoires DIRECTIVES APPLIQUEES S100E-S120E (chambre cuisson) vaporisateur Cet appareil est conforme aux directives : S100L-S120L (étuve) Porte-outils Directive Basse Tension 2006/95/CE...
CONNEXIONS 2.5.2.2 BRANCHEMENT ELECTRIQUE DE L’ETUVE ATTENTION ! Il est nécessaire d’installer pour l'étuve, un 2.5.1 CONNEXION EVACUATION VAPEURS interrupteur général bipolaire avec des fusibles ou un interrupteur ATTENTION ! La connexion d'évacuation des vapeurs doit être automatique adapté aux valeurs indiquées sur la plaquette. exécutée exclusivement par un personnel spécialisé.
REMARQUE! Le dispositif d’évacuation de l’eau est muni d’un + : augmenter paramètre - : diminuer paramètre robinet qui doit rester ouvert pendant l’utilisation de l’appareil. ↑ : déplacer sélection “Vers le haut” REMARQUE! le constructeur décline toute responsabilité dans le ↓...
Seite 31
composants (plaques réfractaires, etc.). Avant d'atteindre le point présents en mémoire, dans l'ordre alphabétique à partir de la lettre de consigne, toujours stationner pendant au moins 40 minutes à sélectionnée. Se déplacer jusqu'au programme souhaité et appuyer sur “OK”. Le programme est chargé. une température comprise entre 120°C et 160°C.
Seite 32
aux pages-écrans précédentes, appuyer une ou plusieurs fois sur la Pour sélectionner les températures de la voûte et de la sole, agir sur les touche “RETOUR”. touches “+” et/ou “-“ pour augmenter et/ou diminuer la température Pour faciliter le réglage des MINUTERIES, on peut accéder à la page- correspondante.
Seite 33
paramètres avec les touches “+” et “-” puis confirmer avec la touche Pour activer cette fonction, appuyer sur la touche “MENU”, “OK”. sélectionner l'élément VAPORISATION avec touches “SELECTION” (↑ et ↓) et appuyer sur “OK” pour accéder au sous- Uniquement sur les modèles prévoyant la cuisson à la vapeur, les pages suivantes concernent les sélections de 3 temps de vaporisation menu.
Seite 34
cours…”. L'éclairage chambre s'allume s'éteint Lorsque le four entre en fonction (ou qu’il s’est éteint) à l’horaire automatiquement. prédéfini par la minuterie, la fonction "Minuterie" reste opérationnelle. Au terme du programme, le four passe à l'état de STOP en mettant les Par conséquent, si aucune modification n’est effectuée, une semaine résistances hors tension et en émettant une signalisation sonore après et à...
En cas d’anomalie, deux types différents d’alarmes sont susceptibles de d’un chiffon ou d’une éponge humectés, éventuellement avec de l’eau s'afficher sur l'écran. savonneuse et ensuite rincer et essuyer, en nettoyant les parties satinées 1) Alarme Température maximale en suivant le sens du satinage. 2) Alarme Anomalie Thermocouple (cette alarme indique le Exécuter un nettoyage approprié...
ATTENTION INSTRUCTIONS SUIVANTES RELATIVES L’“ENTRETIEN EXTRAORDINAIRE” SONT STRICTEMENT RESERVEES PERSONNEL TECHNIQUE SPECIALISE MUNI D’UNE LICENCE SPECIFIQUE, RECONNU ET AGREE PAR LE FABRICANT. ENTRETIEN EXTRAORDINAIRE 5.3.3 REMPLACEMENT DU THERMOCOUPLE Une fois les opérations du 5.1 exécutées, pour le remplacement du OPERATIONS PRELIMINAIRES DE SECURITE thermocouple, procéder comme suit : ATTENTION ! Toutes les opérations d’entretien et de réparation - Enlever le panneau latéral droit (détail 6 tab.
5.4 REMPLACEMENT DE PARTIES DE L'ETUVE 5.4.1 REMPLACEMENT DE LA LAMPE D’ECLAIRAGE Une fois les opérations du point 5.1 exécutées, la lampe d’éclairage et/ou la calotte se remplacent à l’intérieur de l'étuve, en exécutant les opérations suivantes: - Dévisser la calotte (détail 7 Tab.B) et remplacer l’ampoule (détail 4 Tab.B) et/ou la calotte.
Seite 39
INHALTSVERZEICHNIS TECHNISCHE ANGABEN INSTALLATION BETRIEB WARTUNG AUSSERORDENTLICHE WARTUNG ERSATZTEILKATALOG Hinweis: Vorliegender Katalog ist in fünf Sprachen ausgeführt. Originalanweisungen auf Italienisch und Übersetzungen der Originalanweisungen auf Englisch, Französisch, Deutsch und Spanisch GARANTIE Bedingungen und Vorschriften Die Garantieleistung ist ausschließlich auf den Ersatz jener Teile beschränkt, die festgestellte Material- oder Konstruktionsfehler aufweisen. Der Versand der Teile erfolgt frei Werk.
Backformhalterungen ausgestattet. Die Maschine ist mit den folgenden Zubehörteilen ausgestattet: Der Gärschrank besteht aus einer Stahlstruktur, ist getäfelt, verfügt über Backformhalterungen und ein Heizthermostat. Modell Zubehör S100E-S120E (Backkammer) Verdampfer ANGEWANDETE RICHTLINIEN Diese Maschine entspricht den folgenden Richtlinien: S100L-S120L (Zelle) Werkzeughalterung...
Anmerkung und Zeichnung der Abdeckungs-Montage auf die vorderen Ausladungen der unteren Kammer (Basis-Bereich) legen. 2.5.2.2 ELEKTROANSCHLUSS GÄRSCHRANK ANSCHLÜSSE ACHTUNG! Für Gärschrank muss zweipoliger Hauptschalter mit Sicherungen oder ein Selbstausschalter 2.5.1 ANSCHLUSS ABDAMPFLEITUNG installiert werden, der für die auf dem Maschinenschild ACHTUNG! Anschluss Abdampfleitung...
MERKE: Der Wasserabfluss besitzt einen Sperrhahn, der Die sechs neutralen Tasten, die rechts und links des graphischen Displays (Abb.16 Detail 2), können folgende Funktionen annehmen: während der Nutzung des Geräts geöffnet bleiben muss. MERKE: Der Hersteller übernimmt keine Haftung, falls die oben + : erhöht Parameter genannten Unfallverhütungsnormen nicht beachtet werden.
Seite 43
ACHTUNG! Führen Sie nie Backvorgänge beim ersten Einschalten Der Zustand des Geräts im Modus Programme wird mittels Präsenz des oder beim Einschalten nach längerer Nichtbenutzung aus. angezeigten Programmnamens in Status bar bestätigt. Zum Auswählen des gewünschten Programms, die Taste “MENU” ANMERKUNG: Bei dem nächsten Einschalten, zu schnelle Heizphasen vermeiden, um die Lebensdauer der Komponenten drücken, PROGRAMME mit den Tasten “AUSWAHL”...
“Einstellungen": zum Ändern der eingestellten Zeit (Abb.19a) Der Modus DUAL-TEMP betrifft die Verwaltung des Ofens, die das "Dauer Signal": zum Ändern der Gesamtdauer des Signals (Abb. Einstellen von 2 Temperaturen ermöglicht, entsprechend von Himmel 19b). Jeder Balken entspricht 10 Sekunden. Mittels annullieren und Boden (Abb.
Buchstaben mit den Tasten "AUSWAHL" anwählen, daraufhin "OK" Vorrichtung befinden. Die Position <ROOT> gibt die erste Stufe des zur Bestätigung drücken, zum nächsten Buchstaben übergehen und so Datei-Systems an. Mit den Tasten "AUSWAHL" die Directorys weiter. Wenn man den zuletzt eingegebenen Buchstaben löschen anwählen, in der sich die zu exportierenden Programme befinden.
Seite 46
dem Display mit einem Prüfsymbol gekennzeichnet. Die Anwesenheit ANMERKUNG: Eine "ON"-Einstellung, die keine darauf folgende des Symbols gibt an, dass die Beleuchtung eingeschaltet ist. "Off"-Einstellung vorsieht, ist trotzdem aktiv: der Ofen wird zur eingestellten Uhrzeit automatisch angehen und muss manuell 3.5.2 REINIGUNG ausgeschaltet werden.
ACHTUNG! Vorgang ausschließlich vorgesehen für ausgebildetes STOPP und vom Hersteller zugelassenem Personal. Die Maßnahme kann die korrekte Funktion des Geräts beeinträchtigen. Zum Ausschalten der Ausrüstung, folgendermaßen fortfahren: “Angleichen": startet die senkrechte Angleich-Prozedur der a) die STOPP_Taste einige Sekunden lang gedrückt halten. Das Graphik.
ACHTUNG DIE FOLGENDEN ANWEISUNGEN ZUR “AUSSERORDENTLICHEN WARTUNG” RICHTEN SICH AUSSCHLIESSLICH FACHPERESONAL ORDENTGEMÄSSER LIZENZ, DAS VOM HERSTELLER ANERKANNT UND BEFUGT IST. AUSSERORDENTLICHE WARTUNG 5.3.3 AUSTAUSCH DES THERMOELEMENTS PRELIMINÄRE SICHERHEITSMASSNAHMEN Nach Durchführung der unter Punkt 5.1 genannten Vorgänge ist beim ACHTUNG! Alle Wartungs- und Reparaturarbeiten müssen mit Austausch des Thermoelements folgendermaßen vorzugehen: geeigneten Unfallverhütungsausrüstungen von vom Hersteller dazu - Das rechte Seitenpaneel abnehmen, indem die vier Fixierschrauben...
- Den Sensor des Thermostates, der sich innerhalb der isolierenden Steinwolle befindet, herausnehmen, indem der betreffende Teil der Steinwolle mit einer Klinge entfernt wird . - Den Thermostat (Detail 28 Tafel A) und den Sensor ersetzen, falls notwendig auch die abgenutzte Steinwolle. - Bei der Remontage in umgekehrter Reihenfolge vorgehen.
Seite 51
ÍNDICE CARACTERÍSTICAS TÉCNICAS INSTALACIÓN FUNCIONAMIENTO MANTENIMIENTO ORDINARIO MANTENIMIENTO EXTRAORDINARIO CATÁLOGO DE LOS RECAMBIOS Nota: El presente manual se ha previsto para la lectura en cinco idiomas. Instrucciones originales en Italiano y traducciones de las instrucciones originales en Inglés, Francés, Alemán y Español. GARANTÍA Normas y reglamentación La garantía se limita a la pura y simple sustitución franco de fábrica de la pieza eventualmente rota o defectuosa sólo en caso de defecto del material o de...
El soporte está formado por una estructura de acero y está equipado con Modelo Accesorio guías portabandejas. S100E-S120E (cámara de cocción) vaporera La celda de fermentación está formada por una estructura de acero, está revestida de paneles, tiene guías portabandejas y termostato para la...
CONEXIONES NOTA: El dispositivo elegido habría de estar cerca del aparato y ha de ser fácilmente accesible. 2.5.1 CONEXIÓN DESCARGA VAPORES La celda de fermentación se entrega con un voltaje de V230 1N 50/60 ¡ATENCIÓN! La conexión de la descarga de los vapores debe ser Hz como se indica en la placa de la parte lateral (fig.1 ).
- las etiquetas presentes sobre el aparato (fig.2), estén íntegras y Una vez encendido el interruptor general 0/1 tanto el display gráfico como el interruptor general se iluminan. En el momento del encendido puedan leerse, de lo contrario, sustituirlas. - todas las operaciones de conexión eléctrica y puesta a tierra se el display gráfico, tras visualizar durante unos segundos la pantalla hayan efectuado correctamente.
Seite 55
representados por un porcentaje) del cielo y de la placa de fondo (fig. El estado del aparato en modo Programas es confirmado ahora por la 17). presencia del nombre del programa en la barra de estado que se alterna Para habilitar el modo SMART BAKING, si ya no estuviera activo, con el texto PRESIONAR START.
Seite 56
Desplazarse en el listado con las teclas "SELECCION" hasta la voz Para ajustar las temperaturas de cielo y placa de fondo utilizar las teclas deseada y confirmar con la tecla "OK". Modificar el parámetro con las "+" y/o "-" para aumentar y/o disminuir la temperatura correspondiente. teclas "+"...
tiempo de cocción ("ajuste el tiempo") (que se cargará previamente en PUESTA FUNCIÓN CÁMARA T1 y T2) (fig. 20b). Modificar los parámetros con las teclas "+" y "-" COCCIÓN CON VAPORERA correspondientes, luego confirmar con la tecla "OK". Así se accede a la Esta función permite introducir vapor dentro de la cámara de cocción tercera pantalla de programación que requiere la introducción del nivel en cantidad “calibrada”.
Fabricante. Una vez terminado el programa y con el horno a temporizador, de la llegada del encendido (o apagado). Este encendido temperatura ambiente, basta con eliminar los residuos carbonizados (o apagado) puede ser interrumpido con la tecla STOP (o con la tecla utilizando una escobilla específica.
“Alinear”: empieza el procedimiento de alineación vertical de la OPERACIONES PRELIMINARES DE SEGURIDAD gráfica. Utilizar las teclas "SELECCIÓN" para mover la gráfica ¡ATENCIÓN! Antes efectuar cualquier operación correspondiente. mantenimiento, interrumpir la alimentación eléctrica apagando "Alarmas": visualiza posibles errores presentes. La tecla los interruptores instalados en la parte exterior del horno y/o de la "SELECCIONAR EN"...
ATENCIÓN SIGUIENTES INSTRUCCIONES RELATIVAS “MANTENIMIENTO EXTRAORDINARIO” ESTÁN RESERVADAS PERSONAL TÉCNICO ESPECIALIZADO EN POSESIÓN DE UNA REGULAR LICENCIA, AUTORIZADO Y HABILITADO POR EL FABRICANTE. MANTENIMIENTO EXTRAORDINARIO 5.3.3 SUSTITUCIÓN DEL TERMOPAR Tras efectuar las operaciones indicadas en el punto 5.1, para sustituir el OPERACIONES PRELIMINARES DE SEGURIDAD termopar hay que: ¡ATENCIÓN! Todas las operaciones de mantenimiento y...
Seite 61
SUSTITUCIÓN DE COMPONENTES DE LA CÁMARA DE FERMENTACIÓN 5.4.1 SUSTITUCIÓN DE LA LÁMPARA DE ILUMINACIÓN Tras efectuar las operaciones indicadas en el punto 5.1, para sustituir la lámpara de iluminación y/o la correspondiente tapa en el interior de la cámara de fermentación, hay que: - Desenroscar la tapa (detalle 7 tabla B) y sustituir la lámpara (detalle 4 tabla B) y/o la tapa;...
Seite 75
Denominazione Denomination Designation Bezeichnung Denominación Assime vetro con Logo Glass with logo Verre avec logo Glas mit Logo Vidrio con logo Interruttore Switch Interrupteur Schalter Interruptor Aspiratore Vapori Vapour Exhaust Fan Aspirateur Vapeurs Dampfabsauggebläse Aspirador De Los Vapores Piano In Lamiera Bugnata Embossed Plate Floor Plan En Tôle Gaufrée Backboden Aus Bossiertem Blech...
Seite 85
Rif. Denominazione Designation Denomination Bezeichnung Denominación Interruttore Switch Interrupteur Schalter Interruptor Motore elettrico Motor Moteur Motor Motor Condensatore Condenser Condenseur Kondensator Condensador 74822530 P60E/P80E/P120E/AMALFI KX –F80 KX – iD KX V230 1N...