
Verwandte Anleitungen für Kerbl SmartCoop

Inhaltszusammenfassung für Kerbl SmartCoop
- Seite 1 Steuerung (DE) Bedienungsanleitung Boîtier de contrôle (FR) Mode d’emploi Control (EN) Operating instructions Controllo (IT) Istruzioni per l‘uso #70600...
-
Seite 3: Inhaltsverzeichnis
10.1.2 Bedienelemente ..................... 10 10.9 Schaltbare Zwischensteckdose (Art. 70628) ..........16 10.1.3 Konfiguration ....................10 10.9.1 Montage ......................16 10.1.3.1 Installation der Kerbl-App ................10 10.9.2 Konfiguration ....................16 10.1.3.2 Ersteinrichtung ................... 11 10.10 Tränkeheizung mit Füllstandsensor (Art. 70652) für Geflügeltränke ..16 10.1.3.3 Reset ...................... -
Seite 4: Allgemeines
Tierbestand von bis zu 50 Hühnern. Auch zur Puten-, Personen installiert und bedient wird. Enten-, und Ziergeflügelhaltung kann SmartCoop eingesetzt werden. Die Steuerung ist das Herzstück des SmartCoop-Systems. Alle Module werden mit der Die Sicherheitshinweise der Module sind jeweils zu beachten. Steuerung per einfachem Stecksystem verbunden und angesteuert. -
Seite 5: Montage Der Steuerung
Bewuchs o.ä.) und Bereiche mit Fremdlichteinfluss (Bsp. Lichteinfall von Straßenbeleuchtung, Gebäude oder Außenlicht). Übersicht Installationsablauf Die Installation des SmartCoop Systems sollte in der nachfolgend beschriebenen Platzieren Sie die Steuerung niemals im Stallinneren, wenn kein externer Tageslichtsensor Reihenfolge vorgenommen werden: (Art. -
Seite 6: Inbetriebnahme Und Bedienung
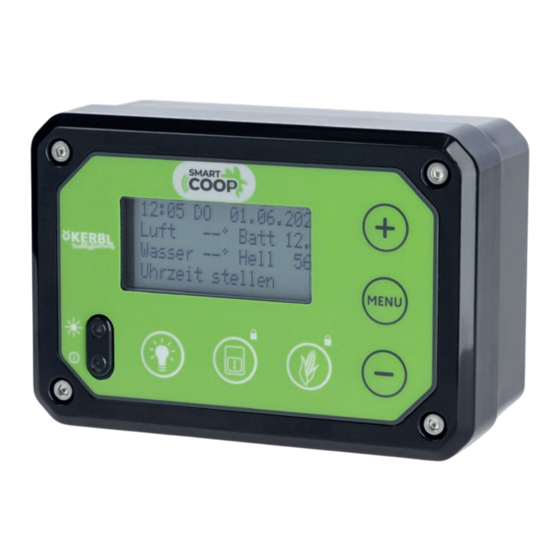
Blinkfolge Hinweis-LED bzw. Signalleuchte Normalbetrieb (15 Sek.) °____________°___________°___________ 7.2 Konfiguration und Bedienung Ihre SmartCoop Steuerung verfügt über ein Konfigurationsmenü und einen Arbeitsmodus. Fehler (1 Sek.) °_°_°_°_°_°_°_°_°_°_°_°_°_°_°_°_°_°_°_°_° Wenn die Steuereinheit zum ersten mal mit der Stromversorgung verbunden wird, erscheint im Display zunächst der Kalibriermodus der Hühnertür. Sie können das Info: Unter dem Menüpunkt „Verlauf“... -
Seite 7: Konfigurationsmenü
Übersicht über alle möglichen Hinweise und Fehleranzeigen: 7.2.2 Konfigurationsmenü: Im Konfigurationsmenü definieren Sie Grundeinstellungen wie Sprache, Uhrzeit/Datum, Bezeichnung Maßnahme Temperatureinheit, Werkseinstellungen oder nehmen modulspezifische Einstellungen vor. Tür verriegelt Hinweis Bei Bedarf manuell entriegeln Das Konfigurationsmenü beinhaltet folgende Menübereiche in chronologischer Reihenfoge: •... -
Seite 8: Energiesparmodus
-Taste wieder aktiv. 70620 Connectivitymodul 8 Wartung und Pflege Ihre SmartCoop Steuerung ist wartungsfrei. Im Falle einer starken Verschmutzung kann die Frontseite mit einem feuchten Tuch gereinigt werden. 9 Mögliche Fehler und Behebung Die Steuerung verliert regelmäßig die Uhrzeit- und Datumseinstellung 70640 Seilzug für Hühnertür... - Seite 9 70622 Externer Tageslicht- 70628 Schaltbare Zwischen- sensor steckdose 70651 Geflügeltränke 70623 Signalleuchte 70652 Tränkeheizung mit Füllstandssensor 70624 Lufttemperatursensor 70660 Futterautomat 70621 LED Stallbeleuchtung 70661 Erweiterungsaufsatz 70625 Stallentlüftung 70662 Futterdosierer mit Füllstandssensor 70626 Stallbelüftung...
-
Seite 10: Connectivitymodul (Art. 70620)
8. Power-LED "Kerbl-App". 10.1.3 Konfiguration Das WLAN erlaubt dem SmartCoop den Zugriff auf das Internet. Dies ermöglicht den 10.1.3.1 Installation der Kerbl-App uneingeschränkten Zugriff auf das System, in Echtzeit und von überall aus. Installieren Sie die App „Kerbl-App“ im Google Playstore oder im Apple Appstore. -
Seite 11: Ersteinrichtung
3. Wählen Sie in der Kerbl-App die Funktion „Gerät hinzufügen“. *** TUER *** *** TUER *** Kalibrierung 4. Wählen Sie nun in der Geräteliste „SmartCoop“ und verbinden Sie sich mit dem Gerät. Tuer kalibrieren Starten mit + Ueberspringen > MENU 5. -
Seite 12: Manuelle Betätigung Des Seilzugs
10.2.4 Konfiguration des Seilzugs 10.2.3 Manuelle Betätigung des Seilzugs Sie entscheiden selbst nach welchen Kriterien (licht- oder zeitgesteuert, Wochenend- Das Öffnen und Schließen der Tür erfolgt prinzipiell automatisch. Bei Bedarf können modus) die Tür im Automatikmodus geöffnet und geschlossen wird. Uhrzeit und Hellig- Sie die Tür auch manuell per kurzem Tastendruck bedienen. -
Seite 13: Deaktiviert
10.4 Externer Tageslichtsensor (Art. 70622) 10.3.1 Montage Bei Montage der SmartCoop Steuerung im Innenbereich ersetzt der externe Tageslichtsen- Bitte entnehmen Sie die einzelnen Schritte zur Montage aus der Montageanleitung sor den integrierten Sensor der Steuerung und ermittelt das Umgebungslicht im Freien. -
Seite 14: Konfiguration
Es bedarf keiner gesonderten Konfiguration. Die Visualisierung von Hinweisen ent- Die Beleuchtung erfolgt ausschließlich am Morgen vor dem Öffnen der Tür. spricht denen der Hinweis LED auf der SmartCoop Steuerung. Die Blinkfolge wird *** BELEUCHTUNG *** detailliert unter Kapitel 7.2 Konfiguration und Bedienung beschrieben. -
Seite 15: Mögliche Fehler Und Behebung
Schließlicht 10.8 Belüftungssystem (Art. 70625, 70626) Bei aktiviertem Schließlicht wird die Beleuchtung immer (unabhängig vom gewählten Beleuchtungsmodus) vor dem Schließen der Tür am Abend mit abnehmender Um- Eine permanent hohe Luftfeuchtigkeit, Kondenswasser und Ammoniakgase sollten im gebungshelligkeit langsam hochgedimmt. So werden die Hühner “konditioniert” Stallinneren unbedingt vermieden werden, ebenso wie hohe Temperaturen im Sommer. -
Seite 16: Mögliche Fehler Und Behebung
Luftaustausch und eine kühlende Wirkung zu sorgen. Falls diese Funktion nicht gewünscht ist, stellen Sie den Wert auf 99°. Die Tränkeheizung ist ein Zubehör für die SmartCoop Geflügeltränke (Art. 70651) zur Füllstandskontrolle und verhindert das Einfrieren des Tränkewassers. -
Seite 17: Mögliche Fehler Und Behebung
10.10.3 Mögliche Fehler und Behebung Pro Tier werden so täglich ca. 120 g Futter gefördert. Diese Futtermenge gilt als Richtwert für Legehennen. Im Display erscheint der Hinweis “Wasser leer”, obwohl sich noch ausreichend Wasser im Kanister befindet: Über die Einstellung „Menge pro Tier“ können Sie bei Bedarf die Gesamtmenge Die Tränkeheizung mit Füllstandsensor hängt zu weit oben ... -
Seite 18: Füllstandsensor
Sie zum Download unter: www.kerbl-smartcoop.com CE-Konformitätserklärung Hiermit erklärt die Albert KERBL GmbH, dass sich das in dieser Anleitung beschriebene Produkt/Gerät in Übereinstimmung mit den grundlegenden Anforderungen und den übrigen einschlägigen Bestimmungen und Richtlinien befindet. Das CE-Zeichen steht für die Er-... - Seite 19 (FR) Mode d’emploi Boîtier de contrôle SmartCoop Contenu 1 Généralités ..................... 20 10.4 Capteur externe de lumière naturelle (Réf. 70622) ........29 10.4.1 Montage ......................30 2 Utilisation conforme à l’usage prévu ............20 10.4.2 Configuration....................30 3 Consignes de sécurité ..................20 10.5 Témoin lumineux (Réf.
-
Seite 20: Généralités
• Veillez impérativement à l’installation et à l’utilisation du système par des adultes. L’unité de contrôle est le cœur du système SmartCoop. Tous les modules sont reliés à l’unité de contrôle par un simple système d’enfichage Respecter les consignes de sécurité... -
Seite 21: Montage De L'unité De Contrôle
Aperçu du déroulement de l’installation rage public, des bâtiments ou de l’éclairage extérieur). L’installation du système SmartCoop doit se faire dans l’ordre décrit ci-après : Ne placez jamais l’unité de contrôle à l’intérieur du poulailler en l’absence de la connexion d’un capteur externe de lumière naturelle (Réf. 70622). -
Seite 22: Mise En Service Et Utilisation
Une erreur requiert votre attention et vous devez y remédier. 7.2 Configuration et utilisation Ordre de clignotement de la LED de signalisation resp. Votre unité de contrôle SmartCoop dispose d’un menu de configuration et d’un mode de du témoin lumineux travail. -
Seite 23: Menu De Configuration
Aperçu de toutes les informations et affichages d’erreurs pouvant se présenter : 7.2.2 Menu de configuration : Dans le menu de configuration, vous pouvez définir les réglages de base comme Désignation Type Action langue, l’heure et la date, l’unité de température et les réglages par défaut, ou procéder à... -
Seite 24: Maintenance Et Entretien
10 Connexion des modules 2. Déterminez la tension minimale autorisée de votre batterie. Cette donnée figure Dans sa version complète, le système SmartCoop peut être combiné avec tous habituellement sur la fiche techniques de la batterie. Pour les batteries au plomb de modules mentionnés ci-dessous. - Seite 25 70622 Capteur externe de 70628 Programmateur à lumière naturelle interrupteur 70651 Abreuvoir à volailles 70623 Témoin lumineux 70652 Chauffage d’abreuvoir avec capteur de niveau 70624 Capteur de tempéra- ture d’air 70660 Nourrisseur automa- tique 70621 Éclairage à LED pour bâtiment d’élevage 70661 Support d’extension 70625...
-
Seite 26: Module De Connectivité (Réf. 70620)
10.1.3 Configuration 10.1.3.1 Installation de l’application Kerbl Le module de connectivité SmartCoop relie l’unité de contrôle au réseau WiFi local et per- Installez l’application « Kerbl-App » dans Google Playstore ou dans l’Appstore d’Apple. met la programmation et la surveillance de toutes les fonctions depuis l’application Kerbl. -
Seite 27: Configuration Initiale
PORTE » dans le menu de configuration : *** PORTE *** 2. Dès que le câble de connexion du module est relié à l’unité de contrôle SmartCoop, la LED de puissance verte brille (en bas) et signale que le module est prêt à fonc- Calibrage PORTE tionner. -
Seite 28: Actionnement Manuel Du Tirant
10.2.4 Configuration du tirant Testez plusieurs fois en appuyant sur la touche si la porte s’ouvre et se ferme Vous décidez vous-même selon quels critères (en fonction de la luminosité ou du selon vos souhaits. Si nécessaire, procédez à un reparamétrage (affichage du mode de temps, en mode week-end) la porte s’ouvre et se ferme en mode automatique. -
Seite 29: Erreurs Possibles Et Remèdes
10.3.1 Montage Veuillez consulter la notice de montage pour prendre connaissance des différentes Si l’unité de contrôle SmartCoop est installée à l’intérieur, le capteur externe de lumière étapes de montage du module. naturelle remplace le capteur intégré à l’unité de contrôle pour évaluer la lumière... -
Seite 30: Montage
Le témoin lumineux permet de visualiser les messages de l’unité de contrôle Soir SmartCoop de plus loin. Le témoin clignote de manière synchrone avec le témoin Matin lumineux intégré à l’unité de contrôle et a pour mission de signaler l’état de la LED de signalisation intégrée, si cette dernière n’est pas visible de l’extérieur en raison de la... -
Seite 31: Erreurs Possibles Et Remèdes
Exemple : durée réelle de la nuit en décembre : 14 heures 10.7.2 Configuration obscurité réglée : 9 heures Une configuration du capteur de température d’air n’est pas requise. Le système durée d’éclairage requise : 14 heures moins 9 heures = 5 heures détecte le capteur de température d’air automatiquement lors d’un redémarrage de l’unité... -
Seite 32: Modes Supplémentaires
Le chauffage d’abreuvoir avec capteur de niveau est un accessoire de l’abreuvoir à vo- 10.8.3 Erreurs possibles et remèdes lailles SmartCoop (Réf. 70651) qui contrôle le niveau d’eau et empêche l’eau de geler. Le ventilateur ne produit plus qu’un faible débit d’air ou ne démarre pas : 10.10.1 Montage... -
Seite 33: Erreurs Possibles Et Remèdes
Chauffage d’abreuvoir : À défaut de la connexion d’un éclairage à LED ou de la porte de poulailler, vous pou- Le chauffage est automatiquement activé si la température de l’eau est basse (environ vez néanmoins définir les heures d’ouverture et de fermeture, et donc le début et la fin 0°C) et il reste en marche jusqu’à... -
Seite 34: Capteur De Niveau
ABCDEFGHIJKLMNOPQRST 11111111111111111111 Déclaration de conformité CE La société Albert KERBL GmbH déclare par la présente que le produit/l‘appareil décrit dans le présent mode d‘emploi est en en conformité avec les exigences et autres dispositions Distribution d’aliment manuelle : applicables des directives La marque CE indique que les directives de l‘Union Européenne Si nécessaire, vous pouvez distribuer manuellement une portion d’aliment en appuyant... - Seite 35 10.1.2 Control elements ................... 42 10.9 Switchable intermediate socket (item 70628) .......... 48 10.1.3 Configuration....................42 10.9.1 Installation ....................48 10.1.3.1 Installation of the Kerbl App ............... 42 10.9.2 Configuration....................48 10.1.3.2 Initial setup ....................43 10.1.3.3 Reset ......................43 10.10 Drinker heating with level sensor (item 70652) for poultry drinker ..
-
Seite 36: General
Comply with the safety instructions for the modules. SmartCoop is a modular, extensible system for automating your chicken coop, and is suitable for a flock of up to 50 chickens. SmartCoop can also be used for rearing 4 Scope of delivery turkeys, ducks, and ornamental birds. -
Seite 37: Installing The Control Unit
(incident light from Overview of the installation process street lighting, buildings, or exterior lights). The installation of the SmartCoop system should be performed in the sequence described below: Never position the control unit inside the coop, unless an external daylight sensor (item 70622) is connected. -
Seite 38: Commissioning And Operation
9. Display Flashing sequence of indicator LED and signal lamp 7.2 Configuration and operation Normal operation °____________°___________°___________ Your SmartCoop control unit is provided with a Configuration menu and an Operating (15 sec.) mode. Error (1 sec.) °_°_°_°_°_°_°_°_°_°_°_°_°_°_°_°_°_°_°_°_° When the control unit is connected to the power supply for the first time, the Calibra- tion mode for the chicken door appears in the display first. -
Seite 39: Configuration Menu
Overview of all potential messages and error displays: 7.2.2 Configuration menu: The Configuration menu is used to define basic settings such as language, time/date, Designation Type Action unit of temperature, works settings, or to make module-specific settings. Door locked Message Unlock manually if necessary The Configuration menu includes the following menu options, in chronological order: •... -
Seite 40: Maintenance And Care
70620 Connectivity module 8 Maintenance and care Your SmartCoop control unit is maintenance-free. In the event of heavy contamination, the front can be cleaned using a damp cloth. 9 Potential errors and their correction 70640 Cable pull for chicken... - Seite 41 70622 External daylight 70628 Switchable intermedi- sensor ate socket 70651 Poultry Drinker 70623 Signal lamp 70652 Drink Heating with Level Sensor 70624 Air Temperature Sensor 70660 Feeder 70621 LED coop lighting 70661 Extension attachment 70625 Coop Air Extraction 70662 Feed Dispenser with Fill Level Sensor 70626 Coop Ventilation...
-
Seite 42: Connectivity Module (Item 70620)
10.1 Connectivity module (item 70620) 7. Status LED 8. Power LED The SmartCoop connectivity module connects the control unit to the local WLAN, and allows all functions to be programmed and monitored via the “Kerbl App”. 10.1.3 Configuration 10.1.3.1 Installation of the Kerbl App The WLAN provides the SmartCoop with Internet access. -
Seite 43: Initial Setup
Start the calibration process by pressing the button briefly. Select the “Cable Pull” 6. Assign an individual name to the device so as to allocate it later (e.g. “SmartCoop 1”). connected door type: *** DOOR *** 7. -
Seite 44: Manual Actuation Of The Cable Pull
10.2.3 Manual actuation of the cable pull Opening the door: In principle, the door opens and closes automatically. If necessary, the door can also For light-controlled opening, the process takes place when the set brightness value be operated manually by briefly pressing the button. This causes the door to change has been exceeded. -
Seite 45: Potential Errors And Their Correction
10.4 External daylight sensor (item 70622) 10.3.2 Calibration When installing the SmartCoop control unit indoors, the external daylight sensor Calibration is necessary to teach the chicken door optimally for the conditions in replaces the integrated control sensor, and detects the ambient light outdoors. -
Seite 46: Configuration
Mode 2: Lighting is switched on only after closing the door in the evening. The signal lamp makes it possible to detect messages from the SmartCoop control unit *** LIGHTING *** at a distance. It flashes synchronously with the control unit’s integrated signal lamp,... -
Seite 47: Potential Errors And Their Correction
Closing light 10.8 Ventilation system (items 70625, 70626) When the closing light is activated, the lighting level is always slowly raised (regardless of the selected lighting mode) before closing the door in the evening as ambient It is essential to avoid high levels of air humidity, condensation, and ammonia gases in brightness decreases. -
Seite 48: Potential Errors And Their Correction
The The drinker heating is an accessory for the SmartCoop poultry drinker (item 70651) setting “100 % ON above” allows selection of a temperature above which the fans are for level control, and it prevents the drinking water from freezing. -
Seite 49: Feed Dispenser With Level Sensor (Item 70662) For Feeder
The message “Water temperature” appears on the display: Day's allocation of feed: The water in the drinker is frozen because the ambient temperature is too low. Thaw The previously defined feed quantity can be dispensed across a maximum of 20 the drinker by adding hot water, and check that the drinker heating is correctly intervals during the day. -
Seite 50: Level Sensor
CE-conformity declaration Albert KERBL GmbH hereby declares that the product / device described in these instructions complies with the fundamental requirements and other relevant stipulations and regulati- ons. The CE mark confirms compliance with the Directives of the European Union. - Seite 51 (IT) Istruzioni per l‘uso Controllo SmartCoop Sommario 1 Informazioni generali ..................52 10.4 Sensore esterno per luce naturale (art. 70622) ........61 10.4.1 Montaggio..................... 62 2 Uso conforme ....................52 10.4.2 Configurazione ....................62 3 Avvertenze di sicurezza .................. 52 10.5 Spia di segnalazione (art.
-
Seite 52: Informazioni Generali
Seguire le avvertenze di sicurezza dei moduli. tacchini, anatre e uccelli ornamentali. L’unità di controllo è il cuore del sistema SmartCoop. Tutti i moduli vengono collegati 4 Dotazione all’unità di controllo tramite un semplice sistema a innesto e comandati con la stessa. -
Seite 53: Montaggio Dell'unità Di Controllo
Panoramica della procedura di installazione tettoie, vegetazione fitta o simili) e le zone soggette all’influsso di fonti luminose L’installazione del sistema SmartCoop deve essere eseguita rispettando l’ordine esterne (ad esempio illuminazione stradale, edifici o luce esterna). indicato qui di seguito: Non posizionare l’unità... -
Seite 54: Messa In Funzione E Utilizzo
9. Display Sequenza di lampeggiamento del LED di indicazione o 7.2 Configurazione e utilizzo della spia di segnalazione La vostra unità di controllo SmartCoop dispone di un menu di configurazione e di una modalità di lavoro. Funzionamento normale °____________°___________°___________ Quando l’unità di controllo viene collegata per la prima volta all'alimentazione (15 sec.) -
Seite 55: Menu Configurazione
Panoramica di tutte le possibili visualizzazioni di errori e indicazioni: 7.2.2 Menu configurazione: Nel menu di configurazione si definiscono impostazioni di base come lingua, ora/data, Denominazione Tipo Intervento unità di temperatura e impostazioni di fabbrica o si eseguono impostazioni specifiche dei moduli. -
Seite 56: Cura E Manutenzione
70620 Modulo connettività 8 Cura e manutenzione La vostra unità di controllo SmartCoop non richiede manutenzione. In caso di forte sporcizia, il lato frontale può essere pulito con un panno umido. 9 Possibili difetti e risoluzione dei problemi L'unità di controllo perde regolarmente l’impostazione di data e ora... - Seite 57 70622 Sensore esterno per 70628 Adattatore presa luce naturale commutabile 70651 Abbeveratoio per pollame 70623 Spia di segnalazione 70652 Riscaldamento abbe- veratoio con sensore di livello 70624 Sensore temperatura aria 70660 Mangiatoia automatica 70621 Illuminazione a LED per il pollaio 70661 Elemento per amplia- mento...
-
Seite 58: Modulo Di Connettività (Art. 70620)
10.1.3 Configurazione 10.1.3.1 Installazione dell'app Kerbl Il modulo di connettività SmartCoop collega l’unità di controllo alla WLAN locale Installare l’app “Kerbl” nel Google Playstore o nell’Appstore di Apple. Creare un e consente la programmazione e il monitoraggio di tutte le funzioni tramite la account utente ed effettuare il login. -
Seite 59: Prima Configurazione
Calibratura porta: tività (max. 10 m). *** PORTA *** 2. Non appena il cavo del modulo viene collegato con l’unità di controllo SmartCoop, il Calibrare PORTA LED Power verde (in basso) si accende in modo continuo e segnala che l'apparec- chio è... -
Seite 60: Azionamento Manuale Del Comando A Cavo Flessibile
10.2.4 Configurazione del comando a cavo flessibile Premendo il tasto , testare più volte se la porta si apre e si chiude correttamente. Siete voi a decidere in base a quali criteri (comando in base a luminosità o orario, Se necessario eseguire una nuova parametrizzazione (apertura del modulo di calibratu- modo weekend) la porta viene aperta e chiusa in modalità... -
Seite 61: Possibili Difetti E Risoluzione Dei Problemi
Premendo il tasto dell’unità di controllo è possibile aprire, chiudere o bloccare manualmente la porta. In caso di montaggio dell’unità di controllo SmartCoop all’interno, il sensore per luce naturale esterno sostituisce il sensore integrato dell’unità di controllo e rileva la luce 10.3.1 Montaggio... -
Seite 62: Montaggio
Non è necessaria una configurazione a parte. La visualizzazione delle indicazioni corri- Modalità 3: sponde a quella del LED di indicazione dell’unità di controllo SmartCoop. La sequenza di L’illuminazione si accende esclusivamente al mattino prima dell'apertura della porta. lampeggiamento è descritta dettagliatamente nel capitolo 7.2 Configurazione e utilizzo. -
Seite 63: Possibili Difetti E Risoluzione Dei Problemi
Es.: Durata effettiva della notte a dicembre: 14 h 10.7.2 Configurazione Tempo di oscuramento impostato: Per il sensore temperatura aria non è necessaria una configurazione. In caso di riavvio Tempo di illuminazione necessario: 14 h - 9 h = 5 h dell’unità... -
Seite 64: Modalità Supplementari
230 V e una presa a 230 V esistente. Trami- La temperatura dell'acqua è visualizzata sul display dell’unità di controllo: te un cavo di comando a 12 V (per il controller SmartCoop), la presa viene attivata o 12:00 SA 01.01.2022... -
Seite 65: Possibili Difetti E Risoluzione Dei Problemi
Riscaldamento abbeveratoio: Se non sono stati collegati un’illuminazione a LED o un apriporta automatico per il Se la temperatura dell'acqua è bassa (circa 0 °C), il riscaldamento si attiva automatica- pollaio, nel menu di configurazione PORTA è comunque possibile impostare gli orari mente e resta acceso finché... -
Seite 66: Sensore Di Livello
11111111111111111111 dichiarazione di conformità CE La Albert KERBL GmbH dichiara che il prodotto/l‘apparecchio descritto in queste istruzioni è conforme ai requisiti fondamentali e alle ulteriori disposizioni e direttive pertinenti. Il Erogazione di mangime manuale: marchio CE indica che sono state soddisfatte le direttive dell‘Unione Europea. - Seite 68 Albert Kerbl GmbH Kerbl Austria Handels GmbH Kerbl France Sarl Kerbl UK Limited Felizenzell 9 Wirtschaftspark 1 3 rue Henri Rouby, B.P 46 Soultz 8 Lands End Way 84428 Buchbach, Germany 9130 Poggersdorf, Austria 68501 Guebwiller Cedex, France Oakham, Rutland LE15 6RF UK Tel.