BD Veritor Plus System InfoWiFi Anweisungen
Vorschau ausblenden
Andere Handbücher für Veritor Plus System InfoWiFi:
- Bedienungsanleitung (2 Seiten)
Inhaltsverzeichnis
Verfügbare Sprachen
Verfügbare Sprachen
Quicklinks
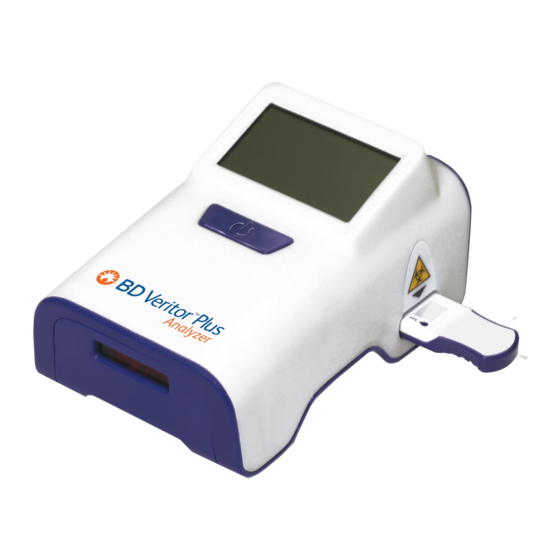
Veritor™ Plus System
BD Veritor™ InfoWiFi Instructions
BD Veritor™ InfoWiFi – Anweisungen
Instrucciones de BD Veritor™ InfoWiFi
Instructions BD Veritor™ InfoWiFi
Istruzioni di BD Veritor™ InfoWiFi
Instruktioner till BD Veritor™ InfoWiFi
Becton, Dickinson and Company
Sparks, Maryland 21152 USA
English / Deutsch / Español / Français /
7 Loveton Circle
Becton Dickinson Ireland Ltd.
Donore Road, Drogheda
Co. Louth, A92 YW26
BD Switzerland Sàrl
Terre Bonne Park – A4
Route de Crassier 17
1262 Eysins, Switzerland
445010
L012424(06) 2022-05
Italiano / Svenska
Ireland
Inhaltsverzeichnis
Fehlerbehebung

Verwandte Anleitungen für BD Veritor Plus System InfoWiFi


Inhaltszusammenfassung für BD Veritor Plus System InfoWiFi
- Seite 39 5.1 Das WLAN-Modul installieren....................... 46 5.2 Stellen Sie über einen PC im lokalen Netzwerk eine Verbindung zum Netzwerk „BDInfoWiFixxxxxx“ her, entsprechend der Anzeige auf dem BD Veritor™ Plus Analyzer..48 6 Abschließen der Registrierung bei BD Synapsys™ Informatics (nur Synapsys-Verbindung) ...................52...
- Seite 40 BD Veritor™ InfoWiFi – Anweisungen 12 Anhang E Wiederherstellen der BD-Werkseinstellungen beim BD Veritor™ InfoWiFi-Barcode-Scanner ..................65 12.1 Allgemeine Anweisungen......................65 12.2 So stellen Sie die Werkseinstellungen wieder her ...............65...
-
Seite 41: Einführung
Anmeldedaten zu erhalten. BD Synapsys™ Informatics Solution – Informationen • Bringen Sie in Erfahrung, wie der BD Veritor™ Plus Analyzer in Ihrer Einrichtung mit Ihrer BD Synapsys™ Informatics Solution verbunden ist. • Wenn sich bei der Verbindung ein WLAN-Zugriffspunkt im selben Netzwerk wie Ihre BD Synapsys™... -
Seite 42: Informationen Zum Wlan
Temporäres Kennwort: In E-Mail von BD bereitgestellt • BD Synapsys™ Informatics Solution-Seriennummer Navigieren Sie in BD Synapsys™ Informatics zu Help > About Us > BD Licenses (Hilfe > Über uns > BD-Lizenzen). Suchen Sie die Seriennummer für die Lizenz mit dem Titel „BD Synapsys Laboratory Solutions“. -
Seite 43: Bd Veritor™ Plus Analyzer - Informationen Und Materialien
BD Veritor™ Plus Analyzer – Informationen und Materialien • BD Veritor™ Plus System InfoWiFi – Kurzanleitung (L012363) • BD Veritor™ Plus Analyzer mit Softwareversion 5.50 oder höher. BD Veritor™ Plus Analyzer mit Softwareversion 5.40 oder niedriger können nicht auf 5.50 aktualisiert werden. • BD Veritor™ Plus Analyzer-Seriennummer •... -
Seite 44: Ein Bd Veritor™-Gerät Registrieren
BD Veritor™ InfoWiFi – Anweisungen Ein BD Veritor™-Gerät registrieren 1 Öffnen Sie im BD Veritor™-Geräteregistrierungsportal die Registerkarte „Device Management“ (Geräteverwaltung). 2 Wählen Sie „Register Device“ (Gerät registrieren). -
Seite 45: Herstellen Einer Verbindung Mit Imagemover
3 Scannen Sie die Seriennummer des BD Veritor™ Plus Analyzer. Wenn keine Möglichkeit zum Scannen besteht, geben Sie die Seriennummer manuell ein. 4 Wählen Sie den Standort/die Einrichtung aus dem Dropdown-Menü aus. 5 Wählen Sie „Register“ (Registrieren) aus, um zu überprüfen, ob die eingegebene Seriennummer mit der Seriennummer auf dem BD Veritor™... -
Seite 46: Bd Veritor™ Infowifi Konfigurieren
BD Veritor™ InfoWiFi konfigurieren Das WLAN-Modul installieren. 1 Anweisungen zum Einsetzen des BD Veritor™ InfoWiFi-Moduls in den Steckplatz des Analyzer finden Sie in der BD Veritor™ Plus System InfoWiFi – Kurzanleitung. 2 Schließen Sie das an eine Wandsteckdose angeschlossene Gleichstromnetzteil an. - Seite 47 Wenn der Konfigurations-Barcode nicht innerhalb von ca. 2 Sekunden gescannt wird, wechselt der BD Veritor™ Plus Analyzer in den normalen Betriebsmodus. Schalten Sie den BD Veritor™ Plus Analyzer aus und wieder ein, um den Barcode erneut zu scannen.
-
Seite 48: Stellen Sie Über Einen Pc Im Lokalen Netzwerk Eine Verbindung Zum Netzwerk „Bdinfowifixxxxxx" Her, Entsprechend Der Anzeige Auf Dem Bd Veritor™ Plus Analyzer
BD Veritor™ InfoWiFi – Anweisungen 4 Der BD Veritor™ Plus Analyzer zeigt die Konfigurationsmodus-Meldung bis zu 30 Sekunden lang an, während das Modul initialisiert wird. 5 Der BD Veritor™ Plus Analyzer zeigt die Adressdetails mit der folgenden Meldung an: Stellen Sie über einen PC im lokalen Netzwerk eine Verbindung zum Netzwerk „BDInfoWiFixxxxxx“... - Seite 49 2 Geben Sie das Netzwerkkennwort „BDInfoWiFixxxxxx“ ein. Das Kennwort für das Netzwerk „BDInfoWiFixxxxxx“ entspricht der gesamten Seriennummer auf der Unterseite des BD Veritor™ Plus Analyzer. 3 Geben Sie 192.168.2.1 in die Adressleiste eines Webbrowsers ein, z. B. Google Chrome™ oder Microsoft Edge™, um die Konfigurationsseite zu öffnen.
- Seite 50 BD Veritor™ InfoWiFi – Anweisungen • Für Regional Synapsys Cloud / Veritor Plus System mit ImageMover™- Implementierungen: Wählen Sie „Use Regional Synapsys Cloud Server“ (Regional Synapsys Cloud-Server verwenden) aus. Wählen Sie die entsprechende Region aus der Dropdown-Liste „Select your region“ (Region auswählen) aus.
- Seite 51 Geben Sie den FQDN (aufgezeichnet in Schritt 2.1) des BD Synapsys™ Informatics Server in das Feld „FQDN“ ein, oder geben Sie den FQDN der lokalen ImageMover™-URL ein. Weitere Informationen zum Einrichten einer ImageMover™-Verbindung finden Sie in Abschnitt 4. HINWEIS Geben Sie das Präfix „https://“ nicht an.
-
Seite 52: Abschließen Der Registrierung Bei Bd Synapsys™ Informatics (Nur Synapsys-Verbindung)
BD Veritor™ InfoWiFi – Anweisungen 6 Wählen Sie „Submit“ (Senden), um die Informationen an BD Veritor™ Plus Analyzer zu übertragen. 7 Das Browser-Fenster „192.168.2.1“ kann geschlossen werden, wenn die folgende Meldung angezeigt wird: „Please continue the next steps on your BD Veritor™ device. You have successfully entered your wireless credentials and may now close this window.“... - Seite 53 3 Das Dialogfeld „Test WiFi“ (WLAN testen) wird angezeigt. 4 Setzen Sie die orangefarbene BD Veritor™ System Reader Verification Cartridge in den BD Veritor™ Plus Analyzer ein. Wenn bereits eine Verifikationskartusche eingesetzt wurde, entfernen Sie diese und setzen Sie sie wieder ein. Das Umschlag-Symbol ( ) auf dem Analyzer wird angezeigt und beginnt zu blinken, was die Übertragung von Daten signalisiert.
- Seite 54 Sie den BD Veritor™ Plus Analyzer aus und kehren Sie zu Abschnitt 5 – BD Veritor™ InfoWiFi konfigurieren zurück. 7 Wenn der BD Veritor™ Plus Analyzer erfolgreich Daten an den BD Synapsys™-Server überträgt, wird im Dialogfeld „Test WiFi“ (WLAN testen) „Result received, WiFi Connected“...
-
Seite 55: Angaben Zur Elektromagnetischen Verträglichkeit (Emv)
Geräteregistrierungsportal zurück. Überprüfen Sie, ob im Feld „Status“ ein grünes Häkchen für das neu registrierte Gerät angezeigt wird. 9 Entfernen Sie die BD Veritor™ System Reader Verification Cartridge. 10 Der BD Veritor™ Plus Analyzer mit BD Veritor™ InfoWiFi wurde erfolgreich konfiguriert und ist einsatzbereit. Angaben zur elektromagnetischen Verträglichkeit (EMV) Der BD Veritor™... - Seite 56 BD Veritor™ InfoWiFi – Anweisungen EMISSIONEN Phänomen Grundlegende EMV-Norm Einschränkungen Geleitete Emissionen EN 55011: 2009 +A1: 2010 Klasse A Abgestrahlte Emissionen EN 55011: 2009 +A1: 2010 Klasse A STÖRFESTIGKEIT Phänomen Grundlegende EMV-Norm Störfestigkeits-Prüfpegel Elektrostatische Entladung IEC 61000-4-2 ± 4 kV Kontakt ±...
- Seite 57 Nahfelder von drahtlosen HF-Kommunikationsgeräten PRÜF- Test- Maximale Ent- PEGEL- Band frequenz Leistung fernung STÖR- Nutzung Modulation (MHz) (MHz) FESTIGKEIT (V/m) Pulsmodulation 380–390 TETRA 400 18 Hz GMRS 460, ± 5 kHz 430–470 FRS 460 Abweichung 1 kHz Sinus Pulsmodulation 704–787 LTE-Band 13, 17 217 Hz GSM 800/900,...
-
Seite 58: Koexistenz Von Funksystemen
BD Veritor™ InfoWiFi – Anweisungen Koexistenz von Funksystemen Der BD Veritor™ Plus Analyzer mit dem BD Veritor™ InfoWiFi-Modul wurde gemäß der Norm ANSI C63.27-2017, Tier 3 „American National Standard for Evaluation of Wireless Coexistence“ geprüft. Einhaltung der FCC-Bestimmungen Dieses Gerät enthält... -
Seite 59: Konformität Mit Ncc Taiwan
Stellen Sie sicher, dass das Modul ordnungsgemäß in den Modulsteckplatz des BD Veritor™ Plus Analyzer eingesetzt ist. • Wenn die Leuchte des Barcode-Scanners beim Starten des Geräts blinkt, ist das BD Veritor™ InfoWiFi-Modul ordnungsgemäß installiert und mit Strom versorgt. •... -
Seite 60: 10 Anhang C - Wichtige Hinweise
• Umschlag-Symbol ( • Zeigt an, wann Daten zur Übertragung bereit sind. • Blinkt, wenn die Datenübertragung läuft. • Wird ausgeschaltet, wenn die Datenübertragung abgeschlossen ist. • Der BD Veritor™ Plus Analyzer zeigt bei Auftreten eines Fehlers die folgende Meldung an:... - Seite 61 • Automatisches Ausschalten • Wenn der Analyzer an die Stromversorgung angeschlossen ist, schaltet er sich nach 60 Minuten automatisch aus. Wenn die Konfiguration nicht innerhalb dieser Zeit abgeschlossen ist, kann der Vorgang durch Scannen des Konfigurationsbarcodes neu gestartet werden. • Wenn der Analyzer nicht an die Stromversorgung angeschlossen ist, schaltet er sich nach 15 Minuten automatisch aus.
-
Seite 62: Anhang D - Konformitätszertifikat Für Spezifizierte Funkanlagen
BD Veritor™ InfoWiFi – Anweisungen 11 Anhang D – Konformitätszertifikat für spezifizierte Funkanlagen in Japan RCB Japan Königswinkel 10 D-32825 Blomberg, Germany Phone: +49 (0) 5235 9500-75 Fax: +49 (0) 5235 9500-28 www.phoenix-testlab.de Certificate No: 15-113559 Technical Regulations Conformity Specified Radio Equipment in Japan... - Seite 63 Annex 1 to Certificate No 15-113559 of Technical Regulations Conformity for Specified Radio Equipment in Japan The validity of this certificate is limited to products, which are equal to the one examined in the type-examination. When the holder of this certificate is placing the product on the Japanese market, the product must be affixed with the following Specified Radio Equipment marking: 204-510009 5.2/5.3 GHz band:この製品は屋内においてのみ使用可能です...
- Seite 64 BD Veritor™ InfoWiFi – Anweisungen Annex 2 to Certificate No 15-113559 of Technical Regulations Conformity for Specified Radio Equipment in Japan Please note the following points: A person (including a legal person) who was granted the Type Certification (hereafter referred to as “certification dealer”...
-
Seite 65: Anhang E - Wiederherstellen Der Bd-Werkseinstellungen Beim Bd Veritor™ Infowifi-Barcode-Scanner
12 Anhang E – Wiederherstellen der BD-Werkseinstellungen beim BD Veritor™ InfoWiFi-Barcode-Scanner Dieser Anhang gilt nur für BD Veritor™ InfoWiFi-Module, deren Seriennummern mit den Zeichen TW beginnen. Wenn eines der folgenden Barcode-Formate erforderlich ist, können Sie es anhand der folgenden Anweisungen hinzufügen. - Seite 66 BD Veritor™ InfoWiFi – Anweisungen Schritt 2: Wiederherstellen der Werkseinstellungen im BD Veritor™ InfoWiFi Bei diesem Schritt werden die folgenden zwei Barcode-Formate aktiviert: • Interleaved 2 of 5 zwischen 2 und 54 Ziffern und • Codabar HINWEIS Die Test-Barcodes werden mit einem Piepton bestätigt, wenn die Konfiguration erfolgreich war.
- Seite 67 Verfahren Barcode zum Scannen Richten Sie den Scanner 3 Sekunden lang so aus, dass das rote Licht über beide Enden des Barcodes hinausragt. Bei diesem Schritt ertönt KEIN PIEPTON. Richten Sie den Scanner 3 Sekunden lang so aus, dass das rote Licht über beide Enden des Barcodes hinausragt.
- Seite 68 BD Veritor™ InfoWiFi – Anweisungen Verfahren Barcode zum Scannen Richten Sie den Scanner 3 Sekunden lang so aus, dass das rote Licht über beide Enden des Barcodes hinausragt. Bei diesem Schritt ertönt KEIN PIEPTON. Testen Sie den Barcode- Scanner, indem Sie den Scanner so ausrichten, dass das rote Licht über beide...
- Seite 188 Assistenza e supporto tecnico: negli Stati Uniti contattare BD al numero 1.800.638.8663 o sul sito bd.com. Per le regioni al di fuori degli Stati Uniti, rivolgersi al rappresentante locale BD o visitare il sito bd.com. Teknisk service: Kontakta närmaste BD-representant eller besök bd.com.
- Seite 189 Symbols Glossary / Symbolglossar / Glosario de símbolos / Glossaire des symboles / Glossario dei simboli / Symbolförteckning Some symbols listed below may not apply to this product. US Customers only: For symbol glossary, refer to bd.com/symbols-glossary. Symbol Meaning Manufacturer / Hersteller / Fabricante / Fabricant / Fabbricante / Tillverkare CE marking: Signifies European technical conformity / CE-Zeichen: Kennzeichnet technische EU-Konformität.
- Seite 190 BD Veritor™ InfoWiFi Instructions Symbol Meaning Logo for the National Communications Commission of Taiwan. / Logo für die nationale Kommission für Kommunikation in Taiwan / Logotipo de la Comisión Nacional de Comunicaciones de Taiwán. / Logo de la Commission nationale des communications de Taïwan. / Logo per la National Communications Commission di Taiwan.