Herunterladen Inhalt Inhalt Diese Seite drucken

Werbung

Verfügbare Sprachen
  • DE

Verfügbare Sprachen

  • DEUTSCH, seite 30
G
F
N
I
Gndfir
D
R
РУКОВОДСТВО

Werbung

Inhaltsverzeichnis
loading

Inhaltszusammenfassung für Fancom AT-Serie

  • Seite 1 Gndfir РУКОВОДСТВО...
  • Seite 2 N.B.: The original, authentic version of this manual is the English version produced by Fancom B.V. or one of its daughter companies (referred to further as Fancom). Any modifications introduced to this manual by third parties have neither been checked nor approved by Fancom. Modifications are taken by Fancom to include translations into languages other than English and the insertion and/or deletion of text and/or illustrations to/from the original contents.
  • Seite 3 Gndfir General introduction ..........................1 How to use this manual ........................1 Symbols on the AT(M) ........................1 Fancom helpdesk ........................... 1 Safety instructions and warnings ....................2 Installing the AT(M) ............................ 3 Mount the AT(M) ..........................3 Connect the AT(M) ......................... 5 Install the protective screen (optional) ....................
  • Seite 4 Read the documentation and safety instructions which are provided in this user manual. Warning indicating danger to the product or danger to human or animals. Moving parts can crush and cut. Air flow direction. For any questions and support, please contact the local Fancom Sales & Service Center.
  • Seite 5 The guarantee does not apply if this product is installed in any other way than is indicated by Fancom and if the product's motor has been opened and changes have been made to the product.
  • Seite 6 Gndfir Install the AT(M) and associated components as follows: Mount the AT(M) (see page 3) Connect the AT(M) (see page 4) Install the protective screen (optional) (see page 6) Test the AT(M) (see page 7) The open position of the damper is factory adjusted. The closed position is automatically calibrated during power up.
  • Seite 7 Gndfir Quick installation may only be done if the structure has exactly the same dimensions as the underside of the module and is sufficiently solid. Position the tube on the underside of the module. Take note that the openings through which the linking pins go are directly across from each other.
  • Seite 8 Gndfir Before connecting, turn off the power and turn it back on only after the entire installation is ready. If an end station controls more than one AT(M) unit (max. 3) in a parallel circuit, each AT(M) unit must be wired directly from the end station. Do not wire from a connection box of one AT(M) unit to a connection box of another AT(M) unit.
  • Seite 9 Gndfir Remove power from the AT(M) before mounting the protective screen. Make sure that the impeller is not turning.
  • Seite 10 Gndfir Air inlet side Install the protective screen on the AT(M) and secure it as shown in the illustration below. Check whether the AT(M) has been connected correctly. Check whether the AT(M) works optimally. Do not touch any of the AT(M) moving parts. Before using the AT(M) you have to set the airflow measurement in the controller.
  • Seite 11 Do not touch any of the AT(M) moving parts. Fancom advises to leave the AT(M) on for about 6 hours after installation, to let it run in. The AT(M) requires no specific maintenance. Fancom recommends that your installation technician inspects the complete climate installation, of which the AT(M) is a component, every half-year.
  • Seite 12 Gndfir When disposing the AT(M) please comply with all relevant requirements and regulations applicable in your country. The following components of the AT(M) can be replaced:  AT motor  DRS feedback sensor For correct operation carry out instructions in the given order. If not, readjustment will be necessary. Remove the plug from the connection box.
  • Seite 13 Gndfir Replace the DRS feedback sensor. Place the AT motor. The control dampers should be still open. Replace the lid, keeping the alignment lock in place. Screw the lid on AT(M) (do not force it). Reconnect the plug on the connection box. 10.
  • Seite 14 Gndfir Manufacturer: Fancom B.V. Address: Industrieterrein 34 City: Panningen (the Netherlands) Hereby declares that the: AT(M) Complies with the provisions of the: Low voltage directive 2014/35/EU according to NEN-EN-IEC 61010-1: 2010 Machine directive 2006/42/EC EMC directive 2014/30/EU Emission according to NEN-EN-IEC 61000-6-3: 2007...
  • Seite 15 N.B.: De originele, authentieke versie van deze handleiding is de door Fancom B.V. of door een van haar dochterondernemingen (verder aangeduid als Fancom) geproduceerde Engelstalige versie. Achteraf door derden aangebrachte wijzigingen in deze handleiding zijn door Fancom noch gecontroleerd, noch goedgekeurd. Onder wijzigingen verstaat Fancom o.a.
  • Seite 16 Algemene inleiding ............................. 1 Hoe gebruikt u deze handleiding ....................1 Symbolen op de AT(M) ........................1 Fancom-helpdesk ........................... 1 Veiligheidsinstructies en waarschuwingen..................2 De AT(M) installeren ........................... 3 De AT(M) monteren ........................3 De AT(M) aansluiten ........................5 Het beschermrooster plaatsen (optie) ....................
  • Seite 17 Lees de documentatie en veiligheidsvoorschriften behorend bij deze gebruikershandleiding. Waarschuwing duidend op gevaar voor het product of gevaar voor mens of dier. Bewegende onderdelen kunnen verbrijzelen en snijden. Luchtstroomrichting. Voor ondersteuning en antwoord op eventuele vragen kunt u het lokale Fancom Sales & Service Centre raadplegen.
  • Seite 18 De garantie is niet van toepassing als dit product op een andere wijze is geïnstalleerd dan door Fancom is aangegeven en/of als de motor van het product is geopend en wijzigingen aan het product zijn aangebracht.
  • Seite 19 gNdfir De AT(M) en bijbehorende onderdelen installeert u als volgt: De AT(M) monteren (zie pagina 3) De AT(M) aansluiten (zie pagina 5) Het beschermrooster plaatsen (optie) (zie pagina 6) De AT(M) testen (zie pagina 7) De openingsstand van de klep is in de fabriek ingesteld. De gesloten stand wordt automatisch gekalibreerd tijdens het inschakelen.
  • Seite 20 gNdfir Snelmontage mag u alleen toepassen als de constructie exact dezelfde maatvoering heeft als de onderzijde van de module, en voldoende stevig is. Plaats de koker aan de onderzijde van de module. Let erop dat de openingen, waar de koppelpennen doorheen gaan, recht tegenover elkaar staan.
  • Seite 21 gNdfir Schakel voor het aansluiten de spanning uit en schakel deze pas in nadat volledige installatie gereed Als een eindstation meer dan één AT(M) regelt (max. 3) in een parallel circuit, moet elke AT(M) rechtstreeks vanaf het eindstation worden bedraad. Leg geen bedrading aan vanuit de aansluitkast van één AT(M) naar de aansluitkast van een andere AT(M).
  • Seite 22 gNdfir...
  • Seite 23 gNdfir Maak de AT(M) spanningsvrij voordat u het beschermrooster monteert. Zorg dat de waaier niet draait. Luchtinlaatzijde Plaats het beschermrooster op de AT(M) en zet het vast zoals getoond in de afbeelding hieronder. Controleer of de AT(M) correct is aangesloten. Controleer of de AT(M) optimaal werkt.
  • Seite 24 Voordat u de AT(M) kunt gebruiken, moet u de luchtstroommeting instellen in de regelcomputer. AT(M) 35-56 AT(M) 63-80 Raak de bewegende onderdelen van de AT(M) niet aan. Fancom adviseert om de AT(M) gedurende circa 6 uur na installatie ingeschakeld te laten zodat deze kan inwerken.
  • Seite 25 De AT(M) vereist geen specifiek onderhoud. Fancom adviseert om de complete klimaatinstallatie waarvan de AT(M) onderdeel uitmaakt, ieder half jaar door uw installateur op een juiste werking te laten controleren. Controleer de AT(M) van tijd tot tijd op eventuele beschadigingen. Meld eventuele beschadigingen direct aan uw installateur.
  • Seite 26 gNdfir De volgende onderdelen van de AT(M) kunnen worden vervangen:  AT-motor  RTTM-sensor Voer de instructies in de opgegeven volgorde uit voor een juiste werking. Als u dat niet doet, kan het nodig zijn om de unit opnieuw af te stellen. Trek de stekker in de aansluitkast los.
  • Seite 27 gNdfir Sluit de stekker in de aansluitkast aan. 10. Controleer of het systeem werkt en stel de AT-regelklep indien noodzakelijk opnieuw af. 11. Bevestig de AT(M) weer op het ventilatiesysteem. Raadpleeg de volgende technische gegevens wanneer u de RTTM-sensor vervangt: RTTM-sensor Voedingsspanning 8–18 Vdc...
  • Seite 28 gNdfir Behuizing Beschermklasse IP55 IP55 Omgevingsklimaat Bereik bedrijfstemperatuur 0 °C tot +40 °C Bereik opslagtemperatuur -10 °C tot 50 °C Relatieve vochtigheid < 85%, niet condenserend...
  • Seite 29 Fabrikant: Fancom B.V. Adres: Industrieterrein 34 Plaats: Panningen (the Netherlands) Verklaart hiermee dat de: AT(M) Voldoet aan de bepalingen van de: De Laagspanningsrichtlijn 2014/35/EU conform NEN-EN-IEC 61010-1: 2010 Machinerichtlijn 2006/42/EC EMC-richtlijn 2014/30/EU Emissienorm conform NEN-EN-IEC 61000-6-3: 2007 Immuniteitsnorm conform NEN-EN-IEC 61000-6-2: 2005...
  • Seite 30 Änderungen in dieser Anleitung wurden von Fancom weder geprüft noch genehmigt. Unter Änderungen versteht Fancom u. a. das Übersetzen in eine andere Sprache als das Englische sowie das Ergänzen und/oder Entfernen von Texten und/oder Abbildungen aus dem Original. Fancom übernimmt keinerlei Haftung für Schäden jeglicher Art, Verletzungen und Garantieforderungen sowie andere Forderungen im Zusammenhang mit derartigen Änderungen, soweit diese Änderungen dazu führen, dass der Inhalt von der von Fancom erstellten englischen...
  • Seite 31 Allgemeine Einleitung ..........................1 Zur Verwendung dieses Handbuchs ....................1 Symbole auf dem AT(M) ......................... 1 Fancom Helpdesk ........................... 1 Sicherheitshinweise und Warnungen ..................... 2 Installation des AT(M) ..........................3 Den AT(M) montieren ........................3 Den AT(M) anschließen ........................5 Einbau des Schutzgitters (optional) ....................
  • Seite 32 Die Warnung weist auf Gefahren für das Produkt oder für Menschen bzw. Tiere hin. Bewegliche Teile können zu Quetsch- und Schnittverletzungen führen. Luftstromrichtung. Wenden Sie sich bei Fragen und für Hilfe an das Fancom Sales & Service Centre in Ihrer Nähe.
  • Seite 33 Abschnitt sind in den Installationsanweisungen eine Reihe spezieller Sicherheitsvorschriften enthalten. Die Installation des Geräts und die Beseitigung von Störungen sollte von einem ausgebildeten Elektriker entsprechend den gültigen Normen vorgenommen werden. Bei Installation mit Abweichung von den von Fancom gegebenen Installationsanweisungen, einem Öffnen des Motors und am Produkt vorgenommenen Änderungen erlischt jeglicher Garantieanspruch.
  • Seite 34 gnDfir Den AT(M) und die dazugehörigen Bauteile wie folgt einbauen: Den AT(M) montieren (siehe Seite 3). Den AT(M) anschließen (siehe Seite 5). Das Schutzgitter montieren (optional) (siehe Seite 6). Den AT(M) testen (siehe Seite 7). Die geöffnete Stellung der Drosselklappe ist werkseitig eingestellt. Die geschlossene Stellung wird beim Einschalten automatisch kalibriert.
  • Seite 35: Einbau Des Schutzgitters (Optional)

    gnDfir Ein schneller Einbau gelingt nur, wenn die Konstruktion genau die gleichen Abmessungen hat wie die Unterseite des Moduls und ausreichend stabil ist. Das Rohr an der Unterseite des Moduls ansetzen. Darauf achten, dass die Öffnungen, durch welche die Sicherungsstifte gesteckt werden, genau gegenüber voneinander liegen. Die Sicherungsstifte eindrücken, sodass das Rohr mit dem Modul verbunden ist.
  • Seite 36 gnDfir Vor dem Anschließen, die Stromversorgung abschalten und erst nach Abschluss des gesamten Einbaus wieder einschalten. Falls eine Endstation mehrere AT(M)-Einheiten (max. 3) in einem Parallelkreis steuert, muss jede AT(M)-Einheit direkt an die Endstation angeschlossen werden. Stellen Sie keine Kabelverbindung von der Anschlussdose einer AT(M)-Einheit zu der Anschlussdose einer anderen AT(M) Einheit her.
  • Seite 37 gnDfir Vor der Montage des Schutzgitters, die Stromversorgung zum AT(M) unterbrechen. Stellen Sie sicher, dass sich das Flügelrad nicht dreht.
  • Seite 38: Zuluftseite

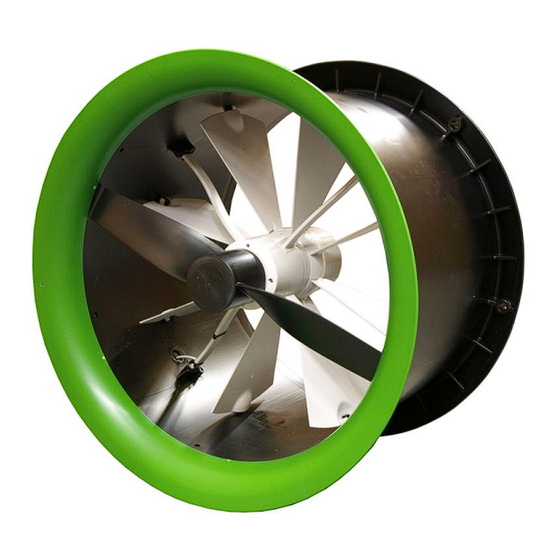
    gnDfir Zuluftseite Das Schutzgitter auf dem AT(M) montieren und wie in der nachfolgenden Abbildung gezeigt sichern. Kontrollieren, ob der AT(M) korrekt angeschlossen ist. Kontrollieren, ob der AT(M) optimal funktioniert. Berühren Sie keine beweglichen Teile des AT(M). Vor der Verwendung des AT(M) muss die Luftstrommessung im Regler eingestellt werden. AT(M) 35-56...
  • Seite 39 AT(M) 63-80 Berühren Sie keine beweglichen Teile des AT(M). Fancom empfiehlt, den AT(M) für ca. 6 Stunden nach der Installation eingeschaltet zu lassen, damit er sich einlaufen kann. Eine spezielle Wartung dieses AT(M) ist nicht erforderlich. Fancom empfiehlt, die gesamte Klimaanlage, zu der dieser AT(M) gehört, alle sechs Monate von einen Installateur auf korrekte Funktion überprüfen zu lassen.
  • Seite 40 gnDfir Achten Sie bei der Entsorgung des AT(M) darauf, dass Sie alle in Ihrem Land geltenden relevanten Bestimmungen und Vorschriften einhalten. Die folgenden Komponenten des AT(M) können ausgetauscht werden:  AT-Motor  RDRM-Fühler Für einen einwandfreien Betrieb müssen die Anweisungen in der angegebenen Reihenfolge beachtet werden.
  • Seite 41 gnDfir Den RDRM-Fühler austauschen. Den AT-Motor wieder in Position bringen. Die Regeldrosselklappen müssen weiterhin geöffnet sein. Den Verschluss wieder einsetzen, sodass die Anschlusszentrierung an der richtigen Position ist. Den Verschluss an den AT(M) anschrauben (keine übermäßige Kraft anwenden). Den Stecker wieder mit der Anschlussdose verbinden. 10.
  • Seite 42 Hersteller: Fancom B.V. Adresse: Industrieterrein 34 Ort: Panningen (The Netherlands) Erklärt hiermit, dass: AT(M) Die Bestimmungen erfüllt von: Niederspannungsrichtlinie 2014/35/EU gemäß NEN-EN-IEC 61010-1: 2010 Maschinenrichtlinie 2006/42/EG EMV-Richtlinie 2014/30/EU Emissionen gemäß NEN-EN-IEC 61000-6-3: 2007 Immunität gemäß NEN-EN-IEC 61000-6-2: 2005 Ort: Panningen...
  • Seite 43 N.B. : La version d’origine de ce manuel est en anglais et est publiée par Fancom B.V. ou l’une de ses filiales (ci- après désignées par Fancom). En cas de modifications apportées à ce manuel par un tiers, elles ne sont ni vérifiées ni approuvées par Fancom.
  • Seite 44 Présentation générale ..........................1 Utilisation de ce manuel........................1 Pictogrammes de l'AT(M) ....................... 1 Assistance utilisateurs Fancom ...................... 1 Consignes de sécurité et avertissements ..................2 Installation du AT(M) ..........................2 Montage du AT(M) .......................... 2 Branchement du AT(M) ........................4 Installation de la grille de protection (facultative) ................
  • Seite 45 Avertissement indiquant un danger pour le produit ou un danger pour les humains et les animaux. Des pièces mobiles peuvent broyer ou couper. Sens du débit d'air. Pour toute question ou demande d’assistance, veuillez contacter le SAV local de Fancom.
  • Seite 46 L'installation de l'appareil et la correction de tout dysfonctionnement doivent être effectuées par un électricien agréé en respectant les normes applicables. La garantie n’est pas valable si le produit n’est pas installé conformément aux instructions de Fancom, que le moteur du produit a été ouvert et que des modifications lui ont été apportées.
  • Seite 47 gndFir 35 - 56 63 - 80 L’installation rapide n’est possible que si la structure a exactement les mêmes dimensions que le dessous du module et qu’elle est suffisamment solide. Positionnez le tube sur le dessous du module. Notez que les ouvertures par lesquelles passent les goujons se font directement face.
  • Seite 48 gndFir Les AT(M) 50 et 56 combinés à des tubes de rallonge CLICK doivent être fixés avec 3 boulons extra M4 (boulons M4 espacés de 120° les uns des autres) en plus des 3 goujons standard. Installation de la grille de protection (facultative) Si nécessaire, installation d’une grille de protection si le AT(M) : ...
  • Seite 49 gndFir Possibilité de régler la position à la tension de commande maximale Transformateur 16 actionneurs maxi sur transformateur 100 VA PFB (Power Fail Box) 16 actionneurs maxi sur PFB Coupez l’alimentation du AT(M) avant d’installer la grille de protection. Assurez-vous que le ventilateur ne fonctionne pas*.
  • Seite 50 gndFir Côté admission d’air Installez la grille de protection sur le AT(M) et fixez-la comme sur l’illustration ci-dessous. Vérifiez que le AT(M) est correctement branché. Vérifiez que le AT(M) fonctionne correctement. Ne touchez aucune partie mobile du AT(M). Avant d’utiliser le AT(M), vous devez définir le débit d’air dans le contrôleur. AT(M) 35-56...
  • Seite 51 AT(M) 63-80 Ne touchez aucune partie mobile du AT(M). Fancom vous conseille de laisser le AT(M) sous tension pendant 6 heures environ après l’installation. Le AT(M) ne nécessite aucun entretien particulier. Fancom recommande que votre installateur inspecte l’ensemble de la climatisation dont le AT(M) fait partie tous les six mois.
  • Seite 52 gndFir Lors de l'élimination de l'AT(M) conformez-vous à toutes les exigences requises et à la réglementation applicable dans votre pays. Les composants suivants du AT(M) peuvent être remplacés :  Moteur AT  Capteur d’asservissement DSR Pour un bon fonctionnement, exécutez les instructions dans l’ordre indiqué. Dans le cas contraire, vous devrez procéder à...
  • Seite 53 gndFir Remplacez le capteur d’asservissement DRS. Installez le moteur AT. Les registres de commande doivent toujours être ouverts. Réinstallez le couvercle, tout en maintenant en place le verrou d’alignement. Vissez le couvercle AT(M) (ne forcez pas). Reconnectez la fiche au boîtier de raccordement. 10.
  • Seite 54 Fabricant : Fancom B.V. Adresse : Industrieterrein 34 Ville : Panningen (The Netherlands) certifie, par le présente, que : AT(M) est conforme aux dispositions suivantes : Directive sur les basses tensions 2014/35/UE conformément à la norme NEN-EN-IEC 61010-1: 2010 Directive sur les machines 2006/42/CE Directive sur les émissions électromagnétiques 2014/30/UE...
  • Seite 55 Fancom B.V. o da una delle sue società controllate (di seguito denominate Fancom). Qualsiasi modifica apportata al presente manuale da terzi non è né controllata né approvata da Fancom. Con modifiche Fancom intende tra le altre cose la traduzione in una lingua diversa da quella inglese e l'aggiunta e/o l'eliminazione di testo e/o figure dal contenuto originale.
  • Seite 56 Introduzione generale ..........................1 Come utilizzare il manuale......................1 I simboli su AT(M) ........................... 1 Helpdesk Fancom ........................... 1 Istruzioni ed avvertenze di sicurezza ....................2 Installazione del AT(M) ..........................2 Montare il AT(M) ..........................2 Collegare il AT(M) ........................... 4 Installare la griglia di protezione (opzionale)...................
  • Seite 57 Avviso che indica un pericolo per il prodotto o situazioni di pericolo per persone o animali. Parti in movimento che potrebbero causare schiacciamenti e tagli. Direzione del flusso d’aria. Per eventuali domande o supporto si prega di contattare il Centro Vendite & Supporto Fancom di zona.
  • Seite 58 La garanzia non si applica se il prodotto viene installato in qualsiasi modo difforme da quanto indicato da Fancom e se il motore del prodotto è stato aperto e sono state apportate modifiche al prodotto.
  • Seite 59 gndfIr 35 - 56 63 - 80 L’installazione rapida può essere svolta solo se la struttura ha esattamente le stesse dimensioni della parte inferiore del modulo ed è sufficientemente solida. Posizionare il tubo sul lato inferiore del modulo. Tenere presente che le aperture attraverso le quali far passare i perni di collegamento sono collegamento opposte uno dall’altra.
  • Seite 60 gndfIr I AT(M) 50 e 56 in combinazione con i tubi di prolunga CLICK devono essere fissati con 3 bulloni M4 supplementari (bulloni M4 distanziati a 120° l’uno dall’altro) in aggiunta ai 3 perni di collegamento standard. Installare la griglia di protezione (opzionale) L’impiego di una la griglia di protezione è...
  • Seite 61 gndfIr Stato standard alla consegna 0 V CC aperto, 8,5 V CC quasi chiuso Possibilità di regolare la posizione sulla tensione di controllo massima Trasformatore max. 16 attuatori su trasformatore 100 VA PFB (Power Fail Box) max. 16 attuatori su PFB...
  • Seite 62 gndfIr Interrompere l'alimentazione al AT(M) prima di montare la griglia di protezione. Accertarsi che il girante non stia ruotando. Lato ingresso aria Posizionare la griglia di protezione sul AT(M) e fissarla come mostrato nell’illustrazione seguente. Controllare se il AT(M) è stato collegato correttamente. Controllare se il AT(M) funziona in modo ottimale.
  • Seite 63 Prima di utilizzare il AT(M) è necessario impostare la misurazione del flusso d’aria nella centralina. AT(M) 35-56 AT(M) 63-80 Non toccare parti in movimento del AT(M). Fancom raccomanda di lasciare il AT(M) acceso per circa 6 ore dopo l’installazione, per svolgere il corretto rodaggio.
  • Seite 64 Il AT(M) non necessita di particolare manutenzione. Fancom raccomanda un’ispezione a cadenza semestrale svolta dal proprio installatore di fiducia sull’intero sistema di climatizzazione, di cui il AT(M) è un componente. Ispezionare periodicamente il AT(M) per eventuali danni. Comunicare immediatamente all’installatore la presenza di eventuali danni.
  • Seite 65 gndfIr Verificare la presenza di un controllo al 100%, l’otturatore del controllo AT deve essere completamente aperto. Anche la tensione in uscita deve essere a 0 V CC. Se l’otturatore di controllo AT è completamente aperto, procedere come indicato di seguito. Scollegare lo spinotto dalla scatola di giunzione.
  • Seite 66 Produttore: Fancom B.V. Indirizzo: Industrieterrein 34 Località: Panningen (the Netherlands) Con la presente dichiara che: AT(M) È conforme con le disposizioni della: Direttiva bassa tensione 2014/35/UE secondo NEN-EN-IEC 61010-1: 2010 Direttiva macchine 2006/42/CE Direttiva EMC 2014/30/UE Emissioni secondo NEN-EN-IEC 61000-6-3: 2007 Immunità...
  • Seite 67 технического обслуживания компании Fancom. Если несмотря на приложенные при составлении этого руководства усилия вы обнаружите в нем какие-либо ошибки, сообщите об этом в компанию Fancom B.V. в письменном виде. Fancom B.V., PO Box 7131, 5980 AC Паннинген (Panningen) Нидерланды (The Netherlands).
  • Seite 68: Inhaltsverzeichnis

    Содержание Введение ..............................1 Принципы работы с этим руководством ..................1 Обозначения на изделии AT(M) ...................... 1 Справочная служба Fancom ......................1 Техника безопасности и меры предосторожности ................2 Установка AT(M) ............................2 Монтаж AT(M) ..........................2 Подсоединение AT(M) ........................4 Установка...
  • Seite 69: Введение

    Предупреждение о возможности повреждения изделия или об опасности для людей и животных. Подвижные части могут нанести травмы (например, переломы или порезы). Направление потока воздуха. Справочная служба По всем вопросам и за помощью обращайтесь в региональный центр продаж и обслуживания Fancom.
  • Seite 70: Техника Безопасности И Меры Предосторожности

    установки. Устанавливать устройство и устранять неполадки в его работе должен квалифицированный монтажник электротехнического оборудования в соответствии с применимыми стандартами. При нарушении инструкций компании Fancom по установке изделия, а также при внесении изменений в его конструкцию либо вскрытии двигателя гарантия аннулируется.
  • Seite 71 gndfiR 35–56 63–80 Быстрый монтаж модели Быстрый монтаж производится только в том случае, если габариты конструкции в точности совпадают с размерами нижней стороны блока, а конструкция при этом достаточно прочная. Расположите трубу на нижней стороне блока. Обратите внимание на то, что отверстия, через которые проходят...
  • Seite 72 gndfiR Модели AT(M) 50 и 56, монтируемые с удлинителями CLICK, закрепляются с помощью трех дополнительных болтов M4 (промежуток между каждыми двумя из них должен составлять 120°) помимо трех стандартных соединительных штифтов. Установка защитного экрана (необязательно) Защитный экран необходим в случае, если AT(M): ...
  • Seite 73 gndfiR Время работы при повороте под углом 90° 22 секунды (ATM 35–56) 49 секунды (ATM 63-80) Штатное состояние при доставке 0 В пост. тока в открытом состоянии, 8,5 В пост. тока в почти закрытом Возможность регулировки положения при максимальном управляющем напряжении Преобразователь...
  • Seite 74: Установка Защитного Экрана Необязательно

    gndfiR Установка защитного экрана необязательно Перед установкой защитного экрана отсоедините блок AT(M) от сети питания. Убедитесь в том, что крыльчатка не вращается. Сторона впуска воздуховода Установите защитный экран на изделие AT(M) и закрепите его, как показано на рисунке ниже. Проверка Проверьте...
  • Seite 75: Эксплуатация At(M)

    Эксплуатация Перед началом эксплуатации AT(M) необходимо настроить измерение расхода в контроллере. AT(M) 35–56 AT(M) 63–80 Первое использование Не прикасайтесь к движущимся элементам AT(M). Fancom рекомендует оставить изделие AT(M) во включенном состоянии примерно на шесть часов после монтажа.
  • Seite 76: Техническое Обслуживание

    Техническое обслуживание Устройство AT(M) не требует никакого особого технического обслуживания. Fancom рекомендует проводить полный осмотр климатических систем, в которые AT(M) входит в качестве компонента, каждые полгода. Регулярно осматривайте устройство AT(M) на предмет повреждений. Незамедлительно сообщайте монтажнику обо всех обнаруженных дефектах. Поврежденное устройство AT(M) может...
  • Seite 77: Замена Датчика Обратной Связи По Скорости И Направлению Вращения

    gndfiR Замените устройство. Подсоедините штекер к распределительной коробке. 10. Проверьте изделие AT(M) с помощью подключенного к нему компьютера. Замена датчика обратной связи по скорости и направлению вращения Убедитесь в том, что устройство находится под полным контролем (регулирующий клапан AT должен быть полностью...
  • Seite 78: Условия Эксплуатации

    От 0 до 40 °C Диапазон температуры хранения От -10 до 50 °C Относительная влажность < 85 % без конденсации Декларация соответствия Изготовитель: Fancom B.V. Адрес: Industrieterrein 34 Город: Паннинген (Panningen) Нидерланды (The Netherlands) Настоящим гарантируется, что AT(M) соответствует перечисленным ниже стандартам.

Inhaltsverzeichnis