
Verwandte Anleitungen für E-FLITE PLATINUM-Serie


Inhaltszusammenfassung für E-FLITE PLATINUM-Serie
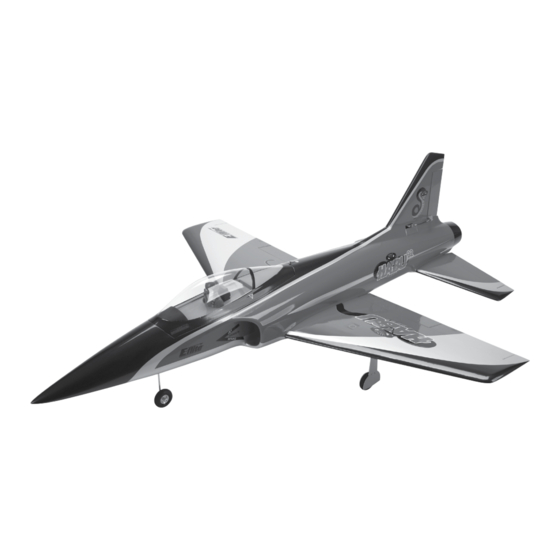
- Seite 1 Instruction Manual Bedienungsanleitung Downloaded from www.Manualslib.com manuals search engine...
-
Seite 2: Battery Warnings
NOTICE All instructions, warranties and other collateral documents are subject to change at the sole discretion of Horizon Hobby, Inc. For up-to-date product literature, visit horizonhobby.com and click on the support tab for this product. Meaning of Special Language The following terms are used throughout the product literature to indicate various levels of potential harm when operating this product: NOTICE: Procedures, which if not properly followed, create a possibility of physical property damage AND a little or no possibility of injury. -
Seite 3: Inhaltsverzeichnis
Contents of Kit/Parts Layout ........4 thrust when powered with an E-flite 6S 5000 30C Li-Po pack. And it does Covering Colors . -
Seite 4: Contents Of Kit/Parts Layout
contents oF kIt/Parts layout 8-channel receiver installation: SPMAR8000 AR8000 DSM2 8-Channel Full-Range Receiver Replacement Parts JSP20030 MC35 Servo (7) EFL807501 Fuselage with Hatches and Rudder JRPSDS368 DS368 Premium Digital Servo, rudder EFL807502 Main Wing Left SPMA3050 3-inch (76mm) Servo Extension (5) EFL807503 Main Wing Right SPMA3051... -
Seite 5: Required Tools And Adhesives
requIred tools and adhesIves control horn InstallatIon Tools & Equipment Required Parts Balancing stand Clear tape Fuselage Wing panel (right and left) Drill Epoxy brush Stabilizer (right and left) Fiberglass control horn (7) Felt-tipped pen Flat file Required Tools and Adhesives Glass cleaner Hemostats Felt-tipped pen... - Seite 6 3. Use medium grit sandpaper to lightly sand the control 7. Sand a slight angle on the fiberglass control horn for the elevator. horns where they fit into the openings in the flap and aileron. This is so the top of the horn does not distort the covering on the top of the elevator.
-
Seite 7: Aileron Servo Installation
aIleron servo InstallatIon 2. Secure a 3-inch (76mm) servo extension to the aileron servo lead using string or a commercially available connector. Required Parts Wing panel (right and left) Transmitter Receiver Receiver battery Silicone tubing Metal clevis (4) 2mm nut (4) Servo with hardware (MC35) (2) Servo extension, 3-inch (76mm) (2) Threaded rod, 2mm x 25mm(2) Hardwood block,... - Seite 8 5. Use a pencil to draw two lines on the cover. The first line is along 8. Use a rotary tool and small sanding drum to make a notch in the the bottom of the cover, 3/32-inch (2.5mm) from the edge. The second line block for the servo lead.
- Seite 9 11. Position the servo between the two blocks. Leave a small gap 14. Use the screws provided with the servo and a #1 Phillips between the servo and servo cover so vibrations from the airframe are not screwdriver to attach the servo to the mounting blocks. transferred directly into the servo.
- Seite 10 17. Use four 2mm x 8mm self-tapping screws and a #1 Phillips 20. Remove the tape holding the flap and aileron in position. Use screwdriver to secure the aileron servo cover to the wing. the radio system to center the aileron servo. Connect the metal clevis to the inner hole of aileron servo horn.
-
Seite 11: Flap Servo Installation
FlaP servo InstallatIon 2. Repeat step 1 to prepare a second flap servo. Note the servos will be identical. Required Parts Wing panel (right and left) Transmitter Receiver Receiver battery Silicone tubing Metal clevis (4) 2mm nut (4) Servo with hardware (MC35) (2) Threaded rod, 2mm x 25mm (2) Hardwood block, 13mm x 10mm x 7mm (4) - Seite 12 5. Use 5-minute epoxy to glue the 13mm x 10mm x 7mm hardwood 8. Use 5-minute epoxy to glue the remaining block to the cover. block to the servo cover. Make sure to glue the 10mm x 7mm end to the Don’t forget to roughen the end of the block as shown in step 6.
- Seite 13 11. Apply 2–3 drops of thin CA in each hole drilled. Also saturate 13. Apply 2–3 drops of thin CA in each of the flap servo cover the front and rear of the block using thin CA to harden the block. This will mounting holes.
- Seite 14 15. Use four 2mm x 8mm self-tapping screws and a #1 Phillips 18. Use the radio system to center the flap servo. Connect the metal screwdriver to secure the flap servo cover to the wing. clevis to the outer hole of flap servo horn. The remaining clevis connects to the flap control horn.
-
Seite 15: Wing Spar Installation
WIng sPar InstallatIon 21. Repeat steps 3 through 18 to install the remaining flap servo and assemble the flap linkage. Connect the flap linkage to the flap control horn Required Parts ONLY at this time. Fuselage Carbon wing spar (2) 8-32 x 1/4-inch socket head screw Wing panel assembly (right and left) - Seite 16 3. Use a 9/64-inch ball driver to start the four 8-32 x 1/4-inch socket 6. Remove the spar from the spar pocket. Use medium grit head bolts in the aluminum wing sockets inside the fuselage. Only thread sandpaper to lightly sand the spar where it fits into the wing. Sand both the screws in a few turns at this time.
- Seite 17 9. Check the fit of the wing on the fuselage. It must rest tightly 12. Use an epoxy brush to apply epoxy to the front, back, top and against the fuselage. If the spar fits into the wing and fuselage spar bottom of the spar where it fits into the wing.
-
Seite 18: Main Landing Gear Installation - Fixed Gear
MaIn landIng gear InstallatIon - FIxed gear Required Parts Wing panel assembly (right and Aluminum wheel collar with left) setscrew, 3.5mm (2) Aluminum wheel spacer, 3.5mm Wheel, 1 -inch (44.5mm) (2) Wheel axle adapter set (2) Main landing gear strut (right and left) Main fixed landing gear unit (2) 3mm x 14mm countersunk self-... - Seite 19 6. Place 2–3 drops of thin CA in each of the holes. This will harden 9. With the flap lowered, rest a square against the flap hinge line. the threads made by the screws making them more secure when the Look down on the axle and check that it is perpendicular to the square landing gear block is installed.
-
Seite 20: Main Landing Gear Installation - Retractable Gear
MaIn landIng gear InstallatIon - E-tips retractaBle gear Required Parts The end of the axles may have a slight bur on them from the factory. If Transmitter Receiver the wheel is hard to install use a file to remove this bur. Receiver battery Wing panel assembly (right and Always use threadlock on metal-to-metal fasteners to prevent them from... - Seite 21 3. Place the retract mechanism in the wing. Make sure it is resting 6. Remove the retract mechanism from the wing. Use a #1 Phillips flat on the landing gear rails. screwdriver to thread a 3mm x 14mm countersunk self-tapping screw in each hole to cut threads into the landing gear rails.
- Seite 22 8. Slide a main gear strut into the retract mechanism. Use the 11. Use the string to pull the lead through the wing and out at setscrews and a 1.5mm hex wrench to secure the main gear wire in the the root rib as shown.
- Seite 23 15. With the flap lowered, rest a square against the flap hinge line. 17. Slide a 3.5mm aluminum wheel spacer on the axle, then the Look down on the axle and check that it is perpendicular to the square wheel with adapters.
-
Seite 24: Optional Main Landing Gear Doors
19. Check the operation of the retract using the radio system. The 2. Draw two lines on the door that are 7/8-inch (22mm) and 2 wheel will retract into the center of the wheel well. If not, slightly bend inch (65mm) from the top edge of the landing gear door as the center the strut so it does. - Seite 25 5. Locate the landing gear door blocks. Use a sanding block and 8. Use a sanding block and medium grit sandpaper to round medium grit sandpaper to sand an angle on the notched side so the block the back of the landing gear door block. This will allow the gear to will rest flat against the angle of the landing gear door.
-
Seite 26: Nose Gear Installation - Fixed Gear
12. Attach the landing gear door to the strut using four 2mm x 8mm 15. Retract the landing gear using the radio system. This will set the self-tapping screws and a #0 Phillips screwdriver. correct angle for the landing gear door against the wing. Allow the glue to cure overnight before moving the gear back to the down position. - Seite 27 2. Use a #1 Phillips screwdriver to thread a servo mounting screw into 5. Install the steering servo in the fuselage using the hardware the mounting holes for the steering servo. Remove the screw after cutting provided with the servo and a #1 Phillips screwdriver. The servo output the threads in the plywood.
- Seite 28 8. Connect the clevis without the tubing to the steering arm of the nose 10. Remove the horn from the servo and attach the clevis to the horn. gear assembly. Place the horn on the servo and check that the steering is centered when the steering servo is centered.
- Seite 29 13. Use a flat file to make a 1/4-inch (6mm) wide flat area on the gear 14. Slide a 3.5mm aluminum wheel spacer on the axle, then the near the end of the axle strut for the setscrew to rest. This will keep the wheel with adapters.
-
Seite 30: Nose Gear Installation - Retracts
nose gear InstallatIon - retracts 3. Place 2–3 drops of thin CA in each of the holes. This will harden the threads made by the screws making them more secure when the steering Required Parts servo is installed. Fuselage assembly Nose gear retract assembly Transmitter Receiver... - Seite 31 6. Use a hobby knife with a #11 blade to trim a 1/4-inch (6mm) piece 9. Use a 1.5mm hex wrench to secure the steering arm by tightening from the silicone tubing. the setscrew on the lower flat of the nose gear strut. Make sure the arm is positioned as shown in the photo.
- Seite 32 12. Secure the nose gear assembly in the fuselage using four 3mm x 15. Select the correct adapter that fits to the landing gear strut. Insert 8mm socket head screws. two adapters in either side of the hub of the wheel. E-tips ...
-
Seite 33: Rudder Servo Installation
rudder servo InstallatIon 17. Slide a 3.5mm aluminum wheel spacer on the axle, then the wheel with adapters. A 3.5mm wheel collar is used to secure the wheel Required Parts in position by tightening the setscrews onto the axle using a 1.5mm hex wrench. - Seite 34 5. Use a #1 Phillips screwdriver to remove the two 2mm x 8mm self- 9. Route the rudder servo lead through the fuselage and formers as tapping screws that secure the rudder servo plate to the rudder servo shown.
-
Seite 35: Stabilizer Spar Installation
12. Remove the low-tack tape holding the rudder to the fin. Attach the 1. Slide the carbon stabilizer spar into the fuselage. Use two 3mm linkage to the rudder and rudder servo. Make a slight bend in the linkage x 15mm socket head screws to secure the spar in position. - Seite 36 3. Remove the spar from the fuselage using a 2.5mm hex wrench. 6. Attach the wing panels to the fuselage using a 9/64-inch hex Check the fit of the spar in the stabilizer. It should easily slide in up to the wrench.
- Seite 37 9. Mix 1/2 ounce (15mL) of 15-minute epoxy. Apply the epoxy to the 12. Before the epoxy cures, slide the stabilizer into position against spar pocket of the stabilizer using a mixing stick. the fuselage. Keep the stabilizer tight against the fuselage until the epoxy fully cures.
-
Seite 38: Elevator Servo Installation
E-tips elevator servo InstallatIon Required Parts The screws for the elevator servo will go in at a slight angle so they can Fuselage assembly Servo with hardware (MC35) (2) be accessed by the screwdriver. Y-harness Metal clevis (4) 3. Use a #1 Phillips screwdriver to thread a servo mounting 2mm nut (4) Silicone tubing screw into the mounting holes for the elevator servo. - Seite 39 6. Repeat steps 3 and 4 using a 2mm x 8mm self-tapping screw and 9. Use a hobby knife with a #11 blade to trim two 1/4-inch (6mm) a #1 Phillips screwdriver to prepare and harden the holes for the pushrod pieces from the silicone tubing.
- Seite 40 13. Remove the tape that holds the elevator to the stabilizer. Connect 14. Repeat steps 3 through 13 to install the remaining elevator servo the clevis to the elevator control horn. Adjust the clevises so the elevator is and linkage.
-
Seite 41: Fan Installation
15. Secure the Y-harness to the elevator servo leads using string or a 3. Use two 2mm x 6mm machine screws and a #1 Phillips commercially available connector. screwdriver to attach the fan fairing to the motor. Note that the fairing faces to the bottom of the fan unit. - Seite 42 6. Measure back 1/2-inch (13mm) and 1 -inch (42mm) from where 9. Fit the fan housing into the fuselage. You may need to remove the the edge of the fan housing fits in the tube. Use these lines and those that elevator servo horns and loosen the screws holding the pushrod supports aligned with the fan fairing to draw a rectangle on the tube.
-
Seite 43: Exhaust Tube And Speed Control Installation
exhaust tuBe and sPeed control InstallatIon Required Parts Fuselage assembly Exhaust tube Clear tape Fan access hatch Speed control Hook and loop tape Required Tools and Adhesives Hobby scissors Felt-tipped pen Hemostats 11. Use a #1 Phillips screwdriver to thread a 3mm x 10mm self- tapping screw into the four holes for mounting the fan unit. - Seite 44 4. Use clear tape to secure the thrust tube to the fan housing. Matching the colors between the ESC and motor when they are connect- ed results in the correct motor direction if using all E-flite components. 8. Connect the leads from the speed control to the leads from the motor.
-
Seite 45: 6-Channel Receiver Installation
6-channel receIver InstallatIon 3. Insert the flap and aileron harnesses through the hole in front of the elevator servo and into the fuselage. The leads will exit toward the top of Required Parts the fuselage above the intake. Secure the leads using tape or tie-wraps to keep them from interfering with the operation of the elevator servos. -
Seite 46: 6-Channel Receiver Assignments
6-channel receIver assIgnMents 8. Route the lead for the retracts through the fuselage. Use a pair of hemostats to hold the leads from the motor while you are plugging the leads from the controller into them. Routing it through the tray Throttle Speed Control the nose gear is mounted to and along the bottom of the fuselage will Aileron Ailerons (harness from step 1) -
Seite 47: 8-Channel Receiver Assignments For Dx8
8-channel receIver 2. Insert the flap harnesses and one of the 18-inch (457mm) extensions through the hole in front of the elevator servo and into the assIgnMents For dx8 fuselage on the right side as shown. Run the other 18-inch (457mm) servo extension inside the hole on the left side of the fuselage. -
Seite 48: Motor Battery Installation
7. Route the lead for the retracts through the fuselage. Routing it 3. Secure the battery in the fuselage using the hook and loop strap. through the tray the nose gear is mounted to and along the bottom of the Make sure the strap is not pinching any of the servo leads on the bottom fuselage will keep the installation clean. -
Seite 49: Center Of Gravity
3. Use clear tape to secure the interior inside the canopy. 2. The recommended Center of Gravity (CG) location for your model is to 4 inches (100 to 115mm) back from the leading edge of the wing as shown with the battery pack installed. Mark the location of the CG on the top of the wing with a felt-tipped pen. -
Seite 50: Control Throws
E-tips control throWs 1. Turn on the transmitter and receiver of your model. Check the The Habu does not always require full flaps for landing. We recommend movement of the rudder using the transmitter. When the stick is moved using full flaps for landings in no wind or light headwind situations. -
Seite 51: Range Test Your Radio
Habu can be set down lightly on the mains and you can hold the nose wheel off balancing the model on the mains till it slows and gently settle the nose. We hope you enjoy flying the E-flite Habu 32 Downloaded from www.Manualslib.com... -
Seite 52: Limited Warranty
lIMIted Warranty please direct your email to productsupport@horizonhobby.com, or call 877.504.0233 toll free to speak to a Product Support representative. You What this Warranty Covers may also find information on our website at www.horizonhobby.com. Horizon Hobby, Inc. (“Horizon”) warrants to the original purchaser Inspection or Services that the product purchased (the “Product”) will be free from defects If this Product needs to be inspected or serviced, please use the Horizon... -
Seite 53: Compliance Information For The European Union
Warranty and servIce contact InForMatIon Country of Purchase Horizon Hobby Address Phone Number / Email Address United States of Horizon Service Center 4105 Fieldstone Rd 877-504-0233 America (Electronics and engines) Champaign, Illinois, 61822 USA Online Repair Request Visit: www.horizonhobby.com/ service Horizon Product Support 4105 Fieldstone Rd 877-504-0233... -
Seite 54: Academy Of Model Aeronautics National Model Aircraft Safety Code
acadeMy oF Model aeronautIcs natIonal Model aIrcraFt saFety code A. GENERAL: A model aircraft is a non-human-carrying aircraft capable of sustained flight in the atmosphere. It may not exceed limitations of this code and is intended exclusively for sport, recreation and/or competition. All model flights must be conducted in accordance with this safety code and any additional rules specific to the flying site. - Seite 55 (b) At air shows or demonstrations, a straight safety line must be established. (c) An area away from the safety line must be maintained for spectators. (d) Intentional flying behind the safety line is prohibited. 4. RC model aircraft must use the radio-control frequencies currently allowed by the Federal Communications Commission (FCC). Only individuals properly licensed by the FCC are authorized to operate equipment on Amateur Band frequencies.
-
Seite 56: Akku Warnungen
HINWEIS Alle Anweisungen, Garantien und anderen zugehörigen Dokumente können im eigenen Ermessen von Horizon Hobby, Inc. jederzeit geändert werden. Die aktuelle Produktliteratur finden Sie auf horizonhobby.com unter der Registerkarte „Support“ für das betreffende Produkt. Spezielle Bedeutungen Die folgenden Begriffe werden in der gesamten Produktliteratur verwendet, um auf unterschiedlich hohe Gefahrenrisiken beim Betrieb dieses Produkts hinzuweisen: HINWEIS: Wenn diese Verfahren nicht korrekt befolgt werden, können sich möglicherweise Sachschäden UND geringe oder keine Gefahr von Verletzungen ergeben. -
Seite 57: Einleitung
Spezifikationen ..........57 mit den E-flite 6S 5000 mAh Akku beindruckendenen Schub gänzlich Über diese Anleitung . -
Seite 58: Lieferumfang
lieFerumFang 8-Kanal Empfänger Einbau: SPMAR8000 AR8000 DSM2 8-Kanal Empfänger mit voller Reichweite Replacement Parts SPMSA4020 4020 Servos (8) EFL807501 Rumpf mit Klappen und Ruder SPMA3050 3-inch (76mm) Servo Verlängerung (5) EFL807502 Tragfläche Links SPMA3051 6-inch (152mm) Servo Verlängerung EFL807503 Tragfläche Rechts SPMA3052 9-inch (228mm) Servo Verlängerung EFL807504... -
Seite 59: Benötigtes Werkzeug Und Ausstattung
benötigteS Werkzeug und montage der ruderhörner auSStattung Benötigte Teile Tools & Equipment Rumpf Tragflächen (links, rechts) Balancierständer Bohrer Höhenruder (links, rechts) GFK Ruderhörner (7) Gaserstift Glasreiniger Benötigtes Werkzeug und Klebstoff Hobbyzange Mischbecher Faserstift Mischer Sticks Papiertücher Petroleum Gelee Klebeband mit geringer Klebkraft 5 Minuten Epoxy Bohrmaschine Lineal... - Seite 60 3. Schleifen Sie mit mittleren Schleifpapier die Stellen 7. Schleifen Sie einen kleinen Winkel wie abgebildet in die des Ruderhornes an, die in der Fläche verklebt werden. Ruderhörner des Höhenruders. Der Winkel dient zur Passung. Testen Sie dieses und stellen sicher, dass das Ruderhorn nicht die Oberfläche des Ruders stört.
-
Seite 61: Einbau Des Querruderservos
einbau deS QuerruderServoS 2. Sichern Sie die 76mm Servoverlängerung mit einer Schnur oder einem handelsüblichen Verbinder. Benötige Teile Tragflächen , links und rechts Sender Empfänger Empfängerakku Silikonschlauch Metallgabelköpfe (4) 2mm Mutter (4) Servos mit Zubehör (2) Servoverlängerungen 76mm (2) Gewindestangen 2mm x 25mm (2) Hartholzblock 13mm x 10mm x 2mm x 8mm selbst- schneidene... - Seite 62 5. Zeichnen Sie mit einem Stift zwei Linien auf der Abdeckung. Der 8. Fräsen Sie eine kleine Ausbuchtung für das Servokabel in den erste Linie 2, 5mm über der Unterkante. Die zweite Linie wie abgebildet Holzblock. Überprüfen Sie die Passung für die Kabelführung. 22mm von der Seite.
- Seite 63 11.Positionieren Sie das Servo zwischen die beiden Blocks. Lassen 14. Schrauben Sie das Servo mit den mitgelieferten Schrauben und Sie einen kleinen Spalt, so dass Vibrationen des Rumpfes nicht gleich einem Phillips #1 Schraubendreher fest. direkt auf das Servo übertragen werden können. Markieren Sie mit einem Stift die Bohrlöcher.
- Seite 64 17. Schrauben Sie die Servoabdeckung mit den vier 2mm x 8mm 20. Entfernen Sie das Klebeband das die Querruder und Schrauben mit einem # 1 Phillips Schraubendreher fest. Landeklappen in Position hält. Zentrieren Sie mit dem Sender das Querruderservo.
-
Seite 65: Einbau Der Klappenservos
einbau der klappenServoS 2. Wiederholen Sie Schritt 1 um das zweite Klappenservo vorzubereiten. Bitte beachten Sie das die Servos in die gleiche Richtung Benötigte Teile zeigen. Tragflächen (Rechts und Links) Sender Empfänger Metallgabelköpfe (4) Gewindestange Silikonschlauch 2mm Mutter (4) Servo mit Zubehör (2) Hartholzblock (4) 2mm x 8mm selbst-schneidene... - Seite 66 5. Nutzen Sie 5 Minuten Epoxy um den 13mm x 10mm x 7mm Block 8. Kleben Sie mit 5 Minuten Epoxy den zweiten Block auf die an die Abdeckung zu kleben. Achten Sie bitte darauf die 10 x 7mm Seite Abdeckung.
- Seite 67 11. Geben Sie 2 bis 3 Tropfen dünnflüssigen Sekundenkleber in 13. Geben Sie 2 - 3 Tropfen dünnflüssigen Sekundenkleber in jedes Bohrloch. Tropfen Sie auch Kleber auf die Vorder- und Rückseite des die Schraublöcher. Das härtet das umgebende Holz und macht die Blockes um das Holz zu härten.
- Seite 68 15. Schrauben Sie die Klappenabdeckung mit den vier 2mm x 8mm 18. Zentrieren Sie mit dem Sender das Klappenservo. Schließen Schrauben mit einem # 1 Phillips Schraubendreher fest. Sie den Gabelkopf in das äußere Loch des Servohornes an. Den zweiten Gabelkopf schließen Sie am Klappenhebel am.
-
Seite 69: Einbau Des Tragflächenverbinder
einbau deS tragFlächenverbinder 21. Wiederholen Sie die Schritte von 3 bis 18 um das zweite Klappensvero anzuschließen. Verbinden Sie das Klappenservo mit dem Benötigte Teile Ruderhorn erst zu dieser Zeit. Rumpf Carbon Flächenverbinder 8-32 x 1/4-inch Tragfläche (rechts und links) Sechskantschraube (4) Benötigtes Werkzeug und Klebstoffe Klebeband mit geringer Klebekraft... - Seite 70 3. Drehen Sie mit einem 9/64 Inbusschlüssel die vier 8-32 x 1/4 6. Nehmen Sie den Verbinder aus der Fläche. Schleifen Sie die Schrauben in die Aluminiumhalter. Drehen Sie die Schrauben vorsichtig Vorder- und Rückseite mit mittleren Schleifpapier an. nur etwas hinein und achten dabei das Aluminium Gewinde nicht zu beschädigen.
- Seite 71 9. Überprüfen Sie die Passung der Fläche zum Rumpf. Die Fläche 12. Streichen Sie mit einem Pinsel den Verbinder wo er in die Fläche muß sauber an den Rumpf passen, wenn der Verbinder in Fläche und geht mit Epoxy ein. Rumpf ist.
-
Seite 72: Einbau Festes Fahrwerk
einbau FeSteS FahrWerk 3. Spannen Sie einen 2mm Bohrer in die Bohrmaschine ein. Kleben Sie 16mm vom Ende des Bohrers Klebeband als Markierung, damit Sie nicht Benötigte Teile tiefer in das Holz bohren. Tragflächen (links und rechts) Alu Stellring mit Schraube 3,5mm (2) Alu Distanzstück 3,5mm (2) Rad 13/4-inch (44.5mm) (2) - Seite 73 6. Geben Sie 2–3 Tropfen dünnflüssigen Sekundenkleber in jedes 9. Halten Sie bei ausgefahrenen Klappen ein Dreieck unten an die Loch. Dieses härtet das Holz und macht die Schraubverbindung des Klappenkante und prüfen dann ob die Fahrwerksachse rechtwinklig dazu Fahrwerkhalters sicherer.
-
Seite 74: Montage Elektrisches Einziehfahrwerk
montage elektriScheS einziehFahrWerk Vorbereitung des Arbeitsplatzes Benötigte Teile Die Enden der Achsen können einen leichten Grat aufweisen. Sollte Sender Empfänger daher das Rad schwer zu montieren sein, müssen Sie diesen entfernen. Empfänger Akku Tragfläche links und rechts Verwenden Sie bei Metallverbindungen immer Schraubensicherungslack Servoverlängerung (76mm) (2) Alu Stellring mit Schraube um ein lösen zu verhindern. - Seite 75 3. Setzen Sie die Mechanik in die Fläche ein. Stellen Sie bitte sicher, 6. Nehmen Sie die Mechanik heraus. Schrauben Sie mit einem #1 dass sie richtig auf den Holzsschienen aufliegt. Phillips Schraubendreher 3m x 14 selbstschneidene Senkkopfschrauben in die vorher gebohrten Löcher.
- Seite 76 8. Schieben Sie die Fahrwerksbeine in die Mechanik. Sichern Sie 11. Ziehen Sie mit der Schnur die Verängerung durch die Fläche. diese mit den Madenschrauben an den abgeflachten Seiten und einem Entfernen Sie danach die Schnur. 1,5 mm Inbusschlüssel. Bauen Sie beide Fahrwerke zusammen. ...
- Seite 77 14. Halten Sie bei ausgefahrenen Klappen ein Dreieck unten an die 16. Schieben Sie ein 3,5mm Alu Distanzstück auf die Achse, Klappenkante und prüfen dann ob die Fahrwerksachse rechtwinklig dazu dann das Rad mit den Adaptern. Zum sichern wird ein 3,5mm Stellring ausgerichtet ist.
-
Seite 78: Optionale Hauptfahrwerkstüren
18. Überprüfen Sie die Funktion mit der Fernsteuerung. Das 2. Zeichnen Sie zwei Linien die 22mm und 65mm von dem oberen Fahrwerk sollte sauber in den Fahrwerksschacht einfahren. Falls nicht, Ende der Fahrwerkstüren entfernt sind. Diese Linien sind die Mittellinien biegen Sie das Rad bitte vorsichtig bis es paßt. - Seite 79 5. Schleifen Sie die Fahrwerkstürblöcke so, dass Sie wie abgebildet 8. Verrunden Sie mit mittleren Schleifpapier die Rückseite an die Innenseite der Fahrwerkstüren passen. Arbeiten Sie hier bitte mit des Blockes. Das ist notwendig, damit das Fahrwerk vernünftig dem Schleifblock und mittlererem.
-
Seite 80: Einbau Des Festen Bugrads
12. Schrauben Sie die Fahrwerkstür mit vier 2mm x 8mm selbst 15. Fahren Sie das Fahrwerk mit der Fernsteuerung ein. Damit schneidenen Schrauben und einem #0 Phillips Schraubendreher an. stellen Sie den richtigen Winkel der Fahrwerkstür ein. Lassen Sie den Kleber über Nacht trocknen und fahren dann das Fahrwerk wieder aus. - Seite 81 2. Schrauben Sie mit einem #1 Phillips Schraubendreher eine 5. Bauen Sie das Lenkservo mit dem gelieferten Zubehör mit einem Servoschraube in die vier Löcher der Lenkservobefestigung. Schrauben #1 Phillips Schraubendreher ein. Der Servoabtrieb zeigt nach hinten zum Sie die Schraube nachdem Sie die Gewinde in das Holz geschnitten haben Heck.
- Seite 82 8. Stecken Sie den Gabelkopf ohne Schlauch auf den Steuerarm. 10. Nehmen Sie das Servohorn ab und montieren das Lenkgestänge. Setzen Sie das Servohorn wieder auf und überprüfen ob die Lenkung zentriert ist wenn das Servo zentriert ist. Schrauben Sie zum Kontern die 2mm Mutter gegen die Gabelköpfe.
- Seite 83 13. Feilen Sie am Ende des Fahrwerksbeines wie abgebildet eine 6mm 14. Schieben Sie ein 3,5mm Alu Distanzstück auf die Achse, dann breite Abflachung für die Madenschraube des Stellringes. das Rad mit den Adaptern. Zum sichern wird ein 3,5mm Stellring aufgeschoben der durch eine Madenschraube mit 1,5mm Inbusschlüssel befestigt wird.
-
Seite 84: Einbau Des Einziehfahrwerkes
einbau deS einziehFahrWerkeS 3. Geben Sie 2–3 Tropfen dünnflüssigen Sekundenkleber in jedes Loch. Das härtet das Holz und macht die Schraubverbindung des Lenkservos Benötigte Teile sicherer. Rumpf Bugrad EZFW Empfänger Silikonschlauch Empfänger Akku Metallgabelköpfe Gewindestange 57mm Servo mit Zubehör 3mm x 8mm Inbuschrauben (4) Aluminium Stellring mit Madenschrauben,3,5mm... - Seite 85 6. Schneiden Sie mit einem Hobbymesser mit # 11 Klinge 6mm von 9. Verwenden Sie einen 1,5mm Inbusschlüssel um den Steuerarm einem Silikonschlauch ab. durch anziehen der Madenschraube auf dem unteren flachen Teil zu sichern. Stellen Sie sicher, dass der Arm wie auf dem Foto abgebildet aussieht.
- Seite 86 12. Schrauben Sie den Fahrwerkshalter mit den vier 3mm x 8mm 15. Nehmen Sie die Radadapter und stecken Sie in beide Seiten des Schrauben in den Rumpf ein. Rades. 13. Nehmen Sie das Servohorn ab und montieren das Lenkgestänge. Vorbereitung des Arbeitsplatzes Setzen Sie das Servohorn wieder auf und überprüfen ob die Lenkung und Servo zentriert sind.
-
Seite 87: Einbau Des Seitenruderservos
einbau deS SeitenruderServoS 17. Schieben Sie ein 3,5mm Alu Distanzstück auf die Achse, dann das Rad mit den Adaptern. Zum sichern wird ein 3,5mm Stellring Benötigte Teile aufgeschoben der durch eine Madenschraube für 1,5mm Inbusschlüssel befestigt wird. Rumpf Metallgabelköpfe Silikonschlauch Gewindestange Muttern 2mm (2) - Seite 88 5. Schrauben Sie mit einem #1 Phillips Schraubendreher die beiden 9. Führen Sie die Servokabel durch den Rumpf und die Öffnungen in Schrauben des Seitenruderservohalters los und legen den Halter zur Seite. den beiden Spanten nach vorne Richtung Cockpit. ...
-
Seite 89: Einbau Höhenruder Holm
12. Entfernen Sie das Klebeband, dass das Seitenruder an der Finne 1. Schieben Sie den Holm in den Rumpf ein. Sichern Sie den fixiert. Montieren Sie die Anlenkung am Servo und Ruderhorn. Biegen Hom mit zwei 3mm x 15mm Inbusschrauben. Führen Sie ggfls. kleine Sie die Anlenkung wie abgebildet, so dass die Anlenkung das Ruder bei Anpassungen in der Rumpföffnung durch, dass sich der Holm ohne Vollausschlag nicht berührt. - Seite 90 3. chrauben sie den Holm mit einem 2,5 mm Inbusschlüssel los und 6. Schrauben Sie die beiden Tragflächen mit einem 9/64 Inbusschlüssel nehmen ihn aus dem Rumpf heraus. Prüfen Sie die Passung den Holmsin an den Rumpf. Stellen Sie sich in 2–3 Meter Abstand hinter das Modell dem Höhenleitwerk.
-
Seite 91: Einbau Der Höhenruderservos
9. Mischen Sie ca 15ml des 15 Minuten Epoxy an. Geben Sie das 12. Schieben Sie das Höhenruder in die Halterung am Rumpf bevor Epoxy mit dem Mischerstäbchen in die Öffnung des Höhenruderholmes. das Expox ausgehärtet ist. Fixieren Sie das Höhenruder mit Klebeband mit geringer Klebekraft. - Seite 92 5. Bauen Sie das Höhenruderservo mit dem gelieferten Zubehör ein. Der Servoabtrieb zeigt dabei nach vorne. Führen Sie das Servokabel Vorbereitung des Arbeitsplatzes überhalb des Einlasses nach vorne. Die Anlenkung wird in das Loch des Servoarmes gesteckt dass 10mm von der Mitte entfernt ist.
- Seite 93 8. Schieben Sie den Halter auf die Höhenruderbowdenzughülle. 12. Schieben Sie den Silikonschlauch auf den Gabelkopf. Schrauben Schrauben Sie den Halter mit zwei 2mm x 8mm selbst -schneidenen Sie die 2mm Mutter und dann die den Gabelkopf auf die Gewindestange. Schrauben fest.
-
Seite 94: Impeller Einbau
14. Wiederholen Sie die Schritte 3 bis 13 um das zweite 15. Sichern Sie das Y- Kabel zu dem Höhenruderservo mit einem Band Höhenruderservo und Anlenkung zu montieren. Bauen Sie den oder einem Verbinder. Gestängehalter aus dem Boden und den beiden Seitenteilen (L1 und L2) zusammen. - Seite 95 3. Schrauben Sie die Verkleidung mit den beiden 2mm x 6mm 6. Messen Sie von dem Punkt wo das Schubrohr auf das Gehäuse trifft Maschinenschrauben mit einem # 1 Phillips Schraubendreher fest. Bitte einmal 13mm und 42mm. Nehmen Sie diese beiden Maße und die vorher beachten Sie, dass die Verkleidung zur Unterseite des Impellers zeigt.
- Seite 96 9. Setzen Sie den Impeller im Rumpf ein. Es kann notwendig sein, 11. Schrauben Sie mit dem # 1 Phillips Schraubendreher eine der dass Sie dazu die Servohörner der Höhenruderservos abnehmen und die 3mm x 10mm Schrauben in die vier Löcher der Impellerbefestigung. Schrauben der Halter lösen müssen.
-
Seite 97: Montage Schubrohr Und Regler/Esc
montage Schubrohr und regler/eSc 4. Befestigen Sie das Schubrohr mit klaren Klebeband. Benötigte Teile Rumpf Schubrohr Regler Rumpfklappe Impeller Benötigtes Werkzeug und Klebstoffe Schere Klebeband Klettband Faserstift Klemmen 1. Rollen oder drücken Sie vorsichtig das Schubrohr in die gezeichnete Form. -
Seite 98: Empfängereinbau 6 Kanal Empfänger
6 kanal empFänger Vorbereitung des Arbeitsplatzes Benötigte Teile Verbinden Sie bei E-Flite die Kabel des Motors und Reglers farblich pas- Rumpf Fahrwerkskabel send, dreht der Motor in die richtige Richtung. 6-inch (152mm) Y-Kabel (2) 3-inch (76mm) Y-Kabel 8. Verbinden Sie die Motor- mit den Reglerkabeln. Nehmen Sie dabei... -
Seite 99: Nutzen Sie Die Folgende Aufstellung Als Anschlußplan
3. Führen Sie das Klappen- und Querruderkabel durch das Loch vor dem Höhenruderservo in den Rumpf ein. Führen Sie das Kabel nach oben Vorbereitung des Arbeitsplatzes über den Einlass. Sichern Sie die Kabel mit Klebeband oder Kabelbinder um die Funktion der Höhenruderservo nicht zu behindern. Programmierungen der DX8 für die Habu32 stehen auf der Spektrum Website zum Download bereit. -
Seite 100: Empfängereinbau 8 Kanal Empfänger
Vorbereitung des Arbeitsplatzes empFängereinbau 8 kanal empFänger Die 18 inch (457mm) Servoverlängerungen reichen bis zu den Flügel- wurzeln und reduzieren die freie Kabellänge auf ein Minimum. Sollten Benötigte Teile Sie die Habu 32 öfter demontieren, verbinden Sie für ein einfacheres Rumpf Fahrwerkskabel Handling noch je eine 3 inch (76mm) Verlängerung an die 18 inch (457) -
Seite 101: Akkueinbau
akkueinbau 5. Schneiden Sie mit der Schere ein Stück Klettband ab und befestigen damit den Empfänger im Rumpf. Benötigte Teile Rumpf Akku Klettband Klettschlaufe Benötigtes Werkzeug und Klebstoffe Schere Phillips Schraubendreher #1 1. Kleben Sie Klettband auf die Unterseite des Akkus. Das verhindert dass der Akku verrutscht und somit den Schwerpunkt verändert. -
Seite 102: Montage Kabinenhaube
montage kabinenhaube der SchWerpunkt Benötigte Teile Benötigte Teile Kabinenhaube Cockpiteinsatz Pilot (optional ) (PKZ4414 komplett montiertes Flugzeug Benötigtes Werkzeug und Klebstoffe Benötigtes Werkzeug und Klebstoffe Schere klares Klebeband Balancierständer Faserstift 1. 1. Schneiden Sie das Cockpitinnenteil an der markierten Linie aus. ACHTUNG: Überspringen Sie diesen Schritt nicht, da Sie sonst Lassen Sie bei dem Ausschneiden etwas Platz zur Linie, dass Sie die Eigentum oder Personen verletzen könnten. -
Seite 103: Ruderausschläge
Höhenruder 3. Halten Sie bei dem Balancieren das Modell umgedreht an den Markierungen mit den Fingern oder auf einem Balancierständer. Siehe High Rate (große Ausschläge) Rauf 12mm 18% Expo Abbildung. Stellen Sie vor dem Balancieren sicher, dass das Modell Runter 12mm 24% Expo... -
Seite 104: Vor Dem Flug
vor dem Flug Flugcharakteristik und Austrimmen Steigen Sie nach dem Start auf Sicherheitshöhe, fahren das Fahrwerk • Funktions- und Reichweitentest ein und schalten auf kleine (Low) Rates um. Trimmen Sie das Modell. • Stellen Sie vor der Fahrt zum Flugplatz sicher, dass alle benötigten Reduzieren Sie das Gas auf Halbgas und fahren die Klappen auf mittlere Akkus des Senders, Empfänger und Zubehör nach ihren Spezifikationen Position. -
Seite 105: Täglicher Flug Check
täglicher Flug check (c) Ansprüche des Käufers ¬ Es liegt ausschließlich im Ermessen von Horizon, ob das Produkt, bei dem ein Garantiefall festgestellt wurde, 1. Prüfen Sie die Akkuspannung des Senders und Empfängers. Fliegen repariert oder ausgetauscht wird. Dies sind die exklusiven Ansprüche des Sie nicht unter der vom Hersteller ihrer Fernsteuerung vorgegebenen Käufers, wenn ein Defekt festgestellt wird. -
Seite 106: Konformitätshinweise Für Die Europäische Union
Verwenden Sie einen Paketdienstleister mit einer Tracking Funktion und Kostenpflichtige Reparaturen Versicherung, da Horizon bis zur Annahme keine Verantwortung für den Liegt eine kostenpflichtige Reparatur vor, erstellen wir einen Versand des Produktes übernimmt. Bitte legen Sie dem Produkt einen Kostenvoranschlag, den wir Ihrem Händler übermitteln. Die Reparatur wird Kaufbeleg bei, sowie eine ausführliche Fehlerbeschreibung und eine erst vorgenommen, wenn wir die Freigabe des Händlers erhalten. - Seite 107 Downloaded from www.Manualslib.com manuals search engine...
- Seite 108 © 2012 Horizon Hobby, Inc. E-flite, JR SPORT, DSM, DSM2 and UltraCote are trademarks or registered trademarks of Horizon Hobby, Inc The Spektrum trademark is used with permission of Bachmann Industries, Inc.. All other trademarks, service marks and logos are the property of their respective owners.