Herunterladen Inhalt Inhalt Diese Seite drucken
Parkside PSS 65 A1 Originalbetriebsanleitung
Vorschau ausblenden Andere Handbücher für PSS 65 A1:
Inhaltsverzeichnis

Werbung

Verfügbare Sprachen

Verfügbare Sprachen

TOOL SHARPENING STATION PSS 65 A1
TOOL SHARPENING STATION
Translation of the original instructions
SCHÄRFSTATION
Originalbetriebsanleitung
IAN 291715
ΣΥΣΚΕΥΗ ΑΚΟΝΙΣΜΑΤΟΣ
Μετάφραση των αυθεντικών οδηγιών λειτουργία

Werbung

Inhaltsverzeichnis
loading

Inhaltszusammenfassung für Parkside PSS 65 A1

  • Seite 1 TOOL SHARPENING STATION PSS 65 A1 TOOL SHARPENING STATION ΣΥΣΚΕΥΗ ΑΚΟΝΙΣΜΑΤΟΣ Translation of the original instructions Μετάφραση των αυθεντικών οδηγιών λειτουργία SCHÄRFSTATION Originalbetriebsanleitung IAN 291715...
  • Seite 2 Before reading, unfold the page containing the illustrations and familiarise yourself with all functions of the device. Πριν ξεκινήσετε την ανάγνωση, ανοίξτε τη σελίδα ε τι εικόνε και εξοικειωθείτε ε όλε τι λειτουργίε τη συσκευή . Klappen Sie vor dem Lesen die Seite mit den Abbildungen aus und machen Sie sich anschließend mit allen Funktionen des Gerätes vertraut.
  • Seite 4 180° 180°...
  • Seite 5: Inhaltsverzeichnis

    Content Introduction Introduction ......... 5 Congratulations on the purchase of your Intended use ........ 5 new device. With it, you have chosen a General description ...... 6 high quality product. Scope of delivery ......6 During production, this equipment has Function description......6 been checked for quality and subjected to Summary ........6 Technical specifications ....
  • Seite 6: General Description

    General description 10 Grinding wheel 11 rotatable drill mount The illustrations can be found on 12 Knurled nut for drill-fastening the front and rear fold-out pages. 13 Release lever for sharpener Scope of delivery 14 Drill holder 15 Adjusting device Unpack the equipment and check that it is 16 Grinding wheel nuts complete.
  • Seite 7: Safety Instructions

    Symbols in the manual: Technical and optical changes may be undertaken in the course of further devel- Warning symbols with in- opment without notice. All dimensions, formation on damage and references and information in this instruc- injury prevention. tion manual are therefore not guaranteed. Legal claims made on the basis of the instruction manual can therefore not be Instruction symbols with information...
  • Seite 8 Do not abuse the cord. Never - Do not use tools in the presence of • yank the cord do disconnect it from the Power tools create sparks which may socket. Keep the cord away from heat, ignite the dust or fumes. oil and sham edges.
  • Seite 9: Further Safety Instructions

    Further Safety Instructions Use outdoor extension leads. • When the tool is used outdoors, use only extension cords intended for out- • Connect the device only to a power door use and so marked. point with a residual current protective Stay alert, watch what you are •...
  • Seite 10: Residual Risks

    Therefore, proceed cautiously and hold active or passive medical implants. To reduce the risk of serious or lethal inju- slipping which could cause your hands ries, we recommend that persons with to come into contact with the grinding medical implants consult their doctor belt or grinding wheel.
  • Seite 11: Risk Of Injury

    5. In order to fasten the selected 1. To switch on, press the “I” On switch sharpener in the working posi- and the device starts up (see tion, from above push this into the 2. To switch off, press the “0” off switch guide rails.
  • Seite 12: Sharpening Picks And Chisels

    6. Using the knurled nut fasten the 5. Switch the device on and move the drill for drill-fastening (12). tool table (6) equally back and forth 7. Remove the drill holder (14) and along the grinding wheel (10). insert this into the rotatable drill 6.
  • Seite 13: Sharpening Scissors

    Sharpening scissors • Do not use any saw blades. • Always reassemble the device completely after replacing the grinding wheel. The device is not suitable for grinding Switch the device off and remove serrated scissors. The device is not the mains plug. suitable for grinding pinking shears.
  • Seite 14: Cleaning

    Before each use, check the equipment • Grinding disks must be stored dry and for obvious defects such as loose, worn upright and are not to be stacked. or damaged components and check that Waste disposal and en- screws or other parts are sitting correctly. In particular, check the grinding disk ( vironmental protection 10).
  • Seite 15: Trouble Shooting

    Trouble Shooting Always disconnect the plug from the mains socket before working. Danger of electric shock. Problem Possible Cause Error correction Check the socket, mains cable, line, mains plug, repairs to be Mains voltage missing Main circuit breaker is tripped cian if necessary, check main circuit breaker.
  • Seite 16: Guarantee

    Guarantee Guarantee Cover The equipment has been carefully pro- Dear Customer, duced in accordance with strict quality This equipment is provided with a 3-year guidelines and conscientiously checked prior to delivery. guarantee from the date of purchase. In case of defects, you have statutory rights against the seller of the product.
  • Seite 17: Repair Service

    Service-Center • After consultation with our customer service, a product recorded as defec- Service Great Britain tive can be sent postage paid to the service address communicated to you, Tel.: 0871 5000 720 with the proof of purchase (receipt) (£ 0.10/Min.) E-Mail: grizzly@lidl.co.uk IAN 291715 the defect and when it occurred.
  • Seite 18: Εισαγωγή

    Περιεχόμενα Εισαγωγή Εισαγωγή ..........1 8 Συγχαρητήρια...
  • Seite 19: Γενική Περιγραφή

    Γενική περιγραφή 4 Αποστάτης 5 Μαγνητική συγκράτηση Θα βρείτε τις απεικονίσεις 6 Απόθεση εργαλείου 7 Κοχλίας ασφάλισης για στην μπροστινή και πίσω ανα- διπλωνόμενη σελίδα. ρύθμιση γωνίας 8 Προστατευτικό κάλυμμα Παραδοτέα υλικά 9 Οπές συναρμολόγησης για συναρμολόγηση πάγκου Αποσυσκευάστε το μηχάνημα και ελέγ- εργασίας...
  • Seite 20: Υποδείξεις Ασφάλειας

    Στάθμη ηχητικής πίεσης Μην πετάτε τις ηλεκτρικές συσκευ- ) .....59,3 dB(A); K = 3 dB ές στα σκουπίδια. Επιτρεπόμενη στάθμη θορύβου ) ....73,5 dB(A); K = 3 dB Διάμετρος τρυπανιού * Μετά από τη συνεχόμενη διάρκεια λειτουρ- Παξιμάδι δίσκων λείανσης γίας...
  • Seite 21 Διαβάστε όλες αυτές τις υποδείξεις αφήνετε παιδιά, να αγγίζουν την ηλε- προτού χρησιμοποιήσετε το παρόν κτρική συσκευή ή το καλώδιο. Να τα ηλεκτρικό εργαλείο και φυλάξτε τις κρατάτε μακριά από την περιοχή εργα- υποδείξεις ασφάλειας καλά. σίας. • Να φυλάγετε τις ηλεκτρικές συσκευ- Η...
  • Seite 22 - Να διατηρείτε τις χειρολαβές στεγνές - Σε περίπτωση εργασιών με σκόνη, να χρησιμοποιείτε μάσκα για προ- και ελεύθερες από λάδια και λίπη. στασία της αναπνοής. Υφίσταται κίνδυνος τραυματισμού. • Συνδέστε το σύστημα αναρρόφησης • Να βγάζετε το βύσμα από την πρίζα σκόνης.
  • Seite 23: Περισσότερες Υποδείξεις Ασφαλείας

    να πληρούν όλους τους όρους για • Η αντικατάσταση του βύσματος ή του να εξασφαλίζουν την άψογη λειτουρ- αγωγού σύνδεσης πρέπει να διεξάγε- γία της συσκευής. ται πάντα από τον κατασκευαστή του ηλεκτρικού εργαλείου ή από το τμήμα - Τα ελαττωματικά συστήματα ασφα- λείας...
  • Seite 24: Υπολειπόμενου Κινδύνου

    • Το τεμάχιο επεξεργασίας αποκτά υψη- Προσοχή! Αυτό το ηλεκτρικό εργα- λή θερμοκρασία κατά τη λείανση. Μην λείο δημιουργεί κατά τη λειτουργία πιάνετε στο σημείο επεξεργασίας, επι- ένα ηλεκτρομαγνητικό πεδίο. Αυτό τρέψτε να κρυώσει. Υπάρχει κίνδυνος το πεδίο δεν αποκλείεται υπό ορι- εγκαύματος.
  • Seite 25: Συναρμολόγηση Διατάξεων Ακονίσματος

    Συναρμολόγηση διατάξεων - Ποτέ μη χρησιμοποιείτε τη συ- ακονίσματος σκευή χωρίς διαφανές προστα- τευτικό κάλυμμα. - Ενεργοποιείτε το μηχάνημα μόνο, 1. Επιλέξτε μια από τις τρεις διατάξεις ακονίσματος. αφού έχει συναρμολογηθεί ασφα- 2. Για να μπορείτε να απομακρύνετε μια λώς στην επιφάνεια εργασίας. διάταξη...
  • Seite 26: Ακόνισμα Τρυπανιών

    Δοκιμαστική λειτουργία: στε την, με το περικόχλιο με Πριν την πρώτη εργασία και μετά από ραβδώσεις για την στερέωση κάθε αντικατάσταση δίσκου λείανσης εκτε- τρυπανιών (12) προς τα κάτω στην περιστρεφόμενη υποδοχή λέστε μια δοκιμαστική λειτουργία τουλάχι- στον 60 δευτερόλεπτων. Απενεργοποιή- διάτρησης...
  • Seite 27: Ακόνισμα Μαχαιριών

    Η μαγνητική συγκράτηση (5) απόσπασμα Συναρμολόγηση συγκρατεί την λεπίδα στην θέση διάταξης ακονίσματος). της. 2. Ενεργοποιήστε τη συσκευή. 3. Τοποθετήστε τη λεπίδα μαχαιριού 3. Λασκάρετε τον κοχλία ασφάλισης για την ρύθμιση γωνίας (7) και ολόκληρη στην εσοχή λείανσης. περιστρέψτε την απόθεση εργα- 4.
  • Seite 28: Αλλαγή Δίσκου Λείανσης

    6. Απομακρύνετε το ψαλίδι από τη 1. Λασκάρετε τα παξιμάδια συσκευή ακονίσματος και γυρί- δίσκων τροχίσματος (16) στε το ψαλίδι για το ακόνισμα της δεξιόστροφα (αριστερό σπείρωμα). άλλης κόψης. 2. Απομακρύνετε τον δίσκο λείαν- 7. Οδηγήστε την άλλη κόψη ψαλι- σης...
  • Seite 29: Καθαρισμός

    Απόσυρση/προστασία του Καθαρισμός περιβάλλοντος Μη χρησιμοποιείτε εριστικά καθα- ριστικά και διαλυτικά. Χημικές ου- Παραδώστε συσκευή, αξεσουάρ και συ- σίες μπορούν να προσβάλλουν τα σκευασία για ανακύκλωση που σέβεται το πλαστικά μέρη του μηχανήματος. περιβάλλον. Μην καθαρίζετε το μηχάνημα ποτέ κάτω από τρέχον νερό. Μην...
  • Seite 30: Ανίχνευση Βλαβών

    Ανίχνευση βλαβών Πριν από την εκτέλεση όλων των εργασιών στη συσκευή να βγάζετε το βύσμα από την πρίζα. Κίνδυνος ηλεκτροπληξίας. Πρόβλημα Πιθανή αιτία Αντιμετώπιση σφάλματος Ελέγξτε την πρίζα, το καλώδιο Δεν υπάρχει τάση δικτύου δικτύου, τον αγωγό, το βύσμα δικτύου, εάν απαιτείται αναθέ- Η...
  • Seite 31: Εγγύηση

    Εγγύηση να εξαρτήματα. Ενδεχόμενα ελαττώματα που διαπιστώνονται κατά την αγορά, Αξιότιμη πελάτισσα, αξιότιμε πελάτη, πρέπει να δηλωθούν αμέσως μετά το ξε- πακετάρισμα. Για όλες τις επισκευές που για τη συσκευή αυτή σας προσφέρουμε εγγύηση 3 ετών από την ημερομηνία της καθίστανται...
  • Seite 32: Σέρβις Επισκευής

    • Για όλα τα αιτήματα να έχετε πρόχειρα γασία συσκευών που μας απεστάλησαν την απόδειξη αγοράς και τον αριθμό καλά συσκευασμένες και με πληρωμένα αναγνώρισης (ΙΑΝ 291715) ως απο- ταχυδρομικά τέλη. Προσοχή: Παρακαλούμε να στείλετε τη δεικτικό στοιχεί για την αγορά. •...
  • Seite 33: Einleitung

    Inhalt Einleitung Einleitung ........33 Herzlichen Glückwunsch zum Kauf Ihres Bestimmungsgemäße neuen Gerätes. Sie haben sich damit für Verwendung ......33 ein hochwertiges Gerät entschieden. Allgemeine Beschreibung ... 34 Dieses Gerät wurde während der Produkti- Lieferumfang........34 on auf Qualität geprüft und einer Endkon- Funktionsbeschreibung ....34 trolle unterzogen.
  • Seite 34: Allgemeine Beschreibung

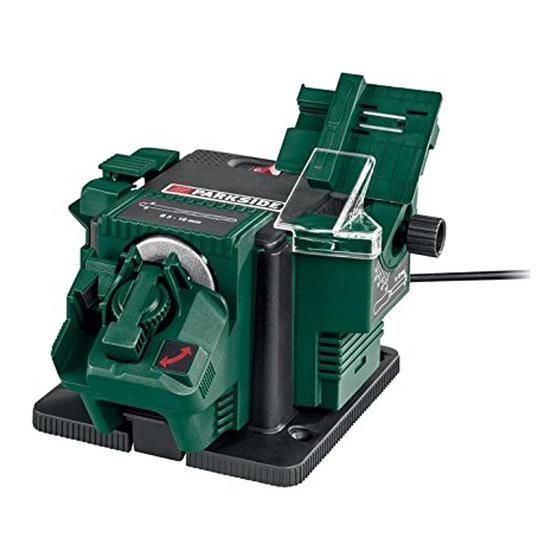
    Allgemeine 7 Feststellschraube für Beschreibung Winkeleinstellung 8 Schutzhaube Die Abbildung der wichtigsten 9 Montagelöcher für Werkbankmontage der vorderen und hinteren Aus- 10 Schleifscheibe klappseite. 11 drehbare Bohreraufnahme Lieferumfang 13 Entriegelungshebel für Schärfvorrichtungen Packen Sie das Gerät aus und kontrollieren 14 Bohrerhalterung Sie, ob es vollständig ist.
  • Seite 35: Sicherheitshinweise

    Lärm- und Vibrationswerte wurden entspre- Zum Schleifen von Messer chend den in der Konformitätserklärung und Schere genannten Normen und Bestimmungen ermittelt. Technische und optische Verän- Drehbare Bohreraufnahme derungen können im Zuge der Weiterent- Symbole in der Betriebsanleitung: wicklung ohne Ankündigung vorgenom- men werden.
  • Seite 36: Sicheres Arbeiten

    Sicheres Arbeiten: - Verwenden Sie keine leistungsschwa- • Halten Sie Ihren Arbeitsbereich chen Maschinen für schwere Arbei- in Ordnung. ten. Unordnung im Arbeitsbereich kann Un- - Benutzen Sie das Elektrowerkzeug fälle zur Folge haben. nicht für solche Zwecke, für die es •...
  • Seite 37: Vermeiden Sie Unbeabsichtigten

    • Sichern Sie das Werkstück. • Vermeiden Sie unbeabsichtigten Anlauf. Vergewissern Sie sich, dass Benutzen Sie Spannvorrichtungen oder einen Schraubstock, um das Werkstück der Schalter beim Einstecken des Ste- festzuhalten. Es ist damit sicherer gehal- ckers in die Steckdose ausgeschaltet ist. •...
  • Seite 38: Weiterführende Sicherheitshinweise

    ein- und ausschalten lässt. Beschädig- • Verwenden Sie nur Schleifscheiben, de- ren aufgedruckte Drehzahl mindestens te Schalter müssen bei einer Kunden- dienstwerkstatt ersetzt werden. so hoch ist wie die auf dem Typenschild • Achtung! des Gerätes angegebene. • Unterziehen Sie die Schleifscheibe vor Der Gebrauch anderer Einsatzwerkzeu- ge und anderen Zubehörs kann eine dem Gebrauch einer Sichtprüfung.
  • Seite 39: Restrisiken

    Restrisiken - Vor Inbetriebnahme müssen alle Abdeckungen und Schutzvorrich- Auch wenn Sie dieses Elektrowerkzeug vor- tungen ordnungsgemäß montiert schriftsmäßig bedienen, bleiben immer Rest- sein. risiken bestehen. Folgende Gefahren können - Ziehen Sie den Netzstecker, bevor im Zusammenhang mit der Bauweise und Sie Einstellungen am Gerät vor- Ausführung dieses Elektrowerkzeugs auftreten: nehmen.
  • Seite 40: Bedienung

    Die Schärfvorrichtungen Zum Einschalten drücken Sie den Ein- stellen auch eine Sicherheits- schalter „I“( 3), das Gerät läuft an. einrichtung dar. Benutzen Zum Ausschalten drücken Sie den Sie das Gerät nie ohne eine Ausschalter „0“ ( 3) , das Gerät Schärfvorrichtung.
  • Seite 41: Schärfen Von Meißeln Und Beiteln

    5. Schieben Sie den Bohrer nach 2. Legen Sie die Klinge so auf die vorne in die V-Nut, bis an den Metallanschlag. Die Schneidkan- sie am Abstandhalter (4) anliegt. ten des Bohrers müssen dabei an Der Magnethalter (5) hält die Klinge auf ihrer Position.
  • Seite 42: Schärfen Von Scheren

    1. Montieren Sie die ausgewählte 6. Nehmen Sie die Schere von der Schärfvorrichtung (siehe Schärf- Schärfstation weg und drehen vorrichtungen montieren). Sie die Schere zum Schärfen des 2. Schalten Sie das Gerät ein. anderen Blattes um. 7. Führen Sie das andere Scheren- 3.
  • Seite 43: Reinigung Und Wartung

    Reinigung 1. Lösen Sie die Schleifscheiben- Mutter (16) im Uhrzeigersinn (Linksgewinde). Verwenden Sie keine Reinigungs- 2. Nehmen Sie die Schleifscheibe (10) bzw. Lösungsmittel. Chemische Sub- stanzen können die Kunststoffteile 3. Setzen Sie die neue Schleifscheibe (10) des Gerätes angreifen. Reinigen Sie auf.
  • Seite 44: Ersatzteile/Zubehör

    Ersatzteile/Zubehör Ersatzteile und Zubehör erhalten Sie unter www.grizzly-service.eu Sollten Sie kein Internet haben, so wenden Sie sich bitte telefonisch an das Service-Center (siehe „Service-Center“ Seite 46). Halten Sie die unten genannten Bestellnummern bereit. Position Position Bezeichnung Bestell-Nr. Anleitung Explosionszeichnung 20+22 Schleifscheibe mit Schleifscheiben-Mutter 91103590 Schärfvorrichtung für Messer und Scheren 91103591 Schärfvorrichtung für Bohrer...
  • Seite 45: Garantie

    Garantie Garantieumfang Das Gerät wurde nach strengen Qualitäts- Sehr geehrte Kundin, sehr geehrter Kunde, richtlinien sorgfältig produziert und vor Sie erhalten auf dieses Gerät 3 Jahre Ga- Anlieferung gewissenhaft geprüft. rantie ab Kaufdatum. Im Falle von Mängeln dieses Gerätes Die Garantieleistung gilt für Material- oder stehen Ihnen gegen den Verkäufer des Fabrikationsfehler.
  • Seite 46: Reparatur-Service

    Service-Center Serviceabteilung telefonisch oder per E-Mail. Sie erhalten dann weitere In- Service Deutschland formationen über die Abwicklung Ihrer Reklamation. Tel.: 0800 54 35 111 • Ein als defekt erfasstes Gerät können E-Mail: grizzly@lidl.de IAN 291715 Sie, nach Rücksprache mit unserem Kundenservice, unter Beifügung des Service Österreich Kaufbelegs (Kassenbons) und der...
  • Seite 47: Original Eg-Konformitätserklärung

    Original EG-Konformitätserklärung Hiermit bestätigen wir, dass die Schärfstation Baureihe PSS 65 A1 Seriennummer 201711000001 - 201711375099 folgenden einschlägigen EU-Richtlinien in ihrer jeweils gültigen Fassung entspricht: 2006/42/EG • 2014/30/EU • 2011/65/EU* Um die Übereinstimmung zu gewährleisten, wurden folgende harmonisierte Normen sowie nationale Normen und Bestimmungen angewendet: EN 61029-1:2009/A11:2010 •...
  • Seite 48: Μετάφραση Της Πρωτότυπης Δήλωσης Συμμόρφωσης Ce

    Μετάφραση της πρωτότυπης Δήλωσης συμμόρφωσης CE συσκευή ακονίσματος PSS 65 A1 Αριθμός σειράς 201711000001 - 201711375099 ανταποκρίνεται στις ακόλουθες Οδηγίες της ΕΕ στην εκάστοτε ισχύουσα μορφή τους: 2006/42/EC • 2014/30/EU • 2011/65/EU* EN 61029-1:2009/A11:2010 • EN ISO 12100:2010 • EN 13236:2010/A1:2015 EN 55014-1:2006/A2:2011 •...
  • Seite 49: Translation Of The Original Ec Declaration Of Conformity

    Translation of the original EC declaration of conformity Sharpening station model PSS 65 A1 Serial number 201711000001 - 201711375099 conforms with the following applicable relevant version of the EU guidelines: 2006/42/EC • 2014/30/EU • 2011/65/EU* In order to guarantee consistency, the following harmonised standards as well as natio- nal standards and stipulations have been applied: EN 61029-1:2009/A11:2010 •...
  • Seite 51: Exploded Drawing

    Exploded Drawing • Explosionszeichnung Επί μέρoυς σχεδιαγράμματα informative, informativ, ενημερωτικό 2017-08-09-rev02-sh...
  • Seite 56 GRIZZLY TOOLS GMBH & CO. KG Stockstädter Straße 20 DE-63762 Großostheim GERMANY Last Information Update · Έκδοση των πληροφοριών Stand der Informationen: 08 / 2017 Ident.-No.: 75019436082017-GB / IE / NI / CY IAN 291715...

Diese Anleitung auch für:

Ian 291715

Inhaltsverzeichnis