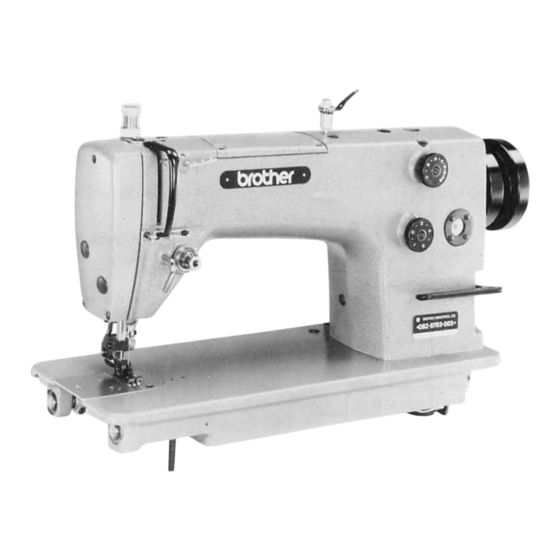
Brother DB2-B793 Bedienungsanleitung
INSTRUCTION
MANUAL
BEDIENUNGSANLEITUNG
MANUEL
D'INSTRUCTIONS
MANUAL
DE
INSTRUCCIONES
SINGLE
NEEDLE
ADJUSTABLE
STEPPSTICH-NÄHMASCHINE
UND
UNTERTRANSPORT
MACHINE
A
AIGUILLE
POUR
SURFILAGE
MAQUINA
DE
DOBLE
AJUSTABLES
CON
BROTHER
TOP AND
MIT EINFACHNADEL
UNIQUE
A
ENTRAINEMENT
PESPUNTE
DE
UNA
SOLA
AGWA
INDUSTRIES,
NAGOYA,
BOTTOM
FEED
LOCK
UND EINSTELLBAREM
INFERIEUR
ALIMENTACION
SUPERIOR
LTD.
JAPAN
DB2-B7S3
STITCH
MACHINE
OBER-
ET
SUPERIEUR
E INFERIOR

Verwandte Anleitungen für Brother DB2-B793


Inhaltszusammenfassung für Brother DB2-B793
- Seite 1 SINGLE NEEDLE ADJUSTABLE TOP AND BOTTOM FEED LOCK STITCH MACHINE STEPPSTICH-NÄHMASCHINE MIT EINFACHNADEL UND EINSTELLBAREM OBER- UNTERTRANSPORT MACHINE AIGUILLE UNIQUE ENTRAINEMENT INFERIEUR SUPERIEUR POUR SURFILAGE MAQUINA DOBLE PESPUNTE ALIMENTACION SUPERIOR E INFERIOR AJUSTABLES SOLA AGWA BROTHER INDUSTRIES, LTD. NAGOYA, JAPAN...
- Seite 2 Thank you very much for your purchase of a BROTHER sewing machine. The full performance of your new sewing machine depends, above all, on correct operation. Be sure to carefully read the following instructions before use. Vielen Dank, daß Sie sich für eine BROTHER-Nähmaschine entschieden haben.
- Seite 3 Fit the head hinges O in the table slot, fit it to the rubber hinge base O of the table, and then place the head onto the rubber pads O at the four corners. When you use model DB2-B793-015 (pedal system), please make a hole for chain as shown on the figure above. Ölwanne wie oben abgebildet stellen.
- Seite 4 Beachten Sie, daß Stoffdrückerfuß auch durch Betätigung des FuBpedals hochgehoben werden kann. * Befestigen Sie beim Modell DB2-B793-715und 915die Kette O vom Pedaldirekt an der SchraubeO. Pose du cåble de fronGage (modéle DB2-B793-015) Monter Ie cäble de fronqage O avec la vis crantée O et l'écrou...
- Seite 5 Upper feed adjustment dial assembly Oberetransporteinstel}scheibe Cadrans de réglage de I'entraTnement supérieur Conjunto del dial de ajuste de la alimentaciön sperior Knee lifter stop adjustment (for gather sewing) When theamount o f material tobegathered orshirredischanged, besure to adjustknee lifterstopB.Notethatif knee litterstopBisnotproperly a djusted, theshirring wirewillwear o utsooner thannormal, orthegather o rshirring may be small.
- Seite 6 3. Wipe away contamination from the magnet O, and the oil pan. Use the oil specified by BROTHER: Hi-White 70. Oiling * Before using the machine, be sure to supply one or two drop of oil to the point indicated by the arrow.
- Seite 7 Less Less More weniger mehr ÖI weniger 01 Moins d'huile Plus d'huiie Moins d'huile Mås aceite J Menos aceite Menos aceite Less weniger ÖI More oil Moins d'huile mehr 01 Menos aceite Plus d'huiie More Mås aceite mehr Öl Plus d'huile Mås aceite...
- Seite 8 Precautions before installing the belt cover: I. Fit the V belt onto the sewing machine pulley. 2. Bring the sewing machine down toward the horizontal position, and then install the belt cover. 3. The set screws for belt cover instalation are in the accessories pocket.
- Seite 9 How to install the bobbin winder Install the bobbin winderO to the table with two screws O. (Install it so that the bobbin winder pulley O wil not slip.) Montage des Spulers Den SpuIerO mit zwei SchraubenO am Tisch befestigen. (Die Spulerscheibe O darf nicht rutschen.) Installation...
- Seite 10 Lower thread winding Fit the bobbin O onto the bobbin winder spindle O. Push the bobbin winder stop latch O completely upward. After winding the thread around the bobbinO a few times in the direction of the arrow, operate the machine. 4.
- Seite 11 How to install the needle Insert the needle O all the way, making sure that the long groove of the needle is at the left, and tighten by using the set screw O Use a DBXI machine needle. Nadelbefestigung * Die Nadel O mit der langen Kerbe nach links bis zum Ansch lag hineinstecken Stettschraube O...
- Seite 12 Stitches when upper thread tension is too low. obere Fadenspannung ist zu gering. Points lorsque la tension du fit supérieur est trop faible. Less tension More tension Puntadas cuando la tensiön geringere Spannung größere Spannung La tension diminue del hilo superior es poca.
- Seite 13 Model DB2-B793-003 Model DB2-3793-015 Stitch Length Adjustment Set the reverse leverO to the center position and after aligning the appropriate stitch length on the feed adjustment dial assembly O with the pin O at top, release the reverse lever O. (Be sure to set the reverse lever O at the center position...
- Seite 14 DB2-B793-015 Adjustment of upper feed amount Model DB2-B793-003 Press the reverse lever O to the center position, and after setting the desired number (1 6) on the upper feed adjustment dial assemble O to the "12 0'clock" position, release the reverse lever O The upper feed amount becomes larger as the number becomes larger.
- Seite 15 Der obere Stoff ist länger. Le tissu supérieur est long. Model DB2-B793-003 Model DB2-B79a-015 La tela de arriba es mås larga. Adjustment of sewing If the lower material is long when sewing is finished, set the upper feed adjustment dial assemblyO to a smaller number, or set the feed adjustment dial assembly O to a larger number.
- Seite 16 Partial gathering is possible with model DB2-B793-015 Set the feed adjustment dial assembly to the desired stitch length.
- Seite 17 Debido a que la cantidad del fruncido depende del tipo de tejido util izado, la longitud de la puntada y otr.osfactores, el avance apropiado debe estar determinado y ajustado utilizando el dial de ajuste. Se puede realizar un fruncido parcial con los modelos DB2-B793-015 Colocar eI dial de ajuste de alimentaci6n a la longitud de puntada deseada.
- Seite 18 0.4 mm Walking Presser Foot Vertical Stroke Adjustment Longer stroke TO increase the vertical stroke of the walking presser foot Remove screw Disconnect the vertical stroke link O Move the vertical stroke connecting rod O back in the di rection of the arrow, and then reinstall with the vertical stroke link O and set screw O.
- Seite 19 3500 ppm. Cuando se utiliza un calibrador de tipo tensor (conjunto A) o antifruncido (conjunto C), utilizar una alimentaciån superior de menos de 6 mm. Approx. 1 mm Model DB2-B793-003 Model 082-8793-015 Clearance between upper feed dog and preser foot I.
- Seite 20 Rises in the forward direction Anheben in Vorwätsrichung Soulever dans la direction avant Sube hacia adelante Descends in the forward direction Absenken in Vorwärtsrichtung Rabattre dans la direction avant Baja hacia adelante Feed dog height 1. When the feed dog O is raised above the needle plate, standard feed dog heights are: 0.8 mm, for medium thick materials.
- Seite 21 Needle bar height Turn the pulley slowly, and lower the needle O to the needle down position. Confirm that second from bottom reference line on the needle bar O is aligned with the bottom of the needle bar bushing. • Loosen set screw O and align this second reference line...
- Seite 22 Adjustment of presser foot height * The standard height of the presser foote is 6mm when itis raised by using the knee lifter, and locked by the presserfootstopper O. Loosen the nut O of the adjustment screw and then the presser foot adjustment screw O so that no pressure will beapplied to the presser foot.
- Seite 23 How to replace gauge parts <How to remove the presser loot, upper feed dog, needle plate and feed dog> 1. Loosen the set screw O, and then remove the needle O. 2. Remove the set screw O.and then remove the presser foot O. 3.
- Seite 24 Wird auf die Abbildung A verwiesen. Pose de "ensemble de fronqage (Accessoire standard pour le modéle DB2-B793-015) Soulever le pied presseur 2. Poser Ilensemble de fronqage avec les vis de fixation O et les rondelles O. 3. Introduire l'ensemble de fronqage sous le pied presseur O et s'assurer que l'aiguille ne touche pas "ensemble de fronGage.