G&D CATVision Installation Und Bedienung

Verwandte Anleitungen für G&D CATVision


Inhaltszusammenfassung für G&D CATVision
- Seite 1 Guntermann & Drunck GmbH www.gdsys.de G&D CATVision Installation und Bedienung Installation and Operation A9100189-2.70...
- Seite 2 Guntermann & Drunck GmbH Installations- und Bedienungsanleitung CATVision (MC) INWEISE Achtung M DAS ISIKO EINES TROMSCHLAGES ZU VERM EIDEN SOLLTEN ERÄT NICHT ÖFFNEN ODER BDECKUNGEN ENTFERNEN ERVICEFALL WENDEN IE SICH BITTE AN UNSERE ECHNIKER ESEN IE DIE EDIENUNGSANLEITUNG SORGFÄLTIG BEVOR IE DAS ERÄT IN...
-
Seite 3: Inhaltsverzeichnis
CATVision Inhaltsverzeichnis Beschreibung ....................... 6 Lieferumfang ......................7 Installationsanleitung ..................8 Installation der Sendeeinheit................ 8 3.1.1 Videoanschluss am CATVision-MC-CPU .......... 9 3.1.2 Optionale Anschlussmöglichkeiten ............ 9 Installation der Empfangseinheit ..............10 3.2.1 Videoanschluss am CATVision-MC-Con ......... 11 3.2.2 Optionale Anschlussmöglichkeiten ..........11 Stromversorgung .................... - Seite 4 Guntermann & Drunck GmbH Installations- und Bedienungsanleitung CATVision (MC) Config......................35 6.2.1 IVT....................36 6.2.2 System Config .................. 37 6.2.2.1 Definition des ersten Hotkeys..........38 6.2.2.2 Festlegung des Doppel-HotKey ..........38 6.2.2.3 Set System Defaults (Supervisor-Funktion) ......39 6.2.2.4 Remote Video (Dunkelschaltung) .......... 39 6.2.2.5...
- Seite 5 Lieferumfang ....................65 11.2 Installationsanleitung.................. 66 11.2.1 Einbau im PC ................... 66 11.2.2 Verbinden mit CATVision-CPU ............68 11.2.3 Verbinden des Tasters mit dem CATVision-CON ......68 Technische Daten ....................70 12.1 CATVision ....................70 12.2 CATVision-MC ................... 72 Anhang........................ 74 13.1 HotKey-Belegungstabelle................
-
Seite 6: Catvision
Wert, auflösungs- und kabelabhängig) fern zu bedienen. Zusätzlich kann auch eine lokale Bedienstation am Sender angeschlossen werden. Die Bedienung kann wahlweise lokal oder remote durchgeführt werden. Setzten Sie ein CATVision-MC-System ein, kann der Rechner mit bis zu 4 Videoausgängen ausgestattet sein. Folgende Varianten stehen zur Verfügung (Unterscheidung nach den existierenden Videokanälen). -
Seite 7: Lieferumfang
CPU-2 Anschlusskabel Video/Keyboard/Mouse PS/2 Zum Anschluss am CATVision-CPU (bzw. CATVision-MC-CPU): 1 x MDR-20 f. Monitor, Keyboard und Mouseanschluss Zum Anschluss des PC: 1 x PS/2 für Mouseanschluss (inkl. 9pol-Adapter für serielle Mouse) 1 x PS/2 (incl. AT-Adapter) für Keyboard-Anschluss 1 x HD-15 Stecker für VGA-Anschluss... -
Seite 8: Installationsanleitung
Installations- und Bedienungsanleitung CATVision (MC) Installationsanleitung Die Installation der CATVision und CATVision-MC unterscheidet sich lediglich in der Anzahl der anzuschließenden Videoquellen. Daher wird in den folgenden Abschnitten nur die Installation des CATVision beschrieben. Der Anschluss zusätzlicher Videoquellen wird gesondert erläutert. -
Seite 9: Videoanschluss Am Catvision-Mc-Cpu
Keyb PS/2. 12V DC/0,6A Transmission Monitor VGA Keyb. Mouse CPU Anschluss von RS232 Das Anschlusskabel RS232-M/F-x (x=2, 4, 6 od. 9 Meter) mit einer COM-Schnittstelle des Rechners und der Schnittstelle RS232 (optional) des CATVision-CPU verbinden (Belegung 1:1). Seite 9... -
Seite 10: Anschluss Von Audio
Hinweis zur Kompatibilität des transparenten USB-Anschlusses: Der USB-Anschluss entspricht den USB 1.1 Spezifikationen, welche das Design von USB full-speed Geräten regeln. Dennoch garantieren wir nicht, dass alle USB full-speed Geräte kompatibel zum CATVision sind. Installation der Empfangseinheit Anschluss von Keyboard/Mouse für remote Konsole... -
Seite 11: Videoanschluss Am Catvision-Mc-Con
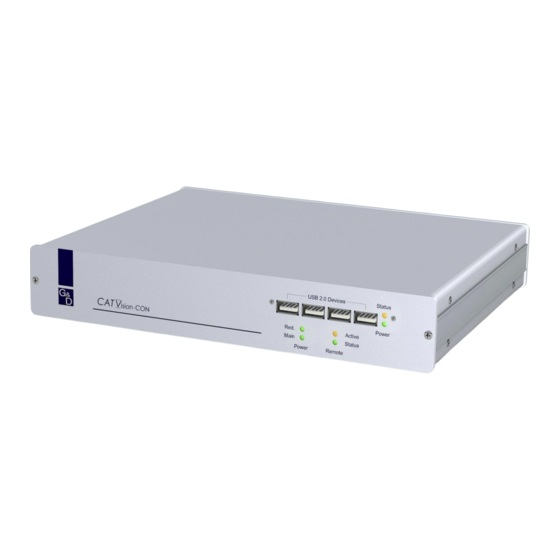
Das Verlängerungskabel K-C7-x in die Schnittstelle TRANSMISSION der Empfangseinheit CATVision-CON einstecken. Den Monitor an die Buchse MONITOR anschließen. Das PS/2-Keyboard an der Schnittstelle Keyb. am CATVision-CON anschließen. Die PS/2-Mouse an die Buchse MOUSE PS/2 anstecken. Optional haben Sie Möglichkeit, Keyboard und Mouse (auch SUN- USB-Tastaturen) über USB anzuschließen. - Seite 12 Anschluss von USB1.1 Zum Anschluss Ihrer USB-Geräte stecken Sie die USB-Geräte auf der Frontseite des CATVision-CON in eine der hier vier verfügbaren USB- A-Buchsen. Hinweis: Es handelt sich hier um die transparente Verlängerung von USB-Signalen an den angeschlossenen Rechner.
-
Seite 13: Stromversorgung
Keyb. Mouse USB Trans 12V DC/0,9A Transmission Red. Power Keyb. PS/2 Mouse Service Monitor Anschluss der optionalen redundanten Stromversorgung Rückblende CATVision-CON Hinweis zum USB-Betrieb Beim Anschluss von USB-Geräten werden durch das CATVision-System high- Power-Geräte (bis 500 mA) unterstützt. Seite 13... -
Seite 14: Inbetriebnahme
Nach diesem Startfenster erscheint das Bild des Rechners auf Ihrem Monitor. WICHTIG Wenn Sie das CATVision System starten, passt das System automatisch alle Parameter (z. B. Kabellänge, Laufzeitunterschiede, Dämpfung) an Ihr Umfeld an. Als Ergebnis sollte ein Bild auf Ihrem Monitor erhalten, welches keiner weiteren Anpassung bedarf. -
Seite 15: Keyboard/Mouse Lokal Nicht Vorhanden
Bedienungsanleitung CATVision (MC) 5.2.1 Keyboard/Mouse lokal nicht vorhanden Sollte das lokale Keyboard und die Mouse nicht mit dem CATVision-CPU verbunden sein, erscheint auf beiden Monitoren (lokal und remote) folgender Warnhinweis: S Y S T E M S T A R T U P... -
Seite 16: Fehlen Der Cat-X-Verbindung
Guntermann & Drunck GmbH Installations- und Bedienungsanleitung CATVision (MC) In diesem Fall bleibt das CATVision-System in diesem Zustand stehen. Um mit der Inbetriebnahme weiter fortfahren zu können, stellen Sie bitte erst die notwendigen CAT-x-Verbindungen her. Wenn diese Verbindungen hergestellt sind, wechselt das CATVision-System automatisch an beiden Konsolen (lokal... -
Seite 17: Led Anzeigen
Guntermann & Drunck GmbH Installations- und Bedienungsanleitung CATVision (MC) LED Anzeigen Nach dem Anschluss des Steckernetzteils schalten Sie die CATVisions über die Kippschalter auf den Rückseiten der Geräte ein. Die LEDs auf der Frontseite der beiden Geräte haben folgende Bedeutung:... - Seite 18 Guntermann & Drunck GmbH Installations- und Bedienungsanleitung CATVision (MC) CATVision CPU CATVision CON Active Leuchtet, wenn eine der beiden Konsolen aktiv ist. Status Leuchtet, wenn die Keyboard/Mouse-Emulation des CATVision-Systems arbeitet USB- Status Leuchtet, wenn eine CAT-x- Abschnitt Verbindung zwischen CV-CPU und CV-CON besteht.
-
Seite 19: Ivt - Individuelles Video Tuning
Bedienungsanleitung CATVision (MC) IVT – Individuelles Video Tuning WICHTIG Wenn Sie das CATVision System starten, passt das System automatisch alle Parameter (z. B. Kabellänge, Laufzeitunterschiede, Dämpfung) an Ihr Umfeld an und ein Videoprofil wird angelegt. Als Ergebnis sollte ein Bild auf Ihrem Monitor erhalten, welches keiner weiteren Anpassung bedarf. -
Seite 20: Aufruf Des Ivt-Modus
Guntermann & Drunck GmbH Installations- und Bedienungsanleitung CATVision (MC) 5.4.2 Aufruf des IVT-Modus Der IVT-Modus kann über drei Wege aufgerufen werden (Default-Werte): CTRL & NUM Über das Function-Menü CTRL & Rollen Über den Keyboard-Hotkey Es öffnet sich folgendes Fenster:... -
Seite 21: Aufruf Über Das Function Menü
Guntermann & Drunck GmbH Installations- und Bedienungsanleitung CATVision (MC) 5.4.2.1 Aufruf über das Function Menü Zum Aufruf des IVT-Modus öffnen Sie das Function Menü über die CTRL + NUM Keyboardkombination (Default). F u n c t i o n C V M... -
Seite 22: Einstellung Des Video Tuning
IVT-Submenü ohne Änderung speichert alle Änderungen und beendet das IVT-Submenü kopiert alle Einstellungen auf alle existierenden Kanäle 1/2/3/4 Wechsel zwischen den Videokanälen (nur bei CATVision-MC- Systemen) führt die automatische Videooptimierung für den aktiven Kanal durch führt die automatische Videooptimierung für alle Kanäle durch Zwischen den einzelnen Einträgen können Sie mit den... -
Seite 23: Videokanalwechsel
Kanal wird die automatische Videoanpassung durchgeführt. Mit der F6-Taste führen Sie die automatische Anpassung für alle Kanäle (nur bei CATVision-MC-Systemen) durch. In diesem Fall erscheint auf Ihrem Bildschirm folgende Meldung: I n f o C V M... -
Seite 24: Manuelle Einstellung
Installations- und Bedienungsanleitung CATVision (MC) Während des automatischen Messvorgangs teilt Ihnen dieses Fenster den jeweiligen Messstatus mit. Hinweis: Die Kanäle 2 bis 4 gelten nur beim Einsatz eines CATVision-MC- Systems! Die Einträge hinter den Kanalangaben haben folgende Bedeutung: Messvorgang erfolgreich abgeschlossen... -
Seite 25: Festlegung Der Videoverstärkung
Guntermann & Drunck GmbH Installations- und Bedienungsanleitung CATVision (MC) 5.4.4.3.1 Festlegung der Videoverstärkung Boost: Zur Veränderung der Videoverstärkung stehen Ihnen folgende Tasten zur Verfügung: subtrahiert den Wert 1 zur Videoverstärkung Taste addiert den Wert 1 zur Videoverstärkung Taste ... -
Seite 26: Beseitigung Der Fahnenbildung
5.4.4.3.4 Einstellung der Laufzeitkompensation delay R delay G delay B 0 ns 0 ns 0 ns Die Delaykompensation kann beim CATVision-System für alle drei Farbsignale bis zu 46 ns durchgeführt werden. Bei 0 ns ist keine Delaykompensation (Verzögerung) vorhanden. Seite 26... -
Seite 27: Kopieren Der Ivt-Einstellungen
Die für einen Videokanal getroffenen Einstellungen lassen sich über die Taste auf alle weiteren vorhanden Videokanäle kopieren. Das kann sinnvoll sein, wenn für diese weiteren Videokanäle die gleichen Rahmenbedingungen vorliegen. 5.4.6 Getestete Auflösungen Die maximale Auflösung des CATVision (bei aktiviertem IVT - Individuelles Video Tuning) beträgt 1920 1440... -
Seite 28: Kabelempfehlung
200 Meter 800 x 600 85 Hz Diese Übersicht stellt keine Maximalwerte dar. 5.4.7 Kabelempfehlung G&D empfiehlt zum Einsatz mit dem CATVision System folgende Kabel: Patchkabel: AETWYLER (bis 100 Meter) UNINET 7702 flex 4P AWG26 S-STP Installationskabel: Kerpen MegaLine G12-150 S/F AWG22 (bis 300 Meter) -
Seite 29: Konfiguration
Guntermann & Drunck GmbH Installations- und Bedienungsanleitung CATVision (MC) Konfiguration Das CATVision-System kann an Ihre Bedürfnisse angepasst werden. Die AdonIS Konfiguration wird über ausgeführt. CTRL (Default-Einstellung) öffnen Sie das AdonIS: F u n c t i o n C V M... -
Seite 30: Console Setup
Der hier einzustellende ScreenSaver wird vom CATVision erzeugt und steht in keiner Verbindung zum ScreenSaver des Rechners. Da in der Regel nur eine indirekte Verbindung (über das CATVision) zwischen dem Rechner und dem Monitor besteht, sollten Sie die ScreenSaver der Rechner aus Gründen Ihrer Arbeitserleichterung abschalten. -
Seite 31: Einstellung Des Autologout
Guntermann & Drunck GmbH Installations- und Bedienungsanleitung CATVision (MC) 6.1.2 Einstellung des AutoLogout Über diese Einstellung können Sie ein automatisches LOGOUT des Systems aktivieren. Der automatische LOGOUT führt, gleich dem manuellen (Taste F8), zurück zur LOGIN Maske. Das System wird damit gegen nicht autorisierten Zugriff geschützt und erst nach einer Passwort-Eingabe im LOGIN Fenster kann wieder auf den Rechner zugegriffen werden (nur gültig, wenn der OPEN ACCESS deaktiviert ist). -
Seite 32: Aktivierung Der Kanalanzeige „Display
Guntermann & Drunck GmbH Installations- und Bedienungsanleitung CATVision (MC) 6.1.4 Aktivierung der Kanalanzeige „Display“ Hier besteht die Möglichkeit, die Anzeige der Systemzustandsmeldungen entweder Dauernd => Perm oder Temporär => Temp (verschwindet ca. 5 Sek. nach Umschaltung) einzustellen. Nach dem Fahren des Cursors auf das Feld DISPLAY können Sie über die... -
Seite 33: Einstellung Der Menu-Position / - Size
6.1.7 Einstellung der erweiterten Mouseunterstützung Hier besteht die Möglichkeit, die Unterstützung der Sondertasten der Intelli- Explorer Mouse für die Arbeit mit dem CATVision zu aktivieren. Setzen Sie AdonIS, den Eintrag hier auf „Yes“, kann das zusätzlich zum Aufruf über das Keyboard, auch durch Betätigen der Taste 4 oder 5 der Explorer-Mouse (linke... -
Seite 34: Osd Syncmod
Um die Einstellungen zu speichern, verlassen Sie dies Menü mit 6.1.9 Keyboard Layout Passen Sie hier den vom CATVision verwendeten Keyboard-Satz an das tatsächliche Layout des angeschlossenen Keyboards an. Sie sollten z. B. eine Umstellung vornehmen, wenn Sie eine Y/Z-Vertauschung feststellen (amerikanisch/deutsches Layout). -
Seite 35: Config
In jedem Fall hat der SUPERVISOR immer eine Zugriffsberechtigung auf das Config Menü! Da das CATVision-System entweder im Systemzustand des Open Access (der Zugriff auf das System ist ohne Login-Name und Passwort möglich) oder durch angelegte User Accounts betrieben werden kann, ergeben sich dadurch unterschiedliche Konstellationen beim Aufruf des Config-Menüs:... -
Seite 36: Ivt
Guntermann & Drunck GmbH Installations- und Bedienungsanleitung CATVision (MC) Angelegte User Accounts + Supervisor (OpenAccess ist deaktiv): Der Zugriff ist ohne Passwortabfrage möglich, da sich die Benutzer bereits angemeldet haben d.h. die Zwischenabfrage (über das Access Config Fenster) der Konfigurationsberechtigung entfällt. -
Seite 37: System Config
Guntermann & Drunck GmbH Installations- und Bedienungsanleitung CATVision (MC) 6.2.2 System Config Steppen Sie im Config Menü auf den Eintrag System Config und drücken Sie die Taste Enter. Folgendes Fenster öffnet sich: S Y S T E M C O N F I G... -
Seite 38: Definition Des Ersten Hotkeys
Guntermann & Drunck GmbH Installations- und Bedienungsanleitung CATVision (MC) 6.2.2.1 Definition des ersten Hotkeys Fahren Sie den Cursor auf den Eintrag HotKey. SPACE Durch Betätigen der -Taste können Sie dann zwischen folgenden Alternativen wählen: Ctrl, Alt, AltGr, Win, Shift Bitte beachten Sie, dass der hier eingestellte HotKey ferner auch als... -
Seite 39: Set System Defaults (Supervisor-Funktion)
Guntermann & Drunck GmbH Installations- und Bedienungsanleitung CATVision (MC) 6.2.2.3 Set System Defaults (Supervisor-Funktion) Die Ausführung dieser Funktion versetzt das Gerät zurück in den Lieferzustand. Auch die eingestellten Passwörter und IVT-Einstellungen werden zurückgesetzt. Die jeweiligen Default-Einstellungen entnehmen Sie bitte der Darstellung der einzelnen Menü-Fenster in diesem Handbuch. -
Seite 40: Local Video (Dunkelschaltung)
Permanent Access Möchten Sie, dass z. B. Ihre Konfigurationsarbeiten nicht von Dritten unterbrochen werden sollen, so besteht sowohl für die remote Konsole (CATVision-CON) als auch die lokale Konsole am CATVision-CPU die Möglichkeit, einen permanenten Zugriff (Haltefunktion; vgl. Kapitel 7.3) zu aktivieren (Permanent Access). -
Seite 41: Festlegung Der Time-Out-Zeit
Guntermann & Drunck GmbH Installations- und Bedienungsanleitung CATVision (MC) 6.2.2.7 Festlegung der Time-Out-Zeit Mit der Festlegung der Time-Out-Zeit wird definiert, wie lange die inaktive Konsole gesperrt bleibt, nachdem an der aktiven Konsole die letzte Keyboard/Mouse-Aktivität getätigt wurde. Nach Ablauf dieser Time-Out-Zeit sind beiden Konsolen für Eingaben wieder freigeschaltet. -
Seite 42: Keyb. Led Flash
6.2.2.10 Festlegung des Scancode-Satzes local Der Scancode bezeichnet die „Sprache“, in welcher das Keyboard mit dem Rechner kommuniziert. Das CATVision arbeitet im Scancode 2 (Default). Stellen Sie diese Einstellung nur nach Rücksprache mit unserem Service Fahren Sie den Cursor auf den entsprechenden Eintrag. -
Seite 43: Usb Sun-Keyboard Mode
Installations- und Bedienungsanleitung CATVision (MC) 6.2.2.13 USB SUN-Keyboard mode Wird ein SUN-Rechner mit USB-Keyboard (und -Maus) an CATVision-CPU an- geschlossen, so wird dies dem System durch Änderung des Wertes dieser Einstellung auf „yes“ mitgeteilt. Im Auslieferungszustand ist die Unterstützung für USB SUN-Keyboards de- aktiviert (Wert steht auf „no“)! -
Seite 44: Keyboard Type Local
OSD und Display zu wählen. Um die Einstellung zu speichern, verlassen Sie dies Menü mit 6.2.2.16 Keyboard Type Local Nach Anwahl dieses Menüpunktes können Untermenü Unterstützung der Tastaturen „PixelPower Clarity (blue)“ bzw. „SKIDATA1“ im CATVision für die lokale Konsole aktivieren. Seite 44... -
Seite 45: Keyboard Type Remote
Separated H/V as input Wenn CATVision getrennte HV-Signale erkennt, wird Remote sync auf „Separated H/V“ gestellt und ist nicht veränderbar. Wenn keine HV-Signale erkannt werden, besteht die Möglichkeit diese über die Einstellung „Separated H/V“ trotzdem auszugeben. Bei Auswahl „as input“ wird das Signal so ausgegeben wie es vom Rechner in das CATVision-System gelangt. -
Seite 46: User Account
Aufgrund der Besonderheiten des Supervisor sowie des Open Access Accounts, erscheinen diese gesondert im Menü. Supervisor: Diese Account können keine Rechte entzogen werden User: Benutzer, der wahlweise mit Konfigurationsrechten ausgestattet werden kann Open Access: Ist die offene Zugangsvariante zum CATVision-System und kein "echter" User. Seite 46... -
Seite 47: User Account
Guntermann & Drunck GmbH Installations- und Bedienungsanleitung CATVision (MC) Derzeit können 8 User, der Supervisor sowie der Open Access-Zugang verwaltet werden. U s e r A c c o u n t C V M A c c o u n t N o . 1... - Seite 48 Guntermann & Drunck GmbH Installations- und Bedienungsanleitung CATVision (MC) Wird der User Name geändert, erscheint automatisch ein Fenster, welches Sie auf die erfolgte Umstellung hinweist. Nachdem Sie eine beliebige Taste betätigt haben, erscheint das Eingabemenü für das User-Passwort: C H A N G E P A S S W O R D...
-
Seite 49: Set Account Defaults
Guntermann & Drunck GmbH Installations- und Bedienungsanleitung CATVision (MC) 6.2.3.3 Set Account Defaults Set Account Defaults Diese Funktion setzt alle Änderungen des USER ACCOUNT zurück auf den Lieferzustand, der in diesem Kapitel jeweils am Ende eines Abschnitts als „default“ angegeben ist. -
Seite 50: User Account Access
Guntermann & Drunck GmbH Installations- und Bedienungsanleitung CATVision (MC) 6.2.3.6 User Account Access User Account Access ... No/Yes Hier können Sie dem Inhaber dieses Accounts den Zugang zum Menü User Account gewähren oder entziehen. Steuern Sie das Feld an und gewähren Sie den Zugang zum User Account oder verwehren Sie diesen durch N. -
Seite 51: Mouse Utility
Guntermann & Drunck GmbH Installations- und Bedienungsanleitung CATVision (MC) ENTER schließt die erste Eingabe ab und springt automatisch in das zweite ENTER Feld, wo das Passwort nochmals einzugeben ist. bestätigt das neue Passwort und führt zurück zum USER ACCOUNT. speichert die neue Einstellung und führt zurück zum SELECT ACCOUNT. - Seite 52 Guntermann & Drunck GmbH Installations- und Bedienungsanleitung CATVision (MC) Enable Mouse (for Unix) Wählen Sie diese Funktion bei Nicht-Windows-Systemen (z. B. Linux), wenn der Rechner mit einem Standard-Mouse Treiber arbeitet. Reset Mouse Wählen Sie diese Funktion bei Windows-Betriebssystemen; unabhängig vom eingestellten Mouse-Treiber.
-
Seite 53: Systembedienung
Im den nachfolgenden Kapiteln werden die einzelnen Zugriffsmöglichkeiten näher erläutert. 7.1.1 Zugriff über OpenAccess Beim Zugriff über OpenAccess kann jeder auf das CATVision-System und die angeschlossene CPU zugreifen. Der OpenAccess definiert sich im Lieferzustand folgendermaßen: Zugriff auf die angeschlossene CPU ohne vorherige Anmeldung mit ... - Seite 54 Space-Taste den dortigen Eintrag auf NO. Speichern Sie Ihre Einstellung mit F1. Somit ist der OpenAccess deaktiviert und der Zugriff auf das CATVision- System nur noch über den Login möglich. Um den OpenAccess zu aktivieren, wiederholen Sie die zuvor beschriebene Verfahrensweise, ändern jedoch den Eintrag im Feld Account enabled von NO...
-
Seite 55: Zugriff Über Definierte User
Guntermann & Drunck GmbH Installations- und Bedienungsanleitung CATVision (MC) 7.1.2 Zugriff über definierte User Beabsichtigen Sie, das System gegen unbefugten Zugriff zu schützen, ist es sinnvoll User anzulegen und diese User mit bestimmten Rechten auszustatten. Sobald durch den Supervisor im Menü UserAccount Benutzer angelegt worden sind, ist der Zugriff auf des System nur noch über einen Login-Namen... -
Seite 56: Automatische Umschaltung
Installations- und Bedienungsanleitung CATVision (MC) Automatische Umschaltung Das CATVision-System erlaubt die wahlweise Bedienung des Rechners von beiden Konsolen aus (lokal und remote). Im Grundzustand ist die Bedienung für beide Konsolen freigechaltet. Sobald an einer der Stationen eine Eingabe über Keyboard oder Mouse durchgeführt wird, sind Keyboard/Mouse der anderen Station automatisch... -
Seite 57: Manuelle Haltefunktion (Permanent Access)
Installations- und Bedienungsanleitung CATVision (MC) Manuelle Haltefunktion (Permanent Access) Durch das CATVision-System ist es möglich, dass entweder die lokale oder die entfernte (remote) Konsole exklusiv den Rechner bedienen kann. Dies verhindert, dass das System die andere Konsole nach dem voreingestellten Time-Out von ca. -
Seite 58: Protected Mode
Konsole, welche weiterhin gesperrt ist, durch schnell blinkende Keyboard-Led „Scroll Lock“, die ACTIVE LED LOCAL (z. B. bei CATVision-CPU) erlischt und die ACTIVE LED CPU leuchtet auf beiden Monitoren erscheint folgende Anzeige PROTECTION ACTIVATED Die Protected Mode wird durch erneutes Drücken der Tastenkombination... -
Seite 59: Dunkelschaltung Des Monitors
Installations- und Bedienungsanleitung CATVision (MC) Dunkelschaltung des Monitors Beim CATVision-System besteht die Möglichkeit, während des lokalen oder entfernten Zugriffs auf den Rechner, den Monitor der nicht zugreifenden Konsole dunkel zu schalten. Sie können somit z. B. als Supervisor Ihre Konfigurationseinstellungen gegen unbefugte Beobachter schützen. -
Seite 60: Manueller Logout
Installations- und Bedienungsanleitung CATVision (MC) Manueller Logout Durch Drücken der Taste im Function Menü führen Sie ein Logout durch. Diese Funktion hebt Ihre Anmeldung am CATVision auf. LOGIN Nach der Ausführung wechselt der CATVision zum Fenster: Sollten Sie sich noch im Modus OPEN ACCESS befinden, können Sie Enter-Taste sich über die... -
Seite 61: Optionale Ausstattung
Guntermann & Drunck GmbH Installations- und Bedienungsanleitung CATVision (MC) Optionale Ausstattung Alle in diesem Kapitel erwähnten Ausstattungskomponenten sind als Zukaufoption erhältlich. Sollten Sie nachträglich einen der im folgenden genannten Komponenten benötigen, so setzen Sie sich bitte mit unserem Vertrieb (02739-8901-100 oder sales@gdsys.de) in Verbindung. -
Seite 62: Audio
Guntermann & Drunck GmbH Installations- und Bedienungsanleitung CATVision (MC) Audio Das CATVision bietet eine bidirektionale Stereo-Audio-Übertragung in nahezu CD-Qualität an. Dazu befinden sich am CATVision-CPU die Audioschnittstellen Line In Line Out Mouse PS/2 RS 232 Line In Line Out USB K/M USB 1.1... -
Seite 63: Rs232
Guntermann & Drunck GmbH Installations- und Bedienungsanleitung CATVision (MC) RS232 Mit der Schnittstelle RS232 lassen sich externe serielle Geräte am CATVision anschließen. Folgende Parameter müssen diese Geräte erfüllen: Übertragungsrate: 200 Meter max. 38400 bit/s 100 Meter max. 57600 bit/s ... -
Seite 64: System-Update
Guntermann & Drunck GmbH Installations- und Bedienungsanleitung CATVision (MC) System-Update Mit dem CATVision haben Sie die Möglichkeit einen Firmware-Update über die Servicebuchse (2,5mm Klinke) durchzuführen. Diese Buchse finden Sie beim CATVision-CPU auf der Vorderseite des Gerätes. Servicebuchse für Firmwareupdate Beim CATVision-CON befindet sich diese Buchse auf der Rückseite des Gerätes. -
Seite 65: Cv-Power-Erweiterung
PC. Dafür werden mit einer einfachen Slot-Blenden-Einsteckkarte in dem zu bedienenden PC die vorhandenen Taster mit den Steuersignalen des CATVision kombiniert. 11.1 Lieferumfang Zum Anschluss am CATVision-CPU 1 x CV-Power Slotkarte (ATX-Modul) zum Einbau im PC ... -
Seite 66: Installationsanleitung
Guntermann & Drunck GmbH Installations- und Bedienungsanleitung CATVision (MC) 11.2 Installationsanleitung 11.2.1 Einbau im PC Die Verbindung des CV-Power (ATX-Modul) mit dem Motherboard des Rechners ermöglicht die Durchführung von RESET und Schalten der ATX-Stromversorgung Zum Schalten der ATX-Stromversorgung gehen Sie bitte folgendermaßen vor: ... - Seite 67 O2 RESET# (Pin 3) O2 ATXPWR# (Pin 1) Die Fernauslösung von Reset oder Ein-/Ausschalten des Rechners funktioniert nur bei eingeschalteten und verbundenen (über CAT-x Kabel) CATVision-CPU und CATVision-CON. Bei ordnungsgemäßer Verdrahtung funktionieren die Taster am PC ganz wie gewohnt auch weiterhin.
-
Seite 68: Verbinden Mit Catvision-Cpu
ATX-Modul CV-Power. 11.2.3 Verbinden des Tasters mit dem CATVision-CON Bevor Sie Ihren Taster mit dem CATVision-CON verbinden, muss Ihr Taster mit der im Lieferumfang enthaltenen 3-poligen Kabelbuchse verbunden werden. Anhand der nachfolgenden Abbildungen ersehen Sie, welche Leitungen mit welchem PIN verbunden werden müssen. - Seite 69 I1 SW1_ATXPWR# (Pin 1) I2 SW2_RESET# (Pin 3) - 0V (Pin 2) Nachdem Sie Ihren Taster mit der 3-poligen Kabelbuchse verbunden haben, stecken Sie diese in den 3-poligen Flanschstecker des CATVision-CON. Dieser ist auf der Rückseite des Gerätes angebracht. (3-poliger Flanschstecker) Seite 69...
-
Seite 70: Technische Daten
Guntermann & Drunck GmbH Installations- und Bedienungsanleitung CATVision (MC) Technische Daten 12.1 CATVision Video: Auflösung: max. 1920 x 1440 Bildpunkte (abhängig von Kabel und Videosignal) Übertragungslänge: 10 bis max. 300 Meter (abhängig von Kabel, Auflösung und Video- signal) ... - Seite 71 Guntermann & Drunck GmbH Installations- und Bedienungsanleitung CATVision (MC) Gehäusemaße: CATVision-CPU 210 x 44 x 210 ( 19“ / 1HE ) ( B x H x T in mm ) CATVision-CON 210 x 44 x 210 ( 19“ / 1 HE )
-
Seite 72: Catvision-Mc
Guntermann & Drunck GmbH Installations- und Bedienungsanleitung CATVision (MC) 12.2 CATVision-MC Video Auflösung: max. 1920 x 1440 Bildpunkte (abhängig von Kabel und Videosignal) Übertragungslänge: 10 bis max. 300 Meter (abhängig Kabel, Auflösung Videosignal) übertragbare Signale: RGBHV, RGsB oder RsGsBs... - Seite 73 Guntermann & Drunck GmbH Installations- und Bedienungsanleitung CATVision (MC) Gehäusemaße CATVision-MC 2 (3,4)-CPU; CATVision-MC 3 (4)-CON Twin CATVision-MC 2-CPU 435 x 44 x 210 (19“ / 1 HE) ( B x H x T in mm ) CATVision-MC2-CON 210 x 44 x 210 (19“ / 1 HE)
-
Seite 74: Anhang
Guntermann & Drunck GmbH Installations- und Bedienungsanleitung CATVision (MC) Anhang 13.1 HotKey-Belegungstabelle Funktion Default-HotKey Persönlicher Seite im HotKey Handbuch Aufruf des Function- CTRL+ NUM Seite 29 Menüs Permanent Access CTRL + DRUCK Seite 40 Freischaltung der Bedienung im CTRL + DRUCK... -
Seite 75: Passwort
Guntermann & Drunck GmbH Installations- und Bedienungsanleitung CATVision (MC) 13.3 Passwort Für den OpenAccess muss kein Name und Passwort eingegeben werden. Wollen Sie Konfigurationen am System vornehmen, müssen Sie sich als SUPVERVISOR anmelden! SUPERVISOR L O G I N C V M... - Seite 147 NOTES...
- Seite 148 NOTES...
- Seite 149 NOTES...
- Seite 150 NOTES...
- Seite 151 NOTES...
- Seite 152 Das Handbuch wird fortlaufend aktualisiert und im Internet veröffentlicht. The manual is constantly updated and available on our website. http://gdsys.de/A9100189 Guntermann & Drunck GmbH Dortmunder Str. 4a 57234 Wilnsdorf Germany http://www.GDsys.de sales@GDsys.de...