
Verwandte Anleitungen für G&D DP-Vision-CAT


Inhaltszusammenfassung für G&D DP-Vision-CAT
- Seite 1 Guntermann & Drunck GmbH www.gdsys.de G&D DP-Vision-CAT Installation und Bedienung Installation and Operation A9100238-1.01...
-
Seite 2: Zu Dieser Dokumentation
© Guntermann & Drunck GmbH 2016. Alle Rechte vorbehalten. Version 1.01 – 05.12.2016 Firmware: 1.1.002 Guntermann & Drunck GmbH Dortmunder Str. 4a 57234 Wilnsdorf Germany Telefon +49 (0) 2739 8901-100 Telefax +49 (0) 2739 8901-120 http://www.GDsys.de sales@GDsys.de i · G&D DP-Vision-CAT... -
Seite 3: Inhaltsverzeichnis
Inhaltsverzeichnis Inhaltsverzeichnis Sicherheitshinweise ..................1 Die DP-Vision-CAT-Serie ................2 Verfügbare Gerätevarianten ................2 Lieferumfang ....................3 Installation ....................... 4 Vorbereitung ..................... 4 Installation des Rechnermoduls ................. 5 Installation des Arbeitsplatzmoduls ..............9 Inbetriebnahme ....................13 Startvorgang ....................13 On-Screen-Display des Arbeitsplatzmoduls ............13 Erstkonfiguration der Netzwerkeinstellungen .......... - Seite 4 Bedeutung der LEDs an der Frontseite ............. 53 Bedeutung der LEDs an der Rückseite .............. 54 Technische Daten ................... 55 Allgemeine Eigenschaften der Serie ..............55 Spezifische Eigenschaften der Single-Channel-Geräte ......... 57 Spezifische Eigenschaften der Multi-Channel-Geräte .......... 58 Stromaufnahme ....................60 iii · G&D DP-Vision-CAT...
-
Seite 5: Sicherheitshinweise
Betreiben Sie dieses Gerät nur mit dem mitgelieferten oder in der Bedienungsan- leitung aufgeführten Netzteil. ! Betreiben Sie das Gerät ausschließlich im vorgesehenen Einsatzbereich Die Geräte sind für eine Verwendung im Innenbereich ausgelegt. Vermeiden Sie extreme Kälte, Hitze oder Feuchtigkeit. G&D DP-Vision-CAT · 1... -
Seite 6: Die Dp-Vision-Cat-Serie
Übertragung von USB 2.0-Signalen und/oder die Verwendung mehrerer Bildschirme erlauben: Modell Videokanäle USB 2.0 nicht unterstützt DP-Vision-CAT-AR DP-Vision-CAT-ARU Full Speed Hi-Speed DP-Vision-CAT-ARU2 DP-Vision-CAT-MC2-AR nicht unterstützt DP-Vision-CAT-MC2-ARU Full Speed Hi-Speed DP-Vision-CAT-MC2-ARU2 DP-Vision-CAT-MC4-AR nicht unterstützt Full Speed DP-Vision-CAT-MC4-ARU DP-Vision-CAT-MC4-ARU2 Hi-Speed 2 · G&D DP-Vision-CAT... -
Seite 7: Lieferumfang
Videokabel (DP-Cable-M/M-2) im Lieferumfang enthalten. 1 × USB-Gerätekabel (USB-AM/BM-2) 2 × Audio-Kabel (Audio-M/M-2) 1 × serielles Anschlusskabel (RS232-M/F-2) 1 × Servicekabel (USB-Service-2) 1 × Installations- und Bedienhandbuch 1 × Bedienhandbuch für Webapplikation Config Panel G&D DP-Vision-CAT · 3... -
Seite 8: Installation
) in der Nähe des ent- fernten Arbeitsplatzes. HINWEIS: Die maximale Kabellänge zwischen dem Arbeitsplatzmodul und den Geräten des Arbeitsplatzes beträgt fünf Meter. 4. Entnehmen Sie die mitgelieferten Kabel der Verpackung und legen Sie diese für die Installation der Geräte bereit. 4 · G&D DP-Vision-CAT... -
Seite 9: Installation Des Rechnermoduls
Verbinden Sie die PS/2-Tastatur-Schnittstelle des Rechners mit dieser Schnittstelle. Verwenden Sie hierzu den violetten Stecker des separat erhältlichen Twin-PS/2-Kabels (Twin-PS/2-M/M-2). Verbinden Sie eine USB-Schnittstelle des Rechners mit dieser Schnittstelle. USB CPU: Verwenden Sie hierzu das Kabel USB-AM/BM-2. G&D DP-Vision-CAT · 5... -
Seite 10: Videoausgang Des Rechners Anschließen
Verwenden Sie hierzu das Kabel USB-AM/BM-2. USB 2.0 Trans. Stecken Sie ein als Zubehör erhältliches Twisted-Pair-Kabel der Kate- gorie 5e (oder höher) ein. Das andere Ende des Kabels ist mit der USB 2.0 Trans. Schnittstelle des Arbeitsplatzmoduls zu verbinden. 6 · G&D DP-Vision-CAT... -
Seite 11: Optional: Lokalen Arbeitsplatz Anschließen
Schließen Sie den Monitor des lokalen Arbeitsplatzes an. DisplayPort Out: HINWEIS: Pro Videokanal der Multi-Channel-Variante ist je eine DisplayPort Out- Schnittstelle verfügbar. Die Ziffern hinter den Schnittstellen-Bezeichnungen ord- nen jede Schnittstelle einem bestimmten Kanal zu. G&D DP-Vision-CAT · 7... -
Seite 12: Verbindung Mit Dem Arbeitsplatzmodul Herstellen
Transmission DisplayPort 1 Keyb. CPU Mouse USB CPU Stecken Sie ein mitgeliefertes Kaltgerätekabel ein. Main Power: An diese Buchse können Sie ein optionales Tischnetzteil anschließen. Red. Power: Hierdurch wird eine zweite, redundante Stromversorgung des Gerätes erreicht. 8 · G&D DP-Vision-CAT... -
Seite 13: Installation Des Arbeitsplatzmoduls
Modus unverändert an das Rechnermodul übertragen. WICHTIG: Bei aktiviertem Generic-HID -Modus kann das OSD mit einer Tastatur an -Buchse nicht bedient werden. Generic Mouse: Schließen Sie die PS/2-Maus des Arbeitsplatzes an. Schließen Sie die PS/2-Tastatur des Arbeitsplatzes an. Keyb.: G&D DP-Vision-CAT · 9... -
Seite 14: Monitor Des Arbeitsplatzes Anschließen
5e (oder höher) ein. Das andere Ende des Kabels ist mit der entsprechenden Schnittstelle des Rechnermoduls zu verbinden. HINWEIS: Pro Videokanal der Multi-Channel-Variante ist je eine Transmission- Schnittstelle verfügbar. Die Ziffern hinter den Schnittstellen-Bezeichnungen ord- nen jede Schnittstelle einem bestimmten Kanal zu. 10 · G&D DP-Vision-CAT... -
Seite 15: Zusätzliche Schnittstellen Der Aru/Aru2-Varianten Verbinden
USB 2.0 Trans. Stecken Sie in diese Schnittstelle der ARU2 -Variante ein als Zubehör erhältliches Twisted-Pair-Kabel der Kategorie 5e (oder höher) ein. Das andere Ende des Kabels ist mit der USB 2.0 Trans. -Schnittstelle des Rechnermoduls verbinden. G&D DP-Vision-CAT · 11... - Seite 16 USB 2.0 Devices Transmission DP Out Micro In Speaker Keyb./Mouse Keyb. Red. Power Stecken Sie ein mitgeliefertes Kaltgerätekabel ein. Main Power: Stecken Sie ein mitgeliefertes Kaltgerätekabel ein. Hierdurch wird eine Red. Power: zweite, redundante Stromversorgung des Arbeitsplatzmoduls erreicht. 12 · G&D DP-Vision-CAT...
-
Seite 17: Inbetriebnahme
Arbeitsplatzmoduls und der Remote hotkey (Standard: Strg ) zum Öffnen des entfernten OSD des Rechnermoduls angezeigt. TIPP: Betätigen Sie die Pause -Taste, um den Vorgang anzuhalten. Ein Tasten- druck auf die führt den Vorgang fort. Leertaste G&D DP-Vision-CAT · 13... -
Seite 18: Erstkonfiguration Der Netzwerkeinstellungen
Netzwerkschnittstelle ausschalten. Off: Static: Es wird eine statische IP-Adresse zugeteilt. Bezug der IP-Adresse von einem DHCP-Server. DHCP: IP address: Geben Sie die IP-Adresse der Schnittstelle an. Im Betriebsmodus DHCP ist keine Eingabe möglich. 14 · G&D DP-Vision-CAT... -
Seite 19: Konfiguration Der Globalen Netzwerkeinstellungen
Geben Sie die IP-Adresse des Gateways an. DNS Server 1: Geben Sie die IP-Adresse des DNS-Servers an. DNS Server 2: Geben Sie optional die IP-Adresse eines weiteren DNS-Servers an. 5. Betätigen Sie die -Taste zur Speicherung der durchgeführten Änderungen. G&D DP-Vision-CAT · 15... -
Seite 20: Bedienung
Um die exklusive Bedienung des KVM-Extenders durch einen Arbeitsplatz zu ermöglichen, kann die Berechtigung für den exklusiven Zugriff des Arbeitsplatzes aktiviert werden. Ist diese Funktion eingeschaltet, kann die exklusive Bedienung des KVM-Extenders mit der Tastenkombination Hotkey+Druck (Standard: Strg+Druck ) aktiviert werden. 16 · G&D DP-Vision-CAT... -
Seite 21: Steckdose Schalten
Steckdose zugewiesen ist, ist die Zeile nicht anwählbar und der Text n.c. (not connected) wird angezeigt. 3. Betätigen Sie die , um die in der Zeile angezeigt Operation auszuführen: Eingabetaste Steckdose(n) ausschalten turn off Steckdose(n) einschalten turn on G&D DP-Vision-CAT · 17... -
Seite 22: Verwendung Des Reset-Tasters
Die Wiederherstellung der Standardeinstellungen ist alternativ auch über das OSD oder die Webapplikation möglich (s. Seite 45). Config Panel Nur bei der Wiederherstellung der Standardeinstellungen über die Webapplikation ist optional die Beibehaltung der Konfiguration der Netzwerkschnittstellen möglich. 18 · G&D DP-Vision-CAT... -
Seite 23: Temporäre Deaktivierung Der Netzfilterregeln
3. Bearbeiten Sie die im Gerät gespeicherten Netzfilterregeln mit der Webapplika- tion Config Panel und speichern Sie die Regeln anschließend ab. WICHTIG: Wird innerhalb von 15 Minuten keine neue Netzfilterkonfiguration erstellt, werden die ursprünglichen Einstellungen wieder aktiviert. G&D DP-Vision-CAT · 19... -
Seite 24: Konfiguration
PC Standard Unterstützung für Spezialtastaturen Standard Änderung des Scancode-Sets einer PS/2-Tastatur Scancode-Set 2 Tastatur für Start des Arbeitsplatzmoduls erforderlich nein Wartezeit des Bildschirmschoners einstellen deaktiviert Tastaturlayout für Eingaben innerhalb des OSDs auswählen german Wiederherstellung der Standardeinstellungen 20 · G&D DP-Vision-CAT... -
Seite 25: Bedienung Des On-Screen-Displays Am Arbeitsplatz
Nach der Ausführung des Hotkeys wird das OSD auf dem Monitor des Arbeitsplat- zes angezeigt: Configuration Console setup Local console setup Target setup System setup Network setup Information Target power turn off Die Menüansichten des On-Screen-Displays bestehen aus drei Hauptbereichen: G&D DP-Vision-CAT · 21... -
Seite 26: Bedienung Des On-Screen-Displays
Daten geschlossen und das übergeordnete Menü angezeigt. Betätigen Sie diese Taste, um zwischen den verschiedenen Optionen eines Menüeintrags zu wechseln. Strg+F8: Konfigurationseinstellungen mit vielen verfügbaren Optionen unterstützen diese Tastenkombination zum Aufruf einer über- sichtlichen Liste aller Optionen. 22 · G&D DP-Vision-CAT... -
Seite 27: Grundlegende Bedienung Der Webapplikation
Im KVM-Extender ist ein SSL-Zertifikat hinterlegt, welches dem Webbrowser bzw. dem Benutzer erlaubt, die Gegenseite zu authentifizieren. WICHTIG: Ersetzen Sie das im Auslieferungszustand des Geräts enthaltene Zertifi- kat durch ein individuelles, gerätebezogenes Zertifikat. Die Erstellung eines sol- chen Zertifikats wird im Handbuch der Webapplikation beschrieben. G&D DP-Vision-CAT · 23... -
Seite 28: Benutzerauthentifizierung Gegenüber Der Webapplikation
Melden Sie sich hierfür mit dem Administratorkonto in die Webapplikation ein und ändern Sie anschließend das Passwort wie im separaten Handbuch der Webapplikation beschrieben. Die voreingestellten Zugangsdaten zum Administratorkonto lauten: Benutzername: Admin 4658 Passwort: 24 · G&D DP-Vision-CAT... -
Seite 29: Konfigurationseinstellungen
4. Wählen Sie in der Zeile Hotkey Modifizierer mindestens eine der aufgeführten Modifizierertasten (Strg, Alt, Alt Gr, Win oder Shift) durch Anklicken des bzw. der entsprechenden Kontrollkästchen(s) aus. 5. Klicken Sie auf , um die erfassten Daten zu speichern. G&D DP-Vision-CAT · 25... -
Seite 30: Änderung Der Osd-Taste
Hotkey-Modifizierertaste(n) den Aufruf des On-Screen-Displays bewirkt. Zur Auswahl stehen die Tasten Pause, Einfg, Entf, Pos 1, Bild auf, Bild ab, Num, Ende oder Space. 5. Klicken Sie auf , um die erfassten Daten zu speichern. 26 · G&D DP-Vision-CAT... -
Seite 31: On-Screen-Display Mit Doppeltem Tastendruck Starten
OSD-Aufruf mit doppeltem Druck auf die Windows-Taste Shift OSD-Aufruf mit doppeltem Druck auf die Umschalt-Taste OSD-Aufruf mit doppeltem Druck auf die Druck-Taste Druck 5. Klicken Sie auf , um die erfassten Daten zu speichern. G&D DP-Vision-CAT · 27... -
Seite 32: Änderung Der Exklusiv-Taste
Taste aus. Exklusiv-Taste Zur Auswahl stehen die Tasten Backspace, Druck, Rollen, Num, Pause, Einf., , Bild und Space. Entf., Pos 1, Ende, Bild 5. Klicken Sie auf , um die erfassten Daten zu speichern. 28 · G&D DP-Vision-CAT... -
Seite 33: Änderung Der Zeitspanne Der Eingabesperre
4. Geben Sie im Feld die gewünschte Zeitspanne der Multiuser-Eingabesperre Eingabesperre (1 bis 90 Sekunden) ein. 5. Klicken Sie auf , um die erfassten Daten zu speichern. Verwandtes Thema: Exklusive Bedienung des KVM-Extenders auf Seite 16 G&D DP-Vision-CAT · 29... -
Seite 34: Berechtigung Für Exklusiven Zugriff Des Arbeitsplatzes
3. Wählen Sie in der Zeile Enable exclusive durch Betätigung der -Taste zwi- schen folgenden Optionen: Berechtigung für exklusiven Zugriff erteilt (Standard) Berechtigung für exklusiven Zugriff verweigert 4. Betätigen Sie die -Taste zur Speicherung der durchgeführten Änderungen. 30 · G&D DP-Vision-CAT... -
Seite 35: Änderung Der Videobetriebsart Der Arbeitsplätze
Alternativ können Sie festlegen, dass das Bild des anderen Arbeitsplatzes ausge- schaltet wird, sobald eine Eingabe an einem Arbeitsplatz erfolgt. Das Bild wird auf dem anderen Arbeitsplatz wird angezeigt, sobald die Eingaben des Anwenders am Arbeitsplatz abgeschlossen sind. G&D DP-Vision-CAT · 31... - Seite 36 Aktionen am entfernten/lokalen Arbeitsplatz aus 5. Klicken Sie auf , um die erfassten Daten zu speichern. Verwandte Themen: Änderung der Zeitspanne der Eingabesperre auf Seite 29 Berechtigung für exklusiven Zugriff des Arbeitsplatzes auf Seite 30 32 · G&D DP-Vision-CAT...
-
Seite 37: Auswahl Des Edid-Modus Des Kvm-Extenders
Sie die Eingabetaste Wählen Sie mit den Pfeiltasten das zu aktivierende Profil und aktivieren Sie es mit der -Taste. Speichern Sie Ihre Auswahl mit der -Taste. 5. Betätigen Sie die -Taste zur Speicherung der durchgeführten Änderungen. G&D DP-Vision-CAT · 33... -
Seite 38: Verwendung Des Freeze-Modus
Arbeitsplatzmodul empfangene Bild darstellen möchten bis die Verbin- dung wiederhergestellt ist. Um den Verbindungsabbruch deutlich zu signalisieren, wird das zuletzt empfan- gene Bild wahlweise mit einem farbigen Rahmen und/oder der Einblendung Frozen und der vergangenen Zeit seit dem Verbindungsabbruch dargestellt. 34 · G&D DP-Vision-CAT... - Seite 39 5. Falls der Freeze-Modus aktiviert ist, wählen Sie zusätzlich eine oder beide Optionen im Feld Freeze-Visualisierung Rahmen Anzeige eines farbigen Rahmens bei Verbindungsabbruch. Einblendung des Hinweises Frozen und der vergangenen Zeit seit dem Verbindungsabbruch. 6. Klicken Sie auf , um die erfassten Daten zu speichern. G&D DP-Vision-CAT · 35...
-
Seite 40: Usb-Hid-Modus Auswählen
NOTTROT N170 KGE Wacom Cintiq 21UX Wacom Cint.21 Wacom Intuos3 Wacom Int.3 Wacom Intuos4 S Wacom Int.4S Wacom Intuos4 M Wacom Int.4M Wacom Intuos4 L Wacom Int.4L Wacom Intuos4 XL Wacom Int.4XL 36 · G&D DP-Vision-CAT... - Seite 41 An das Arbeitsplatzmodul können Sie eine LK463-kom- patible Tastatur anschließen. Die Anordnung der 108 Tasten solcher Tastaturen ent- spricht dem OpenVMS-Tastaturlayout. Ein spezieller USB-Tastaturmodus gewährleistet die Übermittlung der Betätigung einer Sondertaste dieser Tastatur an den Zielrechner: EINGABEGERÄT EINSTELLUNG LK463-kompatible Tastatur LK463 G&D DP-Vision-CAT · 37...
- Seite 42 Bei Verwendung einer Standardtastatur können die Funktionen dieser Tasten durch Betätigung der unten aufgelisteten Tastenkombinationen emuliert werden: TASTENKOMBINATION »SOLARIS SHORTCUT KEY« DES SUN KEYBOARDS Strg+Alt+F2 Wiederholen Strg+Alt+F3 Eigenschaften Strg+Alt+F4 Zurücknehmen Strg+Alt+F5 Vordergrund Strg+Alt+F6 Kopieren Strg+Alt+F7 Öffnen Strg+Alt+F8 Einfügen Strg+Alt+F9 Suchen Strg+Alt+F10 Ausschneiden Strg+Alt+F11 Hilfe 38 · G&D DP-Vision-CAT...
-
Seite 43: Unterstützung Für Spezialtastaturen
Enh. keyboard schen folgenden Optionen: Unterstützung von Spezialtastaturen deaktivieren PixelPower C Unterstützung der Tastatur PixelPower Blue aktivieren Unterstützung der Tastatur SKIDATA1 aktivieren SKIDATA1 4. Betätigen Sie die -Taste zur Speicherung der durchgeführten Änderungen. G&D DP-Vision-CAT · 39... -
Seite 44: Änderung Des Scancode-Sets Einer Ps/2-Tastatur
Der KVM-Extender interpretiert in der Standardeinstellung alle Eingaben einer PS/2- Tastatur mit dem Scancode-Set 2. Falls das Verkettungszeichen (engl. Pipe, „|”) nicht eingegeben werden kann oder die Pfeiltasten der Tastatur nicht wie erwartet funktionieren, ist die Umstellung auf das Scancode-Set 3 empfehlenswert. 40 · G&D DP-Vision-CAT... - Seite 45 Aktivierung des Scancode-Sets 3 für PS/2-Tastatureingaben 5. Klicken Sie auf , um die erfassten Daten zu speichern. 6. Schalten Sie den KVM-Extender aus und wieder ein. Die Tastatur wird nach dem erneuten Einschalten initialisiert und das ausgewählte Scancode-Set angewendet. G&D DP-Vision-CAT · 41...
-
Seite 46: Tastatur Für Start Des Arbeitsplatzmoduls Erforderlich
3. Wählen Sie im Feld zwischen folgenden Optionen: Tastatur erforderlich Startvorgang bei Fehlen der Tastatur fortsetzen (Standard). Nein Startvorgang bei Fehlen der Tastatur unterbrechen. 4. Klicken Sie auf , um die erfassten Daten zu speichern. 42 · G&D DP-Vision-CAT... -
Seite 47: Wartezeit Des Bildschirmschoners Einstellen
-Modul) einstellen möchten. 4. Geben Sie in der Zeile Bildschirmschoner (Minuten) die Wartezeit (1 bis 999 Minuten) des Bildschirmschoners ein. Der Wert 0 deaktiviert den Bildschirmschoner. 5. Klicken Sie auf , um die erfassten Daten zu speichern. G&D DP-Vision-CAT · 43... -
Seite 48: Tastaturlayout Für Eingaben Innerhalb Des Osds Auswählen
4. Wählen Sie im Feld Tastaturlayout zwischen folgenden Optionen: Deutsch Englisch (USA) Englisch (Großbritannien) Französisch Spanisch lat. Amerikanisch Portugiesisch 5. Klicken Sie auf , um die erfassten Daten zu speichern. 44 · G&D DP-Vision-CAT... -
Seite 49: Wiederherstellung Der Standardeinstellungen
Konfiguration der Netzwerkschnittstellen beibehalten möchten. 4. Klicken Sie auf die Schaltfläche , um die Standardeinstel- Werkseinstellungen lungen wiederherzustellen. HINWEIS: Die Wiederherstellung der Standardeinstellungen ist alternativ auch durch Betätigung des Reset-Tasters möglich. Weitere Informationen hierzu finden Sie auf Seite 18. G&D DP-Vision-CAT · 45... -
Seite 50: Farbe Der Informationseinblendung Ändern
2. Doppelklicken Sie das Rechnermodul des zu konfigurierenden KVM- Extenders. 3. Klicken Sie auf die Reiter Remote > Extendersysteme > Persönliches Profil 4. Wählen Sie im Feld die gewünschte Farbe. Display-Farbe 5. Klicken Sie auf , um die erfassten Daten zu speichern. 46 · G&D DP-Vision-CAT... -
Seite 51: Anzeige Der Informationseinblendung
Remote > Extendersysteme > Persönliches Profil 4. Wählen Sie im Feld Display zwischen folgenden Optionen: Informationseinblendung ausschalten temporäre Informationseinblendung für 5 Sekunden (Standard) Temporär Permanent permanente Informationseinblendung 5. Klicken Sie auf , um die erfassten Daten zu speichern. G&D DP-Vision-CAT · 47... -
Seite 52: Transparenz Des On-Screen-Displays Einstellen
OSD-Transparenz hohes Durchscheinen des Bildschirminhalts Hoch mittleres Durchscheinen des Bildschirminhalts (Standard) Mittel leichtes Durchscheinen des Bildschirminhalts Niedrig überdeckende Darstellung des On-Screen-Displays 5. Klicken Sie auf , um die erfassten Daten zu speichern. 48 · G&D DP-Vision-CAT... -
Seite 53: Position Der Informationseinblendung Ändern
Maus, um das On-Screen-Display an Pfeiltasten die gewünschte Position zu verschieben oder betätigen Sie die Tastenkom- bination Strg+D zur Wiederherstellung der Standardposition. 6. Betätigen Sie die -Taste zur Speicherung der durchgeführten Änderun- gen oder die -Taste zum Abbruch der Aktion. G&D DP-Vision-CAT · 49... -
Seite 54: Weiterführende Informationen
Während des Testbetriebs unter Laborbedingungen haben folgende Kabel die besten Ergebnisse erzielt: Kerpen MegaLine ® G12-150 S/F (AWG 22) bis 140 Meter: bis 100 Meter: Dätwyler uninet ® 5502 S-STP (AWG 24) Dätwyler uninet ® 7702 Flex (AWG24) bis 80 Meter: 50 · G&D DP-Vision-CAT... -
Seite 55: Übertragung Der Usb-Daten Der Aru2-Variante
Üblicherweise werden die DDC-Informationen des Monitors unverändert an den Rech- ner weitergeleitet. Stellt der KVM-Extender aber fest, dass sich die Informationen des Monitors nicht vollständig auslesen lassen oder diese unzulässige Einträge enthalten, werden die Informationen (wenn möglich) vervollständigt oder korrigiert. G&D DP-Vision-CAT · 51... -
Seite 56: Pin-Belegung Der Rs232-Buchse/Schnittstelle
Eingang Ausgang TxD (Transmit Data) Ausgang Eingang DTR (Data Terminal Ready) Ausgang Eingang GND (Ground) Ground Ground DSR (Dataset Ready) Eingang Ausgang RTS (Request to Send) Ausgang Eingang CTS (Clear to Send) Eingang Ausgang nicht belegt 52 · G&D DP-Vision-CAT... -
Seite 57: Statusanzeigen
Trans. gelb Verbindung zur Gegenstelle hergestellt. Verbindung zur Gegenstelle nicht hergestellt. Network links gelb Die Verbindung mit dem Netzwerk wurde erfolgreich aufgebaut. Es konnte keine Verbindung hergestellt werden. rechts grün flackert Netzwerkaktivität findet statt. keine Netzwerkaktivität G&D DP-Vision-CAT · 53... -
Seite 58: Bedeutung Der Leds An Der Rückseite
Kommunikation mit Gegenstelle hergestellt. blinkt Verbindung zur Gegenstelle hergestellt. Verbindung zur Gegenstelle nicht hergestellt. grün An Gegenstelle angemeldet. An Gegenstelle nicht angemeldet. USB 2.0 Trans. gelb USB-Host-Verbindung aufgebaut blinkt Energiesparmodus keine USB-Host-Verbindung grün Link aufgebaut kein Link 54 · G&D DP-Vision-CAT... -
Seite 59: Technische Daten
1 × Mini-USB-Buchse (Typ B) Audio Übertragungsart: transparent, bidirektional Auflösung: 24 bit digital, Stereo Abtastrate 96 kHz Bandbreite: 22 kHz RS232 Übertragungsart: transparent Übertragungsrate: max. 115.200 bit/s Übertragene Signale: RxD, TxD, RTS, CTS, DTR, DSR, DCD G&D DP-Vision-CAT · 55... - Seite 60 Übertragungsrate: max. 480 Mbit/s Unterstützte Geräte: High-Power-Devices (bis 500 mA) Reichweite: max. 100 Meter Hauptstrom- Typ: internes Netzteil versorgung Anschluss: Kaltgerätestecker (IEC-320 C14) Spannung: AC100-240V/60-50Hz redundante Strom- Typ: externes Netzteil versorgung Anschluss: miniDIN-4 Power-Buchse Spannung: +12VDC 56 · G&D DP-Vision-CAT...
-
Seite 61: Spezifische Eigenschaften Der Single-Channel-Geräte
Material: Aluminium eloxiert Dimensionen (B × H × T): 210 × 44 × 210 mm (Desktop) 19” × 1 HE × 210 mm (Rackmount) Einsatzumgebung Temperatur: +5 bis +45 °C Luftfeuchte: < 80 %, nicht kondensierend G&D DP-Vision-CAT · 57... -
Seite 62: Spezifische Eigenschaften Der Multi-Channel-Geräte
USB 2.0 1 × RJ45-Buchse Variante -ARU2 Gehäuse Material: Aluminium eloxiert Dimensionen (B × H × T): 270 × 44 × 210 mm Einsatzumgebung Temperatur: +5 bis +45 °C Luftfeuchte: < 80 %, nicht kondensierend 58 · G&D DP-Vision-CAT... - Seite 63 USB 2.0 1 × RJ45-Buchse Variante -ARU2 Gehäuse Materialien: Aluminium eloxiert Dimensionen (B × H × T): 435 × 44 × 210 mm Einsatzumgebung Temperatur: +5 bis +45 °C Luftfeuchte: < 80 %, nicht kondensierend G&D DP-Vision-CAT · 59...
-
Seite 64: Stromaufnahme
12VDC/1.8A MC2-ARU2-CON 100-240V, 60-50Hz, 0.6-0.3A 12VDC/2.9A MC4-AR-CPU 100-240V, 60-50Hz, 0.5-0.3A 12VDC/3.0A MC4-AR-CON 100-240V, 60-50Hz, 0.6-0.3A 12VDC/3.0A MC4-ARU-CPU 100-240V, 60-50Hz, 0.5-0.3A 12VDC/3.1A MC4-ARU-CON 100-240V, 60-50Hz, 0.6-0.3A 12VDC/4.0A MC4-ARU2-CPU 100-240V, 60-50Hz, 0.6-0.3A 12VDC/3.1A MC4-ARU2-CON 100-240V, 60-50Hz, 0.6-0.4A 12VDC/4.1A 60 · G&D DP-Vision-CAT... - Seite 66 © Guntermann & Drunck GmbH 2016. All rights reserved. Version 1.01 – 05/12/2016 Firmware: 1.1.002 Guntermann & Drunck GmbH Dortmunder Str. 4a 57234 Wilnsdorf Germany Phone +49 2739 8901-100 +49 2739 8901-120 http://www.GDsys.de sales@GDsys.de i · G&D DP-Vision-CAT...
- Seite 67 Table of contents Inhaltsverzeichnis Safety instructions .................... 1 The DP-Vision-CAT series ................2 Available variants ....................2 Package contents ....................3 Installation ....................... 4 Preparation ....................... 4 Installing the computer module ................5 Installing user modules ..................9 Start-up ......................12 Starting process ....................
- Seite 68 Meaning of the LEDs on the back panel ............51 Technical data ....................52 General features of the series ................52 Specific features of single-channel devices ............54 Specific features of multi-channel devices ............55 Current consumption ..................57 iii · G&D DP-Vision-CAT...
-
Seite 69: Safety Instructions
Operate this device with the provided G&D power pack or with the power pack listed in the manual. ! Operate the device only in designated areas. The devices are designed for indoor use. Avoid exposure to extreme cold, heat or humidity. G&D DP-Vision-CAT · 1... -
Seite 70: The Dp-Vision-Cat Series
USB 2.0 signals and the use of several monitors: Variant Video channels USB 2.0 DP-Vision-CAT-AR not supported DP-Vision-CAT-ARU full speed high speed DP-Vision-CAT-ARU2 DP-Vision-CAT-MC2-AR not supported full speed DP-Vision-CAT-MC2-ARU DP-Vision-CAT-MC2-ARU2 high speed DP-Vision-CAT-MC4-AR not supported full speed DP-Vision-CAT-MC4-ARU DP-Vision-CAT-MC4-ARU2 high speed 2 · G&D DP-Vision-CAT... -
Seite 71: Package Contents
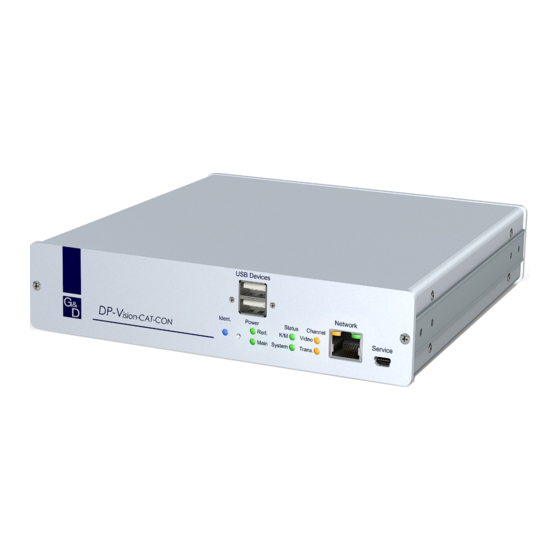
Package contents Package contents Standard package contents of the DP-Vision-CAT series The KVM extender system consist of a computer module ( ) and a DP-Vision-CAT-CPU user module ( DP-Vision-CAT-CON Additionally, the package contents include the following accessories: 2 × power cable (PowerCable-2 Standard) ... -
Seite 72: Installation
NOTE: Please mind the maximum cable length of five meters between the user module and the devices of the user console. 4. Take the supplied cables and have them ready for the installation of the devices. 4 · G&D DP-Vision-CAT... -
Seite 73: Installing The Computer Module
Keyb. CPU: Use the green plug of an optionally available twin PS/2 cable (Twin-PS/ 2-M/M-2) to connect the computer’s PS/2 keyboard interface to this interface. USB CPU: Use the USB-AM/BM-2 cable to connect one of the computer’s USB inter- faces to this interface. G&D DP-Vision-CAT · 5... - Seite 74 USB 2.0 Trans. Plug a category 5e (or better) twisted pair cable, which is available as accessory, into this interface. Connect the other end of the cable to the USB 2.0 Trans. interface of the user module. 6 · G&D DP-Vision-CAT...
- Seite 75 Connect the monitor of the local console to this interface. DisplayPort Out: NOTE: interface is available for every video channel of multi-chan- DisplayPort Out nel variants. The number behind the name of the interface assign each interface to a particular channel. G&D DP-Vision-CAT · 7...
-
Seite 76: Establishing The Power Supply
Line Transmission DisplayPort 1 Keyb. CPU Mouse USB CPU Insert one of the supplied IEC cables here. Main Power: To provide a second, redundant power supply, connect a portable power Red. Power: pack to this interface. 8 · G&D DP-Vision-CAT... -
Seite 77: Installing User Modules
If the generic HID mode is active, the OSD cannot be operated by a keyboard connected to the socket. Generic Mouse: Connect the PS/2 mouse of the console. Connect the PS/2 keyboard of the console. Keyb.: G&D DP-Vision-CAT · 9... - Seite 78 Micro In Speaker Keyb./Mouse Keyb. Red. Power Transmission DP Out If required, connect a microphone to this interface. Micro In: Connect the speakers or another audio output device. Speaker: RS232: Connect the serial end device to this interface. 10 · G&D DP-Vision-CAT...
- Seite 79 DP Out Micro In Speaker Keyb./Mouse Keyb. Red. Power Insert one of the supplied IEC cables here. Main Power: Red. Power: To provide a second, redundant power supply, connect a portable power pack to this interface. G&D DP-Vision-CAT · 11...
-
Seite 80: Start-Up
) to open the local OSD of the user local hotkey module and the remote OSD (default: ) to open the remote remote hotkey Ctrl OSD of the computer module are shown. ADVICE: Press to stop the process. Pressing continues the process. Pause Space 12 · G&D DP-Vision-CAT... -
Seite 81: Initial Configuration Of The Network Settings
A static IP address is assigned. Static: DHCP: IP address is obtained from a DHCP server. IP address: Enter the IP address of the interface. The operational mode DHCP does not allow making entries. G&D DP-Vision-CAT · 13... -
Seite 82: Configuring Global Network Settings
Enter the domain the device is to belong to. Gateway: Enter the gateway IP address. DNS Server 1: Enter the IP address of the DNS server. DNS Server 2: Optionally, enter the IP address of another DNS server. 5. Press to save your settings. 14 · G&D DP-Vision-CAT... -
Seite 83: Operation
Caps Lock, Num as well as the Scroll Lock LEDs are blinking alter- nately at the keyboard of the locked console. The blinking Scroll Lock LED at the active console indicates the exclusive opera- tion of the KVM extender. G&D DP-Vision-CAT · 15... -
Seite 84: Switching Power Outlets
(not connected) is shown instead. 3. Press Enter to carry out one of the following options: turn off turn power outlet(s) off turn power outlet(s) on turn on 16 · G&D DP-Vision-CAT... -
Seite 85: Using The Reset Button
You can also reset the default settings using the OSD or the Config Panel web application (see page 42). When using the web application to reset the default settings, it is possible to keep the configuration of the network interfaces. G&D DP-Vision-CAT · 17... -
Seite 86: Temporarily Deactivating The Netfilter Rules
3. Use the Config Panel web application to edit the netfilter rules stored in the device and, afterwards, save these rules. IMPORTANT: The former settings are reactivated if no new netfilter rules are created within 15 minutes. 18 · G&D DP-Vision-CAT... -
Seite 87: Configuration
Changing the scancode set of PS/2 keyboards scancode set 2 Keyboard required to start the user module Adjusting the waiting period of the screensaver disabled Selecting a keyboard layout for inputs via OSD German Resetting the default settings G&D DP-Vision-CAT · 19... -
Seite 88: Operating The On-Screen Display At The Console
After pressing the hotkeys, the OSD is displayed on the console monitor: Configuration Console setup Local console setup Target setup System setup Network setup Information Target power turn off The on-screen display consists of three parts: 20 · G&D DP-Vision-CAT... -
Seite 89: Operating The On-Screen Display
The displayed menu closes after the settings are saved and the superior menu is displayed again. Press this key to switch between the different options of a menu item. Ctrl+F8: Configuration settings with many options support this hotkey to open a clearly-arranged list containing all options. G&D DP-Vision-CAT · 21... -
Seite 90: Basic Operation Of The Web Application
Replace the certificate that is included in the defaults of the device with an individual certificate, which is related to the device. Information on how to create such a certificate is given in the separate manual of the web application. 22 · G&D DP-Vision-CAT... -
Seite 91: User Authentication Against The Web Application
Use the access data listed below to log in to the web application. Now, change the password as described in the separate manual of the web application. Enter the default access data to log on to the administrator account: Username: Admin Password: 4658 G&D DP-Vision-CAT · 23... -
Seite 92: Configuration Settings
4. In the row of the Configuration paragraph select at least one of Hotkey modifier the mentioned modifiers (Ctrl, Alt, Alt Gr, Win or Shift) by clicking the par- ticular box(es). 5. Click to save your changes. 24 · G&D DP-Vision-CAT... -
Seite 93: Changing The Osd Key
Hotkey together with the hotkey modifier(s) to open the on-screen display. Select the OSD key from the keys Pause, Insert, Delete, Home, Page Up, Page Down, Num, End or Space. 5. Click to save your changes. G&D DP-Vision-CAT · 25... -
Seite 94: Opening The On-Screen Display Via Double Keypress
OSD is opened by pressing the Windows key twice Shift OSD is opened by pressing the Shift key twice PrtSc OSD is opened by pressing the Print key twice 5. Click to save your changes. 26 · G&D DP-Vision-CAT... -
Seite 95: Changing The Exclusive Key
3. Click the tab. General 4. Under select one of the following keys: Exclusive mode actionkey Backspace, PrtSc, Scroll, Num, Pause, Insert, Delete, Home, End, Page Up, Page Down and Space. 5. Click to save your changes. G&D DP-Vision-CAT · 27... -
Seite 96: Changing The Time Span Of The Input Lock
If the function right for exclusive console access is activated in the web application, you are able to operate the KVM extender exclusively by pressing the hotkey Hot- key+Print (default: Ctrl+Print 28 · G&D DP-Vision-CAT... - Seite 97 Enabled Disabled right for exclusive access is denied 5. Click to save your changes. Related topics: Operating the KVM extender exclusively on page 15 Changing the video mode of consoles on page 30 G&D DP-Vision-CAT · 29...
-
Seite 98: Changing The Video Mode Of Consoles
5. Click to save your changes. Related topics: Changing the time span of the input lock on page 28 Right for exclusive access to the console on page 28 30 · G&D DP-Vision-CAT... -
Seite 99: Selecting The Edid Mode Of The Kvm Extender
automatic treatment of EDID data default) [Auto] sue of a G&D profile for a particular resolution GUD DVI … Name EDID profile that has been read out by the user 5. Click to save your changes. G&D DP-Vision-CAT · 31... -
Seite 100: Freeze Mode
Freeze visualization frame shows a coloured frame when disconnected shows Frozen and the time passed since disconnection frame+OSD shows a coloured frame ( frame ) and Frozen ( 5. Press to save your settings. 32 · G&D DP-Vision-CAT... -
Seite 101: Selecting The Usb-Hid Mode
HID device in generic HID mode can not be guaranteed. IMPORTANT: When connecting a USB hub or a USB composite device, which contains multiple USB devices, only the first of the connected HID devices can be used in mode. generic HID G&D DP-Vision-CAT · 33... - Seite 102 INPUT DEVICE SETTING any USB device Generic HID IMPORTANT: generic HID mode supports many available HID device. How- ever, being able to operate particular HID device in generic HID mode can not be guaranteed. 34 · G&D DP-Vision-CAT...
- Seite 103 2. Double-click the computer module of the KVM extender to be configured. 3. Click the tab. General 4. Under , select the desired option (see above). USB HID mode 5. Click to save your changes. G&D DP-Vision-CAT · 35...
- Seite 104 »SOLARIS SHORTCUT KEY« OF SUN KEYBOARDS Ctrl+Alt+F2 Again Ctrl+Alt+F3 Props Ctrl+Alt+F4 Undo Ctrl+Alt+F5 Front Ctrl+Alt+F6 Copy Ctrl+Alt+F7 Open Ctrl+Alt+F8 Paste Ctrl+Alt+F9 Find Ctrl+Alt+F10 Ctrl+Alt+F11 Help Ctrl+Alt+F12 Mute Ctrl+Alt+NUM+ Loud Ctrl+Alt+NUM- Quiet Ctrl+Alt+NUM* Compose Ctrl+Alt+Pause Shutdown Pause+A Stop 36 · G&D DP-Vision-CAT...
-
Seite 105: Support Of Special Keyboards
In the default configuration, the KVM extender interprets any entry made at the PS/2 keyboard with the scancode set 2. Use the scancode set 3 if you cannot enter the pipe “|” or the arrow keys do not work as expected. G&D DP-Vision-CAT · 37... - Seite 106 Set 3 5. Click to save your changes. 6. Turn the KVM extender off and on again. After you turn the KVM extender on again, the keyboard is initialised and the selected scancode set is applied. 38 · G&D DP-Vision-CAT...
-
Seite 107: Keyboard Required To Start The User Module
Click on the tab Remote > General 3. Under Keyboard required select one of the following options: continue starting process without a keyboard (default). interrupt starting process without a keyboard. 4. Click to save your changes. G&D DP-Vision-CAT · 39... -
Seite 108: Adjusting The Waiting Period Of The Screensaver
Remote > General the remote console (at the module). 4. Under enter a waiting period (1 to 999 minutes) for the Screensaver (minutes) screensaver. Entering the value 0 disables the screensaver. 5. Click to save your changes. 40 · G&D DP-Vision-CAT... -
Seite 109: Selecting A Keyboard Layout For Inputs Via Osd
Remote > General 4. Under Keyboard layout select one of the following options: German English (US) English (UK) French Spanish lat. American Portuguese 5. Click to save your changes. G&D DP-Vision-CAT · 41... -
Seite 110: Resetting The Default Settings
4. Click on Default settings to reset the default settings. NOTE: You can also reset the default settings by pressing the Reset keys.. Further information about this topic is given on page 17. 42 · G&D DP-Vision-CAT... -
Seite 111: Changing The Colour Of The Information Display
2. Double-click the computer module of the KVM extender you want to con- figure. 3. Click on the tabs Remote > Extender systems > Personal profile 4. Under you can select the desired colour. Display colour 5. Click to save your changes. G&D DP-Vision-CAT · 43... -
Seite 112: Information Display
4. Under select one of the following options: Display information display is turned off information display is shown temporarily for 5 seconds (default) Temp permanent information display Perm 5. Click to save your changes. 44 · G&D DP-Vision-CAT... -
Seite 113: Adjusting The Transparency Of The On-Screen Display
OSD transparency high transparency of the screen content high average average transparency of the screen content (default) low transparency of the screen content screen content is covered 5. Click to save your changes. G&D DP-Vision-CAT · 45... -
Seite 114: Changing The Position Of The Information Dispaly
5. Use the arrow keys or the mouse to move the on-screen display to the desired position or press Ctrl+D to reset the default position. 6. Press to save your settings or to cancel the process. 46 · G&D DP-Vision-CAT... -
Seite 115: Further Information
The following cables achieved the best results during test operation: up to 140 metres: §Kerpen MegaLine G12-150 S/F AWG22 §G&D K-C5-HR up to 100 metres: up to 80 metres: §Dätwyler Uninet flex 4P, AWG26, S-STP G&D DP-Vision-CAT · 47... -
Seite 116: Transmission Of Usb Data Of Aru2 Variants
The monitor’s DDC information is usually transmitted one-to-one to the computer. Should the KVM extender determine that the display cannot be read without errors or that the entries are invalid, the information is completed or corrected (if possible). 48 · G&D DP-Vision-CAT... -
Seite 117: Pin Assignment Of The Rs232 Socket/Interface
Input Output TxD (Transmit Data) Output Input DTR (Data Terminal Ready) Output Input GND (Ground) Ground Ground DSR (Dataset Ready) Input Output RTS (Request to Send) Output Input CTS (Clear to Send) Input Output not occupied G&D DP-Vision-CAT · 49... -
Seite 118: Status Leds
The connection to the remote station could not be established. Network left yellow The connection to the network has been successfully established. A connection could not be established. right green flickering Network activity. No network activity 50 · G&D DP-Vision-CAT... -
Seite 119: Meaning Of The Leds On The Back Panel
Not logged on at remote station. USB 2.0 Trans. yellow A connection to the USB host has been estab- lished blinking Power save mode No connection to USB host green Link has been established No link G&D DP-Vision-CAT · 51... -
Seite 120: Technical Data
1 × Mini-USB socket (type B) Audio Transmission type: transparent, bidirectional Resolution: 24 bit digital, Stereo Sampling rate: 96 kHz Bandwidth: 22 kHz RS232 Transmission type: transparent Transmission rate: max. 115.200 bit/s Supported signals: RxD, TxD, RTS, CTS, DTR, DSR, DCD 52 · G&D DP-Vision-CAT... - Seite 121 (up to 500 mA) Range: max. 100 meters Main power supply Type: internal power pack Connector: IEC plug (IEC-320 C14) Voltage: AC100-240V/60-50Hz Redundant power suppply Type: external power pack Connector: miniDIN-4 Power socket Voltage: +12VDC G&D DP-Vision-CAT · 53...
-
Seite 122: Specific Features Of Single-Channel Devices
Dimensions (W × H × D): 210 × 44 × 210 mm (Desktop) 19” × 1 U × 210 mm (Rackmount) Operating environment Temperature: +5 to +45 °C Air humidity: < 80 %, non-condensing 54 · G&D DP-Vision-CAT... -
Seite 123: Specific Features Of Multi-Channel Devices
1 × RJ 45 socket -ARU2 variant Casing Material: anodised aluminium Dimensions (W × H × D): 270 × 44 × 210 mm Operating environment Temperature: +5 to +45 °C Air humidity: < 80 %, non-condensing G&D DP-Vision-CAT · 55... - Seite 124 1 × RJ 45 socket -ARU2 variant Casing Materialien: anodised aluminium Dimensions (W × H × D): 435 × 44 × 210 mm Operating environment Temperature: +5 to +45 °C Air humidity: < 80 %, non-condensing 56 · G&D DP-Vision-CAT...
-
Seite 125: Current Consumption
12VDC/1.8A MC2-ARU2-CON 100-240V, 60-50Hz, 0.6-0.3A 12VDC/2.9A MC4-AR-CPU 100-240V, 60-50Hz, 0.5-0.3A 12VDC/3.0A MC4-AR-CON 100-240V, 60-50Hz, 0.6-0.3A 12VDC/3.0A MC4-ARU-CPU 100-240V, 60-50Hz, 0.5-0.3A 12VDC/3.1A MC4-ARU-CON 100-240V, 60-50Hz, 0.6-0.3A 12VDC/4.0A MC4-ARU2-CPU 100-240V, 60-50Hz, 0.6-0.3A 12VDC/3.1A MC4-ARU2-CON 100-240V, 60-50Hz, 0.6-0.4A 12VDC/4.1A G&D DP-Vision-CAT · 57... - Seite 128 Das Handbuch wird fortlaufend aktualisiert und im Internet veröffentlicht. The manual is constantly updated and available on our website. http://gdsys.de/A9100238 Guntermann & Drunck GmbH Dortmunder Str. 4a 57234 Wilnsdorf Germany http://www.GDsys.de sales@GDsys.de...