
Verwandte Anleitungen für MAVIG Portegra2


Inhaltszusammenfassung für MAVIG Portegra2
- Seite 1 Installation Manual – Portegra2 Languages: English 2 - 52 Deutsch 53 - 107 Rev.: POR03O0...
-
Seite 2: Contact Information
The master document is in English. In case of translation, precedence remains with the English version. Copyright and Trademarks All rights reserved. These instructions/manuals are protected by copyright law. MAVIG and Portegra2 are registered trademarks of the company MAVIG GmbH. All other trademarks mentioned in the manuals ... - Seite 3 Installation of the MAVIG mounting plate to Unistrut rails 14-15 ® 5.2 Installation of the MAVIG mounting plate to a ceiling 14-15 5.3 Installation of the ceiling column to the mounting plate 16-17 6.1 ...
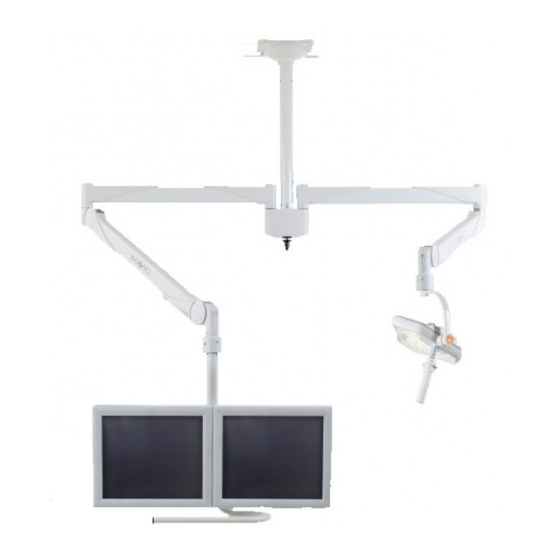
- Seite 4 This manual is intended for the installation of the different components of the Portegra2 System produced by MAVIG. The instructions are for installing the Portegra2 ceiling track, mounting plate, wall mount, ceiling Indicates that the information is a warning. Warnings advise you of circumstances that ...
- Seite 5 Delivery With this symbol, MAVIG declares that the products comply with the relevant regulati- ons set forth in the applicable European Directives. This component has been recognised by Underwriters Laboratories Inc. Representative samples of this product have been reviewed by UL and comply. with the applicable ...
- Seite 6 a potentially dangerous and unstable condition of the system. This product must be serviced with MAVIG approved, original replacement parts. Failure to follow this recommendation will void the manufacturer‘s warranty and will release MAVIG from all liability and warranty claims.
- Seite 7 result in damage or injury. the system will be forcefully pulled in an unpredictable manner. The Portegra2 System can be installed to a MAVIG ceiling mounting plate, MAVIG track system, Unistrut ® rails, or directly to ceiling. Prior to installation, a structural engineer must certify that the rough ceiling is ...
- Seite 8 Mounting the track system to the ceiling center/middle of cross strut Fig. 2 grounding connector Fig. 3...
- Seite 9 Mounting the track system to the ceiling Selection of appropriate installation hardware and its torque value is the sole responsibility of the NOTE: It is strongly recommended that at least two people perform the installation. The gauge of the ceiling track is preset at the factory. Do not loosen all cross struts simultaneously to avoid altering the gauge (Fig.
- Seite 10 Mounting the track system to the ceiling Fig. 4 „Layout Carriage“ Fig. 5...
- Seite 11 Mounting the track system to the ceiling When installing and adjusting the Portegra2 and/or associated components, ensure to cut off the power supply to the entire system. Danger of Death! NOTE: Connect the electrical cable of the cable spooler properly to the carriage/column unit, before ...
- Seite 12 Mounting the track system to the ceiling „Layout Cable Electric Spooler“ Power Supply Fig. 6 360° column Twin column Fig. 7 Fig. 8...
- Seite 13 Mounting the track system to the ceiling 4.3.1 Using light pressure, loosen the 6 screws (1/Fig. 6) of the cable spooler cover with a half turn. 4.3.2 Remove the cover (3/Fig. 6). 4.3.3 Guide the power cable from the outside through the provided pull relief cap (2/Fig. 6). 4.3.4 ...
- Seite 14 Installing a Portegra2 column to a MAVIG mounting plate Fig. 9 TS1520 TS1521 TS1521-SI Fig. 10a Fig. 10b (Siemens only) Fig. 10c...
- Seite 15 Installing a Portegra2 column to a MAVIG mounting plate When installing and adjusting the Portegra2 and/or associated components, ensure to cut off the power supply to the entire system. Danger of Death! ® 5.1.1 For the correct distance between the Unistrut rails, please see Fig.
- Seite 16 Installing a Portegra2 column to a MAVIG mounting plate (each corner) Fig. 11 Fig. 12...
- Seite 17 (6/Fig. 11) provided, apply Loctite ® and repair of electrical components. When installing and adjusting the Portegra2 and/or associated components, ensure to cut off the power supply to the entire system. Danger of Death! 5.3.7 Ground the ceiling column with the screw marked with a grounding symbol (7/Fig. 11). ...
- Seite 18 Installing a Portegra2 column to a ceiling A removeable copy of this template can be found on page 105 or ordered as PDF at info@mavig.com. Ø 10 / 0.39” Ø 10 / 0.39” (Ø) 150 / 5.91” Ø 8 / 0.32”...
- Seite 19 Installing a Portegra2 column to a ceiling NOTE: If installing the optional MAVIG isolation kit E-TS20B05, please follow the instructions included with the kit. Selection of appropriate installation hardware and its torque value is sole responsibility of the structural ...
- Seite 20 Installing a Portegra2 column to a ceiling (each corner) Fig. 15 Fig. 16...
- Seite 21 Installing a Portegra2 column to a ceiling 6.2.2 Carefully, slide the canopy down the ceiling column (use caution to prevent scratches in the NOTE: with the set screws until the installation is complete. ...
- Seite 22 Installation/removal of plastic covers (mounting posts) 360° column Twin column Fig. 17 Fig. 18...
- Seite 23 Installation/removal of plastic covers (mounting posts) To avoid damage to the plastic cover during shipping, the two halves comprising the cover (1/Fig. 17/18) must be attached on site. To ensure proper installation of the cover, please complete following steps: 7.1.1 ...
- Seite 24 Installation of the wall mount bracket Ø 12 / 0.47” Fig. 19b 25.4 / 1” Ø 12 / 0.47” Fig. 19c Fig. 19a...
- Seite 25 Electrical connections of the wall mount bracket must be performed by licensed or When installing and adjusting the Portegra2 and/or associated components, ensure to cut off the power supply to the entire system. Danger of Death! 8.2.2 ...
- Seite 26 Installation of the extension/spring arm combination 360° column Snap ring pliers Twin column (included) Fig. 20...
- Seite 27 NOTE: It is strongly recommended that at least two people perform the installation. When installing and adjusting the Portegra2 and/or associated components, ensure to cut off the power supply to the entire system. Danger of Death! If an electrical extension/spring arm combination is required, it must be mounted to the ...
- Seite 28 Installation of the extension/spring arm combination Fig. 21...
- Seite 29 Remove the arm cover (7/Fig. 21) from the ceiling column shipping carton. Use this instead of the arm cover supplied with the Portegra2 extension/suspension. 9.2.11 Place the speed nut (10/Fig. 21) on the screw hole tab of the the arm cover. Attach the two ...
- Seite 30 Installation of the extension/spring arm combination Fig. 22...
- Seite 31 Remove the arm cover (9/Fig. 22) from the ceiling column shipping carton. Use this cover instead of the arm cover supplied with the Portegra2 extension/suspension. 9.3.11 Place the speed nut (13/Fig. 22) on the screw hole tab of the the arm cover. Attach the two halves ...
- Seite 32 Installation and removal of adaptable elements Portegra2 Spring Arm End Positions Fig. 23 Fig. 24...
- Seite 33 Unauthorized loosing of screws can weaken the system and result in damage or injury. NOTE: The Portegra2 systems are built and validated for MAVIG original devices. Only these MAVIG devices are optimized and equipped with all safety features. MAVIG cannot accept any warranty ...
- Seite 34 Installation and removal of adaptable elements Non-electrical Adaptable Elements Fig. 25...
- Seite 35 Installation and removal of adaptable elements 10.1.1 Remove the screws (2,3/Fig. 25) from the safety collar (1/Fig. 25). Store them in a safe place. NOTE: It is best to use a screwdriver with a magnetic tip to loosen the screws. 10.1.2 ...
- Seite 36 Installation and removal of adaptable elements Portegra2 Spring Arm End Positions Fig. 26 Fig. 27...
- Seite 37 Installation and removal of adaptable elements NOTE: It is strongly recommended that at least two people perform the installation. Cut off all electricity prior to performing any works on the system - hazardous situation! NOTE 01: The M130 has the transformer built into the lamp housing, no additional ...
- Seite 38 Installation and removal of adaptable elements Electrical Adaptable Elements Fig. 28...
- Seite 39 Installation and removal of adaptable elements 10.2.1 Remove the screws (2,3/Fig. 28) from the safety collar (1/Fig. 28). Store them in a safe place. NOTE: It is best to use a screwdriver with a magnetic tip to loosen the screws. 10.2.2 ...
- Seite 40 Installation and removal of adaptable elements Portegra2 Spring Arm End Positions Fig. 29 Fig. 30...
- Seite 41 after movement. 10.4.1 The spring arm section of the Portegra2 suspension arm can be pulled downwards 50° and moved upwards 45° (Fig. 29). The upper movement of the spring arm can be limited to any point from ...
- Seite 42 Installation and removal of adaptable elements Portegra2 Spring Arm End Positions Fig. 31 Fig. 32...
- Seite 43 Installation and removal of adaptable elements NOTE: It is strongly recommended that at least two people perform the installation. Cut off all electricity prior to performing any works on the system - hazardous situation! Set the upper stop of the spring arm to the horizontal position (Position B/Fig. 31) during the installation process.
-
Seite 44: Technical Data
Technical Data length/weight: 2.5 m /17.0 kg 4.0 m /30.0 kg weight 2.0 kg 950 (750) 750 (950) weight 10.0 kg (10.5 kg) max. load 18.0 kg (15.0 kg) weight up to 17.5 kg weight 10.5 kg (10.0 kg) max. - Seite 45 13.0 kg / 28.66 lbs 1000 mm / 39.37 in 14.0 kg / 30.86 lbs Ceiling/ Standard Portegra2 mounting plate 22.0 kg / 48.50 lbs Wall Mounting Wall mount 2.0 kg / 4.41 lbs ...
- Seite 46 Technical Data...
- Seite 47 is declared in the devices instructions for use. Placing a third party device or adaptor onto the Portegra2 system is not allowed without the written consent of MAVIG. Any party putting a third party device into operation with a Portegra2 system or ...
- Seite 48 CT Room Planning Considerations/Guide Structural Ceiling False Ceiling B Distance point approx. 208 cm / 82 in, unless your gantry is higher. to false ceiling at least 22.8“ point 220.0 cm - 270.0 cm 460 mm / stationary ...
- Seite 49 III) horizontal distance The optimal distance from the ceiling is for the low point of the Portegra2 (point B, Fig. 31) to be a few cm / inches above the top of the gantry, so that when the gantry is pivoted it does not interfere with ...
-
Seite 50: Technical Drawings
Technical Drawings Ø 185 Portegra2 - Stationary mounted Twin column Ø 60 750/950 360° 360° 235° At least 2050 mm to the ground Portegra2 - Track mounted Twin column 2500/4000 Ø 185 Ø 60 750/950 360° 360° 235° At least 2050 mm to the ground... - Seite 51 Technical Drawings Ø 185 Portegra2 - Stationary mounted 360° column Ø 60 750/950 360° 360° 235° 360° At least 2050 mm to the ground 2500/4000 Portegra2 - Track mounted 360° column Ø 185 Ø 60 750/950 360° 360° 235°...
- Seite 53 Installationsanleitung - Portegra2 Sprachen: English 2 - 52 Deutsch 53 - 107 Rev.: POR03O0...
-
Seite 54: Kontaktinformationen
Sehr geehrter Kunde, vielen Dank, dass Sie sich für ein MAVIG Portegra2-Geräteträgersystem oder eine Komponente dieses Systems entschieden haben. Bitte lesen Sie dieses Dokument sorgfältig durch, und befolgen Sie alle Anweisungen, Warnungen und Hinweise. Bitte wenden Sie sich bei Fragen oder Kommentaren zu ... - Seite 55 64-65 5.1 Installation der MAVIG-Montageplatte an Unistrut -Schienen 66-67 ® 5.2 Installation der MAVIG-Montageplatte an einer Decke 66-67 5.3 Installation des Deckenstativs an die Montageplatte 68-69 6.1 Installation von Sicherungskette mit Sicherungsanker ...
- Seite 56 Dieses Handbuch beschreibt die Installation der verschiedenen Komponenten des von MAVIG produzierten Versionen. Weist darauf hin, dass die Information eine Warnung ist. Warnungen weisen auf Umstände und verstehen. Weist darauf hin, dass die Information eine Vorsichtsmaßnahme ist. Vorsichtsmaßnahmen ...
-
Seite 57: Lieferung
Lieferung Mit diesem Symbol erklärt MAVIG, dass die Produkte die relevanten Vorschriften in den Diese Komponente wurde von Underwriters Laboratories Inc. anerkannt. Repräsentative Betriebsbedingungen in den Betriebsanleitungen. 270 (im Lieferumfang der Portegra2-Trägerarme enthalten) ® 243 oder gleichwertig (nicht im Lieferumfang enthalten) - Seite 58 Wichtige Bemerkungen zu Sicherheit/Vorsichtsmaßnahmen Installieren des Systems: MAVIG legt dringend nahe, dass ein Bauingenieur/Statiker vor der Installation der Deckenstativ und Deckenschiene unterliegen der Verantwortung des Bauingenieurs/Statikers. änderungen die schriftliche Autorisierung durch MAVIG. Dieses Produkt muss mit von MAVIG zugelassenen Originalersatzteilen gewartet werden. Die ...
- Seite 59 erwähnt werden, da diese mit einer passenden Schraubensicherung gesichert und Portegra2-Systeme bestehen aus Eisenwerkstoffen. In einem starken magnetischen Feld wird das System auf unvorhersehbare Weise kräftig gezogen. Das Portegra2-System kann an einer MAVIG-Deckenmontageplatte, einem MAVIG-Schienensystem, ...
- Seite 60 Montage des Schienensystems an der Decke Zentrum/Mitte der Kreuzstrebe Abb. 2 Masseanbindung Abb. 3...
-
Seite 61: Falls Ein Unistrut
Montage des Schienensystems an der Decke Verantwortung des Bauingenieurs. Dieser bestimmt auch das Layout des Systems. HINWEIS: streben gleichzeitig, um zu verhindern, dass sich diese Weite ändert (Abb. 2). damit diese mit den in der Vorausplanung ermittelten Montagepunkten ausgerichtet werden. ... - Seite 62 Montage des Schienensystems an der Decke Abb. 4 „Schaltplan Laufwagen“ Abb. 5...
- Seite 63 Montage des Schienensystems an der Decke Komponenten ist sicherzustellen, dass die Stromversorgung zum gesamten System unterbrochen wurde. Lebensgefahr! HINWEIS: Verbinden Sie das elektrische Kabel des Kabelaufrollers ordnungsgemäß mit dem Laufwagen/ Stativ, bevor Sie die Deckenstativ mit dem Laufwagen in das Schienensystem hineinschieben. 4.2.1 ...
- Seite 64 Montage des Schienensystems an der Decke „Schaltplan Elektrische Kabelaufroller“ Strom- versorgung Abb. 6 360°-Stativ Twin-Stativ Abb. 7 Abb. 8...
- Seite 65 Montage des Schienensystems an der Decke halben Umdrehung. 4.3.2 Entfernen Sie die Abdeckung (3/Abb. 6). 4.3.4 Schließen Sie die elektrischen Verbindungen gemäß „Schaltplan Kabelaufroller“ an (Abb. 6). Seitenabdeckung (mit/ohne Kabelaufroller) an der Deckenschiene befestigt ist. 4.4.2 ...
- Seite 66 Installation Portegra2-Stativ an eine MAVIG-Montageplatte Abb. 9 TS1520 TS1521 TS1521-SI Fig. 10a Fig. 10b (nur Siemens) Fig. 10c...
-
Seite 67: Den Korrekten Abstand Zwischen Den Unistrut
Installation Portegra2-Stativ an eine MAVIG-Montageplatte Komponenten ist sicherzustellen, dass die Stromversorgung zum gesamten System unterbrochen wurde. Lebensgefahr! ® 5.1.1 Den korrekten Abstand zwischen den Unistrut -Schienen entnehmen Sie bitte den Abbildungen ® Abb. 10a, 10b und Abb. 10c. - Seite 68 Installation Portegra2-Stativ an eine MAVIG-Montageplatte (jede Ecke) Abb. 11 Elektrische Strom- versorgung Klemme Elektrische Strom- versorgung Stativ Abb. 12...
- Seite 69 Installation Portegra2-Stativ an eine MAVIG-Montageplatte HINWEIS: HINWEIS: Wenn Sie den optionalen MAVIG-Isolierungskit E-TS20B05 installieren, befolgen Sie bitte die dem Kit beigelegten Anleitungen. 5.3.2 Schieben Sie dden Baldachin vorsichtig entlang des Deckenstativs nach unten, bis es auf den ...
- Seite 70 Installation des Portegra2-Stativs an einer Decke Die exakte Position aller fünf Bohrlöcher muss eingehalten werden, da die Installation ansonsten nicht abgeschlossen werden kann. info@mavig.com bestellt werden. Ø 10/0,39” Ø 10/0,39” (Ø) 150/5,91” Ø 8/0,32” Position des Sicherungsankers 3,5/0,14”...
- Seite 71 Installation des Portegra2-Stativs an einer Decke HINWEIS: Wenn Sie den optionalen MAVIG-Isolierungskit E-TS20B05 installieren, befolgen Sie bitte die dem Kit beigelegten Anleitungen. Verantwortung des Bauingenieurs/Statikers. Dieser bestimmt auch das Layout des Systems. ...
- Seite 72 Installation des Portegra2-Stativs an einer Decke (jede Ecke) Abb. 15 Elektrische Strom- versorgung Klemme Elektrische Strom- versorgung Stativ Abb. 16...
- Seite 73 Installation des Portegra2-Stativs an einer Decke 6.2.2 Schieben Sie den Baldachin vorsichtig entlang des Deckenstativs nach unten, bis es auf den HINWEIS: abgeschlossener Installation mit den Stellschrauben am Stativ befestigt werden. 6.2.3 Befestigen Sie das Deckenstativ an der Decke unter Verwendung des vom Bauingenieur ...
- Seite 74 Installieren/Entfernen der Kunststoffabdeckungen (Arm-Aufnahme) 360°-Stativ Twin-Stativ Abb. 17 Abb. 18...
-
Seite 75: Installieren/Entfernen Der Kunststoffabdeckungen (Arm-Aufnahme)
Installieren/Entfernen der Kunststoffabdeckungen (Arm-Aufnahme) Schritte aus, um die ordnungsgemäße Installation der Abdeckung zu gewährleisten: (2/Abb. 17/18) und die Blechmutter(n) (3/Abb. 17/18) und bewahren Sie sie zur späteren Wiederverwendung an einem sicheren Ort auf. 7.1.2 Stecken Sie die Blechmutter(n) (3/Abb. - Seite 76 Installation der Wandhalterung Ø 12/0,47” Abb. 19b 25,4/1” Ø 12/0,47” Abb. 19c Abb. 19a...
-
Seite 77: Installation Der Wandhalterung
Installation der Wandhalterung alleinigen Verantwortung des Bauingenieurs/Statikers. Er kann auch weitere Installationsschritte auswählen und vorgeben. sind in der Bohrvorlage angegeben (Abb. 19a). angebracht wird. an der Wand. 8.1.7 Bringen Sie die Kunststoffabdeckungen an (1/Abb. - Seite 78 Installation der Ausleger-/Federarm-Kombination 360°-Stativ Zange für Sicherungsring Twin-Stativ (im Lieferumfang) Abb. 20...
- Seite 79 Installation der Ausleger-/Federarm-Kombination 9.0 HINWEIS: Komponenten ist sicherzustellen, dass die Stromversorgung zum gesamten System unterbrochen wurde. Lebensgefahr! Aufnahmen wird elektrisch betrieben. Diese lässt sich anhand der Steckerbuchse identi- HINWEIS: der Oberseite der Kunststoffkappe der Arm-Aufnahme. Sie werden später während der ...
- Seite 80 Installation der Ausleger-/Federarm-Kombination Abb. 21...
- Seite 81 270 (1/Abb. 21) und befestigen Sie den Sicherungs- ® Sie diese anstelle der mit dem Portegra2-Ausleger-/Trägerarm gelieferten Armabdeckung. 9.2.11 Stecken Sie die Blechmutter (10/Abb. 21) auf das Bohrloch der Armabdeckung. Bringen Sie die ...
- Seite 82 Installation der Ausleger-/Federarm-Kombination Abb. 22...
- Seite 83 an der Gewindestange fest (11/Abb. 22). Sie diese anstelle der mit dem Portegra2-Ausleger-/Trägerarm gelieferten Armabdeckung. 9.3.11 Stecken Sie die Blechmutter (13/Abb. 22) auf das Bohrloch der Armabdeckung. Bringen Sie die beiden Hälften der Abdeckung (9/Abb. 22) am Arm an und stellen Sie dabei sicher, dass ...
-
Seite 84: Installation Und Entfernen Der Passenden Endgeräte
Installation und Entfernen der passenden Endgeräte Endpositionen des Portegra2-Federarms Abb. 23 Abb. 24... - Seite 85 MAVIG-Geräte sind optimiert und mit allen Sicherheitsfunktionen ausgestattet. MAVIG Portegra2-Systeme angeschlossen sind, es sei denn, diese Geräte wurden von MAVIG validiert und zugelassen. Das nachstehend beschriebene Installationsverfahren ist das Standard-...
- Seite 86 Installation und Entfernen der passenden Endgeräte Nicht elektrische Endgeräte Abb. 25...
-
Seite 87: Entfernen Sie Den Hufeisenschuh (4/Abb. 25) Aus Seiner Halterung (Abb. 25), Und Entfernen
Setzen Sie den beiliegenden Stift (7/Abb. 25) gerade in die Bohrung ein. Bei korrekter Installation in Abb. 25 gezeigt. HINWEIS: Verwenden Sie stets neue MAVIG-Sicherungsfedern. Eine Ersatzfeder ist im Versandkarton. 10.1.7 Befestigen Sie die Sicherungsfeder (8/Abb. 25) unter dem Hufeisenschuh (4/Abb. 25). ... - Seite 88 Installation und Entfernen der passenden Endgeräte Endpositionen des Portegra2-Federarms Abb. 26 Abb. 27...
- Seite 89 Installation und Entfernen der passenden Endgeräte HINWEIS: – Gefährdungssituation! HINWEIS 01 formator geliefert. Es ist daher kein zusätzlicher Trafo erforderlich! HINWEIS 02: Alle anderen Halogenleuchten haben externe Trafos, die installiert werden ...
- Seite 90 Installation und Entfernen der passenden Endgeräte Elektrische Endgeräte Abb. 28...
-
Seite 91: Entfernen Sie Den Hufeisenschuh (4/Abb. 28) Aus Seiner Halterung (Abb. 28), Und Entfernen
Halterung ein. in Abb. 28 gezeigt. HINWEIS: Verwenden Sie stets neue MAVIG-Sicherungsfedern. Eine Ersatzfeder ist im Versandkarton. 10.2.5 Befestigen Sie die Sicherungsfeder (8/Abb. 28) unter dem Hufeisenschuh (4/Abb. 28). ist sicherzustellen, dass die Sicherungsfeder fest verankert ist. - Seite 92 Installation und Entfernen der passenden Endgeräte Endpositionen des Portegra2-Federarms Abb. 29 Abb. 30...
- Seite 93 Der Federarm ist korrekt eingestellt, wenn die vertikale Bewegung leicht und reibungslos 10.4.1 Der Federarmteil des Portegra2-Trägerarms kann um 50° nach unten und um 45° nach oben verstellt werden (Abb. 29). Die obere Bewegung des Federarms kann durch Anpassen der ...
- Seite 94 Installation und Entfernen der passenden Endgeräte Endpositionen des Portegra2-Federarms Abb. 31 Abb. 32...
- Seite 95 Installation und Entfernen der passenden Endgeräte HINWEIS: – Gefährdungssituation! Bringen Sie den oberen Anschlag des Federarms während des Installationsverfahrens in nach rechts, da der Federarm andernfalls unkontrollierbar nach oben schwingt. HINWEIS: horizontalen Position. Dies verringert den Druck auf die Schraube, und diese kann nun ...
-
Seite 96: Technische Daten
Technische Daten Länge/Gewicht: 2 ,5 m/17,0 kg 4,0 m/30,0 kg Gewicht 2,0 kg 950 (750) 750 (950) Gewicht 10,0 kg (10,5 kg) max. Belastung 18,0 kg (15,0 kg) Gewicht bis zu 17,5 kg Gewicht 10,5 kg (10,0 kg) max. - Seite 97 11,5 kg 850 mm 13,0 kg 1000 mm 14,0 kg Decken/ Standard-Portegra2-Montageplatte 22,0 kg Wandmontage Wandhalterung 2,0 kg (abhängig von der Länge des Auslegerarms) Deckenmontiert ...
- Seite 98 Technische Daten...
- Seite 99 Dr. MACH Halogen- und LED-Operations- und Untersuchungsleuchten sowie allen anderen MAVIG-Produkten zugelassen, deren Kompatibilität in den Bedienungsanleitungen des Geräts angegeben ist. Der Anschluss eines Geräts oder Adapters eines Drittanbieters an das Portegra2-System ist ohne die ...
- Seite 100 CT-Raumplanungserwägungen/Anleitung Rohdecke Der Abstand zwischen dem Boden und Punkt B B Abstand von Punkt sollte ca. 208 cm betragen, außer die Gantry zur falschen Decke mindestens 58 cm Punkt 220,0 cm - 270,0 cm 460 mm/Fixpunkt-Montage ...
- Seite 101 II) der vertikale Abstand III) der horizontale Abstand Der optimale Abstand von der Decke wird erzielt, wenn sich der niedrigste Punkt des Portegra2-Systems der Gantry keine Behinderung des Systems verursacht. Diese Anforderung wird normalerweise durch ...
- Seite 102 Ø 185 Portegra2 – Fixpunkt-montiertes Twin-Stativ Ø 60 750/950 360° 360° 235° Mindestens 2050 mm bis zum Boden Portegra2 – Schienenmontiertes Twin-Stativ 2500/4000 Ø 185 Ø 60 750/950 360° 360° 235° Mindestens 2050 mm bis zum Boden...
- Seite 103 Ø 185 Portegra2 – Fixpunkt-montiertes 360°-Stativ Ø 60 750/950 360° 360° 235° 360° Mindestens 2050 mm bis zum Boden 2500/4000 Portegra2 – Schienenmontiertes 360°-Stativ Ø 185 Ø 60 750/950 360° 360° 235° 360° Mindestens 2050 mm bis zum Boden...
- Seite 104 Technical Drawings...
- Seite 105 Drilling Template - Bohrvorlage Die exakte Position aller fünf Bohrlöcher muss eingehalten werden, da die Installation ansonsten nicht abgeschlossen werden kann. Ø 10 / 0.39” Ø 10 / 0.39” (Ø) 150 / 5.91” Ø 8 / 0.32” Safety anchor location Position des Sicherungs-...
- Seite 108 25 Hytec Circle Beirut Lebanon (overseas) e-Mail: mavig@mena-md.com 1 800 836 8422 (in the US) e-Mail: mavig@ti-ba.com © Copyright 2013 MAVIG GmbH, Munich, Germany Right to technical changes reserved. PT2_IM_1013-1 / Printed in Germany...