Herunterladen Inhalt Inhalt Diese Seite drucken
Whirlpool AFO ED4 DS Anleitungen Für Den Bedienungs-Und Wartung

Whirlpool AFO ED4 DS Anleitungen Für Den Bedienungs-Und Wartung

Heissluftöfen
Inhaltsverzeichnis

Werbung

Verfügbare Sprachen
  • DE

Verfügbare Sprachen

  • DEUTSCH, seite 20
EN CONVECTION OVENS
INSTRUCTIONS FOR USE AND MAINTENANCE
IT
FORNI A CONVEZIONE
ISTRUZIONI PER L'USO E LA MANUTENZIONE
DE HEISSLUFTÖFEN
ANLEITUNGEN FÜR DEN BEDIENUNGS-UND WARTUNG
FR
FOURS À AIR PULSE'
INSTRUCTIONS POUR L'EMPLOI ET LA MAINTENANCE
ES HORNOS A CONVECCIÓN
INSTRUCCIONES PARA USO Y MANTENIMIENTO
AFO ED4 DS
AFO ED6 DS
AFO GD6 DS
AFO ED10 DS

Werbung

Inhaltsverzeichnis
loading

Inhaltszusammenfassung für Whirlpool AFO ED4 DS

  • Seite 1 ISTRUZIONI PER L’USO E LA MANUTENZIONE DE HEISSLUFTÖFEN ANLEITUNGEN FÜR DEN BEDIENUNGS-UND WARTUNG FOURS À AIR PULSE’ INSTRUCTIONS POUR L’EMPLOI ET LA MAINTENANCE ES HORNOS A CONVECCIÓN INSTRUCCIONES PARA USO Y MANTENIMIENTO AFO ED4 DS AFO ED6 DS AFO GD6 DS AFO ED10 DS...
  • Seite 2: Inhaltsverzeichnis

    INDEX IT INDICE DE INHALT BEDIENUNGS-UND USE AND MAINTENANCE USO E MANUTENZIONE WARTUNGSANLEITUNG INSTRUCTIONS FOR A SAFE USE OF AVVERTENZE PER L’USO SICURO ANWEISUNGEN FÜR SICHEREN THE OVEN DEL FORNO GEBRAUCH DES OFENS MAX. FOOD LOADING CARICO MASSIMO DI ALIMENTI MAX.
  • Seite 3: Index

    INDEX INDICE EMPLOI ET MAINTENANCE USO Y MANTENIMIENTO INSTRUCTIONS POUR ADVERTENCIAS PARA EL USO L’UTILISATION SÛRE DU FOUR SEGURO DEL HORNO CHARGEMENT MAX. DES ALIMENTS CARGA MÁXIMA DE ALIMENTOS DESCRIPTION DES ÉLÉMENTS DU DESCRIPCIÓN DEL PANEL DE PANNEAU MANDOS ÉTAT “PRÊT” ESTADO “LISTO”...
  • Seite 4: Use And Maintenance

    USE AND MAINTENANCE INSTRUCTIONS FOR A SAFE USE OF THE OVEN • Ensure the oven is on a stable position and safety devices installed upstream are efficient. • Always use adequate protection gloves to introduce or pull out the trays. •...
  • Seite 5: Control Panel Description

    4.0 CONTROL PANEL DESCRIPTION ON-OFF button Start-Stop button Low ventilation speed Time setting Core probe setting Temperature setting Delta T setting Chamber humidity Phase setting Go back/delete Recipe’s cookbook Confirm Increase value Automatic washing Decrease value Manual decrease of humidity Manual increase of hunmidity Time/core probe display Temperature/Delta T display...
  • Seite 6 From this moment onward you can put the meals to cook into the oven. When the oven door is re - closed, the transition to the next phase will occur automatically (2 bips are emitted). If the door is opened and closed before the oven reaches the final pre-heating temperature (i.e. before the 2 bips are emitted), the transition to the next phase will occur anyway.
  • Seite 7 4.5E SET UP HUMIDITY Humidity set point is showed by 10 lightened led .They represent a humidity scale of 11x2 values from steam cooking (5 bleu led lightened) to dry cooking (5 red led lightened). To set up the chamber’s hu- midity you have to press the key (8) HUMIDITY.
  • Seite 8: Temporary Stop

    MENU/MEMO lightened shows that it is in selection of category of program. On display runs the name of the carrying out category of program (first level). By rotating the ENCODER (13) you can run the categories, when appears the right one by pressing (12) ENTER you confirm the category. With a single pressure on the key (10) CANC you go out to programs mode.
  • Seite 9: Washing

    4.6 WASHING Attention: you have to do this operation at the first installation Washing set up: by pressing the key (14) washing one time and then a second time (long pressure), in display d appear ‘’set up’’; after you must press the key (2) start/stop to perform for about 2 minutes the charge of the soap. Warning: SET UP will start up only if the oven chamber temperature is below 60º.
  • Seite 10: Safety Entrances

    SAFETY ENTRANCES The card has 3 safety entrances: chamber’s safety, burner’s safety, fan’s safety. If the card in READY, START or TEMPORARY STOP mode, you can see on display the message (of its own error) and the buzzer starts to sound. On display you can see: ‘’THERM’’: Thermic error safety ‘’FAN’’: Fan error...
  • Seite 11: Cooking Tips

    10.0 COOKING TIPS To obtain the best results, we advise to use GAS- TRONORM trays, available in different models and materials according to the type of cooking. It’s fundamental always to leave an interspace of 3 cm at least between the food to be cooked and the upper tray for a good air circulation.
  • Seite 12: Uso E Manutenzione

    USO E MANUTENZIONE AVVERTENZE PER L’USO SICURO DEL FORNO • Assicurarsi che il forno sia in posizione stabile e che i dispositivi di protezione installati a monte dell’a- parecchio siano efficienti. • Utilizzare sempre adeguati guanti protettivi per introdurre e/o estrarre le teglie. •...
  • Seite 13: Descrizione Pannello Comandi

    4.0 DESCRIZIONE PANNELLO COMANDI Tasto ON-OFF Tasto Start-Stop Ventilazione a bassa velocità Tempo di cottura Sonda al cuore Temperatura / avvio ritardato Delta T Umidità Fase di cottura Indietro / cancella Menù / salva ricetta Conferma Aumenta valore Lavaggio automatico Riduci valore Riduzione manuale dell’umidità...
  • Seite 14 Da questo momento in poi si possono introdurre le pietanze da cuocere. Quando viene richiusa la porta del forno, si avrà automaticamente il passaggio alla fase successiva (vengono emessi 2 bip). Se la porta viene aperta e chiusa prima che il forno abbia raggiunto la temperatura finale di preriscal- damento (cioè...
  • Seite 15 4.5E IMPOSTAZIONE UMIDITA’ Il setpoint dell’umidità viene visualizzato per mezzo dei 10 LED umidità rossi e blu. Essi rappresentano una scala di umidità tabulata in 11x2 valori che va dalla cottura a vapore (5 LED blu accesi) alla cottu- ra secca (5 LED rossi accesi). L’impostazione dell’umidità della camera avviene premendo il tasto (8) UMIDITA’.
  • Seite 16 Sul display a bandiera viene visualizzato a scorrimento il nome della categoria di programma corrente (1° livello). Con (13) l’encoder si scorrono le categorie e con (12) ENTER si seleziona la categoria. Con il tasto CANC (pressione singola) si esce dalla modalità programmi. Apportando modifiche al programma selezionato queste vengono tenute buone per il ciclo di cottura successivo ma non vengono memorizzate.
  • Seite 17: Spegnimento

    4.6 LAVAGGIO AUTOMATICO ATTENZIONE :da farsi alla prima installazione!!! SET UP LAVAGGIO : Premendo il tasto (14) LAVAGGIO una volta e successivamente una seconda volta prolungata (10 sec.) nel display D compare la scritta ‘’SET UP’’; a questo punto schiacciare il tasto (2) START/STOP in questo modo si avvia per circa 2 minuti il carico del detergente.
  • Seite 18: Ingressi Sicurezza

    INGRESSI SICUREZZA La scheda è dotata di tre ingressi sicurezza: sicurezza camera, sicurezza bruciatore, sicurezza ventole. Nel caso occorra uno dei precedenti allarmi viene visualizzato il relativo messaggio di allarme e si attiva il buzzer con la scheda negli stati PRONTO, START e STOP TEMPORANEO. I messaggi di allarme sono i seguenti: - “ERR BRUC”...
  • Seite 19: Consigli Per Le Cotture

    10.0 CONSIGLI PER LE COTTURE Per ottenere i migliori risultati si consiglia l’uso di teglie di tipo GASTRONORM, disponibili in diversi modelli e materiali a seconda del tipo di cottura. È fondamentale lasciare sempre uno spazio mi- nimo di 3 cm. tra gli alimenti di una teglia e la teglia sovrastante, al fine di permettere la perfetta circolazione dell’aria.
  • Seite 20: Bedienungs-Und Wartungsanleitung

    BEDIENUNGS-UND WARTUNGSANLEITUNG ANWEISUNGEN FÜR SICHEREN GEBRAUCH DES OFENS • Überprüfen Sie den Ofen in einer stabilen Position liegt und die Schutzvorrichtungen aufwärts effizient sind. • Immer geeignete Schutzhandschuhe tragen, um die Bleche zu stecken und herauszuziehen. • Immer vorsichtig sein, weil der Boden wegen Dampf beim Garen rutschig sein könnte. •...
  • Seite 21: Beschreibung Der Bedienungstafel

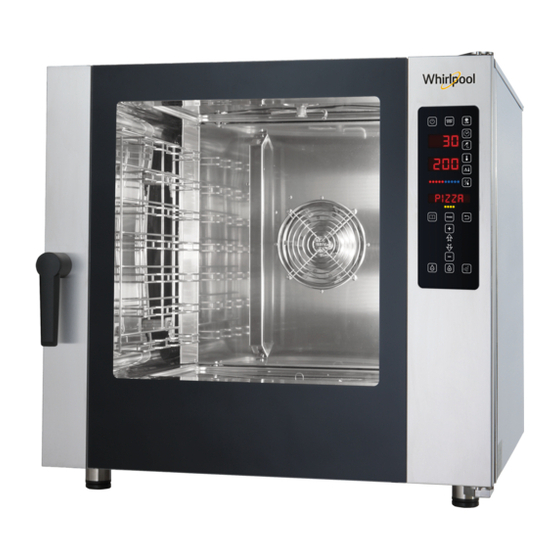
    4.0 BESCHREIBUNG BESTANDTEILE DER BEDIENUNGSTAFEL ON-OFF Start-Stop / Vorübergehende Unterbrechung Niedriger Lüfterdrehzahl Kochzeit Kernfühler Kochtempertur / Verzögertes Garen Garvorgang Delta T Luftfeuchtigkeit Koch Phasen Loeschen / Zurück Menü / Rezept Speichern Bestätigung Wert erhöhen Automatisches Waschen Wert reduzieren Manuelle Luftfeuchtigkeit’s Reduzieung Manuelle Luftfeuchtigkeitsteigeung Zeit / Kernfühler Anzeige Kochtempertur / Delta T Anzeige...
  • Seite 22: B Einstellung Garzyklus

    Ab diesem Moment kommt man zur Phase 2 nur wenn man lange auf der Taste 9 presst ( 2 bip töne werden ertönen ). 4.5B EINSTELLUNG GARZYKLUS Im Allgemeinen ist die Einstellung eines Garzyklus eine bindende und sich selbst korrigierende Aktions- sequenz von oben nach unten.
  • Seite 23: F Einstellung Der Gebläsedrehzahl

    4.5E EINSTELLUNG DER FEUCHTIGKEIT Der Feuchtigkeitssollwert wird mit den 10 roten und blauen LEDS der Feuchtigkeit gezeigt. Sie bilden eine Feuchtigkeitsskala in 11x2 Werten aufgelistet, die vom Dampfgaren (5 blaue eingeschaltete LEDS) zum Trockengaren (5 rote eingeschaltete LEDS) geht. Die Einstellung der Feuchtigkeit im Garraum erfolgt mit der Taste (8) FEUCHTIGKEIT.
  • Seite 24 Mit der Taste (10) LOESCHEN-ZURÜCK (einmaliges Drücken) wechselt man zur höheren Ebene (Programmkate- gorie). Der MANUELLE Modus ist ein Sonderfall, für ihn ist keine Programmliste auf der 2. Ebene vorgesehen. Deshalb geht man, wenn man den manuellen Modus gewählt hat, beim Drücken der Taste (11) MENÜ/MEMO direkt zur Wahl der Programmkategorie über.
  • Seite 25: Automatisches Waschen

    4.6 AUTOMATISCHES WASCHEN ACHTUNG MUSS BEI ERSTINSTALLATION ERFOLGEN!!! SET UP PUTZ CYCLUS: drückt man die Taste (14) PUTZ CYCLUS einmal und anschließen ein zweites Mal für längere Zeit (10 Sek.) erscheint auf dem Display D die Schrift ‘’SET UP’’; jetzt die Taste (2) START/ STOP drücken, damit startet man für etwa 2 Minuten das Einfüllen des Spülmittels.
  • Seite 26: Sicherheitseingänge

    SICHERHEITSEINGÄNGE Die Karte verfügt über drei Sicherheitseingänge: Garraumsicherheit, Brennersicherheit und Gebläse- sicherheit. Falls ein vorheriger Alarm aufgerufen wird, erscheint die betreffende Alarmmeldung und der Summer ertönt, die Karte befindet sich in BETRIEBSBEREIT, START und VORÜBERGEHENDE UNTER - BRECHUNG. Die Alarmmeldungen sind folgende: - “ERR BRUC”...
  • Seite 27: Nützliche Hinweise Beim Garen

    10.0 NÜTZLICHE HINWEISE BEIM GAREN Um beste Ergebnisse zu erzielen, ist es ratsam, GASTRO-NORM-Behälter mit Rand zu verwenden und darauf zu achten, dass zwischen der zu garen- den Speise und dem darüber stehenden Behälter ein Abstand von mindestens 3 cm besteht, damit die Luft frei zirkulieren kann.
  • Seite 28: Emploi Et Maintenance

    EMPLOI ET MAINTENANCE INSTRUCTIONS POUR L’UTILISATION SÛRE DU FOUR • S’assurer que le four est installé sur une position stable et que les dispositifs installés en amont de l’appareil soient efficients. • Toujours utiliser des gants de protection pour introduire et extraire les bacs. •...
  • Seite 29 4.0 DESCRIPTION DES ÉLÉMENTS DU PANNEAU ON-OFF Start-stop / stop temporaire Basse vitesse de ventilation Temps de cuisson Sonde à coeur Température / start à temps retardé Cuisson avec Delta T Humidité Phases de cuisson Annuler / arrière Menu / enregister la recette Confirmer Augmentation valeur Lavage automatique...
  • Seite 30 Une fois que la porte du four se ferme, le passage à la phase suivante s’effectuera automatiquement (2 bips seront émis). Si la porte s’ouvre et se ferme avant que le four n’ait atteint la température de préchauffage finale (c’est-à-dire avant que les 2 bips ne soient émis), le passage à la phase suivante s’effectuera de toute façon.
  • Seite 31 4.5E CONFIGURATION HUMIDITÉ La valeur de réglage de l’humidité est affichée au moyen des 10 LED humidité, rouges et bleues. Elles représentent une échelle d’humidité tabulée en 11x2 valeurs, qui va de la cuisson à vapeur (5 LED bleues allumées) à la cuisson à sec (5 LED rouges allumées). La configuration de l’humidité de la chambre se fait en appuyant sur la touche (8) HUMIDITÉ.
  • Seite 32 Avec la touche (10) CANC (appuyer une fois), on passe au niveau supérieur (catégorie de programme). Un cas particulier est la modalité MANUEL pour laquelle il n’est pas prévu une liste de programmes de 2° niveau. Donc, quand la modalité manuelle est sélectionnée, en appuyant sur la touche (11) MENU/MEMO on passe directement à...
  • Seite 33 4.6 LAVAGE AUTOMATIQUE ATTENTION, À EFFECTUER À LA PREMIÈRE INSTALLATION!!! SET UP LAVAGE : En appuyant sur la touche (14) LAVAGE une fois et puis, une deuxième fois prolongée (10 sec.), l’écran D affiche l’inscription ‘’SET UP’’; maintenant, appuyer sur la touche (2) START/STOP, de cette manière on fait démarrer pendant environ 2 minutes le chargement du détergent.
  • Seite 34 ENTRÉES SÉCURITÉ La carte est équipée de trois entrées de sécurité : sécurité de la chambre, sécurité du brûleur, sécurité des ventilateurs. Dans le cas d’une des alarmes précédentes, le message d’alarme relatif est affiché et le buzzer s’active avec la carte dans les états PRÊT, START et STOP TEMPORAIRE. Les messages d’alarme sont les suivants: •...
  • Seite 35 10.0 CONSEILS POUR LES CUISSONS Pour obtenir de meilleurs résultats, nous consei- llons d’utiliser des bacs avec rebord, du type GAS- TRO NORM, en s’assurant qu’il y ait toujours un espace d’au moins 3 cm entre les aliments à cuire et le bac situé...
  • Seite 36: Uso Y Mantenimiento

    USO Y MANTENIMIENTO ADVERTENCIAS PARA EL USO SEGURO DEL HORNO • Asegúrarse de que el horno esté en una posición estable y que los dispositivos de protección instala- dos por encima del mismo sean eficientes. • Utilizar siempre adecuados guantes de protección para introducir y/o extraer las bandejas. •...
  • Seite 37: Descripción Del Panel De Mandos

    4.0 DESCRIPCIÓN DEL PANEL DE MANDOS Tecla ON-OFF Tecla Start-Stop Ventilación a baja velocidad Tiempo de cocción Sonda al corazón Temperatura / inicio retrasado Delta T Humedad Fase de cocción Atrás / cancelar Menú / guardar receta Confirmar Aumentar valor Lavado automático Reducir valor Reducción manual de humedad...
  • Seite 38 Ahora se pueden introducir los alimentos para cocinar. Cuando la puerta del horno se cierra nuevamen- te, el horno pasará automáticamente a la fase 2 (emitiendo 2 bips). Si la puerta se abre y se cierra antes de que el horno haya alcanzado la temperatura de precalentamien- to (es decir, antes de que se emitan los 2 bips), el horno pasará...
  • Seite 39 4.5E AJUSTE HUMEDAD El punto de ajuste de la humedad se muestra mediante 10 LED rojos y azules. Esos LEDs representan una escala de humedad tabulada en 11x2 valores que van desde cocción al vapor (5 LED azules encen- didos) a la cocción seca (5 LED rojos encendidos). El ajuste de humedad se hace presionando la tecla (8) HUMEDAD.
  • Seite 40 l nombre de la categoría del programa actual se desplaza en la pantalla (20) (1er nivel). Use las teclas (13) y (15) para desplazarse por las categorías y presione (12) para seleccionarla. Use la tecla CANC para salir del modo de programa. Al hacer cambios en el programa seleccionado, estos se mantienen para el próximo ciclo de cocción pero no se almacenan.
  • Seite 41 4.6 LAVADO AUTOMÁTICO ATENCIÓN:hacer en la primera instalación!!! CONFIGURACIÓN DE LAVADO: Presionando la tecla (14) LAVADO una vez y luego una segunda vez por 10 segundos, en la pantalla aparece D ‘SET UP’; ahora, presionar la tecla (2) START/STOP. De esta manera, se inicia la carga de detergente durante aproximadamente 2 minutos.
  • Seite 42: Entradas De Seguridad

    ENTRADAS DE SEGURIDAD La tarjeta está equipada con tres entradas de seguridad: seguridad de la cámara, seguridad del que- mador, seguridad del ventilador. Si se produce una de las alarmas anteriores, se muestra el mensaje de alarma relativa y se activa el zumbador con la tarjeta en los estados LISTO, START y STOP TEMPORAL. Los mensajes de alarma son los siguientes: - “ERR BRUC”...
  • Seite 43 10.0 CONSEJOS PARA LAS COCCIONES Para conseguir los mejores resultados se aconseja emplear bandejas de tipo GASTRONORM, procu- rando dejar siempre un espacio mínimo de 3 cm. entre el alimento a cocer y la fuente de encima, para permitir una buena circulación del aire. Es buena norma evitar que el alimento a cocer salga de la fuente;...

Diese Anleitung auch für:

Afo ed6 dsAfo gd6 dsAfo ed10 ds

Inhaltsverzeichnis