Tamiya M1A2 ABRAMS Montageanleitung
Vorschau ausblenden
Andere Handbücher für M1A2 ABRAMS:
- Handbuch (11 Seiten) ,
- Bedienungsanleitung (12 Seiten)
Quicklinks
ITEM
56040
c.s.»mwurr1frÆNK
MIA2
are subject to change without notice.
Daten können im Zuge Ohne Ankündigung verändert werden.
ASSEMBLY
KIT
pouvant étre modifiées sans information préalable.
1/16 SCALE
RADIO
CONTROL
TANK
TAMIYA, INC.
3-7 ONDAWARA, SURUGA-KU, SHIZUOKA 422-8610 JAPAN
56040 RCT MIA2 Abrams (11056447)
TAMIYA

Verwandte Anleitungen für Tamiya M1A2 ABRAMS


Inhaltszusammenfassung für Tamiya M1A2 ABRAMS
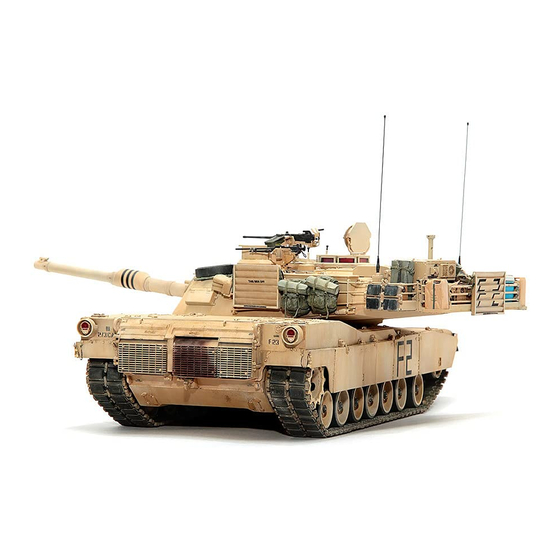
- Seite 1 *Technische Daten können im Zuge Ohne Ankündigung verändert werden. ASSEMBLY *Caractéristiques pouvant étre modifiées sans information préalable. 1/16 SCALE RADIO CONTROL TANK TAMIYA, INC. 3-7 ONDAWARA, SURUGA-KU, SHIZUOKA 422-8610 JAPAN 56040 RCT MIA2 Abrams (11056447) 0817 02017 TAMIYA...
- Seite 2 BENOTIGTE WERKZEUGE / OUTILLAGE •prepare a set of painting instruments (paints, brushes, palette, Pinzette cloth, etc.) to give your model a realistic finish. Tamiya colors for Précelles finishing this model are introduced on page 3. 'Apply metal primer before painting metal parts. Tamiya Metal Primer is recommended.
- Seite 3 Les lignes de joint et de collage doivent étre poncées avec du papier (Painting tips) abrasif avant de peindre. L'application d'apprét Tamiya met en évidence les défauts The same colors should be painted at the same time, before assembly.
- Seite 4 RC SYSTEM & MULTI-FUNCTION UNIT G±ftw» Transmitter •4ch R/C system Sender @ Ich •4 Kanal RIC Anlage Emetteur @2ch • Ensemble R/C 4 voies @ 3ch (É)4ch —5— (NED) Receiver Empfänger Récepteur EfatRLED Ffß) Turret control unit Turmelektronik Unité de contröle de Ia tourelle @ -34 @ -34...
- Seite 5 Schäden infolge fehlerhaften Anschließens übernimmt Tamiya keine Garantie. nents. The receiver must be powered through mufti-function unit by a battery pack. Tamiya accepts pas utiliser un pack réception de 6V pour le no responsibility for damage caused by improper connections.
- Seite 6 @AppIiquer de I'apprét pour métal Tamiya avant injury when handling photo-etched parts. Tamiya CA Cement (Gel Type) is recommended for de peindre. @Enlever Ies parties excédentaires en Ies limant attachment. soigneusement. FOTOGEÄTZTE TEILE 'Manipuler les piéces photo-découpées...
- Seite 7 Leistung. ASSEMBLY *Use TamiyaExtra Thin Cementwhen attaching B,C and M parts. *Für Zusammenbau der Teilen B, C und M Tamiya Extra dünnen Kleber verwenden. *Utiliser de la Colle Extra-Fluide Tamiya pour fixer Ies pieces B, C et M. *Apply metal primer to metal surfaces before painting.
- Seite 8 R l/beari GA 76 Entrepring AChse Differe O i erer,tiialg fférentiå9et r,ebe 2.Gage ntial e.41 åbilles c;tg næ 416* *read acoyeu nabe...
- Seite 9 2nd gear 2 2. Gang 2 2nd0 Vitesse Gear 1150 Zahnrad Pignon B 1150 Ball bearing Kugellager Gear Roulement billes Zahnrad 1150 Pignon D BAIO 4mEi)Y5 E-Ring 1150 1150 Circlip BA14 Distanzring BA15 Entretoise 7X5XO.5nm BA14 BA15 7X5X1.2nm BAIO Spacer Distanzring BA15 Entretoise...
- Seite 10 Gearbox Getriebegehäuse Carter 3 X IOnm Thread lock Schraubensicherung Frein filet *Apply a small amount of Thread Lock to the sections shown by this mark using tools such as toothpicks. *Auf dieser Markierung gekennzeichneten Bereiche mit einem Hilfswerkzeug wie etwa einem Zahnsto- cher eine geringe Menge Schraubensi- cherung auftragen.
- Seite 11 Attaching bump stoppers Screw Anbau der Endanschläge Cap screw Schraube Zylinderkopfschraube Fixation des arréts de bras BBIO Vis a tote cylindrique de suspension *Ensure that Bl Orotates freely. *Sicherstellen, dass sich BIO frei bewegt. *S'assurer que BIO tourne librement. *Make BIO* Tapping screw Cap screw...
- Seite 12 (ENJ) BB12 BB12 Attaching suspension mounts (right) Aufhängungs-Befestigungen (rechts) 1280 1280 Fixation des supports de suspension (droit) *push * Eindrücken. *Introduire. BB12 1280 BB12 BB12 1280 1280 BB12 1280 BB12 1280 BB12 *Make 1280 *4 Satz anfertigen. *Faire 4 jeux. 2.6 x 8M 2.6 x 8m BB12...
- Seite 13 n— (HND Attaching road wheels (left) Befestigung der Laufräder (links) Fixation des roues de route (gauche) *Cut silver color sticker to size shown attach to seal lower hull. *Silbernen Aufkleber auf die gezeigte Größe zuschneiden und anbringen, um die Unterwanne abzudichten.
- Seite 14 (GfÅlJ) Attaching road wheels (right) *Also refer to Step O. Befestigung der Laufräder (rechts) 5rrnElJ>5 *Ebenfalls Schritt beachten. BB15 référerégalement å l'étapeO. Fixation des roues de route (droit) E-Ring Circlip (Large) (Small) (Klein) (Groß) (Grand) (Petit) BB22 BB22 Torsion *Note direction.
- Seite 15 Attaching gearbox Getriebegehäuse-Einbau BB17 Fixation du carter 6X16.6M BB16 BB17 6X20mfi3— 6x 16.6mmh3— Screw Screw Schraube Schraube Halter Support 3X18rn BB19 BB16 BB19 Gearbox plate Getriebegehäuse-Platte Plaquette de carter Attaching rear mount plate Screw Hintere Befestigungsplatte-Einbau Screw BB24 Schraube Schraube Fixation de la plaque support arriére Rear mount plate Hintere Befestigungsplatte...
- Seite 16 Speaker unit Lautsprechereinheit x 26 Module sonore Tapping Screw Schneidschraube Vis décolletée Vehicle control unit Fahrzeugsteuereinheit Unité de contröle du véhicule Tapping screw Schneidschraube Vis décolletée Tapping screw Schneidschraube Vis décolletée 3x8rnm Speaker 3x8rnm Haut-parleur xe—h— Speaker Lautsprecher Haut-parleur not touch speaker cone. Lautsprecherkonus nicht berühren.
- Seite 17 'Ration Laut unit 3*78.9 2usam*lCfQb ferme"on de d Unit en Dlace DPODO/Sio acotor Rot/ PYer&9en Gelb / uat&ie / tinin -barbotin leseinarüCkeo. 90te...
- Seite 18 Äi•yh— Attaching cable tags Cable tag Anbringung der Kabeletiketten Kabeletiketten Mise en place des étiquettes de cåbles Etiquette de cåble *Note size, bulb color and cable color when attaching cable tags. *Beim Anbringen der Kabeletiketten Größe, Glühlampenfarbe und Kabelfarbe beachten. Front LED harness *Faire...
- Seite 19 Attaching driver's hatch BCII BC23 Anbau der Fahrerluke 2.6rm7•yYy— Fixation de la trappe du conducteur Washer Tapping screw Schneidschraube Beilagscheibe BAG C C / SACHET Vis décolletée Rondelle Driver's hatch Fahrerluke Trappe du conducteur x-23 x-23 Hull color Wannen-Farbe Couleur de la caisse «itjxn»...
- Seite 20 Rear panel Heckplatte Panneau arriére x-27 ax-27 Taillights Rücklicht Feux arriére X-27 x-27 Attaching rear panel BB5 x6 Anbringung der Heckplatte Fixation du panneau arriére Tapping screw Lock Tapping screw Schneidschraube Sicherungsmutter Schneidschraube *Make Ecrou de blocage Vis décolletée Vis décolletée 2 Satz anfertigen.
- Seite 21 Checking R/C equipment *Make sure the servo is in neutral prior to assembly. Überprüfen der RC-Anlage *Servo vor dem Einbau in neutrale Stellung bringen. Vérification de l'équipement RIC *S'assurer que le servo est au neutre avant assemblage. Tapping screw Schneidschraube Vis décolletée Checking RIC equipment (i)lnstall batteries.
- Seite 22 Initial setting for multi-function unit Anfangseinstellung der Multi-Funktions Einheit *Make sure sticks and trims are in neutral position prior to setup. Switch on transmitter CAUTION Réglage initial de I'unité multifonctions turret control unit. *Darauf achten, dass die Knüppel und Trimmungen vor dem Einrichten in neutraler Stellung stehen.
- Seite 23 Attaching upper hull *Pass cables through hole. Einbau des Wannen-OberteilS *Die Kabeldurch die Öffnungfüyen. Fixation de Ia caisse supérieure *Passer les cåbles dans le trou. Screw Schraube Rear *Make sure not to pinch cables while attaching upper IWI. Hinten Beim Anbringen des Wannen-Oberteils darauf achten, die CAUTION Kabel nicht zu quetschen.
- Seite 24 Attaching turret ring Anbau Turmdrehkranzes Fixation de la bague de tourelle Lower turret Turm-Unterteil Tourelle inférieure Tapping screw Illfiiiiii Schneidschraube Vis décolletée Attaching lower turret Anbau Turm-unterteil Fixation de la tourelle inférieure *Attach turret ring so that indicated point faces forward. Turmdrehkranz befestigen, Tapping...
- Seite 25 Installing mechanism deck Einbau der RC-Grundplatte Installation de la platine R/C Servo Servo Servo BCIO BCIO 3 x 8m BC22 BC13 Turret rotation limiter Begrenzung des Turmdrehwinkels Limiteur de rotation de la tourelle 8.5m Tapping screw Schneidschraube Vis décolletée Tapping screw Schneidschraube Vis décolletée 3x8nrn...
- Seite 26 Recoil unit Rückstoß-Einheit Tapping screw Unité de recul BC17 Schneidschraube 3X14tnm Vis décolletée BC18 BC17 3x12r -t' 7 Shaft Achse Recoil gear B Recoil gear A Rückst0ß-zahnrad Rückstoß-Zahnrad BC18 Pignon de recul A PignOn de recul B Shaft Achse RI 5 BC24 Recoil spring Rückstoß-Feder...
- Seite 27 Gun barrel BCIO not paint. Kanonenrohr *Nicht bemalen. Füt de canon pas peindre. Screw Washer Tapping screw Schraube Schneidschraube Beilagscheibe Vis décolletée Rondelle Gun barrel Kanonenrohr Füt de canon Hull color Wannen-Farbe de la caisse Turret LED harness Main gun LED 05) I FD Verkabelung im Turm BCI O—U LED für Hauptwaffe...
- Seite 28 *Battle system * Smulateur de combat Tamiya battery pack Tamiya Akkupack Pack d'accus Tamiya *Secure power cable and connection cable using nylon band. ensuring there is enough slack to allow turret rotation. *Motor- und Verbindungskabel Kabel so mit Nylonband S«vo...
- Seite 29 Upper turret (inside) *Item 53447 Battle system Turm-OberteiI (Innenseite) "*Artikel Nr 53447 Gefechtssimulator Tourelle supérieure (face interne) 3 X 8m *Réf. 53447 Simulateur de combat upper turret Turm-Oberteil Tourelle supérieure *Detach screws from GFS base and attach optional Battle System to M5 as shown.
- Seite 30 Rangefinder Cupola Loader's hatch Entfernungsmesser Turmkuppel Ladeschützenluke Télémétre Coupole Trappe du chargeur Note direction. *Auf richtige Platzierung achten. *Noter le sens. x-23 x-23 a XF-85 CCITV» x-23 x-23 Attaching turret hatches Cupola Anbau der Turmluken Turmkuppel fixation des trappes de tourelle Coupole Tapping screw Schneidschraube...
- Seite 31 Attaching smoke dischargers Nebelwerfer-Einbau XF-84 XF-56 Fixation des lance-fumigönes x-18 x-18 XF-56 OSÄJV-3vy5) Crosswind sensor Bustle rack Querwindsensor Stauraum Sonde anémométrique Panier de tourelle (APU) Attaching crosswind sensor x-18 x-18 Querwindsensor anbringen Fixation de la sonde anémométrique *Use in place of Cll on left side. *Anstelle von Cll auf der linken...
- Seite 32 Attaching bustle rack Einbau des Stauraumes Connector Toolbox lids Mise en place du panier de tourelle Kugelkopf Scharniere des Werkzeugkastens BC14 Connecteur rotule Couvercles des Caissons å outillage BC14 BC14 Box wrench Steckschlüssel Clé tube BC14 Bustle rack Stauraum BC14 Panier de tourelle Attaching...
- Seite 33 Attaching toolbox lids Anbau der Scharniere des Werkzeugkastens Fixation des couvercles de caissons *Push *Eindrücken. *Appuyer. Attaching machine guns Einbau der Maschinengewehre XF-85 Fixation des mitrailleuses 7.62mm machine gun 7,62mm Maschinengewehr Mitrailleuse 7,62mm *Attach as shown. *Gemåß Abbildung einbauen. M2 heavy machine gun *Fixer comme indiqué.
- Seite 34 Bilder auf der Verpackung Middle East featured overall sand-colored Scheme best represented by the verwenden. Tamiya Color TS-46 Light sand. Applying a coat of Peinture du MIA2 Abrams Tamiya Metal Primer metal parts such Les tanks Abrams portaient généralement...
- Seite 35 PARTS Specifications are subject to change without notice. *Technische Daten können im Zuge ohne Ankündigung verändert werden. Caractéristiques pouvant étre modifiées sans information préalable. PARTS 10015017 (305 PARTS 19005742 PARTS 19008205 PARTS 10015018 ppö Illbi"liiiiijiijiiili PARTS 19004423 PARTS 10005981 Not used. Nicht verwenden.
- Seite 36 PARTS 19004415 PARTS 19004416 PARTS 19115465 PARTS 19115466 PARTS 19115467 Not used. Nicht verwenden. Non utilisées. PARTS 19225183 PARTS 19115468 Upper hull 19335784 Wan nen-Oberteil Caisse supérieure Upper turret 19335783 Turm-Oberteil Tourdle supérieure Lower turret 19335782 Turm-Unterteil Tourelle inférieure 56040 RCT (11056447)
- Seite 37 BT2*1 PARTS geÜ B '225077 Pignon de BT3X1 Turret rotaffon gear TurmWeh-Zahnrad Pignon de rotatbon de Rhg gear 19335411 ngret rirq tB33S411 BT4 Xl IQ2W77 tc:nrdle Clutch gear A 1922W7t Recoil gear A ROckstoß • Zahnrad 192n77 Pignon de recul A Clutch gear B Kupplungs•Zahnrad B d'ernbrayage B...
- Seite 38 55Äöyh— *Extra screws and nuts are included. Use them as spares. Decal Cable tag stickers 11420814 Silver color sticker 19493244 11420218 liegen zusätzliche Schrauben -muttern bei. AIS Abziehbildes Kabeletiketten Silberner Aufkleber Ersatzteile ver-wenden. Stickers d'identification des cåbles Sticker argenté Décalcomanie *Des vis et des écrous supplémentaires sont inclus.
- Seite 39 BB20 Wheel st•.dt x 16 Erdantriebswdle BB21 190035 2XIOm9*7F BA16 roue route kbre 19003034 Shaft Achse BB22 BB16 OX 20m "3 — x 14 19803037 Bare BB17 19803032 BB18 BB23 Front mount plate Vordere avant BB19 19803036 BB24 Gearbox plate Hintere Betestigungsplatte 19803033...
- Seite 40 Please örtlichen Fachhändler. Bezüglich Angaben, Tamiya, amenez cette liste votre point de vente Tamiya qti ne note that specifications, availability and price are subject to *halten. rhaltung der Artikel und der Preise Sind Anderungen manquera pas de vous renseigner.