Herunterladen Inhalt Inhalt Diese Seite drucken
Minipack-Torre Pratika 56CS Installations-, Gebrauchs- Und Wartungsanleitung

Minipack-Torre Pratika 56CS Installations-, Gebrauchs- Und Wartungsanleitung

Vorschau ausblenden Andere Handbücher für Pratika 56CS:
Inhaltsverzeichnis

Werbung

Verfügbare Sprachen
  • DE

Verfügbare Sprachen

  • DEUTSCH, seite 44
I
ISTRUZIONI PER L'INSTALLAZIONE, L'USO E LA MANUTENZIONE
GB INSTALLATION, OPERATION AND MAINTENANCE
D
INSTALLATIONS-, GEBRAUCHS- UND WARTUNGSANLEITUNG
F
INSTRUCTIONS POUR L'INSTALLATION, L'EMPLOI ET L'ENTRETIEN
E
INSTRUCCIONES PARA LA INSTALACIÓN, USO Y MANTENIMENTO
I
LEGGERE ATTENTAMENTE QUESTE ISTRUZIONI PRIMA DI USARE LA MACCHINA
GB
BEFORE USING THE MACHINE PLEASE CAREFULLY READ THE INSTRUCTIONS
D
BITTE LESEN SIE DIESE ANLEITUNG GENAU DURCH, BEVOR SIE DIE MASCHINE BENÜTZEN
F
PRIERE DE LIRE ATTENTIVEMENT CE MANUEL D'INSTRUCTIONS AVANT D'UTILISER LA MACHINE
E
LEER ATENTAMENTE ESTE MANUAL ANTES DE USAR LA MÁQUINA
ITA
Italiano
Pagina
GB
English
Page
D
Deutsch
Seite
F
Français
Page
E
Español
Página
Minipack-torre S.p.A.
Via Provinciale, 54 - 24044 Dalmine (BG) - Italy
Tel. (035) 563525 – Fax (035) 564945
E-mail: info@minipack-torre.it
http://www.minipack-torre.it
Pratika 56CS
01
22
43
64
85
DOC. N. FM111128
REV. 0
ED.12.2011

Werbung

Inhaltsverzeichnis
loading

Inhaltszusammenfassung für Minipack-Torre Pratika 56CS

  • Seite 1 INSTALLATIONS-, GEBRAUCHS- UND WARTUNGSANLEITUNG INSTRUCTIONS POUR L’INSTALLATION, L’EMPLOI ET L’ENTRETIEN INSTRUCCIONES PARA LA INSTALACIÓN, USO Y MANTENIMENTO Pratika 56CS LEGGERE ATTENTAMENTE QUESTE ISTRUZIONI PRIMA DI USARE LA MACCHINA BEFORE USING THE MACHINE PLEASE CAREFULLY READ THE INSTRUCTIONS BITTE LESEN SIE DIESE ANLEITUNG GENAU DURCH, BEVOR SIE DIE MASCHINE BENÜTZEN PRIERE DE LIRE ATTENTIVEMENT CE MANUEL D’INSTRUCTIONS AVANT D’UTILISER LA MACHINE...
  • Seite 2: Inhaltsverzeichnis

    ISTRUZIONI ORIGINALI Indice Capitolo 1. Descrizione Pagina 1.1. Prefazione 1.2. Prestazioni della macchina 1.3. Dati tecnici della macchina Capitolo 2. Caratteristiche del film 2.1. Films da adoperare 2.2. Calcolo della fascia A Capitolo 3. Condizioni d’uso della macchina 3.1. Dimensioni max. della confezione 3.2.
  • Seite 3: Capitolo 1. Descrizione

    1.2. Prestazioni della macchina La confezionatrice “Pratika 56CS” è stata progettata per confezionare pezzi sfusi o gruppi di prodotti (alimentari, casalinghi, giocattoli, ecc.) utilizzando un film termoretraibile monopiegato. La macchina può essere alimentata manualmente o lavorare in serie con altre macchine.
  • Seite 4: Dati Tecnici Della Macchina

    Capitolo 1. Descrizione 1.3. Dati tecnici della macchina Peso e dimensioni dell’imballo 2940 x 1440 x 1870mm Peso = 774Kg Peso della macchina 724Kg Alimentazione pneumatica: 120 l/min Produzione massima: 2400 confezioni/ora. I = Collegamento elettrico P = Collegamento pneumatico C = Presa attacco “supplementare”...
  • Seite 5: Capitolo 2. Caratteristiche Del Film

    Capitolo 2. Caratteristiche del film 2.1. Films da adoperare La macchina può lavorare con tutti i films termoretraibili e non, con spessore da 15 a 50 micron sia di tipo tecnico che alimentare. Per garantire i migliori risultati è consigliato l’utilizzo dei films da noi commercializzati.
  • Seite 6: Capitolo 4. Norme Di Sicurezza

    Capitolo 4. Norme di sicurezza 4.1. Avvertimenti NON PERMETTERE L’USO DELLA MACCHINA A PERSONALE NON ADDESTRATO! ATTENZIONE! Durante il funzionamento della macchina è vietato fumare! È VIETATO eseguire qualsiasi operazione di manutenzione e/o regolazione durante il funzionamento della macchina. Lo smontaggio delle protezioni deve essere affidato solo ai manutentori addetti ed istruiti a tale scopo. È...
  • Seite 7: Dispositivi Di Protezione Individuale

    Capitolo 4. Norme di sicurezza 4.3. Dispositivi di protezione individuale Utilizzare scarpe di protezione resistenti all’urto, allo schiacciamento e alla compressione del piede durante il trasporto e lo spostamento della macchina. Utilizzare guanti di protezione dal pericolo di schiacciamento e dai pericoli meccanici durante il trasporto e lo spostamento della macchina.
  • Seite 8: Posizionamento Con Tunnel (Dove Previsto)

    Capitolo 5. Installazione della macchina 5.3. Posizionamento con tunnel (dove previsto) Dopo aver posizionato la “Pratika 56CS”, avvicinare il “tunnel di retrazione” in modo che il nastro del tunnel sia il più vicino possibile a quello della “Pratika 56CS”. Il nastro del tunnel deve risultare 1mm più alto rispetto a quello della “Pratika 56CS”, per evitare la caduta dei prodotti confezionati.
  • Seite 9: Capitolo 6. Regolazione Ed Approntamento Macchina

    Capitolo 6. Regolazione ed approntamento macchina 6.1. Pannello comandi La macchina è dotata di un pannello di comando, alloggiato sull’apposito supporto, dal quale è possibile impostare tutte le funzioni di programmazione e funzionamento. Led “allarme”. Lampeggia se uno dei sensori della macchina blocca il processo operativo. Led “resistenza lunga”.
  • Seite 10: Accensione Della Macchina

    Capitolo 6. Regolazione ed approntamento macchina 6.2. Accensione della macchina Ruotare l’interruttore generale (Q1) nella posizione ON. Il display si accende e compaiono le seguenti scritte: Viene effettuato il test dei led sulla scheda tastiera. Viene effettuato il check dei dati di sistema. Appare la scritta OK (con dati corretti) oppure ERRORE (con dati errati).
  • Seite 11: Modalitá Manuale

    Capitolo 6. Regolazione ed approntamento macchina 6.2.1.2. Modalitá MANUALE È la condizione di utilizzo della macchina necessaria per le fasi di messa a punto, inserimento e cambio della bobina del film. ATTIVAZIONE DELLA “SALDATURA” Premere il pulsante (16) per attivare un ciclo di saldatura. ATTIVAZIONE DEL “TRAINO DEL FILM”...
  • Seite 12 Capitolo 6. Regolazione ed approntamento macchina L’elenco delle variabili impostabili nel programma AUTOMATICO è il seguente: Regola la quantità di film che si vuole lasciare davanti al pacco. Valori: 0 ÷ 300. Default: 25. Regola la quantità di film che si vuole lasciare dietro al pacco. Valori: 0 ÷...
  • Seite 13 Capitolo 6. Regolazione ed approntamento macchina Disattiva la lettura della “fine del pezzo” (con fotocellula). Quindi per determinare la lunghezza della confezione agire sulla funzione film posteriore. Valori: OFF ÷ ON. Default: OFF. Permette di mantenere fermo il nastro di carico durante la saldatura per facilitare la composizione della confezione.
  • Seite 14: Schema Riassuntivo Delle Variabili Impostabili

    Capitolo 6. Regolazione ed approntamento macchina 6.2.4. Schema riassuntivo delle variabili impostabili (programma AUTOMATICO e MANUALE) STOP MANUALE AUTOMATICO / XXXXXXX L: XXX.X F: XXX.X STOP STOP MANUALE AUTOMATICO XXXXXXX XXXXXXX L: XXX.X F: XXX.X L: XXX.X F: XXX.X TIPO MENU TIPO MENU Valori: UTENTE 1, UTENTE 2...
  • Seite 15: Allarmi

    Capitolo 6. Regolazione ed approntamento macchina 6.3. Allarmi La macchina prevede una serie di ALLARMI necessari a monitorare le situazioni di pericolo e di malfunzionamento. Ogni volta che interviene un allarme il display visualizza l’anomalia, contemporaneamente ad un segnale acustico e all’accensione dell’elemento luminoso rosso (E2), Al ripristino dell’allarme si spegne sia l’elemento luminoso che il segnale acustico.
  • Seite 16: Inserimento Del Film

    Capitolo 6. Regolazione ed approntamento macchina 6.4. Inserimento del film Per inserire il film è necessario mettere la macchina in modalità START MANUALE. Ruotare l’interruttore “ESCLUSIONE SICUREZZA” (S2) su ON e aprire i ripari anteriore e posteriore. FASE 1 FASE 2 Prendere il lato inferiore del film in corrispondenza del Per facilitare il posizionamento della bobina di film estrarre il lato posteriore del triangolo di inversione e farlo...
  • Seite 17 Capitolo 6. Regolazione ed approntamento macchina FASE 5 Far passare il film tra i due rullini (R3) e tra le due ruote (R4) del trascinatore. Inserire poi il film seguendo lo schema rappresentato in figura fino ad annodare il film sul perno presente sulla flangia posteriore (F).
  • Seite 18: Regolazioni

    Capitolo 6. Regolazione ed approntamento macchina 6.5. Regolazioni 6.5.1. Regolazione del triangolo superiore In funzione dell’altezza del prodotto da confezionare, regolare la posizione del triangolo superiore effettuando le seguenti operazioni: Mettere la macchina in modalità START MANUALE. alzare triangolo Premere il pulsante superiore.
  • Seite 19: Regolazione Astina Di Apertura Film

    Capitolo 6. Regolazione ed approntamento macchina 6.5.5. Regolazione astina di apertura film L’astina (A1) consente di separare i 2 lembi della bobina di film. Posizionare l’astina all’interno dei 2 lembi del film in modo che la sua estremità sia 1cm più indietro rispetto alla piega del film. Nota: vedi capitolo 6.4: FASE 1 6.5.6.
  • Seite 20: Capitolo 7. Manutenzione Ordinaria

    Capitolo 7. Manutenzione ordinaria 7.1. Precauzioni e messa in stato di manutenzione ATTENZIONE!  La manutenzione deve essere affidata esclusivamente a personale esperto conoscitore della macchina.  È vietato fare interventi di manutenzione, lubrificazione, riparazione quando la macchina è in moto e/o sotto tensione.
  • Seite 21: Sostituzione Del Cavo Di Alimentazione

    Capitolo 7. Manutenzione ordinaria 7.3. Sostituzione del cavo di alimentazione ATTENZIONE! Se il cavo di alimentazione è danneggiato, esso deve essere sostituito dal costruttore o dal suo servizio assistenza tecnica, o comunque da una persona con qualifica similare, in modo da prevenire ogni rischio. 7.4.
  • Seite 22: Smontaggio, Demolizione E Smaltimento Residui

    Capitolo 7. Manutenzione ordinaria 7.6. Smontaggio, demolizione e smaltimento residui ATTENZIONE! Le operazioni di smontaggio e demolizione devono essere affidate a personale specializzato a tali attività e dotato delle competenze meccaniche ed elettriche necessarie a lavorare in condizioni di sicurezza. Procedere nel seguente modo: 1.
  • Seite 23 TRANSLATION OF THE ORIGINAL INSTRUCTIONS Contents Chapter 1. Description Page 1.1. Preface 1.2. Machine performance 1.3. Machine technical data Chapter 2. Film features 2.1. Films to be used 2.2. Band A calculation Chapter 3. Machine usage conditions 3.1. Max. pack sizes 3.2.
  • Seite 24: Chapter 1. Description

    The manufacturer declines all liability for damage or phisical injury caused by failure to observe safety standards. 1.2. Machine performance The L-sealer “Pratika 56CS” has been designed to wrap loose, individual or groups of products (foodstuff, household item, toys etc.) using single fold heat shrink film.
  • Seite 25: Machine Technical Data

    Chapter 1. Description 1.3. Machine technical data Package weight and sizes 2940 x 1440 x 1870mm Peso = 774Kg Machine weight 724Kg Pneumatic supply: 120 l/min Maximum production 2400 packages/hour I = Electrical connections P = Pneumatic connections C = “Supplementary” coupling...
  • Seite 26: Chapter 2. Film Features

    Chapter 2. Film features 2.1. Films to be used The machine can work with all heat shrink and non-heat shrink films, from 15 to 50 microns in thickness, of a technical and food type. To guarantee the best results, it is recommended to use the films marketed by The special features of our films assure their outstanding reliability, with regard both to compliance with laws in force and to an excellent machine performance.
  • Seite 27: Chapter 4. Safety Standards

    Chapter 4. Safety standards 4.1. Warnings THE MACHINE CAN NOT BE USED BY UNTRAINED PERSONNEL! CAUTION! Smoking is forbidden while the machine is operating! NEVER performs maintenance and/or adjustments to the machine during operation. Guards may only be disassembled by suitably trained and qualified maintenance engineers. NEVER operate the machine without all guards fitted.
  • Seite 28: Individual Protection Devices

    Chapter 4. Safety standards 4.3. Individual protection devices Wear safety shoes that protect feet from impacts, crushing and compression while moving or handling the machine. Wear safety gloves that protect the hands from crushing and mechanical hazards and while moving or handling the machine.
  • Seite 29: Positioning With Tunnel (If Present)

    The tunnel conveyor belt must be 1mm higher than that of “Pratika 56CS”, to keep packaged products from falling. Act on the 4 support feet to adjust the height of “Pratika 56CS”. Position the tunnel so that the outfeed product from “Pratika 56CS” is positioned at the centre of the tunnel conveyor belt. 5.4 Positioning without tunnel If “Pratika 56CS”...
  • Seite 30: Chapter 6 Machine Adjustment And Setting Up

    Chapter 6. Machine adjustment and setting up 6.1. Control panel The machine is fitted with a control panel, mounted on support, from which all programming and operation functions can be set. Led “alarm”. Flashes if one of the machine sensors shuts down the operating process. Led “long heater”.
  • Seite 31: Switching The Machine On

    Chapter 6. Machine adjustment and setting up 6.2. Switching the machine on Turn the main switch (Q1) to pos. ON. The display turns on and the following indications will appear: The led test on the panel control board is carried out. The system data check is carried out.
  • Seite 32: Manual Mode

    Chapter 6. Machine adjustment and setting up 6.2.1.2. MANUAL mode This condition is necessary when carrying out the set-up procedures and when inserting or changing the film reel. ACTIVATION OF “SEALING” Press the button (16) to activate the sealing cycle. ACTIVATION OF "FILM ADVANCEMENT”...
  • Seite 33 Chapter 6. Machine adjustment and setting up The following is the list of the variables that can be set in the AUTOMATIC program: Adjusts the quantity of film to leave in front of the pack. Values: 0 ÷ 300. Default: 25. Adjusts the quantity of film to leave behind the pack.
  • Seite 34 Chapter 6. Machine adjustment and setting up This function enables the operator to deactivate end of part reading (with photocell). Therefore, to determine the length of the pack, act on the function REAR FILM. Values: OFF ÷ ON. Default: OFF. This function enables the operator prevent the loading belt from running during the sealing phase in order to ensure that the package is processed correctly.
  • Seite 35: Summary Of Configurable Variables (Automatic And Manual Programs)

    Chapter 6. Machine adjustment and setting up 6.2.4. Summary of configurable variables (AUTOMATIC and MANUAL programs) STOP AUTOMATIC / MANUAL XXXXXXX S: XXX.X F: XXX.X STOP STOP AUTOMATIC MANUAL XXXXXXX XXXXXXX S: XXX.X F: XXX.X S: XXX.X F: XXX.X TYPE OF MENU TYPE OF MENU Range: USER 1, USER >...
  • Seite 36: Alarms

    Chapter 6. Machine adjustment and setting up 6.3. Alarms The machine includes a series of ALARMS that are necessary in order monitor hazard and fault conditions. Whenever an alarm is activated, the display views the fault, together with an acoustic signal and the red light element turns on (E2), When the alarm is restored, the red light element and acoustic signal turn off.
  • Seite 37: Introducing Of The Film

    Chapter 6. Machine adjustment and setting up 6.4. Introducing of the film To insert the film, the machine must be in MANUAL START mode. Rotate the “BYPASS SAFETY PROTECTIONS” (S2) switch to on, and open the rear door. PHASE 1 PHASE 2 To make it easier to position film reel, extract the reel support Take the lower edge of the film corresponding to the...
  • Seite 38 Chapter 6. Machine adjustment and setting up PHASE 5 Feed the film between the two rollers (R3) and the two wheels (R4) on the feeder. Insert the film as shown in the figure and secure it to the pin on the rear flange (F). PHASE 6 Next, adjust the positioning bars (B), regulating the knob (M3) in order to lock the reel, and leaving a gap of 5 mm between the bars and the reel.
  • Seite 39: Adjustments

    Chapter 6. Machine adjustment and setting up 6.5. Adjustments 6.5.1. Adjustment of upper triangle Depending on the height of the product to be packed, adjust the position of the upper triangle by performing the following operations: Place the machine in START MANUAL MODE. Press the button to lift the upper triangle.
  • Seite 40: Adjustment Of Film Opening Bar

    Chapter 6. Machine adjustment and setting up 6.5.5. Adjustment of film opening bar The bar (A1) allows to separate the 2 edges of the film reel. Position the bar inside the 2 edges of the film so that the end is 1 cm behind the crease of the film.
  • Seite 41: Chapter 7. Ordinary Maintenance

    Chapter 7. Ordinary maintenance 7.1. Precautions and setting to maintenance mode CAUTION!  Maintenance must be performed exclusively by skilled personnel familiar with the machine.  Never carry out maintenance, lubrication, or repairs when the machine is in operation and/or connected to the power supply.
  • Seite 42: Replacement Of The Supply Cord

    Chapter 7. Ordinary maintenance 7.3. Replacement of the supply cord ATTENTION! If the supply cord is damaged, it must be replaced by the manufacturer, its service agent or similarly qualified persons in order to avoid a hazard. 7.4. Wiring diagram (page 107÷111) Triangle up/down adjustment sensor Unwinder motor...
  • Seite 43: Disassembling, Demolition And Elimination Of Residuals

    Chapter 7. Ordinary maintenance 7.6. Disassembling, demolition and elimination of residuals ATTENTION! All disassembling and demolition operations must be done by qualified personnel with mechanical and electrical expertise required to work in safe conditions. Proceed as follows: disconnect machine from power mains disconnect the machine from the pneumatic system disassemble components All wastes must be treated, eliminated or recycled according to their classification and to the procedures in...
  • Seite 44 ÜBERSETZUNG DER ORIGINAL- ANLEITUNG Inhaltsverzeichnis Kapitel 1. Beschreibung Seite 1.1. Vorwort 1.2. Leistungen der Maschine 1.3. Technische Daten der Maschine Kapitel 2. Merkmale der Folie 2.1. Die zu verwendenden Folie 2.2. Berechnung des Bands A Kapitel 3. Verwendung der Maschine 3.1.
  • Seite 45: Kapitel 1. Beschreibung

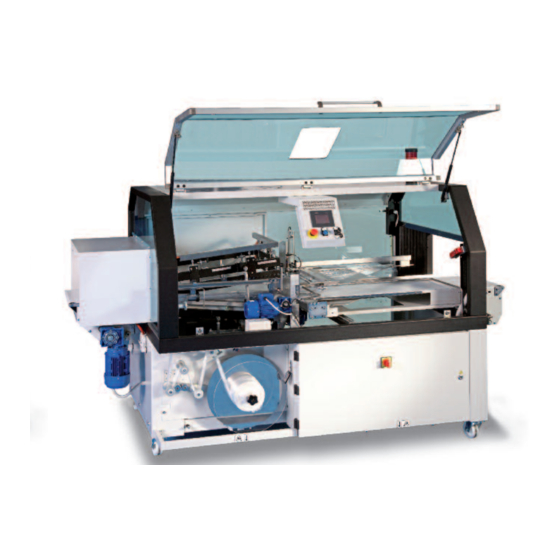
    Sicherheitsvorschriften entstehen. 1.2. Leistungen der Maschine Die Verpackungsmaschine „Pratika 56CS“ wurde so geplant, dass man mit ihr einzelne Teile oder Produktgruppen (Lebensmittel, Haushaltsgegenstände, Spielzeug usw.) mit einer einfach gefalzten Wärmeschrumpffolie verpacken kann. Die Maschine kann von Hand beschickt werden oder in einer Straße mit anderen Maschinen betrieben werden.
  • Seite 46: Technische Daten Der Maschine

    Kapitel 1. Beschreibung 1.3. Technische Daten der Maschine Gewicht und Größen der Verpackung 2940 x 1440 x 1870mm Gewicht = 774Kg Gewicht der Maschine 724Kg Druckluftversorgung: 120 l/min Höchstproduktion 2400 Verpackungen pro Stunde. I = Elektrischer Anschluß P = Luftverbindung C = Zusätzlicher Anschluss...
  • Seite 47: Kapitel 2. Merkmale Der Folie

    Kapitel 2. Merkmale der Folie 2.1. Die zu verwendenden Folie Maschine kann allen wärmeschrumpfenden nicht wärmeschrumpfenden Folien mit einer Stärke von 15 bis 50 Mikron arbeiten, sowohl mit technischen Folien als auch mit Lebensmittelfolien. Um optimale Ergebnisse zu garantieren, wird empfohlen, die von uns vermarkteten Folien zu verwenden.
  • Seite 48: Kapitel 4. Sicherheitsvorschriften

    Kapitel 4. Sicherheitsvorschriften 4.1. Warnungen NICHT AUSGEBILDETEM PERSONAL DARF DIE ANWENDUNG DER MASCHINE NICHT GESTATTET WERDEN! ACHTUNG! Während des Maschinenbetriebs ist es verboten zu rauchen! ES IST VERBOTEN, irgend eine Wartung und/oder Regulierung vorzunehmen, während die Maschine in Betrieb ist. Der Ausbau der Schutzvorrichtungen darf nur von den zuständigen Wartungstechnikern, die für diesen Zweck ausgebildet wurden, ausgeführt werden.
  • Seite 49: Persönliche Schutzausrüstungen

    Kapitel 4. Sicherheitsvorschriften 4.3. Persönliche Schutzausrüstungen Sicherheitsschuhe mit Stoß-, Quetsch- und Druckwiderstand zum Fußschutz bei der Handhabung der Maschine tragen. Schutzhandschuhe wegen Quetschgefahr oder mechanischer Gefahr bei Transport und Handhabung der Maschine tragen. Schutzhandschuhe wegen Schnittgefahr beim Auswechseln der Siegelleisten tragen. Schutzhandschuhe wegen eventuell...
  • Seite 50: Positionierung Mit Tunnel (Falls Vorgesehen)

    Nach der Positionierung der „Pratika 56CS" den Schrumpftunnel so annähern, dass das Band des Tunnels so nah wie möglich an dem der „Pratika 56CS" ist. Das Band des Tunnels muss 1 mm höher sein, als das der „Pratika 56CS", um das Fallen der verpackten Produkte zu verhindern.
  • Seite 51: Kapitel 6. Einstellung Und Vorbereitung Der Maschine

    Kapitel 6. Einstellung und Vorbereitung der Maschine 6.1. Steuertafel Die Maschine besitzt ein Bedienfeld auf eigenem Ständer, mit dem sämtliche Programmier- und Betriebsfunktionen eingestellt werden können. Led „Alarm“. Blinkt, wenn einer der Sensoren der Maschine den Betrieb blockiert. Led „langer Widerstand“. Leuchtet, wenn der Widerstand mit Strom versorgt wird. Led „kurzer Widerstand“.
  • Seite 52: Maschine Einschalten

    Kapitel 6. Einstellung und Vorbereitung der Maschine 6.2. Maschine Einschalten Drehen Sie den Hauptschalter (Q1) in Pos. ON. Das Display schaltet sich ein und die folgenden Angaben werden erscheinen: Es wird ein Test der LEDs an der Tastaturkarte durchgeführt. Es wird ein Test der Systemdaten durchgeführt. Es erscheint OK(bei korrekten Daten) oder FEHLER (bei fehlerhaften Daten).
  • Seite 53: Manuelle Betriebsart

    Kapitel 6. Einstellung und Vorbereitung der Maschine 6.2.1.2. MANUELLE Betriebsart Diese Betriebsart der Maschine ist für die Einrichtung sowie für das Einlegen und Wechseln der Folienrolle erforderlich. AKTIVIERUNG DER „SCHWEISSUNG” Die Taste (16) drücken um den automatischen Schweißzyklus zu aktivieren. AKTIVIERUNG DES „FOLIENZUGS”...
  • Seite 54 Kapitel 6. Einstellung und Vorbereitung der Maschine Liste der im Programm AUTOMATISCH einstellbaren Variablen: Erlaubt die Einstellung der vor dem Paket gewünschten Folienmenge Werte: 0 ÷ 300. Default: 25. Erlaubt die Einstellung der hinter dem Paket gewünschten Folienmenge. Werte: 0 ÷ 900. Default: 50. Ermöglicht die Einstellung der Schweißdauer.
  • Seite 55 Kapitel 6. Einstellung und Vorbereitung der Maschine Die Funktion deaktiviert die Erfassung des Artikels (mit Lichtschranke). Für die Bestimmung der Länge des Pakets also die Funktion FILM HINTEN verwenden. Werte: OFF ÷ ON. Default: OFF. Die Funktion schaltet das Förderband während des Schweißvorgangs ab, um den Verpackungsablauf zu erleichtern.
  • Seite 56: Übersichtsplan Der Programmierbaren Variabeln (Automatisches Und Manuelles Programm)

    Kapitel 6. Einstellung und Vorbereitung der Maschine 6.2.4. Übersichtsplan der programmierbaren Variabeln (AUTOMATISCHES und MANUELLES Programm) STOP AUTOMATISCH / MANUELL XXXXXXX S: XXX.X V: XXX.X STOP STOP AUTOMATISCH MANUELL XXXXXXX XXXXXXX S: XXX.X V: XXX.X S: XXX.X V: XXX.X TYP VON MENU TYP VON MENU Werte: BENUTZER 1, BENUTZER 2...
  • Seite 57: Alarme

    Kapitel 6. Einstellung und Vorbereitung der Maschine 6.3. Alarme Die Maschine sieht eine Reihe von ALARMEN vor, die zur Überwachung von Gefahrensituationen und Störungen notwendig sind. Bei Alarmen zeigt das Display die Störung an. Gleichzeitig ertönt ein akustisches Signal und es schaltet sich dasrote Leuchtelement (E2) ein.
  • Seite 58: Einsetzen Der Folie

    Kapitel 6. Einstellung und Vorbereitung der Maschine 6.4. Einsetzen der Folie Zum Einlegen der Folie müssen Sie die Maschine auf MANUELLER START schalten. Drehen Sie den Schalter „SICHERUNG AUSSCHALTEN” (S2) auf EIN und öffnen Sie die hintere Tür. PHASE 1 PHASE 2 Für eine einfachere Positionierung der Folienrolle den Die untere Folienseite auf Höhe der Vorderseite des...
  • Seite 59 Kapitel 6. Einstellung und Vorbereitung der Maschine PHASE 5 Die Folien zwischen die beiden Rollen (R3) und die beiden Rädern (R4) des Mitnehmers durchschieben. Danach die Folie gemäß dem Plan in der Abbildung einführen, bis sie auf dem am hinteren Flansch (F) vorhandenen Bolzen festgemacht werden kann.
  • Seite 60: Einstellungen

    Kapitel 6. Einstellung und Vorbereitung der Maschine 6.5. Einstellungen 6.5.1. Einstellung des oberen Dreiecks Entsprechend der Höhe des zu verpackenden Produktes die Höhe des oberen Dreiecks einstellen, indem wie folgt vorgegangen wird: Die Maschine in den manuellen BETRIEBSMODUS START schalten. Heben oberen Drücken der Taste...
  • Seite 61: Einstellung Des Folienöffnungsstabs

    Kapitel 6. Einstellung und Vorbereitung der Maschine 6.5.5. Einstellung des Folienöffnungsstabs er Stab (A1) ermäglicht die Trennung der 2 Enden der Folienspule. Den Stab in den 2 Enden der Folie positionieren, sodass sich sein Ende 1 cm hinter der Falte der Folie befindet. ANM.: Siehe Kapitel 6.4: PHASE 1.
  • Seite 62: Kapitel 7. Ordentliche Wartung

    Kapitel 7. Ordentliche Wartung 7.1. Vorsichtsmaßnahmen und Wartungseinstellung ACHTUNG!  Die Wartung darf ausschließlich erfahrenem Personal anvertraut werden, das die Maschine gut kennt.  Es ist verboten, Wartungs-, Schmier- und/oder Reparaturarbeiten vorzunehmen, wenn die Maschine in Bewegung ist und/oder unter Spannung steht. ...
  • Seite 63: Auswechseln Des Stromversorgungskabels

    Kapitel 7. Ordentliche Wartung 7.3. Auswechseln des Stromversorgungskabels ACHTUNG! Wenn das Stromversorgungskabel beschädigt ist, muss es vom Hersteller oder von dessen Kundendienst ausgewechselt werden, oder zumindest von einer Person mit gleichwertiger Qualifikation, um jegliche Gefahr zu meiden. 7.4. Schaltbild (Seite 107÷111) Sensor Dreieck-Höhenverstellung Motor Abwickler Schalter Hauben-Sicherheitsvorrichtung...
  • Seite 64: Abbau, Verschrottung Und Entsorgung Der Rückstände

    Kapitel 7. Ordentliche Wartung 7.6. Abbau, Verschrottung und Entsorgung der Rückstände ACHTUNG! Die Abbau- und Verschrottungsarbeiten dürfen nur von Personen durchgeführt werden, die auf diese Tätigkeiten spezialisiert sind und die zum sicheren Arbeiten notwendigen mechanischen und elektrischen Fachkenntnisse besitzen. Gehen Sie folgendermaßen vor: Trennen Sie die Maschine vom Stromnetz Maschine von der Druckluftversorgung trennen.
  • Seite 65 TRADUCTION DES INSTRUCTIONS ORIGINALES Table des matières Chapitre 1. Description Page 1.1. Avant-propos 1.2. Prestations de la machine 1.3. Caractéristiques techniques de la machine Chapitre 2. Caractéristiques du film 2.1. Films admissibles 2.2. Calculer la largeur du film A Chapitre 3. Conditions d’utilisation de la machine 3.1.
  • Seite 66: Chapitre 1. Description

    1.2. Prestations de la machine La conditionneuse “Pratika 56CS” a été conçue pour conditionner des pièces en vrac ou des produits regroupés (alimentaires, ménagers, jouets, etc.) en utilisant un film thermorétractable plié une fois. La machine peut être chargée à la main ou travailler en série avec d’autres machines.
  • Seite 67: Caractéristiques Techniques De La Machine

    Chapitre 1. Description 1.3. Caractéristiques techniques de la machine Poids et dimensions de l’emballage 2940 x 1440 x 1870mm Poids = 774Kg Poids et dimensions de la machine 724Kg Alimentation pneumatique: 120 l/min Production maximale: 2400 conditionnements/heure I = Raccordement électrique P = Raccordement pneumatique C = Prise raccord “supplémentaire”...
  • Seite 68: Chapitre 2. Caractéristiques Du Film

    Chapitre 2. Caractéristiques du film 2.1. Films admissibles La machine peut usiner tous les films thermorétractables ou non dont l'épaisseur est comprise entre 15 et 50 microns, de type technique et alimentaire. Pour obtenir le meilleur résultat, il est conseillé d'utiliser les films que nous commercialisons.
  • Seite 69: Chapitre 4. Normes De Sécurité

    Chapitre 4. Normes de sécurité 4.1. Avertissements NE PERMETTEZ PAS AU PERSONNEL NON FORME D’UTILISER LA MACHINE! ATTENTION! Il est interdit de fumer pendant le fonctionnement de la machine! IL EST INTERDIT d’effectuer une opération d’entretien et/ou de réglage, quelles qu’elles soient, pendant le fonctionnement de la machine.
  • Seite 70: Equipements De Protection Individuelle

    Chapitre 4. Normes de sécurité 4.3. Equipements de protection individuelle Porter des bottines de protection qui résistent au choc, à l’écrasement et à la compression du pied au cours du levage et du transport de la machine. Porter des gants de protection contre le danger d’écrasement et les dangers mécaniques au cours du transport et du levage de la machine.
  • Seite 71: Positionnement Avec Tunnel (Si Prévu)

    "Pratika 56CS". Le tapis du tunnel doit être 1mm plus haut que le tapis de la "Pratika 56CS", afin d'éviter la chute des produits emballés. Pour régler la hauteur de la "Pratika 56CS", agir sur les 4 pieds d'appui.
  • Seite 72: Chapitre 6. Réglage Et Mise En Service

    Chapitre 6. Réglage et mise en service 6.1. Panneau de commande La machine possède un pupitre opérateur avec une interface, à partir duquel il est possible de sélectionner toutes les fonctions de programmation et de fonctionnement. Led “urgence”. Elle clignote si un des capteurs de la machine bloque le processus de fonctionnement. Led “résistance longue”.
  • Seite 73: Mise Sous Tension De La Machine

    Chapitre 6. Réglage et mise en service 6.2. Mise sous tension de la machine Tournez l’interrupteur général (Q1) dans la position ON. L’écran s’allume et les messages suivants apparaissent: Le test des leds est effectué sur la fiche clavier. La vérification des données du système est effectuée. L’inscription OK (avec données correctes) ou ERREUR (avec données incorrectes) apparaît.
  • Seite 74: Mode Manuel

    Chapitre 6. Réglage et mise en service 6.2.1.2. Mode MANUEL Il s’agit du mode de fonctionnement à sélectionner pour les phases de mise au point, introduction et changement de la bobine du film. ACTIVATION DE LA "SOUDURE" Appuyer sur le bouton (16) pour activer un cycle de soudure.
  • Seite 75 Chapitre 6. Réglage et mise en service La liste des variables configurables dans le programme AUTOMATIQUE est la suivante: Règle la quantité de film que l’on souhaite laisser devant le paquet Valeurs: 0 ÷ 300. Par défaut: 25. Règle la quantité de film que l’on souhaite laisser derrière le paquet. Valeurs: 0 ÷...
  • Seite 76 Chapitre 6. Réglage et mise en service La fonction désactive la lecture de la fin de la pièce (avec photocellule). Pour déterminer la longueur de l'emballage, il faut donc intervenir sur la fonction FILM POSTERIEUR. Valeurs: OFF ÷ ON. Par défaut: OFF. La fonction permet de maintenir la bande de chargement à...
  • Seite 77: Schéma Récapitulatif Des Variables Paramétrables (Programme Automatique Et Manuel)

    Chapitre 6. Réglage et mise en service 6.2.4. Schéma récapitulatif des variables paramétrables (programme AUTOMATIQUE et MANUEL) STOP AUTOMATIQUE / MANUEL XXXXXXX L: XXX.X F: XXX.X STOP STOP AUTOMATIQUE MANUEL XXXXXXX XXXXXXX L: XXX.X F: XXX.X L: XXX.X F: XXX.X TYPE DU MENU TYPE DU MENU Valeurs: USAGER 1,...
  • Seite 78: Alarmes

    Chapitre 6. Réglage et mise en service 6.3. Alarmes La machine prévoit une série d’ALARMES nécessaires à surveiller les situations de danger et d’erreurs de fonctionnement. A chaque fois qu'une alarme se déclenche, l'écran affiche l'anomalie, en même temps qu'un signal sonore et l'allumage de l’élément lumineux rouge (E2), Lors du réarmement de l'alarme, l'élément lumineux et le signal sonore s'éteignent.
  • Seite 79: Amorçage Du Film

    Chapitre 6. Réglage et mise en service 6.4. Amorçage du film Pour amorcer le film, mettre la machine dans le mode START MANUEL . Tourner l’interrupteur “EXCLUSION SECURITE” (S2) sur ON et ouvrir le portillon arrière. PHASE 1 PHASE 2 Prendre la face inférieure du film à...
  • Seite 80 Chapitre 6. Réglage et mise en service PHASE 5 Faire passer le film entre les deux galets (R3) et entre les deux roues (R4) de l’entraîneur. Amorcer ensuite le film en suivant le schéma représenté dans la figure ci dessus puis arrêter le film sur la broche située sur la flasque arrière (F).
  • Seite 81: Réglages

    Chapitre 6. Réglage et mise en service 6.5. Réglages 6.5.1. Réglage du triangle supérieur En fonction de la hauteur du produit à emballer, régler la position du triangle supérieur en effectuant les opérations suivantes: Mettre la machine en mode START MANUEL. pour soulever le triangle Appuyer sur le bouton supérieur.
  • Seite 82: Réglage De La Tige D'ouverture Du Film

    Chapitre 6. Réglage et mise en service 6.5.5. Réglage de la tige d'ouverture du film La tige (A1) permet de séparer les 2 pans de la bobine de film. Placer la tige à l'intérieur des 2 pans du film, de manière à ce que son extrémité...
  • Seite 83: Chapitre 7. Entretien Ordinaire

    Chapitre 7. Entretien ordinaire 7.1. Précautions et mise en état d’entretien ATTENTION!  L’entretien doit être confié exclusivement au personnel expert connaissant la machine.  Il est interdit de faire des interventions d’entretien, lubrification, réparation quand la machine est en marche et/ou sous tension.
  • Seite 84: Remplacement Du Câble D'alimentation

    Chapitre 7. Entretien ordinaire 7.3. Remplacement du câble d’alimentation ATTENTION ! Si le câble d’alimentation est abîmé, il doit être remplacé par le Constructeur ou par son service d’assistance technique, ou du moins par une personne possédant le même niveau de qualification, de manière à prévenir le moindre risque d’accident. 7.4.
  • Seite 85: Démontage, Démolition Et Mise À La Décharge

    Chapitre 7. Entretien ordinaire 7.6. Démontage, démolition et mise à la décharge ATTENTION! Le démontage et la démolition doivent être confiés à du personnel spécialisé ayant une parfaite maîtrise de la mécanique et de l’électricité pour pouvoir travailler dans des conditions de sécurité. Procédez comme suit: débranchez la machine de la ligne d’alimentation en énergie électrique déconnecter la machine de l'installation pneumatique...
  • Seite 86 TRADUCCIÓN DE LAS INSTRUCCIONES ORIGINALES Indice Capítulo 1. Descripción Página 1.1. Prólogo 1.2. Prestaciones de la máquina 1.3. Datos técnicos de la máquina Capítulo 2. Características del film 2.1. Films para emplear 2.2. Cálculo banda A Capítulo 3 Condiciones de uso de la máquina 3.1.
  • Seite 87: Capítulo 1. Descripción

    1.2. Prestaciones de la máquina La envasadora “Pratika 56CS” ha sido diseñada para envasar productos individualmente o en grupos (alimentarios, para el hogar, juguetes, etc.) con film termorretráctil en monopliegue. La máquina puede trabajar con alimentación manual o en serie con otras máquinas.
  • Seite 88: Datos Técnicos De La Máquina

    Capítulo 1. Descripción 1.3. Datos técnicos de la máquina Peso y dimensiones del embalaje 2940 x 1440 x 1870mm Peso = 774Kg Peso de la máquina 724Kg Alimentación neumática: 120 l/min Producción máxima: 2400 envases/hora I = Conexión eléctrica P = Conexión neumática C = Toma de conexión “auxiliar”...
  • Seite 89: Capítulo 2. Características Del Film

    Capítulo 2. Características del film 2.1. Films para emplear La máquina puede trabajar con todas las películas termorretráctiles y no, con espesores entre 15 y 50 micrones , tanto de tipo técnico como de tipo alimentario. Para garantizar los mejores resultados, se aconseja utilizar las películas comercializadas por nosotros.
  • Seite 90: Capítulo 4. Normas De Seguridad

    Capítulo 4. Normas de seguridad 4.1. Advertencias ¡NO PERMITIR EL USO DE LA MÁQUINA A EMPLEADOS NO ENTRENADOS ATENCIÓN! ¡Se prohíbe fumar durante el funcionamiento de la máquina! SE PROHÍBE realizar cualquier tipo de operación de mantenimiento y/o regulación cuando la máquina está funcionando.
  • Seite 91: Dispositivos De Protección Individual

    Capítulo 4. Normas de seguridad 4.3. Dispositivos de protección individual Utilizar calzado con puntera de protección contra los golpes, el aplastamiento y la compresión del pie durante el transporte y el desplazamiento de la máquina. Utilizar guantes de protección contra el riesgo de aplastamiento y contra los peligros mecánicos durante el transporte y el desplazamiento de la máquina.
  • Seite 92: Colocación Con Túnel (Donde Está Previsto)

    Después de haber colocado la “Pratika 56CS”, acerque el túnel de retracción para que la cinta del túnel quede lo más cerca posible al de la “Pratika 56CS”. La cinta del túnel debe quedar 1 mm más alto respecto a la de la “Pratika 56CS” para evitar la caída de los productos embalados.
  • Seite 93: Capítulo 6. Regulación Y Preparación De La Máquina

    Capitulo 6. Regulación y preparación de la máquina 6.1. Panel de comando La máquina incorpora un panel de mando para configurar todas las funciones de programación y funcionamiento que está alojado en un soporte específico. Led “alarmas”. Parpadea si uno de los sensores de la máquina bloquea el proceso operativo. Led “resistencia larga”.
  • Seite 94: Encendido De La Máquina

    Capitulo 6. Regulación y preparación de la máquina 6.2. Encendido de la máquina Girar el interruptor general (Q1) en la posición ON. La pantalla se enciende y aparecen las siguientes frases: Se efectúa el test de los led en la tarjeta teclado. Se efectúa el control de los datos del sistema.
  • Seite 95: Modo Manual

    Capitulo 6. Regulación y preparación de la máquina 6.2.1.2. Modo MANUAL Es la modalidad de funcionamiento de la máquina que se ha de habilitar durante las fases de puesta a punto e introducción y cambio de la bobina de film. ACTIVACIÓN DE LA "SOLDADURA"...
  • Seite 96 Capitulo 6. Regulación y preparación de la máquina La lista de las variables configurables en el programa AUTOMÁTICO es la siguiente: Regula la cantidad de film que se desea dejar por delante del paquete. Valores: 0 ÷ 300. Default: 25. Regula la cantidad de film que se desea dejar por detrás del paquete.
  • Seite 97 Capitulo 6. Regulación y preparación de la máquina Esta función desactiva la lectura final de pieza (con fotocelula). Por lo tanto, para determinar las dimensiones del embalaje, accione la función de film posterior. Valores: OFF ÷ ON. Default: OFF. Esta función permite mantener parada la cinta de carga durante el soldadura para facilitar la composición del envase.
  • Seite 98: Esquema De Variables Configurables (Programa Automático Y Manual)

    Capitulo 6. Regulación y preparación de la máquina 6.2.4. Esquema de variables configurables (programa AUTOMÁTICO y MANUAL) STOP AUTOMATICO / MANUAL XXXXXXX L: XXX.X F: XXX.X STOP STOP AUTOMATICO MANUAL XXXXXXX XXXXXXX L: XXX.X F: XXX.X L: XXX.X F: XXX.X TIPO MENU TIPO MENU Valores: UTILIZADOR 1,...
  • Seite 99: Alarmas

    Capitulo 6. Regulación y preparación de la máquina 6.3. Alarmas La máquina incorpora una serie de ALARMAS que son necesarias para controlar las situaciones de peligro y anomalía. Cada vez que interviene una alarma, la pantalla muestra la anomalía simultáneamente con una señal acústica y en el momento en que se enciende el elemento luminoso de color rojo (E2), Al iniciar la alarma, se puede apagar el elemento luminoso o la señal acústica.
  • Seite 100: Introducción Del Film

    Capitulo 6. Regulación y preparación de la máquina 6.4. Introducción del film Para introducir el film es necesario habilitar la modalidad START MANUAL. Girar el interruptor “DESACTIVACIÓN DISPOSITIVOS SEGURIDAD” (S2) hacia ON y abrir la puerta posterior. FASE 1 FASE 2 Agarrar el lado inferior del film que coincide con el lado Para montar la bobina de film con mayor facilidad, extraer posterior del triángulo de inversión y pasarlo por debajo...
  • Seite 101 Capítulo 6. Regulación y preparación de la máquina FASE 5 Pasar el film entre los dos rodillos (R3) y entre las dos ruedas (R4) del arrastrador. Introducir el film como muestra el esquema de la figura y anudarlo al perno de la brida posterior (F). FASE 6 Regular las varillas de posicionamiento (B) con los mandos (M3) para bloquear la bobina, dejando una separación de 5 mm entre las varillas y la bobina.
  • Seite 102: Regulaciones

    Capitulo 6. Regulación y preparación de la máquina 6.5. Regulaciones 6.5.1. Regulación del triángulo superior En función de la altura del producto que hay que embalar, regule la posición del triángulo superior realizando las siguientes operaciones: Coloque la máquina en modo START MANUAL. para elevar triángulo...
  • Seite 103: Regulación De La Varilla De Apertura Del Film

    Capitulo 6. Regulación y preparación de la máquina 6.5.5. Regulación de la varilla de apertura del film La varilla (A1) permite separar los 2 bordes de la bobina de film. Coloque la varilla dentro de los dos bordes de film para que su extremo sea de 1 cm más hacia atrás respecto al pliegue del film.
  • Seite 104: Capítulo 7. Manutención Ordinaria

    Capítulo 7. Manutención ordinaria 7.1. Precauciones y puesta en estado de mantenimiento ¡ATENCIÓN!  El mantenimiento sólo debe ser efectuado por personal experto que conozca la máquina.  Se prohíbe realizar operaciones de mantenimiento, lubricación y reparación cuando la máquina está en movimiento y/o bajo tensión.
  • Seite 105: Sustitución Del Cable De Alimentación

    Capítulo 7. Manutención ordinaria 7.3. Sustitución del cable de alimentación ¡ATENCIÓN! Si el cable de alimentación está dañado, debe ser sustituido por el constructor o por su servicio de asistencia técnica, o en cualquier caso por una persona con cualificación similar, con el fin de prevenir cualquier riesgo. 7.4.
  • Seite 106: Desmontaje, Demolición Y Eliminación De Los Residuos

    Capítulo 7. Manutención ordinaria 7.6. Desmontaje, demolición y eliminación de los residuos ¡ATENCIÓN! Las tareas de desmontaje y demolición se deben encargar a personal especializado en dichas actividades y equipado con los equipos mecánicos y eléctricos necesarios para trabajar en condiciones de seguridad. Proceder de la siguiente manera: desconectar la máquina de la red de alimentación eléctrica desconecte la máquina de la instalación neumática...
  • Seite 107: Dichiarazione Ce Di Conformita

    SVE PACKNINGSMASKIN TYP: MÁQUINA CONFECCIONADORA TIPO: GR ΜΗΧΑΝΗ ΣΥΣΚΕΥΑΣΙΑΣ ΤΥΠΟΥ: Pratika 56CS n° è conforme ai requisiti essenziali di sicurezza e a tutte le disposizioni pertinenti delle direttive applicabili conforms to the essential safety requirements and all the provisions of the applicable directives entspricht den grundlegenden Sicherheitsanforderungen und allen betreffenden Bestimmungen der einschlägigen Richtlinien...
  • Seite 108 7.4.
  • Seite 109 7.4.
  • Seite 110 7.4.
  • Seite 111 7.4.
  • Seite 112 7.4.
  • Seite 113 7.5.
  • Seite 115  (I) Tipo CERTIFICATO DI GARANZIA (GB) Type CERTIFICATE OF GUARANTEE (D) Typ GARANTIESCHEIN (F) Type BULLETIN DE GARANTIE (E) Tipo CERTIFICADO DE GARANTÍA (P) Tipo CERTIFICADO DE GARANTIA (GR) Τύπος ΠΙΣΤΟΠΟΙΗΤΙΚΟ ΕΓΓΥΗΣΗΣ (I) Matricola n° Data e timbro rivenditore (GB) Serial No.
  • Seite 116 Minipack-torre S.p.A. Via Provinciale, 54 - 24044 DALMINE (BG) - ITALY Tel. (035) 563525 – Fax (035) 564945 E-mail: info@minipack-torre.it http://www.minipack-torre.it  Spett.le minipack-torre S.p.A. Via Provinciale, 54 24044 DALMINE (BG) ITALY...

Inhaltsverzeichnis