Inhaltsverzeichnis
Werbung
Quicklinks
I
ISTRUZIONE PER L'INSTALLAZIONE, L'USO E LA MANUTENZIONE
GB INSTALLATION, OPERATION AND MAINTENANCE
D
INSTALLATIONS, GEBRAUCHS UND WARTUNGSANWEISUNGEN
F
INSTRUCTIONS POUR L'INSTALLATION, L'EMPLOI ET L'ENTRETIEN
E
INSTRUCCIONES PARA LA INSTALACION, USO Y MANTENIMENTO
I
LEGGERE ATTENTAMENTE QUESTO LIBRETTO PRIMA DI USARE LA MACCHINA
GB
BEFORE USING THE MACHINE PLEASE CAREFULLY READ THE INSTRUCTIONS
D
BEACHTEN SIE GUT DIE BEDINUNGSANLEITUNG BEVOR MAN DIE MASCHINE BENÜTZT
F
NOUS VOUS PRIONS DE BIEN LIRE LE MANUEL D'INSTRUCTIONS AVANT D'UTILISER LA MACHINE
E
LEER ATENTAMENTE ESTE MANUAL ANTES DE USAR LA MÁQUINA
Minipack-torre S.p.A.
Via Provinciale, 54 - 24044 Dalmine (BG) - Italy
Tel. (035) 563525 – Fax (035) 564945
E-mail: info@minipack-torre.it
http://www.minipack-torre.it
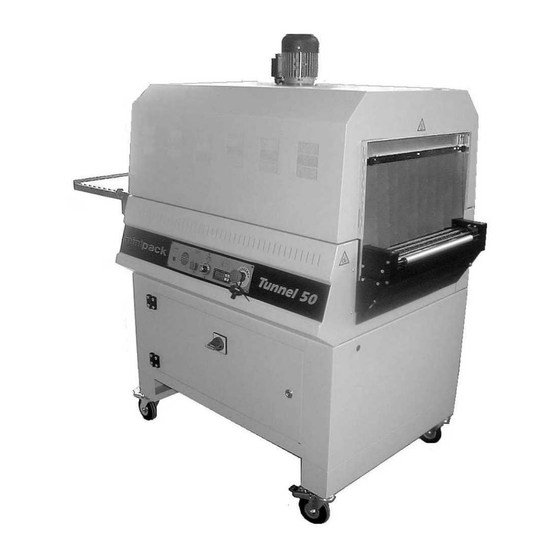
Tunnel 50
DOC. N. FM111011
REV. 02
ED. 09.2006
Werbung
Inhaltsverzeichnis

Verwandte Anleitungen für Minipack-Torre Tunnel 50


Inhaltszusammenfassung für Minipack-Torre Tunnel 50
- Seite 1 INSTALLATIONS, GEBRAUCHS UND WARTUNGSANWEISUNGEN INSTRUCTIONS POUR L’INSTALLATION, L’EMPLOI ET L’ENTRETIEN INSTRUCCIONES PARA LA INSTALACION, USO Y MANTENIMENTO Tunnel 50 LEGGERE ATTENTAMENTE QUESTO LIBRETTO PRIMA DI USARE LA MACCHINA BEFORE USING THE MACHINE PLEASE CAREFULLY READ THE INSTRUCTIONS BEACHTEN SIE GUT DIE BEDINUNGSANLEITUNG BEVOR MAN DIE MASCHINE BENÜTZT NOUS VOUS PRIONS DE BIEN LIRE LE MANUEL D’INSTRUCTIONS AVANT D’UTILISER LA MACHINE...
- Seite 2 УПАКОВОЧНОЕ ОБОРУДОВАНИЕ ПРОИЗВОДСТВО И ПОСТАВКА СЕРВИСНЫЙ РЕМОНТ ЗАПАСНЫЕ ЧАСТИ РАСХОДНЫЕ МАТЕРИАЛЫ Диагностика, ремонт, сервисное обслуживание. Запасные части и расходный материал: резина, тефлоновая лента, термонож (лезвие), гель для смазки. Плёнка термоусадочная полиолефиновая. Система «Trade-In» − замена Вашего оборудования на новое и более...
- Seite 3 GB Index Inhaltsverzeichnis Chapter 1. Foreword Kapitel 1. Einleitung 1.1. Introduction…………………………………………………….. 1-1 1.1. Einleitung………………………………………………………... 1-1 1.2. Performances of packaging machine…………….…………. 1-5 1.2. Leistungen der Verpackungsmachine………………………… 1-5 1.3. Machine identification………………………………………… 1-5 1.3. Beschreibung der Maschine…………………………………… 1-5 1.4. Weight and dimensions of packed machine……………….. 1-7 1.4.
-
Seite 4: Inhaltsverzeichnis
Indice Capitolo 1. Introduzione 1.1. Prefazione...................…………… 1-2 1.2. Prestazioni della macchina confezionatrice…………………………………… 1-6 1.3. Identificazione della macchina.............…………… 1-6 1.4. Peso e dimensioni della macchina imballata.......…………… 1-8 1.5. Peso e dimensioni della macchina..........…………… 1-8 Capitolo 2. Installazione della macchina 2.1. Trasporto e posizionamento............…………… 2-2 2.2. - Seite 5 Chapter 1. Foreword Kapitel 1. Einleitung Chapitre 1. Avant-propos Capítulo 1. Prefacio 1.1. Introduction 1.1. Einleitung 1.1. Avant-propos 1.1. Prefacio GB This manual has been drawn up in compliance with the UNI 10893 standard dated July 2000. It is meant for all users in order to enable them to use the machine correctly.
- Seite 6 Capitolo 1. Introduzione 1.1. Prefazione Il presente manuale è redatto nel rispetto della norma UNI 10893 del Luglio 2000. È rivolto a tutti gli utilizzatori al fine di consentire un corretto uso della macchina. Conservarlo in luogo facilmente accessibile vicino alla macchina e noto a tutti gli utilizzatori. Il presente manuale è parte integrante della macchina ai fini della sicurezza.
- Seite 7 Chapter 1. Foreword Kapitel 1. Einleitung Chapitre 1. Avant-propos Capítulo 1. Prefacio 1.1. Introduction 1.1. Einleitung 1.1. Avant-propos 1.1. Prefacio GB All reproduction rights of this manual are reserved to the manufacturer. Partial or complete reproduction is forbidden as provided by the law. Descriptions and pictures provided on this manual are not binding. Therefore the manufacturer, reserves the right of making any change considered necessary.
- Seite 8 Capitolo 1. Introduzione 1.1. Prefazione Tutti i diritti di riproduzione del presente manuale sono riservati alla ditta costruttrice. La riproduzione, anche parziale, è vietata a termini di legge. Le descrizioni e le illustrazioni presenti in questo manuale non sono impegnative, di conseguenza la ditta costruttrice si riserva il diritto di apportare in qualsiasi momento tutte le modifiche che riterrà...
- Seite 9 Chapter 1. Foreword Kapitel 1. Einleitung Chapitre 1. Avant-propos Capítulo 1. Prefacio 1.2. Performances of packaging machine 1.2. Leistungen der Verpackungsmachine 1.2. Performances de l’emballeuse 1.2. Prestaciones de la màquina para confeccionar GB You have bought a machine with outstanding features and performance and we thank You very much for Your confidence in choosing it.
-
Seite 10: Capitolo 1. Introduzione
Capitolo 1. Introduzione 1.2. Prestazioni della macchina confezionatrice Avete acquistato una macchina dalle caratteristiche e prestazioni eccezionali e vi ringraziamo per la preferenza accordataci. Il sistema di confezionamento è unico nel suo genere e si è affermato nel mondo con la presenza di oltre 70000 macchine operanti nel campo dell’imballaggio e del confezionamento. - Seite 11 Chapterl 1. Foreword Kapitel 1. Einleitung Chapitre 1. Avant-propos Capítulo 1. Prefacio 1.4. Weight and dimensions of packed machine 1.4. Gewicht und Abmessungen des verpackten Geräts 1.4. Poids et dimensions de la machine emballée 1.4. Peso y medidas del embalaje de la máquina a = mm 1390 b = mm 910 c = mm 1640...
-
Seite 12: Peso E Dimensioni Della Macchina Imballata
Capitolo 1. Introduzione 1.4. Peso e dimensioni della macchina imballata a = mm 1390 b = mm 910 c = mm 1640 Peso = Kg 193 1.5. Peso e dimensioni della macchina a = mm 1240 b = mm 500 c = mm 800 d = mm 1450 Peso = Kg 163... - Seite 13 Chapter2. Machine installation Kapitel2. Maschinenaustellung Chapitre2. Installation de la machine Capitulo2. Installación de la máquina 2.1. Transport and positioning 2.1. Beförderung und Positionierung 2.1. Transport et positionnement 2.1. Transporte y postura It is recommended to handle with great care during transport and positioning! Use protection gloves while handling the machine.
-
Seite 14: Capitolo 2. Installazione Della Macchina
Capitolo 2. Installazione della macchina 2.1. Trasporto e posizionamento Nel trasporto e nel posizionamento della macchina si raccomanda di manovrare con molta cautela! Nella movimentazione della macchina utilizzare guanti di protezione. Tagliare con la forbice la reggia (avendo cura di proteggersi gli occhi con degli occhiali) e sfilare il cartone. - Seite 15 Chapter2. Machine installation Kapitel2. Maschinenaustellung Chapitre2. Installation de la machine Capitulo2. Installación de la máquina 2.1. Transport and positioning 2.1. Beförderung und Positionierung 2.1. Transport et positionnement 2.1. Transporte y postura GB Position the roller plate, coupling it to the conveyor belt. Die zylindrische Rolle positionieren und sie an das Förderband anhängen.
-
Seite 16: Condizioni Ambientali
Capitolo 2. Installazione della macchina 2.1. Trasporto e posizionamento Posizionare la rulliera agganciandola al nastro trasportatore. 2.2. Condizioni ambientali Posizionare la macchina accertandosi che sia livellata sul pavimento, in un ambiente adatto, privo di umidità, materiali infiammabili, gas, esplosivi. Lasciare uno spazio minimo di 200mm attorno alla macchina, per non ostruire le prese d’aria. - Seite 17 Chapter 2. Machine installation Kapitel 2. Maschinenaustellung Chapitre 2. Installation de la machine Capítulo 2. Installación de la máquina 2.3. Electrical connections 2.3. Elektrischer Anschluß 2.3. Raccordement électrique 2.3. Conexión electrica OBSERVE HEALTH AND SAFETY REGULATIONS! If the machine is not equipped with the power supply plug, use a plug that is suitable for the voltage and amperage values described by the rating plate and that can comply with the rules in force in the installation country.
-
Seite 18: Collegamento Elettrico
Capitolo 2. Installazione della macchina 2.3. Collegamento elettrico RISPETTARE LE NORME PER LA SICUREZZA SUL LAVORO! Se la macchina non è dotata della spina di alimentazione utilizzare una spina adeguata ai valori di tensione e amperaggio descritti nella targhetta dati e comunque conforme alle normative vigenti paese... - Seite 19 Chapter 3. Machine adjustment and setting up Kapitel 3. Regelung und Bereitstellung der Maschine Chapitre 3. Reglage et preparation de la machine Capitulo 3. Regulación y preparacion máquina 3.1. Checking the fan rotation sense (reserved to the assistance personel) 3.1. Prüfung Der Umlaufsrichtung (den Techniker vorbehaltet) 3.1.
-
Seite 20: Capitolo 3. Regolazione Ed Approntamento Macchina
Capitolo 3. Regolazione ed approntamento macchina 3.1. Controllo senso di rotazione (riservato al personale di assistenza) Prima di mettere in funzione la macchina verificarne l’esatto senso di rotazione, seguendo queste istruzioni: 1. Collegare il cavo di alimentazione ad una presa trifase più terra (vedi paragrafo 2.3.). 2. - Seite 21 Chapter 3. Machine adjustment and setting up Kapitel 3. Regelung und Bereitstellung der Maschine Chapitre 3. Reglage et preparation de la machine Capitulo 3. Regulación y preparacion máquina 3.2. Adjustment 3.2. Regelung 3.2. Reglage 3.2. Regulación GB 1. Main switch START button Belt speed adjustment knob Heater temperature regulator...
-
Seite 22: Regolazione
Capitolo 3. Regolazione ed approntamento macchina 3.2. Regolazione 1. Interruttore generale 2. Pulsante START 3. Manopola regolazione velocità nastro 4. Regolatore temperatura resistenze 5. Pulsante EMERGENZA 6. Led START 7. Pulsante di programmazione 8. Pulsante accensione/spegnimento resistenze 9. Pulsante UP di regolazione 10. - Seite 23 Chapter 3. Machine adjustment and setting up Kapitel 3. Regelung und Bereitstellung der Maschine Chapitre 3. Reglage et preparation de la machine Capitulo 3. Regulación y preparacion máquina 3.2. Adjustment 3.2. Regelung 3.2. Reglage 3.2. Regulación POWER ON PHASE Turn the main switch (1) into position 1. Led (6) will turn on. Press button START (2).
- Seite 24 Capitolo 3. Regolazione ed approntamento macchina 3.2. Regolazione FASE DI ACCENSIONE 1. Ruotare l’interruttore generale (1) nella posizione 1. Si accende il led (6). 2. Premere il pulsante START (2). 2.1. Se la procedura di arresto è stata corretta, sul display del regolatore (4) compare la scritta “test OFF”...
- Seite 25 Chapter 3. Machine adjustment and setting up Kapitel 3. Regelung und Bereitstellung der Maschine Chapitre 3. Reglage et preparation de la machine Capitulo 3. Regulación y preparacion máquina 3.2. Adjustment 3.2. Regelung 3.2. Reglage 3.2. Regulación STOP PHASE Press button (8) of the regulator for some seconds until the “OFF” indication followed by the temperature of resistances will appear on the display.
- Seite 26 Capitolo 3. Regolazione ed approntamento macchina 3.2. Regolazione FASE DI ARRESTO 1. Premere il pulsante (8) del regolatore per qualche secondo, fino a far comparire la scritta “OFF” seguita dalla temperatura delle resistenze. Le resistenze si spengono, ma il nastro trasportatore e la ventola continuano a funzionare. 2.
- Seite 27 Chapter 3. Machine adjustment and setting up Kapitel 3. Regelung und Bereitstellung der Maschine Chapitre 3. Reglage et preparation de la machine Capitulo 3. Regulación y preparacion máquina 3.3. Air flow adjustment 3.3. Regelung der Luftströmung 3.3. Reglage de l’écoulement d’air 3.3.
-
Seite 28: Regolazione Del Flusso D'aria
Capitolo 3. Regolazione ed approntamento macchina 3.3. Regolazione del flusso d’aria È possibile regolare il flusso dell’aria calda sul prodotto confezionare agendo sulle manopole (11). La rotazione delle manopole (11) determina la posizione dei deflettori (12), che dirigono il flusso dell’aria calda nella direzione voluta per ottenere la migliore retrazione. - Seite 29 Chapter 3. Machine adjustment and setting up Kapitel 3. Regelung und Bereitstellung der Maschine Chapitre 3. Reglage et preparation de la machine Capitulo 3. Regulación y preparacion máquina 3.4. Conveyor belt adjustment 3.4. Die Regulierung des Förderbandes 3.4. Reglage du ruban transporteur 3.4.
-
Seite 30: Regolazione Nastro Trasportatore
Capitolo 3. Regolazione ed approntamento macchina 3.4. Regolazione nastro trasportatore Regolare l’altezza nastro trasportatore agendo sulle apposite viti (13). Mediante la regolazione dei volantini (14) posti sulle spalle del nastro trasportatore é possibile fare in modo che i rullini (15) del nastro, ruotino o siano folli. - Seite 31 Chapter 4. Limits and conditions in the use of machine Kapitel 4. Gebrauchsbeschränkungen und Gebrauchsbedingungen der Maschine Chapitre 4. Restrictions et conditions à l’emploi de la machine Capítulo 4. Limitaciones y condiciones de uso de la máquina 4.1. Max. weight and dimensions of the package 4.1.
-
Seite 32: Capitolo 4. Limitazioni E Condizioni D'uso Della Macchina
Capitolo 4. Limitazioni e condizioni d’uso della macchina 4.1. Dimensioni e peso max. della confezione a = mm 740 b = mm 380 c = mm 220 Peso max.: Kg.60 N.B.: Il peso da considerare é quello complessivo distribuito sul nastro e, non quello del singolo pacco. 4.2. - Seite 33 Chapter 5. Safety standards Kapitel 5. Sicherheitvorschriften Chapitre 5. Notices de securité Capítulo 5. Normas de seguridad 5.1. Warnings 5.1. Sicherheitshinweise 5.1. Avertissements 5.1. Advertencias During the work phases pay attention to all hot parts of the machine. The temperature they can reach is so high that it can cause burns! Do not touch the transport belt while it is moving! It is forbidden to smoke when the machine is working!
-
Seite 34: Capitolo 5. Norme Di Sicurezza
Capitolo 5. Norme di sicurezza 5.1. Avvertimenti Durante le fasi di lavoro porre attenzione a tutte le parti calde della macchina che possono raggiungere temperature tali da provocare ustioni. Non toccare il nastro trasportatore quando é in movimento. Durante il funzionamento della macchina è vietato fumare! - Seite 35 Chapter 6. Ordinary maintenance Kapitel 6. Wartung der Maschine Chapitre 6. Ordinaire entretien Capítulo 6. Manutención ordinaria 6.1. Precautions for ordinary maintenance interventions 6.1. Maßnahmen, die getroffen werden müssen, bevor Wartungsarbeiten durchgefürt werden 6.1. Précautions pour interventions ordinaire d’entretien 6.1. Precauciones para intervenciones de manutención ordinaria ORDINARY MAINTENANCE, MUST BE EXECUTED BY QUALIFIED STAFF APPROPRIATELY TRAINED.
-
Seite 36: Capitolo 6. Manutenzione Ordinaria
Capitolo 6. Manutenzione ordinaria 6.1. Cautele per interventi di manutenzione ordinaria LA MANUTENZIONE ORDINARIA DEVE ESSERE EFFETTUATA DA PERSONALE QUALIFICATO OPPORTUNAMENTE ISTRUITO. Prima di effettuare le operazioni di manutenzione spegnere la macchina agendo sull’interruttore generale, togliere la spina dalla presa di rete e attendere il raffreddamento della macchina! Durante le operazioni di manutenzione si consiglia di utilizzare guanti di protezione! 6.2. - Seite 37 Chapter 6. Ordinary maintenance Kapitel 6. Wartung der Maschine Chapitre 6. Ordinaire entretien Capítulo 6. Manutención ordinaria 6.3. Plastic film and other scrap removal 6.3. Entfernung von Abfällen des plastischen Films und anderer Art 6.3. Enlevement des dechets de plastique et divers 6.3.
-
Seite 38: Rimozione Di Sfridi Di Film Plastico E Vari
Capitolo 6. Manutenzione ordinaria 6.3. Rimozione di sfridi di film plastico e vari È molto importante provvedere con frequenza alla pulizia interna del tunnel, in modo da asportare tutti i residui di film dei prodotti confezionati. Prima di eseguire questa operazione, attendere tunnel adeguatamente raffreddato. - Seite 39 Chapter 6. Ordinary maintenance Kapitel 6. Wartung der Maschine Chapitre 6. Ordinaire entretien Capítulo 6. Manutención ordinaria 6.5. Wiring diagram 6.5. Das Schaltbild 6.5. Circuit électrique 6.5. Esquema eléctrico GB Q1 Main switch Heater 2300W Fuse 10.3X38 AM 2A Heater 2300W Fuse 10.3X38 AM 1A 380/415/440V / 2A 200/208/220V Heater 2300W Fuse 10.3X38 AM 1A...
-
Seite 40: Schema Elettrico
Capitolo 6. Manutenzione ordinaria 6.5. Schema elettrico Interruttore generale Resistenza 2300W Fusibile 10.3X38 AM 2A Resistenza 2300W Fusibile 10.3X38 AM 1A 380/415/440V / 2A 200/208/220V Resistenza 2300W Fusibile 10.3X38 AM 1A Inverter 0,18 KW 200/240V 50/60Hz Fusibile 10.3X38 AM 1A 380/415/440V / 2A 200/208/220V P1 4K7 Regolazione velocità... - Seite 41 Chapter 6. Ordinary maintenance Kapitel 6. Wartung der Maschine Chapitre 6.Ordinaire entretien Capitulo 6. Manutención ordinaria 6.6. Disassembling, demolition and elimination of residuals 6.6. Demontage, abbau und entsorgung der rückstände 6.6. Démontage, démolition et ècoulement des résidus 6.6. Desmontaje, demolición y desecho de los residuos ATTENTION! All operations about disassembling and demolition must be done by qualified personnel with mechanical and electrical expertise required to work in security conditions.
-
Seite 42: Smontaggio, Demolizione E Smaltimento Residui
Capitolo 6. Manutenzione ordinaria 6.6. Smontaggio, demolizione e smaltimento residui ATTENZIONE! Le operazioni di smontaggio e demolizione devono essere affidate a personale specializzato a tali attività e dotato delle competenze meccaniche ed elettriche necessarie a lavorare in condizioni di sicurezza. Procedere nel seguente modo: scollegare la macchina dalla rete di alimentazione elettrica smontare i componenti... - Seite 43 Chapter 7. Guarantee Kapitel 7. Garantiezeit Chapitre 7. Garantie Capítulo 7. Garantía 7.1. Certificate of guarantee 7.1. Garantieschein 7.1. Certificat de garantie 7.1. Certificación de garantia GB The guarantee runs for 12 months after the installation date under the conditions set forth on the instruction manual. Fill in the card with all data requested, tear out along the perforations and send in.
-
Seite 44: Capitolo 7. Garanzia
Capitolo 7. Garanzia 7.1. Certificato di garanzia La Garanzia ha validità 12 mesi dalla data di installazione alle condizioni riportate sul libretto d’istruzioni. Compilare il retro della cartolina in ogni sua parte, strappare lungo la linea e spedire. 7.2. Condizioni di garanzia La garanzia è... -
Seite 45: Dichiarazione Ce Di Conformità
µηχανή συσκευασίας τύπου: Tunnel 50 n° è conforme a quanto prescritto dalle seguenti direttive e successive modifiche: is in conformity with prevision of following directives and their modifications: ist im vebereinstimmaung mit den Sicherheitszielen der Bestimmungen und Zuckünftige warianten: est en conformité... - Seite 48 " (I) Tipo CERTIFICATO DI GARANZIA (GB) Type CERTIFICATE OF GUARANTEE (D) Typ GARANTIESCHEIN (F) Type BULLETIN DE GARANTIE (E) Tipo CERTIFICADO DE GARANTIA (I) Matricola n° Data e timbro rivenditore (GB) Serial n° Date and dealer’s stamp (D) Kennummer Datum und stempel des verkaufers (F) No.
- Seite 49 Minipack-torre S.p.A. Via Provinciale, 54 - 24044 DALMINE (BG) - ITALY Tel. (035) 563525 – Fax (035) 564945 E-mail: info@minipack-torre.it http://www.minipack-torre.it " Spett.le minipack-torre S.p.A. Via Provinciale, 54 24044 DALMINE (BG) ITALY MADE IN ITALY...