Metz MECABLITZ 58 AF-2 Canon Bedienungsanleitung
Vorschau ausblenden
Andere Handbücher für MECABLITZ 58 AF-2 Canon:
- Bedienungsanleitung (230 Seiten) ,
- Bedienungsanleitung (230 Seiten) ,
- Bedienungsanleitung (206 Seiten)
Kapitel
Inhaltsverzeichnis
Fehlerbehebung

Verwandte Anleitungen für Metz MECABLITZ 58 AF-2 Canon


Inhaltszusammenfassung für Metz MECABLITZ 58 AF-2 Canon
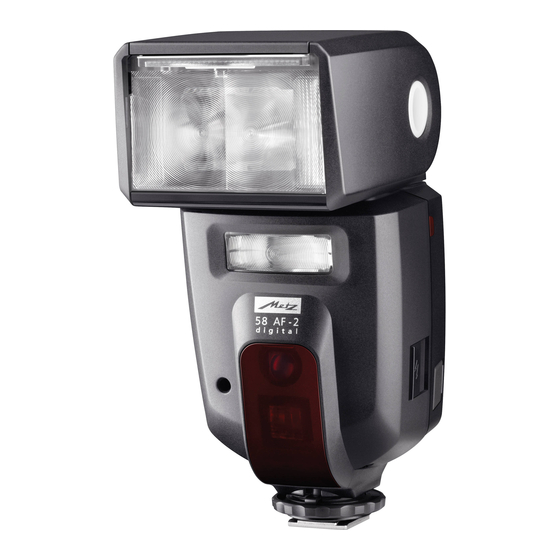
- Seite 1 MECABLITZ 58 AF-2 digital für/for Canon-Digitalkameras mit/with TTL / E-TTL / E-TTL II Bedienungsanleitung Mode d’emploi Gebruiksaanwijzing Operating instruction Manuale istruzioni Manual de instrucciones...
-
Seite 2: Inhaltsverzeichnis
Sicherheitshinweise ......... . 3 Weitwinkelstreuscheibe . -
Seite 3: Sicherheitshinweise
• Verbrauchte Batterien/Akkus nicht ins Feuer werfen! • Aus verbrauchten Batterien kann Lauge austreten, was zur Beschädigung der Vielen Dank, dass Sie sich für ein Metz Produkt entschieden haben. Kontakte führt. Verbrauchte Batterien deshalb immer aus dem Gerät entnehmen. Wir freuen uns, Sie als Kunde begrüßen zu dürfen. -
Seite 4: Dedicated-Blitzfunktionen
2 Dedicated-Blitzfunktionen 3 Blitzgerät vorbereiten Die Dedicated-Blitzfunktionen sind speziell auf das Kamerasystem abgestimmte 3.1 Montage des Blitzgerätes Blitzfunktionen. In Abhängigkeit vom Kameratyp werden dabei verschiedene Blitzgerät auf die Kamera montieren Blitzfunktionen unterstützt. Kamera und Blitzgerät vor der Montage oder Demontage ausschalten. •... -
Seite 5: Ein- Und Ausschalten Des Blitzgerätes
• Power Pack P76 mit Verbindungskabel V58-50 (Sonderzubehör) 3.4 Power Pack P76 (Sonderzubehör) Wenn die Blitzanzahl und die Blitzfolgezeiten für Ihren Anwendungsfall nicht Wenn Sie das Blitzgerät längere Zeit nicht benutzen, entfernen Sie bitte die Batterien bzw. Akkus aus dem Gerät. ausreichen, kann das Blitzgerät von einem Power Pack P76 (Sonderzubehör) mit Energie versorgt werden. -
Seite 6: Displaybeleuchtung
Blitzgerät wird durch Drücken einer beliebigen Taste bzw. durch Antippen des HSS Manueller Blitzbetrieb mit Kameraauslösers (Wake-Up-Funktion) wieder eingeschaltet. E TTL Kurzzeitsynchronisation Mode E TTL HSS Wenn das Blitzgerät längere Zeit nicht benötigt wird, sollte das Gerät Stroboskop-Blitzbetrieb grundsätzlich immer mit dem Hauptschalter ausgeschaltet werden! •... -
Seite 7: Ttl- Und E-Ttl Aufhellblitzbetrieb
Der TTL-Blitzbetrieb wird von allen Kamerabetriebsarten (z.B. Programm „P“, Einstellvorgang: Mode Zeitautomatik „A“, Blendenautomatik „Tv“, Vari- bzw. Motiv-Programme, • Taste so oft drücken, bis im Display „Mode“ E TTL Mode Manuell „M“ usw.) unterstützt. E TTL HSS angezeigt wird. Einstellvorgang: •... -
Seite 8: Automatik-Blitzbetrieb
5.4 Automatik-Blitzbetrieb 5.6 Manueller Blitzbetrieb Im Automatik-Blitzbetrieb A misst der Fotosensor des Blitzgerätes das vom Im manuellen Blitzbetrieb wird vom Blitzgerät ungeregelt die volle Energie Motiv reflektierte Licht. Der Fotosensor hat einen Messwinkel von ca. 25° und abgestrahlt, sofern keine Teillichtleistung eingestellt ist. Die Anpassung an die misst nur während der eigenen Lichtabgabe. -
Seite 9: Stroboskop-Blitzbetrieb
5.7 Stroboskop-Blitzbetrieb Stroboskop-Blitzanzahl (N) Der Stroboskop-Betrieb ist eine manuelle Blitzbetriebsart. Dabei können Im Stroboskop-Blitzbetrieb kann die Blitzanzahl (N) pro Auslösung eingestellt mehrere Blitzbelichtungen auf einem Bild gemacht werden. Das ist besonders werden. interessant bei Bewegungsstudien und Effektaufnahmen. Die Blitzanzahl lässt sich von 2 bis 50 in Einer-Schritten einstellen. Die maximal Beim Stroboskop-Betrieb werden mehrere Blitze mit einer bestimmten mögliche manuelle Teillichtleistung wird dabei automatisch angepasst. -
Seite 10: Blitzparameter (Parameter-Menü)
Im Display wird die zu den eingestellten Parametern gültige Entfernung ange- 6 Blitzparameter (Parameter-Menü) zeigt. Durch Verändern des Blendenwertes oder der Teillichtleistung kann der Für eine korrekte Funktion des Blitzgerätes ist es erforderlich, dass verschie- angezeigte Entfernungswert an die Entfernung zum Motiv angeglichen werden. dene Blitzparameter wie z.B. -
Seite 11: Blende (F)
• Taste so oft drücken, bis im Display der gewünschte Blitzparameter 6.2 Blende (F) Para angezeigt wird. Wenn keine digitale Datenübertragung zwischen Kamera und Blitzgerät stattfin- Folgende Parameter sind möglich: det können die Blendenwerte (F) von 1,0 bis 45 (bei ISO 100) in Abständen von ganzen Blendenstufen manuell eingestellt werden. -
Seite 12: Hauptreflektorposition (Zoom)
6.3 Hauptreflektorposition (Zoom) 6.4 Blitzbelichtungskorrektur (EV) Wenn keine digitale Datenübertragung zwischen Kamera Bei starken Kontrastunterschieden zwischen Motiv und Bildhintergrund kann eine und Blitzgerät stattfindetkönnen die Reflektorpositionen 24 mm - 28 mm - 35 mm manuelle Blitzbelichtungskorrektur (EV) erforderlich sein. Es lassen sich - 50 mm - 70 mm - 85 mm - 105 mm (Kleinbildformat 24 x 36) manuell einge- Korrekturwerte von -3 Blendenwerten (EV) bis +3 Blendenwerte (EV) in stellt werden. -
Seite 13: Lichtempfindlichkeit (Iso)
6.5 Lichtempfindlichkeit (ISO) 6.6 Manuelle Teillichtleistung (P) Im manuellen Blitzbetrieb und Stroboskop-Betrieb lässt sich die Wenn keine digitale Datenübertragung zwischen Kamera und Blitzgerät statt- Lichtleistung durch Einstellen einer manuellen Teillichtleistung (P) der findet, können die ISO–Werte für die Lichtempfindlichkeit von 6 bis 6400 Aufnahmesituation anpassen. -
Seite 14: Sonderfunktionen (Select-Menü)
7 Sonderfunktionen (Select-Menü) • Taste drücken und damit die Auswahl der Sonderfunktion bestätigen. Die Sonderfunktionen werden mit der Taste (Select) ausgewählt. Je nach • Mit den Tasten die gewünschte Kameratyp und eingestellter Blitzbetriebsart stehen verschiedene Einstellung vornehmen. Die Einstellung wird sofort Sonderfunktionen zur Auswahl. -
Seite 15: Blitzbelichtungsreihen (Fb)
Blenden- und ISO-Einstellung zu einer Überschreitung des zulässigen 7.3 Blitzbelichtungsreihen (FB) Lichtregelbereiches führen würde. Die Automatik-Blende wird automatisch auf In den Blitzbetriebsarten und Automatik kann eine den nächstliegenden zulässigen Wert geändert. Blitzbelichtungsreihe (Flash-Bracketing FB) durchgeführt werden. Eine Blitzbelichtungsreihe besteht aus drei aufeinander folgenden Blitzlichtaufnahmen Einstellvorgang: mit unterschiedlichen Blitzbelichtungskorrekturwerten. -
Seite 16: Synchronisation Auf Den 2. Verschlussvorhang (Rear)
• Die erste Aufnahme wird ohne der Verschlusszeit ausgelöst. Dies ist vor allem bei Belichtungen mit langen F 5.1 Korrekturwert ausgeführt. Im Display Verschlusszeiten (länger als z.B. 1/30 Sekunde) und bewegten Motiven mit eige- AZoom 28 wird zusätzlich „FB1“ angezeigt. ner Lichtquelle von Vorteil, weil bewegte Lichtquellen dann einen Lichtschweif 7.7 m hinter sich herziehen, anstatt ihn - wie beim Synchronisieren auf den... -
Seite 17: Extended-Zoom-Betrieb (Zoom Ext)
Die REAR-Funktion kann nur beim Betrieb mit einer geeigneten Kamera • Mit den Tasten die gewünschte eingestellt werden! Bei vielen Kompakt - Kameras (z.B. PowerShot) Einstellung vornehmen. Die Einstellung wird sofort Ext ON erfolgt die Einstellung an der Kamera (siehe wirksam. -
Seite 18: Drahtloser Remote-Betrieb (Remote)
Einstellvorgang 7.7 Drahtloser Remote-Betrieb (Remote) • Bei der Anzeige „Remote OFF“ ist der drahtlose Remote-Betrieb deaktiviert. • Taste so oft drücken, bis im Display „Select“ Zoom Ext Select angezeigt wird. • Bei der Anzeige „Remote Master“ arbeitet das Blitzgerät als steuerndes Zoom Size •... -
Seite 19: M - Ft Umschaltung
7.8 m - ft Umschaltung 7.9 Zweitreflektor Die Reichweitenanzeige im Display des Blitzgerätes kann wahlweise in Meter m Der Zweitreflektor dient zur Frontalaufhellung bei indirekter Beleuchtung wenn oder Feet ft erfolgen. Die Einstellung erfolgt im Menü-Punkt m / ft. der Hauptreflektor seitlich oder nach oben abgeschwenkt ist (siehe 10.3). -
Seite 20: Einstelllicht (Ml) „Modelling Light
7.10 Einstelllicht (ML) „Modelling Light“ Beim Betätigen des Handauslösers wird das Einstelllicht ausgelöst, wenn das Blitzgerät von der Kamea gelöst ist. Ist das Blitzgerät auf der Kamera montiert, Beim Einstelllicht handelt es sich um ein Stroboskop-Blitzlicht mit hoher Frequenz. kann mit dem Handauslöser das Einstelllicht ausgelöst werden, wenn das Bei einer Dauer von ca. -
Seite 21: Tastatur-Verriegelung (Keylock)
Das Blitzgerät schaltet dann, wenn es nicht benutzt wird, nach einer bzw. nach 7.12 Tastatur-Verriegelung (KEYLOCK) zehn Minuten in den Strom sparenden Standby–Zustand. Zum Mit der Funktion zur Tastatur-Verriegelung (KEYLOCK) lassen sich die Tasten des Wiedereinschalten eine beliebige Taste drücken, bzw. den Kameraauslöser Blitzgerätes gegen unbeabsichtigte Verstellung verriegeln. -
Seite 22: Af-Beam (Af-Hilfslicht)
7.13 AF-BEAM (AF-Hilfslicht) 8 Motor-Zoom-Reflektor Wenn das AF-Meßsystem einer digitalen AF-Spiegelreflexkamera wegen man- Die Anpassung der Zoomposition des Hauptreflektors kann für gelnder Umgebungshelligkeit nicht scharf stellen kann, so wird von der Kamera Objektivbrennweiten ab 24 mm (Kleinbildformat 24 x 36) erfolgen. Für das im Blitzgerät eingebaute AF-Hilfslicht aktiviert. -
Seite 23: Weitwinkelstreuscheibe
Manuelle Verstellung der Zoomposition bei AZoom 10 Blitztechniken Die Zoomposition des Haupteflektors kann auch beim Betrieb des Blitzgerätes 10.1 Indirektes Blitzen mit einer Kamera, die Daten überträgt, verändert werden, um z.B. bestimmte Beleuchtungseffekte zu erzielen (z.B. hot-spot usw.). Siehe auch 6.3. Durch indirektes Blitzen wird das Motiv weicher ausgeleuchtet und die ausge- Nach dem Speichern wird „MZoom“... -
Seite 24: Indirektes Blitzen Mit Zweitreflektor
10.3 Indirektes Blitzen mit Zweitreflektor 10.5 Manuelle Blitzbelichtungskorrekturen Bei geschwenktem Hauptreflektor kann für eine Frontalaufhellung des Motivs Die Blitzbelichtungsautomatik des Blitzgerätes und der meisten Kameras ist auf der Zweitreflektor im Select-Menü zusätzlich aktiviert werden (siehe 7.9). einen Reflexionsgrad von 25 % (durchschnittlicher Reflexionsgrad von Blitzmotiven) abgestimmt. -
Seite 25: Blitzbereitschaftsanzeige
11 Blitzbereitschaftsanzeige 13 Belichtungskontrollanzeige Bei aufgeladenem Blitzkondensator leuchtet am Blitzgerät Die Belichtungskontrollanzeige „o.k.“ leuchtet nur, die Blitzbereitschaftsanzeige auf und zeigt damit wenn die Aufnahme im TTL-, E-TTL- bzw. Automatik- die Blitzbereitschaft an. Das bedeutet, dass für die näch- Blitzbetrieb richtig belichtet wurde! ste Aufnahme Blitzlicht verwendet werden kann. -
Seite 26: Reichweitenanzeige
15 Reichweitenanzeige 15.2 Manuelle Anpassung der Reichweitenanzeige Wenn die Kamera keine Daten an das Blitzgerät überträgt, so müssen für eine Im Display des Blitzgerätes wird der Wert zuverlässige Reichweitenanzeige die Blitzparameter für Zoomposition, F 4.5 für die maximale Reichweite des 14 m AZoom 70 Lichtempfindlichkeit ISO und Blendenwert von Hand am Blitzgerät eingestellt... -
Seite 27: Blitzsynchronisation
17 Blitzsynchronisation • Bei der Einstellung „REAR OFF“ ist die Normalsynchronisation eingestellt. Die REAR-Funktion kann nur beim Betrieb mit einer geeigneten Kamera 17.1 Normalsynchronisation im Select-Menü des Blitzgerätes angewählt und eingestellt werden! Der Bei der Normalsynchronisation wird das Blitzgerät zum Beginn der Verschlusszeit REAR-Betrieb wird nur dann am Blitzgerät angezeigt, wenn die ausgelöst (Synchronisation auf den 1.Verschlussvorhang). -
Seite 28: Mehrzonen-Af-Meßblitz
geschränkt! Beachten Sie daher die Reichweitenanzeige am LC-Display des 19 Drahtloser Remote-Betrieb Blitzgerätes! Die Kurzzeitsynchronisation HSS wird automatisch ausgeführt, Der drahtlose Remote-Betrieb ist kompatibel zum Canon-E-TTL-Remote-System. wenn an der Kamera manuell oder automatisch durch das Blichtungsprogramm Das Remote-System besteht aus einem Master-Blitzgerät auf der Kamera und eine kürzere Verschlusszeit als die Blitzsynchronzeit eingestellt ist. -
Seite 29: Einstellen Und Ausschalten Des Remote-Betriebes
19.1 Einstellen und Ausschalten des Remote-Betriebes 19.2 Einstellungen am Master-Blitzgerät • Taste so oft drücken, bis im Display „Select“ Die Slave-Gruppen A und B sind immer aktiviert. Sie können nicht deakti- BEEP Select viert werden! Das Master-Blitzgerät M und die Slave-Gruppe C können angezeigt wird. - Seite 30 Einstellvorgang für Slave-Gruppe C Einstellvorgang für Master-Blitzgerät • Taste so oft drücken bis im Display C bzw. C TTL (für Slave-Gruppe C) • Taste so oft drücken bis im Display M bzw. M TTL (für Master-Blitzgerät) Para Para angezeigt wird. angezeigt wird.
-
Seite 31: Einstellung Am Slave-Blitzgerät
Einstellvorgang für Slave-Gruppe C 19.3 Einstellung am Slave-Blitzgerät • Mit der Taste nacheinander die Einstellungen für die Auswahl der Slave- • Taste so oft drücken bis im Display C bzw. C M (für Slave-Gruppe C) Para Para angezeigt wird. Gruppe „Group“, den Remote-Kanal „Channel“ und die Reflektorposition „Zoom“... -
Seite 32: Servo-Betrieb
19.5 Servo-Betrieb Teillichtleistung bzw. Reflektorposition (MZoom) einstellen • Im SERVO–Blitzbetrieb die Taste so oft Der SERVO-Betrieb ist ein einfacher Slave-Betrieb mit Vorblitzunterdrückung, bei Para Servo drücken, bis im Display die gerade eingestellte dem das Slave-Blitzgerät immer einen Blitz abgibt, sobald es einen Lichtimpuls MZoom 50 Teillichtleistung oder die Reflektorposition angezeigt P1/64... -
Seite 33: Wartung Und Pflege
• Am mecablitz ist ein nicht zulässiges Power Pack angeschlossen. Schließen Sie nur eine Metz Power Pack P76 an. • Ein Metz Power Pack P76 ist angeschlossen und im Batteriefach des mecablitz sind noch Batterien/Akkus eingelegt. Batterien/Akkus aus dem Batteriefach... - Seite 34 Im Display erscheint ein Batteriesymbol Auf Auto-Zoom umschalten (siehe 9.1). • Am mecablitz ist ein Metz Power Pack P76 angeschlossen und im Batteriefach • Der Hauptreflektor ist aus seiner verriegelten Normalposition geschwenkt. des mecablitz befinden sich Batterien. Batterien aus dem mecablitz entnehmen.
- Seite 35 Die Aufnahmen sind zu dunkel. Der E Blitzbetrieb lässt sich nicht einstellen. • Es hat kein Datenaustausch zwischen Blitzgerät und Kamera stattgefunden. • Das Motiv liegt außerhalb der Reichweite des Blitzgerätes. Beachten Sie: Beim Kameraauslöser antippen. indirekten Blitzen verringert sich die Reichweite des Blitzgerätes. •...
-
Seite 36: Technische Daten
Blitzgerät mit Integrierter Weitwinkelstreuscheibe und Reflektorkarte, Filmempfindlichkeit: Bedienungsanleitung, Gürteltasche T58, Standfuß. ISO 6 bis ISO 6400 Synchronisation: Niederspannungs-IGBT-Zündung Blitzanzahlen (bei jeweils voller Lichtleistung): • Ca. 250 mit NiMH Akkus 2100mAh • Ca. 180 mit Hochleistungs Alkali-Mangan-Batterien • Ca. 430 mit Metz Power-Pack P76 (Sonderzubehör) -
Seite 37: Sonderzubehör
23 Sonderzubehör Batterie-Entsorgung Für Fehlfunktionen und Schäden am Blitzgerät, verursacht durch die Batterien/Akkus gehören nicht in den Hausmüll! Bitte bedienen Sie sich bei der Verwendung von Zubehör anderer Hersteller, wird keine Gewährleistung Rückgabe verbrauchter Batterien/Akkus eines vorhandenen Rücknahmesystems. übernommen! Bitte geben Sie nur entladene Batterien/Akkus ab. Batterien sind in der Regel •... -
Seite 38: Garantiebestimmungen
6. Beanstandete Geräte bitten wir zusammen mit dem Kaufbeleg entweder über Metz-Werke GmbH & Co KG den Fachhändler oder direkt an die Firma Metz-Werke GmbH & Co KG - Zentralkundendienst - Ohmstrasse 55, 90513 Zirndorf, transportsicher ver- packt unter genauer Schilderung der Beanstandung einzusenden. Sie können unter den gleichen Bedingungen auch an die autorisierten Kundendienststellen der Firma Metz-Werke GmbH &... - Seite 40 Consignes de sécurité ......... . 41 Diffuseur grand-angle .
-
Seite 41: Avant-Propos
• Sortez immédiatement les piles usées du flash ! En effet, les piles usées peu- vent „couler“ et provoquer une dégradation du flash. Nous vous remercions d’avoir choisi un produit Metz et sommes heureux de vous • Ne rechargez pas les piles sèches ! saluer au sein de la grande famille de nos clients. -
Seite 42: Fonctions Flash Dédiées
2 Fonctions flash dédiées 3 Préparation du flash Les fonctions flash dédiées sont des fonctions de flash adaptées spécialement à 3.1 Montage du flash un système d’appareil photo. Les fonctions de flash supportées dépendent alors Fixation du flash sur l’appareil du type d’appareil. -
Seite 43: Mise En Marche Et Coupure Du Flash
• 4 piles au lithium de 1,5 V, type CEI FR6 (AA / Mignon), source de courant 3.4 Power Pack P76 (accessoire spécial) sans entretien à haute performance et avec une perte de capacité minime. Il est possible d’utiliser le Power Pack P76 (accessoire spécial) pour alimenter le •... -
Seite 44: Éclairage De L'écran
touche quelconque ou en enfonçant à mi-course le déclencheur de l’appareil HSS Mode flash manuel avec synchronisation E TTL Mode photo (fonction de réveil). E TTL HSS haute vitesse Si le flash reste inutilisé pendant une période prolongée, il est conseillé de Mode flash stroboscope couper le flash avec l’interrupteur général •... -
Seite 45: Dosage Automatique Flash/Ambiance En Mode Ttl- Et E-Ttl
Le mode flash TTL est pris en charge par tous les modes de fonctionnement de Procédure de réglage : Mode l’appareil photo (par ex. programme „P“, priorité au diaphragme „A“, priorité à E TTL • Appuyez à plusieurs reprises sur la touche Mode la vitesse „Tv“, Vari, programmes-résultats, manuel „M“, etc.). -
Seite 46: Mode Flash Automatique
Veillez à ce que la source en contre-jour ne frappe pas directement l’ob- 5.5 Dosage automatique flash/ambiance jectif, car cela fausserait la mesure TTL de l’appareil photo ! Pour le dosage automatique flash/ambiance en lumière du jour, une valeur de correction d’environ -1 EV à... -
Seite 47: Mode Flash Stroboscope
• Appuyez sur la touche . L’écran revient à l’affichage normal. Si vous n’ap- • Appuyez sur la touche . L’écran revient à l’affi- N15:f10 puyez pas sur la touche , l’écran revient automatiquement à l’affichage chage normal. Si vous n’appuyez pas sur la touche AZoom 24 3.6 m P1/32... -
Seite 48: Paramètres Du Flash (Menu „Parameter" (Paramètres)
La distance valable pour les paramètres réglés s’affiche à l’écran. Il est possible 6 Paramètres du flash (menu „Parameter“ (Paramètres) d’adapter la valeur de la distance affichée à la distance au sujet en modifiant Il est nécessaire d’adapter différents paramètres du flash, comme par ex. la posi- l’ouverture du diaphragme ou la puissance partielle. -
Seite 49: Diaphragme (F)
• Appuyez à plusieurs reprises sur la touche jusqu’à ce que le paramètre 6.2 Diaphragme (F) Para du flash souhaité (voir ci-dessous) apparaisse sur l’écran. Lorsqu'aucune transmission de données numérique n'a lieu entre l'appareil Les paramètres suivants sont possibles : photo et le flash, les valeurs d'ouverture du diaphragme (F) peuvent être entrées manuellement de 1,0 à... -
Seite 50: Position Du Réflecteur Principal (Zoom)
6.3 Position du réflecteur principal (zoom) 6.4 Correction d’exposition au flash (IL) S’il n’y a pas de transmission numérique des données entre l’appareil photo et le Une correction manuelle d’exposition au flash (IL) peut être nécessaire en cas de flash, il est possible de régler manuellement les positions suivantes du réflecteur : contrastes importants entre le sujet et l’arrière-plan. -
Seite 51: Sensibilité (Iso)
6.5 Sensibilité (ISO) 6.6 Puissance partielle manuelle (P) S’il n’y a pas de transmission numérique des données entre l’appareil photo et le Dans le mode flash manuel et le mode stroboscope , il est possible d’adap- flash, il est possible de régler manuellement des valeurs ISO pour les sensibilités ter la puissance lumineuse à... -
Seite 52: Fonctions Spéciales (Menu „Select „ (Sélectionner))
7 Fonctions spéciales (menu „Select „ (Sélectionner)) La touche permet de sélectionner les fonctions spéciales. Il existe plusieurs TTL/E-TTL/A/E-TTL-HSS M/M HSS fonctions spéciales en fonction du type de l’appareil photo et du mode flash – réglé. En ce qui concerne les appareils photo qui ne prennent pas en charge cer- –... -
Seite 53: Fonction Bip (Beep)
7.2 Fonction bip (Beep) Procédure de réglage : L’utilisateur peut souhaiter que certaines fonctions de l’appareil du flash soit sig- • Appuyez à plusieurs reprises sur la touche Select nalées par un bip sonore. Le photographe peut ainsi concentrer toute son atten- jusqu’à... -
Seite 54: Séries D'expositions Au Flash (Fb - Flash-Bracketing)
7.3 Séries d’expositions au flash (FB - Flash-Bracketing) • La première photo est prise sans valeur F 5.1 de correction. „FB1“ apparaît également Dans les modes flash et automatique , il est possible d’effectuer AZoom 28 sur l’écran. 7.7 m une série d’expositions au flash (FB - Flash-Bracketing). -
Seite 55: Synchronisation Sur Le 2Ème Rideau (Rear)
7.4 Synchronisation sur le 2 rideau (REAR) Procédure de réglage : ème En synchronisation normale, le flash est déclenché au début du temps de pose • Appuyez à plusieurs reprises sur la touche Select (synchronisation sur le 1er rideau). La synchronisation normale est le mode de jusqu’à... -
Seite 56: Mode Zoom Étendu (Zoom Ext)
7.5 Mode zoom étendu (Zoom Ext) Après avoir activé le mode zoom étendu, F 5.6 „ E-Zoom“ apparaît à côté de la focale sur Dans le mode zoom étendu, la focale du réflecteur principal est décalée automa- EZoom 35 EZoom 4.1 m l’écran. -
Seite 57: Mode Remote Sans Fil (Remote)
Procédure de réglage : 7.7 Mode remote sans fil (Remote) • Lorsque „Remote OFF“ apparaît sur l’écran, le mode remote sans fil est désactivé. • Appuyez à plusieurs reprises sur la touche Zoom Ext Select jusqu’à ce que „ Select“ apparaisse sur l’écran. •... -
Seite 58: Commutation Mètres - Pieds (M / Ft)
7.8 Commutation mètres - pieds (m / ft) 7.9 Réflecteur secondaire La portée peut être affichée sur l’écran du flash soit en mètres (m) soit en pieds Le réflecteur secondaire i permet l'éclairage frontal dans les situations de lumino- (feet = ft). Le réglage a lieu à l’option du menu „m / ft“. sité... -
Seite 59: Lumière Pilote (Ml - Modelling Light)
7.10 Lumière pilote (ML - Modelling Light) Lorsque le flash fonctionne comme un flash maître dans le système remote sans fil Metz, le déclenchement de la lumière pilote déclenche La lumière pilote est une séquence d’éclairs stroboscopiques à haute fréquence également la lumière pilote du flash esclave (voir 19.4). -
Seite 60: Verrouillage Du Clavier (Keylock)
Procédure de réglage : 7.12 Verrouillage du clavier (KEYLOCK) La fonction de verrouillage du clavier (KEYLOCK) permet de verrouiller les tou- • Appuyez à plusieurs reprises sur la touche Select jusqu’à ce que „Select“ apparaisse sur l’écran. ches du flash pour empêcher tout déréglage inopportun. Le symbole s’af- Standby fiche à... -
Seite 61: Af-Beam (Lumière Auxiliaire Af)
7.13 AF-BEAM (lumière auxiliaire AF) 8 Asservissement de la tête zoom motorisée Lorsque le système de mesure AF d’un appareil photo reflex numérique AF ne La position du zoom du réflecteur principal peut s’adapter à des distances foca- peut pas effectuer la mise au point faute d’une luminosité ambiante suffisante, les d’au moins 24 mm (film de petit format 24 x 36). -
Seite 62: Diffuseur Grand-Angle
Réglage manuel de la position du zoom pour le „AZoom“ 10 Techniques de photographie au flash Il est possible de modifier la position du zoom du réflecteur principal en cas 10.1 Éclairage indirect au flash d’utilisation du flash avec un appareil photo qui transmet des données pour par ex. -
Seite 63: Éclairage Indirect Au Flash Avec Un Réflecteur Secondaire
10.3 Éclairage indirect au flash avec un réflecteur secondaire 10.5 Corrections manuelles d’exposition au flash Il est également possible d’activer le réflecteur secondaire dans le menu L’automatisme d’exposition au flash du flash de la plupart des appareils photo „Select“ pour déboucher frontalement les ombres du sujet lorsque le réflecteur est calibré... -
Seite 64: Témoin De Disponibilité Du Flash
11 Témoin de disponibilité du flash synchro-flash. Il est ainsi possible d'opérer au flash à toutes les vitesses d'obturation. Pour obtenir la pleine puissance lumineuse du flash, nous Lorsque le condensateur du flash est chargé, le témoin recommandons dene pas régler sur l'appareil photo une vitesse d'obtura- de disponibilité... -
Seite 65: Affichage De La Portée
Dans les différents programmes d’exposition ou automatiques, les raisons de 15.1 Adaptation automatique de l’indication de la portée mauvaise exposition peuvent être variées. Les appareils photos transmettent les paramètres du flash relatifs à la sensibilité Pour l’interprétation des signalisations dans le viseur, veuillez vous repor- ISO, l’ouverture du diaphragme (en mm), la distance focale de l’objectif et la ter au mode d’emploi de votre appareil photo. -
Seite 66: Synchronisation Du Flash
Les modifications intervenant dans la situation d’éclairage après le La synchronisation sur le second rideau permet donc de rendre avec naturel les déclenchement de l’éclair de mesure FE ne sont plus prises en considéra- sujets lumineux animés ! Suivant le mode sélectionnée sur l’appareil photo, celui- tion au moment de prendre la photo ! ci réglera un temps de pose plus long que celui correspondant à... -
Seite 67: Synchronisation Haute Vitesse Automatique Hss
17.4 Synchronisation haute vitesse automatique HSS Afin que l’illuminateur AF à plusieurs zones AF puisse être activé par l’appareil photo, l’objectif monté sur le reflex doit être réglé sur le mode Différents appareils photo prennent en charge la synchronisation automatique autofocus „Single-AF (S) „... -
Seite 68: Réglage Et Désactivation Du Mode Remote
Pour éviter que plusieurs systèmes remote se dérangent mutuellement dans le 19.2 Réglages sur flash maître même espace, il existe quatre canaux remote autonomes. Les flashs maître et Les groupes esclaves A et B sont toujours activés. Ils ne peuvent pas être esclaves qui font partie du même système remote doivent être réglés sur le même désactivés ! Le flash maître M et le groupe esclave C peuvent être activés canal remote. - Seite 69 Procédure de réglage pour le groupe esclave C Procédure de réglage pour le flash maître • Appuyez à plusieurs reprises sur la touche jusqu'à ce que C ou C TTL • Appuyez à plusieurs reprises sur la touche jusqu'à ce que M ou M TTL Para Para (pour le groupe esclave C) apparaisse sur l'écran.
-
Seite 70: Réglage Sur Le Flash Esclave
Procédure de réglage pour le groupe esclave C 19.3 Réglage sur le flash esclave • Appuyez sur la touche pour sélectionner, les uns après les autres, les • Appuyez à plusieurs reprises sur la touche jusqu'à ce que C ou C M Para Para (pour le groupe esclave C) apparaisse sur l'écran. -
Seite 71: Mode Servo
19.5 Mode Servo Régler la puissance lumineuse partielle ou la position du réflecteur (MZoom) • En mode SERVO, appuyer sur la touche jusqu- Le mode SERVO est un mode esclave simple lors duquel un flash est toujours Para Servo ’à ce que la puissance lumineuse partielle ou la posi- généré... -
Seite 72: Maintenance Et Entretien
La charge des piles ou accus doit être suffisante pour que le témoin de recyclage s’allume au plus tard 1 minute après la mise en marche. • Une alimentation Metz Power Pack P76 est raccordée et des piles/accumula- teurs sont encore présents dans le compartiment à piles du flash. Retirez les... - Seite 73 Un symbole de pile s'affiche à l'écran. • Le diffuseur grand angle est rabattu devant le réflecteur principal. • Un bloc d'alimentation Metz P76 est connecté au mecablitz et des piles se trou- • Un Mecabounce est monté devant le réflecteur principal.
- Seite 74 Les prises de vue sont trop sombres. Il est impossible de régler le dosage automatique flash/ambiance en mode E • Le sujet est situé en dehors de la portée du flash. Tenez compte du fait que l’é- • Il n’y a pas eu d’échange de données entre le flash et l’appareil photo. clairage indirect réduit la portée du flash.
-
Seite 75: Caractéristiques Techniques
: 192 • env. 4,5 s avec des piles alcalines au manganèse haute performance Modes flash: • env. 2,5 s avec le Power-Pack P76 de Metz (accessoire spécial) TTL standard non pré-éclair de mesure, E-TTL, E-TTL II, Manuel M, Éclairage : Mode flash stroboscope, Mode flash automatique, Mode remote Réflecteur principal à... -
Seite 76: Accessoires En Option
23 Accessoires en option Elimination des batteries Ne pas jeter les batteries dans les ordures ménagères. Nous déclinons toute responsabilité pour le mauvais fonctionnement et l’endommagement du flash dus à l’utilisation d’accessoires d’autres con- Veuillez rendre vos batteries usées là où elles sont éventuellement reprises dans structeurs ! votre pays. - Seite 78 Veiligheidsinstructies ......... . . 79 Groothoekdiffusor .
-
Seite 79: Veiligheidsinstructies
• Uit verbruikte batterijen kan loog lekken, wat beschadiging van de contactpun- ten tot gevolg heeft. Haal daarom verbruikte batterijen altijd uit het apparaat. Hartelijk dank voor uw beslissing om een product van Metz aan te schaffen. Wij • Batterijen kunnen niet worden opgeladen. -
Seite 80: Dedicated Flitsfuncties
2 Dedicated flitsfuncties 3 Flitser gereedmaken Dedicated flitsfuncties zijn speciaal op het camerasysteem ingestelde flitsfuncties. 3.1 Het aanbrengen van de flitser Afhankelijk van het type camera worden daarbij verschillende flitsfuncties onder- Flitser op de camera monteren steund. Camera en flitser vóór het aanbrengen of afnemen uitschakelen. •... -
Seite 81: In- En Uitschakelen Van De Flitser
• 4 Lithiumbatterijen 1,5 V, type IEC FR6 (AA / Penlight), onderhoudsvrije voe- 3.4 Power-pack P76 (optioneel accessoire) ding met hoge capaciteit en geringe zelfontlading. Als het aantal flitsen en de flitsvolgtijden voor uw toepassing niet voldoen, kan • Power-Pack P76 met verbindingskabel V58-50 (optioneel accessoire). de flitser door een Power-Pack P76 (optioneel accessoire) van energie worden voorzien. -
Seite 82: Displayverlichting
wordt door op een willekeurige toets te drukken, c.q. door het aantippen van HSS Flitsen met manual-instellingen en synchroni- E TTL Mode de ontspanknop op de camera (Wake-Up-functie) weer ingeschakeld. E TTL HSS satie ook bij korte belichtingstijden Als u de flitser langere tijd niet gaat gebruiken, schakel hem dan in Stroboscoop-flitsfunctie principe altijd via zijn hoofdschakelaar uit! -
Seite 83: Ttl / Ettl Invulflitsen
Het instellen: Het instellen: Mode E TTL • Druk zo vaak op de toets , dat in het display ‘Mode’ wordt aangegeven. • Druk zo vaak op de toets , dat in het display Mode Mode E TTL HSS ‘Mode’ aangegeven wordt. •... -
Seite 84: Automatisch Flitsenfunctie A
Bij een correct belichte opname licht de aanduiding van 5.5 Automatisch invulflitsfunctie de flitscontrole “o.k.’ gedurende 3 seconden op (zie Bij de automatisch invulflitsfunctie bij daglicht wordt op de flitser in de automa- 13). tisch-flitsenfunctie een correctiewaarde van ong. -1 EV … -2 EV voor de flitsbelichting ingesteld (zie 6.4 en 10.5). -
Seite 85: Stroboscopisch Flitsen
In het display wordt de afstand aangegeven, waarbij het onderwerp correct Aantal flitsen (N) bij stroboscopisch flitsen wordt belicht. In deze functie kan het aantal flitsen (N) per opname worden ingesteld. Sommige camera’s ondersteunen de functie van flitsen met manual-instel- Het aantal flitsen kan tussen 2 en 50 stapsgewijs worden ingesteld. -
Seite 86: Flitsparameters (Menu 'Parameter')
In het display wordt de bij de ingestelde parameters geldende afstand aangege- 6 Flitsparameters (menu ‘Parameter’) ven. Door het veranderen van de diafragmawaarde of het deelvermogen kan de Voor het correct functioneren van de flitser is het noodzakelijk dat de verschillen- waarde van de afstand tot het onderwerp worden aangepast. -
Seite 87: Diafragmawaarde (F)
• Druk zo vaak op de toets , dat in het display de gewenste flitsparameter 6.2 Diafragmawaarde (F) Para (zie hieronder) wordt aangegeven. Als er tussen camera en flitser geen digitale overdracht van gegevens plaatsvindt De volgende flitsparameters zijn mogelijk: kunnen de diafragmawaarden (F) van 1,0 tot 45 (bij ISO 100) met de hand in stappen van een hele diafragmastop worden ingesteld. -
Seite 88: Stand Van De Hoofdreflector (Zoom)
6.3 Stand van de hoofdreflector (Zoom) 6.4 Correcties op de flitsbelichting (EV) Als er geen digitale overdracht van gegevens tussen camera en flitser plaats Bij grote helderheidsverschillen tussen onderwerp en achtergrond kan het nodig heeft gevonden kunnen de reflectorstanden zijn een met de hand in te stellen correctie op de flitsbelichting (EV) uit te voeren. Er zijn correctiewaarden van -3 diafragmawaarden (EV) tot +3 diafragmawaar- 24 mm –... -
Seite 89: Lichtgevoeligheid (Iso)
6.5 Lichtgevoeligheid (ISO) 6.6 Met de hand in te stellen deelvermogen (P) Als er geen digitale overdracht van gegevens tussen camera en flitser plaats In de manual flitsfunctie en de stroboscopisch-flitsenfunctie is het flits- heeft gevonden, kunnen de ISO-waarden voor de lichtgevoeligheid van 6 tot vermogen door het met de hand (manual) instellen van een deelvermogen (P) 6400 met de hand worden ingesteld. -
Seite 90: Extra Functies (Menu 'Select')
7 Extra functies (menu ‘Select’) • Druk op de toets en bevestig daarmee de keu- ze van de extra functie. De extra functies worden met de toets (Select) gekozen. Afhankelijk van • Kies met behulp van de toetsen het type camera en de ingestelde flitsfunctie staan er verschillende extra functies gewenste instelling. -
Seite 91: Flitsbelichtingstrapje (Fb)
Beep-signalen bij de instellingen in de automatisch-flitsenfunctie: 7.3 Flitsbelichtingstrapje (FB) In de flitsfuncties en automatisch kan een flitsbelichtingstrapje • Een korte piep als alarm treedt op, wanneer bij de automatisch-flitsenfunctie de diafragma- en ISO-instellingen tot het overschrijden van het regelbereik van (Flash-Bracketing FB) worden uitgevoerd. -
Seite 92: Synchronisatie Bij Het Dichtgaan Van De Sluiter (Rear)
• De eerste opname wordt zonder correctie tingstijd ontstoken, onmiddellijk vóórdat de sluiter begint dicht te gaan. Dit is F 5.1 uitgevoerd. In het display verschijnt vooral een voordeel bij opnamen met lange belichtingstijden (langer dan bijv. AZoom 28 bovendien ‘FB 1’. 1/30 seconde) en bewegende onderwerpen met een eigen lichtbron, omdat dan 7.7 m de bewegende lichtbronnen een lichtstaart achter zich laten, in plaats van dat... -
Seite 93: Extended-Zoomfunctie (Zoom Ext)
De REAR-functie kan alleen worden ingesteld bij een camera die daar- • Met de toetsen de gewenste instelling voor geschikt is! Bij veel compactcamera’s (PowerShot) moet de instelling uitvoeren. De instelling treedt onmiddellijk in werking. Ext ON op de camera zelf plaatsvinden (zie de gebruiksaanwijzing van uw •... -
Seite 94: Draadloze Bediening Van De Flitser (Remote)
- door de zoomstand van 70mm resulteert dat in een brandpuntsafstand van 7.7 Draadloze bediening van de flitser (Remote) 70mm : 1,5 = 46,6mm, in het display van de mecablitz wordt daarom • Bij de aanduiding ‘Remote OFF’ is de draadloze remote-functie gedeactiveerd. "SZoom 47"... -
Seite 95: Schakelen Tussen Meter En Feet (M / Ft)
7.8 Schakelen tussen meter en feet (m / ft) 7.9 Hulpreflector De aanduiding van de reikwijdte in het display van de flitser kan naar keuze in De hulpreflector dient voor het frontaal ophelderen als de hoofdreflector meters m of in feet ft plaatsvinden. De instelling vindt in het item m / ft plaats. voor indirect flitsen naar de zijkant of naar boven is gezwenkt (zie 10.3). -
Seite 96: Instellicht (Ml) 'Modelling Light
7.10 Instellicht (ML) ‘Modelling Light’ Als de flitser als master in het draadloos remote-systeem werkt, wordt tegelijk met het ontsteken van zijn instellicht dat van de slaafflitser(s) ont- Bij het instellicht gaat het om een stroboscopisch flitslicht met hoge frequentie. Bij stoken (zie 19.4). -
Seite 97: Vergrendeling Van De Toetsen (Keylock)
Het instellen: 7.12 Vergrendeling van de toetsen (KEYLOCK) Met de functie voor het vergrendelen van de toetsen (KEYLOCK) kunnen de toet- • Druk zo vaak op de toets , dat in het display Select ‘Select’ wordt aangegeven. sen van de flitser tegen onbedoeld verstellen worden vergrendeld. Als de toets- Standby vergrendeling via drie toetsen geactiveerd is, wordt in het display het symbool •... -
Seite 98: Af-Beam (Af-Hulplicht)
7.13 AF-BEAM (AF-hulplicht) 8 Motorisch gestuurde zoomreflector Als het AF-meetsysteem van een digitale AF-spiegelreflexcamera vanwege te Het aanpassen van de zoomstand van de hoofdreflector kan bij objectieven met weinig omgevingslicht niet kan scherpstellen wordt door de camera het in de flit- een brandpuntsafstand vanaf 24 mm (kleinbeeld 24 x 36 mm) plaatsvinden. -
Seite 99: Groothoekdiffusor
Met de hand verstellen van de zoomstand bij AZoom 10 Flitstechnieken De zoomstand van de hoofdreflector kan ook bij het gebruik op een camera 10.1 Indirect flitsen die de gegevens doorgeeft, veranderd worden, bijv. om bepaalde verlichtingsef- Door indirect te flitsen wordt het onderwerp zachter verlicht en vermindert de fecten te verkrijgen (bijv. -
Seite 100: Indirect Flitsen Met De Hulpreflector
10.3 Indirect flitsen met de hulpreflector 10.5 Met de hand in te stellen correcties op de flitsbelichting Bij gezwenkte hoofdreflector kan als extra voor frontale opheldering van het De belichtingsautomaat van de flitser en van de meeste camera’s is afgestemd op een reflectiegraad van 25% (gemiddelde reflectiegraad van flitsonderwerpen). -
Seite 101: Aanduiding Van Flitsparaatheid
11 Aanduiding van flitsparaatheid 13 Aanduiding van de belichtingscontrole Zodra de flitscondensator opgeladen is, licht op de flit- De aanduiding van belichtingscontrole „o.k.“ licht ser de aanduiding van flitsparaatheid ) op en alleen op, als de opname in de TTL - / E-TTL - flitsfunctie, geeft daarmee aan, dat de flitser gereed is. -
Seite 102: Aanduiding Van De Flitsreikwijdte
15 Aanduiding van de flitsreikwijdte 15.2 Met de hand aanpassen van de aanduiding van de flitsreikwijdte Als de camera geen gegevens aan de flitser doorgeeft, dan moeten, om een In het display van de flitser wordt de waar- F 4.5 betrouwbare aanduiding van de maximale reikwijdte te krijgen, de parameters de van de maximale reikwijdte van het 14 m... -
Seite 103: Flitssynchronisatie
17 Flitssynchronisatie • Bij de instelling ‘REAR ON’ vindt de synchronisatie plaats bij het dichtgaan van de sluiter; 17.1 Normale synchronisatie • Bij de instelling ‘ REAR OFF’ is de normale synchronisatie ingesteld. Bij de normale synchronisatie wordt de flits aan het begin van de belichting ont- De REAR-functie kan alleen bij het gebruik van een camera in het menu stoken (synchronisatie bij het opengaan van de sluiter). -
Seite 104: Meerzone Af-Meetflits
Natuurkundig bepaald, wordt door de synchronisatie bij korte belichtingstijden 19 Draadloze remote-functie HSS echter het richtgetal en daarmee ook de reikwijdte van de flits soms flink De draadloze remote-functie is compatibel met het Canon-E-TTL-Remote-systeem. beperkt! Let daarom op de aanduiding van de reikwijdte in het LC-display van Het remote-systeem bestaat uit een masterflitser op de camera en een of meer de flitser! De HSS-synchronisatie bij korte belichtingstijden wordt automatisch uit- slaafflitsers. -
Seite 105: Instellen En Uitschakelen Van De Remote-Functie
19.1 Instellen en uitschakelen van de remote-functie 19.2 Instellingen op de masterflitser • Druk zo vaak op de toets , dat in het display De slaafgroepen A en B zijn altijd geactiveerd. Deze kunnen niet worden BEEP Select gedeactiveerd! De masterflitser-M en de slaafgroep C kunnen wel geacti- ‘Select’... - Seite 106 Het instellen van slaafgroep C Het instellen van de masterflitser • Druk zo vaak op de toets , dat in het display C, c.q. C TTL (voor slaaf- • Druk zo vaak op de toets , dat in het display M, c.q. M TTL (voor de Para Para groep C) wordt aangegeven.
-
Seite 107: Instellingen Op De Slaafflitser
Het instellen van groep C 19.3 Instellingen op de slaafflitser • Druk zo vaak op de toets , dat in het display C, c.q. C M (voor slaaf- Para • Met de toets na elkaar de instellingen voor het kiezen van de slaafgroep Para groep C) wordt aangegeven. - Seite 108 19.5 Servo-functie Deelvermogen, c.q. reflectorstand (MZoom) instellen Servo • Druk in de SERVO-flistfunctie zo vaak op de toets De SERVO-functie is een eenvoudige slaaffunctie waarbij de flitser altijd een flits MZoom 35 P1/64 , dat in het display het zojuist ingestelde ontsteekt zodra hij een lichtimpuls ontvangt.
-
Seite 109: Onderhoud En Verzorging
1 min. na het inschakelen oplicht. een Metz Power Pack P76 aan. • Een Metz Power Pack P76 is aangesloten en in het batterijvak van de meca- blitz zitten nog batterijen/accu's. Haal de batterijen uit het batterijvak van de... - Seite 110 In het display verschijnt een batterijsymbool • De groothoekdiffusor is voor de hoofdreflector geklapt. • Op de mecablitz is een Metz Power Pack P76 aangesloten en in het batterijvak • Voor de hoofdreflector is een Mecabounce aangebracht. van de mecablitz bevinden zich batterijen. Haal deze batterijen uit de meca- blitz.
- Seite 111 De opname zijn te donker. De TTL-invulflitsfunctie E laat zich niet instellen. • Het onderwerp ligt buiten het bereik van de flits. Let op: bij indirect flitsen ver- • Er heeft geen uitwisseling van gegevens tussen camera en flitser plaatsgevon- mindert de reikwijdte van de flits.
-
Seite 112: Technische Gegevens
Kleurtemperatuur: Ong. 5600 K Lichtgevoeligheid: ISO 6 tot ISO 6400 Synchronisatie: Laagspannings-IGBT-ontsteking Aantallen flitsen (telkens bij vol vermogen): • Ong. 250 met Metz NiMH accupak 2100mAh • Ong. 180 met super-alkalimangaanbatterijen • Ong. 430 met Metz Power-Pack P76 Flitsvolgtijd (telkens bij vol vermogen): •... -
Seite 113: Bijzondere Toebehoren
23 Bijzondere toebehoren Afvoeren van de batterijen Voor foute werking van en schades aan de mecablitz, veroorzaakt door Batterijen horen niet bij het huisvuil. het gebruik van accessoires van andere fabrikanten, zijn wij niet aan- S.v.p. de batterijen bij een daarvoor bestemd inzamelpunt afgeven. sprakelijk. - Seite 114 Safety instructions..........115 Wide-angle diffuser .
-
Seite 115: Safety Instructions
• Do not expose the flash unit or battery charger to dripping or splashing water such as rain! Thank you for purchasing a Metz product. We are happy to welcome you as a • Protect the flash unit from excessive heat and humidity! Do not store the customer. -
Seite 116: Dedicated Flash Functions
2 Dedicated flash functions 3 Preparing the flash unit for use Dedicated flash functions are flash functions that have been specially adapted to 3.1 Mounting the flash unit a given camera system. Depending on the type of camera, different flash func- Mounting the flash unit on the camera tions are supported. -
Seite 117: Switching The Flash Unit On And Off
• Power Pack P76 with connecting cable V58-50 (optional accessory) 3.4 Power Pack P76 (optional accessory) If a battery-operated flash does not meet your needs in terms of number of flas- If your flash unit is not going to be used for an extended period of time, hes and recycling times, a Power Pack P76 (optional) can be connected to the remove the batteries. -
Seite 118: Display Illumination
If necessary, the Auto OFF function can be set to occur after 1 minute of inactivi- • Set the flash mode of your choice ( , automatic E TTL Mode ty, or can be deactivated (see 7.11). E TTL HSS , manual , etc.) using the keys. -
Seite 119: Bijzondere Toebehoren
Setting procedure: Setting procedure: Mode E TTL • Press the button until „Mode“ flashes on the LC display. • Press the button until „Mode“ flashes on the LC Mode Mode E TTL HSS display. • Set the flash mode using the keys. -
Seite 120: Automatic Flash Mode
Ensure that the contre-jour light source does not shine directly into the This has a graduated lightening effect on shadowy areas, which has a natural lens, as this will interfere with the camera’s TTL metering system. appearance on the photograph. 5.4 Automatic flash mode 5.6 Manual flash mode In the automatic flash mode A, the flash unit sensor... -
Seite 121: Strobe Flash Mode
Strobe number of flashes (N) Some cameras only support the manual flash mode when the camera is set to the manual operating mode M. In strobe mode, the number of flashes per shot (N) can be selected. The number of flashes can be set from 2 to 50 in intervals of one. The maximum 5.7 Strobe flash mode manual partial light output is automatically adjusted to this number. -
Seite 122: Flash Parameters (Parameter Menu)
Setting procedure: 6 Flash parameters (Parameter menu) • Press the button (Parameters) until the desired Para For the flash unit to operate correctly, various flash parameters such as the zoom F 4.0 flash parameter position of the main reflector, aperture, ISO light sensitivity, etc. have to be adju- MZoom 24 (F=f-stop or P=partial light output) appears on the LC 4,6 m... -
Seite 123: Aperture (F)
6.2 Aperture (F) TTL/E-TTL/A/E-TTL-HSS M/M HSS Table 1 If there is no digital data transfer between the camera and flash unit, the apertu- — — Number of strobe flashe re can be set by hand from 1.0 to 45 (at ISO 100), in intervals of one full aper- —... -
Seite 124: Main Reflector Position (Zoom)
6.3 Main reflector position (Zoom) 6.4 Flash exposure correction (EV) If there is no digital data transfer between the camera and flash unit, the reflector Manual flash exposure correction (EV) can help offset extreme differences in positions contrast between the subject and background. Corrections from -3 f-stops (EV) to 24 mm - 28 mm - 35 mm - 50 mm - 70 mm - 85 mm - 105 mm (35mm format +3 f-stops (EV) can be made, in 1/3 increments (also see 10.5). -
Seite 125: Light Sensitivity (Iso)
6.5 Light sensitivity (ISO) 6.6 Manual partial light output (P) If there is no digital data transfer between the camera and flash unit, the ISO can In the manual mode and the strobe mode , the light output can also be be manually set from 6 to 6400. -
Seite 126: Special Functions (Select Menu)
7 Special functions (Select menu) • Press the key to confirm the special function selection. Special functions are selected using the button. Depending on the camera • Choose the setting desired using the model and flash mode set, various special functions are available. If certain spe- keys. -
Seite 127: Flash Bracketing Series (Fb)
Setting procedure: 7.3 Flash Bracketing Series (FB) A series of flash exposures (flash-bracketing FB) can be carried out in the • Press the button repeatedly until „Select“ appe- Select ars on the display. and automatic flash modes. A flash bracketing series consists Beep of three successive flash shots with different flash exposure correction values. -
Seite 128: 2Nd Curtain Synchronisation (Rear Mode)
• The first shot is taken without a correction and when shooting moving objects that have their own source of light, because F 5.1 value. „FB 1“ will also appear on the streaks of light then trail behind light sources instead of building up in front of AZoom 28 display. -
Seite 129: Extended Zoom Mode (Zoom Ext)
The REAR function can only be used with a camera suitably equipped for • Confirm the selection of the special function by pres- this mode. For many compact cameras (PowerShot), this setting is done sing the button. Ext ON directly on the camera (see camera's operating instructions). The REAR •... -
Seite 130: Cordless Remote Mode (Remote)
Setting procedure: 7.7 Cordless remote mode (Remote) • When „Remote OFF“ appears, the cordless remote mode is deactivated. • Press the button repeatedly until „Select“ Zoom Ext Select appears on the display. • When „Remote Master“ appears, the flash unit is operating as a guiding Zoom Size m/ft master flash unit on the camera. -
Seite 131: Meter-Feet Changeover (M/Ft)
7.8 Meter-Feet changeover (m/ft) 7.9 Secondary reflector The maximum flash range indicated by the flash unit’s display can either be The secondary reflector i is used for frontal brightening in the case of indirect shown in meters or feet. The setting can be adjusted under the menu option m/ft. lighting when the main reflector is pivoted to the side or upwards (see 10.3). -
Seite 132: Modelling Light (Ml)
7.10 Modelling Light (ML) When the flash unit functions as master in the cordless remote system, the activation of the modelling light also activates the modelling light of slave The modelling light is a high-frequency stroboscopic flash. It creates the impres- flash units (see 19.4). -
Seite 133: Keylock
Setting procedure: 7.12 KEYLOCK The KEYLOCK function enables the user to lock the buttons on the flash unit to • Press the button repeatedly until „Select“ appe- Select ars on the display. prevent them from inadvertently being pressed. When the KEYLOCK function is Standby activated, a symbol appears on the display above three buttons. -
Seite 134: Af-Beam (Af Auxiliary Light)
7.13 AF-BEAM (AF auxiliary light) 8 Motor Zoom Reflector If the AF metering system of a digital AF reflex camera is unable to focus due to The zoom position of the main reflector can be adjusted for focal lengths of at insufficient ambient lighting, the camera activates the AF auxiliary light built into least 24 mm (35 mm format). -
Seite 135: Wide-Angle Diffuser
Manual adjustment of the zoom position with AZoom 10 Flash techniques The zoom position of the main reflector can also be changed when the flash 10.1 Bounce flash unit is used with a camera capable of data transmission, in order to achieve spe- Bounce flash illuminates the subject more softly and reduces dense shadows. -
Seite 136: Bounce Flash With Secondary Reflector
10.3 Bounce flash with secondary reflector 10.5 Manual flash exposure corrections When the main reflector is swivelled or tilted, the secondary reflector The auto flash exposure mode of the flash unit, as of most cameras, is adjusted also be activated in the Select Menu for frontal fill-in lighting of the subject (see to a reflection factor of 25% (the average reflection factor of flash subjects). -
Seite 137: Flash Readiness Indication
11 Flash readiness indication 13 Correct exposure indication When the flash capacitor is charged, the flash readi- The correct exposure indication „OK“ only lights up ness symbol lights up on the flash unit, indicating if the shot was correctly exposed in TTL /E-TTL flash that the flash is ready to fire. -
Seite 138: Flash Range Indication
15 Flash range indication 15.2 Manual adjustment of the flash range indication If the camera does not send the parameterrs, the zoom position, ISO film speed The maximum flash range is indicated on and f-stop parameters must be adjusted manually on the flash unit if the flash F 4.5 the display panel of the flash unit. -
Seite 139: Flash Synchronisation
17 Flash synchronisation The REAR function can be selected and set in the flash unit’s Select Menu only when the flash unit is operated with a suitable Group B camera 17.1 Normal synchronisation (Table 1). The REAR mode is indicated on the flash unit only when it has been set on the flash unit. -
Seite 140: Multi-Zone Af Measuring Beam
18 Multi-zone AF measuring beam 19 Wireless remote flash mode The multi-zone AF measuring beam is activated in the flash unit by the Wireless remote operation is compatible with the Canon E-TTL remote system. camera when the ambient lighting conditions become inadequate for automatic The remote system consists of a master flash unit on the camera and one or more focusing. -
Seite 141: Switching The Remote Flash Mode On And Off
19.1 Switching the remote flash mode on and off 19.2 Settings on the master flash unit Slave groups A and B are always activated. They cannot be deactivated. • Press the key repeatedly until "Select" appears The master flash unit M and slave group C can be activated or deactiva- BEEP Select on the display. - Seite 142 Adjusting the settings for slave group C • To activate the master flash unit, press the key until M TTL appears on Mode – the LC display. While M TTL is displayed, the keys can be used • Press the key repeatedly until C or C TTL (for slave group C) appears on Para to adjust the flash exposure correction value for the slave flash units of group...
-
Seite 143: Settings On The Slave Flash Unit
• To deactivate slave group C, press the key repeatedly until only C 19.3 Settings on the slave flash unit Mode appears on the LC display. • Use the key to select, in succession, the settings for choice of slave Para group („Group“), the remote channel („Channel“) and the reflector position Setting the remote channel... -
Seite 144: Servo Mode
19.5 Servo mode Setting partial lighting or reflector position (MZoom) Servo • In SERVO mode, press the button repeatedly Servo mode is a simple slave mode with complete preflash suppression, in which Para MZoom 35 P1/64 until the set partial lighting or reflector position is the slave flash unit always triggers a flash as soon as the camera flash unit recei- Para –... -
Seite 145: Care And Maintenance
Metz Power Pack P76. • A Metz Power Pack P76 is connected and there are still batteries in the battery compartment of the mecablitz. Remove the batteries from the mecablitz. - Seite 146 The aperture setting on the flash unit is not automatically adjusted to that of the lens. • There is a Metz Power Pack P76 connected to the mecablitz and there are bat- teries in the battery compartment of the mecablitz. Remove batteries from the •...
- Seite 147 Automatic switching to the flash sync speed fails to occur. The shots are too bright. • For close-ups it is necessary to ensure that certain minimum lighting distances • The camera has a between-the-lens shutter (as do most compact cameras), are maintained to avoid overexposure.
-
Seite 148: Technical Data
Number of flashes (at full light output): • Approx. 250 with NiMH batteries 2100 mAh • Approx. 180 with high-capacity alkaline manganese batteries • Approx. 430 with Metz Power Pack P76 (special accessory) Recycling time (at full light output): • Approx. 4,5 sec with NiMH batteries •... -
Seite 149: Optional Accessories
23 Optional accessories Disposal of batteries Do not dispose of spent batteries with domestic rubbish. We accept no liability for malfunctions of or damage to the flash unit cau- sed by the use of accessories of other manufacturers. Please return spent batteries to collecting points should they exist in your country! •... - Seite 150 Per la vostra sicurezza ........151 Diffusore grandangolare .
-
Seite 151: Per La Vostra Sicurezza
• Non gettare nel fuoco le batterie o le pile esaurite! • Un’eventuale fuoriuscita di acido dalle batterie esaurite può provocare danni Grazie per aver scelto un prodotto Metz! Siamo lieti di potervi dare il benvenuto al flash. Rimuovere subito le batterie esaurite dall’apparecchio! tra i nostri Clienti. -
Seite 152: Funzioni Flash Dedicate
2 Funzioni flash dedicate 3 Preparazione del flash Le funzioni flash dedicate sono funzioni messe a punto specificatamente per i 3.1 Montaggio del flash diversi sistemi di camera. Le funzioni del flash supportate dipendono dal tipo di Montaggio del flash sulla camera camera. -
Seite 153: Accensione E Spegnimento Del Flash
• 4 batterie al litio 1,5 V, tipo IEC FR6 (AA/Mignon), una fonte di energia esen- 3.4 Power Pack P76 (accessorio a richiesta) te da manutenzione, ad elevata capacità e autoscarica contenuta. Se il numero di lampi e i tempi di ricarica non sono sufficienti per la vostra •... -
Seite 154: Illuminazione Display
tocca leggermente il pulsante di scatto della camera (funzione Wake-Up). Modo flash Stroboscopico E TTL Mode E TTL HSS Se prevedete di non utilizzare il flash per lungo tempo è opportuno speg- • Impostate il modo flash desiderato con i tasti nere l’apparecchio sempre con l’interruttore principale , Automatico , Manuale... -
Seite 155: Modo Lampo Di Schiarita Ttl / Ettl
Procedura per l’impostazione: • Impostate il modo flash E con i tasti Mode E TTL • Premete il tasto finché nel display non comparirà „Mode“. La modalità del flash selezionata viene dunque evi- Mode E TTL HSS denziata rendendo l’impostazione attiva da subito. •... -
Seite 156: Modo Flash Automatico
Se la fotocamera non supporta alcuni parametri za di luce diurna e con il lampeggiatore regolato sul modo flash Automatico flash questi dovranno essere impostati a mano , viene impostato un valore di compensazione dell’esposizione di circa -1 EV ... sull'apparecchio! -2 EV (vedi i punti 6.4 e 10.5). -
Seite 157: Modo Flash Stroboscopico
Numero lampi stroboscopio (N) F 4.0 MZoom 24 Alcune camere supportano il modo flash manua- Con il modo flash Stroboscopico è possibile impostare il numero di lampi (N) 10 m P1/2 per scatto. solo se impostate anch’esse sulla modalità Mode Para manuale M! Il numero dei lampi è... -
Seite 158: Parametri Del Flash (Menu Parametri)
Sul display viene indicata la distanza valida in funzione dei parametri impostati. 6 Parametri del flash (Menu Parametri) Modificando l’apertura del diaframma o la potenza ridotta il valore della distan- Per un corretto funzionamento del lampeggiatore è necessario che i diversi para- za indicato può... -
Seite 159: Diaframma (F)
• Premete il tasto più volte finché sul display non compare il parametro 6.2 Diaframma (F) Para flash desiderato (vedi sotto). Se tra fotocamera e flash non avviene una trasmissione dati digitale, i valori del Possono essere selezionate i seguenti parametri: diaframma (F) possono essere impostati a mano da 1,0 a 45 (con ISO 100) ad intervalli di gradi pieni del diaframma. -
Seite 160: Posizione Della Parabola (Zoom)
6.3 Posizione della parabola (Zoom) 6.4 Correzione dell’esposizione (EV) Se non avviene alcuna trasmissione dati digitale tra camera e flash, le posizioni In caso di forte contrasto tra soggetto e sfondo immagine può essere necessaria della parabola possono essere impostate a mano su una correzione manuale dell’esposizione flash (EV). -
Seite 161: Sensibilità Alla Luce (Iso)
6.5 Sensibilità alla luce (ISO) 6.6 Potenza ridotta manuale (P) Se non avviene alcuna trasmissione dati digitale tra camera e flash, i valori ISO Nel modo flash manuale e nel modo Stroboscopico è possibile adatta- per la sensibilità alla luce possono essere impostati manualmente da 6 a 6400. re la potenza luminosa alle condizioni di ripresa impostando una potenza ridot- ta manuale (P). -
Seite 162: Funzioni Speciali (Menu Select)
7 Funzioni speciali (Menu Select) • Premete il tasto e confermate così la selezione della funzione speciale. Le funzioni speciali vengono selezionate con il tasto (Select). Secondo il • Effettuate l’impostazione desiderata con i tasti tipo di camera e del modo flash impostato sono disponibili diverse funzioni spe- . -
Seite 163: Serie Di Esposizioni Flash (Fb)
Segnali bip nelle impostazioni in modo flash automatico: 7.3 Serie di esposizioni flash (FB) Nei modi flash e automatico è possibile effettuare una serie di • Si ha un breve segnale bip di allarme se nel modo flash automatico l’imposta- zione di diaframma e ISO porterebbe a superare l’intervallo consentito di esposizioni flash (Flash-Bracketing FB). -
Seite 164: Sincronizzazione Sulla 2Éme Tendina (Rear)
• La prima ripresa viene effettuata senza 1/30 di secondo) e con soggetti in movimento con fonte di luce propria, poiché la F 5.1 valore di correzione. Sul display si visua- fonte di luce in movimento lascia dietro di sé una scia luminosa, contrariamente a AZoom 28 lizzerà... -
Seite 165: Modo Zoom Esteso (Zoom Ext)
La funzione REAR può essere impostata solo in abbinamento con una • Premete il tasto e confermate così la selezione fotocamera adeguata! In diverse fotocamere compatte (PowerShot) l'im- della funzione speciale. Ext ON postazione avviene direttamente sulla fotocamera (vedi le relative istru- •... -
Seite 166: Modo Con Controllo A Distanza (Remote)
zoom a 70 mm al fine di assicurare un'illuminazione completa. - dalla posizio- 7.7 Modo con controllo a distanza (Remote) ne di zoom a 70 mm risulta una distanza focale pari a 70 mm: 1,5 = 46,6, il • Quando si visualizza „Remote OFF“ il modo con controllo a distanza è disatti- display del mecablitz riporta quindi "SZoom 47". -
Seite 167: Commutazione Metri - Piedi (M/Ft)
7.8 Commutazione metri - piedi (m/ft) 7.9 Parabola ausiliaria Il campo di utilizzo può essere visualizzato sul display a scelta in metri „m“ o in La parabola ausiliaria i serve a schiarire frontalmente in presenza di illumina- zione indiretta quando la parabola principale g è rivolta di lato o verso l'alto piedi „ft“. -
Seite 168: Luce Pilota (Ml) „Modelling Light
7.10 Luce pilota (ML) „Modelling Light“ Premendo il tasto di emissione manuale del lampo viene emessa la luce pilota. La luce pilota è un flash stroboscopico ad alta frequenza. Con una durata di cir- Se il flash lavora come controller nel sistema con controllo a distanza, con ca 3 secondi si ha l’impressione di una luce quasi permanente. -
Seite 169: Blocco Dei Tasti (Keylock)
Il flash passa quindi allo stato a risparmio energetico stand-by dopo uno o dieci 7.12 Blocco dei tasti (KEYLOCK) minuti di inattività. Per riaccenderlo basta premere un tasto qualsiasi o toccare Con la funzione blocco dei tasti (KEYLOCK) è possibile bloccare i pulsanti del leggermente il pulsante di scatto della camera (funzione Wake-Up). -
Seite 170: Af-Beam (Illuminatore Ausiliario Af)
7.13 AF-BEAM (Illuminatore ausiliario AF) 8 Parabola zoom motorizzata Se il sistema di misurazione AF di una fotocamera reflex digitale AF non riesce a L’adattamento della posizione dello zoom della parabola principale può avveni- mettere a fuoco a causa della scarsa luminosità dell’ambiente, verrà attivato l’il- re per focali d’obiettivo a partire da 24 mm (piccolo formato 24 x 36). -
Seite 171: Diffusore Grandangolare
Esempio: 10 Tecniche lampo State utilizzando un obiettivo zoom con un intervallo di focali da 35 mm a 105 10.1 Lampo riflesso mm. In questo esempio mettete la posizione della parabola zoom su 35 mm! Utilizzando il lampo riflesso la luce sul soggetto risulta più morbida e le ombre Regolazione manuale della posizione zoom con AZoom sono meno dure. -
Seite 172: Lampo Riflesso Con Parabola Ausiliaria
10.3 Lampo riflesso con parabola ausiliaria 10.5 Correzioni manuali dell’esposizione flash Quando la parabola principale è inclinata, per ottenere una luce frontale di Il sistema di esposizione automatica del flash e della maggior parte delle camere schiarita sul soggetto è possibile potete azionare anche la parabola ausiliaria è... -
Seite 173: Indicazione Di Stato Del Flash
11 Indicazione di stato del flash Sulle fotocamere con otturatore centrale (vedi le istruzioni d'uso della fotocamera) e sincronizzazione ad alta velocità HSS (vedi il punto 17.4) Quando il condensatore flash è carico, sul flash si non ha luogo il controllo automatico del tempo di sincronizzazione. In accende la spia di carica del flash per indicare questo modo è... -
Seite 174: Indicazione Campo D'utilizzo
Indicazioni generali in caso di esposizione non corretta: 15.1 Adattamento automatico dell’indicazione del campo d’utilizzo • In caso di sovraesposizione: non usare il flash! Le camere al flash i parametri riguardanti la sensibilità alla luce ISO, la focale d’obiettivo (mm), il diaframma e la correzione dell’esposizione. Il flash adatta •... -
Seite 175: Sincronizzazione Del Lampo
Eventuali modifiche dell’esposizione successive al lampo di prova FE non Su alcune fotocamere la funzione REAR non è possibile in determinati modi di verranno prese in considerazione durante la ripresa per motivi insiti al funzionamento (ad es. alcuni programmi "Vari" o "Scene"). La funzione REAR, in questi casi, non si può... -
Seite 176: Flash Di Misurazione Multizone Af
lizzare il flash anche con tempi di posa più rapidi di quelli di sincronizzazione. Obiettivi zoom con apertura ridotta del diaframma iniziale limitano a volte con- È interessante ad es. nei primi piani con luce ambiente molto chiara, quando la siderevolmente la portata del flash di misurazione multizone AF! profondità... -
Seite 177: Impostazione E Disattivazione Del Controllo A Distanza
19.1 Impostazione e disattivazione del controllo a distanza 19.2 Impostazioni sul flash controller I gruppi slave A e B sono sempre attivi. Non possono essere disattivati! Il • Premete il tasto più volte finché sul display non BEEP flash controller M e il gruppo slave C possono essere attivati e disattivati! Select compare "Select". - Seite 178 Procedura per l'impostazione del gruppo slave C Procedura per l'impostazione del flash controller • Premete il tasto più volte finché sul display non compare C, ovvero C • Premete il tasto più volte finché sul display non compare M ovvero M Para Para TTL (per il gruppo slave C).
-
Seite 179: Impostazione Sul Flash Slave
Procedura per l'impostazione del gruppo slave C 19.3 Impostazione sul flash slave • Richiamate in ordine successivo le impostazioni per la selezione del gruppo • Premete il tasto più volte finché sul display non compare C ovvero C M Para (per gruppo slave C). -
Seite 180: Modo Servo
19.5 Modo Servo Impostare una potenza luminosa ridotta o la posi- Servo zione della parabola (MZoom) Il modo SERVO è un semplice modo slave in cui il flash slave emette sempre un MZoom 35 P1/64 • Nel modo flash SERVO premere il tasto fin- flash non appena riceve un impulso luminoso. -
Seite 181: Cura E Manutenzione
• Un Metz Power Pack P76 è collegato e nel vano batterie del mecablitz sono ancora presenti delle batterie. Rimuovete le batterie dal relativo alloggiamento... - Seite 182 Il display mostra il simbolo di una batteria • Il diffusore grandangolare è inserito davanti alla parabola principale. • Un Metz Power Pack P76 è collegato al mecablitz e sono presenti delle batte- • Davanti alla parabola principale è montato un Mecabounce.
- Seite 183 Le riprese sono troppo scure. Non è possibile impostare il modo flash di schiarita E • Il soggetto si trova al di fuori del campo d’utilizzo del flash. Ricordate: con il • Non ha avuto luogo lo scambio dati tra flash e fotocamera. Premere legger- lampo riflesso si riduce il campo d’utilizzo del flash.
-
Seite 184: Dati Tecnici
• Circa 250 con accumulatore NiMH 2100 mAh • Circa 180 con batterie alcaline al manganese ad alte prestazioni • Circa 430 con Power-Pack Metz P76 (accessorio a richiesta) Tempo di ricarica (sempre a potenza luminosa piena): • Circa 4,5 secondi con accumulatore NiMH •... -
Seite 185: Accessori Opzionali
Le batterie non vanno gettate insieme ai rifiuti domestici. l cattivo funzionamento e i danni eventualmente provocati al flash dall’u- tilizzo di accessori non prodotti dalla Metz non sono coperti dalla nostra Si prega di utilizzare un sistema di smaltimento adeguato, p. es. portandole al garanzia! negozio dove le si è... - Seite 186 Indicaciones de seguridad ........187 Difusor de gran angular .
-
Seite 187: Indicaciones De Seguridad
• Las pilas secas no pueden recargarse. • No exponer el flash ni el cargador a gotas o salpicaduras de agua, por Le agradecemos que se haya decidido por un producto Metz y nos complace ejemplo, a la lluvia. saludarle como usuario de nuestra marca. -
Seite 188: Funciones Dedicadas Del Flash
2 Funciones dedicadas del flash 3 Preparación del flash Las funciones dedicadas del flash son las que se adecuan de manera especial al 3.1 Montaje del flash sistema de la cámara. Así, las funciones del flash serán compatibles dependien- Colocar el flash en la cámara do del modelo de cámara. -
Seite 189: Conexión Y Desconexión Del Flash
• 4 pilas de litio de 1,5 V, tipo IEC FR6 (AA/ Mignon), que suministran energía 3.4 Power Pack P76 (accesorio opcional) sin necesidad de mantenimiento con una capacidad mayor y una menor auto- Si la cantidad de destellos y los intervalos entre destellos no son suficientes para descarga. -
Seite 190: Iluminación De La Pantalla
Cuando no se vaya a utilizar el flash durante un periodo de tiempo pro- • Con las teclas puede ajustar el modo de E TTL Mode longado, debe apagarse siempre mediante el interruptor général funcionamiento del flash deseado ( , automático E TTL HSS , manual , etc.). -
Seite 191: Modo De Relleno Ttl (Ttl Bl)
Configuración: Configuración: Mode E TTL • Pulsar la tecla hasta que aparezca „Mode“ en la pantalla. • Pulsar la tecla hasta que aparezca „Mode“ en Mode Mode E TTL HSS la pantalla. • Ajustar el modo de flash con las teclas . -
Seite 192: Modo Automático
Si la toma se ha iluminado correctamente aparece la 5.5 Modo de relleno automático indicación „o.k.“ en la indicación de control de la Cuando se ajusta el modo de relleno automático con luz diurna, en el modo exposición (consultar 13). automático del flash se realiza una corrección de aprox. -
Seite 193: Modo Estroboscópico
En la pantalla aparece la distancia a la que debería estar el motivo para que la Cantidad de destellos estroboscópicos (N) exposición fuera correcta. En el modo estroboscópico la cantidad de destellos (N) se puede ajustar por Varias cámaras son compatibles con el modo manual M únicamente disparo. -
Seite 194: Parámetros Del Flash (Menú Parámetros)
En la pantalla aparece la distancia adecuada según los parámetros selecciona- 6 Parámetros del flash (menú Parámetros) dos. Si se cambia la apertura o la potencia parcial, se puede ajustar la distancia Para un correcto funcionamiento del flash es necesario que los distintos paráme- mostrada a la distancia real del motivo. -
Seite 195: Apertura Del Diafragma (F)
• Pulsar la tecla hasta que aparezca en la pantalla el parámetro de flash 6.2 Apertura del diafragma (F) Para deseado (consultar a continuación). Si no tiene lugar una transmisión digital de datos entre la cámara y el flash, los Estos son los parámetros disponibles: valores de diagragma (F) de 1,0 hasta 45 (con ISO 100) pueden ajustarse manualmente en intervalos enteros de valores de diafragma. -
Seite 196: Posición Del Reflector Principal(Zoom)
6.3 Posición del reflector principal (zoom) 6.4 Corrección de la exposición del flash (EV) Si no existe transmisión digital de datos entre la cámara y el flash, se pueden Cuando existen grandes diferencias de contraste entre el motivo y el fondo de la ajustar las posiciones del reflector imagen puede ser necesaria una corrección manual de la exposición del flash (EV). -
Seite 197: Sensibilidad De La Película (Iso)
6.5 Sensibilidad de la película (ISO) 6.6 Potencia parcial manual (P) Si no existe transmisión digital de datos entre la cámara y el flash, se pueden En el modo de flash manual y el modo estroboscópico se puede aju- ajustar manualmente los valores de sensibilidad ISO desde 6 hasta 6400. star la potencia del destello a la toma, seleccionando una potencia parcial (P) de forma manual. -
Seite 198: Funciones Especiales (Menú Select)
7 Funciones especiales (menú Select) • Pulsar la tecla para confirmar la selección de la función especial. Las funciones especiales se seleccionan con la tecla . Según el modelo de • Establecer el ajuste deseado con las teclas cámara y el modo de funcionamiento del flash seleccionado, están disponibles . -
Seite 199: Horquillado De Flash (Fb)
Pitido al ajustar el modo de flash automático: 7.3 Horquillado de flash (FB) En el modo y automático se puede realizar un horquillado de • Se oye un breve pitido de aviso cuando, estando seleccionado el modo de funcionamiento automático, se ajusta la apertura y la sensibilidad más allá del flash (Flash Bracketing, FB). -
Seite 200: Sincronización Con La Segunda Cortinilla (Rear)
• La primera toma se realiza sin valor de Esto es una ventaja, sobre todo en exposiciones con velocidades de obturación F 5.1 lentas (p. ej., más de 1/30 seg.) y motivos en movimiento con fuente de luz pro- corrección. En la pantalla aparece „FB1“. AZoom 28 pia, ya que las fuentes de luz en movimiento dejan una estela luminosa tras de 7.7 m... -
Seite 201: Modo De Zoom Extendido (Zoom Ext)
La función REAR se puede seleccionar solamente usando una cámara • Pulsar la tecla para confirmar la selección de apropiada. En muchas cámaras compactas (PowerShot) el ajuste se reali- la función especial. Ext ON za en la cámara (consultar el manual de instrucciones de la cámara). El •... -
Seite 202: Modo Remoto Inalámbrico (Remote)
- La iluminación se consiguió cuando se llevó el reflector principal del mecablitz 7.7 Modo remoto inalámbrico (Remote) a la posición de zoom de 50 mm. x 1,5 = 75 mm. Como el mecablitz sólo tie- • Si aparece „Remote OFF“ en la pantalla, el modo inalámbrico está desactivado. ne las posiciones de Zoom 70 mm. -
Seite 203: Conmutación De Metros A Pies (M-Ft)
7.8 Conmutación de metros a pies (m-ft) 7.9 Segundo reflector La indicación del alcance en la pantalla del flash se puede realizar, según las El reflector adicional i sirve para la iluminación frontal, mediante iluminación indirecta, cuando el reflector principal g está inclinado lateralmente o hacia arri- preferencias del usuario, en metros (m) o pies (ft). -
Seite 204: Luz De Modelado (Ml)
7.10 Luz de modelado (ML) Cuando el flash funciona como maestro en un sistema remoto inalámbri- co, al disparar la luz de modelado se dispara también la luz de modela- Se trata de una secuencia de destellos estroboscópicos a alta frecuencia con una do del flash esclavo (consultar 19.4). -
Seite 205: Bloqueo Del Teclado (Keylock)
Configuración: 7.12 Bloqueo del teclado (KEYLOCK) La función de bloqueo del teclado (KEYLOCK) permite bloquear los botones del • Pulsar la tecla hasta que aparezca „Select“ en Select la pantalla. flash contra la activación accidental. Si se activa el bloqueo del teclado, en la Standby pantalla aparece el símbolo encima de los botones centrales. -
Seite 206: Af-Beam (Luz Auxiliar Af)
7.13 AF-BEAM (luz auxiliar AF) 8 Reflector con zoom motorizado Cuando el sistema de medición AF de una cámara réflex AF digital no puede El zoom del reflector principal se puede ajustar a distancias focales de objetivo enfocar con nitidez debido a una luminosidad ambiente insuficiente, la cámara a partir de 24 mm (pequeño formato 24 x 36). -
Seite 207: Difusor De Gran Angular
Ajuste manual de la posición del zoom con AZoom 10 Técnicas de destello La posición de zoom del reflector principal también se puede modificar cuan- 10.1 Destellos indirectos do se utiliza el flash con una cámara que transmite los datos, por ejemplo, para Mediante los destellos indirectos, el motivo recibe una iluminación más suave y conseguir determinados efectos de iluminación, como puntos calientes, etc. -
Seite 208: Destellos Indirectos Con Segundo Reflector
10.3 Destellos indirectos con segundo reflector 10.5 Corrección manual de la exposición del flash Con el reflector principal girado, se puede activar el segundo reflector Los flashes automáticos y la mayoría de las cámaras se han diseñado con un el menú Select (consultar 7.9) para conseguir un relleno frontal del motivo. grado de reflexión del 25 % (grado de reflexión medio de los motivos con flash). -
Seite 209: Indicación De Disponibilidad Del Flash
11 Indicación de disponibilidad del flash En cámaras con obturador central (consultar el manual de instrucciones de la cámara) y utilizando sincronización de alta velocidad HSS (véase Cuando el condensador del flash está cargado, se 17.4) no hay control automático de la velocidad de sincronización del enciende la indicación de disponibilidad en el flash flash. -
Seite 210: Indicación Del Alcance
Las causas de las exposiciones erróneas pueden encontrarse en los diversos pro- Para ello, debe haber transmisión de datos entre la cámara y el flash, p. ej., gramas de exposición y automatismo. pulsando el disparador de la cámara. Para las indicaciones en el visor de la cámara, leer en las instrucciones de 15.2 Ajuste manual de la indicación del alcance manejo de la cámara, lo que es válido para ese tipo de cámara. -
Seite 211: Sincronización Del Flash
17 Sincronización del flash • Cuando se ajusta „REAR ON“, la sincronización se realiza con la segunda cortinilla. 17.1 Sincronización normal • Cuando se ajusta „REAR OFF“, la sincronización es normal. En la sincronización normal, el flash se dispara al principio del tiempo de obtu- La función REAR sólo se puede seleccionar y configurar en el menú... -
Seite 212: Destello De Medición Af Matricial
Por motivos físicos, sin embargo, mediante la sincronización de alta velocidad 19 Modo remoto inalámbrico se restringe sensiblemente el número guía y por ello el alcance del flash. Tenga El modo remoto inalámbrico es compatible con el sistema remoto Canon E–TTL. en cuenta el indicador de alcance en la pantalla LC del flash. -
Seite 213: Configurar Y Desactivar El Modo Remoto
19.1 Configurar y desactivar el modo remoto 19.2 Ajustes en el flash maestro Los grupos esclavos A y B están siempre activados, no es posible desacti- • Pulsar la tecla hasta que en la pantalla apa- varlos. El flash maestro M y el grupo esclavo C pueden ser activados o BEEP Select rezca “Select”. - Seite 214 – • Guardar la configuración mediante la tecla . Si no se pulsa la tecla • Mediante las teclas ajustar la posición del zoom. los ajustes se guardarán automáticamente después de aproximadamente • Guardar la configuración mediante la tecla . Si no se pulsa la tecla 5 seg.
-
Seite 215: Configuración Del Flash Esclavo
– • Durante la indicación B M es posible configurar mediante las teclas 19.3 Configuración del flash esclavo una potencia de luz parcial desde 1/1 hasta 1/128 para los flashes del • Con la tecla seleccionar una tras otra la configuración del grupo escla- Para grupo esclavo B. -
Seite 216: Modo Servo
19.5 Modo Servo Ajustar potencia luminosa parcial y posición del reflector (MZoom) • En modo de flash SERVO, pulsar la tecla sha- El modo SERVO es un modo esclavo simple en el que el flash esclavo emite Para Servo sta que aparezca en la pantalla la potencia parcial siempre un disparo tan pronto como recibe un impulso lumínico. -
Seite 217: Mantenimiento Y Cuidados
1 minuto después un Power Pack Metz P76. de encender el flash. • Se ha conectado un Power Pack Metz P76, pero hay todavía baterías en el compartimento de baterías del mecablitz. Retirar las baterías del comparti- mento del mecablitz. - Seite 218 En la pantalla aparece un símbolo de batería • El reflector principal está girado respecto a su posición normal bloqueada. • En el mecablitz hay un Power Pack Metz P76 conectado, y en el comparti- • El difusor de gran angular está desplegado por delante del reflector miento de las baterías hay baterías.
- Seite 219 La imagen aparece demasiado oscura. El modo de relleno E no se puede ajustar. • El motivo se encuentra fuera del alcance del flash. Recordar que con los • No se produce transmisión de datos entre la cámara y el flash. Pulsar el dispa- destellos indirectos se reduce el alcance del flash.
-
Seite 220: Características Técnicas
Encendido de baja tensión IGBT Cantidad de destellos (todos a plena potencia): • Aprox. 250 con baterías de NiMH de 2.100 mAh • Aprox. 180 con pilas alcalino-manganesas de alta capacidad • Aprox. 430 con Power-Pack P76 de Metz (accesorio opcional) -
Seite 221: Accesorios Especiales
Eliminación de las baterías No se deben tirar las baterías a la basura casera. Metz no asume ninguna garantía por funcionamientos erróneos o daños en el flash, causados al utilizar accesorios de otros fabricantes. Para la devolución de sus baterías gastadas, sírvase utilizar uno de los sistemas •... -
Seite 222: Tableau 3: Nombres-Guides Pour La Puissance Maximale (P 1)
Zoom 6/9° 8/10° 10/11° 12/12° 16/13° 20/14° 25/15° 32/16° 40/17° 50/18° 64/19° 80/20° 100/21° 125/22° 160/23° 200/24° 250/25° 320/26° 400/27° 500/28° 650/29° 800/30° 1000/31° 63 Tabelle 3: Leitzahlen bei maximaler Lichtleistung (P 1/1) 1250/32° 71 Tableau 3: Nombres-guides pour la puissance maximale (P 1/1) 1600/33°... -
Seite 223: Tableau 4: Durée De L'éclair Pour Les Différents Niveaux De Puissance
Teillichtleistung Blitzleuchtzeit (s) Leitzahl Leitzahl Niveaux de puissance Durée d’éclair (s) Nombre-guide Nombre-guide Deelvermogensstappen Flitsdur (s) Richtgetal Richtgetal Partial light output Flash duration Guide number Guide number Livello di potenza Durata del lampo Numero guida Numero guida Potencia parcial Duración de destello Número-guía Número-guía (P=Flash Power) ISO 100/50 mm... -
Seite 224: Tableau 5: Vitesses D'obturation Du Reflex En Mode Stroboscope
Tabelle 5: Kameraverschlusszeiten im Stroboskop-Betrieb Blitzfrequenz Blitzanzahl Tableau 5: Vitesses d’obturation du reflex en mode stroboscope f(Hz) (Blitze/Sek.) Nombre d’éclairs Tabel 5: Belichtingstijden bij de stroboscoopfunctie Fréquence f(Hz) Table 5: Camera shutter speeds in stroboscopic mode Aantal flitsen (éclairs/seconde) Tabella 5: Tempi di posa per il modo stroboscopico Flitsfrequentie Number of flashes Tabla 5:... -
Seite 225: Tableau 6: Temps De Recyclage Et Autonomie Pour Différents Types De Piles
Zoom Batterietyp Blitzfolgezeiten Blitzanzahl Type de pile/accu Temps de recyclage Nombre d’éclairs Type voeding Flitsvolgtijden Aantal flitsen Battery type Recycling times Number of flashes Tabelle 7: Maximale Leitzahlen im HSS-Betrieb Tipo batterie Tempi di ricarica Numero ampi Tableau 7: Nombres-guides en mode HSS Tipo de pila Tiempo de secuencia de dest. - Seite 226 Bitte helfen Sie mit die Umwelt, in der wir leben, zu erhalten. This will help to protect the environment in which we all live. Votre produit Metz a été conçu et fabriqué avec des matériaux et Il vostro prodotto Metz è stato progettato e realizzato con materi- composants de haute qualité, susceptibles d'être recyclés et réutili-...
- Seite 227 Hinweis: Opmerking: Avvertenza: In het kader de CE-markering werd Nell’ambito delle prove EMV per il Im Rahmen des CE-Zeichens wurde bei bij de EMV-test de correcte be-lich- segno CE è stata valutata la corretta der EMV-Prüfung die korrekte ting bepaald. esposizione.
- Seite 228 Entriegelungsknopf Hauptreflektor Reflektorkarte Bouton de déverrouillage pour réflecteur Carte-réflecteur Ontgrendelingsknop Hoofdreflector Hauptreflektor Reflecterende kaart Unlocking button for the main reflector Réflecteur principale Reflector card Pulsante di sblocco della parabola principale Pannello riflettente Hoofdreflector Botón de desbloqueo del reflector principal Tarjeta reflectante Main-reflector Parabola principale Weitwinkelstreuscheibe...
- Seite 229 Display Werkseinstellung (Reset) Display Mode Para Mode Para Select-Menü (Sonderfunktionen**) Display Gruppe B 5 sec. Display Gruppe A Mode-Menü* Parameter-Menü** TTL +1 Display Display ON/OFF Para — REAR ON/OFF Gruppe C Beep ON/OFF Bsp. für Displayanzeige des 58 AF-1: Remote Remote OFF/Master/Slave M (steht für Master) 1/3 —...
- Seite 230 Metz - Werke GmbH & Co KG • Postfach 1267 • D-90506 Zirndorf • info@metz.de • www.metz.de Consumer electronics Photoelectronics Plastics technology 709 47 0210.A3 Metz - always first class.