Herunterladen Inhalt Inhalt Diese Seite drucken
Metz MECABLITZ 54 AF-1 Minolta Bedienungsanleitung

Metz MECABLITZ 54 AF-1 Minolta Bedienungsanleitung

Vorschau ausblenden Andere Handbücher für MECABLITZ 54 AF-1 Minolta:
Inhaltsverzeichnis

Werbung

Verfügbare Sprachen
  • DE

Verfügbare Sprachen

  • DEUTSCH, seite 1
MECABLITZ 54 AF-1M
Bedienungsanleitung
Gebruiksaanwijzing
Manuale istruzioni
Mode d'emploi
Operating instruction
Manual de instrucciones

Werbung

Inhaltsverzeichnis
loading

Inhaltszusammenfassung für Metz MECABLITZ 54 AF-1 Minolta

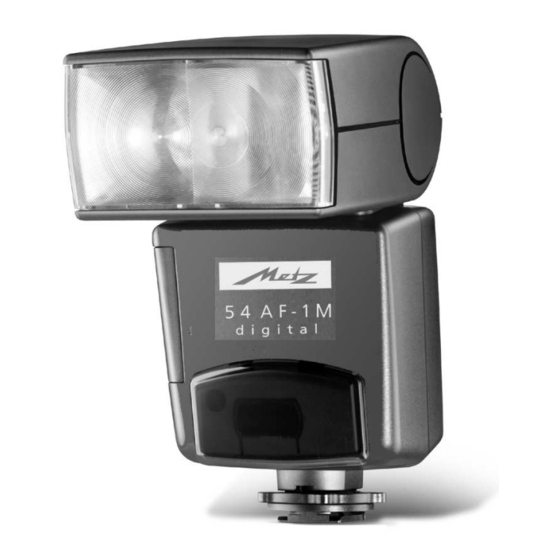
  • Seite 1 MECABLITZ 54 AF-1M Bedienungsanleitung Mode d’emploi Gebruiksaanwijzing Operating instruction Manuale istruzioni Manual de instrucciones...
  • Seite 2: Inhaltsverzeichnis

    5.3 Anzeigen im Kamerasucher / Kamera LCD-Monitor ..10 Sicherheitshinweise ........3 5.3.1 Dynax / Maxxum .
  • Seite 3: Sicherheitshinweise

    • Aus verbrauchten Batterien kann Lauge austreten, was zur Beschädigung der Kontakte führt. Verbrauchte Batterien deshalb immer aus dem Gerät Vielen Dank, dass Sie sich für ein Metz Produkt entschieden haben. Wir entnehmen. freuen uns, Sie als Kunde begrüßen zu dürfen.
  • Seite 4: Blitzgerät Vorbereiten

    Dedicated-Blitzfunktionen 2. Blitzgerät vorbereiten Die dedicated-Blitzfunktionen sind speziell auf das Kamerasystem abge- 2.1 Montage des Blitzgerätes stimmte Blitzfunktionen. In Abhängigkeit vom Kameratyp werden dabei ver- 2.1.1 Blitzgerät auf der Kamera montieren schiedene Blitzfunktionen unterstützt. Im Rahmen dieser Bedienungsanleitung Kamera und Blitzgerät vor der Montage oder Demontage ausschalten. ist es nicht möglich, alle Kameratypen mit den einzelnen dedicated-Blitzfunk- tionen detailliert zu beschreiben.
  • Seite 5: Batterien Austauschen

    ...in den Standby-Betrieb schaltet (Auto-OFF), um Energie zu sparen und die 2.2.2 Batterien austauschen (Bild 1) Stromquellen vor unbeabsichtigtem Entladen zu schützen. Die Blitzbereit- Die Akkus / Batterien sind leer bzw. verbraucht, wenn die Blitzfolgezeit (Zeit schaftsanzeige und die Anzeigen auf dem LC-Display verlöschen. vom Auslösen eines Blitzes mit voller Lichtleistung, z.B.
  • Seite 6: Programmblitzautomatik

    erforderlichen Lichtmenge sendet die Kameraelektronik ein Stopp-Signal an 3. Programmblitzautomatik (Blitz-Vollautomatik) das Blitzgerät und die Lichtabstrahlung wird sofort unterbrochen. Der Vorteil In der Programmblitzautomatik steuert die Kamera die Blende, Verschlusszeit dieses Blitzbetriebes liegt darin, dass alle Faktoren, welche die Belichtung des und das Blitzgerät automatisch so, dass in den meisten Aufnahmesituationen, Films beeinflussen (Aufnahmefilter, Blenden- und Brennweitenänderungen bei auch im Aufhellblitzbetrieb, zusammen mit dem Blitzlicht ein optimales Auf-...
  • Seite 7: Automatisches Ttl-Aufhellblitzen Bei Tageslicht

    Eine Belichtungskorrektur durch Verändern der Objektivblende ist nicht 4.1.1 Automatisches TTL-Aufhellblitzen bei Tageslicht (Bild 5 und 6) möglich, da die Belichtungsautomatik der Kamera die geänderte Blende wie- Bei den meisten Kameratypen wird in der Programmautomatik „P“, und den derum als normale Arbeitsblende betrachtet. Motiv-Programmen bei Tageslicht automatisch der Aufhellblitzbetrieb aktiviert (siehe Kamerabedienungsanleitung).
  • Seite 8: Adi-Blitzsteuerung

    zonen-Blitzbelichtungsmessung und nähere Hinweise entnehmen Sie der Einstellvorgang für den manuellen Blitzbetrieb M Kamerabedienungsanleitung. • Blitzgerät mit dem Hauptschalter einschalten. 4.3 ADI-Blitzsteuerung (Advanced Distance Integration) • Taste „Mode“ so oft drücken, bis im LC-Display „M“ blinkt. Systembedingt nur mit Dimage 5 und Dimage 7, 7i möglich! Die ADI- •...
  • Seite 9: Blitztechniken

    Beim Wechsel der Blitzbetriebsart, z.B. auf TTL wird der manuelle 4.5.2 Nahaufnahmen / Makroaufnahmen Teillichtleistungswert auf P 1/1 (maximale Lichtleistung) zurück Um Parallaxefehler auszugleichen, kann der Blitzreflektor um einen Winkel gesetzt. von -7° nach unten geschwenkt werden. Dazu den Entriegelungsknopf des Reflektors drücken und den Reflektor nach unten schwenken.
  • Seite 10: Langzeitsynchronisation / Slow

    Kürzere Verschlusszeiten als die Kamerasynchronzeit können nicht eingestellt Die REAR-Funktion wird an der Kamera eingestellt (siehe Kamera- bedienungsanleitung). Eine Anzeige am Blitzgerät erfolgt nicht. werden, bzw. werden auf die Kamerasynchronzeit umgeschaltet. Verschiedene Kameras verfügen über einen Synchronzeitbereich, z.B. 4.6.3 Langzeitsynchronisation / SLOW 1/30 s bis 1/125 s (siehe Kamerabedienungsanleitung).
  • Seite 11: Dimage 5, 7, 7I

    zutrifft. Starke Abweichungen des Refexionsgrades, z.B. bei sehr stark oder 5.3.2 Dimage 5, 7, 7i sehr schwach reflektierenden Objekten, können die Reichweite des Blitzge- Die unten genannten Anzeigen erfolgen im LCD-Monitor der Kamera nur rätes beeinflussen. dann, wenn der Kameraauslöser angetippt und damit das Messsystem der Kamera aktiviert ist.
  • Seite 12: Lc-Display-Beleuchtung

    • Tastenkombination „Select“ (= Taste „Mode“ + Taste „Zoom“) gedrückt hal- die Digitalkameras Dimage 5 und 7, 7i kann die angesteuerte Reflek- ten. torbrennweite von der eingestellten Objektivbrennweite abweichen. Die Kamera steuert dabei den Reflektor so, dass die Aufnahme weiter •...
  • Seite 13: Extended-Zoom-Betrieb

    Oder: Ausschalten des Extended-Zoom-Betriebes • Schalten Sie das Blitzgerät mit dem Hauptschalter kurzzeitig aus. Nach dem • Tastenkombination „Select“ (= Taste „Mode“ + Taste „Zoom“) so oft drü- Wiedereinschalten wird im Display des Blitzgerätes „Auto Zoom“ angezeigt. cken, bis im LC-Display „Ex“ erscheint. •...
  • Seite 14: Zündungssteuerung

    Blitzbereitschaftsanzeige im Kamerasucher signalisiert. Beim Betä- Das Auslösen des Einstelllichtes von Slave-Blitzgeräten im drahtlosen tigen des Kameraauslösers wird kein Blitzlicht ausgelöst. Metz-Remote-System wird nicht unterstützt. Die Zündungssteuerung arbeitet bei verschieden Kameras nur in der Betriebs- Ausschalten der Einstelllicht-Funktion art Programm „P“...
  • Seite 15: Spezielle Kamerahinweise

    6. Spezielle Kamerahinweise 7. Sonderzubehör Für Fehlfunktionen und Schäden am Blitzgerät, verursacht durch die Wegen der Vielzahl der Kameratypen und deren Eigenschaften ist es im Verwendung von Zubehör anderer Hersteller, wird keine Gewähr- Rahmen dieser Bedienungsanleitung nicht möglich, auf alle kameraspezifi- leistung übernommen! schen Möglichkeiten, Einstellungen, Anzeigen usw.
  • Seite 16: Hilfe Bei Störungen

    8. Hilfe bei Störungen 10. Technische Daten Sollte es einmal vorkommen, dass z.B. im LC-Display des Blitzgerätes unsin- Max. Leitzahl bei ISO 100/21°; Zoom 105 mm: nige Anzeigen erscheinen oder das Blitzgerät funktioniert nicht so, wie es Im Metersystem: 54 Im Feet-System: 177 soll, so schalten Sie das Blitzgerät für ca.
  • Seite 17: Batterieentsorgung

    Schwenkbereiche und Raststellungen des Reflektorkopfes: Batterie-Entsorgung Nach oben / unten: 60°, 75°, 90° / -7° Batterien/Akkus gehören nicht in den Hausmüll! Abmaße ca. in mm: Bitte bedienen Sie sich bei der Rückgabe verbrauchter Batterien/Akkus eines 75 x 125 x 108 (B x H x T) vorhandenen Rücknahmesystems.
  • Seite 18: Garantiebestimmungen

    6. Beanstandete Geräte bitten wir zusammen mit dem Kaufbeleg entweder über den Fachhändler oder direkt an die Firma Metz-Werke GmbH & Co Metz-Werke GmbH & Co KG KG - Zentralkundendienst - Ohmstrasse 55, 90513 Zirndorf, transportsi- cher verpackt unter genauer Schilderung der Beanstandung einzusenden.
  • Seite 20 Consignes de sécurité ....... . . 21 5.3 Signalisations dans le viseur / sur l’écran ACL de l’appareil ..28 Préparation du flash .
  • Seite 21: Avant-Propos

    • Sortez immédiatement les piles usées du flash ! En effet, les piles usées peuvent „couler“ et provoquer une dégradation Nous vous remercions d’avoir porté votre choix sur un produit Metz et avons du flash. le plaisir de vous saluer au sein de la grande famille de nos clients.
  • Seite 22: Fonctions Flash Dédiées

    Fonctions flash dédiées 2. Préparation du flash Les fonctions flash dédiées sont des fonctions de flash adaptées spécialement 2.1 Montage du flash à un système d’appareil photo, les fonctions de flash supportées dépendant 2.1.1 Fixation du flash sur l’appareil du type d’appareil. Dans le cadre du présent mode d’emploi, il n’est pas Couper l’appareil photo et le flash avec l’interrupteur général ! possible d’aborder en détail tous les types d’appareils photo et leurs fonc- tions flash dédiées.
  • Seite 23: Remplacement Des Piles

    pour éviter une consommation inutile d’énergie et ménager ainsi les piles ou 2.2.2 Remplacement des piles (Fig. 1) accus. Le témoin de disponibilité et les affichages sur l’écran ACL du flash Les piles ou accus sont vides ou usées lorsque le temps de recyclage (délai s’éteignent.
  • Seite 24: Automatisme Programmé Au Flash

    nique de l’appareil photo envoie un signal au flash qui provoque l’interrup- 3. Automatisme programmé au flash (flash tout automatique) tion immédiate de l’éclair. L’avantage du mode TTL réside dans le fait que Dans ce mode tout automatique, l’appareil photo gère l’ouverture, la vitesse tous les facteurs exerçant une influence sur la lumination sont automatique- d’obturation et le flash de manière à...
  • Seite 25: Fill-In Automatique Au Flash En Mode Ttl

    Une correction d’exposition par action sur le diaphragme de l’objectif n’est 4.1.1 Fill-in automatique au flash en mode TTL (Fig. 5 et 6) pas possible puisque l’automatisme d’exposition de l’appareil photo consi- Sur la plupart des appareils photo, le fill-in au flash est activé automatique- dérera l’ouverture corrigée comme ouverture de travail normale.
  • Seite 26: Contrôle Du Flash Adi

    Le flash doit se trouver en mode TTL. La mesure multizone de l’exposition au affiche la distance flash-sujet à respecter pour obtenir une photo correcte- flash n’exige pas de réglage spécial sur le flash et n’est pas signalée de fa- ment exposée au flash (voir aussi 5.4.2).
  • Seite 27: Techniques De Photographie Au Flash

    Pour afficher le niveau de puissance partielle, appuyer sur la combinaison 4.5.2 Macrophotographie (photographie rapprochée) de touches “Select” (= touche “Mode” + touche “Zoom”). Pour compenser l’erreur de parallaxe, le réflecteur principal est orientable Lors du passage à un autre mode de contrôle du flash, par ex. sur vers le bas d’un angle de -7°.
  • Seite 28: Synchronisation En Vitesse Lente / Slow

    La fonction REAR se règle sur l’appareil photo (voir le mode d’emploi tesse de synchronisation choisie par l’appareil dépend alors du mode de l’appareil photo). Elle n’est pas signalée sur le flash ! sélectionné sur l’appareil, du niveau de l’éclairage ambiant et de la distance focale de l’objectif.
  • Seite 29: Dimage 5, 7, 7I

    5.3.2 Dimage 5, 7, 7i 5.4.1 Affichage de portée en mode flash TTL Les signalisations ci-dessous n’apparaissent sur l’écran ACL de l’appareil photo L’écran de contrôle ACL du flash affiche la valeur de la portée maximale de que si le déclencheur est enfoncé à mi-course, afin d’activer le système de me- l’éclair.
  • Seite 30: Suppression De L'affichage De Portée

    L’asservissement automatique de la tête zoom motorisée a lieu pour des dis- 5.4.4 Suppression de l’affichage de portée tances focales à partir de 24 mm. En présence d’un objectif avec une dis- La portée de l’éclair n’est pas affichée sur l’écran ACL du flash lorsque le ré- tance focale de moins que 24 mm, la valeur „24“...
  • Seite 31: Mode Zoom Étendu

    • Répéter l’appui sur la touche „Zoom“ jusqu’à ce que „On“ clignote sur l’écran ACL. Retour à „Auto-Zoom“ On a les possibilités suivantes pour retourner à „Auto Zoom“ : • Le réglage prend effet immédiatement. Après env. 5 s, l’écran ACL retour- ne à...
  • Seite 32: Inhibition De L'éclair

    à cet effet sur la touche flash de l’appareil photo (voir le mode d’em- configuration multi-flash sans cordon Metz Remote n’est pas possible. ploi de l’appareil photo) et maintenez-la enfoncée pendant que vous prenez la photo. En enfonçant à mi-course le déclencheur, le témoin de disponibilité du Désactivation de la fonction Lumière pilote...
  • Seite 33: Retour Aux Réglages Initiaux

    5.10 Retour aux réglages initiaux 6.1.3 Mode multi-flash sans cordon REMOTE Le flash peut être réinitialisé sur ses réglages de base en maintenant pendant Pour des raisons inhérentes au système, le flash ne supporte pas le mode au moins 3 secondes l’appui sur la touche „Mode“. multi-flash sans cordon REMOTE.
  • Seite 34: Remède En Cas De Mauvais Fonctionnement

    8. Remède en cas de mauvais fonctionnement 10. Caractéristiques techniques S’il devait arriver que l’écran de contrôle ACL du flash affiche des valeurs Nombre-guide maximal pour ISO 100 / 21°; zoom 105 mm : aberrantes ou que le flash ne fonctionne pas comme il le devrait dans les dif- en mètres : 54 en feet : 177 férents modes, couper le flash pendant environ 10 secondes au moyen de...
  • Seite 35: Elimination Des Batteries

    Orientation et crantages de la tête zoom : Elimination des batteries vers le haut / bas : 60°, 75°, 90° / -7° Ne pas jeter les batteries dans les ordures ménagères. Dimensions approx. en mm : Veuillez rendre vos batteries usées là où elles sont éventuellement reprises 75 x 125 x 108 (L x H x P) dans votre pays.
  • Seite 36 Veiligheidsvoorschriften 5.3 Aanduidingen in de zoeker van de camera / LCD-monitor van de camera Flitser voorbereiden 5.3.1 Dynax / Maxxum 2.1 Opzetten van de flitser 5.3.2 Dimage 5, 7, 7i 2.1.1 Flitser op de camera aanbrengen 5.4 Aanduidingen in het LC-display 2.1.2 De flitser van de camera afnemen 5.4.1 Aanduiding van de reikwijdte in de TTL-flitsfunctie 2.2 Voeding...
  • Seite 37: Veiligheidsvoorschriften

    Hartelijk dank voor het in ons getoonde vertrouwen door uw keuze van een • Batterijen kunnen niet worden opgeladen. Metz product. Wij zijn blij, u als klant te mogen begroeten. • Stel flitser en oplaadapparaat niet bloot aan druip- en spatwater (bijv. regen)! Natuurlijk kunt u nauwelijks wachten met het in gebruik nemen van uw nieu- we flitser.
  • Seite 38: Dedicated Flitsfuncties

    Dedicated flitsfuncties 2. Flitser voorbereiden Dedicated flitsfuncties zijn speciaal op het camerasysteem afgestemde flits- 2.1 Opzetten van de flitser functies. Afhankelijk van het type camera worden hierbij verschillende flits- 2.1.1 Flitser op de camera aanbrengen functies ondersteund. Binnen het kader van deze gebruiksaanwijzing is het Schakel camera en flitser via hun hoofdschakelaar uit! niet mogelijk alle typen camera met de eigen dedicated flitsfuncties gedetail- leerd te beschrijven.
  • Seite 39: Batterijen Vervangen

    2.2.2 Batterijen vervangen (afb. 1) 2.4 Automatische uitschakeling / Auto - OFF (afb. 2) De accu’s / batterijen zijn leeg (verbruikt) als de oplaadtijd van de flitser (de Bij fabricage is de flitser zo ingesteld, dat hij ong. 3 minuten - tijd tussen het ontsteken van een flits met vol vermogen, bijv.
  • Seite 40: Geprogrammeerd Automatisch Flitsen

    • Druk zo vaak op de toets ’Zoom’, dat in het LC-display ’ON’ knippert. 4. Flitsfuncties van de flitser • De instelling treedt onmiddellijk in werking. Na ong. 5 s. schakelt het LC-dis- 4.1 TTL-flitsfunctie (afb. 3) play naar de normale weergave terug. Let op de aanwijzingen onder paragraaf 4.2 en 4.3 voor de camera’s Dimage 5, 7 en 7i.
  • Seite 41: Automatisch Ttl-Invulflitsen Bij Daglicht

    • Schakel de flitser via zijn hoofdschakelaar in. Donker onderwerp tegen een lichte achtergrond: positieve correctie- waarde (ong. 1 tot 2 stops). Licht onderwerp tegen donkere achter- • Druk zo vaak op de toets ’Mode’ dat n het LC-display ’TTL’ knippert. grond: negatieve correctiewaarde (ong.
  • Seite 42: Adi-Flitsregeling

    de camera ontvangt met zijn belichtingssysteem en de 14-honingraatvelden- 4.4.1 Manual flitsfunctie ’M’ met vol vermogen meerveldsmeting het door het onderwerp weerkaatste licht en stelt, op grond In deze functie geeft de flitser altijd een ongeregelde flits met vol vermogen van de gemeten lichtverdeling en de informaties uit het AF-systeem en de opti- af.
  • Seite 43: Flitstechnieken

    steld, wordt in het LC-display MLo aangegeven. De aanduiding van de flitsaf- Let er op, dat de reikwijdte van de flitser bij indirect flitsen sterk af- stand wordt aangepast aan de waarde van het deelvermogen. Door te druk- neemt. Bij een normale kamerhoogte kunt u zich voor het bepalen van de maximale reikwijdte met de volgende vuistregel behelpen: ken op de toetscombinatie ’Select’...
  • Seite 44: Synchronisatie Bij Het Dichtgaan Van De Sluiter (Rear-Functie)

    4.6.2 Synchronisatie bij het dichtgaan van de sluiter (REAR-functie) (afb. 8) 5. Flitser- en camerafuncties Sommige camera’s bieden de mogelijkheid tot synchronisatie op een moment 5.1 De flitsklaar-aanduiding vlak vóórdat de sluiter begint dicht te gaan (REAR-functie). Daarbij wordt de Zodra de condensator in de flitser opgeladen is, licht op de flitser de flits- flits pas afgevuurd aan het einde van de belichtingstijd.
  • Seite 45: Aanduidingen In De Zoeker Van De Camera / Lcd-Monitor Van De Camera

    5.3 Aanduidingen in de zoeker van de camera / 5.4 Aanduidingen in het LC-display LCD-monitor van de camera De camera’s geven de waarde van filmgevoeligheid ISO, brandpuntsafstand van het objectief (mm), diafragma en belichtingscorrectie door naar de flit- 5.3.1 Dynax / Maxxum ser.
  • Seite 46: Aanduiding Van De Flitsreikwijdte Bij De Manual-Flitsfunctie M, C.q. Mlo

    5.4.2 Aanduiding van de flitsreikwijdte bij de Bij de eerste bediening van de toetsen vindt er geen verandering van de instellingen op de flitser plaats! manual-flitsfunctie M, c.q. MLo In het LC-display van de flitser wordt de afstandswaarde aangegeven die Werd in de TTL-flitsfunctie de opname correct belicht, dan wordt gedurende voor een correcte belichting van het onderwerp moet worden aangehouden.
  • Seite 47: Zoomfunctie 'M. Zoom

    5.6.2 Zoomfunctie ’M. Zoom’ 5.6.3 Extended-zoomfunctie Indien u dat wenst, kunt u de stand van de zoomreflector ook met de hand Bij de extended-zoomfunctie (Ex) wordt de brandpuntsafstand van de flitser verstellen om bijv. bepaalde verlichtingseffecten te verkrijgen (bijv. hot-spot een stap gereduceerd ten opzichte van de brandpuntsafstand op de camera! enz.).
  • Seite 48: Autofocus-Meetflits

    Uitschakelen van de extended-zoomfunctie 5.8 Ontsteeksturing Is er voldoende omgevingslicht voor een belichting in de normale modus, • Druk zo vaak op de toetscombinatie ’Select’ (= toets ’Mode’ + toets ’Zoom’), dat in het LC-display ’Ex’ verschijnt. dan verhindert de camera het ontsteken van een flits. De belichting vindt dan plaats met de in het display van de camera aangegeven belichtingstijd.
  • Seite 49: Terug Naar De Basisinstelling

    Door op de ontspanknop voor handbediening op de flitser te drukken wordt het instellicht ontstoken. betreffende hoofdstukken van de gebruiksaanwijzing van de camera! In het draadloze Metz-Remote-systeem wordt het ontsteken van het 6.1 In de flitsfunctie niet ondersteunde, bijzondere functies instellicht op de slave-flitsers niet ondersteund.
  • Seite 50: Optionele Accessoires

    7. Optionele accessoires 8. Hulp bij een eventuele storing Wij zijn niet aansprakelijk voor het verkeerd werken of schade aan Zou het ooit voorkomen, dat bijv. in het LC-display van de flitser onzinnige de flitser, ontstaan door het gebruik van toebehoren van andere fabri- aanduidingen verschijnen of dat de flitser niet functioneert op de manier die kanten dan wijzelf! op grond van de gedane instellingen van hem zouden mogen worden ver-...
  • Seite 51: Technische Gegevens

    Afmetingen ong. in mm: 10. Technische gegevens 75 x 125 x 108 (B x H x D) Maximaal richtgetal bij ISO 100/21°; Zoom 105 mm: Gewicht: In meters: 54 In feet: 177 Flitser met stroombronnen: ong. 420 gram Flitsduur: Levering bestaat uit: Ong.
  • Seite 52 Safety instructions ........53 5.3.1 Dynax / Maxxum ........60 5.3.2 Dimage 5, 7, 7i .
  • Seite 53: Safety Instructions

    We congratulate you on purchasing this flash unit and thank you for your • Protect the flash unit from excessive heat and humidity! Do not store the confidence in Metz products. flash unit in the glove compartment of a car! It is only natural that you should want to use your flash unit straight away.
  • Seite 54: Dedicated Flash Functions

    Dedicated flash functions 2. Preparing the flash unit for use Dedicated flash functions are flash functions that have been specifically 2.1 Mounting the flash unit adapted to a given camera system. The supported flash functions depend on 2.1.1 Mounting the flash unit on the camera the type of the camera used.
  • Seite 55: Replacing Batteries

    • Actuating the shutter release 2.2.2 Replacing batteries (Fig. 1) The batteries are exhausted if the recycling time (elapsing from the triggering • Switching off the camera’s exposure metering system. of a full-power flash, e.g. in the M mode, to the moment the flash ready indi- After automatic switch-off the last-used settings are retained and instantly cator lights up again) exceeds 60 seconds.
  • Seite 56: Operating Modes Of The Flash Unit

    play of the flash unit (see 5.4). If flash exposure was correct, the LC display of Settings on the camera the flash unit indicates „o.k.“ for about 3 sec. (see 4.1.3). Set your camera to Program “P” or a Subject Program Mode (such as Land- scape, Portrait, Sports, etc.).
  • Seite 57: Manual Ttl Flash Exposure Correction

    4.1.2 Manual TTL flash exposure correction Also see section 5.3 for the display of exposure symbols in the ca- mera’s viewfinder. The TTL auto flash mode of most cameras is matched to a 25 % degree of light reflection by the subject (average amount of light reflected by flash-shot 4.2 Multi-zone flash exposure metering (preflash metering) subjects).
  • Seite 58: Manual Flash Mode

    • Alongside P, the set partial light output value flashes. 4.4 Manual flash mode Various cameras automatically switch the flash unit to TTL flash mode when • The partial light output level can be diminished with the “Mode” key, or in Program “P”...
  • Seite 59: Close-Ups / Macrophotography

    The light bounced off the reflecting surfaces produces a soft and uniform illu- 4.6.2 REAR - Second-curtain synchronisation (Fig. 8) mination of the subject. The reflecting surface must be white or have a neu- Some cameras offer the facility of second-curtain synchronisation (REAR tral colour, and it must not be structured (e.g.
  • Seite 60: Automatic Flash Sync Speed Control

    If a picture is shot before flash readiness is signalled in the camera’s view- 5.3 Displays in the camera’s viewfinder or LCD monitor finder, then the flash unit will not be triggered so that the exposure may be 5.3.1 Dynax / Maxxum incorrect if the camera has changed over to flash sync speed in the meantime Symbols in viewfinder: Meaning:...
  • Seite 61: Information In The Lc Display

    5.4 Information in the LC display 5.4.2 Maximum flash range indication in the manual flash modes M and MLo The cameras transmit the ISO sensitivity, the focal length (mm), f-stop and exposure correction to the flash unit which automatically adapts its settings The LC display of the flash unit indicates the distance to be maintained for accordingly.
  • Seite 62: Motor Zoom Reflector

    If the shot was correctly exposed in TTL flash mode, then the LC display illu- If manual adjustment of the zoom reflector results in a setting in which mination will be activated during „o.k.“ display (see 4.1.3). the shot will not be fully illuminated right out to the image corners, then the reflector position indicated on the display of the flash unit will 5.6 Motor zoom reflector start to flash as a warning.
  • Seite 63: Af Measuring Beam

    The extended zoom mode is only possible in the „Auto Zoom“ mode with a to focus automatically. The AF beam has a range of approx. 6 m to 9 m focal length setting of 28 mm and longer. Since the start position of the zoom (with a 50 mm/f/1.7 standard lens).
  • Seite 64: Modelling Light

    The modelling light is triggered by pressing the manual firing button on the flash unit. 6.1 Special functions that are not supported in flash mode Triggering the modelling light of slave flash units in the cordless Metz 6.1.1 Creative P...
  • Seite 65: High Speed Synchronisation

    6.1.2 High-speed synchronisation (HSS) 8. Advice in the event of a fault For system-induced reasons, high-speed synchronisation is not supported by Should the LC display indicate meaningless information or should the flash the flash unit. unit not work properly in the individual modes, then switch off the flash unit for about 10 seconds by its main switch.
  • Seite 66: Disposal Of Batteries

    Film speed: Disposal of batteries ISO 6 to ISO 6400 Do not dispose of spent batteries with domestic rubbish. Synchronisation: Please return spent batteries to collecting points should they exist in your Low-voltage ignition country! Please return only fully discharged batteries. Number of flashes: Normally, batteries are fully discharged if: approx.
  • Seite 68 Per la vostra sicurezza ....... . 69 5.3.1 Dynax / Maxxum ........76 Preparazione del flash .
  • Seite 69: Per La Vostra Sicurezza

    • Non gettare nel fuoco le batterie o le pile esaurite! • Un’eventuale fuoriuscita di acido dalle batterie esaurite può provocare Vi ringraziamo vivamente per aver acquistato un prodotto Metz e siamo lieti danni al flash. Rimuovete subito le batterie esaurite dall’apparecchio! di potervi accogliere come nostri Clienti.
  • Seite 70: Funzioni Flash Dedicate

    Funzioni flash dedicate 2. Preparazione del flash Le funzioni flash dedicate sono funzioni flash messe a punte speficamente 2.1 Montaggio del flash per una determinata camera. A seconda del tipo di camera vengono sup- 2.1.1 Montaggio del flash sulla camera portate determinate funzioni flash.
  • Seite 71: Sostituizione Delle Batterie

    ... commuti su stand-by (Auto-OFF) per risparmiare energia ed evitare che le 2.2.2 Sostituizione delle batterie (Fig. 1) sorgenti d’alimentazione si scarichino inutilmente. La spia di carica del flash Le pile/batterie sono vuote o esaurite, quando il tempo di ricarica (tempo e le indicazioni sul display LC si spengono.
  • Seite 72: Automatismo Di Programma Flash

    circuito di controllo elettronico della fotocamera trasmette al flash un segnale 3. Automatismo di programma flash di stop che interrompe istantaneamente l’emissione del lampo. Questo tipo di (flash completamente automatico) funzionamento è vantaggioso poiché tiene conto, per la regolazione del lam- Nell’automatismo di programma flash, la camera gestisce automaticamente po, automaticamente di tutti i fattori che influiscono sull’esposizione, (presen- l’apertura del diaframma, i tempi di posa e il flash, in modo tale che si otten-...
  • Seite 73: Lampi Di Schiarita Automatici Ttl Con Luce Diurna

    Non è possibile correggere l’esposizione modificando l’apertura di diafram- 4.1.1 Lampi di schiarita automatici TTL con luce diurna (Fig. 5 e 6) ma sull’obiettivo, in quanto il sistema di esposizione automatica della Sulla maggior parte delle camere viene attivato automaticamente, in presen- camera considererebbe il nuovo valore come il normale diaframma di za di luce diurna, il modo flash lampo di schiarita nell’Automatismo di pro- lavoro.
  • Seite 74: Controllo Del Flash Adi

    principale successivo e quindi l’illuminazione della ripresa avvengono in 4.4.1 Modo flash manuale M con potenza piena base ai risultati di misurazione del prelampo. In questo Modo, il flash emette sempre un lampo non dosato a potenza pie- Il flash deve essere impostato nel modo TTL. Un’impostazione e un’indicazio- na.
  • Seite 75: Tecniche Lampo

    ne visualizzato. La visualizzazione della distanza viene adattata al valore Fate attenzione che il campo d’utilizzo del flash si riduce notevolmente di potenza ridotta. con il lampo indiretto. Per un’altezza normale di una stanza si può utilizzare la seguente formula per determinare il campo d’utilizzo Per visualizzare il valore di potenza ridotta premete la combinazione di massimo: tasti “Select”...
  • Seite 76: Sincronizzazione Con Tempi Lunghi / Slow

    le esposizioni con lunghi tempi di posa (più lunghi di 1/30 secondo) e con Se la ripresa viene fatta prima che sul mirino compaia l’indicazione di flash soggetti in movimento con fonte di luce propria, poiché la fonte di luce in carico, il flash non viene attivato e la foto potrebbe avere un’esposizione non movimento lascia dietro di sé...
  • Seite 77: Dimage 5, 7, 7I

    Spia di controllo dell’esposizione: selezionato, la posizione della parabola e „M.Zoom“. Il valore di apertura La spia lampeggia dopo la ripresa velocemente: del diaframma e il campo d’utilizzo vengono visualizzati solo se il flash ha Esposizione corretta. ricevuto i dati necessari dalla camera. La spia lampeggia: Su alcune camere l’indicazione del campo d’utilizzo sul display LC del flash viene soppresso con valori ISO (ad es.ISO 6400) o compensazio-...
  • Seite 78: Soppressione Dell'indicazione Del Campo D'utilizzo

    L’adattamento automatico della parabola ha luogo per focali d’obiettivo a 5.4.4 Soppressione dell’indicazione del campo d’utilizzo partire da 24 mm. Se si impiega una focale inferiore a 24 mm, sul display Orientando verso l’alto o verso il basso la testa della parabola, la distanza LC il simbolo „24“...
  • Seite 79: Modo „Zoom Esteso

    Il simbolo „Ex“ per il Modo Zoom esteso rimane visualizzato dopo l’imposta- Reset su „Auto-Zoom“ zione sul display LC del flash! Per risettare su „Auto Zoom“ esistono diverse possibilità: Tenete presente che un’illuminazione più ampia nel Modo Zoom este- • Premete il tasto „Zoom“ sul flash finché sul display non compare „Auto so determina un campo d’utilizzo del flash ridotto! Zoom“.
  • Seite 80: Soppressione Del Lampo

    L’attivazione della luce pilota sui flash asserviti (slave) nella configura- Programma “P” e Automatismo di diaframmi “S” (vedi istruzioni per l’uso zione a distanza Metz senza cavi non viene supportata. della camera). Con diverse camere questa funzione può essere disattivata.
  • Seite 81: Ritorno All'impostazione Inizale (Reset)

    5.10 Ritorno all’impostazione inizale (reset) 6.1.3 Controllo flash a distanza senza cavo (REMOTE) Il flash può essere riportato all’impostazione inizale tenendo premuto il tasto Per ragioni insite al sistema, il controllo flash a distanza senza cavo (REMOTE) „Mode“per almeno 3 secondi. non viene supportato dal flash.
  • Seite 82: In Caso Di Anomalie Di Funzionamento

    8. In caso di anomalie di funzionamento 10. Dati tecnici Nel caso il cui il display LC del flash dovesse per esempio fornire indicazioni Numero guida massimo per ISO 100 / 21°; Zoom 105 mm: senza senso o il flash non funzionasse come dovrebbe, spegnete il flash per in metri: 54 in piedi: 177 circa 10 secondi con l’interruttore principale.
  • Seite 83: Smaltimento Delle Batterie

    Dimensioni in mm (ca.): Smaltimento delle batterie 75 x 125 x 108 (larg x alt x prof) Le batterie non vanno gettate insieme ai rifiuti domestici. Peso: Si prega di utilizzare un sistema di smaltimento adeguato, p. es. portandole flash con batterie: ca. 420 grammi al negozio dove le si è...
  • Seite 84 Indicaciones de seguridad......85 5.3.1 Dynax / Maxxum ........93 5.3.2 Dimage 5, 7, 7i .
  • Seite 85: Indicaciones De Seguridad

    • Las pilas gastadas pueden soltar ácido, lo que podría causar daños en los contactos. Por tanto, retirar siempre las pilas gastadas del aparato. Le agradecemos que se haya decidido por un producto de Metz y nos com- • Las pilas secas no se pueden recargar.
  • Seite 86: Preparación Del Flash

    Funciones del flash dedicadas 2. Preparación del flash Las funciones dedicadas del flash son aquellas funciones del flash que están 2.1 Montaje del flash adaptadas especialmente al sistema de la cámara. Entonces, dependiendo 2.1.1 Montar el flash sobre la cámara del modelo de la cámara, son soportadas algunas funciones del flash.
  • Seite 87: Cambio De Las Pilas

    2.2.2 Cambio de las pilas (Grabado 1) 2.4 Desconexión automática del flash/ Auto - OFF (Grabado 2) Se considera que las pilas o los acumuladores están descargadas o usadas, De fábrica, el flash está ajustado de manera que, aprox. 3 minutos - cuando el intervalo entre destellos (tiempo desde el disparo de un destello, •...
  • Seite 88: Automatismo Programado Para Flash

    Al igual que se han llevado a cabo los ajustes anteriores, se puede comen- Activación de la desconexión automática del flash zar, sin problemas, con las tomas con luz del flash, una vez que el flash • Conectar el flash mediante el interruptor principal. haya indicado su disposición de disparo (ver 5.1)! •...
  • Seite 89: Destello De Aclaración Ttl Automático, Con Luz De Día

    ¡Para probar la función TTL, ha de haber una película dentro de la 4.1.2 Control manual de exposición del flash TTL cámara! En la selección de la película, observar si existen limitaciones El automatismo TTL de la exposición del flash de la mayor parte de las cámaras está en la cámara, respecto a la máxima sensibilidad de la película o al adaptado a un grado de reflexión del sujeto del 25 % (grado medio de reflexión de valor ISO (por ej.
  • Seite 90: Medición Multizonal De La Exposición Del Flash

    xión (por ej. con destellos indirectos) y repetir la toma. Observar el indica- El flash debe estar conmutado en el modo TTL. En el flash no aparece una dor del alcance en el display LC del flash (ver 5.4.1). indicación especial para el control ADI del flash. El proceso de ajuste en la cámara para el control ADI del flash, así...
  • Seite 91: Técnicas De Destello

    display LC del flash se indica la distancia que hay que mantener para una 4.5 Técnicas de destello correcta exposición del flash (ver también 5.4.2). 4.5.1 Destellos indirectos Procedimiento de ajuste para el modo de flash manual MLo: Las imágenes con destellos directos se reconocen, generalmente, por la típi- •...
  • Seite 92: Fotografía De Proximidad/Primeros Planos

    4.5.2 Fotografía de proximidad/primeros planos La función REAR se ajusta en la cámara (ver las instrucciones de empleo de la cámara). En el flash no aparece ninguna indicación. Para compensar errores de paralaje, el reflector del flash se puede girar en un ángulo de -7°, hacia abajo.
  • Seite 93: Control Automático De Sincronización Del Flash

    La indicación parpadea: 5.2 Control automático de sincronización del flash Para la situación actual de la toma, es necesaria la iluminación Según el tipo de cámara y su modo de funcionamiento, al conseguirse la por flash. disposición de disparo, la velocidad de obturación se conmuta a la veloci- En determinadas circunstancias, los símbolos en el visor de la cámara dad de sincronización del flash (ver instrucciones de servicio de la cámara).
  • Seite 94: Indicador Del Alcance En Funcionamiento Ttl Del Flash

    En distintas cámaras se suprime la indicación del alcance en el dis- 5.4.4 Desaparición del indicador del alcance play LC del flash, cuando se dan altos valores ISO (por ej. ISO 6400) ¡Si se gira la cabeza del reflector desde su posición normal, hacia arriba o o con correcciones de la exposición del flash.
  • Seite 95: Auto-Zoom

    Ejemplo: 5.6.1 „Auto-Zoom“ • Se trabaja con una distancia focal del objetivo de 50 mm. Cuando el flash se acciona con una cámara, que comunica los datos de la distancia focal del objetivo al flash, se adapta automáticamente su posición •...
  • Seite 96: Destello De Medición Autofoco

    ción de aviso, de que no se puede activar, para el funcionamiento de zoom ... 9 m (con el objetivo estándar de 1,7 / 50 mm). Debido al paralaje entre extendido, la posición necesaria del reflector. el objetivo y el reflector de luz roja AF, el límite de medición autoenfoque para la corta distancia es de aprox.
  • Seite 97: Luz Piloto / Modelling-Light

    No es posible la liberación de la luz piloto con flashes esclavos en el sistema sin cables Metz Remote. 6.1 Funciones especiales no soportadas en modo flash Desactivación de la función Luz piloto 6.1.1 Modo de programas creativos P...
  • Seite 98: Sincronización De Velocidad Rápida Hss

    6.1.2 Sincronización de velocidad rápida HSS 8. Ayuda en caso de problemas Condicionado por el sistema, el flash no soporta la sincronización de veloci- Si alguna vez, por ej., aparecen en el display LC del flash indicaciones ab- dad rápida. surdas, o el flash no funciona como es debido, entonces, desconectar el flash 6.1.3 Control sin cable del flash REMOTE durante aprox.
  • Seite 99: Eliminación De Las Baterías

    Temperatura de color: Eliminación de las baterías Aprox. 5600 K No se deben tirar las baterías a la basura casera. Sensibilidad de la película: Para la devolución de sus baterías gastadas, sírvase utilizar uno de los siste- ISO 6 hasta ISO 6400 mas de reciclaje existente eventualmente en su país.
  • Seite 100: Leitzahlentabelle Für Ttl Und Volle Lichtleistung M Im Meter-System

    Zoom Leitzahlentabelle für TTL und volle Lichtleistung M im Meter-System Leitzahl (ft) = Leitzahl (m) x 3,3 6/9° 8/10° 10/11° Tableau des nombres-guides pour TTL et pleine puissance M en mètres 12/12° 10,5 12 nombre-guide (ft) = nombre-guide (m) x 3,3 16/13°...
  • Seite 101 Betriebsartenwahl Sélecteur de mode LoPDE Functieschakelaar o.k. REAR Mode selector M. Zoom Auto Zoom Selettore del modo di funzionamento Handauslösetaste und Blitzbereitschaftsanzeige Selección de modos Bouton d’essai et témoin de recyclage de funcionamiento Ontspanknop voor handbediening en flitsaparaat-aanduiding Manual firing button and flash-ready indicator Pulsante test (emissione manuale del lampo) e indicazione di “pronto lampo”...
  • Seite 102 Entriegelungsknopf Hauptreflektor Bouton de déverrouillage pour réflecteur Ontgrendelingsknop Hoofdreflector Zoom Unlocking button for the main reflector Pulsante di sblocco della parabola principale Displaybeleuchtung Botón de desbloqueo del reflector principal Eclairage de l’écran Diaplayverlichting Display lighting Hauptschalter Interrupteur général Tasto di illuminazione del display Iluminación de display Hoofdschakelaar Main switch...
  • Seite 103 Rändelmutter AF-Messblitz Écrou moleté Illuminateur AF Kartelmoer AF-meetflits Knurled nut AF measuring beam Dato zigrinato Illuminatore di assistenza AF Tuerca moleteada Destello de medición AF 44 AF-3M...
  • Seite 104 Bild 5 / Fig. 5 / Afb. 5 / Grab. 5 Bild 7 / Fig. 7 / Afb. 7 / Grab. 7 Bild 6 / Fig. 6 / Afb. 6 / Grab. 6 Bild 8 / Fig. 8 / Afb. 8 / Grab. 8...
  • Seite 105 Sensor Senseur Sensor Sensore Bild 1 / Fig. 1 / Afb. 1 / Grab. 1 Bild 3 / Fig. 3 / Afb. 3 / Grab. 3 o.k. Bild 2 / Fig. 2 / Afb. 2 / Grab. 2 Bild 4 / Fig. 4 / Afb. 4 / Grab. 4...
  • Seite 107 Hinweis: Opmerking: Avvertenza: In het kader de CE-markering werd Nell’ambito delle prove EMV per il Im Rahmen des CE-Zeichens wurde bei bij de EMV-test de correcte be-lich- segno CE è stata valutata la corretta der EMV-Prüfung die korrekte ting bepaald. esposizione.
  • Seite 108 Metz - Werke GmbH & Co KG • Postfach 1267 • D-90506 Zirndorf • info@metz.de • www.metz.de Consumer electronics Photoelectronics Plastics technology Industrial electronics 704 47 0021.A1 Metz. Always first class.

Inhaltsverzeichnis