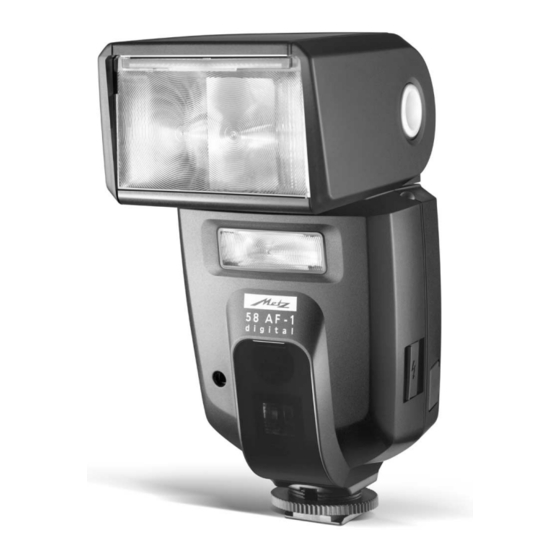
Metz MECABLITZ 58 AF-1 Canon Bedienungsanleitung
Vorschau ausblenden
Andere Handbücher für MECABLITZ 58 AF-1 Canon:
- Bedienungsanleitung (230 Seiten) ,
- Bedienungsanleitung (166 Seiten) ,
- Bedienungsanleitung (190 Seiten)
Kapitel
Inhaltsverzeichnis
Fehlerbehebung

Verwandte Anleitungen für Metz MECABLITZ 58 AF-1 Canon


Inhaltszusammenfassung für Metz MECABLITZ 58 AF-1 Canon
- Seite 1 MECABLITZ 58 AF-1 digital für/for Canon-Digitalkameras mit/with TTL / E-TTL / E-TTL II Bedienungsanleitung Mode d’emploi Gebruiksaanwijzing Operating instruction Manuale istruzioni Manual de instrucciones...
-
Seite 2: Inhaltsverzeichnis
Sicherheitshinweise........3 Weitwinkelstreuscheibe....... . 18 Dedicated-Blitzfunktionen . -
Seite 3: Sicherheitshinweise
• Verbrauchte Batterien/Akkus nicht ins Feuer werfen! • Aus verbrauchten Batterien kann Lauge austreten, was zur Beschädigung der Vielen Dank, dass Sie sich für ein Metz Produkt entschieden haben. Kontakte führt. Verbrauchte Batterien deshalb immer aus dem Gerät entnehmen. Wir freuen uns, Sie als Kunde begrüßen zu dürfen. -
Seite 4: Dedicated-Blitzfunktionen
2. Dedicated-Blitzfunktionen 3. Blitzgerät vorbereiten Die Dedicated-Blitzfunktionen sind speziell auf das Kamerasystem abgestimmte 3.1 Montage des Blitzgerätes Blitzfunktionen. In Abhängigkeit vom Kameratyp werden dabei verschiedene Blitzgerät auf die Kamera montieren Blitzfunktionen unterstützt. Kamera und Blitzgerät vor der Montage oder Demontage ausschalten. •... -
Seite 5: Ein- Und Ausschalten Des Blitzgerätes
quelle mit hoher Kapazität und geringer Selbstentladung. 3.4 Power Pack P76 (Sonderzubehör) Wenn die Blitzanzahl und die Blitzfolgezeiten für Ihren Anwendungsfall nicht • Power Pack P76 mit Verbindungskabel V58-50 (Sonderzubehör) ausreichen, kann das Blitzgerät von einem Power Pack P76 (Sonderzubehör) mit Wenn Sie das Blitzgerät längere Zeit nicht benutzen, entfernen Sie bitte Energie versorgt werden. -
Seite 6: Displaybeleuchtung
Blitzgerät wird durch Drücken einer beliebigen Taste bzw. durch Antippen des HSS Manueller Blitzbetrieb mit Kurzzeitsynchronisation Kameraauslösers (Wake-Up-Funktion) wieder eingeschaltet. Stroboskop-Blitzbetrieb Wenn das Blitzgerät längere Zeit nicht benötigt wird, sollte das Gerät • Mit den Tasten UP und DOWN die gewünschte Blitzbetriebsart ( grundsätzlich immer mit dem Hauptschalter ausgeschaltet werden! Automatik... -
Seite 7: Ttl- Und E-Ttl Aufhellblitzbetrieb
Einstellvorgang: Einstellvorgang: • Taste „Mode“ so oft drücken, bis im Display „Mode“ angezeigt wird. • Taste „Mode“ so oft drücken, bis im Display „Mode“ angezeigt wird. • Mit den Tasten UP und DOWN die Blitzbetriebsart einstellen. Die • Mit den Tasten UP und DOWN die Blitzbetriebsart E einstellen. -
Seite 8: Automatik-Blitzbetrieb
5.4 Automatik-Blitzbetrieb 5.6 Manueller Blitzbetrieb Im Automatik-Blitzbetrieb A misst der Fotosensor des Blitzgerätes das vom Im manuellen Blitzbetrieb wird vom Blitzgerät ungeregelt die volle Energie Motiv reflektierte Licht. Der Fotosensor hat einen Messwinkel von ca. 25° und abgestrahlt, sofern keine Teillichtleistung eingestellt ist. Die Anpassung an die misst nur während der eigenen Lichtabgabe. -
Seite 9: Blitzparameter (Parameter-Menü)
interessant bei Bewegungsstudien und Effektaufnahmen. • Mit den PLUS / MINUS -Tasten den gewünschten Wert einstellen. Die Beim Stroboskop-Betrieb werden mehrere Blitze mit einer bestimmten Einstellung wird sofort wirksam. Blitzfrequenz abgegeben. Die Funktion ist daher nur mit einer Teillichtleistung • Die Taste „Return“ drücken. -
Seite 10: Einstellvorgang Für Die Blitzparameter
Für die automatische Anpassung der Blitzparameter muss die Kombination aus • Mit den PLUS / MINUS -Tasten den gewünschten Wert einstellen. Die Kamera und Blitzgerät montiert und eingeschaltet sein. Zusätzlich muss ein Einstellung wird sofort wirksam. Datenaustausch zwischen Kamera und Blitzgerät stattfinden. Dazu den •... -
Seite 11: Blitzbelichtungskorrektur (Ev)
Einstellvorgang: Einstellvorgang: • Taste „Para“ (Parameter) so oft drücken, bis im Display „Zoom“ angezeigt wird. • Taste „Para“ (Parameter) so oft drücken, bis im Display „ISO“ angezeigt wird. • Mit den PLUS / MINUS -Tasten die gewünschte Reflektorposition einstellen. Die •... -
Seite 12: Sonderfunktionen (Select-Menü)
7. Sonderfunktionen (Select-Menü) • Taste „Set“ drücken und damit die Auswahl der Sonderfunktion bestätigen. • Mit den Tasten UP und DOWN die gewünschte Einstellung vornehmen. Die Sonderfunktionen werden mit der Taste „Sel“ (Select) ausgewählt. Je nach Die Einstellung wird sofort wirksam. Kameratyp und eingestellter Blitzbetriebsart stehen verschiedene Sonderfunktionen zur Auswahl. -
Seite 13: Blitzbelichtungsreihen (Fb)
Bei eingeschalteter Beep-Funktion wird im Display zusätzlich das Symbol erfolgt. Wenn die Taste „Return“ nicht gedrückt wird, schaltet das Display angezeigt. nach ca. 5s automatisch auf die normale Anzeige zurück. Bei der Anzeige „FB 0“ ist die Blitzbelichtungsreihe deaktiviert. Einstellvorgang: •... -
Seite 14: Extended-Zoom-Betrieb (Zoom Ext)
Verschlusszeiten (länger als z.B. 1/30 Sekunde) und bewegten Motiven mit eige- 7.5 Extended-Zoom-Betrieb (Zoom Ext) ner Lichtquelle von Vorteil, weil bewegte Lichtquellen dann einen Lichtschweif Beim Extended-Zoom-Betrieb wird die Brennweite des Hauptreflektors um eine hinter sich herziehen, anstatt ihn - wie beim Synchronisieren auf den Stufe gegenüber der Objektivbrennweite der Kamera reduziert. -
Seite 15: Aufnahmeformat-Anpassung (Zoom Size)
7.6 Aufnahmeformat-Anpassung (Zoom Size) 7.7 Drahtloser Remote-Betrieb (Remote) Bei einigen Digitalkameras kann der Leuchtwinkel des Hauptreflektors an das • Bei der Anzeige „Remote OFF“ ist der drahtlose Remote-Betrieb deaktiviert. Chip-Format (Abmessungen des Bildaufnahmebausteines) angepasst werden. • Bei der Anzeige „Remote Master“ arbeitet das Blitzgerät als steuerndes •... -
Seite 16: Zweitreflektor
• Taste „Return“ so oft drücken, bis im Display die normale Anzeige erfolgt. Dauerlichtes. Mit dem Einstelllicht kann die Lichtverteilung und Schattenbildung Wenn die Taste „Return“ nicht gedrückt wird, schaltet das Display nach bereits vor einer Aufnahme beurteilt werden. ca. 5s automatisch auf die normale Anzeige zurück. •... -
Seite 17: Tastatur-Verriegelung (Keylock)
• nach dem Auslösen eines Blitzes, – Bei der Anzeige „Standby 1min“ erfolgt die automatische Geräteabschaltung nach 1 Minute. • nach dem Antippen des Kameraauslösers, – Bei der Anzeige „Standby OFF“ ist die automatische Geräteabschaltung • nach dem Ausschalten des Kamerabelichtungsmesssystems... deaktiviert. -
Seite 18: Motor-Zoom-Reflektor
„58 AF-1C digital“ besteht die Möglichkeit, das AF-Hilfslicht des Blitzgerätes Wenn Sie ein Zoom-Objektiv benutzen und nicht unbedingt immer die volle Leitzahl und Reichweite des Blitzgerätes benötigen, können Sie die gezielt auszuschalten. Dazu wählen Sie im Select-Menü „AF-BEAM OFF“. Position des Hauptreflektors auf der Anfangsbrennweite des Die deaktivierte „AF-Beam-Funktion“... -
Seite 19: Blitztechniken
10. Blitztechniken nicht geschwenkt ist wird der Zweitreflektor bei der Aufnahme nicht ausgelöst. Ist die Lichtmenge des Zweitreflektors zu groß, so kann diese im Select-Menü verrin- 10.1 Indirektes Blitzen gert werden (siehe 7.9). Durch indirektes Blitzen wird das Motiv weicher ausgeleuchtet und die ausge- Der Zweitreflektor wird von den Blitzbetriebsarten Stroboskop, prägte Schattenbildung verringert. -
Seite 20: Blitzbereitschaftsanzeige
Am Blitzgerät können im TTL-, E-TTL- und Automatik-Blitzbetrieb manuelle Der im Blitzgerät integrierte Mehrzonen-AF-Meßblitz kann von AF–Kameras nur bei angezeigter Blitzbereitschaft aktiviert werden (siehe 18)! Korrekturwerte für die Blitzbelichtung von –3 EV (Blendenwerte) bis +3 EV (Blendenwerte) in Drittel-Stufen eingestellt werden. 12. -
Seite 21: Anzeigen Im Kamerasucher
14. Anzeigen im Kamerasucher Ändern des Blendenwertes erreicht werden. Im manuellen Blitzbetrieb M wird die Entfernung zum Motiv angezeigt, die für Blitzsymbol blinkt: eine korrekte Blitzbelichtung einzuhalten ist. Die Anpassung an die jeweilige Aufforderung zur Verwendung bzw. zum Einschalten des Blitzgerätes (bei eini- Aufnahmesituation kann z.B. -
Seite 22: Blitzbelichtungsspeicherung Fe
16. Blitzbelichtungsspeicherung FE ihrer Betriebsart auf die Blitzsynchronzeit umgeschaltet. Üblich sind Zeiten zwi- schen 1/30 s und 1/125 s (siehe Kamerabedienungsanleitung). Am Blitzgerät Einige Canon-Kameras bieten die Möglichkeit einer Blitzbelichtungsspeicherung FE erfolgt keine Einstellung bzw. Anzeige für diesen Betrieb. (FE = flash exposure). Diese wird im E-TTL-Blitzbetrieb unterstützt. 17.2 Synchronisation auf den 2.Verschlussvorhang (REAR-Betrieb) Mit der Blitzbelichtungsspeicherung FE im E-TTL-Blitzbetrieb kann vor der eigent- Einige Kameras bieten die Möglichkeit zur Synchronisation auf den... -
Seite 23: Automatische Kurzzeitsynchronisation Hss
geringer Umgebungshelligkeit den Bildhintergrund stärker zur Geltung zu bringen. 18. Mehrzonen-AF-Meßblitz Erreicht wird dies durch Kameraverschlusszeiten, die dem Umgebungslicht angepasst Sobald die Umlichtverhältnisse für eine automatische Fokussierung nicht mehr sind. Dabei werden von der Kamera automatisch Verschlusszeiten, die länger als die ausreichen, wird von der Kamera der Mehrzonen-AF-Meßblitz im Blitzgerät Blitzsynchronzeit sind, eingesteuert. -
Seite 24: Einstellen Und Ausschalten Des Remote-Betriebes
Das gesamte Remote-System kann entweder mit der Betriebsart E-TTL oder M 19.2 Einstellungen am Master-Blitzgerät betrieben werden. Die Slave-Gruppen A und B sind immer aktiviert. Sie können nicht deakti- viert werden! Das Master-Blitzgerät M und die Slave-Gruppe C können Eine Änderung der Blitzbetriebsart muss am Master in der Slave-Gruppe aktiviert oder deaktiviert werden! Bei deaktiviertem Master-Blitzgerät über- A vorgenommen werden. - Seite 25 Einstellvorgang für Slave-Gruppe C Einstellvorgang für Master-Blitzgerät • Taste „Para“ so oft drücken bis im Display C bzw. C TTL (für Slave-Gruppe C) • Taste „Para“ so oft drücken bis im Display M bzw. M TTL (für Master- angezeigt wird. Blitzgerät) angezeigt wird.
-
Seite 26: Einstellung Am Slave-Blitzgerät
• Zum Aktivieren der Slave-Gruppe C die Taste „Mode“ so oft drücken bis im Remote bzw. Manuell-Remote) kann am Slave-Blitzberät nicht eingestellt werden, weil die Steuerung vom Master-Blitzgerät automatisch erfolgt! Display C M (für Slave-Gruppe C) angezeigt wird. Während der Anzeige C M kann mit den Tasten (-) und (+) eine Teillichtleistung von 1/1 bis 1/128 für die •... -
Seite 27: Reset
21.3 Formieren des Blitzkondensators Der im Blitzgerät eingebaute Blitzkondensator erfährt eine physikalische • Ein Metz Power Pack P76 ist angeschlossen und im Batteriefach des mecablitz Veränderung, wenn das Gerät längere Zeit nicht eingeschaltet wird. Aus diesem sind noch Batterien/Akkus eingelegt. Batterien/Akkus aus dem Batteriefach Grund ist es notwendig, das Gerät im vierteljährlichen Abstand für ca. - Seite 28 gewählt, so wird der AF-Meßblitz im Blitzgerät nicht aktiviert! Zentralen AF- Der Zweitreflektor blitzt, obwohl er ausgeschaltet ist. Sensor aktivieren! • Der mecablitz arbeitet als Master im Remote-System. Der Zweitreflektor des Master-Blitzgerätes steuert die Slave-Blitzgeräte. Das Licht des Zweitreflektors Am Blitzgerät lässt sich die Synchronisation auf den 2.Verschlussvorhang (REAR) nicht aktivieren.
-
Seite 29: Technische Daten
Der Mindestabstand zu Motiv sollte mindestens 10% der im Display * Ca. 180 mit Hochleistungs Alkali-Mangan-Batterien angezeigten Reichweite betragen. * Ca. 430 mit Metz Power-Pack P76 (Sonderzubehör) Die Blitzparameter für Lichtempfindlichkeit ISO und die Blende F lassen sich am (bei jeweils voller Lichtleistung) Blitzgerät nicht verstellen. -
Seite 30: Sonderzubehör
Abmaße ca. in mm (B x H x T): Batterie-Entsorgung 71 x 148 x 99 Batterien/Akkus gehören nicht in den Hausmüll! Bitte bedienen Sie sich bei der Gewicht: Rückgabe verbrauchter Batterien/Akkus eines vorhandenen Rücknahmesystems. Blitzgerät ohne Stromquellen: 355 gr Bitte geben Sie nur entladene Batterien/Akkus ab. Batterien sind in der Regel Auslieferungsumfang: dann entladen, wenn das damit betriebene Gerät Blitzgerät mit Integrierter Weitwinkelstreuscheibe, Bedienungsanleitung,... -
Seite 31: Garantie
6. Beanstandete Geräte bitten wir zusammen mit dem Kaufbeleg entweder über Metz-Werke GmbH & Co KG den Fachhändler oder direkt an die Firma Metz-Werke GmbH & Co KG - Zentralkundendienst - Ohmstrasse 55, 90513 Zirndorf, transportsicher ver- packt unter genauer Schilderung der Beanstandung einzusenden. Sie können unter den gleichen Bedingungen auch an die autorisierten Kundendienststellen der Firma Metz-Werke GmbH &... - Seite 32 1. Consignes de sécurité ..........33 9.
-
Seite 33: Avant-Propos
• Sortez immédiatement les piles usées du flash ! En effet, les piles usées peu- vent „couler“ et provoquer une dégradation du flash. Nous vous remercions d’avoir choisi un produit Metz et sommes heureux de vous • Ne rechargez pas les piles sèches ! saluer au sein de la grande famille de nos clients. -
Seite 34: Fonctions Flash Dédiées
2. Fonctions flash dédiées 3. Préparation du flash Les fonctions flash dédiées sont des fonctions de flash adaptées spécialement à 3.1 Montage du flash un système d’appareil photo. Les fonctions de flash supportées dépendent alors Fixation du flash sur l’appareil du type d’appareil. -
Seite 35: Mise En Marche Et Coupure Du Flash
• 4 piles au lithium de 1,5 V, type CEI FR6 (AA / Mignon), source de courant 3.4 Power Pack P76 (accessoire spécial) sans entretien à haute performance et avec une perte de capacité minime. Il est possible d’utiliser le Power Pack P76 (accessoire spécial) pour alimenter le flash en énergie si le nombre d’éclairs et les temps de recyclage ne suffisent pas •... -
Seite 36: Éclairage De L'écran
touche quelconque ou en enfonçant à mi-course le déclencheur de l’appareil HSS Mode flash manuel avec synchronisation haute vitesse photo (fonction de réveil). Mode flash stroboscope Si le flash reste inutilisé pendant une période prolongée, il est conseillé de • Réglez le mode de fonctionnement du flash souhaité avec les touches UP couper le flash avec l’interrupteur général DOWN , automatique... -
Seite 37: Dosage Automatique Flash/Ambiance En Mode Ttl- Et E-Ttl
Procédure de réglage: Procédure de réglage : • Appuyez à plusieurs reprises sur la touche „Mode“ jusqu’à ce que „Mode“ • Appuyez à plusieurs reprises sur la touche „Mode“ jusqu’à ce que „Mode“ apparaisse sur l’écran. apparaisse sur l’écran. • Réglez le mode de fonctionnement du flash avec les touches UP •... -
Seite 38: Mode Flash Automatique
5.4 Mode flash automatique 5.6 Mode flash manuel En mode flash automatique A, le capteur photographique du flash mesure la En mode flash manuel , le flash émet un éclair non dosé avec sa pleine puis- lumière réfléchie par le sujet. Le capteur photographique a un angle de mesure sance si aucune puissance partielle n’est réglée. -
Seite 39: Paramètres Du Flash (Menu „Parameter" (Paramètres)
ressant en cas d’études de mouvements et de prises de vues à effet. Dans le • Réglez la valeur souhaitée avec les touches PLUS / MOINS. Le réglage prend mode stroboscope, le flash émet plusieurs éclairs à une certaine fréquence d’é- immédiatement effet. -
Seite 40: Procédure De Réglage Des Paramètres Du Flash
L’appareil photo et le flash doivent, en plus, échanger des données. Pour cela, • Appuyez sur la touche „Return“ . L’écran revient à l’affichage normal. Si enfoncez à mi-course le déclencheur de l’appareil photo. Pour cela, enfoncez à vous n’appuyez pas sur la touche „Return“ , l’écran revient automatique- mi-course le déclencheur de l’appareil photo. -
Seite 41: Correction D'exposition Au Flash (Il)
Procédure de réglage : Procédure de réglage : • Appuyez à plusieurs reprises sur la touche „Para“ (Paramètres) jusqu’à ce que • Appuyez à plusieurs reprises sur la touche „Para“ (Paramètres) jusqu’à ce que „ Zoom“ apparaisse sur l’écran. „ISO“ apparaisse sur l’écran. •... -
Seite 42: Fonctions Spéciales (Menu „Select „ (Sélectionner))
7. Fonctions spéciales (menu „Select „ (Sélectionner)) • Appuyez sur la touche „Set „ (Réglage) et confirmez ainsi la sélection de la fonction spéciale. La touche „Sel“ (Select (Sélectionner) permet de sélectionner les fonctions spécia- • Procédez au réglage souhaité avec les touches UP et DOWN . -
Seite 43: Séries D'expositions Au Flash (Fb - Flash-Bracketing)
• Procédez au réglage souhaité avec les touches UP et DOWN . Le réglage Lorsque la fonction „Beep „ est activée, le symbole s’affiche en plus à prend immédiatement effet. l’écran. • Appuyez sur la touche „Return“ . L’écran revient à l’affichage normal. Si Procédure de réglage : vous n’appuyez pas sur la touche „Return“... -
Seite 44: Synchronisation Sur Le 2Ème Rideau (Rear)
Certains appareils photo offrent la possibilité de synchroniser sur le 2 ème rideau La fonction de synchronisation sur le 2ème rideau (REAR) ne peut être sélectionnée et réglée que sur un appareil photo adéquat ! Sur de nom- (mode REAR). Dans ce cas, l’éclair n’est déclenché que sur la fin du temps de breux appareils photo compacts (PowerShot) le réglage s'effectue sur pose. -
Seite 45: Adaptation Au Format De La Prise De Vue (Zoom Size)
Après avoir activé le mode zoom étendu, „ E-Zoom“ apparaît à côté de la focale • Appuyez sur la touche „ Set“ (Réglage) et confirmez ainsi la sélection de la sur l’écran. fonction spéciale. Pour des raisons inhérentes au système, le mode zoom étendu n’est pris •... -
Seite 46: Commutation Mètres - Pieds (M / Ft)
7.8 Commutation mètres - pieds (m / ft) Le symbole s’affiche à l’écran après la mémorisation lorsque le réflecteur La portée peut être affichée sur l’écran du flash soit en mètres (m) soit en pieds secondaire est activé. (feet = ft). Le réglage a lieu à l’option du menu „m / ft“. Procédure de réglage : Procédure de réglage : •... -
Seite 47: Verrouillage Du Clavier (Keylock)
Lorsque le flash fonctionne comme un flash maître dans le système DOWN . L’option de menu sélectionnée est alors mise en surbrillance. remote sans fil Metz, le déclenchement de la lumière pilote déclenche • Appuyez sur la touche „Set“ (Réglage) et confirmez ainsi la sélection de la également la lumière pilote du flash esclave (voir 19.4). -
Seite 48: Af-Beam (Lumière Auxiliaire Af)
fiche à l’écran au-dessus des trois touches du centre lorsque le verrouillage du du flash « 58 AF-1C digital ». Pour cela, sélectionnez le point AF-BEAM dans clavier est activé. le menu Select, puis l’option OFF. La fonction AF-Beam désactivée s’affiche à l’écran avec le symbole AF Activation du verrouillage du clavier : barré... -
Seite 49: Diffuseur Grand-Angle
Exemple : 10. Techniques de photographie au flash Vous utilisez un objectif zoom avec une distance focale comprise entre 35 et 10.1 Éclairage indirect au flash 105 mm. Dans ce cas, vous réglez la tête zoom du flash sur 35 mm ! Avec l’éclairage indirect, le sujet est éclairé... -
Seite 50: Macrophotographie (Photographie Rapprochée)
qu’en cas d’éclairage indirect au flash avec un réflecteur principal basculé. Pour rattraper l’erreur d’exposition mentionnée ci-dessus, certains appareils Lorsque le réflecteur principal n’est pas basculé, le réflecteur secondaire n’est photo permettent de corriger manuellement l’exposition au flash d’une valeur pas déclenché... -
Seite 51: Commutation Automatique Sur La Vitesse De Synchro Flash
Si l’on prend la photo avant l’apparition du témoin de disponibilité, le flash n’est 13. Témoin de bonne exposition avec flash pas déclenché, ce qui peut conduire éventuellement à une sous-exposition si Le témoin de bonne exposition " o.k. " ne s'affiche que si la prise de vue l’appareil photo a déjà... -
Seite 52: Affichage De La Portée
15. Affichage de la portée diaphragme se règlent manuellement sur le flash (voir 6). 15.3 Dépassement de la capacité d’affichage L’écran du flash affiche la valeur de la portée maximale de l’éclair. La valeur affichée se rapporte à une réflectance de 25 % du sujet, ce qui est le cas dans la Le flash peut afficher une portée maximale de 999 m ou 999 ft. -
Seite 53: Synchronisation Normale
17. Synchronisation du flash En ce qui concerne les appareils photo le réglage pour la synchronisation sur le 2 rideau (REAR) doit s’effectuer sur l’appareil photo (voir le mode ème 17.1 Synchronisation normale d’emploi de l’appareil photo) ! Utilisez un trépied pour éviter le bougé dans le cas de long temps de pose ! En synchronisation normale, le flash est déclenché... -
Seite 54: Illuminateur Af À Plusieurs Zones
Tenez compte que le nombre-guide du flash dépend, en plus, du temps de plusieurs flashs esclaves. Le ou les flashes esclaves sont commandés à distance pose pour la synchronisation haute vitesse en mode FP : plus le temps de sans fil par le réflecteur secondaire du flash maître. Dans ce cas de figure, la pose est court, plus le nombre-guide est petit. -
Seite 55: Réglages Sur Flash Maître
désactiver la commande à distance. Le réglage prend immédiatement effet. • Appuyez sur la touche "Return" pour mémoriser le réglage. Si vous n'ap- puyez pas sur la touche "Return" , les réglages sont automatiquement • Appuyez sur la touche „Return“ . -
Seite 56: Réglage Sur Le Flash Esclave
• Appuyez sur la touche "Return" pour mémoriser le réglage. Si vous n'ap- Procédure de réglage pour le groupe esclave C puyez pas sur la touche "Return" , les réglages sont automatiquement • Appuyez à plusieurs reprises sur la touche "Para" jusqu'à ce que C ou C M mémorisés après 5 secondes environ. -
Seite 57: Vérification Du Mode Remote
5 secondes environ. Vous trouverez de plus amples informations à ce sujet sur Internet, sur le 19.4 Vérification du mode remote site Metz à l’adresse www.metz.de. • Positionnez les flashs esclaves comme souhaité pour la prise de vue ultérieure. 21.2 Réinitialisation •... -
Seite 58: Remède En Cas De Mauvais Fonctionnement
. Vérifiez les réglages sur l’appareil photo et si • Un bloc d'alimentation Metz P76 est connecté au mecablitz et des piles se trou- le pied du flash est engagé correctement dans la griffe porte-accessoires. vent dans le compartiment à piles du mecablitz. Ôter les piles du mecablitz. - Seite 59 • Il n’y a pas d’échange de données entre le flash et l’appareil photo. Enfoncez • L'appareil photo fonctionne avec la synchronisation haute vitesse HSS. Aucune à mi-course le déclencheur de l’appareil photo ! commutation sur la vitesse de synchronisation n'a lieu. •...
-
Seite 60: Caractéristiques Techniques
Temps de recyclage (à pleine puissance lumineuse) : * env. 5 s avec des accus NiMH * env. 5 s avec des piles alcalines au manganèse haute performance * env. 2,5 s avec le Power-Pack P76 de Metz (accessoire spécial) (à chaque fois à pleine puissance lumineuse) -
Seite 61: Accessoires En Option
24. Accessoires en option Elimination des batteries Nous déclinons toute responsabilité pour le mauvais fonctionnement et Ne pas jeter les batteries dans les ordures ménagères. l’endommagement du flash dus à l’utilisation d’accessoires d’autres con- Veuillez rendre vos batteries usées là où elles sont éventuellement reprises dans structeurs ! votre pays. - Seite 62 1. Veiligheidsinstructies..........63 9.
-
Seite 63: Veiligheidsinstructies
• Uit verbruikte batterijen kan loog lekken, wat beschadiging van de contactpun- ten tot gevolg heeft. Haal daarom verbruikte batterijen altijd uit het apparaat. Hartelijk dank voor uw beslissing om een product van Metz aan te schaffen. Wij • Batterijen kunnen niet worden opgeladen. -
Seite 64: Dedicated Flitsfuncties
2. Dedicated flitsfuncties 3. Flitser gereedmaken Dedicated flitsfuncties zijn speciaal op het camerasysteem ingestelde flitsfuncties. 3.1 Het aanbrengen van de flitser Afhankelijk van het type camera worden daarbij verschillende flitsfuncties onder- Flitser op de camera monteren steund. Camera en flitser vóór het aanbrengen of afnemen uitschakelen. •... -
Seite 65: In- En Uitschakelen Van De Flitser
• 4 Lithiumbatterijen 1,5 V, type IEC FR6 (AA / Penlight), onderhoudsvrije voe- 3.4 Power-pack P76 (optioneel accessoire) ding met hoge capaciteit en geringe zelfontlading. Als het aantal flitsen en de flitsvolgtijden voor uw toepassing niet voldoen, kan de flitser door een Power-Pack P76 (optioneel accessoire) van energie worden •... -
Seite 66: Displayverlichting
wordt door op een willekeurige toets te drukken, c.q. door het aantippen van HSS Flitsen met manual-instellingen en synchronisatie ook bij korte belich- de ontspanknop op de camera (Wake-Up-functie) weer ingeschakeld. tingstijden Als u de flitser langere tijd niet gaat gebruiken, schakel hem dan in Stroboscoop-flitsfunctie principe altijd via zijn hoofdschakelaar uit! -
Seite 67: Ttl-/ E-Ttl Invulflitsen
Het instellen: • Stel met de toetsen UP en DOWN de flitsfunctie E in. Achter de gese- • Druk zo vaak op de toets ‘Mode’, dat in het display ‘Mode’ wordt aangegeven. lecteerde flitsfunctie verschijnt een balkje. De instelling treedt onmiddellijk in werking. -
Seite 68: Automatisch Flitsenfunctie A
5.4 Automatisch flitsenfunctie A opnamesituatie kan bijv. door de diafragma-instelling op de camera of door het kiezen van een geschikt deelvermogen worden bereikt. In de automatisch-flitsenfunctie A meet de fotosensor van de flitser het door het onderwerp gereflecteerde licht. De fotosensor heeft een meethoek van Het instellen: ong. -
Seite 69: Flitsparameters (Menu 'Parameter')
Voor een stroboscoop-opname kan de flitsfrequentie (flitsen per seconde) van 1 Het maximaal mogelijke deelvermogen stelt zich in de stroboscoopfunctie auto- … 50 Hz in stappen van 1 Hz en het aantal flitsen van 2 … 50 in stappen van 1 matisch in. -
Seite 70: Het Instellen Van De Flitsparameters
6.1 Het instellen van de flitsparameters 6.2 Diafragmawaarde (F) Als er tussen camera en flitser geen digitale overdracht van gegevens plaatsvindt Bij het voor het eerst op een knop drukken wordt de displayverlichting kunnen de diafragmawaarden (F) van 1,0 tot 45 (bij ISO 100) met de hand in geactiveerd stappen van een hele diafragmastop worden ingesteld. -
Seite 71: Correcties Op De Flitsbelichting (Ev)
• Druk op de toets ‘Return’ . Het display schakelt naar de normale weergave • Met de PLUS / MINUS -toetsen de ISO-waarde van de camera instellen. De terug. Als u niet op de toets ‘Return’ drukt, schakelt het display na ong. 5 instelling treedt onmiddellijk in werking. -
Seite 72: Extra Functies (Menu 'Select')
7. Extra functies (menu ‘Select’) • Druk op de toets ‘Set’ en bevestig daarmee de keuze van de extra functie. • Kies met behulp van de toetsen UP en DOWN de gewenste instelling. De extra functies worden met de toets ‘Sel’ (Select) gekozen. Afhankelijk van het Deze instelling treedt onmiddellijk in werking type camera en de ingestelde flitsfunctie staan er verschillende extra functies ter beschikking. -
Seite 73: Flitsbelichtingstrapje (Fb)
Als ‘FB 0’ aangegeven wordt is het flitsbelichtingstrapje gedeactiveerd. Bij ingeschakeld Beep-functie wordt in het display ook het symbool aangegeven. • De eerste opname wordt zonder correctie uitgevoerd. In het display verschijnt bovendien ‘FB 1’. Het instellen: • Druk zo vaak op de toets ‘SEL’, dat in het display ‘Select’ aangegeven wordt. •... -
Seite 74: Extended-Zoomfunctie (Zoom Ext)
de bewegende lichtbronnen een lichtstaart achter zich laten, in plaats van dat Voorbeeld: deze zich vóór het onderwerp opbouwt. Met het synchroniseren bij het dicht- De brandpuntsafstand van het objectief bedraagt 50 mm. De flitser stuurt, bij gaan van de sluiter krijgt u bij bewegende lichtbronnen een ‘natuurlijker’ weer- ingestelde extended-zoomfunctie, de zoomstand van de hoofdreflector aan op gave van de opnamesituatie! Afhankelijk van de erop ingestelde functie stelt de 35 mm. -
Seite 75: Draadloze Bediening Van De Flitser (Remote)
Voorbeeld: 7.7 Draadloze bediening van de flitser (Remote) • Bij de aanduiding ‘Remote OFF’ is de draadloze remote-functie gedeactiveerd. - De functie "ZoomSize" is ingeschakeld; • Bij de aanduiding ‘Remote Master’ werkt de flitser als sturende masterflitser op - de cropfactor (verlengingsfactor van de brandpuntsafstand) van de digitale de camera. -
Seite 76: Hulpreflector
- Bij de aanduiding ‘ft’ worden de afstanden in feet aangegeven. 7.10 Instellicht (ML) ‘Modelling Light’ Bij het instellicht gaat het om een stroboscopisch flitslicht met hoge frequentie. Bij • Druk zo vaak op de toets ‘Return’ , dat het display weer naar de normale een duur van ong. -
Seite 77: Automatische Uitschakeling (Standby)
7.11 Automatische uitschakeling (Standby) display na ong 5 sec. terug naar de normale weergave. In de fabriek is de flitser zo ingesteld, dat hij ong 10 minuten – - Bij de aanduiding ‘Standby 10 min’ vindt de automatische uitschakeling na 10 minuten plaats;... -
Seite 78: Af-Beam (Af-Hulplicht)
7.13 AF-BEAM (AF-hulplicht) Aanpassen van de zoomstand met de hand Als het AF-meetsysteem van een digitale AF-spiegelreflexcamera, bijv. Canon Als de camera de parameter voor de brandpuntsafstand van het objectief, c.q. EOS, vanwege onvoldoende omgevingslicht niet kan scherpstellen, wordt door voor de zoomstand ervan, niet doorgeeft, moet de zoomstand van de flitsreflec- de camera het in de flitser geïntegreerde AF-hulplicht geactiveerd. -
Seite 79: Flitstechnieken
Trek de groothoekdiffusor uit de hoofdreflector tot de aanslag naar voren • houd de reflecterende kaart vast en schuif de groothoekdiffusor terug in en laat hem los. De groothoekdiffusor klapt automatisch naar beneden. de reflectorkop. De hoofdreflector wordt automatisch in de vereiste stand gestuurd. In het display 10.3 Indirect flitsen met de hulpreflector worden de afstandswaarden en de zoomwaarde naar 18 mm gecorrigeerd. -
Seite 80: Aanduiding Van Flitsparaatheid
een reflectiegraad van 25% (gemiddelde reflectiegraad van flitsonderwerpen). 11. Aanduiding van flitsparaatheid Een donkere achtergrond die veel licht absorbeert of een lichte achtergrond (bijv. Zodra de flitscondensator opgeladen is, licht op de flitser de aanduiding van flit- bij tegenlichtopnamen) of een die sterk reflecteert kan tot over- c.q. onderbelich- sparaatheid ) op en geeft daarmee aan, dat de flitser gereed is. -
Seite 81: Aanduiding Van De Belichtingscontrole
13. Aanduiding van de belichtingscontrole 15. Aanduiding van de flitsreikwijdte De aanduiding van belichtingscontrole „o.k.“ licht alleen op, als de opname In het display van de flitser wordt de waarde van de maximale reikwijdte van het in de TTL - / E-TTL - flitsfunctie, c.q. de automatisch-flitsenfunctie correct werd flitslicht aangegeven. -
Seite 82: Met De Hand Aanpassen Van De Aanduiding Van De Flitsreikwijdte
15.2 Met de hand aanpassen van de aanduiding van de flitsreikwijdte na de FE-proefflits plaatsvinden, bij de opname nog in acht worden geno- men! Als de camera geen gegevens aan de flitser doorgeeft, dan moeten, om een Bij verschillende camera’s wordt het opslaan van de flitsbelichting FE in betrouwbare aanduiding van de maximale reikwijdte te krijgen, de parameters het groene ’geheel automatisch geprogrammeerd’... -
Seite 83: Synchronisatie Met Lange Belichtingstijden / Slow
kiezen, c.q. wordt automatisch gewist of niet uitgevoerd (zie de gebruiksaanwij- scherptediepte begrensd moet worden! De flitser ondersteunt de synchronisatie zing van uw camera). bij korte belichtingstijden in de flitsfuncties E-TTL (E-TTL HSS) en M (M HSS). • Bij de instelling ‘REAR ON’ vindt de synchronisatie plaats bij het dichtgaan Natuurkundig bepaald, wordt door de synchronisatie bij korte belichtingstijden van de sluiter;... -
Seite 84: Draadloze Remote-Functie
Sommige cameratypes ondersteunen alleen met de centrale AF-sensor van de 19.1 Instellen en uitschakelen van de remote-functie camera de AF-meetflits van de flitser. Wordt dan een decentrale sensor geselec- • Druk zo vaak op de toets ‘SEL’, dat in het display ‘Select’ aangegeven wordt. teerd, dan wordt de AF-meetflits in de flitser niet geactiveerd! •... - Seite 85 den. Het instellen van een remote-kanaal • Met de toets ‘Return’ de instelling opslaan. Als u niet op de toets ‘Return • Druk zo vaak op de toets ‘Para’, dat in het display ‘Ch’ wordt aangegeven. ’ drukt, wordt de instelling na ong. 5 s. automatisch opgeslagen. •...
-
Seite 86: Instellingen Op De Slaafflitser
• Zolang de aanduiding A M aangegeven is, kan met de toetsen (-) en (+) een • Druk, om de masterflitser te activeren, zo vaak op de toets ‘Mode’, dat in het deelvermogen 1/1 tot 1/128 voor de slaafflitsers van groep A worden inge- display M M wordt aangegeven. -
Seite 87: Batterijwaarschuwing
Metz Power Pack P76 aan. 21.3 Formeren van de flitscondensator • Een Metz Power Pack P76 is aangesloten en in het batterijvak van de meca- De in de flitser ingebouwde flitscondensator ondergaat een natuurkundige ver- blitz zitten nog batterijen/accu's. Haal de batterijen uit het batterijvak van de andering, als het apparaat gedurende een langere tijd niet wordt ingeschakeld. - Seite 88 In het display verschijnt een batterijsymbool • Er vindt geen uitwisseling van gegevens tussen camera en flitser plaats. • Op de mecablitz is een Metz Power Pack P76 aangesloten en in het batterijvak Ontspankop op de camera aantippen! van de mecablitz bevinden zich batterijen. Haal deze batterijen uit de meca- •...
-
Seite 89: Technische Gegevens
Aantallen flitsen: • Het onderwerp bevat zeer lichte of reflecterende beelddetails. Daardoor wordt • Ong. 180 met Metz NiMH accupak 1600mAh het meetsysteem van de camera, c.q. van de flitser beïnvloed. Stel met de hand • Ong. 180 met super-alkalimangaanbatterijen een positieve correctie op de flitsbelichting van bijv. -
Seite 90: Bijzondere Toebehoren
Zwenkbereiken en klikstanden van de hoofdreflector 24. Bijzondere toebehoren Naar boven -7° 45° 60° 75° 90° Voor foute werking van en schades aan de mecablitz, veroorzaakt door Tegen de wijzers van de klok in 30° . . 180° het gebruik van accessoires van andere fabrikanten, zijn wij niet aan- Richting wijzers van de klok 30°... -
Seite 91: Afvoeren Van De Batterijen
Afvoeren van de batterijen Batterijen horen niet bij het huisvuil. S.v.p. de batterijen bij een daarvoor bestemd inzamelpunt afgeven. S.v.p. alleen ontladen batterijen / accu’s afgeven. Batterijen / accu’s zijn in de regel ontladen wanneer het daarvoor gebruikte apparaat - uitschakelt en aangeeft „batterijen leeg“ - de batterijen na langer gebruik niet meer goed functioneren. - Seite 92 1. Safety instructions ..........93 9.
-
Seite 93: Safety Instructions
• Do not expose the flash unit or battery charger to dripping or splashing water such as rain! Thank you for purchasing a Metz product. We are happy to welcome you as a • Protect the flash unit from excessive heat and humidity! Do not store the customer. -
Seite 94: Dedicated Flash Functions
2. Dedicated flash functions 3. Preparing the flash unit for use Dedicated flash functions are flash functions that have been specially adapted to 3.1 Mounting the flash unit a given camera system. Depending on the type of camera, different flash func- Mounting the flash unit on the camera tions are supported. -
Seite 95: Switching The Flash Unit On And Off
• Power Pack P76 with connecting cable V58-50 (optional accessory) flash unit to provide extra power. A V58-50 connecting cable (optional) is neces- sary for connecting the Power Pack P76 to the flash unit. If your flash unit is not going to be used for an extended period of time, In this case, no batteries have to be inserted into the flash unit. -
Seite 96: Display Illumination
4. Display illumination The flash parameters for ISO, aperture and lens focal length or mirror position are set automatically, if the camera transfers the necessary data to the flash unit. Every time a button on the flash unit is pressed, the flash display illumination is The range indicator on the display of the control unit matches the flash parame- activated for 10 seconds. -
Seite 97: Ttl Fill-In Flash Mode
suitable combination of shutter speed, aperture and flash output. flash mode / E II flash mode In E II mode, and with suitable lenses, the distance to the subject is also taken The E-TTL and E-TTL II flash modes are improvements upon the standard TTL flash into consideration in calculating the optimal flash output. -
Seite 98: Automatic Fill-In Flash Mode
5.5 Automatic fill-in flash mode Some cameras only support the manual flash mode when the When shooting in automatic fill-in flash mode in daylight, the automatic flash camera is set to the manual operating mode M. mode will automatically set a correction of between -1 and -2 f-stops to 5.7 Strobe flash mode compensate for flash exposures (see 6.4 and 10.5). -
Seite 99: Flash Parameters (Parameter Menu)
Setting procedure: For this automatic data transfer to occur, the flash unit has to be mounted on the camera, and both devices have to be switched on. In addition, a data exchange • Press the „Para“ button (Parameters) until the desired flash parameter (N or f) between the camera and flash unit has to be initiated, for which you simply brie- flashes on the LC display. -
Seite 100: Aperture (F)
• Set the desired value using the +/— buttons. The setting takes effect immedia- Setting procedure: tely. • Press the „Para“ button (Parameters) until „Zoom“ appears on the LC display. • Press the „Return“ button to change the LC display back to the normal •... -
Seite 101: Manual Partial Light Output (P)
Setting procedure: 7. Special functions (Select menu) • Press the „Para“ button (Parameters) until „ISO“ flashes on the LC display. Special functions are selected using the „Sel“ (Select) button. Depending on the camera model and flash mode set, various special functions are available. If cer- •... -
Seite 102: Beep Function (Beep)
• Press the „Set“ key to confirm the special function selection. Setting procedure: • Choose the setting desired using the UP and DOWN arrows. The setting • Press the „Sel“ button repeatedly until „Select“ appears on the display. takes effect immediately. •... -
Seite 103: 2Nd Curtain Synchronisation (Rear Mode)
When „FB 0“ is displayed, the flash bracketing series is deactivated. synchronisation is able to deliver a more realistic impression of movement! Depending on its operating mode, the camera uses shutter speeds that are slo- • The first shot is taken without a correction value. „FB 1“ will also appear on the wer than its sync speed. -
Seite 104: Adjusting Exposure Format (Zoom Size)
Example: - The crop factor (focal length extension factor) of the digital camera is 1.5. (The crop factor is transferred automatically by the camera). The focal length of the camera lens is 50 mm. The extended zoom mode sets a 35 mm reflector position on the flash unit. -
Seite 105: Meter-Feet Changeover (M/Ft)
Setting procedure: lighting when the main reflector is pivoted to the side or upwards (see 10.3). • Press the „SEL“ button repeatedly until „Select“ appears on the display. If the secondary reflector produces too much light, it can be reduced to 1/2 or 1/4 . -
Seite 106: Auto Off Function (Standby)
Setting procedure: (wake-up function). • Press the „SEL“ button repeatedly until „Select“ appears on the display. The flash unit should always be turned off by the main switch if it is not going to be used for an extended period! •... -
Seite 107: Af-Beam (Af Auxiliary Light)
Activating the KEYLOCK function: 8. Motor Zoom Reflector • Press the „SEL“ button repeatedly until „Select“ appears on the display. The zoom position of the main reflector can be adjusted for focal lengths of at least 24 mm (35 mm format). For lenses with focal lengths of 18 mm or more, •... -
Seite 108: Wide-Angle Diffuser
Manual adjustment of the zoom position with AZoom should be colour-neutral or white. For frontal fill-in lighting, the secondary reflec- can also be activated in the Select Menu (see 7.9). The zoom position of the main reflector can also be changed when the flash unit is used with a camera capable of data transmission, in order to achieve spe- When tilting the main reflector vertically, make sure that it is turned cial lighting effects (such as hot-spot, etc.). -
Seite 109: Close-Ups / Macro Shots
10.4 Close-ups / macro shots Bright subject in front of a dark background: In close-ups and macro shots, parallax error between the flash unit and lens may Negative correction value (approximately -1 to -2 f-stops EV). result in shadows on the lower edge of the image. To compensate for this, the When a correction value is set, the flash range indicated on the flash unit display main reflector can be tilted downwards by an angle of -7°. -
Seite 110: Correct Exposure Indication
instructions). The sync speed set by the camera depends on the camera mode, Fundamentals in connection with faulty exposures: the ambient light, and the focal length of the lens used. • With overexposure: Do not flash! Shutter speeds slower than the flash sync speed can be set according to the •... -
Seite 111: Automatic Adjustment Of The Flash Range Indication
15.1 Automatic adjustment of the flash range indication camera assesses the light reflected from the FE test flash to determine the light out- put required for the subsequent exposure. The main subject can thereafter be focu- Cameras transmit to the flash unit the flash parameters for ISO film speed, focal sed with the AF sensor metering area of the camera. -
Seite 112: Slow Synchronisation / Slow
On some cameras the rear function is not possible in certain operating modes be sure to note the maximum flash range on the LC display of the flash unit. HSS (e.g., certain vari- or subject programs, or with red eye reduction). In that case, high speed synchronisation is activated automatically if a shutter speed faster the rear mode cannot be selected, or the rear function is automatically cancelled than the flash sync speed is set on the camera, whether manually or automatical-... -
Seite 113: Wireless Remote Flash Mode
19. Wireless remote flash mode selected menu option will be indicated by a dark bar. • Press the "Set" key to confirm the selection of "Remote". Wireless remote operation is compatible with the Canon E-TTL remote system. The remote system consists of a master flash unit on the camera and one or more •... - Seite 114 Adjusting the settings for slave group B • Press "Return" to save your settings. If the "Return" key is not pressed, the settings will be saved automatically after approximately 5 seconds. • Press the "Para" key repeatedly until B TTL (for slave group B) appears on the Setting the zoom position of the reflector LC display.
-
Seite 115: Settings On The Slave Flash Unit
Adjusting the settings for slave group B 19.3 Settings on the slave flash unit • Use the „Para“ key to select, in succession, the settings for choice of slave • Press the "Para" key repeatedly until B M (for slave group B) appears on the group („Group“), the remote channel („Channel“) and the reflector position LC display. -
Seite 116: Low Battery Warning Indicator
For this reason it is necessary to switch the • A Metz Power Pack P76 is connected and there are still batteries in the battery unit on for approximately 10 minutes at least once every three months. The power compartment of the mecablitz. - Seite 117 • There is no exchange of data between the flash unit and the camera. Tap the camera’s shutter release. • There is a Metz Power Pack P76 connected to the mecablitz and there are bat- teries in the battery compartment of the mecablitz. Remove batteries from the •...
-
Seite 118: Technical Data
* Approx. 180 with high-capacity alkaline manganese batteries • There is an exchange of digital data between flash unit and camera through * Approx. 430 with Metz Power Pack P76 (special accessory) which the ISO and aperture (f) values are automatically adjusted on the flash unit. -
Seite 119: Optional Accessories
Light coverage: 24. Optional accessories Main reflector from 24 mm (35 mm format) We accept no liability for malfunctions of or damage to the flash unit cau- Main reflector with wide-angle diffuser from 18 mm (35 mm format) sed by the use of accessories of other manufacturers. Secondary reflector from 35 mm (35 mm format) •... - Seite 120 Per la vostra sicurezza ........121 Diffusore grandangolare .
-
Seite 121: Per La Vostra Sicurezza
• Non gettare nel fuoco le batterie o le pile esaurite! • Un’eventuale fuoriuscita di acido dalle batterie esaurite può provocare danni Grazie per aver scelto un prodotto Metz! Siamo lieti di potervi dare il benvenuto al flash. Rimuovere subito le batterie esaurite dall’apparecchio! tra i nostri Clienti. -
Seite 122: Funzioni Flash Dedicate
2 Funzioni flash dedicate 3. Preparazione del flash Le funzioni flash dedicate sono funzioni messe a punto specificatamente per i 3.1 Montaggio del flash diversi sistemi di camera. Le funzioni del flash supportate dipendono dal tipo di Montaggio del flash sulla camera camera. -
Seite 123: Accensione E Spegnimento Del Flash
• 4 batterie al litio 1,5 V, tipo IEC FR6 (AA/Mignon), una fonte di energia esen- 3.4 Power Pack P76 (accessorio a richiesta) te da manutenzione, ad elevata capacità e autoscarica contenuta. Se il numero di lampi e i tempi di ricarica non sono sufficienti per la vostra applicazione, il flash può... -
Seite 124: Illuminazione Display
tocca leggermente il pulsante di scatto della camera (funzione Wake-Up). Modo flash Stroboscopico Se prevedete di non utilizzare il flash per lungo tempo è opportuno speg- • Impostate il modo flash desiderato con i tasti UP e DOWN nere l’apparecchio sempre con l’interruttore principale Automatico , Manuale , ecc.). -
Seite 125: Modo Lampo Di Schiarita Ttl / Ettl
Procedura per l’impostazione: • Impostate il modo flash E con i tasti UP e DOWN . La modalità del • Premete il tasto „Mode“ finché nel display non comparirà „Mode“. flash selezionata viene dunque evidenziata rendendo l’impostazione attiva da subito. •... -
Seite 126: Modo Lampo Di Schiarita Automatico
25° e procede alla misurazione solamente durante la propria emissione del lam- camera oppure tramite la selezione manuale di una potenza ridotta adeguata. po. Se l’intensità della luce è sufficiente, il sistema di esposizione automatica del Procedura per l’impostazione: lampeggiatore disattiva il flash. Il fotosensore deve essere rivolto verso sog- •... -
Seite 127: Parametri Del Flash (Menu Parametri)
pi al secondo) da 1 a 50 Hz - a passi di 1 Hz - e il numero dei lampi da 2 a 50, Con il modo Stroboscopico la massima potenza ridotta possibile viene impostata a passi di 1. automaticamente. Dipende dal ISO e dall’apertura del diaframma. Al fine di ottenere durate brevi del lampo è... -
Seite 128: Procedura Per L'impostazione Dei Parametri Flash
6.1 Procedura per l’impostazione dei parametri flash 6.2 Diaframma (F) Se tra fotocamera e flash non avviene una trasmissione dati digitale, i valori del Alla prima pressione di qualsiasi tasto si illumina il display. diaframma (F) possono essere impostati a mano da 1,0 a 45 (con ISO 100) ad In base al tipo di modo flash impostato, nel menu vengono indicati diversi para- intervalli di gradi pieni del diaframma. -
Seite 129: Correzione Dell'esposizione Flash (Ev)
• Premete il tasto „Return“ . Il display ritorna alla schermata normale. Se non non premete il tasto „Return“ il display torna comunque automaticamente premete il tasto „Return“ il display torna comunque automaticamente alla alla schermata normale dopo circa 5 secondi. schermata normale dopo circa 5 secondi. -
Seite 130: Funzioni Speciali (Menu Select)
7. Funzioni speciali (Menu Select) • Premete il tasto „Set“ e confermate così la selezione della funzione speciale. • Effettuate l’impostazione desiderata con i tasti UP e DOWN . Le funzioni speciali vengono selezionate con il tasto „Sel“ (Select). Secondo il L’impostazione è... -
Seite 131: Serie Di Esposizioni Flash (Fb)
Quando si visualizza „FB 0“ la serie di esposizioni è disattivata. Con la funzione bip attivata viene inoltre visualizzato il simbolo • La prima ripresa viene effettuata senza valore di correzione. Sul display si Procedura per l’impostazione: visualizzerà in aggiunta „FB1“. •... -
Seite 132: Modo Zoom Esteso (Zoom Ext)
la fonte luminosa. Con la sincronizzazione sulla seconda tendina si avrà l’effetto flash si regola alla posizione di riflessione di 35 mm. Sul display continuano ad di una riproduzione „naturale“ della situazione di ripresa! Secondo il modo d’e- essere indicati 50 mm. sercizio, la camera gestisce tempi di posa più... -
Seite 133: Modo Con Controllo A Distanza (Remote)
- l fattore di crop (fattore di allungamento della distanza focale) è 1,5 (il fattore • Quando si visualizza „Remote Slave“ il flash lavora come slave. di crop viene trasmesso automaticamente dalla fotocamera). Per ulteriori informazioni consultate anche il capitolo 19. - sull'obiettivo della fotocamera viene regolata una distanza focale di 50 mm. -
Seite 134: Parabola Ausiliaria
7.9 Parabola ausiliaria pilota è possibile valutare già prima di una fotografia la distribuzione della luce e la creazione di ombre. La parabola ausiliaria i serve a schiarire frontalmente in presenza di illumina- zione indiretta quando la parabola principale g è rivolta di lato o verso l'alto •... -
Seite 135: Blocco Dei Tasti (Keylock)
• dopo lo spegnimento del sistema di misurazione dell’esposizione della 7.12 Blocco dei tasti (KEYLOCK) camera... Con la funzione blocco dei tasti (KEYLOCK) è possibile bloccare i pulsanti del flash per evitare regolazioni involontarie. Se la funzione blocco dei tasti è attiva ... -
Seite 136: Parabola Zoom Motorizzata
menu Select del flash "58 AF-1C digital" si può disattivare l’illuminatore ausiliario l’obiettivo zoom. Così si garantisce sempre l’illuminazione completa della AF del flash. Nel menu Select selezionare la voce AF-BEAM e impostare su OFF. vostra immagine e risparmiate l’adattamento continuo alla focale. Dopo il salvataggio, la disattivazione della funzione AF-BEAM viene segnalata Esempio: sul display con un simbolo AF sbarrato. -
Seite 137: Tecniche Lampo
10. Tecniche lampo L’impiego della parabola ausiliaria è sensato, e possibile, solo con lampo riflesso e parabola inclinata. Se la parabola principale non è inclinata, per la 10.1 Lampo riflesso ripresa la parabola ausiliaria non viene attivata. Utilizzando il lampo riflesso la luce sul soggetto risulta più morbida e le ombre Qualora l’intensità... -
Seite 138: Indicazione Di Stato Del Flash
sposizione flash con un valore di correzione. Il valore di correzione dipende dal Se la ripresa viene fatta prima che sul mirino compaia l’indicazione di flash contrasto tra il soggetto e lo sfondo dell’immagine! carico, il flash non viene attivato e la foto potrebbe avere un’esposizione non corretta nel caso in cui la camera abbia già... -
Seite 139: Indicazione Di Corretta Esposizione
13. Indicazione di corretta esposizione 15. Indicazione campo d’utilizzo L'indicazione di corretta esposizione "o.k." si accende solo se la ripresa è Sul display del flash viene visualizzato il valore del massimo campo d’utilizzo stata correttamente esposta nel modo flash TTL / E-TTL o nel modo Automatico! del flash. -
Seite 140: Adattamento Manuale Dell'indicazione Del Campo D'utilizzo
15.2 Adattamento manuale dell’indicazione del campo d’utilizzo Su alcune camere la funzione di memorizzazione dell’esposizione flash FE non viene supportata nel programma completamente automatico “qua- I parametri flash per la posizione zoom, la sensibilità alla luce ISO e il valore di dratino verde”... -
Seite 141: Sincronizzazione Con Tempi Lunghi / Slow
• Con l’impostazione „REAR ON“ la sincronizzazione avviene sulla seconda Tuttavia, per cause naturali, con la sincronizzazione ad alta velocità HSS il numero tendina. guida, e quindi anche il campo d'utilizzo del flash, verranno in parte limitati consi- derevolmente! Fate pertanto attenzione all'indicazione del campo d'utilizzo sul •... -
Seite 142: Modo Con Controllo A Distanza
solo con il sensore AF centrale. Se viene selezionato un sensore AF decentrato, il • Selezionate il punto del menu "Remote" con i tasti UP e DOWN . Il punto flash di misurazione AF del lampeggiatore non viene attivato! del menu selezionato verrà evidenziato in scuro. •... - Seite 143 Procedura per l'impostazione del gruppo slave B • Impostate il canale remoto con i tasti (+) e (-). • Memorizzate l'impostazione con il tasto "Return" . Se non premete il tasto • Premete il tasto "Para" più volte finché sul display non compare B TTL (per il "Return"...
-
Seite 144: Impostazione Sul Flash Slave
• Mentre rimane visualizzato A, premete il tasto "Mode" più volte finché accanto • Per attivare il flash controller premete il tasto "Mode" più volte finché sul ad A non compare M (=controllo a distanza manuale). display non compare M M. Mentre rimane visualizzato M M, con i tasti (-) e (+) potete impostare una potenza luminosa ridotta da 1/1 a 1/256 per il flash •... -
Seite 145: Livello Di Carica Delle Batterie
Questo non riguarda gli aggiornamenti del software del flash! Metz Power Pack P76. • Un Metz Power Pack P76 è collegato e nel vano batterie del mecablitz sono 21.3 Formazione del condensatore flash ancora presenti delle batterie. Rimuovete le batterie dal relativo alloggiamento Il condensatore incorporato nel flash tende a deformarsi quando il lampeggiato- del mecablitz. - Seite 146 • La fotocamera non trasmette al flash dati digitali. Il display mostra il simbolo di una batteria • Un Metz Power Pack P76 è collegato al mecablitz e sono presenti delle batte- • Non ha luogo uno scambio dati tra flash e fotocamera. Premere leggermente rie nell'apposito alloggiamento del mecablitz.
-
Seite 147: Dati Tecnici
* Circa 180 con batterie alcaline al manganese ad alte prestazioni Le riprese sono troppo chiare. * Circa 430 con Power-Pack Metz P76 (accessorio a richiesta) • Per le riprese da vicino, bisogna mantenere determinate distanze minime di (sempre a potenza luminosa piena) illuminazione per evitare sovraesposizioni. -
Seite 148: Accessori Opzionali
Parabola principale, a partire da 24 mm (formato piccolo 24x36) l cattivo funzionamento e i danni eventualmente provocati al flash dall’u- Parabola principale con diffusore grandangolare, a partire da 18 mm (formato tilizzo di accessori non prodotti dalla Metz non sono coperti dalla nostra piccolo 24x36) garanzia! •... -
Seite 149: Smaltimento Delle Batterie
Smaltimento delle batterie Le batterie non vanno gettate insieme ai rifiuti domestici. Si prega di utilizzare un sistema di smaltimento adeguato, p. es. portandole al negozio dove le si è acquistate o ad un centro di raccolta apposito. Si prega di effettuare lo smaltimento soltanto di batterie scariche. Le batterie sono scariche, quando l’apparecchio, alimentato dalle stesse, - si spegne e segnala „batteria vuota“... - Seite 150 1. Indicaciones de seguridad ......... 151 9.
-
Seite 151: Indicaciones De Seguridad
• Las pilas secas no pueden recargarse. • No exponer el flash ni el cargador a gotas o salpicaduras de agua, por Le agradecemos que se haya decidido por un producto Metz y nos complace ejemplo, a la lluvia. saludarle como usuario de nuestra marca. -
Seite 152: Funciones Dedicadas Del Flash
2. Funciones dedicadas del flash 3. Preparación del flash Las funciones dedicadas del flash son las que se adecuan de manera especial al 3.1 Montaje del flash sistema de la cámara. Así, las funciones del flash serán compatibles dependien- Colocar el flash en la cámara do del modelo de cámara. -
Seite 153: Conexión Y Desconexión Del Flash
• 4 pilas de litio de 1,5 V, tipo IEC FR6 (AA/ Mignon), que suministran energía 3.4 Power Pack P76 (accesorio opcional) sin necesidad de mantenimiento con una capacidad mayor y una menor auto- Si la cantidad de destellos y los intervalos entre destellos no son suficientes para descarga. -
Seite 154: Iluminación De La Pantalla
sar cualquier tecla o el disparador de la cámara (función Wake-Up). • Con las teclas UP y DOWN puede ajustar el modo de funcionamiento del flash deseado ( , automático , manual , etc.). El modo de fun- Cuando no se vaya a utilizar el flash durante un periodo de tiempo pro- cionamiento seleccionado aparece resaltado por una barra. -
Seite 155: Modo De Relleno Ttl (Ttl Bl)
Configuración: • Pulsar la tecla „Return“ . La pantalla regresa a la indicación normal. Si no se pulsa la tecla „Return“ , la pantalla regresa automáticamente a la indica- • Pulsar la tecla „Mode“ hasta que aparezca „Mode“ en la pantalla. ción normal aprox. -
Seite 156: Modo De Relleno Automático
En la pantalla aparece el alcance máximo. La distancia de disparo más • Pulsar la tecla „Return“ . La pantalla regresa a la indicación normal. Si no pequeña equivale aprox. al 10 % de esta distancia. El motivo debe encontrarse se pulsa la tecla „Return“... -
Seite 157: Parámetros Del Flash (Menú Parámetros)
aplica de forma inmediata. Configuración: • Pulsar la tecla „Return“ . La pantalla regresa a la indicación normal. Si no • Pulsar la tecla „Para“ (Parámetro) hasta que aparezca en la pantalla el pará- se pulsa la tecla „Return“ , la pantalla regresa automáticamente a la indica- metro de flash deseado (F = Apertura o P = Potencia parcial manual). -
Seite 158: Apertura Del Diafragma (F)
Si la cámara no transmitiera determinados parámetros de flash, estos • Mediante las teclas MÁS / MENOS ajustar el valor de diafragma. La configu- deberán introducirse manualmente en el flash. ración se activa inmediatamente. • Pulsar la tecla „Para“ (Parámetro) hasta que aparezca en la pantalla el pará- •... -
Seite 159: Sensibilidad De La Película (Iso)
(EV). Para ello, están disponibles valores de corrección de -3 valores de diafrag- Configuración: ma (EV) hasta +3 (EV) en tercios de diafragma (consultar también 10.5). • Pulsar la tecla „Para“ (Parámetro) hasta que aparezca „P“ en la pantalla. Configuración: •... -
Seite 160: Función Beep (Pitido)
Aviso acústico al encender el flash: TTL/E-TTL/A/E-TTL-HSS M/M HSS • Al encender el flash, un breve pitido continuado (aprox. 2 seg.) indica que el – flash está preparado. – REAR REAR Pitido tras la toma: Beep Beep Beep • Un breve pitido continuado (aprox. 2 seg.) justo después de la toma indica Remote Remote Remote... -
Seite 161: Horquillado De Flash (Fb)
7.3 Horquillado de flash (FB) Horquillado en el modo TTL En el modo y automático se puede realizar un horquillado de Un horquillado del flash en el modo TTL sólo es posible cuando la cámara per- flash (Flash Bracketing, FB). Esto consiste en una exposición en serie de tres mite ajustar una corrección manual de la exposición del flash (consultar manual tomas seguidas con flash a diferentes valores de corrección del flash. -
Seite 162: Modo De Zoom Extendido (Zoom Ext)
• Pulsar la tecla „Set“ para confirmar la selección de la función especial. • Pulsar la tecla „Set“ para confirmar la selección de la función especial. • Establecer el ajuste deseado con las teclas UP y DOWN . El ajuste se •... -
Seite 163: Modo Remoto Inalámbrico (Remote)
Configuración: • Pulsar la tecla „Return“ hasta que la pantalla regrese a la indicación nor- mal. Si no se pulsa la tecla „Return“ , la pantalla regresa automáticamente • Pulsar la tecla „SEL“ hasta que aparezca „Select“ en la pantalla. a la indicación normal aprox. -
Seite 164: Luz De Modelado (Ml)
• Establecer el ajuste deseado con las teclas UP y DOWN . El ajuste se apli- • Ajuste “ P1/2“: segundo reflector a media potencia ca de forma inmediata. • Ajuste “ P1/4“: segundo reflector a 1/4 de potencia • Pulsar la tecla „Return“ hasta que la pantalla regrese a la indicación nor- Al activar el segundo reflector, después de confirmar aparece el símbolo mal. -
Seite 165: Bloqueo Del Teclado (Keylock)
pasa al modo Standby de ahorro de energía. Para volver a encenderlo debe • Establecer el ajuste deseado con las teclas UP y DOWN . pulsarse cualquier tecla o el disparador de la cámara (función Wake-Up). - Cuando aparece „KEYLOCK Yes?“ se activa el bloqueo de teclado. Configuración: - Cuando aparece „KEYLOCK No?“... -
Seite 166: Difusor De Gran Angular
Posiciones de zoom disponibles: Restablecimiento del modo de zoom A 24 mm - 28 mm - 35 mm - 50 mm - 70 mm - 85 mm - 105 mm • Pulsar el disparador de la cámara para que se produzca la transmisión de datos entre el flash y la cámara. -
Seite 167: Destellos Indirectos Con Tarjeta Reflectante
Cuando se gira el reflector principal, en la pantalla no aparecen indicaciones Si el reflector principal está inclinado hacia abajo, en el visor aparecerá la indicación "TILT". sobre el alcance. Con fotografía de primeros planos debe respetarse la distancia mínima de ilumi- 10.2 Destellos indirectos con tarjeta reflectante nación para evitar sobreexposiciones. -
Seite 168: Indicación De Disponibilidad Del Flash
Una corrección manual de la exposición del flash en el modo TTL sólo es Algunas cámaras disponen de un margen de sincronización, p. ej., 1/30 s a posible si la cámara cuenta con esta función (consultar manual de instruc- 1/125 s (consultar manual de instrucciones de la cámara). Dependiendo del ciones de la cámara). -
Seite 169: Indicación Del Alcance
se puede conseguir modificando el diafragma del objetivo y mediante la selecci- El símbolo de flash luce: ón entre plena potencia luminosa y las potencias parciales „P“. El flash está listo para el uso (en algunas cámaras). El alcance se puede indicar en metros (m) o en pies (ft) (consultar 7.6). Algunas cámaras disponen en el visor, de una función para el aviso de una Cuando el reflector principal está... -
Seite 170: Sincronización Del Flash
principal. cortinilla (modo REAR). Se trata de disparar el flash al final del tiempo de expo- sición. Esto es una ventaja, sobre todo en exposiciones con velocidades de obtu- Conectar el flash en el modo E-TTL (ver 5.2). El encuadre secundario sobre el ración lentas (p. -
Seite 171: Sincronización Automática De Alta Velocidad Hss
„Av“, programa de toma nocturna, etc.) se activa automáticamente (ver instruc- cámara. Debido al paralaje entre el objetivo y el destello de medición AF, el ciones de servicio de la cámara). En el flash no se produce una indicación o aju- límite de medición con el flash de medición AF es de aprox. -
Seite 172: Configurar Y Desactivar El Modo Remoto
Para que varios sistemas remotos en el mismo espacio no interfieran mutuamen- Canon E-TTL-Remoto te, están a disposición cuatro canales remotos independientes. Los flashes de Procedimiento de ajuste para el grupo esclavo A cámara y esclavos pertenecientes al mismo sistema remoto deben estar configu- •... - Seite 173 configurar mediante las teclas (-) y (+) un ajuste de exposición de flash de –3 • Para activar el flash maestro pulsar la tecla “Mode“ hasta que en la pantalla valores de diafragma (EV) hasta +3 EV en pasos de un tercio para los flashes aparezca M TTL.
-
Seite 174: Configuración Del Flash Esclavo
El flash esclavo debe ajustarse en el mismo canal remoto que el flash Consultar más información en la página web de Metz: www.metz.de maestro. El modo de funcionamiento del flash esclavo (remoto E-TTL o remoto manual) no puede ajustarse en el flash esclavo, puesto que el... -
Seite 175: Formación Del Condensador De Destellos
Las actualizaciones del firmware no se ven afectadas por esta acción. un Power Pack Metz P76. • Se ha conectado un Power Pack Metz P76, pero hay todavía baterías en el 21.3 Formación del condensador de destellos compartimento de baterías del mecablitz. Retirar las baterías del comparti- El condensador de destellos incorporado en el flash se deforma físicamente si el... - Seite 176 • La función REAR se puede activar desde el flash solo si se ha producido un La configuración de la corrección manual de la exposición del flash TTL no tie- intercambio de datos entre el flash y la cámara, por ejemplo presionando ne ningún efecto.
-
Seite 177: Características Técnicas
* Aprox. 180 con pilas alcalino-manganesas de alta capacidad al motivo debe ser de al menos el 10% del alcance indicado en la pantalla. * Aprox. 430 con Power-Pack P76 de Metz (accesorio opcional) No se pueden ajustar los parámetros de flash para la sensibilidad ISO y la Intervalo entre destellos (todos a plena potencia): apertura F en el flash. -
Seite 178: Accesorios Especiales
24. Accesorios especiales Eliminación de las baterías Metz no asume ninguna garantía por funcionamientos erróneos o daños No se deben tirar las baterías a la basura casera. en el flash, causados al utilizar accesorios de otros fabricantes. Para la devolución de sus baterías gastadas, sírvase utilizar uno de los sistemas •... -
Seite 179: Tableau 3: Nombres-Guides Pour La Puissance Maximale (P 1)
Zoom 6/9° 8/10° 10/11° 12/12° 16/13° 20/14° 25/15° 32/16° 40/17° 50/18° 64/19° 80/20° 100/21° 125/22° 160/23° 200/24° 250/25° 320/26° 400/27° 500/28° 650/29° 800/30° 1000/31° 79 1250/32° 89 Tabelle 3: Leitzahlen bei maximaler Lichtleistung (P 1/1) 1600/33° 100 Tableau 3: Nombres-guides pour la puissance maximale (P 1/1) 2000/34°... -
Seite 180: Tableau 4: Durée De L'éclair Pour Les Différents Niveaux De Puissance
Teillichtleistung Blitzleuchtzeit (s) Leitzahl Leitzahl Niveaux de puissance Durée d’éclair (s) Nombre-guide Nombre-guide Deelvermogensstappen Flitsdur (s) Richtgetal Richtgetal Partial light output Flash duration Guide number Guide number Livello di potenza Durata del lampo Numero guida Numero guida Potencia parcial Duración de destello Número-guía Número-guía (P=Flash Power) ISO 100/50 mm... -
Seite 181: Tableau 5: Vitesses D'obturation Du Reflex En Mode Stroboscope
Tabelle 5: Kameraverschlusszeiten im Stroboskop-Betrieb Blitzfrequenz Blitzanzahl Tableau 5: Vitesses d’obturation du reflex en mode stroboscope f(Hz) (Blitze/Sek.) Nombre d’éclairs Tabel 5: Belichtingstijden bij de stroboscoopfunctie Fréquence f(Hz) Table 5: Camera shutter speeds in stroboscopic mode Aantal flitsen (éclairs/seconde) Tabella 5: Tempi di posa per il modo stroboscopico Flitsfrequentie Number of flashes Tabla 5:... -
Seite 182: Tableau 6: Temps De Recyclage Et Autonomie Pour Différents Types De Piles
Zoom Batterietyp Blitzfolgezeiten Blitzanzahl Type de pile/accu Temps de recyclage Nombre d’éclairs Type voeding Flitsvolgtijden Aantal flitsen Battery type Recycling times Number of flashes Tabelle 7: Maximale Leitzahlen* im HSS-Betrieb Tipo batterie Tempi di ricarica Numero ampi Tipo de pila Tiempo de secuencia de dest. - Seite 183 Anzeige . . .Erklärung „Remote Master“ Blitzgerät arbeitet als steuerndes Master-Blitzgerät auf der Kamera (S.15)..Manueller Blitzbetrieb (S.8). „ Off“ ..Zweitreflektor aus (S.16)..Automatik-Blitzbetrieb (S.8). „...
- Seite 186 Bitte helfen Sie mit die Umwelt, in der wir leben, zu erhalten. This will help to protect the environment in which we all live. Votre produit Metz a été conçu et fabriqué avec des matériaux et Il vostro prodotto Metz è stato progettato e realizzato con materi- composants de haute qualité, susceptibles d'être recyclés et réutili-...
- Seite 187 Hinweis: Opmerking: Avvertenza: In het kader de CE-markering werd Nell’ambito delle prove EMV per il Im Rahmen des CE-Zeichens wurde bei bij de EMV-test de correcte be-lich- segno CE è stata valutata la corretta der EMV-Prüfung die korrekte ting bepaald. esposizione.
- Seite 188 Entriegelungsknopf Hauptreflektor Reflektorkarte Bouton de déverrouillage pour réflecteur Carte-réflecteur Ontgrendelingsknop Hoofdreflector Hauptreflektor Reflecterende kaart Unlocking button for the main reflector Réflecteur principale Reflector card Pulsante di sblocco della parabola principale Pannello riflettente Hoofdreflector Botón de desbloqueo del reflector principal Tarjeta reflectante Main-reflector Parabola principale Weitwinkelstreuscheibe...
- Seite 189 Display Werkseinstellung (Reset) Display Mode Para Mode Para Select-Menü (Sonderfunktionen**) Display Gruppe B 5 sec. Display Gruppe A Mode-Menü* Parameter-Menü** TTL +1 Display Display ON/OFF Para — REAR ON/OFF Gruppe C Beep ON/OFF Remote Remote OFF/Master/Slave Bsp. für Displayanzeige des 58 AF-1: M (steht für Master) 1/3 —...
- Seite 190 Metz - Werke GmbH & Co KG • Postfach 1267 • D-90506 Zirndorf • info@metz.de • www.metz.de Consumer electronics Photoelectronics Plastics technology 706 47 0037.A7 Metz - always first class.