Herunterladen Inhalt Inhalt Diese Seite drucken
Metz MECABLITZ 58 AF-2 Sony Bedienungsanleitung

Metz MECABLITZ 58 AF-2 Sony Bedienungsanleitung

Vorschau ausblenden Andere Handbücher für MECABLITZ 58 AF-2 Sony:
Inhaltsverzeichnis

Werbung

Verfügbare Sprachen
  • DE

Verfügbare Sprachen

  • DEUTSCH, seite 1
MECABLITZ 58 AF-2 digital
für/for Sony-D-SLR Kameras
mit/with ADI / HSS / Preflash-TTL
Bedienungsanleitung
Gebruiksaanwijzing
Manuale istruzioni
Mode d'emploi
Operating instruction
Manual de instrucciones

Werbung

Inhaltsverzeichnis
loading

Inhaltszusammenfassung für Metz MECABLITZ 58 AF-2 Sony

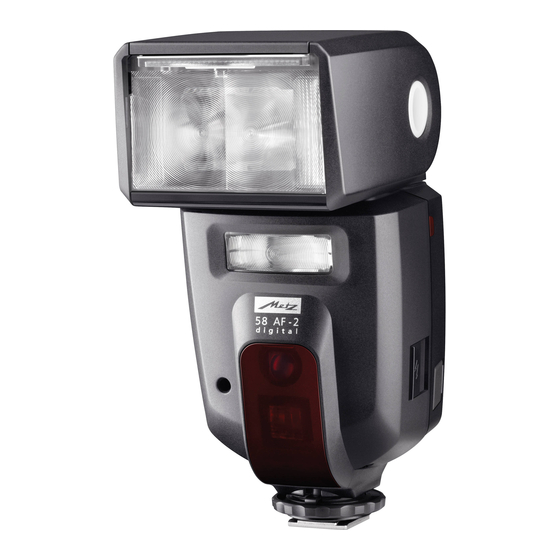
  • Seite 1 MECABLITZ 58 AF-2 digital für/for Sony-D-SLR Kameras mit/with ADI / HSS / Preflash-TTL Bedienungsanleitung Mode d’emploi Gebruiksaanwijzing Operating instruction Manuale istruzioni Manual de instrucciones...
  • Seite 2: Inhaltsverzeichnis

    1 Sicherheitshinweise ........3 8 Motor-Zoom-Reflektor .
  • Seite 3: Sicherheitshinweise

    • Aus verbrauchten Batterien kann Lauge austreten, was zur Beschädigung der Kontakte führt. Verbrauchte Batterien deshalb immer aus dem Gerät entnehmen. Vielen Dank, dass Sie sich für ein Metz Produkt entschieden haben. • Trockenbatterien dürfen nicht geladen werden. Wir freuen uns, Sie als Kunde begrüßen zu dürfen.
  • Seite 4: System-Blitzfunktionen

    2 System-Blitzfunktionen 3 Blitzgerät vorbereiten Die System-Blitzfunktionen sind speziell auf das Kamerasystem abgestimmte 3.1 Montage des Blitzgerätes Blitzfunktionen. In Abhängigkeit vom Kameratyp werden dabei verschiedene Blitzgerät auf die Kamera montieren Blitzfunktionen unterstützt. Kamera und Blitzgerät vor der Montage oder Demontage ausschalten. •...
  • Seite 5: Ein- Und Ausschalten Des Blitzgerätes

    Batterien austauschen 3.4 Power Pack P76 (Sonderzubehör) Die Akkus/Batterien sind leer bzw. verbraucht, wenn die Blitzfolgezeit (Zeit vom Wenn die Blitzanzahl und die Blitzfolgezeiten für Ihren Anwendungsfall nicht Auslösen eines Blitzes mit voller Lichtleistung, z.B. bei M, bis zum erneuten ausreichen, kann das Blitzgerät von einem Power Pack P76 (Sonderzubehör) mit Aufleuchten der Blitzbereitschaftsanzeige ) über 60 Sekunden ansteigt.
  • Seite 6: Displaybeleuchtung

    Die zuletzt benutzte Betriebseinstellung bleibt nach der automatischen Abschaltung 5.1 Einstellvorgang für die Blitzbetriebsarten erhalten und steht nach dem Einschalten sofort wieder zur Verfügung. Das Mode • Taste so oft drücken, bis im Display „Mode“ angezeigt wird. Blitzgerät wird durch Drücken einer beliebigen Taste bzw. durch Antippen des Folgende Betriebsarten stehen zur Auswahl: Kameraauslösers (Wake-Up-Funktion) wieder eingeschaltet.
  • Seite 7: Ttl-Betriebsarten

    5.2 TTL-Betriebsarten Das Blitzgerät muss in die Blitzbetriebsart „TTL“ geschaltet werden. In den TTL-Blitzbetriebsarten erreichen Sie auf einfache Art sehr gute Einstellvorgang: Blitzlichtaufnahmen. In diesen Blitzbetriebsarten wird die • Taste Mode so oft drücken, bis im Display „Mode“ Mode Blitzbelichtungsmessung von einem Sensor in der Kamera vorgenommen. Dieser angezeigt wird.
  • Seite 8: Automatischer Ttl -Aufhellblitzbetrieb

    Einstellvorgang: 5.3 Automatischer -Aufhellblitzbetrieb TTL HSS Mode • Taste Mode so oft drücken, bis im Display „Mode“ Bei den meisten Kameratypen wird in der Programmautomatik P und den Motiv- angezeigt wird. Programmen bei Tageslicht der automatische Aufhellblitzbetrieb aktiviert (siehe Folgende Betriebsarten stehen zur Auswahl: Kamerabedienungsanleitung).
  • Seite 9: Manueller Blitzbetrieb

    5.6 Manueller Blitzbetrieb Teillichtleistung einstellen: Im manuellen Blitzbetrieb wird vom Blitzgerät ungeregelt die volle Energie F 4.0 abgestrahlt, sofern keine Teillichtleistung eingestellt ist. Die Anpassung an die • Taste Para (Parameter) so oft drücken, bis im AZoom 35 Aufnahmesituation kann z.B. durch die Blendeneinstellung an der Kamera oder Display „P“...
  • Seite 10: Stroboskop-Blitzbetrieb

    5.7 Stroboskop-Blitzbetrieb Stroboskop-Blitzanzahl (N) Der Stroboskop-Betrieb ist eine manuelle Blitzbetriebsart. Dabei können Im Stroboskop-Blitzbetrieb kann die Blitzanzahl (N) pro Auslösung eingestellt mehrere Blitzbelichtungen auf einem Bild gemacht werden. Das ist besonders werden. interessant bei Bewegungsstudien und Effektaufnahmen. Die Blitzanzahl lässt sich von 2 bis 50 in Einer-Schritten einstellen. Die maximal Beim Stroboskop-Betrieb werden mehrere Blitze mit einer bestimmten mögliche manuelle Teillichtleistung wird dabei automatisch angepasst.
  • Seite 11: Blitzparameter (Parameter-Menü)

    Im Display wird die zu den eingestellten Parametern gültige Entfernung ange- 6 Blitzparameter (Parameter-Menü) zeigt. Durch Verändern des Blendenwertes oder der Teillichtleistung kann der Für eine korrekte Funktion des Blitzgerätes ist es erforderlich, dass verschiedene angezeigte Entfernungswert an die Entfernung zum Motiv angeglichen werden. Blitzparameter wie z.B.
  • Seite 12: Hauptreflektorposition (Zoom)

    – • Mit den -Tasten den gewünschten Wert einstellen. Wenn der Hauptreflektor seitlich oder nach oben geschwenkt ist erfolgt im AZoom-Betrieb keine Anzeige der Reflektorposition (siehe auch 10.1). Die Einstellung wird sofort wirksam. • Die Taste drücken. Das Display schaltet auf die normale Anzeige zurück. 6.3 Blitzbelichtungskorrektur (EV) (EV = Exposure Value;...
  • Seite 13: Manuelle Teillichtleistung (P = Teillichtleistung)

    6.4 Manuelle Teillichtleistung (P = Teillichtleistung) 7 Sonderfunktionen (Select-Menü) Im manuellen Blitzbetrieb und Stroboskop-Betrieb lässt sich die Die Sonderfunktionen werden mit der Taste (Select) ausgewählt. Je nach Lichtleistung durch Einstellen einer manuellen Teillichtleistung (P) der Kameratyp und eingestellter Blitzbetriebsart stehen verschiedene Aufnahmesituation anpassen.
  • Seite 14: Beep-Funktion (Beep)

    Beep-Signale bei den Einstellungen im Automatik-Blitzbetrieb: • Taste drücken und damit die Auswahl der Sonderfunktion bestätigen. • Ein kurzes Beep-Signal als Alarm erfolgt, wenn im Automatik-Blitzbetrieb die Blenden- und ISO-Einstellung zu einer Überschreitung des zulässigen • Mit den Tasten die gewünschte Lichtregelbereiches führen würde.
  • Seite 15: Blitzbelichtungsreihen (Fb)

    7.3 Blitzbelichtungsreihen (FB) • Die erste Aufnahme wird ohne F 5.1 Korrekturwert ausgeführt. Im Display In der Blitzbetriebsart Automatik kann eine Blitzbelichtungsreihe (Flash- AZoom 28 wird zusätzlich „FB1“ angezeigt. 7.7 m ISO 100 Bracketing FB) durchgeführt werden. • Die zweite Aufnahme erfolgt mit Minus- Eine Blitzbelichtungsreihe besteht aus drei aufeinander folgenden Korrektur.
  • Seite 16: Aufnahmeformat-Anpassung (Zoom Size)

    Einstellvorgang: 7.5 Aufnahmeformat-Anpassung (Zoom Size) Bei einigen Digitalkameras kann der Leuchtwinkel des Hauptreflektors an das KEYLOCK Select Chip-Format (Abmessungen des Bildaufnahmebausteines) angepasst werden. • Taste so oft drücken, bis im Display „Select“ m/ft Zoom Ext angezeigt wird. • Bei der Anzeige „Size ON“ ist die Aufnahmeformat-Anpassung aktiviert. Die Anzeige der Reflektorposition erfolgt im FourThirds - Format.
  • Seite 17: Remote-Slave-Betrieb (Remote)

    7.6 Remote-Slave-Betrieb (Remote) Der Remote-Betrieb besteht aus den Betriebsarten Controller „CTRL“ und Controller Plus „CTRL “ abhängig vom verwendeten Kamerasystem. Damit sich mehrere Remote-System im gleichen Raum nicht gegenseitig stören stehen vier unabhängig Remote-Kanäle (CHANNEL/CH 1, 2, 3 oder 4) zur Verfügung.
  • Seite 18 CTRL-Betrieb Kamera ohne eingebautem Blitzgerät Kamera mit eingebautem Blitzgerät • Blitzgerät, welches als Slave eingesetzt werden soll, auf Kamera montieren. • Taste so oft drücken, bis im Display „Select“ angezeigt wird. • Mit den Tasten den Menü-Punkt „Remote“ auswählen. Der •...
  • Seite 19: Ctrl -Betrieb

    CTRL -Betrieb In der Betriebsart „CTRL “ können die Slave-Blitzgeräte in zwei Slave-Gruppen „RMT“ und „RMT2“ arbeiten. Die Lichtverhältnisse können einge- stellt werden. Die Steuerung übernimmt das Controller-Blitzgerät (Master) auf der Kamera. Kamera ohne eingebautem Blitzgerät Kamera mit eingebautem Blitzgerät •...
  • Seite 20 Allgemein: • Der Aufbau kann grundsätzlich durch Drücken der Taste „AEL“ an der Kamera geprüft werden. Das Slave-Blitzgerät muss mit einem zeitverzögerten Blitz antworten. • Die Slave-Blitzgeräte müssen mit dem integrierten Sensor für den Remote-Betrieb das Licht des Controller-Blitzgerätes empfangen können. •...
  • Seite 21: M - Ft Umschaltung

    7.7 m - ft Umschaltung 7.8 Zweitreflektor Der Zweitreflektor dient zur Frontalaufhellung bei indirekter Beleuchtung Die Reichweitenanzeige im Display des Blitzgerätes kann wahlweise in Meter m wenn der Hauptreflektor seitlich oder nach oben abgeschwenkt ist (siehe oder Feet ft erfolgen. Die Einstellung erfolgt im Menü-Punkt m / ft. 10.3).
  • Seite 22: Einstelllicht (Ml) „Modelling Light

    7.9 Einstelllicht (ML) „Modelling Light“ 7.10 Automatische Geräteabschaltung (Standby) Beim Einstelllicht handelt es sich um ein Stroboskop-Blitzlicht mit hoher Werksseitig ist das Blitzgerät so eingestellt, dass es ca. 10 Minuten - Frequenz. Bei einer Dauer von ca. 3 Sekunden entsteht der Eindruck eines •...
  • Seite 23: Tastatur-Verriegelung (Keylock)

    Einstellvorgang: 7.11 Tastatur-Verriegelung (KEYLOCK) • Taste so oft drücken, bis im Display „Select“ Mit der Funktion zur Tastatur-Verriegelung (KEYLOCK) lassen sich die Tasten des Select Blitzgerätes gegen unbeabsichtigte Verstellung verriegeln. Bei aktivierter angezeigt wird. Standby Tastatur-Verriegelung wird im Display über drei Tasten das Symbol •...
  • Seite 24: Motor-Zoom-Reflektor

    8 Motor-Zoom-Reflektor 9 Reflektorvorsätze Die Anpassung der Zoomposition des Hauptreflektors kann für Weitwinkelstreuscheibe Objektivbrennweiten ab 24 mm (Kleinbildformat 24 x 36) erfolgen. Für Mit der Weitwinkelstreuscheibe können Brennweiten ab 12 mm ausgeleuchtet Objektive mit Brennweiten ab 12 mm kann die integrierte werden (Kleinbild-Format).
  • Seite 25: Blitztechniken

    10 Blitztechniken 10.3 Indirektes Blitzen mit Zweitreflektor Bei geschwenktem Hauptreflektor kann für eine Frontalaufhellung des Motivs 10.1 Indirektes Blitzen der Zweitreflektor im Select-Menü zusätzlich aktiviert werden (siehe 7.8). Durch indirektes Blitzen wird das Motiv weicher ausgeleuchtet und die ausge- Der Einsatz des Zweitreflektors ist grundsätzlich nur bei indirektem Blitzen prägte Schattenbildung verringert.
  • Seite 26: Manuelle Blitzbelichtungskorrekturen

    10.5 Manuelle Blitzbelichtungskorrekturen 11 Blitzbereitschaftsanzeige Die Blitzbelichtungsautomatik des Blitzgerätes und der meisten Kameras ist auf Bei aufgeladenem Blitzkondensator leuchtet am Blitzgerät einen Reflexionsgrad von 25 % (durchschnittlicher Reflexionsgrad von die Blitzbereitschaftsanzeige auf und zeigt damit die Blitzmotiven) abgestimmt. Ein dunkler Hintergrund, der viel Licht absorbiert oder Blitzbereitschaft an.
  • Seite 27: Belichtungskontrollanzeige

    13 Belichtungskontrollanzeige Die Reichweite kann wahlweise in Meter (m) oder Feet (ft) erfolgen (siehe 7.8). Bei geschwenktem Hauptreflektor und im Remote-Betrieb erfolgt Die Belichtungskontrollanzeige „o.k.“ leuchtet nur, keine Reichweitenanzeige! wenn die Aufnahme im TTL- bzw. Automatik- Blitzbetrieb richtig belichtet wurde! Automatische Anpassung der Reichweitenanzeige Die Kameras übertragen die Blitzparameter (z.B.für Lichtempfindlichkeit ISO, Erfolgt keine Belichtungskontrollanzeige „o.k.“...
  • Seite 28: Synchronisation Auf Den 2.Verschlussvorhang

    15.2 Synchronisation auf den 2.Verschlussvorhang 15.4 Kurzzeitsynchronisation HSS Einige Kameras bieten die Möglichkeit zur Synchronisation auf den Verschiedene Kameras mit Schlitzverschluss unterstützen die 2.Verschlussvorhang (REAR,2nd curtain SLOW2). Dabei wird das Blitzgerät erst Kurzzeitsynchronisation HSS (siehe Kamerabedienungsanleitung). Mit dieser zum Ende der Verschlusszeit ausgelöst. Dies ist vor allem bei Belichtungen mit Blitzbetriebsart ist es möglich, auch bei kürzeren Verschlusszeiten als der langen Verschlusszeiten (>...
  • Seite 29: Mehrzonen-Af-Meßblitz

    16 Mehrzonen-AF-Meßblitz 17 Zündungssteuerung (Auto-Flash) Sobald die Umlichtverhältnisse für eine automatische Fokussierung nicht mehr Ist das vorhandene Umgebungslicht für eine Belichtung im normalen Modus ausreichen, wird von der Kamera der Mehrzonen-AF-Meßblitz im Blitzgerät ausreichend, so verhindert die Kamera die Blitzauslösung. Die Belichtung erfolgt aktiviert.
  • Seite 30: Wartung Und Pflege

    Fall, so wenden Sie sich bitte an Ihren Fachhändler. (Firmware-Update). Nachfolgend sind einige Probleme aufgeführt, die in der Blitz-Praxis auftreten Nähere Informationen finden Sie im Internet auf der Metz-Homepage: können. Unter den jeweiligen Punkten sind mögliche Ursachen bzw. Abhilfen für www.metz.de diese Probleme aufgeführt.
  • Seite 31 Sie nur ein Metz Power Pack P76 an. e) Der AF-Messblitz des Blitzgerätes wird nicht aktiviert. • Ein Metz Power Pack P76 ist angeschlossen und im Batteriefach des mecablitz • Das Blitzgerät ist nicht blitzbereit. sind noch Batterien/Akkus eingelegt. Batterien/Akkus aus dem Batteriefach •...
  • Seite 32 l) Der Zweitreflektor lässt sich nicht aktivieren bzw. löst kein Blitzlicht aus q) Die Aufnahmen sind zu hell. • Die Blitzbetriebsarten Stroboskop, Remote und Einstelllicht (ML) werden vom • Bei Aufnahmen im Nahbereich ist zu beachten, dass bestimmte Mindestbe- leuchtungsabstände eingehalten werden müssen, um eine Überbelichtung zu Zweitreflektor nicht unterstützt.
  • Seite 33: Technische Daten

    Auslieferungsumfang: Niederspannungs-IGBT-Zündung Blitzgerät mit Integrierter Weitwinkelstreuscheibe, Bedienungsanleitung, Blitzanzahlen (bei jeweils voller Lichtleistung): Gürteltasche T58, Standfuß. • Ca. 250 mit NiMH Akkus 2100mAh • Ca. 180 mit Hochleistungs Alkali-Mangan-Batterien • Ca. 430 mit Metz Power-Pack P76 (Sonderzubehör) (bei jeweils voller Lichtleistung)
  • Seite 34: Sonderzubehör

    21 Sonderzubehör Batterie-Entsorgung Für Fehlfunktionen und Schäden am Blitzgerät, verursacht durch die Batterien/Akkus gehören nicht in den Hausmüll! Bitte bedienen Sie sich bei der Verwendung von Zubehör anderer Hersteller, wird keine Gewährleistung Rückgabe verbrauchter Batterien/Akkus eines vorhandenen Rücknahmesystems. übernommen! Bitte geben Sie nur entladene Batterien/Akkus ab. Batterien sind in der Regel •...
  • Seite 35: Garantiebestimmungen

    6. Beanstandete Geräte bitten wir zusammen mit dem Kaufbeleg entweder über den Fachhändler oder direkt an die Firma Metz-Werke GmbH & Co KG - Zentralkundendienst - Ohmstrasse 55, 90513 Zirndorf, transportsicher ver- Metz-Werke GmbH & Co KG packt unter genauer Schilderung der Beanstandung einzusenden.
  • Seite 36 7.11 Verrouillage du clavier (KeyLock) ......57 1 Consignes de sécurité ........37 2 Fonctions flash dédiées .
  • Seite 37: Avant-Propos

    • Sortez immédiatement les piles usées du flash ! En effet, les piles usées peuvent „couler“ et provoquer une dégradation du flash. Nous vous remercions d’avoir choisi un produit Metz et sommes heureux de • Ne rechargez pas les piles sèches ! vous saluer au sein de la grande famille de nos clients.
  • Seite 38: Fonctions Flash Dédiées

    2 Fonctions flash dédiées 3 Préparation du flash Les fonctions flash dédiées sont des fonctions de flash adaptées spécialement à 3.1 Montage du flash un système d’appareil photo. Les fonctions de flash supportées dépendent alors Fixation du flash sur l’appareil du type d’appareil.
  • Seite 39: Mise En Marche Et Coupure Du Flash

    Si le flash reste inutilisé pendant une longue période, retirez les piles ou 3.4 Power Pack P76 (accessoire spécial) accus de l’appareil. Il est possible d’utiliser le Power Pack P76 (accessoire spécial) pour alimenter le flash en énergie si le nombre d’éclairs et les temps de recyclage ne suffisent pas Remplacement des piles pour votre application.
  • Seite 40: Éclairage De L'écran

    immédiatement à la remise en marche. Le flash est réactivé en appuyant sur une 5.1 Procédure de réglage des modes de fonctionnement du flash touche quelconque ou en enfonçant à mi-course le déclencheur de l’appareil Mode • Appuyez à plusieurs reprises sur la touche jusqu’à...
  • Seite 41: Modes De Fonctionnement Ttl

    5.2 Modes de fonctionnement TTL flash. La sélection ou le paramétrage des modes pré-éclair TTL et mesure ADI se fait sur l’appareil photo (voir le mode d'emploi de l'appareil photo). Les modes flash TTL vous permettent de réussir sans peine vos photos au flash. Dans ces modes, la mesure de l’exposition est effectuée par une cellule intégrée à...
  • Seite 42: Dosage Automatique Flash/Ambiance Ttl

    Procédure de réglage: 5.3 Dosage automatique flash/ambiance TTL HSS Mode • Appuyez à plusieurs reprises sur la touche Mode Sur la plupart des appareils photo, le mode de dosage automatique jusqu’à ce que „Mode“ apparaisse sur l’écran. flash/ambiance est activé dans le mode automatique des programmes P et dans les modes Sujet à...
  • Seite 43: Mode Flash Manuel

    5.6 Mode flash manuel Réglage de la puissance partielle : En mode flash manuel , le flash émet un éclair non dosé avec sa pleine • Appuyez à plusieurs reprises sur la touche Para F 4.0 puissance si aucune puissance partielle n’est réglée. L’adaptation à la situation (Paramètres) jusqu’à...
  • Seite 44: Mode Flash Stroboscope

    5.7 Mode flash stroboscope Nombre d’éclairs en mode flash stroboscope (N) Le mode stroboscope est un mode flash manuel. Il est possible d’effectuer Il est possible de régler le nombre d’éclairs (N) par déclenchement en mode plusieurs expositions au flash sur une prise de vue. Cela est particulièrement flash stroboscope.
  • Seite 45: Paramètres Du Flash (Menu „Parameter" (Paramètres)

    La distance valable pour les paramètres réglés s’affiche à l’écran. Il est possible 6 Paramètres du flash (menu „Parameter“ (Paramètres) d’adapter la valeur de la distance affichée à la distance au sujet en modifiant Il est nécessaire d’adapter différents paramètres du flash, comme par ex. la posi- l’ouverture du diaphragme ou la puissance partielle.
  • Seite 46: Position Du Réflecteur Principal (Zoom)

    – • Réglez la valeur souhaitée avec les touches Si le réflecteur principal est basculé sur le côté ou vers le haut, il ne s'effectue aucun affichage de la position de réflecteur en mode AZoom Le réglage prend immédiatement effet. (voir aussi 10.1).
  • Seite 47: Puissance Partielle Manuelle (P)

    6.4 Puissance partielle manuelle (P) 7 Fonctions spéciales (menu „Select“ (Sélectionner)) Dans le mode flash manuel et le mode stroboscope , il est possible La touche (Sélectionner) permet de sélectionner les fonctions spéciales. d’adapter la puissance lumineuse à la situation de prise de vue en réglant une puis- Il existe plusieurs fonctions spéciales en fonction du type de l’appareil photo et sance partielle manuelle (P).
  • Seite 48: Fonction Bip (Beep)

    Signaux acoustiques pour les réglages en mode flash automatique : • Appuyez sur la touche (Réglage) et confirmez ainsi la sélection de la fonction spéciale. • Un bref bip fait œuvre d’alarme lorsque les réglages de l’ouverture du dia- phragme et ISO entraîneraient un dépassement de la plage de réglage de la •...
  • Seite 49: Séries D'expositions Au Flash (Fb - Flash-Bracketing)

    7.3 Séries d’expositions au flash (FB - Flash-Bracketing) • La première photo est prise sans valeur F 5.1 de correction. „FB1“ apparaît également En mode de fonctionnement automatique de flash , une séquence d'exposi- AZoom 28 sur l’écran. 7.7 m ISO 100 tion au flash (Bracketing au Flash) peut être effectuée.
  • Seite 50: Adaptation Au Format De La Prise De Vue (Zoom Size)

    7.5 Adaptation au format de la prise de vue (Zoom Size) Procédure de réglage : Sur certains appareils photo numériques, l'angle d'éclairage du réflecteur prin- • Appuyez à plusieurs reprises sur la touche KEYLOCK Select cipal peut être adapté au format de la puce électronique (dimensions de l'élé- jusqu’à...
  • Seite 51: Mode Remote Sans Fil (Remote)

    7.6 Mode remote sans fil (Remote) Le mode remote est composé des modes contrôleur «CTRL» et contrôleur Plus «CTRL », selon le système utilisé. Pour éviter que plusieurs systèmes remote n’interfèrent mutuellement dans le même espace, il existe quatre canaux remote autonomes (CHANNEL/CH 1, 2, 3 ou 4).
  • Seite 52 Mode CTRL Appareil photo avec flash intégré Appareil photo sans flash intégré ne prenant en charge aucun «CTRL » • Presser la touche jusqu'à ce que l'écran affiche «Select». • Monter sur l’appareil photo le flash devant être utilisé comme flash esclave. •...
  • Seite 53 Mode CTRL En mode «CTRL », les flashs esclaves peuvent fonctionner en deux groupes esclaves «RMT» et «RMT2». La luminosité peut être réglée. La commande prend en charge le flash contrôleur (maître) sur l’appareil photo. Appareil photo sans flash intégré Appareil photo avec flash intégré...
  • Seite 54 Informations générales: • La structure peut globalement être vérifiée en appuyant sur la touche «AEL» de l’appareil photo. Le flash esclave doit répondre avec un certain retard par un éclair. • Les flashs esclaves doivent pouvoir recevoir la lumière du flash contrôleur avec le photo-capteur intégré pour le mode Remote •...
  • Seite 55: Commutation Mètres - Pieds (M / Ft)

    7.7 Commutation mètres - pieds (m / ft) 7.8 Réflecteur secondaire La portée peut être affichée sur l’écran du flash soit en mètres (m) soit en pieds Le réflecteur secondaire i permet l'éclairage frontal dans les situations de lumi- (feet = ft). Le réglage a lieu à l’option du menu „m / ft“. nosité...
  • Seite 56: Lumière Pilote (Ml - Modelling Light)

    7.9 Lumière pilote (ML - Modelling Light) 7.10 Coupure automatique du flash (veille) La lumière pilote est une séquence d’éclairs stroboscopiques à haute fréquence En usine, le flash est réglé pour se mettre en veille (Auto-OFF) 10 minutes envi- d’une durée de 3 secondes donnant l’impression d’une lumière pour ainsi dire ron après continue.
  • Seite 57: Verrouillage Du Clavier (Keylock)

    Procédure de réglage : 7.11 Verrouillage du clavier (KEYLOCK) • Appuyez à plusieurs reprises sur la touche La fonction de verrouillage du clavier (KEYLOCK) permet de verrouiller les tou- Select ches du flash pour empêcher tout déréglage inopportun. Le symbole jusqu’à...
  • Seite 58: Asservissement De La Tête Zoom Motorisée

    8 Asservissement de la tête zoom motorisée 9 Réflecteur adaptateur La position du zoom du réflecteur principal peut s’adapter à des distances foca- Diffuseur grand-angle les d’au moins 24 mm (film de petit format 24 x 36). Il est possible de rabattre Le diffuseur grand-angle permet de couvrir des focales d’objectifs à...
  • Seite 59: Techniques De Photographie Au Flash

    10 Techniques de photographie au flash 10.3 Éclairage indirect au flash avec un réflecteur secondaire Il est également possible d’activer le réflecteur secondaire dans le menu 10.1 Éclairage indirect au flash „Select“ (Sélectionner) pour déboucher frontalement les ombres du sujet lorsque Avec l’éclairage indirect, le sujet est éclairé...
  • Seite 60: Corrections Manuelles D'exposition Au Flash

    10.5 Corrections manuelles d’exposition au flash 11 Témoin de disponibilité du flash L’automatisme d’exposition au flash du flash de la plupart des appareils photo Lorsque le condensateur du flash est chargé, le témoin de est calibré pour une réflectance de 25 % (réflectance moyenne des sujets pris au disponibilité...
  • Seite 61: Témoin De Bonne Exposition Avec Flash

    13 Témoin de bonne exposition avec flash La portée peut être affichée soit en mètres (m) soit en pieds (ft) (voir 7.8). La portée n’est pas indiquée lorsque le réflecteur principal est basculé et Le témoin de bonne exposition " o.k. " ne s'affiche en mode remote.
  • Seite 62: Synchronisation Sur Le 2Ème Rideau (Mode 2Nd Curtain Slow2)

    15.2 Synchronisation sur le 2ème rideau (mode 2nd curtain SLOW2) 15.4 Synchronisation haute vitesse HSS Certains appareils photo offrent la possibilité de synchroniser sur le 2ème ride- Différents appareils photo prennent en charge la synchronisation haute vitesse au (REAR, mode 2nd curtain SLOW2). Dans ce cas, l’éclair n’est déclenché que (voir le mode d'emploi de l'appareil photo).
  • Seite 63: Illuminateur Af À Plusieurs Zones

    16 Illuminateur AF à plusieurs zones 17 Inhibition de l’éclair Lorsque la lumière ambiante est insuffisante pour permettre une mise au point Si la lumière ambiante est suffisante pour une exposition en mode normal, automatique, l’appareil photo active l’illuminateur AF à plusieurs zones l’appareil empêche le déclenchement de l’éclair.
  • Seite 64: Maintenance Et Entretien

    Vous trouverez de plus amples informations à ce sujet sur Internet, sur le Vous trouverez ci-après quelques problèmes qui se sont produits dans la pratique. site Metz à l’adresse www.metz.de. Vous trouverez également les causes et solutions possibles pour ces problèmes.
  • Seite 65 Un symbole de pile s'affiche à l'écran. position actuelle du zoom de l’objectif. • Un bloc d'alimentation Metz P76 est connecté au mecablitz et des piles se trou- • L’appareil photo ne transmet aucune donnée au flash vent dans le compartiment à piles du mecablitz. Ôter les piles du mecablitz.
  • Seite 66 m) Le réglage de la correction manuelle d’exposition au flash en r) Il est impossible de modifier les paramètres du flash pour la sensibilité ISO mode TTL ne prend pas effet. et l’ouverture du diaphragme F. • L’appareil photo ne prend pas en charge la correction manuelle d’exposition •...
  • Seite 67: Caractéristiques Techniques

    • env. 4,5 s avec des piles alcalines au manganèse haute performance Modes flash: • env. 2,5 s avec le Power-Pack P76 de Metz (accessoire spécial) TTL standard non pré-éclair de mesure, pré-éclair TTL, mesure ADI, mode flash (à chaque fois à pleine puissance lumineuse) automatique A, manuel M, mode stroboscope, synchronisation haute vitesse Iluminación:...
  • Seite 68: Accessoires En Option

    21 Accessoires en option Elimination des batteries Ne pas jeter les batteries dans les ordures ménagères. Nous déclinons toute responsabilité pour le mauvais fonctionnement et l’endommagement du flash dus à l’utilisation d’accessoires d’autres con- Veuillez rendre vos batteries usées là où elles sont éventuellement reprises dans structeurs ! votre pays.
  • Seite 70 1 Veiligheidsinstructies ........71 7.11 Vergrendeling van de toetsen (KeyLock) .
  • Seite 71: Veiligheidsinstructies

    • Uit verbruikte batterijen kan loog lekken, wat beschadiging van de contactpun- ten tot gevolg heeft. Haal daarom verbruikte batterijen altijd uit het apparaat. Hartelijk dank voor uw beslissing om een product van Metz aan te schaffen. • Batterijen kunnen niet worden opgeladen.
  • Seite 72: Dedicated Flitsfuncties

    2 Dedicated flitsfuncties 3 Flitser gereedmaken Dedicated flitsfuncties zijn speciaal op het camerasysteem ingestelde flitsfunc- 3.1 Het aanbrengen van de flitser ties. Afhankelijk van het type camera worden daarbij verschillende flitsfuncties Flitser op de camera monteren ondersteund. Camera en flitser vóór het aanbrengen of afnemen uitschakelen. •...
  • Seite 73: Batterijen Verwisselen

    Batterijen verwisselen 3.4 Power-pack P76 (optioneel accessoire) De accu’s / batterijen zijn leeg, c.q. verbruikt. Als de flitsvolgtijd (tijd tussen het Als het aantal flitsen en de flitsvolgtijden voor uw toepassing niet voldoen, kan ontsteken van een flits met vol vermogen, bijv. bij ‘M’ tot het opnieuw oplichten de flitser door een Power-Pack P76 (optioneel accessoire) van energie worden van de aanduiding van flitsparaatheid meer dan 60 seconden duurt...
  • Seite 74: Displayverlichting

    den en staat na het inschakelen onmiddellijk weer ter beschikking. De flitser 5.1 Het instellen van de flitsfuncties wordt door op een willekeurige toets te drukken, c.q. door het aantippen van de Mode • Druk zo vak op de toets , dat in het display ‘Mode’...
  • Seite 75: Ttl-Functies

    5.2 TTL-functies Op de flitser moet de flitsfunctie TTL worden ingesteld. In de TTL-flitsfuncties komt u op eenvoudige wijze tot zeer goede flitsopnamen. Het instellen: In deze flitsfuncties wordt de belichtingsmeting door een sensor in de camera • Druk zo vaak op de toets Mode , dat in het display Mode...
  • Seite 76: Automatische Ttl -Invulflitsregeling

    Het instellen: 5.3 Automatische -invulflitsregeling Bij de meeste camera's wordt bij geprogrammeerd, automatisch flitsen P en bij TTL HSS Mode de onderwerpsprogramma's bij daglicht, de automatische invulflitsregeling • Druk zo vaak op de toets Mode , dat in het display geactiveerd (zie de gebruiksaanwijzing van uw camera).
  • Seite 77: Flitsen Met Manual-Instellingen

    5.6 Flitsen met manual-instellingen Het instellen van een deelvermogen: F 4.0 In de functie van flitsen met manual-instellingen wordt door de flitser de AZoom 35 volle energie uitgestraald zonder dat die geregeld wordt. De aanpassing aan • Druk zo vaak op de toets Para (parameter), dat in 2,1 m...
  • Seite 78: Stroboscopisch Flitsen

    5.7 Stroboscopisch flitsen Aantal flitsen (N) bij stroboscopisch flitsen De functie stroboscopisch flitsen is een flitsfunctie met handinstelling (manu- In deze functie kan het aantal flitsen (N) per opname worden ingesteld. al). Hierbij kunnen meerdere flitsbelichtingen op één enkel beeld gemaakt wor- Het aantal flitsen kan tussen 2 en 50 stapsgewijs worden ingesteld.
  • Seite 79: Flitsparameters (Menu 'Parameter')

    In het display wordt de bij de ingestelde parameters geldende afstand aangege- 6 Flitsparameters (menu ‘Parameter’) ven. Door het veranderen van de diafragmawaarde of het deelvermogen kan Voor het correct functioneren van de flitser is het noodzakelijk dat de verschil- de waarde van de afstand tot het onderwerp worden aangepast.
  • Seite 80: Stand Van De Hoofdreflector (Zoom)

    – • Stel met de toetsen de gewenste waarde in. De instelling treedt Als de hoofdreflector opzij of naar boven is gezwenkt, verschijnt er in de functie AZoom geen aanduiding van de reflectorstand (zie 10.1). onmiddellijk in werking. • Druk op de toets .
  • Seite 81: Met De Hand In Te Stellen Deelvermogen (P)

    6.4 Met de hand in te stellen deelvermogen (P) 7 Extra functies (menu ‘Select’) In de manual flitsfunctie en de stroboscopisch-flitsenfunctie is het flits- De extra functies worden met de toets (Select) gekozen. Afhankelijk van vermogen door het met de hand (manual) instellen van een deelvermogen (P) het type camera en de ingestelde flitsfunctie staan er verschillende extra functies aan te passen aan de opnamesituatie.
  • Seite 82: Beep-Functie (Beep)

    Beep-signalen bij de instellingen in de automatisch-flitsenfunctie: • Druk op de toets en bevestig daarmee de keuze van de extra functie. • Een korte piep als alarm treedt op, wanneer bij de automatisch-flitsenfunctie de diafragma- en ISO-instellingen tot het overschrijden van het regelbereik •...
  • Seite 83: Flitsbelichtingstrapje (Fb)

    7.3 Flitsbelichtingstrapje (FB) • De eerste opname wordt zonder correc- F 5.1 tie uitgevoerd. In het display verschijnt In de functie automatisch-flitsen kan een flitsbelichtingstrapje (Flash- AZoom 28 bovendien ‘FB 1’. 7.7 m ISO 100 Bracketing FB) worden uitgevoerd. Een flitsbelichtingstrapje bestaat uit drie opeenvolgende flitsopnamen met elk een andere correctiewaarde.
  • Seite 84: Aanpassing Aan Het Formaat Van De Opnamechip (Zoom-Size)

    Het instellen: 7.5 Aanpassing aan het formaat van de opnamechip (Zoom-size) Bij sommige digitale camera's kan de verlichtingshoek van de hoofdreflector KEYLOCK Select worden aangepast aan het formaat van de opnamechip (afmetingen van het • Druk zo v aak op de toets , dat in het display m/ft opname-element)
  • Seite 85: Remote-Slaaffunctie (Remote)

    7.6 Remote-slaaffunctie (Remote) De remotefunctie bestaat uit de functies Controller ‘CTRL‘ en Controller Plus ‘CTRL ‘, afhankelijk van het gebruikte camerasysteem. Om te voorkomen dat meerdere remotesystemen in één ruimte elkaar storen staan u vier onafhankelijke remotekanalen (CHANNEL/CH 1, 2, 3 of 4) ter beschikking.
  • Seite 86 CTRL-functie Camera met ingebouwde flitser, Camera zonder ingebouwde flitser die ‘CTRL ‘ niet ondersteunt • Druk zo vaak op de toets , dat in het display ‘Select‘ wordt aange- • Breng de flitser die als slaafflitser ingezet moet worden aan op de camera. geven.
  • Seite 87 CTRL -functie In de functie ‘CTRL ‘ kunnen de slaafflitsers in twee slaafgroepen ‘RMT‘ en ‘RMT2‘ werken. De verhoudingen van de lichtafgifte tussen die twee kan daarbij worden ingesteld. De sturing van de slaafflitsers neemt de controllerflitser (Master) op de camera voor zijn rekening. Camera zonder ingebouwde flitser Camera met ingebouwde flitser •...
  • Seite 88 Algemeen: • De opbouw kan in principe door op de toets ‘AEL‘ op de camera te drukken, worden getest. De slaafflitser moet met een in tijd iets vertraagde flits antwoorden. • De slaafflitsers moeten met de ingebouwde sensor voor de remotefunctie het licht van de controllerflitser kunnen ontvangen.
  • Seite 89: Schakelen Tussen Meter En Feet (M / Ft)

    7.7 Schakelen tussen meter en feet (m / ft) 7.8 Hulpreflector De aanduiding van de reikwijdte in het display van de flitser kan naar keuze in De hulpreflector dient voor het frontaal ophelderen als de hoofdreflector meters m of in feet ft plaatsvinden. De instelling vindt in het item m / ft plaats. voor indirect flitsen naar de zijkant of naar boven is gezwenkt (zie 10.3).
  • Seite 90: Instellicht (Ml) 'Modelling Light

    7.9 Instellicht (ML) ‘Modelling Light’ 7.10 Automatische uitschakeling (Standby) Bij het instellicht gaat het om een stroboscopisch flitslicht met hoge frequentie. In de fabriek is de flitser zo ingesteld, dat hij ong 10 minuten – Bij een duur van ong. 3 seconden ontstaat de indruk van een quasi continu •...
  • Seite 91: Vergrendeling Van De Toetsen (Keylock)

    Het instellen: 7.11 Vergrendeling van de toetsen (KEYLOCK) • Druk zo vaak op de toets , dat in het display Met de functie voor het vergrendelen van de toetsen (KEYLOCK) kunnen de toet- Select sen van de flitser tegen onbedoeld verstellen worden vergrendeld. Als de toets- ‘Select’...
  • Seite 92: Motorisch Gestuurde Zoomreflector

    8 Motorisch gestuurde zoomreflector 9 Hoofdreflector adapter Het aanpassen van de zoomstand van de hoofdreflector kan bij objectieven met Groothoekdiffusor een brandpuntsafstand vanaf 24 mm (kleinbeeld 24 x 36 mm) plaatsvinden. Met de groothoekdiffusor wordt de verlichtingshoek van de flitser aangepast Voor objectieven met een brandpuntsafstand vanaf 12 mm kan de ingebouwde aan objectieven met een brandpuntsafstand vanaf 12 mm (kleinbeeldformaat).
  • Seite 93: Flitstechnieken

    10 Flitstechnieken 10.3 Indirect flitsen met de hulpreflector Bij gezwenkte hoofdreflector kan als extra voor frontale opheldering van het 10.1 Indirect flitsen onderwerp de hulpreflector via het menu ‘Select’ worden geactiveerd (zie 7.8). Door indirect te flitsen wordt het onderwerp zachter verlicht en vermindert de Het gebruiken van de hulpreflector is in principe alleen zinvol en mogelijk als duidelijke schaduwwerking.
  • Seite 94: Met De Hand In Te Stellen Correcties Op De Flitsbelichting

    10.5 Met de hand in te stellen correcties op de flitsbelichting 11 Aanduiding van flitsparaatheid De belichtingsautomaat van de flitser en van de meeste camera’s is afgestemd Zodra de flitscondensator opgeladen is, licht op de flit- op een reflectiegraad van 25% (gemiddelde reflectiegraad van flitsonderwer- ser de aanduiding van flitsparaatheid ) op en pen).
  • Seite 95: Aanduiding Van De Belichtingscontrole

    13 Aanduiding van de belichtingscontrole De reikwijdte kan naar keuze in meter (m) of feet (ft) plaatsvinden (zie 7.8). Bij gezwenkte hoofdreflector wordt geen reikwijdte aangegeven! De aanduiding van belichtingscontrole „o.k.“ licht alleen op, als de opname in de TTL-flitsfunctie, c.q. de Automatisch aanpassen van de aanduiding van de flitsreikwijdte automatisch-flitsenfunctie correct werd belicht! De camera's geven de flitsparameters (bijv.
  • Seite 96: Synchronisatie Bij Het Dichtgaan Van De Sluiter (2Nd Curtain,Slow2)

    15.2 Synchronisatie bij het dichtgaan van de sluiter (2nd curtain,SLOW2) 15.4 HSS-synchronisatie bij korte belichtingstijden Sommige camera’s bieden de mogelijkheid de flits te synchroniseren bij het Sommige camera’s ondersteunen de HSS-synchronisatie bij korte belichtingstij- dichtgaan van de sluiter (2nd curtain,SLOW2). Daarbij wordt de flits pas aan den (zie de gebruiksaanwijzing van uw camera).
  • Seite 97: Meerzone Af-Meetflits

    16 Meerzone AF-meetflits 17 Ontsteeksturing (Auto-Flash) Is er voldoende omgevingslicht voor een belichting in de normale modus, dan Zodra er niet meer voldoende omgevingslicht om voor automatisch scherp te verhindert de camera het ontsteken van een flits. De belichting vindt dan plaats kunnen stellen, wordt door de camera de meerzone AF-meetflits in de flitser met de in het display van de camera aangegeven belichtingstijd.
  • Seite 98: Onderhoud En Verzorging

    Hieronder zijn enkele problemen opgevoerd, die in de praktijk van het flitsen Firmware-update). kunnen optreden. Onder elk punt zijn mogelijke oorzaken, c.q. remedies voor Nadere informaties vindt u in het internet op de Metz-homepage: deze problemen aangegeven. www.metz.de a) In het display verschijnt de reikwijdte niet 18.2 Reset...
  • Seite 99 In het display verschijnt een batterijsymbool de centrale AF-sensor! • Op de mecablitz is een Metz Power Pack P76 aangesloten en in het batterij- f) De stand van de zoomreflector wordt niet automatisch aangepast aan de vak van de mecablitz bevinden zich batterijen. Haal deze batterijen uit de actuele zoomstand van het objectief.
  • Seite 100 m) De instelling voor met de hand in te stellen correcties op de TTL-flitsbelich- r) De flitsparameters voor de lichtgevoeligheid ISO en de diafragmawaarde F ting werkt niet. zijn op de flitser niet te verstellen. • De camera ondersteunt de met de hand in te stellen correctiesop de TTL-flits- •...
  • Seite 101: Technische Gegevens

    Synchronisatie: Laagspannings-IGBT-ontsteking De levering omvat Aantallen flitsen: Flitser met ingebouwde groothoekdiffusor, gebruiksaanwijzing, • Ong. 250 met Metz NiMH accupak 2100mAh tas T58 en standvoet. • Ong. 180 met super-alkalimangaanbatterijen • Ong. 430 met Metz Power-Pack P76 (telkens bij vol vermogen)
  • Seite 102: Bijzondere Toebehoren

    21 Bijzondere toebehoren Afvoeren van de batterijen Voor foute werking van en schades aan de mecablitz, veroorzaakt door Batterijen horen niet bij het huisvuil. het gebruik van accessoires van andere fabrikanten, zijn wij niet aan- S.v.p. de batterijen bij een daarvoor bestemd inzamelpunt afgeven. sprakelijk.
  • Seite 104 1 Safety instructions ........105 7.11 KeyLock .
  • Seite 105: Safety Instructions

    • Do not expose the flash unit or battery charger to dripping or splashing water such as rain! Thank you for purchasing a Metz product. We are happy to welcome you as a • Protect the flash unit from excessive heat and humidity! Do not store the customer.
  • Seite 106: Dedicated Flash Functions

    2 Dedicated flash functions 3 Preparing the flash unit for use Dedicated flash functions are flash functions that have been specially adapted to 3.1 Mounting the flash unit a given camera system. Depending on the type of camera, different flash func- Mounting the flash unit on the camera tions are supported.
  • Seite 107: Switching The Flash Unit On And Off

    Replacing batteries 3.4 Power Pack P76 (optional accessory) The batteries are flat or dead if the recycling time (elapsing from the triggering If a battery-operated flash does not meet your needs in terms of number of flas- of a full-power flash, e.g. in the M mode, to the moment the flash ready indica- hes and recycling times, a Power Pack P76 (optional) can be connected to the lights up again) exceeds 60 seconds.
  • Seite 108: Display Illumination

    If necessary, the Auto OFF function can be set to occur after 1 minute of 5.1 Adjusting procedure for flash operating modes inactivity, or can be deactivated (see 7.10). Mode • Press the button until the word „Mode“ appears on the display. You can choose from the following operating modes: 4 Display illumination TTL flash modes: Standard TTL without preflash, TTL preflash and ADI.
  • Seite 109: Ttl-Flash Modes

    5.2 TTL-flash modes Setting procedure: The TTL flash modes offer a very simple method of achieving very good flash Mode shots. In these modes, exposure readings are taken by a sensor built into the • Press the Mode button until „Mode“ flashes on the TTL HSS camera, which measures the amount of light through the camera lens LC display.
  • Seite 110: Automatic Ttl Fill-In Flash Mode

    Setting procedure: 5.3 Automatic fill-in flash mode With most camera models, the auto programme mode P and subject program- TTL HSS Mode me activate the automatic fill-in flash mode in daylight (see the camera's opera- • Press the Mode button until „Mode“ flashes on the ting manual).
  • Seite 111: Manual Flash Mode

    5.6 Manual flash mode Set partial light output: F 4.0 In the manual flash mode , the flash unit emits the full uncontrolled amount • Press the Para button (Parameters ) until „P“ flashes AZoom 35 of light if no partial light output has been selected. The specific photographic on the LC display for partial light output.
  • Seite 112: Strobe Flash Mode

    5.7 Strobe flash mode Strobe number of flashes (N) The strobe flash mode is a manual flash mode. It allows several flash expo- In strobe mode, the number of flashes per shot (N) can be selected. sures to be made on a single photo, which can be especially interesting for The number of flashes can be set from 2 to 50 in intervals of one.
  • Seite 113: Flash Parameters (Parameter Menu)

    The mecablitz LC display will indicate the flash-to-subject distance required for a 6 Flash parameters (Parameter menu) correct flash exposure, given the parameters selected. By changing the aperture For the flash unit to operate correctly, various flash parameters such as the setting or the partial light output, this value can be adjusted to fit the actual zoom position of the main reflector, aperture, ISO light sensitivity, etc.
  • Seite 114: Main Reflector Position (Zoom)

    – • Set the desired value using the buttons. If the main reflector is swivelled to the side or upwards, no reflector posi- tion is displayed in AZoom Mode (also see 10.1). The setting takes effect immediately. • Press the button to change the LC display back to the normal view.
  • Seite 115: Manual Partial Light Output (P)

    6.4 Manual partial light output (P) 7 Special functions (Select menu) In the manual mode and the strobe mode , the light output can also be Special functions are selected using the (Select) button. Depending on the adjusted to fit the shooting situation with the manual partial light output para- camera model and flash mode set, various special functions are available.
  • Seite 116: Beep Function (Beep)

    Beep signals when adjusting automatic mode settings: • Press the key to confirm the special function selection. • A short beep signal as an alarm in automatic mode indicates that the apertu- re and ISO settings exceed the permissible light control range. The auto aper- •...
  • Seite 117: Flash Bracketing Series (Fb)

    7.3 Flash Bracketing Series (FB) • The first shot is taken without a correction F 5.1 value. „FB 1“ will also appear on the display. A series of flash exposures (flash bracketing, FB) can be made in Automatic AZoom 28 7.7 m ISO 100 Flash Mode.
  • Seite 118: Adjusting Exposure Format (Zoom Size)

    Setting procedure: 7.5 Adjusting exposure format (Zoom Size) With some digital cameras it is possible to adjust the light angle of the main KEYLOCK Select reflector to suit the chip format (the dimensions of the image recording module). • Press the button repeatedly until „Select“...
  • Seite 119: Remote Slave Mode (Remote)

    7.6 Remote-Slave-Mode (Remote) The remote mode consists of the modes Controller “CTRL” and Controller Plus “CTRL ”, depending on the camera system used.. To prevent several remote systems in the same room from interfering with each other, there are 4 independent remote channels (CHANNEL/CH 1, 2, 3 or 4).
  • Seite 120 CTRL mode Camera with integrated flash unit Camera without integrated flash unit which does not support “CTRL ” • Press the key repeatedly until "Select" appears on the display. • Mount the flash unit which is to be used as slave on the camera •...
  • Seite 121 CTRL mode In the “CTRL ” mode, the slave flash units can work in two slave groups “RMT” and “RMT2”. The light conditions can be set. The controller flash unit (master) on the camera assumes the control. Camera without integrated flash unit Camera with integrated flash unit •...
  • Seite 122 General: • In general, the design can be checked by pressing “AEL” on the camera. The slave flash unit must answer with a time-delayed flash. • The slave flash units must be able to receive the light from the controller flash unit with the integrated sensor for the remote mode •...
  • Seite 123: Meter-Feet Changeover (M/Ft)

    7.7 Meter-Feet changeover (m/ft) 7.8 Secondary reflector The maximum flash range indicated by the flash unit’s display can either be The secondary reflector i is used for frontal brightening in the case of indirect shown in meters or feet. The setting can be adjusted under the menu option lighting when the main reflector is pivoted to the side or upwards (see 10.3).
  • Seite 124: Modelling Light (Ml)

    7.9 Modelling Light (ML) 7.10 Auto OFF Function (Standby) The modelling light is a high-frequency stroboscopic flash. It creates the impres- To save battery power and prevent inadvertent battery discharge, the flash unit sion of a semi-permanent light for a duration of about 3 seconds. The modelling is factory-set to automatically switch over to standby mode, while flash readi- light enables the user to assess light distribution and the formation of shadows ness and the LC display are switched off about 10 minutes after -...
  • Seite 125: Keylock

    Setting procedure: 7.11 KEYLOCK • Press the button repeatedly until „Select“ The KEYLOCK function enables the user to lock the buttons on the flash unit to Select prevent them from inadvertently being pressed. When the KEYLOCK function is appears on the display. Standby activated, a symbol appears on the display above three buttons.
  • Seite 126: Motor Zoom Reflector

    8 Motor Zoom Reflector 9 Reflector adapter The zoom position of the main reflector can be adjusted for focal lengths of at Wide-angle diffuser least 24 mm (35 mm format). For lenses with focal lengths of 12 mm or more, With the wide angle diffuser , focal lengths of 12 mm or more can be illumi- the integrated wide-angle diffuser...
  • Seite 127: Flash Techniques

    10 Flash techniques 10.3 Bounce flash with secondary reflector When the main reflector is swivelled or tilted, the secondary reflector 10.1 Bounce flash also be activated in the Select Menu for frontal fill-in lighting of the subject Bounce flash illuminates the subject more softly and reduces dense shadows. It (see 7.8).
  • Seite 128: Manual Flash Exposure Corrections

    10.5 Manual flash exposure corrections 11 Flash readiness indication The auto flash exposure mode of the flash unit, as of most cameras, is adjusted When the flash capacitor is charged, the flash readiness to a reflection factor of 25% (the average reflection factor of flash subjects). A symbol lights up on the flash unit, indicating that dark background that absorbs much of the light or a highly reflective bright...
  • Seite 129: Correct Exposure Indication

    13 Correct exposure indication The flash range can be expressed in either meters (m) or feet (ft) according to the chosen setting (see 7.8). There is no flash range indication in remote The correct exposure indication „OK“ only lights up mode or when the main reflector is swivelled or tilted.
  • Seite 130: Second Curtain Synchronisation (2Nd Curtain, Slow2)

    15.2 Second curtain synchronisation (2nd curtain, SLOW2) 15.4 High speed synchronisation HSS Some cameras offer the option of second-curtain synchronisation (2nd curtain Various cameras support the automatic high speed synchronisation HSS (see mode), in which the flash unit is not triggered until the end of the exposure your camera's operating instructions).
  • Seite 131: Multi-Zone Af Measuring Beam

    16 Multi-zone AF measuring beam 17 Triggering control (auto-flash) The multi-zone AF measuring beam is activated in the flash unit by the The camera prevents the triggering of a flash if the ambient light level is suffi- camera when the ambient lighting conditions become inadequate for automatic cient for an exposure in the normal mode.
  • Seite 132: Care And Maintenance

    (Firmware Update). Below is a list of some of the problems that may occur when the flash unit is used. For more information, visit the Metz homepage at www.metz.de. For each item, possible causes and remedies for the problem are listed.
  • Seite 133 Use only a Metz Power Pack P76. activated, or the secondary reflector does not trigger a flash. • A Metz Power Pack P76 is connected and there are still batteries in the bat- • The main reflector is in its normal position or tilted downwards.
  • Seite 134 n) Automatic switching to the flash sync speed fails to occur. s) The camera’s f-stop and ISO values are not displayed and cannot be manually set on the flash unit. • The camera has a between-the-lens shutter (as do most compact cameras), Switching to sync speed is therefore unnecessary.
  • Seite 135: Technical Data

    Number of flashes (at full light output): T58 bag, mounting foot • Approx. 250 with NiMH batteries 2100 mAh • Approx. 180 with high-capacity alkaline manganese batteries • Approx. 430 with Metz Power Pack P76 (special accessory) (at full light output)
  • Seite 136: Optional Accessories

    21 Optional accessories Disposal of batteries Do not dispose of spent batteries with domestic rubbish. We accept no liability for malfunctions of or damage to the flash unit caused by the use of accessories of other manufacturers. Please return spent batteries to collecting points should they exist in your country! •...
  • Seite 138 1 Per la vostra sicurezza ........139 7.11 Blocco dei tasti (KeyLock) .
  • Seite 139: Per La Vostra Sicurezza

    • Un’eventuale fuoriuscita di acido dalle batterie esaurite può provocare danni al flash. Rimuovere subito le batterie esaurite dall’apparecchio! Grazie per aver scelto un prodotto Metz! Siamo lieti di potervi dare il benvenu- • Le batterie a secco non possono essere ricaricate.
  • Seite 140: Funzioni Flash Dedicate

    2 Funzioni flash dedicate 3 Preparazione del flash Le funzioni flash dedicate sono funzioni messe a punto specificatamente per i 3.1 Montaggio del flash diversi sistemi di camera. Le funzioni del flash supportate dipendono dal tipo di Montaggio del flash sulla camera camera.
  • Seite 141: Accensione E Spegnimento Del Flash

    Sostituzione delle batterie 3.4 Power Pack P76 (accessorio a richiesta) Le pile o le batterie sono vuote o esaurite quando il tempo di ricarica (tempo Se il numero di lampi e i tempi di ricarica non sono sufficienti per la vostra che intercorre dall’emissione del lampo a piena potenza, ad es.
  • Seite 142: Illuminazione Del Display

    ne. Il lampeggiatore si riaccende non appena si preme un tasto qualsiasi oppure 5.1 Procedura per l’impostazione delle modalità del flash si tocca leggermente il pulsante di scatto della camera (funzione Wake-Up). Mode • Premete il tasto finché sul display non comparirà „Mode“. Possono essere selezionate le seguenti modalità: Se prevedete di non utilizzare il flash per lungo tempo è...
  • Seite 143: Modalità Flash Ttl

    5.2 Modalità flash TTL Il flash deve essere regolato sul modo flash TTL. Questa modalità permette di ottenere facilmente buone riprese con il flash. La Procedura per l’impostazione: misurazione dell’esposizione flash viene pertanto effettuata da un sensore incor- • Premete il tasto Mode finché...
  • Seite 144: Lampo Di Schiarita Automatico Ttl

    Procedura per l’impostazione: 5.3 Lampo di schiarita automatico Sulla maggior parte dei modelli di fotocamera, nel programma automatico P e TTL HSS Mode nei programmi per scene in luce diurna, viene attivato il flash di schiarita auto- • Premete il tasto Mode finché...
  • Seite 145: Modo Flash Manuale

    5.6 Modo flash Manuale Impostazione della potenza ridotta: Con il modo flash manuale il flash emette un lampo non dosato a potenza F 4.0 piena, salvo sia stata impostata la potenza ridotta. L’adattamento alla situazio- • Premete il tasto Para (Parametri) più...
  • Seite 146: Modo Flash Stroboscopico

    5.7 Modo flash Stroboscopico Numero lampi stroboscopio (N) Il modo flash Stroboscopico è un modo manuale. Con questa funzione è Con il modo flash Stroboscopico è possibile impostare il numero di lampi (N) possibile fare diverse esposizioni su una foto unica. Si rivela particolarmente per scatto.
  • Seite 147: Parametri Del Flash (Menu Parametri)

    Sul display viene indicata la distanza valida in funzione dei parametri impost- 6 Parametri del flash (Menu Parametri) ati. Modificando l’apertura del diaframma o la potenza ridotta il valore della Per un corretto funzionamento del lampeggiatore è necessario che i diversi distanza indicato può...
  • Seite 148: Posizione Della Parabola (Zoom)

    – • Impostate il valore desiderato con i tasti . L’impostazione è imme- Sia che la parabola principale sia orientata lateralmente sia che sia orientata verso l’alto, la sua posizione non viene visualizzata in modo diatamente attiva. AZoom (vedi anche 10.1). •...
  • Seite 149: Potenza Ridotta Manuale (P)

    6.4 Potenza ridotta manuale (P) 7 Funzioni speciali (Menu Select) Nel modo flash manuale e nel modo Stroboscopico è possibile adatta- Le funzioni speciali vengono selezionate con il tasto (Select). Secondo il re la potenza luminosa alle condizioni di ripresa impostando una potenza tipo di camera e del modo flash impostato sono disponibili diverse funzioni spe- ridotta manuale (P).
  • Seite 150: Funzione Bip (Beep)

    Segnali bip nelle impostazioni in modo flash automatico: • Premete il tasto e confermate così la selezione della funzione speciale. • Si ha un breve segnale bip di allarme se nel modo flash automatico l’imposta- zione di diaframma e ISO porterebbe a superare l’intervallo consentito di •...
  • Seite 151: Serie Di Esposizioni Flash (Fb)

    7.3 Serie di esposizioni flash (FB) • La prima ripresa viene effettuata senza F 5.1 valore di correzione. Sul display si visu- In modo flash automatico è possibile effettuare una serie di esposizioni AZoom 28 alizzerà in aggiunta „FB1“. 7.7 m ISO 100 flash (Flash-Bracketing FB).
  • Seite 152: Adattamento Formato Della Ripresa (Zoom Size)

    Procedura per l’impostazione: 7.5 Adattamento formato della ripresa (Zoom Size) Su alcune fotocamere digitali, l'angolo di illuminazione della parabola princi- KEYLOCK Select pale può essere adattato al formato del chip (dimensioni del componente di • Premete il tasto più volte finché sul display m/ft acquisizione dell'immagine).
  • Seite 153: Modo Flash Slave Con Controllo A Distanza (Remote)

    7.6 Modo flash slave con controllo a distanza (Remote) La modalità remote consiste nelle modalità Controller "CTRL" e Controller Plus "CTRL ”, indipendentemente dal tipo di fotocamera utilizzato. Per fare in modo che più sistemi remote nello stesso ambiente non si disturbino a vicenda, sono disponibili 4 canali remote indipendenti (CHANNEL/CH 1, 2, 3 o 4).
  • Seite 154 Modalità CTRL Fotocamera con flash integrato Fotocamera senza flash integrato che non supporta "CTRL ” • Premere tante volte il tasto finché non compare "Select" sul display. • Montare sulla fotocamera il flash che deve essere utilizzato come slave. • Impostare la fotocamera sulla modalità "WL". •...
  • Seite 155 Modalità CTRL Nella modalità "CTRL ” i flash slave possono lavorare in due gruppi slave: "RMT" e "RMT2". È possibile impostare le condizioni di illuminazione. Il flash controller (Master) assume il controllo della fotocamera. Fotocamera senza flash integrato Fotocamera con flash integrato •...
  • Seite 156 Informazioni generali: • In generale, è possibile verificare la corretta installazione premendo il tasto "AEL" sulla fotocamera. Il flash slave deve rispondere illuminandosi con ritardo. • I flash slave devono poter ricevere la luce del flash controller grazie al sensore integrato per la modalità remote •...
  • Seite 157: Commutazione Metri - Piedi (M/Ft)

    7.7 Commutazione metri - piedi (m/ft) 7.8 Parabola ausiliaria Il campo di utilizzo può essere visualizzato sul display a scelta in metri „m“ o in La parabola ausiliaria i serve a schiarire frontalmente in presenza di illuminazione indi- piedi „ft“. L’impostazione avviene attraverso il punto del menu m/ft. retta quando la parabola principale g è...
  • Seite 158: Luce Pilota (Ml) „Modelling Light

    7.9 Luce pilota (ML) „Modelling Light“ 7.10 Spegnimento automatico dell’apparecchio (Standby) La luce pilota è un flash stroboscopico ad alta frequenza. Con una durata di Il flash è impostato di fabbrica in modo tale che circa 10 minuti circa 3 secondi si ha l’impressione di una luce quasi permanente. Con il tasto •...
  • Seite 159: Blocco Dei Tasti (Keylock)

    Procedura per l’impostazione: 7.11 Blocco dei tasti (KEYLOCK) • Premete il tasto più volte finché sul display Con la funzione blocco dei tasti (KEYLOCK) è possibile bloccare i pulsanti del Select flash per evitare regolazioni involontarie. Se la funzione blocco dei tasti è attiva non compare „Select“.
  • Seite 160: Parabola Zoom Motorizzata

    8 Parabola zoom motorizzata 9 Parabola adattatore L’adattamento della posizione dello zoom della parabola principale può avveni- Diffusore grandangolare re per focali d’obiettivo a partire da 24 mm (piccolo formato 24 x 36). Per Con il diffusore grandangolare è possibile illuminare focali a partire da obiettivi con focali a partire da 12 mm si può...
  • Seite 161: Tecniche Lampo

    10 Tecniche lampo 10.3 Lampo riflesso con parabola ausiliaria Quando la parabola principale è inclinata, per ottenere una luce frontale di 10.1 Lampo riflesso schiarita sul soggetto è possibile potete azionare anche la parabola ausiliaria Utilizzando il lampo riflesso la luce sul soggetto risulta più morbida e le ombre dal menu Select (vedi il punto 7.8).
  • Seite 162: Correzioni Manuali Dell'esposizione Flash

    10.5 Correzioni manuali dell’esposizione flash 11 Indicazione di stato del flash Il sistema di esposizione automatica del flash e della maggior parte delle came- Quando il condensatore flash è carico, sul flash si re è regolato su un fattore di riflessione pari al 25% (il fattore medio di riflessio- accende la spia di carica del flash per indicare ne per soggetti ripresi con flash).
  • Seite 163: Indicazione Di Corretta Esposizione

    questo modo è possibile lavorare con qualsiasi tempo di otturazione. Per è possibile, ad esempio, modificando l’apertura del diaframma sull’obiettivo e ottenere la potenza piena del flash non selezionate tempi di otturazione selezionando una potenza piena o una potenza ridotta „P“. più...
  • Seite 164: Sincronizzazione Sulla Seconda Tendina (Rear, Funzione 2Nd Curtain, Slow2)

    15.2 Sincronizzazione sulla seconda tendina 15.4 Sincronizzazione ad alta velocità HSS (REAR, funzione 2nd curtain, SLOW2) Alcune fotocamere supportano la sincronizzazione ad alta velocità HSS (vedi le istruzioni d'uso della fotocamera). Questa funzione permette di utilizzare il flash Con alcune camere è possibile anche la sincronizzazione sulla seconda tendina anche con tempi di posa più...
  • Seite 165: Flash Di Misurazione Multizone Af

    16 Flash di misurazione multizone AF 17 Soppressione del lampo (auto-flash) Non appena la luce dell’ambiente non è più sufficiente per una messa a fuoco La camera inibisce l’emissione del lampo se il livello d’illuminazione ambiente è automatica, la camera attiva nel lampeggiatore il flash di misurazione multizo- sufficiente per un’esposizione normale.
  • Seite 166: Cura E Manutenzione

    Sotto ciascun punto sono riportate le possibili cause e soluzioni per risol- ware). vere il problema. Per maggiori informazioni consultate il sito internet Metz: www.metz.de a) Sul display non è indicato il campo d’utilizzo. 18.2 Reset • La parabola principale non si trova nella posizione normale.
  • Seite 167 Il display mostra il simbolo di una batteria Selezionate il sensore AF centrale! • Un Metz Power Pack P76 è collegato al mecablitz e sono presenti delle batte- f) La posizione della parabola non viene adeguata automaticamente alla rie nell'apposito alloggiamento del mecablitz.
  • Seite 168 m) L’impostazione per la compensazione manuale dell’esposizione TTL non è r) Non è possibile modificare i parametri sul flash per la sensibilità alla luce possibile. ISO e il diaframma F. • La fotocamera non supporta la compensazione manuale dell’esposizione TTL •...
  • Seite 169: Dati Tecnici

    • Circa 250 con accumulatore NiMH 2100mAh • Circa 180 con batterie alcaline al manganese ad alte prestazioni Lampeggiatore con diffusore grandangolare incorporato, istruzioni per l’uso, astuccio T58, base d’appoggio. • Circa 430 con Power-Pack Metz P76 (accessorio a richiesta) (sempre a potenza luminosa piena)
  • Seite 170: Accessori Opzionali

    Le batterie non vanno gettate insieme ai rifiuti domestici. l cattivo funzionamento e i danni eventualmente provocati al flash dall’u- tilizzo di accessori non prodotti dalla Metz non sono coperti dalla nostra Si prega di utilizzare un sistema di smaltimento adeguato, p. es. portandole al garanzia! negozio dove le si è...
  • Seite 172 1 Indicaciones de seguridad ........173 7.11 Bloqueo del teclado (KeyLock) ......193 2 Funciones dedicadas del flash .
  • Seite 173: Indicaciones De Seguridad

    • Las pilas secas no pueden recargarse. • No exponer el flash ni el cargador a gotas o salpicaduras de agua, por Le agradecemos que se haya decidido por un producto Metz y nos complace ejemplo, a la lluvia. saludarle como usuario de nuestra marca.
  • Seite 174: Funciones Dedicadas Del Flash

    2 Funciones dedicadas del flash 3 Preparación del flash Las funciones dedicadas del flash son las que se adecuan de manera especial 3.1 Montaje del flash al sistema de la cámara. Así, las funciones del flash serán compatibles depen- Colocar el flash en la cámara diendo del modelo de cámara.
  • Seite 175: Conexión Y Desconexión Del Flash

    Cambio de las pilas 3.4 Power Pack P76 (accesorio opcional) Se considera que las pilas o baterías están usadas o vacías, cuando el intervalo Si la cantidad de destellos y los intervalos entre destellos no son suficientes para entre destellos (tiempo desde el disparo del flash a plena potencia, por ejemplo, iluminar el motivo que se desea fotografiar, se puede montar un Power Pack en modo M, hasta que se ilumina de nuevo la indicación de disposición de P76 (accesorio opcional) en el flash que le suministre energía.
  • Seite 176: Iluminación De La Pantalla

    ca y se recupera inmediatamente tras la conexión. El flash se conecta de nuevo al 5.1 Configuración de los modos del flash pulsar cualquier tecla o el disparador de la cámara (función Wake-Up). Mode • Pulsar la tecla hasta que aparezca „Mode“ en la pantalla. Cuando no se vaya a utilizar el flash durante un periodo de tiempo pro- Estos son los modos de funcionamiento que pueden seleccionarse: longado, debe apagarse siempre mediante el interruptor général...
  • Seite 177: Modos Ttl

    5.2 Modos TTL figuración de los modos de funcionamiento TTL con predestello y medición ADI se realiza en la cámara (consultar manual de instrucciones de la misma). Los modos de flash TTL le permitirán conseguir de forma sencilla muy buenas tomas con luz de flash.
  • Seite 178: Relleno Automático Ttl

    Configuración: 5.3 Relleno automático • Pulsar la tecla Mode hasta que aparezca „Mode“ TTL HSS Con la mayoría de las cámaras, cuando se utiliza el programa automático P y Mode en la pantalla. los programas Motivo con luz diurna se activa el modo de relleno automático (consultar el manual de instrucciones de la cámara).
  • Seite 179: Modo Manual

    5.6 Modo manual Ajustar una potencia parcial: • Pulsar la tecla Para (Parámetro) hasta que aparez- En el modo de flash manual , el flash libera un destello a plena potencia si F 4.0 ca „P“ en la pantalla, correspondiente a potencia no se ajusta una potencia parcial.
  • Seite 180: Modo Estroboscópico

    5.7 Modo estroboscópico Cantidad de destellos estroboscópicos (N) El modo estroboscópico es un modo de funcionamiento del flash manual. En el modo estroboscópico la cantidad de destellos (N) se puede ajustar por Con este modo se disparan varios destellos durante una toma. Esto resulta disparo.
  • Seite 181: Parámetros Del Flash (Menú Parámetros)

    En la pantalla aparece la distancia adecuada según los parámetros selecciona- 6 Parámetros del flash (menú Parámetros) dos. Si se cambia la apertura o la potencia parcial, se puede ajustar la distan- Para un correcto funcionamiento del flash es necesario que los distintos pará- cia mostrada a la distancia real del motivo.
  • Seite 182: Posición Del Reflector Principal (Zoom)

    – • Ajustar el valor que se desee con las teclas . El ajuste se aplica Cuando el reflector principal esté girado lateralmente o hacia arriba, no aparecerá en modo AZoom ninguna indicación de la posición del reflec- de forma inmediata. tor (consultar 10.1) •...
  • Seite 183: Potencia Parcial Manual (P)

    6.4 Potencia parcial manual (P) 7 Funciones especiales (menú Select) En el modo de flash manual y el modo estroboscópico se puede aju- Las funciones especiales se seleccionan con la tecla (Seleccionar). Según star la potencia del destello a la toma, seleccionando una potencia parcial (P) el modelo de cámara y el modo de funcionamiento del flash seleccionado, de forma manual.
  • Seite 184: Función Beep (Pitido)

    Pitido al ajustar el modo de flash automático: • Pulsar la tecla para confirmar la selección de la función especial. • Se oye un breve pitido de aviso cuando, estando seleccionado el modo de funcionamiento automático, se ajusta la apertura y la sensibilidad más allá •...
  • Seite 185: Horquillado De Flash (Fb)

    7.3 Horquillado de flash (FB) • La primera toma se realiza sin valor de cor- F 5.1 rección. En la pantalla aparece „FB1“. En el modo de flash automático puede efectuarse un horquillado de expo- AZoom 28 7.7 m ISO 100 sición del flash (flash bracketing, FB).
  • Seite 186: Ajuste Al Formato De La Toma (Zoom Size)

    Configuración: 7.5 Ajuste al formato de la toma (Zoom Size) • Pulsar la tecla hasta que aparezca „Select“ en En algunas cámaras digitales, es posible ajustar el ángulo de iluminación del KEYLOCK Select reflector principal al formato del chip (dimensiones de las fotos). la pantalla.
  • Seite 187: Modo Remoto Esclavo (Remote)

    7.6 Modo remoto esclavo (Remote) El funcionamiento remoto se compone de los modos de funcionamiento Controller "CTRL" y Controller Plus "CTRL " en función del sistema de cámara utilizado. Para que los distintos sistemas remotos que pueda haber en la misma habitación no se solapen, existen cuatro canales remotos independientes (CHANNEL/CH 1, 2, 3 o 4).
  • Seite 188 Funcionamiento CTRL Cámara con flash integrado Cámara sin flash integrado que no soporta "CTRL " • Pulsar la tecla hasta que aparezca "Select" en la pantalla. • Montar en la cámara el flash que debe usarse como esclavo. • Ajustar la cámara al modo de funcionamiento "WL". •...
  • Seite 189 Funcionamiento CTRL En el modo de funcionamiento "CTRL ", los flashes esclavos pueden operar en dos grupos esclavos "RMT" y "RMT2". Las condiciones lumínicas se pueden ajustar. El flash controlador (maestro) adopta el control de la cámara. Cámara sin flash integrado Cámara con flash integrado •...
  • Seite 190 General: • La instalación se puede comprobar en principio si pulsa la tecla "AEL" en la cámara. El flash esclavo debe responder con un flash retardado. • Es preciso que los flashes esclavos puedan recibir la luz del flash controlador mediante el sensor integrado para funcionamiento remoto •...
  • Seite 191: Conmutación De Metros A Pies (M-Ft)

    7.7 Conmutación de metros a pies (m-ft) 7.8 Segundo reflector La indicación del alcance en la pantalla del flash se puede realizar, según las El reflector adicional i sirve para la iluminación frontal, mediante iluminación preferencias del usuario, en metros (m) o pies (ft). El ajuste se realiza a través indirecta, cuando el reflector principal g está...
  • Seite 192: Luz De Modelado (Ml)

    7.9 Luz de modelado (ML) 7.10 Desconexión automática (Standby) Se trata de una secuencia de destellos estroboscópicos a alta frecuencia con El flash está ajustado de fábrica de manera que, aprox. 10 minutos una duración de aprox. 3 segundos, que produce la impresión de una ilumina- •...
  • Seite 193: Bloqueo Del Teclado (Keylock)

    Configuración: 7.11 Bloqueo del teclado (KEYLOCK) • Pulsar la tecla hasta que aparezca „Select“ en La función de bloqueo del teclado (KEYLOCK) permite bloquear los botones del Select flash contra la activación accidental. Si se activa el bloqueo del teclado, en la la pantalla.
  • Seite 194: Reflector Con Zoom Motorizado

    8 Reflector con zoom motorizado 9 Reflector adaptador El zoom del reflector principal se puede ajustar a distancias focales de objetivo Difusor de gran angular a partir de 24 mm (pequeño formato 24 x 36). En el caso de objetivos con Con el difusor de gran angular se pueden iluminar distancias focales a par- distancias focales a partir de 12 mm se puede acoplar un difusor de gran...
  • Seite 195: Técnicas De Destello

    10 Técnicas de destello 10.3 Destellos indirectos con segundo reflector Con el reflector principal girado, se puede activar el segundo reflector 10.1 Destellos indirectos el menú Select (consultar 7.8) para conseguir un relleno frontal del motivo. Mediante los destellos indirectos, el motivo recibe una iluminación más suave y La utilización del segundo reflector sólo es posible y aconsejable básicamen- se atenúa la formación de sombras.
  • Seite 196: Corrección Manual De La Exposición Del Flash

    10.5 Corrección manual de la exposición del flash 11 Indicación de disponibilidad del flash Los flashes automáticos y la mayoría de las cámaras se han diseñado con un Cuando el condensador del flash está cargado, se grado de reflexión del 25 % (grado de reflexión medio de los motivos con enciende la indicación de disponibilidad en el flash flash).
  • Seite 197: Indicación De Control De La Exposición

    En cámaras con obturador central (consultar el manual de instrucciones de conseguir modificando el diafragma del objetivo. de la cámara) y utilizando sincronización de alta velocidad HSS (véase En el modo manual M se indica la distancia al motivo necesaria para una cor- 15.4) no hay control automático de la velocidad de sincronización del recta exposición con el flash.
  • Seite 198: Sincronización Con La Segunda Cortinilla (Modo 2Nd Curtain, Slow2)

    15.2 Sincronización con la segunda cortinilla Con velocidades de obturación cortas, utilizar un trípode, para evitar tomas movidas! (modo 2nd curtain, SLOW2) Algunas cámaras ofrecen la posibilidad de la sincronización con la segunda 15.4 Automática de alta velocidad HSS cortinilla (modo REAR). Se trata de disparar el flash al final del tiempo de expo- Distintas cámaras soportan la sincronización automática de alta velocidad HSS sición.
  • Seite 199: Destello De Medición Af Matricial

    16 Destello de medición AF matricial 17 Control de encendido (Auto-Flash) Tan pronto como las condiciones de iluminación sean insuficientes para el enfo- Si la luz ambiente es suficiente para una exposición en modo normal, la cá- que automático, la cámara activa el destello de medición AF matricial en el mara evitará...
  • Seite 200: Mantenimiento Y Cuidados

    Debajo de cada punto, se indican las causas y soluciones para estos firmware). problemas. Consultar más información en la página web de Metz: www.metz.de a) En la pantalla no aparece la indicación del alcance. 18.2 Reset • El reflector principal no se encuentra en la posición normal (consultar 10.1).
  • Seite 201 AF no se activa en el flash. Activar el sensor AF central. • En el mecablitz hay un Power Pack Metz P76 conectado, y en el comparti- miento de las baterías hay baterías. Sacar las baterías del mecablitz.
  • Seite 202 n) No tiene lugar una conmutación automática a la velocidad de r) No se pueden ajustar los parámetros de flash para la sensibilidad ISO y la sincronización del flash apertura F en el flash. • La cámara tiene un obturador central (como la mayoría de las cámaras com- •...
  • Seite 203: Características Técnicas

    Flash con difusor de gran angular integrado, manual de instrucciones, • Aprox. 250 con baterías de NiMH de 2.100 mAh bolsa T58, pie de apoyo. • Aprox. 180 con pilas alcalino-manganesas de alta capacidad • Aprox. 430 con Power-Pack P76 de Metz (accesorio opcional)
  • Seite 204: Accesorios Especiales

    Eliminación de las baterías No se deben tirar las baterías a la basura casera. Metz no asume ninguna garantía por funcionamientos erróneos o daños en el flash, causados al utilizar accesorios de otros fabricantes. Para la devolución de sus baterías gastadas, sírvase utilizar uno de los sistemas de reciclaje existente eventualmente en su país.
  • Seite 206: Tableau 3: Nombres-Guides Pour La Puissance Maximale (P 1)

    Zoom 6/9° 8/10° 10/11° 12/12° 16/13° 20/14° 25/15° 32/16° 40/17° 50/18° 64/19° 80/20° 100/21° 125/22° 160/23° 200/24° 250/25° 320/26° 400/27° 500/28° 650/29° 800/30° 1000/31° 63 1250/32° 71 Tabelle 3: Leitzahlen bei maximaler Lichtleistung (P 1/1) 1600/33° 80 Tableau 3: Nombres-guides pour la puissance maximale (P 1/1) 2000/34°...
  • Seite 207: Tableau 4: Durée De L'éclair Pour Les Différents Niveaux De Puissance

    Teillichtleistung Blitzleuchtzeit (s) Leitzahl Leitzahl Niveaux de puissance Durée d’éclair (s) Nombre-guide Nombre-guide Deelvermogensstappen Flitsdur (s) Richtgetal Richtgetal Partial light output Flash duration Guide number Guide number Livello di potenza Durata del lampo Numero guida Numero guida Potencia parcial Duración de destello Número-guía Número-guía (P=Flash Power) ISO 100/50 mm...
  • Seite 208: Tableau 5: Vitesses D'obturation Du Reflex En Mode Stroboscope

    Blitzfrequenz Blitzanzahl Tabelle 5: Kameraverschlusszeiten im Stroboskop-Betrieb f(Hz) (Blitze/Sek.) Tableau 5:Vitesses d’obturation du reflex en mode stroboscope Nombre d’éclairs Tabel 5: Belichtingstijden bij de stroboscoopfunctie Fréquence f(Hz) Table 5: Camera shutter speeds in stroboscopic mode Aantal flitsen (éclairs/seconde) Tabella 5: Tempi di posa per il modo stroboscopico Flitsfrequentie Number of flashes Tabla 5: Velocidades de obturación en el funcionamiento...
  • Seite 209: Tableau 6: Temps De Recyclage Et Autonomie Pour Différents Types De Piles .209 Tableau 7: Nombres-Guides En Mode Hss

    Zoom Batterietyp Blitzfolgezeiten Blitzanzahl Type de pile/accu Temps de recyclage Nombre d’éclairs Type voeding Flitsvolgtijden Aantal flitsen Battery type Recycling times Number of flashes Tabelle 7: Maximale Leitzahlen im HSS-Betrieb Tipo batterie Tempi di ricarica Numero ampi Tableau 7: Nombres-guides en mode HSS Tipo de pila Tiempo de secuencia de dest.
  • Seite 210 Bitte helfen Sie mit die Umwelt, in der wir leben, zu erhalten. This will help to protect the environment in which we all live. Votre produit Metz a été conçu et fabriqué avec des matériaux et Il vostro prodotto Metz è stato progettato e realizzato con materi- composants de haute qualité, susceptibles d'être recyclés et réutili-...
  • Seite 211 Hinweis: Opmerking: Avvertenza: In het kader de CE-markering werd Nell’ambito delle prove EMV per il Im Rahmen des CE-Zeichens wurde bei bij de EMV-test de correcte be-lich- segno CE è stata valutata la corretta der EMV-Prüfung die korrekte ting bepaald. esposizione.
  • Seite 212 Entriegelungsknopf Hauptreflektor Reflektorkarte Bouton de déverrouillage pour réflecteur Carte-réflecteur Ontgrendelingsknop Hoofdreflector Hauptreflektor Reflecterende kaart Unlocking button for the main reflector Réflecteur principale Reflector card Pulsante di sblocco della parabola principale Pannello riflettente Hoofdreflector Botón de desbloqueo del reflector principal Tarjeta reflectante Main-reflector Parabola principale Weitwinkelstreuscheibe...
  • Seite 213 Display Werkseinstellung (Reset) Display Mode Para Mode Para Select-Menü (Sonderfunktionen**) Display Gruppe B 5 sec. Display Gruppe A Mode-Menü* Parameter-Menü** TTL +1 Display Display ON/OFF Para — REAR ON/OFF Gruppe C Beep ON/OFF Bsp. für Displayanzeige des 58 AF-1: Remote Remote OFF/Master/Slave M (steht für Master) 1/3 —...
  • Seite 214 Metz - Werke GmbH & Co KG • Postfach 1267 • D-90506 Zirndorf • info@metz.de • www.metz.de Photoelectronics Plastics technology Consumer electronics 709 47 0245.A1 Metz - always first class.

Inhaltsverzeichnis