Metz MECABLITZ 58 AF-1 Sony Bedienungsanleitung
Vorschau ausblenden
Andere Handbücher für MECABLITZ 58 AF-1 Sony:
- Bedienungsanleitung (230 Seiten) ,
- Bedienungsanleitung (190 Seiten) ,
- Bedienungsanleitung (190 Seiten)
Kapitel
Inhaltsverzeichnis
Fehlerbehebung

Verwandte Anleitungen für Metz MECABLITZ 58 AF-1 Sony


Inhaltszusammenfassung für Metz MECABLITZ 58 AF-1 Sony
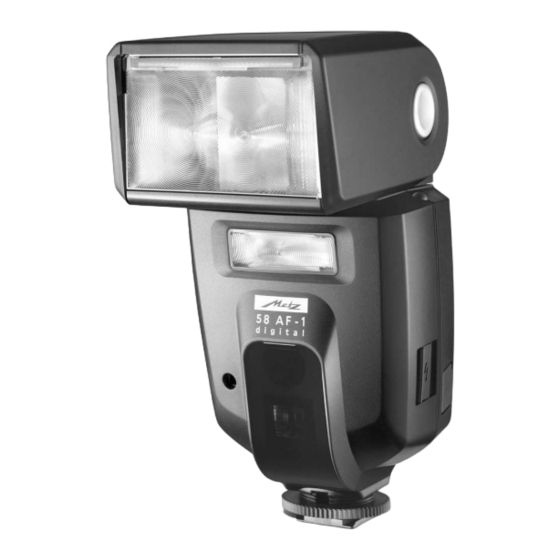
- Seite 1 MECABLITZ 58 AF-1 digital für/for Sony-D-SLR Kameras mit/with ADI / HSS / Preflash-TTL Bedienungsanleitung Mode d’emploi Gebruiksaanwijzing Operating instruction Manuale istruzioni Manual de instrucciones...
-
Seite 2: Inhaltsverzeichnis
1 Sicherheitshinweise ........3 8 Motor-Zoom-Reflektor . -
Seite 3: Sicherheitshinweise
• Verbrauchte Batterien/Akkus nicht ins Feuer werfen! • Aus verbrauchten Batterien kann Lauge austreten, was zur Beschädigung der Vielen Dank, dass Sie sich für ein Metz Produkt entschieden haben. Kontakte führt. Verbrauchte Batterien deshalb immer aus dem Gerät entnehmen. Wir freuen uns, Sie als Kunde begrüßen zu dürfen. -
Seite 4: System-Blitzfunktionen
2 System-Blitzfunktionen 3 Blitzgerät vorbereiten Die System-Blitzfunktionen sind speziell auf das Kamerasystem abgestimmte 3.1 Montage des Blitzgerätes Blitzfunktionen. In Abhängigkeit vom Kameratyp werden dabei verschiedene Blitzgerät auf die Kamera montieren Blitzfunktionen unterstützt. Kamera und Blitzgerät vor der Montage oder Demontage ausschalten. •... -
Seite 5: Ein- Und Ausschalten Des Blitzgerätes
Batterien austauschen Eingelegte Batterien / Akkus dürfen nicht im Blitzgerät verbleiben. Die Akkus/Batterien sind leer bzw. verbraucht, wenn die Blitzfolgezeit (Zeit vom Zum Anschließen des Power Pack P76 bzw. des Verbindungskabels V58-50 Auslösen eines Blitzes mit voller Lichtleistung, z.B. bei M, bis zum erneuten (Zubehör) am Blitzgerät muss der Hauptschalter des Blitzgerätes in die linke Aufleuchten der Blitzbereitschaftsanzeige... -
Seite 6: Displaybeleuchtung
Bei Bedarf kann die automatische Geräteabschaltung bereits nach 1 Minute HSS Manueller Blitzbetrieb mit Kurzzeitsynchronisation HSS erfolgen oder ausgeschaltet werden (siehe 7.9). Stroboskop-Blitzbetrieb • Mit den Tasten UP und DOWN die gewünschte Blitzbetriebsart ( 4 Displaybeleuchtung Automatik , Manuell , usw.) einstellen. Die ausgewählte Bei jedem Tastendruck am Blitzgerät wird für ca. -
Seite 7: Automatischer Ttl -Aufhellblitzbetrieb
Das Blitzgerät unterstützt automatisch die jeweilige TTL-Blitzbetriebsart der TTL-Blitzbetrieb Kamera. Eine besondere Anzeige für die jeweilige Blitzbetriebsart erfolgt nicht! Diese analoge TTL-Blitzbetriebsart wird von älteren analogen Kameras unter- Beachten Sie ob es für Ihren Kameratyp Einschränkungen hinsichtlich des stützt. Es ist der normale TTL-Blitzbetrieb (TTL-Blitzbetrieb ohne Vorblitz). ISO-Wertes für den TTL-Blitzbetrieb gibt (z.B. -
Seite 8: Automatik-Blitzbetrieb
5.4 Automatik-Blitzbetrieb 5.6 Manueller Blitzbetrieb Im Automatik-Blitzbetrieb A misst der Fotosensor des Blitzgerätes das vom Im manuellen Blitzbetrieb wird vom Blitzgerät ungeregelt die volle Energie Motiv reflektierte Licht. Der Fotosensor hat einen Messwinkel von ca. 25° und abgestrahlt, sofern keine Teillichtleistung eingestellt ist. Die Anpassung an die misst nur während der eigenen Lichtabgabe. -
Seite 9: Stroboskop-Blitzbetrieb
5.7 Stroboskop-Blitzbetrieb Einstellvorgang: Der Stroboskop-Betrieb ist eine manuelle Blitzbetriebsart. Dabei können • Taste „Para“ (Parameter) so oft drücken, bis im Display der gewünschte mehrere Blitzbelichtungen auf einem Bild gemacht werden. Das ist besonders Blitzparameter (N bzw. f) angezeigt wird. interessant bei Bewegungsstudien und Effektaufnahmen. •... -
Seite 10: Blitzparameter (Parameter-Menü)
6 Blitzparameter (Parameter-Menü) • Mit den PLUS / MINUS -Tasten den gewünschten Wert einstellen. Die Einstellung wird sofort wirksam. Für eine korrekte Funktion des Blitzgerätes ist es erforderlich, dass verschiedene • Die Taste „Return“ drücken. Das Display schaltet auf die normale Anzeige Blitzparameter wie z.B. -
Seite 11: Blitzbelichtungskorrektur (Ev)
6.3 Blitzbelichtungskorrektur (EV) (EV = Exposure Value; Blendenwert) Im Stroboskop-Betrieb passt sich die maximal einstellbare Teillichtleistung den eingestellten Blitzparametern an. Bei starken Kontrastunterschieden zwischen Motiv und Bildhintergrund kann eine manuelle Blitzbelichtungskorrektur (EV) erforderlich sein. Im Automatik- Im Stroboskop-Blitzbetrieb ist die Verringerung der manuellen Blitzbetrieb A lassen sich Korrekturwerte von –3 Blendenwerten (EV) bis +3 Teillichtleistung nur in ganzen Stufen möglich! Blendenwerte (EV) in Drittelstufen am Blitzgerät einstellen. -
Seite 12: Beep-Funktion (Beep)
Beep-Signale nach der Aufnahme: TTL/TTL-HSS M/M HSS • Ein kurzes (ca. 2s) ununterbrochenes Beep-Signal direkt nach der Aufnahme zeigt an, dass die Aufnahme richtig belichtet wurde und die Blitzbereitschaft Beep Beep Beep Beep weiter fortbesteht. Erfolgt direkt nach der Aufnahme kein Beep-Signal, so wur- —... -
Seite 13: Extended-Zoom-Betrieb (Zoom Ext)
Eine Blitzbelichtungsreihe besteht aus drei aufeinander folgenden Beim Einstellen der Blitzbelichtungsreihe wird der Korrekturwert immer positiv angezeigt! Blitzlichtaufnahmen mit unterschiedlichen Blitzbelichtungskorrekturwerten. Beim Einstellen einer Blitzbelichtungsreihe wird im Display FB und der 7.4 Extended-Zoom-Betrieb (Zoom Ext) Korrekturwert angezeigt. Die möglichen Korrekturwerte reichen von 1/3 bis 3 Beim Extended-Zoom-Betrieb wird die Brennweite des Hauptreflektors um eine Blenden in Drittel-Blendenstufen. -
Seite 14: Remote-Slave-Betrieb (Remote)
7.5 Remote-Slave-Betrieb (Remote) Der Remote-Betrieb besteht aus den Betriebsarten Controller „CTRL“ und Controller Plus „CTRL+“ abhängig vom verwendeten Kamerasystem. Damit sich mehrere Remote-System im gleichen Raum nicht gegenseitig stören stehen vier unabhängig Remote-Kanäle (CHANNEL/CH 1, 2, 3 oder 4) zur Verfügung. - Seite 15 CTRL-Betrieb Kamera ohne eingebautem Blitzgerät Kamera mit eingebautem Blitzgerät • Taste „SEL“ so oft drücken, bis im Display „Select“ angezeigt wird. • Blitzgerät, welches als Slave eingesetzt werden soll, auf Kamera montieren. • Mit den Tasten UP und DOWN den Menü-Punkt „Remote“ auswählen. •...
- Seite 16 CTRL -Betrieb In der Betriebsart „CTRL+“ können die Slave-Blitzgeräte in zwei Slave-Gruppen „RMT“ und „RMT2“ arbeiten. Die Lichtverhältnisse können eingestellt werden. Die Steuerung übernimmt das Controller-Blitzgerät (Master) auf der Kamera. Kamera ohne eingebautem Blitzgerät Kamera mit eingebautem Blitzgerät • zukünftiges Controller-Blitzgerät auf Kamera montieren.. (Blitzgerät darf nicht manuell auf den Slave-Betrieb umgeschaltet sein!) •...
- Seite 17 Allgemein: • Der Aufbau kann grundsätzlich durch Drücken der Taste „AEL“ an der Kamera geprüft werden. Das Slave-Blitzgerät muss mit einem zeitverzögerten Blitz antworten. • Die Slave-Blitzgeräte müssen mit dem integrierten Sensor für den Remote-Betrieb das Licht des Controller-Blitzgerätes empfangen können. •...
-
Seite 18: M - Ft Umschaltung
7.6 m - ft Umschaltung • Mit den Tasten UP und DOWN den Menü-Punkt auswählen. Der aus- gewählte Menü-Punkt wird dabei mit einem dunklen Balken hinterlegt. Die Reichweitenanzeige im Display des Blitzgerätes kann wahlweise in Meter m oder Feet ft erfolgen. Die Einstellung erfolgt im Menü-Punkt m / ft. •... -
Seite 19: Automatische Geräteabschaltung (Standby)
zeigt. Beim Betätigen des Handauslösers wird das Einstelllicht ausgelöst. • Mit den Tasten UP und DOWN die gewünschte Einstellung vornehmen. Die Einstellung wird sofort wirksam. 7.9 Automatische Geräteabschaltung (Standby) • Taste „Return“ so oft drücken, bis im Display die normale Anzeige erfolgt. Werksseitig ist das Blitzgerät so eingestellt, dass es ca. -
Seite 20: Motor-Zoom-Reflektor
9 Reflektorvorsätze . Zum Aufheben der Tastaturverriegelung die beiden mittleren Tasten für ca. 3 Sekunden drücken. Das Display schaltet auf die normale Anzeige zurück, Weitwinkelstreuscheibe wenn die Tastatur-Verriegelung ausgeschaltet ist. Mit der Weitwinkelstreuscheibe können Brennweiten ab 18 mm ausgeleuchtet 8 Motor-Zoom-Reflektor werden (Kleinbild-Format). -
Seite 21: Indirektes Blitzen Mit Reflektorkarte
Beim vertikalen Schwenken des Hauptreflektors ist darauf zu achten, dass 10.4 Nahaufnahmen / Makroaufnahmen um einen genügend großen Winkel geschwenkt wird, damit kein direktes Im Nahbereich und bei Makroaufnahmen kann es durch den Parallaxefehler Licht vom Reflektor auf das Motiv fallen kann. Deshalb mindestens bis zur zwischen Blitzgerät und Objektiv am unteren Bildrand zu Abschattungen kom- 60°... -
Seite 22: Blitzbereitschaftsanzeige
Dunkles Motiv vor hellem Hintergrund: verfügen über einen Synchronzeitbereich, z.B. 1/30s bis 1/125s (siehe Kamerabedienungsanleitung). Welche Synchronzeit die Kamera einsteuert, ist Positiver Korrekturwert (etwa +1 bis +2 Blendenwerte EV). dann von der Kamerabetriebsart, vom Umgebungslicht und der verwendeten Helles Motiv vor dunklem Hintergrund: Objektivbrennweite abhängig. -
Seite 23: Blitzsynchronisation
Spielraum zum Ausgleich gegeben. Der Mindestabstand zum Motiv sollte 10% 15 Blitzsynchronisation des angezeigten Wertes nicht unterschreiten um Überbelichtungen zu vermeiden! 15.1 Normalsynchronisation Die Anpassung an die jeweilige Aufnahmesituation kann z.B. durch Ändern des Bei der Normalsynchronisation wird das Blitzgerät zum Beginn der Verschlusszeit Blendenwertes erreicht werden. -
Seite 24: Kurzzeitsynchronisation Hss
Blitzsynchronzeit sind, eingesteuert. Bei verschiedenen Kameras wird die Langzeit- 16 Mehrzonen-AF-Meßblitz synchronisation in bestimmten Kameraprogrammen (z.B. Nachtaufnahme-Programm Sobald die Umlichtverhältnisse für eine automatische Fokussierung nicht mehr usw.) automatisch aktiviert (siehe Kamerabedienungsanleitung). Am Blitzgerät erfolgt kei- ausreichen, wird von der Kamera der Mehrzonen-AF-Meßblitz im Blitzgerät ne Einstellung bzw. -
Seite 25: Wartung Und Pflege
Unter den jeweiligen Punkten sind mögliche Ursachen bzw. Abhilfen für (Firmware-Update). diese Probleme aufgeführt. Nähere Informationen finden Sie im Internet auf der Metz-Homepage: a) Im Display erfolgt keine Reichweitenanzeige. www.metz.de • Der Hauptreflektor befindet sich nicht in der Normalposition (siehe 10.1). - Seite 26 • Verschiedene Kameratypen unterstützen nur mit dem zentralen AF-Sensor der Kamera den AF-Messblitz im Blitzgerät. Wird ein dezentraler AF-Sensor • Am mecablitz ist ein Metz Power Pack P76 angeschlossen und im Batteriefach gewählt, so wird der AF-Messblitz im Blitzgerät nicht aktiviert! Zentralen des mecablitz befinden sich Batterien.
- Seite 27 m) Die Einstellung für die manuelle TTL-Blitzbelichtungskorrektur wird nicht wirk- r) Die Blitzparameter für Lichtempfindlichkeit ISO und die Blende F lassen sich sam. am Blitzgerät nicht verstellen. • Die Kamera unterstützt die manuelle TTL-Blitzbelichtungskorrektur am • Zwischen Blitzgerät und Kamera findet ein digitaler Datenaustausch statt. Blitzgerät nicht.
-
Seite 28: Technische Daten
Auslieferungsumfang: Niederspannungs-IGBT-Zündung Blitzgerät mit Integrierter Weitwinkelstreuscheibe, Bedienungsanleitung, Blitzanzahlen (bei jeweils voller Lichtleistung): Gürteltasche T58, Standfuß. * Ca. 180 mit NiMH Akkus 1600mAh * Ca. 180 mit Hochleistungs Alkali-Mangan-Batterien * Ca. 430 mit Metz Power-Pack P76 (Sonderzubehör) (bei jeweils voller Lichtleistung) -
Seite 29: Sonderzubehör
21 Sonderzubehör Batterie-Entsorgung Für Fehlfunktionen und Schäden am Blitzgerät, verursacht durch die Batterien/Akkus gehören nicht in den Hausmüll! Bitte bedienen Sie sich bei der Verwendung von Zubehör anderer Hersteller, wird keine Gewährleistung Rückgabe verbrauchter Batterien/Akkus eines vorhandenen Rücknahmesystems. übernommen! Bitte geben Sie nur entladene Batterien/Akkus ab. Batterien sind in der Regel •... -
Seite 30: Garantiebestimmungen
6. Beanstandete Geräte bitten wir zusammen mit dem Kaufbeleg entweder über Metz-Werke GmbH & Co KG den Fachhändler oder direkt an die Firma Metz-Werke GmbH & Co KG - Zentralkundendienst - Ohmstrasse 55, 90513 Zirndorf, transportsicher ver- packt unter genauer Schilderung der Beanstandung einzusenden. Sie können unter den gleichen Bedingungen auch an die autorisierten Kundendienststellen der Firma Metz-Werke GmbH &... - Seite 32 1 Consignes de sécurité ........33 8 Asservissement de la tête zoom motorisée .
-
Seite 33: Avant-Propos
• Sortez immédiatement les piles usées du flash ! En effet, les piles usées peu- vent „couler“ et provoquer une dégradation du flash. Nous vous remercions d’avoir choisi un produit Metz et sommes heureux de vous • Ne rechargez pas les piles sèches ! saluer au sein de la grande famille de nos clients. -
Seite 34: Fonctions Flash Dédiées
2 Fonctions flash dédiées 3 Préparation du flash Les fonctions flash dédiées sont des fonctions de flash adaptées spécialement à 3.1 Montage du flash un système d’appareil photo. Les fonctions de flash supportées dépendent alors Fixation du flash sur l’appareil du type d’appareil. -
Seite 35: Mise En Marche Et Coupure Du Flash
Remplacement des piles Les piles / accus insérées ne doivent pas rester dans le flash Les accus ou les piles sont vides ou usé(e)s lorsque le temps de recyclage (délai Poussez l’interrupteur général du flash vers la gauche (ARRÊT ou OFF) pour entre le déclenchement d’un éclair à... -
Seite 36: Éclairage De L'écran
Si nécessaire, le flash peut s’éteindre déjà après 1 minute ou il est possible de HSS Mode flash manuel avec synchronisation en vitesse rapide FP HSS désactiver la fonction d’arrêt automatique (voir 7.9). Mode flash stroboscope • Réglez le mode de fonctionnement du flash souhaité avec les touches UP 4 Éclairage de l’écran DOWN , automatique... -
Seite 37: Dosage Automatique Flash/Ambiance Ttl
l'appareil photo. Il n’y a pas d’affichage particulier pour ce mode de fonctionne- • Appuyez sur la touche „Return“ . L’écran revient à l’affichage normal. Si vous n’appuyez pas sur la touche „Return“ , l’écran revient automatique- ment du flash ! ment à... -
Seite 38: Mode Flash Automatique
5.4 Mode flash automatique prise de vue s’effectue par ex. en jouant sur le réglage de l’ouverture sur l’ap- pareil photo ou en sélectionnant une puissance partielle manuelle adaptée. En mode flash automatique A, le capteur photographique du flash mesure la Procédure de réglage : lumière réfléchie par le sujet. -
Seite 39: Paramètres Du Flash (Menu „Parameter" (Paramètres)
Il est possible de sélectionner la fréquence d’éclairs (éclairs par seconde) compri- ment à l’affichage normal après 5 secondes environ. se entre 1 et 50 Hz en pas de 1 Hz et le nombre d’éclairs compris entre 2 et 50 La puissance partielle manuelle maximale possible est automatiquement réglée en pas de 1. -
Seite 40: Procédure De Réglage Des Paramètres Du Flash
6.1 Procédure de réglage des paramètres du flash flash, il est possible de régler manuellement les positions suivantes du réflecteur : La première touche enfoncée active tout d’abord l’éclairage de l’écran. 24 mm - 28 mm - 35 mm - 50 mm - 70 mm - 85 mm - 105 mm Différents paramètres de flash s’affichent dans le menu en fonction du mode (film de petit format 24 x 36). -
Seite 41: Puissance Partielle Manuelle (P)
• Appuyez sur la touche „Return“ . L’écran revient à l’affichage normal. Si et du mode flash réglé. En ce qui concerne les appareils photo qui ne prennent vous n’appuyez pas sur la touche „Return“ , l’écran revient automatique- pas en charge certaines fonctions spéciales, ces dernières n’apparaissent éven- ment à... -
Seite 42: Fonction Bip (Beep)
vous n’appuyez pas sur la touche „Return“ , l’écran revient automatique- (Sélectionner) apparaisse sur l’écran. ment à l’affichage normal après 5 secondes environ. • Sélectionnez l’option de menu „Beep“ (BIP) avec les touches UP et DOWN . L’option de menu sélectionnée est alors mise en surbrillance. 7.2 Fonction bip (Beep) •... -
Seite 43: Mode Zoom Étendu (Zoom Ext)
• Procédez au réglage souhaité avec les touches UP et DOWN . Le réglage Procédure de réglage : prend immédiatement effet. • Appuyez à plusieurs reprises sur la touche „ SEL“ jusqu’à ce que „ Select“ • Appuyez sur la touche „Return“ . -
Seite 44: Mode Remote Sans Fil (Remote)
7.5 Mode remote sans fil (Remote) Le mode remote est composé des modes contrôleur «CTRL» et contrôleur Plus «CTRL », selon le système utilisé. Pour éviter que plusieurs systèmes remote n’interfèrent mutuellement dans le même espace, il existe quatre canaux remote autonomes (CHANNEL/CH 1, 2, 3 ou 4). - Seite 45 Mode CTRL Appareil photo avec flash intégré Appareil photo sans flash intégré ne prenant en charge aucun «CTRL » • Presser la touche «SEL» jusqu'à ce que l'écran affiche «Select». • Monter sur l’appareil photo le flash devant être utilisé comme flash esclave. •...
- Seite 46 Mode CTRL En mode «CTRL », les flashs esclaves peuvent fonctionner en deux groupes esclaves «RMT» et «RMT2». La luminosité peut être réglée. La comman- de prend en charge le flash contrôleur (maître) sur l’appareil photo. Appareil photo sans flash intégré Appareil photo avec flash intégré...
- Seite 47 Informations générales: • La structure peut globalement être vérifiée en appuyant sur la touche «AEL» de l’appareil photo. Le flash esclave doit répondre avec un certain retard par un éclair. • Les flashs esclaves doivent pouvoir recevoir la lumière du flash contrôleur avec le photo-capteur intégré pour le mode Remote •...
-
Seite 48: Commutation Mètres - Pieds (M / Ft)
7.6 Commutation mètres - pieds (m / ft) Le symbole s’affiche à l’écran après la mémorisation lorsque le réflecteur La portée peut être affichée sur l’écran du flash soit en mètres (m) soit en pieds secondaire est activé. (feet = ft). Le réglage a lieu à l’option du menu „m / ft“. Procédure de réglage : Procédure de réglage : •... -
Seite 49: Coupure Automatique Du Flash (Veille)
L’option de menu sélectionnée est alors mise en surbrillance. Le symbole s’affiche à l’écran lorsque la coupure automatique du flash est activée. Le flash se met alors en veille pour économiser de l’énergie lorsqu’il reste • Appuyez sur la touche „Set“ (Réglage) et confirmez ainsi la sélection de la inutilisé... -
Seite 50: Asservissement De La Tête Zoom Motorisée
Activation du verrouillage du clavier : En cas d’utilisation du diffuseur grand-angle , le réflecteur principal est amené automatiquement à la position 24 mm ! 18 mm s’affiche à l’é- • Appuyez à plusieurs reprises sur la touche „SEL“ jusqu’à ce que „Select“ cran à... -
Seite 51: Techniques De Photographie Au Flash
18 mm sur l’écran. 10 Techniques de photographie au flash Pour l’introduire, relevez le diffuseur grand-angle de 90° vers le haut et intro- 10.1 Éclairage indirect au flash duisez-le complètement. Avec l’éclairage indirect, le sujet est éclairé en douceur et les ombres portées Mecabounce 58-90 sont moins nombreuses. -
Seite 52: Macrophotographie (Photographie Rapprochée)
Le recours au réflecteur secondaire n’est, par principe, judicieux et possible une sous-exposition ou une surexposition. qu’en cas d’éclairage indirect au flash avec un réflecteur principal basculé. Pour rattraper l’erreur d’exposition mentionnée ci-dessus, certains appareils Lorsque le réflecteur principal n’est pas basculé, le réflecteur secondaire n’est photo permettent de corriger manuellement l’exposition au flash d’une valeur pas déclenché... -
Seite 53: Commutation Automatique Sur La Vitesse De Synchro Flash
l’appareil photo a déjà été réglé sur la vitesse de synchro-flash (voir 12). Si le témoin de bonne exposition „o.k.“ ne s’allume pas après la prise de vue, c’est que la photo a été sous-exposée et il faut répéter la photo avec une plus L’illuminateur AF à... -
Seite 54: Synchronisation Du Flash
mètres du flash et du nombre-guide et s'affiche à l'écran. 15.3 Synchronisation en vitesse lente / SLOW Dans certains modes de fonctionnement, certains appareils photos sont compatibles Pour cela, l’appareil photo et le flash doivent échanger des données par ex. en avec une synchronisation du flash en vitesse lente. -
Seite 55: Fonction De Pré-Éclairs Réducteurs D'yeux Rouges
AF central. L’illuminateur AF du flash n’est pas activé l’adapter aux fonctions des futurs appareils photo dans le cadre des possibilités en cas de sélection d’un capteur AF décentralisé. techniques. Vous trouverez de plus amples informations à ce sujet sur Internet, sur le site Metz à l’adresse www.metz.de. -
Seite 56: Réinitialisation
Metz P76. • Le réflecteur principal n’est pas dans sa position usuelle (voir 10.1). • Une alimentation Metz Power Pack P76 est raccordée et des piles/accumula- • Le mode remote est réglé sur le flash. - Seite 57 L’appareil photo ne commute pas sur la vitesse de synchro • Un bloc d'alimentation Metz P76 est connecté au mecablitz et des piles se trou- flash en fonction du mode de fonctionnement de l’appareil photo (voir le mode vent dans le compartiment à...
-
Seite 58: Caractéristiques Techniques
* env. 180 avec des accus NiMH 1600mAh * env. 180 avec des piles alcalines au manganèse haute performance * env. 430 avec le Power-Pack P76 de Metz (accessoire spécial) (à chaque fois à pleine puissance lumineuse) Temps de recyclage (à pleine puissance lumineuse) : * env. -
Seite 59: Accessoires En Option
* env. 2,5 s avec le Power-Pack P76 de Metz (accessoire spécial) • Ecran réfléchissant 58-23 o 54-23 (réf. 000058235) o (réf. 000054236) (à chaque fois à pleine puissance lumineuse) Renvoie une lumière diffuse pour atténuer les ombres portées. Iluminación: •... - Seite 60 1 Veiligheidsinstructies ........61 8 Motorisch gestuurde zoomreflector .
-
Seite 61: Veiligheidsinstructies
• Uit verbruikte batterijen kan loog lekken, wat beschadiging van de contactpun- ten tot gevolg heeft. Haal daarom verbruikte batterijen altijd uit het apparaat. Hartelijk dank voor uw beslissing om een product van Metz aan te schaffen. Wij • Batterijen kunnen niet worden opgeladen. -
Seite 62: Dedicated Flitsfuncties
2 Dedicated flitsfuncties 3 Flitser gereedmaken Dedicated flitsfuncties zijn speciaal op het camerasysteem ingestelde flitsfuncties. 3.1 Het aanbrengen van de flitser Afhankelijk van het type camera worden daarbij verschillende flitsfuncties onder- Flitser op de camera monteren steund. Camera en flitser vóór het aanbrengen of afnemen uitschakelen. •... -
Seite 63: In- En Uitschakelen Van De Flitser
Als u denkt, de flitser gedurende een langere tijd niet te gebruiken, haal neel accessoire) via de aansluiting aan de flitser aangesloten. Daarbij hoeven de batterijen er dan s.v.p. uit. er in de flitser geen batterijen / accu’s ingelegd te zijn. Ingelegde batterijen / accu’s mogen niet in de flitser blijven. -
Seite 64: Displayverlichting
Als u de flitser langere tijd niet gaat gebruiken, schakel hem dan in prin- Automatisch-flitsenfunctie cipe altijd via zijn hoofdschakelaar uit! Met de hand in te stellen flitsfunctie Indien noodzakelijk kan de automatische uitschakeling reeds na 1 minuut plaats- HSS Flitsen met manual-instellingen en synchronisatie ook bij korte belich- vinden of worden gedeactiveerd (zie 7.9). -
Seite 65: Automatische Ttl -Invulflitsregeling
Na een correct belichte opname verschijnt gedurende ong. 3 sec. de aanduiding Bij een correct belichte opname licht de aanduiding van de flitscontrole “o.k.’ gedurende 3 seconden op (zie 13). van de belichtingscontrole ’o.k.’ (zie 4.2). De flitser ondersteunt automatisch de op de camera ingestelde TTL flitsfunctie. Er TTL-flitsfunctie verschijnt geen aparte aanduiding voor die ingestelde flitsfunctie! Deze analoge TTL-flitsfunctie wordt door alle analoge camera's ondersteund. -
Seite 66: Automatisch Flitsenfunctie
5.4 Automatisch flitsenfunctie opnamesituatie kan bijv. door de diafragma-instelling op de camera of door het kiezen van een geschikt deelvermogen worden bereikt. In de automatisch-flitsenfunctie A meet de fotosensor van de flitser het door het onderwerp gereflecteerde licht. De fotosensor heeft een meethoek van Het instellen: ong. -
Seite 67: Flitsparameters (Menu 'Parameter')
Voor een stroboscoop-opname kan de flitsfrequentie (flitsen per seconde) van Het maximaal mogelijke deelvermogen stelt zich in de stroboscoopfunctie auto- 1 … 50 Hz in stappen van 1 Hz en het aantal flitsen van 2 … 50 in stappen van matisch in. -
Seite 68: Het Instellen Van De Flitsparameters
6.1 Het instellen van de flitsparameters 6.2 Stand van de hoofdreflector (Zoom) Als er geen digitale overdracht van gegevens tussen camera en flitser plaats Bij het voor het eerst op een knop drukken wordt de displayverlichting heeft gevonden kunnen de reflectorstanden geactiveerd Afhankelijk van de ingestelde flitsfunctie worden in het menu verschillende flit- 24 mm –... -
Seite 69: Met De Hand In Te Stellen Deelvermogen (P)
Het instellen: hand in te stellen alleen in hele stappen mogelijk! • Schakel de flitser in de automatisch-flitsenfunctie A (zie 5.4). Bij het verlagen van de het aantal flitsen (N) en de flitsfrequentie (f) wordt het deelvermogen niet verlaagd! • Druk zo vaak op de toets ‘Para’ (parameter), dat in het display ‘EV’ (EV = Exposure Value;... -
Seite 70: Beep-Functie (Beep)
• Druk op de toets ‘Set’ en bevestig daarmee de keuze van de extra functie. Bij ingeschakeld Beep-functie wordt in het display ook het symbool aangegeven. • Kies met behulp van de toetsen UP en DOWN de gewenste instelling. Deze instelling treedt onmiddellijk in werking Het instellen: •... -
Seite 71: Extended-Zoomfunctie (Zoom Ext)
• Met de toetsen UP en DOWN de gewenste instelling uitvoeren. Het instellen: De instelling treedt onmiddellijk in werking. • Druk zo v aak op de toets ‘SEL’, dat in het display ‘Select’ wordt aangegeven. • Druk zo vaak op de toets ‘Return’ , dat het display naar de normale weer- •... -
Seite 72: Remote-Slaaffunctie (Remote)
7.5 Remote-slaaffunctie (Remote) De remotefunctie bestaat uit de functies Controller ‘CTRL‘ en Controller Plus ‘CTRL ‘, afhankelijk van het gebruikte camerasysteem. Om te voorkomen dat meerdere remotesystemen in één ruimte elkaar storen staan u vier onafhankelijke remotekanalen (CHANNEL/CH 1, 2, 3 of 4) ter beschikking. - Seite 73 CTRL-functie Camera met ingebouwde flitser, Camera zonder ingebouwde flitser die ‘CTRL ‘ niet ondersteunt • Druk zo vaak op de toets ‘SEL‘, dat in het display ‘Select‘ wordt aange- • Breng de flitser die als slaafflitser ingezet moet worden aan op de camera. geven.
- Seite 74 CTRL -functie In de functie ‘CTRL ‘ kunnen de slaafflitsers in twee slaafgroepen ‘RMT‘ en ‘RMT2‘ werken. De verhoudingen van de lichtafgifte tussen die twee kan daarbij worden ingesteld. De sturing van de slaafflitsers neemt de controllerflitser (Master) op de camera voor zijn rekening. Camera zonder ingebouwde flitser Camera met ingebouwde flitser •...
- Seite 75 Algemeen: • De opbouw kan in principe door op de toets ‘AEL‘ op de camera te drukken, worden getest. De slaafflitser moet met een in tijd iets vertraagde flits antwoorden. • De slaafflitsers moeten met de ingebouwde sensor voor de remotefunctie het licht van de controllerflitser kunnen ontvangen.
-
Seite 76: Schakelen Tussen Meter En Feet (M / Ft)
7.6 Schakelen tussen meter en feet (m / ft) Het instellen: De aanduiding van de reikwijdte in het display van de flitser kan naar keuze in • Druk zo vaak op de toets ‘SEL’, dat in het display ‘Select’ wordt aangegeven. meters m of in feet ft plaatsvinden. -
Seite 77: Automatische Uitschakeling (Standby)
Na activeren van de instellichtfunctie wordt via de aanduiding van flitsparaa- • Kies met de toetsen UP en DOWN het item ‘Standby’. Het geselecteerde theid , c.q. de ontspanknop voor handbediening het symbool aan- item wordt daarbij tegen een donker balkje getoond. gegeven. -
Seite 78: Motorisch Gestuurde Zoomreflector
Het opheffen van de toetsenvergrendeling: Terugzetten naar de A-Zoom functie Bij het drukken op een toets verschijnt in het display de aanduiding ‘UNLOCK? • Tip de ontspanknop op de camera even aan, zodat er een uitwisseling van Press these keys’ Als aanwijzing dat de toetsen vergrendeld zijn verschijnt het gegevens tussen camera eb flitser plaats kan vinden. -
Seite 79: Flitstechnieken
10 Flitstechnieken 10.3 Indirect flitsen met de hulpreflector Bij gezwenkte hoofdreflector kan als extra voor frontale opheldering van het 10.1 Indirect flitsen onderwerp de hulpreflector via het menu ‘Select’ worden geactiveerd (zie 7.7). Door indirect te flitsen wordt het onderwerp zachter verlicht en vermindert de Het gebruiken van de hulpreflector is in principe alleen zinvol en mogelijk als duidelijke schaduwwerking. -
Seite 80: Met De Hand In Te Stellen Correcties Op De Flitsbelichting
10.5 Met de hand in te stellen correcties op de flitsbelichting 11 Aanduiding van flitsparaatheid De belichtingsautomaat van de flitser en van de meeste camera’s is afgestemd op Zodra de flitscondensator opgeladen is, licht op de flitser de aanduiding van flit- een reflectiegraad van 25% (gemiddelde reflectiegraad van flitsonderwerpen). -
Seite 81: Aanduiding Van De Belichtingscontrole
13 Aanduiding van de belichtingscontrole Automatisch aanpassen van de aanduiding van de flitsreikwijdte De camera's geven de flitsparameters (bijv. die voor de lichtgevoeligheid ISO, De aanduiding van belichtingscontrole „o.k.“ licht alleen op, als de opname brandpuntsafstand van het objectief, diafragma en correctie op de belichting) in de TTL-flitsfunctie, c.q. -
Seite 82: Synchronisatie Met Lange Belichtingstijden / Slow
gere belichtingstijden dan zijn flitssynchronisatietijd in. de hand een kortere tijd dan de flitssynchronisatietijd ingesteld is. De synchronisatie bij het dichtgaan van de sluiter moet op de camera zelf wor- Let er op, dat het richtgetal van de flitser bij de HSS-synchronisatie bij korte belichtingstijden ook van die belichtingstijd afhankelijk is: hoe kor- den ingesteld (zie de gebruiksaanwijzing van uw camera)! ter de belichtingstijd, des te lager het richtgetal! De instelling vindt via het... -
Seite 83: Ontsteeksturing (Auto-Flash)
’P’ en diafragma-automatiek ’S’ (zie de gebruiksaanwijzing van de camera). De ontsteeksturing kan bij sommige camera’s worden gedeactiveerd: druk daarvoor Nadere informaties vindt u in het internet op de Metz-homepage: op de camera op de toets voor de flitssturing (zie de gebruiksaanwijzing van www.metz.de... -
Seite 84: Troubleshooting
Metz Power Pack P76 aan. b) In het display staat de reflectorstand niet aangegeven • Een Metz Power Pack P76 is aangesloten en in het batterijvak van de meca- blitz zitten nog batterijen/accu's. Haal de batterijen uit het batterijvak van de •... - Seite 85 In het display verschijnt een batterijsymbool vindt omschakeling naar de flitssynchronisatietijd niet plaats. • Op de mecablitz is een Metz Power Pack P76 aangesloten en in het batterijvak • De camera werkt met een langere belichtingstijd dan de flitssynchronisatietijd van de mecablitz bevinden zich batterijen.
-
Seite 86: Technische Gegevens
Meethoek fotosensor: Ong. 25° Kleurtemperatuur: Ong. 5600 K Lichtgevoeligheid: ISO 6 tot ISO 6400 Synchronisatie: Laagspannings-IGBT-ontsteking Aantallen flitsen: • Ong. 180 met Metz NiMH accupak 1600mAh • Ong. 180 met super-alkalimangaanbatterijen • Ong. 430 met Metz Power-Pack P76 (telkens bij vol vermogen) Flitsvolgtijd: •... -
Seite 87: Bijzondere Toebehoren
Verlichtingshoek 21 Bijzondere toebehoren Hoofdreflector vanaf 24 mm (kleinbeeldformaat 24 x 36 mm) Voor foute werking van en schades aan de mecablitz, veroorzaakt door ... met groothoekdiffusor vanaf 18 mm (kleinbeeldformaat 24 x 36 mm) het gebruik van accessoires van andere fabrikanten, zijn wij niet aan- Hulpreflector vanaf 35 mm (kleinbeeldformaat 24 x 36 mm) sprakelijk. -
Seite 88: Afvoeren Van De Batterijen
Afvoeren van de batterijen Batterijen horen niet bij het huisvuil. S.v.p. de batterijen bij een daarvoor bestemd inzamelpunt afgeven. S.v.p. alleen ontladen batterijen / accu’s afgeven. Batterijen / accu’s zijn in de regel ontladen wanneer het daarvoor gebruikte apparaat - uitschakelt en aangeeft „batterijen leeg“ - de batterijen na langer gebruik niet meer goed functioneren. - Seite 89 1 Safety instructions .........90 7.10 KeyLock .
-
Seite 90: Safety Instructions
• Do not expose the flash unit or battery charger to dripping or splashing water such as rain! Thank you for purchasing a Metz product. We are happy to welcome you as a • Protect the flash unit from excessive heat and humidity! Do not store the customer. -
Seite 91: Dedicated Flash Functions
2 Dedicated flash functions 3 Preparing the flash unit for use Dedicated flash functions are flash functions that have been specially adapted to 3.1 Mounting the flash unit a given camera system. Depending on the type of camera, different flash func- Mounting the flash unit on the camera tions are supported. -
Seite 92: Switching The Flash Unit On And Off
Replacing batteries 3.4 Power Pack P76 (optional accessory) The batteries are flat or dead if the recycling time (elapsing from the triggering of If a battery-operated flash does not meet your needs in terms of number of flas- a full-power flash, e.g. in the M mode, to the moment the flash ready indicator hes and recycling times, a Power Pack P76 (optional) can be connected to the lights up again) exceeds 60 seconds. -
Seite 93: Display Illumination
4 Display illumination • Press the „Return“ button , and the display changes back to the normal view. If the „Return“ button is not pressed, the display will change back to Every time a button on the flash unit is pressed, the flash display illumination is the normal view after about 5 seconds. -
Seite 94: Automatic Ttl Fill-In Flash Mode
shot, an almost imperceptible measurement preflash is triggered by the camera 5.3 Automatic fill-in flash mode prior to the actual exposure process. The reflected light of the measurement pre- With most camera models, the auto programme mode P and subject programme flash is evaluated by the camera. -
Seite 95: Automatic Flash Mode
• Press the „Return“ button to change the LC display back to the normal • Press the „Return“ button to change the LC display back to the normal view. If the „Return“ button is not pressed, the display will change back to view. -
Seite 96: Flash Parameters (Parameter Menu)
Strobe flash frequency (f) 6 Flash parameters (Parameter menu) Strobe mode allows you to select the flash frequency (f), which indicates the num- For the flash unit to operate correctly, various flash parameters such as the zoom ber of flashes per second. The number of flashes can be set from 1 to 50 in inter- position of the main reflector, aperture, ISO light sensitivity, etc. -
Seite 97: Main Reflector Position (Zoom)
• Press the „Return“ button to change the LC display back to the normal Setting procedure: view. If the „Return“ button is not pressed, the display will change back to • Switch the flash unit to Automatic Flash Mode A (see also 5.4). the normal view after about 5 seconds. -
Seite 98: Special Functions (Select Menu)
7 Special functions (Select menu) • Press „Return“ repeatedly to return the display to its normal reading. If the „Return“ button is not pressed, the display will change back to the normal Special functions are selected using the „Sel“ (Select) button. Depending on the view after about 5 seconds. -
Seite 99: Flash Bracketing Series (Fb)
Setting procedure: view. If the „Return“ button is not pressed, the display is automatically reset to its normal view after about 5 seconds. • Press the „Sel“ button repeatedly until „Select“ appears on the display. When „FB 0“ is displayed, the flash bracketing series is deactivated. •... - Seite 100 • Confirm the selection of the special function by pressing the „Set“ button. • Select the desired setting with the UP and DOWN keys. The setting takes effect immediately. • Press the „Return“ button repeatedly until the screen is reset to its normal view.
-
Seite 101: Remote Slave Mode (Remote)
7.5 Remote-Slave-Mode (Remote) The remote mode consists of the modes Controller “CTRL” and Controller Plus “CTRL ”, depending on the camera system used.. To prevent several remote systems in the same room from interfering with each other, there are 4 independent remote channels (CHANNEL/CH 1, 2, 3 or 4). Controller and slave flash units belonging to the same remote system must all be set to the same remote channel CTRL mode In the “CTRL”... - Seite 102 CTRL mode Camera with integrated flash unit Camera without integrated flash unit which does not support “CTRL ” • Press the "SEL" key repeatedly until "Select" appears on the display. • Mount the flash unit which is to be used as slave on the camera •...
- Seite 103 CTRL mode In the “CTRL ” mode, the slave flash units can work in two slave groups “RMT” and “RMT2”. The light conditions can be set. The controller flash unit (master) on the camera assumes the control. Camera without integrated flash unit Camera with integrated flash unit •...
- Seite 104 General: • In general, the design can be checked by pressing “AEL” on the camera. The slave flash unit must answer with a time-delayed flash. • The slave flash units must be able to receive the light from the controller flash unit with the integrated sensor for the remote mode •...
-
Seite 105: Meter-Feet Changeover (M/Ft)
7.6 Meter-Feet changeover (m/ft) Setting procedure: The maximum flash range indicated by the flash unit’s display can either be • Press the „SEL“ button repeatedly until „Select“ appears on the display. shown in meters or feet. The setting can be adjusted under the menu option m/ft. •... -
Seite 106: Auto Off Function (Standby)
takes effect immediately. Once the modelling light function is activated, the symbol is displayed on the flash-ready indicator or the manual firing button. The modelling light is • Press the „Return“ button repeatedly until the screen is reset to its normal activated when the manual firing button is pressed. -
Seite 107: Motor Zoom Reflector
8 Motor Zoom Reflector 9 Reflector adapter The zoom position of the main reflector can be adjusted for focal lengths of at Wide-angle diffuser least 24 mm (35 mm format). For lenses with focal lengths of 18 mm or more, With the wide angle diffuser , focal lengths of 18 mm or more can be illumi- the integrated wide-angle diffuser... -
Seite 108: Flash Techniques
10 Flash techniques Using the secondary reflector is generally practical and feasible only for bounce flash with a swivelled or tilted main reflector . If the main reflector is 10.1 Bounce flash not swivelled or tilted, the secondary reflector will not be activated for the shot. Bounce flash illuminates the subject more softly and reduces dense shadows. -
Seite 109: Flash Readiness Indication
In Automatic Mode A, manual flash exposure correction factors of from -3 EV 12 Automatic flash sync speed control (f-stops) to +3 EV (f-stops) can be adjusted on the flash unit in 1/3 step incre- Depending on the camera model and camera mode, the shutter speed is swit- ments. -
Seite 110: Flash Range Indication
14 Flash range indication 15 Flash synchronisation The maximum flash range is indicated on the display panel of the flash unit. The 15.1 Normal synchronisation value indicated relates to subjects with a reflection factor of 25%, which applies In normal synchronisation the flash unit is triggered at the beginning of the shut- to most photographic situations. -
Seite 111: High Speed Synchronisation Hss
connection with certain camera programs (e.g. „Av“ aperture priority, night 16 Multi-zone AF measuring beam shots program, etc.). No settings are made on the flash unit nor is there any The multi-zone AF measuring beam is activated in the flash unit by the display for this mode. -
Seite 112: Care And Maintenance
(Firmware Update). b) The reflector position does not appear on the display For more information, visit the Metz homepage at www.metz.de. • The main reflector is turned either laterally or upwardly from its normal 18.2 Reset... - Seite 113 • The main reflector is in its normal position or tilted downwards. • A Metz Power Pack P76 is connected and there are still batteries in the battery m) The setting for manual TTL flash exposure correction has no effect.
-
Seite 114: Technical Data
* Approx. 180 with high-capacity alkaline manganese batteries • Digital data is automatically exchanged between the flash unit and camera. As * Approx. 430 with Metz Power Pack P76 (special accessory) a result, it is not possible to manually set or change the f-stop and ISO values. -
Seite 115: Optional Accessories
Light coverage: 21 Optional accessories Main reflector from 24 mm (35 mm format) We accept no liability for malfunctions of or damage to the flash unit cau- Main reflector with wide-angle diffuser from 18 mm (35 mm format) sed by the use of accessories of other manufacturers. Secondary reflector from 35 mm (35 mm format) •... - Seite 116 1 Per la vostra sicurezza ........117 8 Parabola zoom motorizzata .
-
Seite 117: Per La Vostra Sicurezza
• Non gettare nel fuoco le batterie o le pile esaurite! • Un’eventuale fuoriuscita di acido dalle batterie esaurite può provocare danni Grazie per aver scelto un prodotto Metz! Siamo lieti di potervi dare il benvenuto al flash. Rimuovere subito le batterie esaurite dall’apparecchio! tra i nostri Clienti. -
Seite 118: Funzioni Flash Dedicate
2 Funzioni flash dedicate 3 Preparazione del flash Le funzioni flash dedicate sono funzioni messe a punto specificatamente per i 3.1 Montaggio del flash diversi sistemi di camera. Le funzioni del flash supportate dipendono dal tipo di Montaggio del flash sulla camera camera. -
Seite 119: Accensione E Spegnimento Del Flash
Se prevedete di non usare il flash per lungo tempo, togliete le batterie Le pile / batterie del flash non devono rimanere inserite nell'apparecchio. dall’apparecchio. Prima di collegare il Power Pack P76 o il cavo di collegamento V58-50 (accesso- rio) al flash, l’interruttore principale del flash deve essere spostato nella posi- Sostituzione delle batterie zione sinistra (OFF). -
Seite 120: Illuminazione Del Display
Se si desidera, è possibile impostare lo spegnimento automatico dell’apparec- Modo flash Stroboscopico chio dopo 1 minuto o disattivare la funzione, per maggiori informazioni leggere • Impostate il modo flash desiderato con i tasti UP e DOWN il punto 7.9). Automatico , Manuale , ecc.). -
Seite 121: Lampo Di Schiarita Automatico Ttl
Verificate se per la vostra fotocamera ci sono limitazioni relative al valore Procedura per l’impostazione: ISO in modalità flash TTL (ad es. ISO 64 fino a ISO 1000; vedi il manuale • Premete il tasto „Mode“ finché nel display non comparirà „Mode“. di istruzioni)! Per testare il corretto funzionamento di TTL nelle fotocamere •... -
Seite 122: Modo Lampo Di Schiarita Automatico
Sul display viene indicato il massimo campo di utilizzo. La distanza più breve di Procedura per l’impostazione: ripresa è pari a circa il 10% del massimo campo di utilizzo. Dividendo in tre • Premete il tasto „Mode“ finché sul display non comparirà „Mode“. parti la portata, il soggetto dovrebbe trovarsi circa in quella centrale, in modo •... -
Seite 123: Parametri Del Flash (Menu Parametri)
Procedura per l’impostazione: ottenere durate brevi del lampo è data la possibilità di impostare la potenza ridotta fino al valore minimo di 1/256. • Premete il tasto „Mode“ finché sul display non comparirà „Mode“. Sul display viene indicata la distanza valida in funzione dei parametri impostati. •... -
Seite 124: Procedura Per L'impostazione Dei Parametri Flash
6.1 Procedura per l’impostazione dei parametri flash 24 mm - 28 mm - 35 mm - 50 mm - 70 mm - 85 mm - 105 mm (formato piccolo 24 x 36) Alla prima pressione di qualsiasi tasto si illumina il display. Sul display vengono visualizzati MZoom (Zoom manuale) e la posizione della In base al tipo di modo flash impostato, nel menu vengono indicati diversi para- parabola. -
Seite 125: Potenza Ridotta Manuale (P)
• Premete il tasto „Return“ . Il display ritorna alla schermata normale. Se 7 Funzioni speciali (Menu Select) non premete il tasto „Return“ il display torna comunque automaticamente Le funzioni speciali vengono selezionate con il tasto „Sel“ (Select). Secondo il alla schermata normale dopo circa 5 secondi. -
Seite 126: Funzione Bip (Beep)
• Premete il tasto „Return“ . Il display ritorna alla schermata normale. Se Procedura per l’impostazione: non premete il tasto „Return“ il display torna comunque automaticamente • Premete il tasto „SEL“ più volte finché sul display non compare „Select“. alla schermata normale dopo circa 5 secondi. •... -
Seite 127: Modo Zoom Esteso (Zoom Ext)
L’impostazione è immediatamente attiva. 7.4 Modo zoom esteso (Zoom Ext) Nel modo zoom esteso la focale della parabola viene ridotta di un grado rispet- • Premete il tasto „Return“ . Il display ritorna alla schermata normale. Se non to alla focale dell’obiettivo della camera. La forte illuminazione che ne deriva premete il tasto „Return“... -
Seite 128: Modo Flash Slave Con Controllo A Distanza (Remote)
7.5 Modo flash slave con controllo a distanza (Remote) La modalità remote consiste nelle modalità Controller "CTRL" e Controller Plus "CTRL ”, indipendentemente dal tipo di fotocamera utilizzato. Per fare in modo che più sistemi remote nello stesso ambiente non si disturbino a vicenda, sono disponibili 4 canali remote indipendenti (CHANNEL/CH 1, 2, 3 o 4). - Seite 129 Modalità CTRL Fotocamera con flash integrato Fotocamera senza flash integrato che non supporta "CTRL ” • Premere tante volte il tasto "SEL" finché non compare "Select" sul display. • Montare sulla fotocamera il flash che deve essere utilizzato come slave. •...
- Seite 130 Modalità CTRL Nella modalità "CTRL ” i flash slave possono lavorare in due gruppi slave: "RMT" e "RMT2". È possibile impostare le condizioni di illuminazione. Il flash controller (Master) assume il controllo della fotocamera. Fotocamera senza flash integrato Fotocamera con flash integrato •...
- Seite 131 Informazioni generali: • In generale, è possibile verificare la corretta installazione premendo il tasto "AEL" sulla fotocamera. Il flash slave deve rispondere illuminandosi con ritardo. • I flash slave devono poter ricevere la luce del flash controller grazie al sensore integrato per la modalità remote •...
-
Seite 132: Commutazione Metri - Piedi (M/Ft)
7.6 Commutazione metri - piedi (m/ft) Dopo la memorizzazione, a parabola ausiliaria attivata, sul display si visualizza il simbolo Il campo di utilizzo può essere visualizzato sul display a scelta in metri „m“ o in piedi „ft“. L’impostazione avviene attraverso il punto del menu m/ft. Procedura per l’impostazione: Procedura per l’impostazione: •... -
Seite 133: Spegnimento Automatico Dell'apparecchio (Standby)
• Premete il tasto „Return“ . Il display ritorna alla schermata normale. Se non Procedura per l’impostazione: premete il tasto „Return“ il display torna comunque automaticamente alla • Premete il tasto „SEL“ più volte finché sul display non compare „Select“. schermata normale dopo circa 5 secondi. -
Seite 134: Parabola Zoom Motorizzata
- Quando si visualizza „KEYLOCK NO?“ il blocco dei tasti viene disattivato. Ritorno al modo A-Zoom • Premere il tasto "Set" e confermare così la selezione. • Toccate lo scatto della camera per permettere lo scambio dati tra flash e camera. -
Seite 135: Lampo Riflesso Con Pannello Riflettente
Per utilizzare la modalità di lampo riflesso, la parabola principale del flash riflesso e parabola inclinata. Se la parabola principale non è inclinata, per la può essere ruotata orizzontalmente e verticalmente. Per fare ciò premete la testa ripresa la parabola ausiliaria non viene attivata. di bloccaggio della parabola e inclinate la parabola . -
Seite 136: Indicazione Di Stato Del Flash
l’esposizione flash con un valore di correzione. Il valore di correzione dipende Il flash di misurazione multizone AF incorporato nel flash può essere dal contrasto tra il soggetto e lo sfondo dell’immagine! attivato dalle camere AF solo se compare l’indicazione di flash carico (vedi il punto 17)! È... -
Seite 137: Indicazione Campo D'utilizzo
ripetere la ripresa. Osservate l’indicazione del campo d’utilizzo sul display del 15 Sincronizzazione del lampo flash (vedi il punto 14). 15.1 Sincronizzazione normale 14 Indicazione campo d’utilizzo Nella sincronizzazione normale, il flash interviene all’inizio del tempo di ottura- zione (sincronizzazione sulla prima tendina). Questa è la modalità standard e Sul display del flash viene visualizzato il valore del massimo campo d’utilizzo viene eseguita da tutte le camere. -
Seite 138: Sincronizzazione Ad Alta Velocità Hss
di luminosità ambiente scarsa. Ciò si ottiene adattando i tempo di posa della 15.5 Funzione di prelampo contro l’effetto “occhi rossi” camera alla luce ambiente. In questo caso la camera imposta automaticamente Diverse camere possono attivare la funzione di prelampo contro l’effetto “occhi tempi di posa più... -
Seite 139: Soppressione Del Lampo (Auto-Flash)
(aggiornamento soft- ware). • La parabola principale non si trova nella posizione normale. Per maggiori informazioni consultate il sito internet Metz: www.metz.de • Sul flash è impostato il modo con controllo a distanza. - Seite 140 Metz Power Pack P76. alla sua normale posizione (vedi 10.1). • Un Metz Power Pack P76 è collegato e nel vano batterie del mecablitz sono c) Sul display appare la scritta "TILT” ancora presenti delle batterie. Rimuovete le batterie dal relativo alloggiamento del mecablitz.
- Seite 141 l) Non è possibile attivare la parabola ausiliaria, o non emette alcun lampo. q) Le riprese sono troppo chiare. • Per le riprese da vicino, bisogna mantenere determinate distanze minime di • I modi flash Stroboscopico, con controllo a distanza e luce pilota (ML) non illuminazione per evitare sovraesposizioni.
-
Seite 142: Dati Tecnici
* Circa 180 con accumulatore NiMH 1600mAh * Circa 180 con batterie alcaline al manganese ad alte prestazioni * Circa 430 con Power-Pack Metz P76 (accessorio a richiesta) (sempre a potenza luminosa piena) Tempo di ricarica (sempre a potenza luminosa piena):... -
Seite 143: Accessori Opzionali
Le batterie non vanno gettate insieme ai rifiuti domestici. tilizzo di accessori non prodotti dalla Metz non sono coperti dalla nostra Si prega di utilizzare un sistema di smaltimento adeguato, p. es. portandole al garanzia! negozio dove le si è... - Seite 144 1 Indicaciones de seguridad ........145 8 Reflector con zoom motorizado ......162 2 Funciones dedicadas del flash .
-
Seite 145: Indicaciones De Seguridad
• Las pilas secas no pueden recargarse. • No exponer el flash ni el cargador a gotas o salpicaduras de agua, por Le agradecemos que se haya decidido por un producto Metz y nos complace ejemplo, a la lluvia. saludarle como usuario de nuestra marca. -
Seite 146: Funciones Dedicadas Del Flash
2 Funciones dedicadas del flash 3 Preparación del flash Las funciones dedicadas del flash son las que se adecuan de manera especial al 3.1 Montaje del flash sistema de la cámara. Así, las funciones del flash serán compatibles dependien- Colocar el flash en la cámara do del modelo de cámara. -
Seite 147: Conexión Y Desconexión Del Flash
• Power Pack P76 con cable de conexión V58-50 (accesorio opcional). 3.4 Power Pack P76 (accesorio opcional) Si la cantidad de destellos y los intervalos entre destellos no son suficientes para Cuando no se vaya a utilizar el flash durante un periodo prolongado de iluminar el motivo que se desea fotografiar, se puede montar un Power Pack P76 tiempo, retirar las pilas del aparato. -
Seite 148: Iluminación De La Pantalla
El último ajuste operativo utilizado queda registrado tras la desconexión automática 5.1 Configuración de los modos del flash y se recupera inmediatamente tras la conexión. El flash se conecta de nuevo al pul- • Pulsar la tecla „Mode“ hasta que aparezca „Mode“ en la pantalla. sar cualquier tecla o el disparador de la cámara (función Wake-Up). -
Seite 149: Relleno Automático Ttl
The Lens“). Entonces, la cámara determina automáticamente la potencia lumino- Procedura per l’impostazione: sa necesaria para una correcta exposición de la toma. La ventaja de los modos • Premete il tasto „Mode“ finché nel display non comparirà „Mode“. de flash TTL radica en que todos los factores que influyen en la exposición (filtro, •... -
Seite 150: Modo Automático
Con el flash de relleno se pueden eliminar las molestas sombras y conseguir una 5.5 Modo de relleno automático iluminación armoniosa entre el motivo y el fondo en tomas a contraluz. Un siste- Cuando se ajusta el modo de relleno automático con luz diurna, en el modo ma de medición controlado por ordenador en la cámara asegura la correcta automático del flash se realiza una corrección de aprox. -
Seite 151: Modo Estroboscópico
de destellos se puede ajustar de 1 a 50 en pasos de 1. La máxima potencia par- Varias cámaras son compatibles con el modo manual únicamente cial manual posible se ajusta de forma automática. cuando la cámara también se encuentra en modo manual M. Configuración: 5.7 Modo estroboscópico •... -
Seite 152: Parámetros Del Flash (Menú Parámetros)
6 Parámetros del flash (menú Parámetros) • Ajustar el valor que se desee con las teclas MÁS/MENOS. El ajuste se aplica de forma inmediata. Para un correcto funcionamiento del flash es necesario que los distintos paráme- • Pulsar la tecla „Return“ . -
Seite 153: Corrección De La Exposición Del Flash (Ev)
6.3 Corrección de la exposición del flash (EV) • Pulsar la tecla „Return“ . La pantalla regresa a la indicación normal. Si no se pulsa la tecla „Return“ , la pantalla regresa automáticamente a la indica- Cuando existen grandes diferencias de contraste entre el motivo y el fondo de la ción normal aprox. -
Seite 154: Función Beep (Pitido)
Pitido tras la toma: TTL/TTL-HSS M/M HSS • Un breve pitido continuado (aprox. 2 seg.) justo después de la toma indica que la iluminación es correcta y que el flash está preparado para disparar de Beep Beep Beep Beep nuevo. Si después de la toma no se oye el pitido, significa que la toma ha —... -
Seite 155: Modo De Zoom Extendido (Zoom Ext)
Esto consiste en una exposición en serie de tres tomas seguidas con flash a dife- 7.4 Modo de zoom extendido (Zoom Ext) rentes valores de corrección del flash. Con el modo Extended-Zoom se reduce un nivel la distancia focal del reflector principal con respecto a la distancia focal del objetivo de la cámara. -
Seite 156: Modo Remoto Esclavo (Remote)
7.5 Modo remoto esclavo (Remote) El funcionamiento remoto se compone de los modos de funcionamiento Controller "CTRL" y Controller Plus "CTRL " en función del sistema de cámara utilizado. Para que los distintos sistemas remotos que pueda haber en la misma habitación no se solapen, existen cuatro canales remotos independientes (CHANNEL/CH 1, 2, 3 o 4). - Seite 157 Funcionamiento CTRL Cámara con flash integrado Cámara sin flash integrado que no soporta "CTRL " • Pulsar la tecla "SEL" hasta que aparezca "Select" en la pantalla. • Montar en la cámara el flash que debe usarse como esclavo. • Mediante las teclas UP y DOWN , seleccionar la opción de menú...
- Seite 158 Funcionamiento CTRL En el modo de funcionamiento "CTRL ", los flashes esclavos pueden operar en dos grupos esclavos "RMT" y "RMT2". Las condiciones lumínicas se pueden ajustar. El flash controlador (maestro) adopta el control de la cámara. Cámara sin flash integrado Cámara con flash integrado •...
- Seite 159 General: • La instalación se puede comprobar en principio si pulsa la tecla "AEL" en la cámara. El flash esclavo debe responder con un flash retardado. • Es preciso que los flashes esclavos puedan recibir la luz del flash controlador mediante el sensor integrado para funcionamiento remoto •...
-
Seite 160: Conmutación De Metros A Pies (M-Ft)
7.6 Conmutación de metros a pies (m-ft) Configuración: La indicación del alcance en la pantalla del flash se puede realizar, según las • Pulsar la tecla „SEL“ hasta que aparezca „Select“ en la pantalla. preferencias del usuario, en metros (m) o pies (ft). El ajuste se realiza a través •... -
Seite 161: Desconexión Automática (Standby)
Después de activar la función de luz de modelado, mediante la indicación de • Pulsar la tecla „Set“ para confirmar la selección de la función especial. disponibilidad del flash o del disparador manual, se muestra el • Establecer el ajuste deseado con las teclas UP y DOWN . -
Seite 162: Reflector Con Zoom Motorizado
keys“ (¿Desbloquear? Pulsar estos botones). Para indicar que el teclado está blo- Restablecimiento del modo de zoom A queado aparece el símbolo . Para cancelar el bloqueo del teclado pulsar • Pulsar el disparador de la cámara para que se produzca la transmisión de los dos botones intermedios durante aprox. -
Seite 163: Técnicas De Destello
10 Técnicas de destello 10.3 Destellos indirectos con segundo reflector Con el reflector principal girado, se puede activar el segundo reflector 10.1 Destellos indirectos el menú Select (consultar 7.7) para conseguir un relleno frontal del motivo. Mediante los destellos indirectos, el motivo recibe una iluminación más suave y La utilización del segundo reflector sólo es posible y aconsejable básicamente se atenúa la formación de sombras. -
Seite 164: Corrección Manual De La Exposición Del Flash
10.5 Corrección manual de la exposición del flash 11 Indicación de disponibilidad del flash Los flashes automáticos y la mayoría de las cámaras se han diseñado con un Cuando el condensador del flash está cargado, se enciende la indicación de grado de reflexión del 25 % (grado de reflexión medio de los motivos con flash). -
Seite 165: Indicación De Control De La Exposición
En cámaras con obturador central (consultar el manual de instrucciones recta exposición con el flash. La adaptación a la respectiva situación de la toma de la cámara) y utilizando sincronización de alta velocidad HSS (véase se puede conseguir modificando el diafragma del objetivo y mediante la selecci- 15.4) no hay control automático de la velocidad de sincronización del ón entre plena potencia luminosa y las potencias parciales „P“. -
Seite 166: Sincronización De Tiempo Largo / Slow
sición. Esto es una ventaja, sobre todo en exposiciones con velocidades de obtu- cidad de sincronización. Este modo es interesante, por ejemplo, en retratos con ración lentas (p. ej., más de 1/30 seg.) y motivos en movimiento con fuente de una luz ambiente muy clara, si se desea limitar la profundidad de campo medi- luz propia, ya que las fuentes de luz en movimiento dejan una estela luminosa ante un diafragma abierto (por ejemplo, F 2,0). -
Seite 167: Control De Encendido (Auto-Flash)
(actualización del no se activa el destello de medición AF en el flash. firmware). Consultar más información en la página web de Metz: www.metz.de 17 Control de encendido (Auto-Flash) 18.2 Reset Si la luz ambiente es suficiente para una exposición en modo normal, la cámara... -
Seite 168: Ayuda En Caso De Problemas
No aparece en la pantalla ninguna indicación acerca de la posición del un Power Pack Metz P76. reflector • Se ha conectado un Power Pack Metz P76, pero hay todavía baterías en el • El reflector principal se encuentra girado o bien lateralmente o bien hacia compartimento de baterías del mecablitz. - Seite 169 j) La posición del reflector no se ajusta automáticamente a la posición real de o) Aparece un sombreado en el lado inferior de la imagen. zoom del objetivo. • Debido al paralaje del objetivo y el flash puede ocurrir que los primeros pla- •...
-
Seite 170: Características Técnicas
Encendido de baja tensión IGBT Cantidad de destellos (todos a plena potencia): * Aprox. 180 con baterías de NiMH de 1.600 mAh * Aprox. 180 con pilas alcalino-manganesas de alta capacidad * Aprox. 430 con Power-Pack P76 de Metz (accesorio opcional) -
Seite 171: Accesorios Especiales
21 Accesorios especiales Eliminación de las baterías Metz no asume ninguna garantía por funcionamientos erróneos o daños No se deben tirar las baterías a la basura casera. en el flash, causados al utilizar accesorios de otros fabricantes. Para la devolución de sus baterías gastadas, sírvase utilizar uno de los sistemas •... -
Seite 172: Tableau 3: Nombres-Guides Pour La Puissance Maximale (P 1)
Zoom 6/9° 8/10° 10/11° 12/12° 16/13° 20/14° 25/15° 32/16° 40/17° 50/18° 64/19° 80/20° 100/21° 125/22° 160/23° 200/24° 250/25° 320/26° 400/27° 500/28° 650/29° 800/30° 1000/31° 79 1250/32° 89 Tabelle 3: Leitzahlen bei maximaler Lichtleistung (P 1/1) 1600/33° 100 Tableau 3: Nombres-guides pour la puissance maximale (P 1/1) 2000/34°... -
Seite 173: Tableau 4: Durée De L'éclair Pour Les Différents Niveaux De Puissance
Teillichtleistung Blitzleuchtzeit (s) Leitzahl Leitzahl Niveaux de puissance Durée d’éclair (s) Nombre-guide Nombre-guide Deelvermogensstappen Flitsdur (s) Richtgetal Richtgetal Partial light output Flash duration Guide number Guide number Livello di potenza Durata del lampo Numero guida Numero guida Potencia parcial Duración de destello Número-guía Número-guía (P=Flash Power) ISO 100/50 mm... -
Seite 174: Tableau 5: Vitesses D'obturation Du Reflex En Mode Stroboscope
Tabelle 5: Kameraverschlusszeiten im Stroboskop-Betrieb Blitzfrequenz Blitzanzahl Tableau 5: Vitesses d’obturation du reflex en mode stroboscope f(Hz) (Blitze/Sek.) Nombre d’éclairs Tabel 5: Belichtingstijden bij de stroboscoopfunctie Fréquence f(Hz) Table 5: Camera shutter speeds in stroboscopic mode Aantal flitsen (éclairs/seconde) Tabella 5: Tempi di posa per il modo stroboscopico Flitsfrequentie Number of flashes Tabla 5:... -
Seite 175: Tableau 6: Temps De Recyclage Et Autonomie Pour Différents Types De Piles .175 Tableau 7: Nombres-Guides En Mode Hss
Zoom Batterietyp Blitzfolgezeiten Blitzanzahl Type de pile/accu Temps de recyclage Nombre d’éclairs Type voeding Flitsvolgtijden Aantal flitsen Battery type Recycling times Number of flashes Tabelle 7: Maximale Leitzahlen* im HSS-Betrieb Tipo batterie Tempi di ricarica Numero ampi Tipo de pila Tiempo de secuencia de dest. - Seite 178 Bitte helfen Sie mit die Umwelt, in der wir leben, zu erhalten. This will help to protect the environment in which we all live. Votre produit Metz a été conçu et fabriqué avec des matériaux et Il vostro prodotto Metz è stato progettato e realizzato con materi- composants de haute qualité, susceptibles d'être recyclés et réutili-...
- Seite 179 Hinweis: Opmerking: Avvertenza: In het kader de CE-markering werd Nell’ambito delle prove EMV per il Im Rahmen des CE-Zeichens wurde bei bij de EMV-test de correcte be-lich- segno CE è stata valutata la corretta der EMV-Prüfung die korrekte ting bepaald. esposizione.
- Seite 180 Entriegelungsknopf Hauptreflektor Reflektorkarte Bouton de déverrouillage pour réflecteur Carte-réflecteur Ontgrendelingsknop Hoofdreflector Hauptreflektor Reflecterende kaart Unlocking button for the main reflector Réflecteur principale Reflector card Pulsante di sblocco della parabola principale Pannello riflettente Hoofdreflector Botón de desbloqueo del reflector principal Tarjeta reflectante Main-reflector Parabola principale Weitwinkelstreuscheibe...
- Seite 181 Display Werkseinstellung (Reset) Display Mode Para Mode Para Select-Menü (Sonderfunktionen**) Display Gruppe B 5 sec. Display Gruppe A Mode-Menü* Parameter-Menü** TTL +1 Display Display ON/OFF Para — REAR ON/OFF Gruppe C Beep ON/OFF Remote Remote OFF/Master/Slave Bsp. für Displayanzeige des 58 AF-1: M (steht für Master) 1/3 —...
- Seite 182 Metz - Werke GmbH & Co KG • Postfach 1267 • D-90506 Zirndorf • info@metz.de • www.metz.de Consumer electronics Photoelectronics Plastics technology 707 47 0030.A4 Metz - always first class.