GRAUPNER COMPACT CONTROL 44S Bedienungsanleitung
Inhaltsverzeichnis
Verfügbare Sprachen
Verfügbare Sprachen
Quicklinks
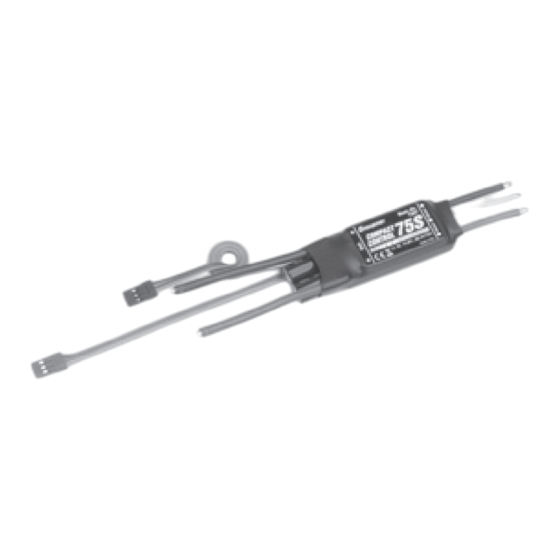
Best.-Nr. 7200-7209
Order-No. 7200-7209
Rèf. No. 7200-7209
BEDIENUNGSANLEITUNG
OPERATING MANUAL
INSTRUCTIONS D´UTILISATION
D
GB
F
COMPACT CONTROL 44S, 75S, 90S, 200S
page 14
page 26
Seite 2
G R A U P N E R GmbH & Co. KG D - 7 3 2 3 0 K I R C H H E I M / T E C K G E R M A N Y
Keine Haftung für Druckfehler! Änderungen vorbehalten!
PN.LA-01
ID # 0058019
Inhaltsverzeichnis

Verwandte Anleitungen für GRAUPNER COMPACT CONTROL 44S


Inhaltszusammenfassung für GRAUPNER COMPACT CONTROL 44S
- Seite 1 Rèf. No. 7200-7209 BEDIENUNGSANLEITUNG OPERATING MANUAL INSTRUCTIONS D´UTILISATION COMPACT CONTROL 44S, 75S, 90S, 200S page 14 page 26 Seite 2 G R A U P N E R GmbH & Co. KG D - 7 3 2 3 0 K I R C H H E I M / T E C K G E R M A N Y Keine Haftung für Druckfehler! Änderungen vorbehalten!
-
Seite 2: Allgemeine Sicherheitshinweise
Sie bei Bedarf am Sender eine Zeitverzögerung für die Gasannahme ein, um Timingfehler zu verhindern. - Benutzen Sie nur Motoren von GM-Racing oder Graupner, die für den verwendeten Spannungs- bereich vorgesehen sind! - Verwenden Sie nur Hochleistungsakkus von GM-Racing oder Graupner. Akkus mit einem zu ho- hen Innenwiderstand können zur Zerstörung des Reglers führen! Benutzen Sie auf keinen Fall ein... - Seite 3 Control ..S vor. Wir wollen in dieser Serie unsere besten Erfahrungen und das Know-How, das wir in den letzten zehn Jahren der Entwicklung von Brushless-Controllern angesammelt haben, umsetzen. Der Compact Control 44S -Regler enthält einen neuen Typ eines BEC-Schalt-Spannungsreglers für den Emp- fänger und die Servos. Dank dieses Bauteils wird eine bedeutende Vergrößerung des Anwendungsbereichs von BEC-Reglern in Richtung auf eine größere Zahl von Flugakku-Zellen hin erreicht.
-
Seite 4: Einstellung Mit Hilfe Der Fernsteueranlage
Einstellung mit Hilfe der Fernsteueranlage Einstellungen mit Hilfe der Fernsteueranlage vornehmen: - Verbinden Sie den Controller über den JR-Stecker mit dem Drosselkanal (Gas) des Empfängers und schließen Sie dann den Motor an. - Stellen Sie den Steuerknüppel für Drossel (Gas) auf „Vollgas“, schalten Sie den Sender ein und schließen Sie die Fahrakkus an. - Seite 5 Ablaufdiagramm Einstellungen mit Hilfe der PROGRAMMER BOX Best.-Nr. 7200 vornehmen Diese Einstellungen lassen sich über die vier Tasten: links L rechts auf U ab D vornehmen. Stecken Sie den JR-Stecker des Reglers in die mit Impuls + - bezeichnete Buchse an der rechten Seite der PROGRAM- MER BOX ein.
- Seite 6 Ablaufdiagramm Bemerkung zu den Strommessungen: 1) Für eine korrekte Messung muss der Regler im Lauf des Flugs mindestens 4 sec. lang mit voller Leistung laufen. Im Fall einer konstanten Drehzahleinstellung (Heli const. RPM) ist diese Bedingung u.U. nicht erfüllt, und die Messung entspricht dann nicht den tatsächlichen Werten.
- Seite 7 Ablaufdiagramm MAN Setting Bestimmte Parameter des Controllers können manuell eingestellt Die Höhe der Temperatur, bei der der Temperaturschutz einsetzt, kann mit den Tasten L-R Temperature eingestellt werden. Protection Neufestlegung der Bremswirkung: Der erste Wert stellt die Höhe der Anfangs-Bremswirkung in % dar, der zweite Wert die Höhe der End-Bremswirkung in %, der dritte Wert die Zeit die zum Erreichen des Wertes von der Anfangs-Bremswirkung zur End-Bremswirkung benötigt wird.
- Seite 8 Ablaufdiagramm Gear Einstellen der Gesamtübersetzung des Hauptrotors mit den Tasten L-R Einstellen der gewünschten max. Rotor-Drehzahl mit den Tasten L-R Set Max Rotor RPM Einstellen der gewünschten min. Rotor-Drehzahl mit den Tasten L-R. Wir empfehlen einen Wert von 1000-1500 U/min SET Min Rotor RPM Stellen Sie mit den Tasten L-R die Geschwindigkeit ein, mit der Abweichungen der Drehzahl ausgeglichen werden.
- Seite 9 Ablaufdiagramm Die Anfangs-Knüppelposition (Motor aus) dient unmittelbar als Stop-Stellung für Initial point auto den Steuerknüppel für die Motordrosselung. (Automatische Erkennung) Einstellen der Anfangs-Knüppelposition (Motor aus) als Festwert in Fix initial point Millisekunden. Setzen Sie die Werte mit Hilfe der L-R – Tasten fest. Mit den Tasten L-R können Sie die gewünschten Vollgas-Knüppeleinstellungs- End Point werte einstellen.
- Seite 10 25-30 cm Länge eingesetzt werden. Bemerkung 2: Mehrmotorige Modelle Wir empfehlen, für jeden Motor denselben Controllertyp zu verwenden. Bei Verwendung eines Compact Control 44S – Reglers schalten Sie nur einen BEC zu. Die Schalter der anderen Controller bleiben in der „SWITCHED OFF“-Stellung.
-
Seite 11: Benützung Der Programmer-Box Als Eigenständige Einheit
Benützung der PROGRAMMER-Box als eigenständige Einheit Benützung der PROGRAMMER-Box als eigenständige Einheit: 1. Messen der Impulsbreiten des Ausgangskanals am Empfänger 2. Servo-Impuls-Generator 3. Servo cycler (Servo-Zyklusgeber) 4. Messen der Servo-Übertragungsgeschwindigkeiten 5. Verbindung zu Compact Control ..S – Reglern Für Anwendung Nr. 1 brauchen Sie einen Empfänger, einen Sender und eine Empfänger- batterie (4,8-6V). - Seite 12 Benützung der PROGRAMMER-Box als eigenständige Einheit 3. Servo cycler (Servo-Zyklusgeber) Mit dieser Anwendung ist es möglich, die Zahl der Zyklen, den Servoausschlag und die Zyklusgeschwindigkeit einzustellen. Diese Funktionen ermöglichen es, Lebensdauer, Einbrand und andere Funktionen von Servos zu überprüfen. Schließen Sie die Batterien und das Servo an und wählen Sie mit den Tasten R und L die Funktion SERVO CYCLE an.
-
Seite 13: Konformität
Konformität EG-Konformitätserklärung: Für das folgend bezeichnete Erzeugnis Compact Control 44S, 75S, 90S, 200S wird hiermit bestätigt, dass es den wesentlichen Schutzanforderungen entspricht, die in der Richtlinie des Rates zur Angleichung der Rechtsvorschriften der Mitgliedstaaten über die elektromagnetische Verträglichkeit (89/336/EWG) festgelegt sind. -
Seite 38: Garantie-Urkunde
Garantie von Monaten warranty for month garantie de mois Die Fa. Graupner GmbH & Co. KG, Henriettenstra- Servicestellen / Service / Service après-vente ße 94-96. 73230 Kirchheim/Teck gewährt ab dem Graupner-Zentralservice Servicehotline Kaufdatum auf dieses Produkt eine Garantie von 24 Graupner GmbH &...