Herunterladen Inhalt Inhalt Diese Seite drucken
Inhaltsverzeichnis

Werbung

Verfügbare Sprachen

Verfügbare Sprachen

DUCT 2
Serie ID3-XY da 27M a 160M
- D
M0KD00001-00
10-2021

Werbung

Inhaltsverzeichnis
loading

Inhaltszusammenfassung für CLIVET DUCT 2 ID3-XY Serie

  • Seite 1 DUCT 2 Serie ID3-XY da 27M a 160M M0KD00001-00 10-2021...
  • Seite 2 MATERIALE INFIAMMABILE Indica che l’apparecchio utilizza un refrigerante infiammabile. GARANZIA Il prodotto CLIVET gode di una garanzia convenzionale, valida a partire dalla data di acquisto dell’apparecchio, le cui condizioni sono specificate nelle CONDIZIONI GENERALI DI VENDITA reperibili all’indirizzo www.clivet.com AVVERTENZA –...
  • Seite 3 INDICE Generalità ............4 4 Manutenzione ..........37 Avvertenze generali e regole per la 4.1 Pulizia dell’unità interna sicurezza 4.2 Pulizia del filtro dell’aria 1.2 Descrizione componenti del sistema 4.3 Pulizia dell’unità esterna 1.3 Accessori 4.4 Riparazione delle perdite di refrigerante 1.4 Identificazione 4.5 Periodi di inutilizzo prolungato 4.6 Manutenzione a inizio stagione...
  • Seite 4: Generalità

    Avvertenze generali e regole per la sicurezza AVVERTENZA – Il presente manuale è proprietà di CLIVET e ne è vietata la riproduzione o la cessione a terzi dei contenuti del presente documento. Tutti i diritti sono riservati. Esso è parte integrante del prodotto; assicurarsi che sia sempre a corredo dell’apparecchio, anche in caso di vendita/trasferimento ad altro proprietario, affinché...
  • Seite 5 Generalità ATTENZIONE PERICOLO – Quando si collegano le linee frigorifere, evitare l’ingresso nell’unità di sostanze o gas diversi dal refrigerante specificato. La presenza di altri gas o sostanze può ridurre le prestazioni dell’unità e causare un innalzamento anomalo della pressione nel ciclo di refrigerazione. Questo può generare rischi di esplosione e conseguenti lesioni.
  • Seite 6 Generalità Descrizione componenti del sistema Fig. 1 1 Quadro elettrico 5 Ingresso aria 2 Filtro 6 Uscita aria 3 Tubo flessibile di drenaggio 7 Display remoto 4 Tubo di collegamento del refrigerante AVVERTENZA Le immagini del presente manuale sono fornite a solo scopo illustrativo. L’aspetto del proprio apparecchio può differire leggermente dalle illustrazioni qui riportate.
  • Seite 7 Generalità Accessori Il condizionatore è provvisto dei seguenti accessori. Per installarlo, usare tutti i componenti e gli accessori d’installazione specificati. Un’installazione non corretta può provocare perdite d’acqua, scosse elettriche e incendi, o causare il malfunzionamento dell’apparecchio. Descrizione Aspetto Quantità Installazione Manuale installazione uso e dell’unità...
  • Seite 8 Generalità Identificazione L’unita interna e l’unità esterna sono identificabili attraverso l’etichetta matricolare che riporta i dati tecnici, prestazionali dell’apparecchio e quanto richiesto dalla Legislazione in vigore. Etichetta matricolare Unità interna Fig. 3 PRESTARE CAUTELA La manomissione, l’asportazione, la mancanza delle etichette di identificazione o quant’altro non permetta la sicura identificazione del prodotto, rende difficoltosa qualsiasi operazione di installazione e manutenzione.
  • Seite 9: Ricevimento Del Prodotto

    Installazione Installazione - avvertenze preliminari 2 INSTALLAZIONE AVVERTENZA Ricevimento del prodotto Prima di installare l’unità interna, consultare l’etichetta sulla confezione del prodotto L’apparecchio viene fornito imballato in più colli. La per controllare che il numero di modello movimentazione deve essere effettuata con appropriati corrisponda a quello dell’unità...
  • Seite 10: Installazione Unità Interna

    Installazione Installazione unità interna Carica di refrigerante Superficie minima [kg] 32,8 2.4.1 Locale di installazione 34,7 PRESTARE CAUTELA 36,6 L’apparecchio deve essere collocato in un 38,5 locale ben ventilato, con una superficie minima 7,956 40,1 che varia in base alla quantità di refrigerante presente.
  • Seite 11 Installazione È VIETATO installare l’unità interna nei È VIETATO installare l’unità interna nei seguenti luoghi: seguenti luoghi: – in un bagno o in un locale adibito a – aree di trivellazione o fracking per estrazione lavanderia, perché l’eccesso di umidità petrolifera;...
  • Seite 12 Installazione 2.4.2 Appendere l’unità interna Facendo riferimento alle figure seguenti, individuare le posizioni dei quattro fori per i bulloni da realizzare sul soffitto. Contrassegnare i punti in cui dovranno essere realizzati i fori per i ganci sul soffitto. Dimensioni ingresso e uscita aria: Uscita aria Ingresso aria Fig.
  • Seite 13 Installazione Legno Tetto con struttura in acciaio Posizionare il pannello di montaggio in legno in senso Installare e utilizzare i supporti angolari in acciaio trasversale rispetto alla trave del tetto, quindi installare i bulloni di sospensione Bullone di sospensione Pannello di montaggio in legno Barra di sostegno angolare d’acciaio Trave del tetto...
  • Seite 14 Installazione 7 Montare l’unità interna. Per sollevare e fissare l’unità INSTALLAZIONE DEI CONDOTTI DEGLI occorreranno due persone. Inserire i bulloni di ACCESSORI sospensione nei fori di aggancio dell’unità. Fissarli 1 Installare il filtro (opzione) in base alla dimensione usando le rondelle e i dadi in dotazione. dell’ingresso aria.
  • Seite 15 Installazione REGOLARE LA DIREZIONE DI INGRESSO INSTALLAZIONE DEL CONDOTTO PER DELL’ARIA L’ARIA FRESCA Modelli 27M - 35M 1 Smontare il pannello di ventilazione e la flangia Attacco del condotto per l’aria fresca Flangia di ritorno aria Pannello di ventilazione Ø92 mm Fig.
  • Seite 16 Installazione Manutenzione della pompa: 2 Togliere e reinserire le batterie nel telecomando: durante primi secondi premere 1 Rimuovere quattro viti dalla pompa di scarico. pulsanti MODE secondi. 2 Staccare il cavo di alimentazione della pompa e il Il telecomando entrerà in modalità “selezione delle cavo dell’interruttore di livello dell’acqua.
  • Seite 17 Installazione USO DEL COMANDO A FILO PER IMPOSTARE LA PRESSIONE STATICA ESTERNA ATTENZIONE PERICOLO NON regolare le serrande quando è attiva la È possibile utilizzare la funzione di regolazione regolazione automatica della portata aria. automatica della portata aria per impostare la pressione statica esterna.
  • Seite 18 Installazione GRAFICI PORTATA / PREVALENZA Unità 27M/35M Par.0 Par.3 Portata aria Portata aria /h) (CFM) /h) (CFM) Par.1 Portata aria /h) (CFM) Par.4 Portata aria /h) (CFM) Par.2 Portata aria (Pa) = pressione statica utile /h) (CFM) Velocità ventilatore Alta velocità Media velocità...
  • Seite 19 Installazione Unità 53M Portata aria Par.0 Par.3 /h) (CFM) Portata aria /h) (CFM) Par.1 Portata aria /h) (CFM) Par.4 Portata aria /h) (CFM) Par.2 Portata aria /h) (CFM) (Pa) = pressione statica utile Velocità ventilatore Alta velocità Media velocità Bassa velocità...
  • Seite 20 Installazione Unità 70M Portata aria Par.0 Par.3 /h) (CFM) Portata aria /h) (CFM) Par.1 Portata aria /h) (CFM) Par.4 Portata aria /h) (CFM) Par.2 Portata aria /h) (CFM) (Pa) = pressione statica utile Velocità ventilatore Alta velocità Media velocità Bassa velocità...
  • Seite 21 Installazione Unità 88M/105M Portata aria Par.0 Par.3 /h) (CFM) Portata aria /h) (CFM) Par.1 Portata aria /h) (CFM) Par.4 Portata aria /h) (CFM) Par.2 Portata aria /h) (CFM) (Pa) = pressione statica utile Velocità ventilatore Alta velocità Media velocità Bassa velocità...
  • Seite 22 Installazione Unità 120M/140M Portata aria Par.0 Par.3 /h) (CFM) Portata aria /h) (CFM) Par.1 Portata aria /h) (CFM) Par.4 Portata aria /h) (CFM) Par.2 Portata aria /h) (CFM) (Pa) = pressione statica utile Velocità ventilatore Alta velocità Media velocità Bassa velocità...
  • Seite 23 Installazione Unità 160M Portata aria Par.0 Par.3 /h) (CFM) Portata aria /h) (CFM) Par.1 Portata aria /h) (CFM) Par.4 Portata aria /h) (CFM) Par.2 Portata aria /h) (CFM) (Pa) = pressione statica utile Velocità ventilatore Alta velocità Media velocità Bassa velocità...
  • Seite 24 Installazione 2.4.4 Predisposizione per i tubi di 2.4.5 Tubo di drenaggio collegamento Il tubo di drenaggio ha la funzione di scaricare l’acqua dall’unità. Un’installazione non corretta può causare È necessario realizzare un foro nella parete in cui far danni all’unità e altri danni materiali. passare le linee frigorifere, il tubo di drenaggio e i cavi elettrici che collegheranno l’unità...
  • Seite 25 Installazione 3 Collegare l’estremità del tubo di drenaggio al tubo INSTALLAZIONE DEL TUBO DI SCARICO di uscita dell’unità. Avvolgere l’estremità del tubo e PER LE UNITÀ PROVVISTE DI POMPA. fissarla saldamente con una fascetta stringitubo. AVVERTENZA Tubo di drenaggio – Quando si utilizza una prolunga per il tubo di drenaggio, stringere la connessione sul lato interno con un tubo di protezione aggiuntivo per impedire che si allenti.
  • Seite 26 Installazione PROVA DI SCARICO Unità con pompa. Controllare che il tubo di drenaggio non sia ostruito. 1 Rimuovere il tappo di prova. Questa prova deve essere eseguita negli edifici di nuova 2 Riempire vaschetta raccolta costruzione prima della finitura del soffitto. 2 litri d’acqua.
  • Seite 27 Installazione 2.4.6 Configurazione con due unità interne (TWIN) COMBINAZIONI POSSIBILI Le unità interne TWIN sono progettate per essere installate in una singola stanza. Il comando permette di controllare l’unità principale mentre la secondaria ne esegue le impostazioni di on/off, set-point, modalità...
  • Seite 28 Installazione Per utilizzare il giunto a Y, tagliare il tubo seguendo lo schema di “Fig. 34” per ottenere le dimensioni corrette AVVERTENZA per adattarsi al tubo interno ed esterno. Assicurarsi che la lunghezza del tubo del refrigerante, il numero di curve e il dislivello Tubazioni liquido tra l’unità...
  • Seite 29 Installazione COLLEGAMENTO UNITÀ TWIN Le 2 unità interne devono essere collegate nella stessa fonte di alimentazione. Collegare i terminali X, Y, E delle unità interne con cavo schermato. Unità interna 1 Unità interna 2 Unità esterna Fig. 36 Alimentazione Alimentazione Segnale unità...
  • Seite 30: Collegamenti Elettrici

    Installazione 2.4.7 Collegamenti elettrici AVVERTENZA Per l’alimentazione e comunicazione tra l’unità interna e Tutti i collegamenti devono essere eseguiti quella esterna sono necessari dei cavi con le seguenti esattamente come indicato nello schema caratteristiche: elettrico situato sul lato interno del coperchio Alimentazione Segnale della morsettiera dell’unità...
  • Seite 31 Installazione ON-OFF REMOTO Per l’ingresso del morsetto CN23 del comando remoto (ON-OFF) e il connettore rapido di JR6 Morsettiere unità INTERNA Morsettiera unità INTERNA Fig. 40 – Rimuovere il connettore rapido di JR6 quando si utilizza la funzione ON-OFF; – Con l’interruttore remoto in posizione OFF (APRIRE), l’unità...
  • Seite 32 Installazione ALLARME Installazione display remoto Per l’ingresso del connettore CN33 ALLARME Il display remoto è provvisto di un ricevitore di segnale integrato che permette di comandare l’unità interna con il telecomando. Il display remoto viene fornito con l’unità interna ma non è...
  • Seite 33 Installazione 4 Tagliare il cavo dal lato del connettore 5 poli. connettore connettore 10 pin 5 pin Fig. 46 5 Fissare il coperchio PVC di protezione sul fondo del display remoto. Fig. 47 6 Collegare il connettore 10 pin del display remoto al connettore CN10 della scheda principale.
  • Seite 34 3 USO ATTENZIONE PERICOLO – Se si verifica una condizione anomala Descrizione componenti del sistema (ad esempio si sente odore di bruciato), spegnere subito l’unità chiedere assistenza al rivenditore per evitare rischi di lesioni, incendio o folgorazione. – EVITARE che l’unità interna o il telecomando si bagnino.
  • Seite 35: Altre Funzioni

    Funzionamento manuale Altre funzioni (senza telecomando) – Riavvio automatico Nel caso in cui il telecomando non funzioni, l’unità l’alimentazione elettrica dell’unità viene può essere azionata manualmente con il tasto di interrotta, al suo ripristino l’unità si riavvierà comando manuale situato sull’unità interna. Si noti automaticamente con le ultime impostazioni.
  • Seite 36 Telecomando ON/OFF MODE Tasto di accensione/ Presenta le modalità spegnimento dell’unità operative nel seguente ordine: AUTO » COOL » DRY » HEAT » FAN TEMP Aumenta la temperatura a incrementi di 1°C. La temperatura massima è di 30°C Usato per selezionare la TEMP velocità...
  • Seite 37: Pulizia Del Filtro Dell'aria

    Manutenzione Pulizia del filtro dell’aria 4 MANUTENZIONE Il filtro impedisce che polvere e altre particelle entrino È buona norma pulire periodicamente sia le parti nell’unità interna. L’accumulo di polvere può ridurre interne che quelle esterne dell’apparecchio. Questo ne l’efficienza del condizionatore d’aria. Per un’efficienza garantisce il buon funzionamento e la durata nel tempo.
  • Seite 38 Manutenzione Pulizia dell’unità esterna Se la batteria dell’unità esterna è intasata, togliere le foglie e i detriti e poi eliminare la polvere con un getto d’aria o un po’ d’acqua. Fig. 54 3 Rimuovere il filtro dell’aria. 4 Pulire il filtro dell’aria con un aspirapolvere o lavandolo con acqua tiepida e un detergente delicato.
  • Seite 39: Periodi Di Inutilizzo Prolungato

    Manutenzione Periodi di inutilizzo prolungato Manutenzione a inizio stagione Se si prevede di non utilizzare il condizionatore per un Dopo un lungo periodo di non utilizzo, o prima di un periodo prolungato, procedere come segue: periodo di uso frequente, procedere come segue: Controllare che i cavi siano Pulire tutti i filtri Pulire tutti i filtri...
  • Seite 40: Ricerca Guasti

    Manutenzione Ricerca guasti ATTENZIONE PERICOLO Se si dovesse verificare UNA QUALSIASI delle seguenti condizioni, spegnere subito l’unità. – Il cavo di alimentazione è danneggiato o è insolitamente caldo. – Si sente un odore di bruciato. – L’unità emette rumori forti o anomali. –...
  • Seite 41: Anomalie E Rimedi

    Manutenzione 4.7.2 Anomalie e rimedi In caso di problemi, eseguire i seguenti controlli prima di rivolgersi a un centro di assistenza. Anomalie Possibili cause Rimedi È possibile che la temperatura impostata sia più alta della temperatura ambiente Impostare una temperatura più bassa del locale Lo scambiatore di calore dell’unità...
  • Seite 42 Manutenzione Codici di errore visualizzati sul display dell’unità interna Spia del tem- Codice errore Causa porizzatore EH 00 / Errore parametro EEPROM dell’unità interna EH 0A EL 01 Errore di comunicazione dell’unità da interno/esterno Velocità del ventilatore interno al di fuori dell’intervallo normale (per alcuni EH 03 modelli) EH 60...
  • Seite 43 Manutenzione CODICI DI ERRORE VISUALIZZATI SUL TELECOMANDO. Per visualizzare gli allarmi utilizzare la funzione “Query mode” dal telecomando (vedere: technical manual special modes). Codice errore Descrizione EH 00 / Errore parametro EEPROM dell’unità interna EH 0A EL 01 Errore di comunicazione dell’unità da interno/esterno EH bA Errore di comunicazione tra l'unità...
  • Seite 44 Manutenzione Protezione massima temperatura del compressore o protezione dell’alta temperatura del modulo PC 02 PC 40 Errore di comunicazione tra chip principale esterno e chip di azionamento del compressore PC 41 Protezione rilevamento ingresso corrente PC 42 Errore di avvio del compressore PC 43 Protezione mancanza di fase (trifase) PC 44...
  • Seite 45: Smaltimento

    Smaltimento 5 SMALTIMENTO Il produttore è iscritto al Registro Nazionale AEE, in RAEE professionali: tutti i RAEE diversi da quelli provenienti conformità all’attuazione della direttiva 2012/19/UE e delle dai nuclei domestici di cui al punto sopra. relative norme nazionali vigenti sui rifiuti di apparecchiature Queste apparecchiature possono contenere: elettriche ed elettroniche.
  • Seite 46 Allegati 6 ALLEGATI Schemi elettrici unità interna...
  • Seite 47: Dichiarazione Di Conformità

    EGALE APPRESENTANTE CLIVET S.P.A. - Via Camp Lonc, 25 - Z.I. VILLAPAIERA - 32030 FELTRE (BL) – ITALIA Cap. Soc. Eur 20.000.000 i.v. – C.F. e reg.Impr. BL n°.00708410253 – R.E.A. n°.66577 –P.I./ VAT :IT 00708410253 Tel. +39 0439 3131 - Fax +39 0439 313300 – Sito Web : www.clivet.it...
  • Seite 48 EGALE APPRESENTANTE CLIVET S.P.A. - Via Camp Lonc, 25 - Z.I. VILLAPAIERA - 32030 FELTRE (BL) – ITALIA Cap. Soc. Eur 20.000.000 i.v. – C.F. e reg.Impr. BL n°.00708410253 – R.E.A. n°.66577 –P.I./ VAT :IT 00708410253 Tel. +39 0439 3131 - Fax +39 0439 313300 – Sito Web : www.clivet.it...
  • Seite 49 EGALE APPRESENTANTE CLIVET S.P.A. - Via Camp Lonc, 25 - Z.I. VILLAPAIERA - 32030 FELTRE (BL) – ITALIA Cap. Soc. Eur 20.000.000 i.v. – C.F. e reg.Impr. BL n°.00708410253 – R.E.A. n°.66577 –P.I./ VAT :IT 00708410253 Tel. +39 0439 3131 - Fax +39 0439 313300 – Sito Web : www.clivet.it...
  • Seite 50 E IL BENESSERE DELL’INDIVIDUO E DELL’AMBIENTE www.clivet.com vendita e assistenza PRONTO CLIVET ASSISTENZA DEDICATA: PRONTO CLIVET Assistenza SPLIT Clivet (solo Italia): Tel. 041/5099169 Lu-Ve 09:00-20:00, Sa 09:00-12:00 (festivi esclusi) split@clivet.support CLIVET SPA Via Camp Lonc 25, Z.I. Villapaiera 32032 Feltre (BL) - Italy Tel.
  • Seite 51 DUCT 2 ID3-XY series from 27M to 160M...
  • Seite 52 Indicates that the appliance uses a flammable refrigerant. WARRANTY The product CLIVET is covered by a conventional warranty, valid from the date of purchase of the appliance, the conditions of which are specified in the GENERAL CONDITIONS OF SALE available at www.clivet.com WARNING –...
  • Seite 53 INDEX General Details ..........4 4 Maintenance ........... 37 General warnings and safety rules 4.1 Cleaning the indoor unit 1.2 Description of system components 4.2 Cleaning the air filter 1.3 Accessories 4.3 Cleaning the outdoor unit 1.4 Identification 4.4 Repairing refrigerant leaks 4.5 Extended periods of inactivity 2 Installation ............
  • Seite 54: General Details

    WARNING – This manual is the property of CLIVET and reproduction or transfer to third parties of the contents of this document is prohibited. All rights reserved. It is an integral part of the product; make sure that it is always supplied with the appliance, even in case of sale/transfer to another owner, so that it can be consulted by the user or by personnel authorized to carry out maintenance and repairs.
  • Seite 55 General Details CAUTION DANGER – When connecting refrigerant piping,keep substances or gases other than the specified refrigerant from entering the unit. The presence of other gases or substances can reduce unit performance and cause an abnormal increase in pressure in the refrigeration cycle. This can lead to explosion hazards and resulting injuries. –...
  • Seite 56 General Details Description of system components Fig. 1 1 Electrical panel 5 Air inlet 2 Filter 6 Air outlet 3 Flexible drainage hose 7 Remote display 4 Refrigerant connection pipe WARNING The images in this manual are provided for illustrative purposes only. The appearance of your device may differ slightly from the illustrations shown here.
  • Seite 57: Accessories

    General Details Accessories The air conditioner is equipped with the following accessories. Use all specified installation components and accessories to install it. Incorrect installation may cause water leakage, electric shock and fire, or cause the unit to malfunction. Description Aspect Quantity Indoor unit Installation use and...
  • Seite 58 General Details Identification The indoor unit and the outdoor unit can be identified by the serial number label that shows the technical and performance data of the unit and what is required by the legislation in force. Serial number label Indoor unit Fig.
  • Seite 59: Receiving The Product

    Installation Installation - preliminary warnings 2 INSTALLATION WARNING Receiving the product Before installing the indoor unit, consult the label on the product package to check that the The appliance is supplied packed in several parcels. model number matches the model number of Handling must be carried out by appropriate means in the outdoor unit.
  • Seite 60: Indoor Unit Installation

    Installation Indoor unit installation Refrigerant charge Minimum surface [kg] 32.8 2.4.1 Installation room 34.7 CAUTION 36.6 appliance must placed 38.5 well-ventilated room, with a minimum surface 7.956 40.1 area that varies according to the amount of refrigerant present. The following information can help you choose a suitable location for the indoor unit.
  • Seite 61 Installation It is PROHIBITED to install the indoor It is PROHIBITED to install the indoor unit in the following locations: unit in the following locations: – in a bathroom or laundry room, because – oil extraction drilling or fracking areas; excess humidity can reduce its service life –...
  • Seite 62 Installation 2.4.2 Hang the indoor unit Referring to the figures below, locate the positions of the four bolt holes to be drilled in the ceiling. Mark the points on the ceiling where the holes for the hooks are to be drilled. Air inlet and outlet sizes: Air outlet Air inlet...
  • Seite 63 Installation Wood Roof with steel structure Place the wooden assembly panel crosswise over the Install and use the angled steel brackets roof beam, then install the suspension bolts Suspension bolt Wooden assembly panel Angled steel support Roof beam Ceiling Suspension bolts Suspension bolts Fig.
  • Seite 64 Installation INSTALLATION OF ACCESSORY DUCTS 1 Install the filter (option) based on the size of the air inlet. 2 Install the air passage frame between the body and the duct. 3 The inlet and outlet air ducts must be sufficiently spaced to avoid short circuits when the air passes through.
  • Seite 65 Installation ADJUST THE AIR INLET DIRECTION INSTALLATION OF THE FRESH AIR DUCT 27M - 35M models 1 Disassemble the ventilation panel and the flange Fresh air duct connection Air return flange Ventilation panel Ø92 mm Fig. 17 Fig. 14 53M - 160M models 2 Change the assembly positions of the ventilation panel and air return flange.
  • Seite 66 Installation Pump maintenance: Take the batteries out of the remote control and put them back in: during the first 30 seconds 1 Remove the four screws from the drain pump. press the MODE + FAN buttons for 5 seconds. 2 Unplug the pump’s power cable and the water level The remote control will go into “function selection”...
  • Seite 67 Installation USING THE WIRED CONTROLLER TO SET THE EXTERNAL STATIC PRESSURE WARNING The automatic airflow control function can be used to set – If there are no changes to the ventilation the external static pressure. after the automatic airflow control has Automatic airflow control acts on the amount of air finished, reset the automatic airflow control emitted, automatically adjusting it to the nominal amount.
  • Seite 68 Installation FLOW RATE / HEAD CHARTS Airflow /h) (CFM) 27M/35M unit Par.0 Airflow /h) (CFM) Par.4 Airflow /h) (CFM) Par.1 Airflow /h) (CFM) (Pa) = available static pressure Fan speed High speed Par.2 Airflow Medium speed /h) (CFM) Low speed Par.3...
  • Seite 69 Installation 53M unit Airflow /h) (CFM) Airflow Par.0 /h) (CFM) Par.4 Airflow Par.1 Airflow /h) (CFM) /h) (CFM) (Pa) = available static pressure Par.2 Airflow /h) (CFM) Fan speed High speed Medium speed Low speed Par.3...
  • Seite 70 Installation 70M unit Airflow /h) (CFM) Airflow Par.0 /h) (CFM) Par.4 Airflow Par.1 Airflow /h) (CFM) /h) (CFM) (Pa) = available static pressure Par.2 Airflow /h) (CFM) Fan speed High speed Medium speed Low speed Par.3...
  • Seite 71 Installation 88M/105M unit Airflow /h) (CFM) Airflow Par.0 /h) (CFM) Par.4 Airflow Par.1 Airflow /h) (CFM) /h) (CFM) (Pa) = available static pressure Par.2 Airflow /h) (CFM) Fan speed High speed Medium speed Low speed Par.3...
  • Seite 72 Installation 120M/140M unit Airflow /h) (CFM) Airflow Par.0 /h) (CFM) Par.4 Airflow Par.1 Airflow /h) (CFM) /h) (CFM) (Pa) = available static pressure Par.2 Airflow /h) (CFM) Fan speed High speed Medium speed Low speed Par.3...
  • Seite 73 Installation 160M unit Airflow /h) (CFM) Airflow Par.0 /h) (CFM) Par.4 Airflow Par.1 Airflow /h) (CFM) /h) (CFM) (Pa) = available static pressure Par.2 Airflow /h) (CFM) Fan speed High speed Medium speed Low speed Par.3...
  • Seite 74 Installation 2.4.4 Preparation for connection pipes 2.4.5 Drainage pipe It is necessary to make a hole in the wall where the The drainage pipe is used to drain the water from the refrigerant piping, drainage pipe and electrical cables unit. Incorrect installation can cause damage to the unit that will connect the indoor unit to the outdoor unit will and other material damage.
  • Seite 75 Installation INSTALLATION OF THE DRAIN PIPE FOR UNITS WITH PUMP. Drainage pipe WARNING – When using an extension for the drainage pipe, tighten the connection on the inside with an additional protection pipe to stop it from coming loose. Metal hose clamp –...
  • Seite 76 Installation DRAIN TEST Unit with pump. Check that the drainage pipe is not blocked. 1 Remove the test cap. This test must be carried out in new builds before finishing 2 Fill the collection tank with 2 litres of water. the ceiling.
  • Seite 77: Possible Combinations

    Installation 2.4.6 Configuration with TWIN indoor units POSSIBLE COMBINATIONS TWIN indoor units are designed to be installed in one room. The controller is used to control the main unit while the secondary unit follows the on/off, set-point, operating mode and fan speed settings.
  • Seite 78 Installation To use the Y joint, cut the pipe following the diagram in “Fig. 34” to fit the internal and external pipe. WARNING Make sure that the length of the refrigerant Liquid pipes pipe, the number of bends and the level 95 ±10 difference between the indoor unit and the outdoor unit meet the requirements given in...
  • Seite 79 Installation TWIN UNIT CONNECTION The 2 indoor units must be connected to the same power supply source. Connect the E, Y, X terminals of both indoor units with shielded cable. Indoor unit 1 Indoor unit 2 Outdoor unit Fig. 36 Outdoor unit power Indoor unit power Signal...
  • Seite 80: Electrical Connections

    Installation 2.4.7 Electrical connections WARNING Cables with the following characteristics are required for All connections must be made exactly as power supply and communication between the indoor shown in the wiring diagram on the inside of and outdoor units: the terminal block cover of the indoor unit. Power supplied Signal from outdoor Indoor...
  • Seite 81: Remote On-Off

    Installation REMOTE ON-OFF For the input of the remote control terminal CN23 (ON- INDOOR unit terminal block OFF) and the JR6 quick-release connector Morsettiere unità INTERNA Fig. 40 – Remove the JR6 quick-release connector when using the ON-OFF function; – When the remote switch is OFF (OPEN), the unit will be turned off;...
  • Seite 82 Installation ALARM Installation of the remote display For the input of ALARM connector CN33 The remote display has a built-in signal receiver for controlling the indoor unit with the remote control. The remote display is supplied with the indoor unit but is not connected to the board.
  • Seite 83 Installation 4 Cut the cable on the 5-pin connector side. connector connector 10 pin 5 pin Fig. 46 5 Fasten the protective PVC cover on the bottom of the remote display. Fig. 47 6 Connect the 10-pin connector of the remote display to the CN10 connector of the main board.
  • Seite 84 3 USE CAUTION DANGER – If an abnormal condition occurs (e.g. Description of system components there is a smell of burning), turn the unit off immediately and ask the dealer for assistance to avoid the risk of injury, fire or electrocution.
  • Seite 85: Other Functions

    Manual operation (without remote Other functions control) – Automatic restart If the remote control does not work, the unit can be If the power supply to the unit is interrupted, the operated manually with the manual control button unit will automatically restart with the last settings located on the indoor unit.
  • Seite 86: Remote Control

    Remote control ON/OFF MODE Unit switch-on/off button Presents the operating modes in the following order: AUTO » COOL » DRY » HEAT » FAN TEMP Increases the temperature by 1°C at a time. The maximum temperature is 30°C Used to select the fan speed TEMP from the following options: Reduces the temperature...
  • Seite 87: Cleaning The Air Filter

    Maintenance Cleaning the air filter 4 MAINTENANCE The filter stops dust and other particles from entering the It is good practice to periodically clean both the internal indoor unit. A build-up of dust can reduce the efficiency and external parts of the appliance. This guarantees its of the air conditioner.
  • Seite 88: Cleaning The Outdoor Unit

    Maintenance Cleaning the outdoor unit If the battery in the outdoor unit is clogged, remove the leaves and debris and then remove the dust with a jet of air or water. Fig. 54 3 Remove the air filter. 4 Clean the air filter with a vacuum cleaner or wash it with warm water and a mild detergent.
  • Seite 89 Maintenance Extended periods of inactivity Maintenance at the start of the season If you do not plan to use the air conditioner for an extended period of time, proceed as follows: After a long period of non-use, or before a period of frequent use, proceed as follows: Clean all filters Activate the Ventilation mode...
  • Seite 90: Common Problems

    Maintenance Troubleshooting CAUTION DANGER If any of the following conditions occur, switch the unit off immediately. – The power cable is damaged or unusually hot. – You can smell burning. – The unit makes loud or abnormal noises. – A fuse blows or the circuit breaker trips frequently. –...
  • Seite 91: Anomalies And Remedies

    Maintenance 4.7.2 Anomalies and remedies If problems occur, please check the following before contacting a service centre. Anomalies Possible causes Remedies The set temperature may be higher than Set a lower temperature the room temperature The heat exchanger of the indoor or Clean the heat exchanger (Service Centre) outdoor unit is dirty Remove the filter and clean it following...
  • Seite 92 Maintenance Error codes displayed on the indoor unit display Error code Cause Timer light EH 00 / Indoor unit EEPROM parameter error EH 0A EL 01 Indoor / outdoor unit communication error EH 03 The indoor fan speed is operating outside of the normal range(for some models) EH 60 Indoor room temperature sensor T1 is in open circuit or has short circuited EH 61...
  • Seite 93 Maintenance ERROR CODES DISPLAYED ON THE REMOTE CONTROL. Use the “Query mode” function on the remote control to display the alarms (see: technical manual special modes). Error code Description EH 00 / Indoor unit EEPROM parameter error EH 0A EL 01 Indoor / outdoor unit communication error EH bA Communication error between indoor unit and indoor external fan module...
  • Seite 94 Maintenance PC 02 Top temperature protection of compressor or High temperature protection of IPM module PC 40 Communication error between outdoor main chip and compressor driven chip PC 41 Current Input detection protection PC 42 Compressor start error PC 43 Lack of phase (3 phase) protection PC 44 Outdoor unit zero speed protection...
  • Seite 95 Disposal 5 DISPOSAL The manufacturer is registered on the National EEE Register, Professional WEEE: all WEEE which comes from something in compliance with implementation of Directive 2012/19/EU other than private households. and pertinent national regulations on electrical and electronic This equipment may contain: equipment waste.
  • Seite 96 Attachments 6 ATTACHMENTS Indoor unit wiring diagrams...
  • Seite 97: Declaration Of Conformity

    EGALE APPRESENTANTE CLIVET S.P.A. - Via Camp Lonc, 25 - Z.I. VILLAPAIERA - 32030 FELTRE (BL) – ITALIA Cap. Soc. Eur 20.000.000 i.v. – C.F. e reg.Impr. BL n°.00708410253 – R.E.A. n°.66577 –P.I./ VAT :IT 00708410253 Tel. +39 0439 3131 - Fax +39 0439 313300 – Sito Web : www.clivet.it...
  • Seite 98 EGALE APPRESENTANTE CLIVET S.P.A. - Via Camp Lonc, 25 - Z.I. VILLAPAIERA - 32030 FELTRE (BL) – ITALIA Cap. Soc. Eur 20.000.000 i.v. – C.F. e reg.Impr. BL n°.00708410253 – R.E.A. n°.66577 –P.I./ VAT :IT 00708410253 Tel. +39 0439 3131 - Fax +39 0439 313300 – Sito Web : www.clivet.it...
  • Seite 99 EGALE APPRESENTANTE CLIVET S.P.A. - Via Camp Lonc, 25 - Z.I. VILLAPAIERA - 32030 FELTRE (BL) – ITALIA Cap. Soc. Eur 20.000.000 i.v. – C.F. e reg.Impr. BL n°.00708410253 – R.E.A. n°.66577 –P.I./ VAT :IT 00708410253 Tel. +39 0439 3131 - Fax +39 0439 313300 – Sito Web : www.clivet.it...
  • Seite 100 FOR 30 YEARS WE HAVE BEEN OFFERING SOLUTIONS FOR SUSTAINABLE COMFORT THE WELL-BEING OF PEOPLE AND THE ENVIRONMENT www.clivet.com sales and service CLIVET SPA Via Camp Lonc 25, Z.I. Villapaiera 32032 Feltre (BL) - Italy Tel. +39 0439 3131 - Fax +39 0439 313300 info@clivet.it...
  • Seite 101 DUCT 2 Série ID3-XY de 27M à 160M...
  • Seite 102 – Le produit doit être utilisé pour l'usage prévu par CLIVET et pour lequel il a été expressément réalisé. Toute responsabilité contractuelle et extra-contractuelle de CLIVET pour des dommages corporels ou...
  • Seite 103 INDEX Généralités ............. 4 4 Entretien ............37 Avertissements généraux et consignes 4.1 Nettoyage de l'unité interne de sécurité 4.2 Nettoyage du filtre à air 1.2 Description des composants du système 4.3 Nettoyage de l’unité externe 1.3 Accessoires 4.4 Réparation des fuites de réfrigérant 1.4 Identification 4.5 Périodes d'inutilisation prolongée 4.6 Entretien en début de saison...
  • Seite 104: Généralités

    MISE EN GARDE – Ce manuel est la propriété de CLIVET et sa reproduction ou le transfert à des tiers du contenu de ce document est interdit. Tous les droits sont réservés. Il fait partie intégrante du produit ; il faut donc s’assurer qu'il est toujours fourni avec l'appareil, même en cas de vente/transfert à...
  • Seite 105 Généralités ATTENTION DANGER – Lors du raccordement des lignes frigorifiques, éviter l’entrée de substances ou de gaz autres que le réfrigérant spécifié dans l'unité. La présence d'autres gaz ou de substances peut réduire les performances de l'unité et provoquer une augmentation anormale de la pression dans le cycle de réfrigération. Cela peut entraîner des risques d'explosion et des blessures consécutives.
  • Seite 106 Généralités Description des composants du système Fig. 1 1 Boîtier électrique 5 Entrée air 2 Filtre 6 Sortie air 3 Tuyau flexible de drainage 7 Écran à distance 4 Tuyau de raccordement du réfrigérant MISE EN GARDE Les images de ce manuel sont fournies à titre indicatif uniquement. L'apparence de l’appareil peut différer légèrement des illustrations présentées ici.
  • Seite 107 Généralités Accessoires Le climatiseur est équipé des accessoires suivants. Pour l'installer, il faut utiliser toutes les pièces et accessoires d'installation spécifiés. Une mauvaise installation incorrecte entraîner des fuites d'eau, des décharges électriques et des incendies, ou provoquer un dysfonctionnement de l'appareil. Description Aspect Quantité...
  • Seite 108 Généralités Identification L'unité interne et l'unité externe sont identifiables au moyen de l'étiquette du numéro de série qui indique les données techniques, les performances de l'appareil et ce qui est requis par la législation en vigueur en la matière. Étiquette du numéro de série Unité...
  • Seite 109: Réception Du Produit

    Installation Installation - mises en garde 2 INSTALLATION préliminaires Réception du produit MISE EN GARDE L'appareil est livré emballé dans plusieurs colis. Avant d'installer l'unité interne, il faut vérifier La manutention doit être effectuée avec des engins l'étiquette située sur l'emballage du produit de appropriés compte tenu du poids total du colis.
  • Seite 110: Installation De L'unité Interne

    Installation Installation de l’unité interne Charge de réfrigérant Surface minimale [kg] 34,7 2.4.1 Pièce pour l’Installation 36,6 FAIRE ATTENTION 38,5 L'appareil doit être placé dans une pièce bien 7,956 40,1 aérée, avec une surface minimale qui varie en fonction de la quantité de réfrigérant présent. Les indications suivantes peuvent vous aider à...
  • Seite 111 Installation IL EST INTERDIT d'installer l'unité IL EST INTERDIT d'installer l'unité interne dans les endroits suivants : interne dans les endroits suivants : – dans une salle de bains ou dans une buanderie, – zones de forage ou de fracturation pour car un excès d'humidité...
  • Seite 112 Installation 2.4.2 Accrocher l’unité interne En se référant aux figures suivantes, il faut déterminer les emplacements des quatre trous pour les boulons, à percer dans le plafond. Tracer une marque aux points où devront être percés les trous pour les crochets sur le plafond. Dimensions d'entrée et de sortie de l'air : Sortie air Entrée air...
  • Seite 113 Installation Bois Toit avec structure en acier Placer le panneau de montage en bois transversalement Installer et utiliser les supports d'angle en acier à la poutre de toit, puis installer les boulons de suspension Boulon de suspension Panneau de montage en bois Barre support Poutre du toit...
  • Seite 114 Installation 7 Monter l’unité interne. Deux personnes sont INSTALLATION DES CONDUITS DES nécessaires pour soulever et fixer l'unité. Insérer les ACCESSOIRES boulons de suspension dans les trous d’accrochage 1 Installer le filtre (option) en fonction de la taille de de l'unité. Les fixer à l'aide des rondelles et des l'entrée d'air.
  • Seite 115 Installation RÉGLER LE SENS D'ENTRÉE DE L'AIR INSTALLATION DU CONDUIT D'AIR NEUF Modèles 27M - 35M 1 Démonter le panneau de ventilation et la bride Raccordement du conduit d'air neuf Bride de retour d’air Panneau de ventilation Ø92 mm Fig. 17 Fig.
  • Seite 116 Installation Entretien de la pompe : Retirer et replacer les piles de la télécommande : pendant les 30 premières secondes, appuyer sur 1 Déposer quatre vis de la pompe d’évacuation. les touches MODE + FAN pendant 5 secondes. 2 Débrancher le cordon d'alimentation de la pompe et La télécommande entrera en mode «...
  • Seite 117 Installation UTILISATION DE LA COMMANDE RACCORDÉE POUR CONFIGURER LA ATTENTION DANGER PRESSION STATIQUE EXTERNE NE pas régler les registres lorsque le réglage automatique du débit d'air est activé. Il est possible d’utiliser la fonction de réglage automatique du débit d'air pour configurer la pression statique externe. Après 3 à...
  • Seite 118 Installation GRAPHIQUES DÉBIT / HAUTEUR D’ÉLÉVATION Unité 27M/35M Par.0 Par.3 Débit d'air Débit d'air /h) (CFM) /h) (CFM) Par.1 Débit d'air /h) (CFM) Par.4 Débit d'air /h) (CFM) Par.2 Débit d'air (Pa) = pression statique utile /h) (CFM) Vitesse ventilateur Vitesse élevée Vitesse moyenne Vitesse lente...
  • Seite 119 Installation Unité 53M Débit d'air Par.0 Par.3 /h) (CFM) Débit d'air /h) (CFM) Par.1 Débit d'air /h) (CFM) Par.4 Débit d'air /h) (CFM) Par.2 Débit d'air /h) (CFM) (Pa) = pression statique utile Vitesse ventilateur Vitesse élevée Vitesse moyenne Vitesse lente...
  • Seite 120 Installation Unité 70M Débit d'air Par.0 Par.3 /h) (CFM) Débit d'air /h) (CFM) Par.1 Débit d'air /h) (CFM) Par.4 Débit d'air /h) (CFM) Par.2 Débit d'air /h) (CFM) (Pa) = pression statique utile Vitesse ventilateur Vitesse élevée Vitesse moyenne Vitesse lente...
  • Seite 121 Installation Unité 88M/105M Débit d'air Par.0 Par.3 /h) (CFM) Débit d'air /h) (CFM) Par.1 Débit d'air /h) (CFM) Par.4 Débit d'air /h) (CFM) Par.2 Débit d'air /h) (CFM) (Pa) = pression statique utile Vitesse ventilateur Vitesse élevée Vitesse moyenne Vitesse lente...
  • Seite 122 Installation Unité 120M/140M Débit d'air Par.0 Par.3 /h) (CFM) Débit d'air /h) (CFM) Par.1 Débit d'air /h) (CFM) Par.4 Débit d'air /h) (CFM) Par.2 Débit d'air /h) (CFM) (Pa) = pression statique utile Vitesse ventilateur Vitesse élevée Vitesse moyenne Vitesse lente...
  • Seite 123 Installation Unité 160M Débit d'air Par.0 Par.3 /h) (CFM) Débit d'air /h) (CFM) Par.1 Débit d'air /h) (CFM) Par.4 Débit d'air /h) (CFM) Par.2 Débit d'air /h) (CFM) (Pa) = pression statique utile Vitesse ventilateur Vitesse élevée Vitesse moyenne Vitesse lente...
  • Seite 124 Installation 2.4.4 Prédisposition pour les tuyaux de 2.4.5 Tuyau de drainage raccordement Le tuyau de drainage a la fonction d’évacuer l'eau de l'unité. Une mauvaise installation peut endommager Il est nécessaire de faire un trou dans le mur pour faire passer l'unité...
  • Seite 125 Installation 3 Raccorder l'extrémité du tuyau de drainage au tuyau INSTALLATION DU TUYAU D’ÉVACUATION de sortie de l'unité. Enrouler l'extrémité du tuyau et la POUR LES UNITÉS ÉQUIPÉES D'UNE POMPE. fixer solidement à l’aide d’un collier de serrage. MISE EN GARDE Tuyau de drainage –...
  • Seite 126 Installation ESSAI D’ÉVACUATION Unité avec pompe. Vérifier que le tuyau de drainage n'est pas obstrué. 1 Retirer le bouchon d’essai. Cet essai doit être effectué dans les bâtiments neufs 2 Remplir le bac de récupération avec 2 litres d'eau. avant la finition du plafond. Unité...
  • Seite 127: Combinaisons Possibles

    Installation 2.4.6 Configuration avec deux unités internes (TWIN) COMBINAISONS POSSIBLES Les unités internes TWIN sont conçues pour être installées dans une seule pièce. La commande permet de contrôler l'unité principale alors que la secondaire effectue ses configurations de marche/ arrêt, point de consigne, mode de fonctionnement et vitesse du ventilateur. Unité...
  • Seite 128 Installation Pour utiliser le joint en Y, couper le tuyau en suivant le schéma de “Fig. 34”» pour obtenir les bonnes dimensions MISE EN GARDE pour s'adapter au tuyau interne et externe. S’assurer que la longueur du tuyau du réfrigérant, le nombre de coudes et le Tuyauteries liquide dénivellement entre l’unité...
  • Seite 129 Installation RACCORDEMENT DE L'UNITÉ TWIN Les 2 unités internes doivent être connectées à la même source d'alimentation. Connecter les bornes E, Y, X des deux unités internes avec le câble blindé. Unité interne 1 Unité interne 2 Unité externe Fig. 36 Alimentation unité...
  • Seite 130: Branchements Électriques

    Installation 2.4.7 Branchements électriques MISE EN GARDE Pour l'alimentation électrique et la communication Tous les branchements doivent être effectués entre les unités interne et externe, des câbles ayant les exactement comme indiqué sur le schéma caractéristiques suivantes sont nécessaires : électrique situé...
  • Seite 131 Installation ON-OFF À DISTANCE Pour l'entrée de la borne CN23 de la télécommande (ON-OFF) et le connecteur rapide de JR6 Morsettiere unità INTERNA Bornier unité INTERNE Fig. 40 – Retirer le connecteur rapide de JR6 lors de l'utilisation de la fonction ON-OFF ; –...
  • Seite 132 Installation ALARME Installation écran à distance Pour l'entrée du connecteur CN33 ALARME L'écran à distance est équipé d'un récepteur de signal intégré qui permet de contrôler l'unité interne avec la télécommande. L'écran à distance est fourni avec l'unité interne mais n'est pas connecté...
  • Seite 133 Installation connecteur B connecteur B 10 broches 5 broches Fig. 46 5 Fixer le couvercle de protection en PVC au bas de l'écran à distance. Fig. 47 6 Connecter le connecteur à 10 broches de l'écran à distance au connecteur CN10 de la carte principale. Si nécessaire, utiliser le câble de rallonge de 2 m fourni en équipement.
  • Seite 134 Utilisation 3 UTILISATION ATTENTION DANGER – Si une condition anormale se produit Description des composants du (telle qu'une odeur de brûlé), éteindre immédiatement l'unité et contacter le système service après-vente du revendeur pour éviter tout risque de blessure, d'incendie ou d’électrocution.
  • Seite 135: Autres Fonctions

    Utilisation Fonctionnement manuel Autres fonctions (sans télécommande) – Redémarrage automatique Si la télécommande ne fonctionne pas, l'unité peut Si l'alimentation électrique de l'unité est interrompue, être actionnée manuellement à l'aide de la touche celle-ci redémarrera automatiquement avec les de commande manuelle située sur l'unité interne. dernières configurations.
  • Seite 136 Utilisation Télécommande ON/OFF MODE Touche de marche/arrêt Présente les modes de de l’unité fonctionnement dans l'ordre suivant : AUTO » COOL » DRY » HEAT » FAN TEMP Augmente la température par paliers de 1°C. La température maximale est de 30°C Utilisé...
  • Seite 137: Nettoyage Du Filtre À Air

    Entretien Nettoyage du filtre à air 4 ENTRETIEN Le filtre empêche la poussière et d’autres particules de Il est recommandé de nettoyer périodiquement les pénétrer dans l'unité interne. L'accumulation de poussière parties internes et externes de l'unité. Cela garantit son peut réduire l'efficacité...
  • Seite 138 Entretien Nettoyage de l’unité externe Si la batterie de l'unité externe est obstruée, il faut enlever les feuilles et les détritus, puis éliminer la poussière à l’aide d’un jet d'air ou d’un peu d'eau. Fig. 54 3 Retirer le filtre à air. 4 Nettoyer le filtre à...
  • Seite 139 Entretien Périodes d'inutilisation prolongée Entretien en début de saison En cas de décision de ne pas utiliser le climatiseur pendant Après une longue période de d’inutilisation ou avant une une période prolongée, il faut procéder comme suit : période d'utilisation fréquente, il faut procéder comme suit : Contrôler que les câbles Nettoyer tous les Nettoyer tous les...
  • Seite 140: Diagnostic Des Pannes

    Entretien Diagnostic des pannes ATTENTION DANGER Si L’UNE des conditions suivantes se produit, il faut immédiatement éteindre l’unité. – Le cordon d'alimentation est endommagé ou est anormalement chaud. – Il y a une odeur de brûlé. – L'unité émet des bruits forts ou anormaux. –...
  • Seite 141: Anomalies Et Remèdes

    Entretien 4.7.2 Anomalies et remèdes En cas de problèmes, il faut effectuer les contrôles suivants avant de contacter un centre de service. Anomalies Causes possibles Remèdes Il est possible que la température configurée soit supérieure à la Configurer une température plus basse température ambiante de la pièce L'échangeur de chaleur de l'unité...
  • Seite 142 Entretien Codes d’erreur affichés sur l’écran de l’unité interne Voyant Code erreur Cause lumineux du timer EH 00 / Erreur paramètre EEPROM unité intérieure EH 0A EL 01 Erreur communication unité intérieure / extérieure La vitesse du ventilateur intérieur est en dehors de la plage normale (pour EH 03 certains modèles) Le capteur de température ambiante intérieure T1 est en circuit ouvert ou en...
  • Seite 143 Entretien CODES D’ERREUR AFFICHÉS SUR LA TÉLÉCOMMANDE. Pour afficher les alarmes, utiliser la fonction « Query mode » de la télécommande (voir : manuel technique modes spéciaux). Code erreur Description EH 00 / Erreur paramètre EEPROM unité intérieure EH 0A EL 01 Erreur communication unité...
  • Seite 144 Entretien Protection contre les températures supérieures du compresseur ou Protection contre les PC 02 températures élevées du module IPM Erreur de communication entre la puce principale extérieure et la puce d’entraînement du PC 40 compresseur PC 41 Protection détection entrée de courant PC 42 Erreur de démarrage du compresseur PC 43...
  • Seite 145 Élimination 5 ÉLIMINATION Le producteur est inscrit dans le Registre National EEE, Les DEEE professionnels : tous les DEEE autres que ceux conformément à l’application de la directive 2012/19/UE et provenant des foyers domestiques mentionnés au point des réglementations nationales correspondantes en vigueur ci-dessus.
  • Seite 146 Pièces jointes 6 PIÈCES JOINTES Schémas électriques unité interne...
  • Seite 147: Déclaration De Conformité

    EGALE APPRESENTANTE CLIVET S.P.A. - Via Camp Lonc, 25 - Z.I. VILLAPAIERA - 32030 FELTRE (BL) – ITALIA Cap. Soc. Eur 20.000.000 i.v. – C.F. e reg.Impr. BL n°.00708410253 – R.E.A. n°.66577 –P.I./ VAT :IT 00708410253 Tel. +39 0439 3131 - Fax +39 0439 313300 – Sito Web : www.clivet.it...
  • Seite 148 EGALE APPRESENTANTE CLIVET S.P.A. - Via Camp Lonc, 25 - Z.I. VILLAPAIERA - 32030 FELTRE (BL) – ITALIA Cap. Soc. Eur 20.000.000 i.v. – C.F. e reg.Impr. BL n°.00708410253 – R.E.A. n°.66577 –P.I./ VAT :IT 00708410253 Tel. +39 0439 3131 - Fax +39 0439 313300 – Sito Web : www.clivet.it...
  • Seite 149 EGALE APPRESENTANTE CLIVET S.P.A. - Via Camp Lonc, 25 - Z.I. VILLAPAIERA - 32030 FELTRE (BL) – ITALIA Cap. Soc. Eur 20.000.000 i.v. – C.F. e reg.Impr. BL n°.00708410253 – R.E.A. n°.66577 –P.I./ VAT :IT 00708410253 Tel. +39 0439 3131 - Fax +39 0439 313300 – Sito Web : www.clivet.it...
  • Seite 150 OFFRONS DES SOLUTIONS POUR UN CONFORT DURABLE ET LE BIEN-ÊTRE DES PERSONNES ET DE L’ENVIRONNEMENT ww.clivet.com vente et assistance CLIVET SPA Via Camp Lonc 25, Z.I. Villapaiera - 32032 Feltre (BL) - Italie Tél. +39 0439 3131 - Fax +39 0439 313300 info@clivet.it...
  • Seite 151 DUCT 2 Baureihe ID3-XY von 27M bis 160M...
  • Seite 152: Einführung

    Weist darauf hin, dass in diesem Gerät entflammbares Kältemittel enthalten ist. GARANTIE Das Produkt CLIVET verfügt über eine herkömmliche Garantie, die ab dem Kaufdatum des Geräts gültig ist und deren Bedingungen in den ALLGEMEINEN VERKAUFSBEDINGUNGEN unter www.clivet.com aufgeführt sind. WARNUNG –...
  • Seite 153 INDEX Allgemeines ............ 4 4 Wartung ............37 Allgemeine Hinweise und 4.1 Reinigung der Inneneinheit Sicherheitsregeln 4.2 Reinigung des Luftfilters 1.2 Beschreibung der Systemkomponenten 4.3 Reinigung der Außeneinheit 1.3 Zubehör 4.4 Reparatur von Kältemittellecks 1.4 Kennzeichnung 4.5 Längerer Stillstand 4.6 Wartung zu Saisonbeginn 2 Installation ............
  • Seite 154: Allgemeines

    Allgemeine Hinweise und Sicherheitsregeln WARNUNG – Dieses Handbuch ist Eigentum von CLIVET und es ist verboten, den Inhalt dieses Dokuments zu vervielfältigen oder an Dritte weiterzugeben. Alle Rechte vorbehalten. Es ist ein wesentlicher Bestandteil des Produkts, weshalb sicherzustellen ist, dass es das Gerät bei einem Verkauf/einer Übertragung an einen anderen Eigentümer immer begleitet, so dass es vom Benutzer oder dem autorisierten Personal für...
  • Seite 155: Achtung Gefahr

    Allgemeines ACHTUNG GEFAHR – Beim Anschluss der Kältemittelleitungen darauf achten, dass keine sonstigen Substanzen oder Gase außer dem spezifizierten Kältemittel in das Gerät gelangen. Sonstige Gase oder Substanzen mindern die Geräteleistung und können anormal hohe Drücke im Kältekreislauf bewirken. Dadurch kann eine Explosion verursacht und können Personen verletzt werden.
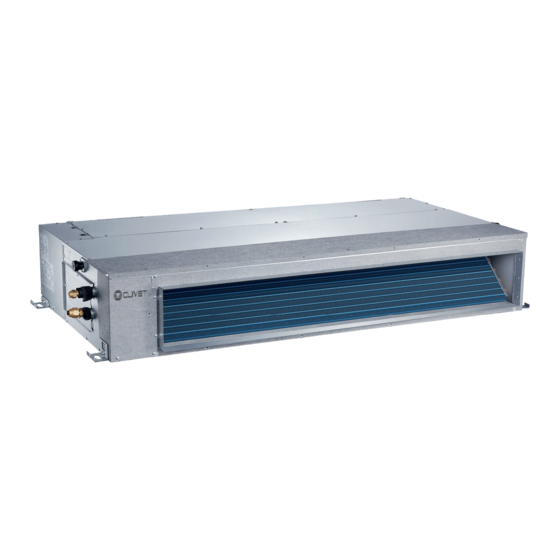
  • Seite 156: Beschreibung Der Systemkomponenten

    Allgemeines Beschreibung der Systemkomponenten Abb. 1 1 Schalttafel 5 Lufteingang 2 Filter 6 Luftausgang 3 Ablaufschlauch 7 Fernanzeige 4 Kältemittel-Anschlussrohr WARNUNG Die Abbildungen in diesem Handbuch dienen nur zur Veranschaulichung. Die Form und das Design Ihres Geräts können geringfügig von den hier gezeigten Abbildungen abweichen. Siehe die effektive Geräteform dargestellt.
  • Seite 157 Allgemeines Zubehör Die Klimaanlage wird mit folgendem Zubehör geliefert. Für die Installation der Klimaanlage müssen sämtliche Installations- und Zubehörteile verwendet werden. Eine unsachgemäße Installation kann Wasserleckagen, einen Stromschlag, Brand oder den Ausfall des Geräts zur Folge haben. Beschreibung Aussehen Menge Installation der Installations-, Bedienungs- und Inneneinheit...
  • Seite 158: Kennzeichnung

    Allgemeines Kennzeichnung Die Inneneinheit und die Außeneinheit können anhand des Aufklebers mit der Seriennummer bestimmt werden, auf dem die technischen Daten und Leistungsdaten des Geräts sowie die Anforderungen der geltenden Rechtsvorschriften aufgeführt sind. Seriennummernschild Inneneinheit Abb. 3 VORSICHT Die Manipulation, das Entfernen, das Fehlen von Kennzeichnungsetiketten oder alles andere, was die sichere Identifizierung des Produkts unmöglich macht, erschwert alle Installations- und Wartungsarbeiten.
  • Seite 159: Installation - Einleitende Hinweise

    Installation Installation – einleitende Hinweise 2 INSTALLATION WARNUNG Anlieferung des Produkts Vor der Installation der Inneneinheit anhand Aufklebers Gerätekarton Das Gerät wird in mehrere Packstücke verpackt geliefert. sicherstellen, dass die Modellnummer der Die Handhabung muss unter Berücksichtigung des Inneneinheit mit der Modellnummer der Gesamtgewichts des Packstücks mit geeigneten Mitteln Außeneinheit übereinstimmt.
  • Seite 160: Installation Der Inneneinheit

    Installation Installation der Inneneinheit Kältemittelfüllung Mindestfläche [kg] 2.4.1 Aufstellungsort 31,0 32,8 VORSICHT 34,7 Das Gerät muss in einem gut belüfteten Raum 36,6 mit einer Mindestfläche aufgestellt werden, 38,5 die je nach der Menge des vorhandenen Kältemittels variiert. 7,956 40,1 Wie folgt vorgehen, um die Mindestfläche des Die folgenden Angaben können bei der Auswahl einer Installationsraums zu berechnen: geeigneten Position für die Inneneinheit hilfreich sein.
  • Seite 161 Installation ES IST VERBOTEN, die Inneneinheit an ES IST VERBOTEN, die Inneneinheit an den folgenden Stellen zu montieren: den folgenden Stellen zu montieren: – In einem Badezimmer oder Wäscheraum, – In Bereichen mit Ölförderung oder Fracking. denn übermäßige Feuchtigkeit kann das Gerät –...
  • Seite 162: Einhängen Der Inneneinheit

    Installation 2.4.2 Einhängen der Inneneinheit Die Lage der vier Bohrlöcher für die Befestigungsschrauben in der Decke ist in den folgenden Zeichnungen angegeben. Die zu bohrenden Löcher für die Deckenhaken unbedingt korrekt anzeichnen. Abmessungen des Lufteingangs und -ausgangs: Luftausgang Lufteingang Abb. 5 Größe der Größe der Größe des...
  • Seite 163 Installation Holz Dach mit Stahlkonstruktion Die Holzdecken-Aufhängung quer über die Deckenbalken Die winkelförmigen Halterungen aus Stahl installieren auflegen und dann die Aufhängeschrauben einschrauben. und verwenden Aufhängeschraube Halterung für Holzdecken Deckenbalken Winkelförmige Decke Stützleiste aus Stahl Aufhängeschrauben Aufhängeschrauben Abb. 6 Abb. 10 Betondecke in Neubau ACHTUNG GEFAHR Die Befestigungsbolzen versenken.
  • Seite 164: Installation Der Kanäle Für Das Zubehör

    Installation 7 Die Inneneinheit einbauen. Es sind zwei Personen INSTALLATION DER KANÄLE FÜR DAS erforderlich, um das Gerät anzuheben und in seiner ZUBEHÖR Einbauposition zu befestigen. Die Aufhängeschrauben 1 Den Filter (Option) basierend auf der Größe des in die Aufhängebohrungen des Geräts einsetzen. Sie Lufteingangs installieren.
  • Seite 165: Die Richtung Des Lufteingangs Anpassen

    Installation DIE RICHTUNG DES LUFTEINGANGS ANPASSEN INSTALLATION DES FRISCHLUFTKANALS Modelle 27M - 35M 1 Ausblasgitter und Flansch abnehmen. Anschluss des Frischluftkanals Rückluftflansch Ausblasgitter Ø92 mm Abb. 17 Abb. 14 Modelle 53M - 160M 2 Die Einbaupositionen Rückluftgitter Rückluftflansch vertauschen. Anschluss des Frischluftkanals Ausblasgitter Ø125 mm Ø160 mm...
  • Seite 166: Betriebseinstellungen Des Ventilators

    Installation 1 Die vier Schrauben der Ablaufpumpe entfernen. Die Batterien aus der Fernbedienung entnehmen und wieder einlegen: Während der ersten 30 Sekunden 2 Das Netzkabel der Pumpe und das Kabel des die Tasten MODE + FAN 5 Sekunden lang drücken. Füllstandssensors trennen.
  • Seite 167: Verwendung Der Kabelgebundenen Steuerung Zur Einstellung Des Statischen Aussendrucks

    Installation VERWENDUNG DER KABELGEBUNDENEN STEUERUNG ZUR EINSTELLUNG DES ACHTUNG GEFAHR STATISCHEN AUSSENDRUCKS Klappen NICHT laufender automatischer Luftdurchflusseinstellung Zur Einstellung des statischen Außendrucks kann die justieren. Funktion zur automatischen Luftdurchflusseinstellung des Geräts verwendet werden. Sobald die Luftdurchflusseinstellung abgeschlossen ist, Die automatische Luftdurchflusseinstellung bezieht sich stoppt die Klimaanlage nach 3 bis 6 Minuten.
  • Seite 168 Installation DIAGRAMME DURCHFLUSS/FÖRDERHÖHE Einheit 27M/35M Par. 0 Par. 3 Luftmenge Luftmenge /h) (CFM) /h) (CFM) Par. 1 Luftmenge /h) (CFM) Par. 4 Luftmenge /h) (CFM) Par. 2 Luftmenge (Pa) = statischer Nutzdruck /h) (CFM) Ventilatorgeschwindigkeit Schnelle Geschwindigkeit Mittlere Geschwindigkeit Langsame Geschwindigkeit...
  • Seite 169 Installation Einheit 53M Luftmenge Par. 0 Par. 3 /h) (CFM) Luftmenge /h) (CFM) Par. 1 Luftmenge /h) (CFM) Par. 4 Luftmenge /h) (CFM) Par. 2 Luftmenge /h) (CFM) (Pa) = statischer Nutzdruck Ventilatorgeschwindigkeit Schnelle Geschwindigkeit Mittlere Geschwindigkeit Langsame Geschwindigkeit...
  • Seite 170 Installation Einheit 70M Luftmenge Par. 0 Par. 3 /h) (CFM) Luftmenge /h) (CFM) Par. 1 Luftmenge /h) (CFM) Par. 4 Luftmenge /h) (CFM) Par. 2 Luftmenge /h) (CFM) (Pa) = statischer Nutzdruck Ventilatorgeschwindigkeit Schnelle Geschwindigkeit Mittlere Geschwindigkeit Langsame Geschwindigkeit...
  • Seite 171 Installation Einheit 88M/105M Luftmenge Par. 0 Par. 3 /h) (CFM) Luftmenge /h) (CFM) Par. 1 Luftmenge /h) (CFM) Par. 4 Luftmenge /h) (CFM) Par. 2 Luftmenge /h) (CFM) (Pa) = statischer Nutzdruck Ventilatorgeschwindigkeit Schnelle Geschwindigkeit Mittlere Geschwindigkeit Langsame Geschwindigkeit...
  • Seite 172 Installation Einheit 120M/140M Luftmenge Par. 0 Par. 3 /h) (CFM) Luftmenge /h) (CFM) Par. 1 Luftmenge /h) (CFM) Par. 4 Luftmenge /h) (CFM) Par. 2 Luftmenge /h) (CFM) (Pa) = statischer Nutzdruck Ventilatorgeschwindigkeit Schnelle Geschwindigkeit Mittlere Geschwindigkeit Langsame Geschwindigkeit...
  • Seite 173 Installation Einheit 160M Luftmenge Par. 0 Par. 3 /h) (CFM) Luftmenge /h) (CFM) Par. 1 Luftmenge /h) (CFM) Par. 4 Luftmenge /h) (CFM) Par. 2 Luftmenge /h) (CFM) (Pa) = statischer Nutzdruck Ventilatorgeschwindigkeit Schnelle Geschwindigkeit Mittlere Geschwindigkeit Langsame Geschwindigkeit...
  • Seite 174: Vorrüstung Für Die Anschlussrohre

    Installation 2.4.4 Vorrüstung für die Anschlussrohre 2.4.5 Ablassleitung Ein Loch in die Wand bohren, um die Kältemittelleitungen, Die Ablassleitung dient zur Ableitung des Kondenswassers die Ablassleitung und die Stromkabel durchzuziehen, die aus dem Gerät. Ein fehlerhafter Einbau kann Geräte- und Innen- und Außeneinheit verbinden.
  • Seite 175 Installation 3 Das Ende der Ablassleitung mit dem Auslassrohr des INSTALLATION DER ABLAUFLEITUNG FÜR Geräts verbinden. Das Ende der Leitung isolieren und GERÄTE MIT PUMPE. das Ende mit einer Rohrschelle festspannen. WARNUNG Ablassleitung – Falls eine Verlängerung der Ablassleitung verwendet wird, den Anschluss an die Inneneinheit einem zusätzlichen...
  • Seite 176: Auslasstest

    Installation AUSLASSTEST Gerät mit Pumpe. Sicherstellen, dass die Ablassleitung nicht verstopft ist. 1 Die Prüfkappe entfernen. Die Überprüfung muss in Neubauten vor dem Einbau der 2 2 Liter Wasser in die Auffangwanne füllen. Deckenverkleidung ausgeführt werden. Geräte ohne Pumpe. 1 2 Liter Wasser in die Auffangwanne füllen. Ablassleitung Abb.
  • Seite 177: Konfiguration Mit Zwei Inneneinheiten (Twin)

    Installation 2.4.6 Konfiguration mit zwei Inneneinheiten (TWIN) KOMBINATIONSMÖGLICHKEITEN Die Inneneinheiten der Baureihe TWIN sind für eine Installation in einem einzigen Raum konzipiert. Mit der Steuerung wird die Haupteinheit gesteuert, während die zweite Einheit gemäß den Einstellungen für Ein/Aus, den Sollwerten, dem Funktionsmodus und der Geschwindigkeit des Ventilators arbeitet. Inneneinheit 1 Inneneinheit 2 Außeneinheit...
  • Seite 178: Konfiguration Der Inneneinheiten

    Installation Um die Y-Verbindung zu verwenden, das Rohr gemäß der Abbildung von “Abb. 34” abschneiden, um die richtige WARNUNG Größe für das Innen- und Außenrohr zu erhalten. Darauf achten, dass Länge Kältemittelleitung, die Anzahl der Biegungen Flüssigkeitsleitungen und der Höhenunterschied zwischen Innen- 95 ±10 und Außeneinheit den Anforderungen in Tabelle 7.1 entsprechen.
  • Seite 179: Anschluss Der Twin-Einheit

    Installation ANSCHLUSS DER TWIN-EINHEIT Die 2 Inneneinheiten müssen an dieselbe Stromquelle angeschlossen werden. Verbinden Sie die Klemmen X, Y, E beider Inneneinheiten mit einem abgeschirmten Kabel. Inneneinheit 1 Inneneinheit 2 Außeneinheit Abb. 36 Versorgung der Versorgung der Signal Außeneinheit Inneneinheit TWIN-Konfiguration Kabelanzahl/ Kabelanzahl/...
  • Seite 180: Achtung Elektrische Gefahr

    Installation 2.4.7 Stromanschlüsse die Klemmleiste zugänglich. Für die Stromversorgung und Kommunikation zwischen WARNUNG Innen- und Außeneinheiten sind Kabel mit folgenden Sämtliche Anschlüsse müssen genau wie im Eigenschaften erforderlich: Schaltplan auf der Innenseite des Deckels der Klemmleiste der Inneneinheit angegeben Stromversorgung Signal ausgeführt werden.
  • Seite 181 Installation REMOTE EIN-AUS Modelle 27M - 35M Für den Eingang der CN23-Klemme der Fernsteuerung Klemmleiste der INNEN-Einheit (ON-OFF) und des JR6-Schnellanschlusses Morsettiere unità INTERNA Abb. 40 – Den JR6-Schnellanschluss entfernen, wenn die ON-OFF-Funktion verwendet wird. – Wenn sich der Fernschalter in der Position OFF (ÖFFNEN) befindet, wird das Gerät ausgeschaltet.
  • Seite 182: Installation Der Fernanzeige

    Installation ALARM Installation der Fernanzeige Für den Eingang des CN33-Verbinders – ALARM Fernanzeige einem integrierten Signalempfänger ausgestattet, mit dem die Inneneinheit mit der Fernbedienung gesteuert werden kann. Die Fernanzeige wird mit der Inneneinheit geliefert, ist jedoch nicht mit der Platine verbunden. Power Für die Installation und den Anschluss wie unten beschrieben vorgehen.
  • Seite 183 Installation abschneiden. Verbinder Verbinder 10-polig 5-polig Abb. 46 5 Den PVC-Schutzdeckel an der Unterseite der Fernanzeige anbringen. Abb. 47 6 Den 10-poligen Verbinder der Fernanzeige mit dem CN10-Verbinder der Hauptplatine verbinden. Ggf. das mitgelieferte 2 m lange Verlängerungskabel verwenden. CN10 Abb.
  • Seite 184: Verwendung

    Verwendung 3 VERWENDUNG ACHTUNG GEFAHR – Wenn ein abnormaler Zustand eintritt (z.B. Beschreibung der Brandgeruch), das Gerät sofort ausschalten und den zuständigen Händler kontaktieren, Systemkomponenten um die Gefahr von Verletzungen, Feuer oder Stromschlägen zu vermeiden. – Darauf achten, dass die Inneneinheit und die Fernbedienung NICHT nass werden.
  • Seite 185: Manueller Betrieb (Ohne Fernbedienung)

    Verwendung Manueller Betrieb (ohne Sonstige Funktionen Fernbedienung) – Automatischer Wiederanlauf Falls die Fernbedienung nicht funktioniert, kann das Nach einem Stromausfall läuft Gerät Gerät manuell mit der manuellen Steuertaste an der automatisch wieder vorherigen Inneneinheit bedient werden. Man beachte, dass die Einstellungen weiter, sobald die Stromversorgung Handbedienung keine langfristige Lösung ist;...
  • Seite 186: Fernbedienung

    Verwendung Fernbedienung ON/OFF (EIN/AUS) MODE (MODUS) Ein-/ Zeigt die Aus-Taste des Geräts Betriebsmodi in folgender Reihenfolge an: AUTO » KÜHLEN» TEMP TROCKNEN » HEIZEN » Erhöht die Temperatur VENTILATOR in Schritten von 1 °C. Die Temperatur max. ist 30 °C. VENTILATOR Dient zur Auswahl der Ventilatorgeschwindigkeit...
  • Seite 187: Wartung

    Wartung Reinigung des Luftfilters 4 WARTUNG Der Filter verhindert, dass Staub und sonstige Partikel in Es empfiehlt sich, sowohl die inneren als auch die die Inneneinheit gelangen. Staubablagerungen können äußeren Teile des Geräts regelmäßig zu reinigen. Dies den Wirkungsgrad der Klimaanlage verringern. Damit garantiert seine einwandfreie Funktion und Haltbarkeit.
  • Seite 188: Reinigung Der Außeneinheit

    Wartung Reinigung der Außeneinheit Wenn das Register der Außeneinheit verstopft ist, die Blätter und Ablagerungen entfernen und dann den Staub mit einem Luftstrahl oder ein wenig Wasser beseitigen. Abb. 54 3 Den Luftfilter herausnehmen. 4 Den Luftfilter mit einem Staubsauger absaugen oder in lauwarmem Wasser mit einem milden Reinigungsmittel Register der reinigen.
  • Seite 189: Längerer Stillstand

    Wartung Längerer Stillstand Wartung zu Saisonbeginn Wenn die Klimaanlage über einen längeren Zeitraum Nach einem längeren Stillstand bzw. vor einer Phase des nicht benutzt werden soll, wie folgt vorgehen: häufigen Gebrauchs, folgendermaßen vorgehen: Sicherstellen, dass die Alle Filter reinigen Alle Filter reinigen Den Belüftungsmodus aktivieren, Kabel nicht beschädigt sind.
  • Seite 190: Häufige Probleme

    Wartung Fehlersuche ACHTUNG GEFAHR In folgenden Fällen muss das Gerät sofort ausgeschaltet werden! – Das Netzkabel ist schadhaft oder stark erwärmt. – Brandgeruch wird bemerkt. – Das Gerät erzeugt laute oder anormale Geräusche. – Eine Sicherung brennt durch oder der Schutzschalter löst häufig aus. –...
  • Seite 191: Störungen Und Abhilfen

    Wartung 4.7.2 Störungen und Abhilfen Im Fall von Funktionsstörungen sollten vor einer Kontaktaufnahme mit dem Kundendienst die folgenden Punkte überprüft werden. Störung Mögliche Ursache Abhilfen Die eingestellte Temperatur kann höher sein als die Umgebungstemperatur des Eine niedrigere Temperatur einstellen. Raums. Der Wärmetauscher der Innen- oder der Den Wärmetauscher reinigen (Kundendienst).
  • Seite 192: Auf Dem Display Des Innengeräts Angezeigte Fehlercodes

    Wartung Auf dem Display des Innengeräts angezeigte Fehlercodes Zeitschaltuhr-Kon- Ursache Ursache trollleuchte EH 00 / EEPROM-Parameterfehler Inneneinheit OFF (AUS) EH 0A EL 01 Kommunikationsfehler Innen-/Außeneinheit OFF (AUS) Die Ventilatorgeschwindigkeit der Inneneinheit liegt außerhalb des EH 03 OFF (AUS) normalen Bereichs (für einige Modelle) Der Kreis des Raumtemperaturfühlers T1 der Inneneinheit ist offen oder EH 60 OFF (AUS)
  • Seite 193 Wartung AUF DER FERNBEDIENUNG ANGEZEIGTE FEHLERCODES. Verwenden Sie die Funktion „Abfragemodus“ auf der Fernbedienung zur Anzeige der Alarme (siehe: Sondermodi im technischen Handbuch). Ursache Beschreibung EH 00 / EEPROM-Parameterfehler Inneneinheit EH 0A EL 01 Kommunikationsfehler Innen-/Außeneinheit EH bA Kommunikationsfehler zwischen Inneneinheit und externem Ventilatormodul der Inneneinheit EH 30 Parameterfehler bei externem Ventilator der Inneneinheit EH 35...
  • Seite 194 Wartung PC 02 Überhitzungsschutz des Verdichters oder Hochtemperaturschutz des IPM-Moduls PC 40 Kommunikationsfehler zwischen Hauptchip der Außeneinheit und verdichtergetriebenem Chip PC 41 Schutz für Stromeingangserkennung PC 42 Startfehler Verdichter PC 43 Schutz vor fehlender Phase (3-phasig) PC 44 Nullgeschwindigkeitsschutz der Außeneinheit PC 45 341PWM-Fehler PC 46...
  • Seite 195: Entsorgung

    Entsorgung 5 ENTSORGUNG Der Hersteller ist gemäß der Umsetzung der Richtlinie Gewerbliche Elektro- und Elektronikaltgeräte: alle 2012/19/EU und der einschlägigen nationalen Vorschriften Elektro- und Elektronikaltgeräte, die nicht aus den oben für Elektro- und Elektronikaltgeräte im nationalen AEE- genannten Haushalten stammen. Register registriert.
  • Seite 196 Anlagen 6 ANLAGEN Schaltpläne für Inneneinheit...
  • Seite 197: Konformitätserklärung

    EGALE APPRESENTANTE CLIVET S.P.A. - Via Camp Lonc, 25 - Z.I. VILLAPAIERA - 32030 FELTRE (BL) – ITALIA Cap. Soc. Eur 20.000.000 i.v. – C.F. e reg.Impr. BL n°.00708410253 – R.E.A. n°.66577 –P.I./ VAT :IT 00708410253 Tel. +39 0439 3131 - Fax +39 0439 313300 – Sito Web : www.clivet.it...
  • Seite 198 EGALE APPRESENTANTE CLIVET S.P.A. - Via Camp Lonc, 25 - Z.I. VILLAPAIERA - 32030 FELTRE (BL) – ITALIA Cap. Soc. Eur 20.000.000 i.v. – C.F. e reg.Impr. BL n°.00708410253 – R.E.A. n°.66577 –P.I./ VAT :IT 00708410253 Tel. +39 0439 3131 - Fax +39 0439 313300 – Sito Web : www.clivet.it...
  • Seite 199 EGALE APPRESENTANTE CLIVET S.P.A. - Via Camp Lonc, 25 - Z.I. VILLAPAIERA - 32030 FELTRE (BL) – ITALIA Cap. Soc. Eur 20.000.000 i.v. – C.F. e reg.Impr. BL n°.00708410253 – R.E.A. n°.66577 –P.I./ VAT :IT 00708410253 Tel. +39 0439 3131 - Fax +39 0439 313300 – Sito Web : www.clivet.it...
  • Seite 200 SEIT 30 JAHREN BIETEN WIR LÖSUNGEN FÜR NACHHALTIGEN KOMFORT, DAS WOHLBEFINDEN FÜR DEN EINZELNEN UND SCHUTZ DER UMWELT. www.clivet.com Verkauf und Kundendienst CLIVET SPA Via Camp Lonc 25, Z.I. Villapaiera 32032 Feltre (BL) - Italien Tel. +39 0439 3131 - Fax +39 0439 313300 info@clivet.it...

Diese Anleitung auch für:

Duct 2 id3-xy 27mDuct 2 id3-xy 35mDuct 2 id3-xy 53mDuct 2 id3-xy 70mDuct 2 id3-xy 88mDuct 2 id3-xy 105m ... Alle anzeigen

Inhaltsverzeichnis