Inhaltsverzeichnis
Werbung
Verfügbare Sprachen
Verfügbare Sprachen
Werbung
Kapitel
Inhaltsverzeichnis

Verwandte Anleitungen für Georg Fischer Piping Systems MSA Plus 400


Inhaltszusammenfassung für Georg Fischer Piping Systems MSA Plus 400
- Seite 1 Betriebsanleitung Operating instructions Mode opératoire MSA Plus 400...
- Seite 2 Alle Rechte, insbesondere das Recht der Vervielfältigung und Verbreitung sowie der Übersetzung, vorbehalten. Vervielfältigungen oder Reproduktionen in jeglicher Form (Druck, Fotokopie, Mikrofilm oder Datenerfassung) bedürfen der schriftlichen Genehmigung durch die Georg Fischer Piping Systems.
-
Seite 3: Inhaltsverzeichnis
Betriebsanleitung MSA Plus 400 Inhaltsverzeichnis Inhaltsverzeichnis Seite Einleitung Gültigkeit Gerätebeschreibung Bedienungselemente Barcode-Leser Protokollspeicher Serviceöffnung Stromversorgung Netzbetrieb Generatorbetrieb 1.10 Verlängerungskabel 1.11 Inbetriebnahme Schweissen mit Standardkonfiguration Übersicht Bedienungsablauf Gerät einschalten Schweissdaten einlesen Schweissung starten Abbruch der Schweissung Schweissung beendet Protokollanzeige Standby-Mode Zusatzfunktionen... - Seite 4 Inhaltsverzeichnis Betriebsanleitung MSA Plus 400 Handeingabe Schweissprogr. Z45 4.10 Eingabe einer 2. Schweiss-Nr. Z46 4.11 Revision Z6, Z60 4.12 Schweissvorbeitung Z0 ON/OFF 4.13 Anzeigen Schweisszeit Z10 ON/OFF 4.14 Letzte Revision 4.15 Nächste Revision Protokollierung Allgemeines zur Protokollierung Zeige Protokolle Protokolle exportieren...
-
Seite 5: Einleitung
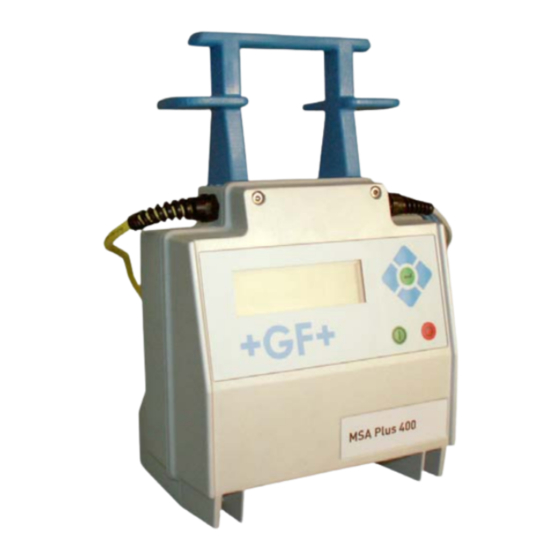
Bitte beachten Sie zu Ihrer Sicherheit die Hinweise zum bestimmungsgemässen Gebrauch und die Unfallschutzvorschriften genau. Vielen Dank Gültigkeit Diese Bedienungsanleitung gilt für die Geräte MSA Plus 400 ab Gerätenummer 20000 und der Softwareversion 2.00. Die Gerätenummer befindet sich auf dem Typenschild auf der rechten Seite des Gerätes. Gerätebeschreibung Das MSA Plus 400 ist ein Schweissgerät zur Verschweissung von... -
Seite 6: Bedienungselemente
1 Einleitung Betriebsanleitung MSA Plus 400 Bedienungselemente Auf der Frontplatte befinden sich die Anzeige und die Bedienungstasten. • AUF-Taste (1) • RECHTS-Taste (2) • AB-Taste (3) • LINKS-Taste (4) • ENTER-Taste (5) • START-Taste (6) • STOP-Taste (7) Barcode-Leser Der Barcode-Leser liest am besten, wenn er in einem Winkel von 10–30 Grad zur Senkrechten über den Barcode geführt wird. -
Seite 7: Protokollspeicher
Während der Schweissung werden Daten aufgezeichnet und anschliessend als Schweissprotokolle gespeichert. Im Kapitel «Protokollierung» sind detaillierte Angaben zu finden. Serviceöffnung Unter der Abdeckung auf der rechten Seite des MSA Plus 400 befindet sich die Serviceöffnung. Die Abdeckung muss beim Arbeiten im Freien geschlossen sein. Stromversorgung Das MSA Plus 400 ist für einphasige Wechselspannung von 230 Volt und einer... -
Seite 8: Schweissen Mit Standardkonfiguration
2 Schweissen mit Standardkonfiguration Betriebsanleitung MSA Plus 400 Schweissen mit Standardkonfiguration Übersicht Bedienungsablauf SCHWEISSDATEN? MSA Plus 400 ^^^^ Ω 21°C 14:20 Fitting 03-06-2007 SCHWEISSDATEN? MSA Plus 400 7.15 Ω 21°C 14:20 Barcode 03-06-2007 GF I * 32mm START 15/20003 7.15 Ω... -
Seite 9: Gerät Einschalten
Betriebsanleitung MSA Plus 400 2 Schweissen mit Standardkonfiguration Gerät einschalten Gerät an Stromquelle anschliessen. Das MSA Plus 400 startet auf. SCHWEISSDATEN? MSA Plus 400 ^^^^ Ω 21°C 14:20 03-06-2007 Fitting anschliessen. Schweissdaten einlesen Wenn Schweissdaten verlangt werden, Barcode des Fittings einlesen. -
Seite 10: Schweissung Starten
2 Schweissen mit Standardkonfiguration Betriebsanleitung MSA Plus 400 Schweissung starten Das MSA Plus 400 ist nun zum Schweissen bereit. Schweissung mit START-Taste auslösen. GF I * 32mm START 15/20003 7.15 Ω 21°C Während den ersten Sekunden wird die Qualität der Eingangsspannung überprüft. -
Seite 11: Protokollanzeige
Betriebsanleitung MSA Plus 400 2 Schweissen mit Standardkonfiguration Protokollanzeige Nach Beendung des Speichervorgangs, wird das Protokoll alternierend zur einzuhaltenden Abkühlzeit angezeigt: GF I * 32mm MSA Plus 400 15/20003 7.41kJ 14:20 03-06-2007 ABKUEHLZEIT IN MSA Plus 400 MINUTEN: 14:20 03-06-2007 Falls im Schweissprogramm des Fittings keine Abkühlzeit programmiert ist,... -
Seite 12: Zusatzfunktionen
3 Zusatzfunktionen Betriebsanleitung MSA Plus 400 Zusatzfunktionen Das Diagramm zeigt die Reihenfolge der Anzeigefenster (Menüs). Mit der AUF-Taste oder AB-Taste kann von einem Menü zum andern gesprungen werden. SCHWEISSDATEN? MSA Plus 400 ^^^^ Ω 21°C 14:20 03-06-2007 > 39.5V MSA Plus 400... - Seite 13 Betriebsanleitung MSA Plus 400 3 Zusatzfunktionen AUFTRAG? MSA Plus 400 ABC1 14:20 03-06-2007 MSA Plus MSA Plus 400 DRUCKEN MEMORY 14:20 03-06-2007 MSA Plus MSA Plus 400 DRUCKEN SPS 14:20 03-06-2007 PC-KOMMUNIKATION MSA Plus 400 14:20 03-06-2007 VERSION SW: 1.00...
-
Seite 14: Bemerkung
3 Zusatzfunktionen Betriebsanleitung MSA Plus 400 EXPORT MSA Plus 400 14:20 03-06-2007 ZEIGE PROTOKOLLE MSA Plus 400 14:20 03-06-2007 BEMERKUNG 2 MSA Plus 400 14:20 03-06-2007 BEMERKUNG 1 MSA Plus 400 14:20 03-06-2007 Eingabe Bedienerausweis Bei aktivierter Konfiguration «Ausweis zwingend» (Z21), wird nach Eingabe der Schweissdaten die Eingabe einer Bedieneridentifikation über den... -
Seite 15: Eingabe Auftragsnummer
Betriebsanleitung MSA Plus 400 3 Zusatzfunktionen Eingabe Auftragsnummer Bei aktivierter Konfiguration «Auftrag zwingend» (Z41), wird nach Eingabe der Schweissdaten die Eingabe der Auftragsnummer über den Auftrags-Barcode verlangt: AUFTRAG: MSA Plus 400 14:20 03-06-2007 Eine eingegebene Auftragsnummer bleibt bis zum Datumswechsel erhalten. -
Seite 16: Eingabe Infotext
3 Zusatzfunktionen Betriebsanleitung MSA Plus 400 Eingabe Infotext Bei aktivierter Konfiguration «Eingabe Infotext» (Z43) wird nach der Eingabe der Schweissdaten die Eingabe der Infotexte erwartet: MSA Plus 400 14:20 03-06-2007 MSA Plus 400 14:20 03-06-2007 Die Stelle, an der der Cursor steht, kann editiert werden. Mit den RECHTS- und LINKS-Tasten die Stelle wechseln und mit den AUF- und AB-Tasten die gewünschten Ziffern wählen. -
Seite 17: Schweissung Wiederholen
Betriebsanleitung MSA Plus 400 3 Zusatzfunktionen Mit den RECHTS- und LINKS-Tasten die Stelle wechseln und mit den AUF- und AB-Tasten die gewünschten Ziffern wählen. Mit der ENTER-Taste bestätigen. > 39.?V MSA Plus 400 0000s 14:20 03-06-2007 Mit der AB-Taste zur Eingabe der Schweisszeit wechseln. -
Seite 18: Sprache Wählen
3 Zusatzfunktionen Betriebsanleitung MSA Plus 400 Sprache wählen Die Anzeigesprache des Gerätes kann während des Betriebes geändert werden. SPRACHE: MSA Plus 400 14:20 03-06-2007 RECHTS-Taste so oft drücken, bis die gewünschte Sprache erscheint. Die Eingabe muss nicht mit der ENTER-Taste bestätigt werden. -
Seite 19: Eingabe Bemerkung 1 + 2
Ziffern wählen. Mit der ENTER-Taste bestätigen. Die Bemerkungsfelder gelten nur für die nächste Schweissung und werden somit nach Abschluss der Schweissung, Standby oder ausschalten der MSA Plus 400 wieder gelöscht. Mögliche Nutzung der Bemerkungsfelder: • Wettercode, Umgebungsbedingungen der Schweissungen •... -
Seite 20: Service Menü
(bis max. 40 Sprachen) • ACHTUNG Speichermedien dürfen nur im ausgeschalteten Zustand oder im Standby-Mode des MSA Plus 400 ein- und ausgesteckt werden! • Während dem Laden der Sprachen darf die Spannungsversorgung nicht entfernt werden! 1. Die Sprachdaten auf die oberste Verzeichnisebene eines unterstützten USB-Memorysticks kopieren. -
Seite 21: Lade Sprachen
Softwaren ersetzt werden. • ACHTUNG Speichermedien dürfen nur im ausgeschalteten Zustand oder im Standby- Mode des MSA Plus 400 ein- und ausgesteckt werden! • Während dem Software-Update darf die Spannungsversorgung nicht entfernt werden! 1. Die Softwaredaten auf einen unterstützten USB-Memorysticks installieren. - Seite 22 VERSION SW: 1.00 U K R 14:20 03-06-2007 Im Display wird der erfolgreiche Ladevorgang angezeigt. MSA Plus MSA Plus 400 CF/USB AUSSCHALTEN 14:20 03-06-2007 6. Jetzt MSA Plus 400 kurz vom Stromnetz trennen und wieder einschalten. (10.07) MSA Plus 400_d.doc...
-
Seite 23: Konfiguration
Betriebsanleitung MSA Plus 400 4 Konfiguration Konfiguration Mit der AUF- oder AB-Taste ins Menü Konfiguration wechseln. Die aktuelle Konfiguration wird angezeigt. (Z-Funktionen) KONFIGURATION MSA Plus 400 20 / 40 / 51 / 60 / 80 14:20 03-06-2007 Datum und Uhrzeit Z5, Z50, Z51 Mit dem Datum-Barcode (Z5) können Datum und Uhrzeit eingestellt werden. -
Seite 24: Protokollspeicher Z8, Z80, Z81
4 Konfiguration Betriebsanleitung MSA Plus 400 Protokollspeicher Z8, Z80, Z81 Die Betriebsart der Protokollspeicherkarte und des Sicherheitsprotokollspeichers (SPS) können mit den Barcodes Z8, Z80 und Z81 konfiguriert werden. Mit dem Einlesen der Barcodes Z8, Z80 und Z81 wird die Abfrage «Memorycard löschen» aktiviert. Mit der RECHTS-Taste zwischen Ja und Nein umschalten und mit der ENTER-Taste bestätigen. -
Seite 25: Bedienerausweis Z20, Z21
Betriebsanleitung MSA Plus 400 4 Konfiguration Bedienerausweis Z20, Z21 Das MSA Plus 400 akzeptiert alle Bedienerausweise, wenn sie der aktuellen Norm ISO/TC138/SC4 WG12176 entsprechen. Mit den Barcodes Z20 «Ausweis freiwillig» und Z21 «Ausweis zwingend» kann konfiguriert werden, ob zum Schweissen ein Bedienerausweis erforderlich ist. -
Seite 26: Eingabe Traceability Z44
Mit dem Barcode Z44 kann die Eingabe von Daten für die Traceability ( Norm ISO 12176-4 ) zulässig gemacht werden. Die Eingabe erfolgt über einen Barcode oder die Tastatur des MSA Plus 400. Die eingelesenen Daten werden zusammen mit den anderen, für die Schweissung relevanten Daten, nach der Schweissung abgespeichert. -
Seite 27: Handeingabe Schweissprogr. Z45
Betriebsanleitung MSA Plus 400 4 Konfiguration Handeingabe Länge (die Länge kann nur über die Tastatur eingegeben werden): LAENGE: MSA Plus 400 ELEMENT 1 14:20 002.10 m 03-06-2007 Die Cursorposition wird durch ein blinkendes Fragezeichen angezeigt. ACHTUNG Bei der Handeingabe muss die eingegebene Zahlenfolge der Norm ISO 12176-4 entsprechen. -
Seite 28: Eingabe Einer 2. Schweiss-Nr. Z46
4 Konfiguration Betriebsanleitung MSA Plus 400 4.10 Eingabe einer 2. Schweiss-Nr. Z46 Diese Funktion erlaubt die Eingabe einer 2. Schweissnummer zu jeder Schweissung. Die zweite Schweissnummer besteht aus 4 numerischen Stellen und einer Stelle [Leerzeichen, A-Z] abgetrennt durch das Minuszeichen -> z.B.: 1005-B. -
Seite 29: Anzeigen Schweisszeit Z10 On/Off
Betriebsanleitung MSA Plus 400 4 Konfiguration 4.13 Anzeigen Schweisszeit Z10 ON/OFF Mit dem Barcode «Zeit hoch zählen» Z10 ON wird die Schweisszeit hochgezählt. Mit Z10 OFF wird die Schweisszeit runtergezählt. 4.14 Letzte Revision Mit der AUF- oder AB-Taste ins Menü «Letzte Revision» wechseln. -
Seite 30: Protokollierung
Protokolle exportieren Es können Protokolle vom Sicherheitsprotokollspeicher auf einen formatierten USB Stick exportiert werden. ACHTUNG Speichermedien nur im ausgeschalteten Zustand oder im Standby-Mode des MSA Plus 400 ein- und ausstecken. EXPORT MSA Plus 400 14:20 03-06-2007 Mit der ENTER-Taste bestätigen. -
Seite 31: Protokolle Drucken
Exportieren der Protokolle mit der ENTER-Taste bestätigen. Protokolle drucken Druckerkabel in den dafür vorgesehenen USB Anschluss einstecken. ACHTUNG Kabel und Speichermedien nur im ausgeschalteten Zustand oder im Standby- Mode des MSA Plus 400 ein- und ausstecken. MSA Plus 400 einschalten. MSA Plus MSA Plus 400 CF/PR... -
Seite 32: Drucken Sps Nach Auftrag
5 Protokollierung Betriebsanleitung MSA Plus 400 Einzelprotokoll Mit der AUF- oder AB-Taste Einzelprotokoll auswählen. Mit der ENTER-Taste drucken bestätigen. EINZELPROTOKOLL MSA Plus 400 CF/PR AUSDRUCK 14:20 03-06-2007 Nach START 17/20003 MSA Plus 400 CF/PR Schweissnummer STOP 1/20003 drucken 14:20 03-06-2007 Die Startposition AUF- AB-Taste einstellen, beginnend mit der höchsten... -
Seite 33: Pc-Kommunikation
Das Kabel für den Anschluss zum PC in die dafür vorgesehene Buchse stecken. ACHTUNG Kabel und Speichermedien dürfen nur im ausgeschalteten Zustand oder im Standby-Mode des MSA Plus 400 ein- und ausgesteckt werden. MSA Plus 400 einschalten. Mit der AB-Taste Menü «PC-Kommunikation» auswählen. PC KOMMUNIKATION... -
Seite 34: Fehler-Meldungen
Codierte Meldungen Anzeigentext Bemerkungen NETZSPANNUNG Generator überprüfen ZU HOCH UMGEBUNGSTEMPERATUR ZU TIEF UMGEBUNGSTEMPERATUR ZU HOCH INNENTEMPERATUR MSA Plus 400 in geheiztem Raum ZU TIEF erwärmen INNENTEMPERATUR MSA Plus 400 abkühlen lassen ZU HOCH FITTINGWIDERSTAND Fitting überprüfen ZU KLEIN FITTINGWIDERSTAND Fitting überprüfen... -
Seite 35: Uncodierte Meldungen
Betriebsanleitung MSA Plus 400 6 Fehler-Meldungen Anzeigentext Bemerkungen MEMORYCARD ENTFERNT MSA Plus 400 ausschalten, Protokollspeicherkarte einsetzen TEMPERATUR MSA Plus 400 in Revision geben MESSSYSTEMERROR UNTERBRUCH WEGEN MSA Plus 400 aus Generatorbereich MAGN. EINFLUSS entfernen SCHWEISSLEISTUNG Generatorleistung/Verlängerungskabel ZU TIEF überprüfen SCHWEISSLEISTUNG... - Seite 36 SPEICHER (SPS) FEHLER BEIM MSA Plus 400 ausschalten, neuen LADEN USB-Memorystick einsetzen VENTILATOR Ventilatoröffnung kontrollieren. Wenn FEHLER frei, MSA Plus 400 in Revision geben EINGABE FEHLER Inhalt oder Aufbau des TR- Barcodes TRACEABILITY ist nicht korrekt (10.07) MSA Plus 400_d.doc...
-
Seite 37: Produkte-Information
Betriebsanleitung MSA Plus 400 7 Produkte-Information Produkte-Information Netzspannung 180–264VAC Nennspannung: 230VAC Netzfrequenz 45–65Hz Nennfrequenz: 50Hz Leistungsaufnahme max. 3500 W Nennleistung Generator-Ausgangsleistung 2–4KVA sinusförmig (einpoliger Betrieb) je nach Fittingdurchmesser bei ELGEF Plus bis d75 2KVA Vorsicherung 10–15AT je nach Fittingdurchmesser Schweissspannung 8–42 (48) VAC galvanisch getrennt... -
Seite 38: Unterhalt
8 Unterhalt Betriebsanleitung MSA Plus 400 Unterhalt Reinigung Gerät und Barcode-Leser regelmässig mit einem feuchten Lappen reinigen. Die Frontplatte und die Schilder können bei starker Verschmutzung mit Alkohol gereinigt werden (kein Verdünner oder Trichlor). Das Gerät darf auf keinen Fall abgespritzt, ins Wasser getaucht oder mit Pressluft abgeblasen werden. -
Seite 39: Unfallschutz-Vorschriften
Betriebsanleitung MSA Plus 400 9 Unfallschutz-Vorschriften Unfallschutz-Vorschriften Betrieb des Gerätes Das Gerät vor Unbefugten, nicht instruiertem Personal und Kindern fernhalten. Nichtbenützte Geräte vor unbefugter Benutzung gesichert in einem trockenen, verschlossenen Raum aufbewahren. Der sichere Betrieb des Schweissgerätes setzt folgendes voraus: •... -
Seite 40: Defektes Gerät
9 Unfallschutz-Vorschriften Betriebsanleitung MSA Plus 400 Defektes Gerät Beschädigte Gehäuse oder andere Teile unverzüglich durch eine autorisierte Service-Stelle auswechseln oder instandsetzen lassen. Falls das Gerät Fehlfunktionen zeigt, muss es unverzüglich durch eine autorisierte Service- Stelle instandgesetzt werden. Nur entsprechend autorisiertes, qualifiziertes Personal darf Eingriffe am Schweissgerät vornehmen. -
Seite 41: Konformitätserklärung / Declaration Of Conformity / Déclaration De Conformité
Schweissautomat MSA Plus 300, MSA Plus 350 und MSA Plus 400 Fusion control unit MSA Plus 300, MSA Plus 350 and MSA Plus 400 Machine à souder automatique MSA Plus 300, MSA Plus 350 et MSA Plus 400 auf das sich diese Erklärung bezieht, mit den folgenden Normen übereinstimmt: to which this declaration relates is in conformity with the following standards: auquel se réfère cette déclaration est conforme aux normes:... -
Seite 42: Geräterücknahme Am Ende Der Lebensdauer
Geräterücknahme am Ende der Lebensdauer Das von Georg Fischer +GF+ an Sie gelieferte Gerät fällt unter die Regelungen der europäischen Richtlinie 2002/96/EG (WEEE) und der entsprechenden Umsetzungen in das Recht der EU-Mitgliedsstaaten (in Deutschland ElektroG). Damit haben Sie die Möglichkeit, das Gerät am Ende seiner Lebensdauer zur sachgerechten Entsorgung und Verwertung zurückzugeben. - Seite 44 Norway www.georgfischer.se Georg Fischer AS China Italy 1351 Rud Switzerland Georg Fischer Piping Systems Ltd Shanghai Georg Fischer S.p.A. Phone +47(0)67 18 29 00 Pudong, Shanghai 201319 20063 Cernusco S/N (MI) Georg Fischer Rohrleitungssysteme no.ps@georgfischer.com Phone +86(0)21/58 13 33 33...
- Seite 45 Operating instructions MSA Plus 400...
- Seite 46 All rights reserved, in particular the rights of duplication and distribution as well as translation. Duplication and reproduction in any form (print, photocopy, microfilm or electronic) require the written permission of Georg Fischer Piping Systems Ltd.
- Seite 47 Operating instructions MSA Plus 400 Table of contents Table of contents Page Introduction Validity Product Description Operation Controls Barcode Reader Protocol Memory Service Opening Power Supply Mains Supply Generator 1.10 Extension Cables 1.11 Starting Up Operation with Standard Configuration Overview of Operating Procedure...
- Seite 48 Table of contents Operating instructions MSA Plus 400 Manual input of fusion programme Z45 4.10 Input of a 2. Fusion Number, Z46 4.11 Maintenance Z6, Z60 4.12 Fusion Preparation Z0 ON/OFF 4.13 Display Fusion Time Z10 ON/OFF 4.14 Last Service 4.15 Next Service...
-
Seite 49: Introduction
Interleaved 2/5 according to ISO/TC138/SC5/WG12. All relevant data for fusion and tracing back past operations are stored twice in the MSA Plus 400 and can be retrieved for evaluation or further processing in a variety of ways. The MSA Plus 400 can be specially configurated for different purposes. -
Seite 50: Operation Controls
1 Introduction Operating instructions MSA Plus 400 Operation Controls The display and control functions are located on the front plate. • UP (1) • RIGHT (2) • DOWN (3) • LEFT (4) • ENTER (5) • START (6) • STOP (7) Barcode Reader The barcode reader operates best when held at an angle of 10–30 degrees... -
Seite 51: Protocol Memory
The CompactFlash-Card is located underneath the hinged lid on the right side of the MSA Plus 400. The socket to connect a cable from a PC or printer is also located here. When working outdoors, the lid should be kept closed. -
Seite 52: Operation With Standard Configuration
2 Operation with Standard Configuration Operating instructions MSA Plus 400 Operation with Standard Configuration Overview of Operating Procedure FUSION DATA? MSA Plus 400 ^^^^ Ω 21°C 14:20 Fitting 03-06-2007 FUSION DATA ? MSA Plus 400 7.15 Ω 21°C 14:20 Barcode... -
Seite 53: Switching On
Operating instructions MSA Plus 400 2 Operation with Standard Configuration Switching on Connect unit to the power source. The MSA Plus 400 is then switched on. FUSION DATA? MSA Plus 400 ^^^^ Ω 21°C 14:20 03-06-2007 Connect fitting. Input Fusion Data If fusion data is requested, swipe the barcode of the fitting. -
Seite 54: Start Fusion Process
2 Operation with Standard Configuration Operating instructions MSA Plus 400 Start Fusion Process The MSA Plus 400 is now ready for fusion. Press START to initiate fusion. GF I * 32mm START 15/20003 7.15 Ω 21°C During the first seconds of the fusion, the quality of the input voltage is checked. -
Seite 55: Protocol Display
Operating instructions MSA Plus 400 2 Operation with Standard Configuration Protocol Display After the operation data has been stored, the protocol and the remaining cooling time are displayed alternately. GF I * 32mm MSA Plus 400 15/20003 7.41kJ 14:20 03-06-2007... -
Seite 56: Additional Functions
3 Additional Functions Operating instructions MSA Plus 400 Additional Functions The diagram shows the sequence of display windows (menus). By pressing UP or DOWN the display changes from one menu to the next. FUSION DATA? MSA Plus 400 ^^^^ Ω... - Seite 57 Operating instructions MSA Plus 400 3 Additional Functions JOB NUMBER? MSA Plus 400 ABC1 14:20 03-06-2007 MSA Plus MSA Plus 400 PRINT MEMORY 14:20 03-06-2007 MSA Plus MSA Plus 400 PRINT SPS 14:20 03-06-2007 PC-COMMUNICATION MSA Plus 400 14:20 03-06-2007 VERSION SW: 1.00...
-
Seite 58: Enter Operator Identification
3 Additional Functions Operating instructions MSA Plus 400 EXPORT MSA Plus 400 14:20 03-06-2007 SHOW RECORD MSA Plus 400 14:20 03-06-2007 REMARK 2 MSA Plus 400 14:20 03-06-2007 REMARK 1 MSA Plus 400 14:20 03-06-2007 Enter Operator Identification If the configuration «Identification Required» (Z21) is activated, the display will ask the operator to enter his operator identification barcode after the fusion data has been entered. -
Seite 59: Enter Job Number
Operating instructions MSA Plus 400 3 Additional Functions Enter Job Number If the configuration «Job Number Required» (Z41) is activated, the display will ask the operator to enter the job number from the job barcode. JOB NUMBER: MSA Plus 400... -
Seite 60: Query Infotext
3 Additional Functions Operating instructions MSA Plus 400 Query Infotext If the configuration «Query Infotext» (Z43) is activated, the display will ask the operator to enter the text after entering the fusion data: MSA Plus 400 14:20 03-06-2007 MSA Plus 400... -
Seite 61: Repeat Fusion
Operating instructions MSA Plus 400 3 Additional Functions > 39.?V MSA Plus 400 0000s 14:20 03-06-2007 Press DOWN to switch to «Enter Fusion Time». 24.0V MSA Plus 400 > 000?s 14:20 03-06-2007 Edit and enter the figures as described above. -
Seite 62: Choose Language
3 Additional Functions Operating instructions MSA Plus 400 Choose Language The display language of the unit can be changed during operation LANGUAGE: MSA Plus 400 14:20 03-06-2007 Press RIGHT repeatedly until the desired language appears. There is no need to press ENTER to confirm. -
Seite 63: Enter Comments 1
Operating instructions MSA Plus 400 3 Additional Functions 3.11 Enter comments 1 + 2 It is possible to define 2 comment fields before fusing (up to 16 characters). The input is entered manually or by means of the barcode reader. To enter with barcode reader, the input text must be available as barcode 128. -
Seite 64: Load Languages
1. The language data have to be copied on the top level of the directory of a supported USB-memory stick. 2. Plug in USB-memory stick with language data when device is switched off or in standby mode. 3. Switch on the MSA Plus 400. SERVICE MENUE MSA Plus 400 14:20... -
Seite 65: Software Update
With an USB-memory stick and the corresponding software data the saved software can get replaced. • ATTENTION It’s only allowed to plug in or unplug record media in the MSA Plus 400 when it’s switched off or standby mode! • While languages get loaded don’t remove the power supply! 1. -
Seite 66: Configuration
4 Configuration Operating instructions MSA Plus 400 Configuration Press UP or DOWN to switch to the configuration menu. The current configuration is displayed. CONFIGURATION MSA Plus 400 20 / 40 / 51 / 60 / 80 14:20 03-06-2007 Date and Time Z5, Z50, Z51 The date and time can be adjusted with the date barcode (Z5). -
Seite 67: Protocol Memory Z8, Z80, Z81
14:20 03-06-2007 Operator Identification Z20, Z21 The MSA Plus 400 accepts all operator identification cards which conform with the current ISO/TC138/SC4 WG12176 norm. The barcodes Z20 «Identification Voluntary» and Z21 «Identification Required» can be used to set whether identification is required for fusion. In the (10.07) -
Seite 68: Enter Fusion Data Manual Z30 On/Off
The two text strings will be stored in the MSA Plus 400 together with all the other relevant fusion data. The title, displayed during the entry of the text, is part of the configuration barcode Z43. -
Seite 69: Traceability Z44
This feature allows the user of the fusion set to enter additional information regarding the components being used ( ISO 12176-4 norm). The data may be entered either by means of a barcode or by the MSA Plus 400 keypad, whereas an authorized person defines, using a configuration barcode, which additional information must be entered. -
Seite 70: Manual Input Of Fusion Programme Z45
4 Configuration Operating instructions MSA Plus 400 Manual entry of the length (may only be entered by keyboard): LENGTH: MSA Plus 400 ELEMENT 1 14:20 002.10 m 03-06-2007 The position of the cursor is indicated by a blinking question mark. -
Seite 71: Input Of A 2. Fusion Number, Z46
Operating instructions MSA Plus 400 4 Configuration 4.10 Input of a 2. Fusion Number, Z46 This function allows the input of a second fusion number for every fusion. The second fusion number consists of 4 numerical positions and one position (space, A-Z) separated by a minus sign ->... -
Seite 72: Display Fusion Time Z10 On/Off
4 Configuration Operating instructions MSA Plus 400 4.13 Display Fusion Time Z10 ON/OFF When the «Count Time Upwards» barcode is ON, the fusion time will begin at zero. When Z10 is OFF, the fusion time will start with the total time required and count down. -
Seite 73: Protocol
03-06-2007 Export protocols Protocols from the SPS safety memory can be transferred onto a protocol memory card. Only put in and take out the Record media when the MSA Plus 400 is switched ATTENTION off or in standby mode. EXPORT... -
Seite 74: Print Protocol
ENTER button. Print Protocol Plug in the printer cable in designated socket. Note The MSA Plus 400 must be switched off or Standby-Mode when Cable and memory media are inserted or removed. Switch the MSA Plus 400 on MSA Plus... - Seite 75 Operating instructions MSA Plus 400 5 Protocol Print Single Protocol Press DOWN to select Single Record. Press ENTER to confirm. PRINT MSA Plus 400 CF/PR SINGLE RECORD 14:20 03-06-2007 Print by Fusion START 17/20003 MSA Plus 400 Number CF/PR STOP...
-
Seite 76: Pc Communication
Insert the cable for connecting the PC in the designated socket. Note The MSA Plus 400 must be switched off or Standby-Mode when Cable and memory media are inserted or remove. Switch MSA Plus 400 on. -
Seite 77: Error Messages
Check functioning of generator AMBIENT TEMP. TOO LOW AMBIENT TEMP. TOO HIGH INTERNAL TEMP. TOO LOW Allow MSA Plus 400 to warm up in a heated room INTERNAL TEMP. TOO HIGH Allow MSA Plus 400 to cool off FITTING RESISTANCE TOO... -
Seite 78: Uncoded Messages
ISO/TR 13950 UNKNOWN BARCODE Use a MSA barcode CONFIGURATION ERROR Send MSA Plus 400 in for servicing RESISTANCE MEASUREMENT ERROR Disconnect MSA Plus 400 and fitting from the generator, check the connection SERVICE NECESSARY Send MSA Plus 400 in for servicing soon SERVICE NECESS. - Seite 79 Operating instructions MSA Plus 400 6 Error Messages Display Comments ERROR DURING LOADING Switch off MSA Plus 400, insert new USB-Memorystick VENTILATOR ERROR Check ventilator opening if unobstructed, send MSA Plus 400 for servicing INSERTION ERROR Barcode or manual entry do not...
-
Seite 80: Product Information
7 Product Information Operating instructions MSA Plus 400 Product Information Mains Voltage 180–264V AC, Nominal voltage 230V AC Mains Frequency 45–65 Hz, Nominal frequency: 50 Hz Power Consumption max. 3500 W nominal output Generator Output Performance 2–4 KVA Sinusoidal (unipolar operation) -
Seite 81: Maintenance
Operating instructions MSA Plus 400 8 Maintenance Maintenance Cleaning Clean the unit and the barcode reader regularly with a slightly damp cloth. The front plate and other plates can be cleaned with industrial alcohol if necessary (no solvents or Trichlor products). -
Seite 82: Accident Prevention
9 Accident Prevention Operating instructions MSA Plus 400 Accident Prevention Operating the Unit Do not let unauthorized or untrained personnel or children use the unit. When the unit is not in operation, avoid unauthorized use by keeping it in a dry, locked room. -
Seite 83: Defect Unit
Operating instructions MSA Plus 400 9 Accident Prevention Defect Unit Arrange that damaged housings or other parts are replaced or repaired by an authorized service agent. If the unit is not functioning properly it must be repaired by an authorized service agent without delay. -
Seite 84: Konformitätserklärung / Declaration Of Conformity / Déclaration De Conformité
Schweissautomat MSA Plus 300, MSA Plus 350 und MSA Plus 400 Fusion control unit MSA Plus 300, MSA Plus 350 and MSA Plus 400 Machine à souder automatique MSA Plus 300, MSA Plus 350 et MSA Plus 400 auf das sich diese Erklärung bezieht, mit den folgenden Normen übereinstimmt: to which this declaration relates is in conformity with the following standards: auquel se réfère cette déclaration est conforme aux normes:... - Seite 85 Take-back and treatment in the end-of- life case. (Only relevant for customers in EC-Member states) The product/equipment described here falls under the scope of the European directives 2002/96/EC (WEEE) and therefore under the domestic law in your country, derived from that directive. This gives you the option to return the equipment to the producer for environmentally sound treatment, recycling and disposal.
- Seite 86 Norway www.georgfischer.se Georg Fischer AS China Italy 1351 Rud Switzerland Georg Fischer Piping Systems Ltd Shanghai Georg Fischer S.p.A. Phone +47(0)67 18 29 00 Pudong, Shanghai 201319 20063 Cernusco S/N (MI) Georg Fischer Rohrleitungssysteme no.ps@georgfischer.com Phone +86(0)21/58 13 33 33...
-
Seite 87: Mode Opératoire
Mode opératoire MSA Plus 400... - Seite 88 Tous droits réservés, en particulier les droits de reproduction et distribution ainsi que de traduction. Les reproductions sous une forme quelconque (impression, photocopie, microfilm ou sous forme informatique) requièrent l'autorisation écrite de Georg Fischer Piping Systems Ltd.
- Seite 89 Mode opératoire MSA Plus 400 Table des matières Table des matières Page Introduction Validité Description de l’appareil Eléments de commande Lecteur code-barres Mémoire de protocole Ouverture pour le service Alimentation de courant Fonctionnement en réseau Fonctionnement par générateur 1.10 Câble de prolongement 1.11 Mise en service...
- Seite 90 Table des matières Mode opératoire MSA Plus 400 Entrée manuelle programme de soudage Z45 4.10 Entrée d’un deuxième numéro de soudage Z46 4.11 Entretien Z6, Z60 4.12 Préparation du processus de soudage Z0 ON/OFF 4.13 Affichages temps de soudage Z10 ON/OFF 4.14 Dernier entretien...
-
Seite 91: Introduction
Description de l’appareil Le MSA Plus 400 est un appareil à souder destiné au soudage des raccords électriques soudés (fittings). Il est possible de lire les programmes de soudage de fitting avec un code- barres Interleaved 2/5 F’après la norme ISO/TC138/SC5/WG12. -
Seite 92: Eléments De Commande
1 Introduction Mode opératoire MSA Plus 400 Eléments de commande Sur le panneau frontal se trouvent les annonces et les touches de service. • Touche EN HAUT (1) • Touche DROITE (2) • Touche EN BAS (3) • Touche GAUCHE (4) •... -
Seite 93: Mémoire De Protocole
Voir le chapitre «Gestion des protocoles de soudage» pour plus de détails. Ouverture pour le service Sous le couvercle, sur le côté droit la machine MSA Plus 400, se trouve la carte CF ainsi que les connecteurs USB pour les liaisons de la clé mémoire USB, PC ou imprimante. -
Seite 94: Souder Par Configuration Standard
2 Souder par configuration standard Mode opératoire MSA Plus 400 Souder par configuration standard Survol du déroulement de processus DONNEES SOUDAGE? MSA Plus 400 ^^^^ Ω 21°C 14:20 Raccord 03-06-2007 DONNEES SOUDAGE ? MSA Plus 400 7.15 Ω 21°C 14:20... -
Seite 95: Brancher L'appareil
Mode opératoire MSA Plus 400 2 Souder par configuration standard Brancher l‘appareil Raccorder l’appareil à la source de courant. Le MSA Plus 400 se met en marche. DONNEES SOUDAGE? MSA Plus 400 ^^^^ Ω 21°C 14:20 03-06-2007 Raccorder le fitting. -
Seite 96: Démarrer L'opération De Soudage
2 Souder par configuration standard Mode opératoire MSA Plus 400 Démarrer l’opération de soudage Le MSA Plus 400 est maintenant prêt pour le processus de soudage. Déclencher le soudage avec la touche START. GF I * 32mm START 15/20003 7.15 Ω... -
Seite 97: Affichage De Protocole
Mode opératoire MSA Plus 400 2 Souder par configuration standard Affichage de protocole Après la fin du processus de mémorisation, le protocole est affiché en alternance avec le temps de refroidissement restant: GF I * 32mm MSA Plus 400 15/20003 7.41kJ... -
Seite 98: Fonctions Supplémentaires
3 Fonctions supplémentaires Mode opératoire MSA Plus 400 Fonctions supplémentaires Le diagramme montre l’ordre des fenêtre d’affichage (menus). Avec la touche EN HAUT ou EN BAS, il est possible de sauter d’un menu à un autre. DONNEES SOUDAGE ? MSA Plus 400 ^^^^ Ω... - Seite 99 Mode opératoire MSA Plus 400 3 Fonctions supplémentaires CODE CHANTIER? MSA Plus 400 ABC1 14:20 03-06-2007 MSA Plus MSA Plus 400 IMPRIMER MEMOIRE 14:20 03-06-2007 MSA Plus MSA Plus 400 IMPRIMER SPS 14:20 03-06-2007 COMMUNICATION PC MSA Plus 400 14:20...
-
Seite 100: Entrée De La Carte D'opérateur
3 Fonctions supplémentaires Mode opératoire MSA Plus 400 EXPORTER MSA Plus 400 14:20 03-06-2007 AFFICH PROTOCOL MSA Plus 400 14:20 03-06-2007 REMARQUE 2 MSA Plus 400 14:20 03-06-2007 REMARQUE 1 MSA Plus 400 14:20 03-06-2007 Entrée de la carte d’opérateur Par la configuration active «Carte d’opérateur»... -
Seite 101: Entrée Du Numéro D'ordre
Mode opératoire MSA Plus 400 3 Fonctions supplémentaires Entrée du numéro d’ordre Par la configuration active «Ordre obligatoire» (Z41), il est obligatoire, après l’entrée des données de soudage, l’entrée du numéro d’ordre par le code- barres de l’ordre: COMMANDE: MSA Plus 400... -
Seite 102: Entrée Du Texte D'information
3 Fonctions supplémentaires Mode opératoire MSA Plus 400 Entrée du texte d’information Par la configuration active „Entrée du texte d’information“ (Z43) et après l’entrée des données de soudage, l’entrée des textes d’information sont attendus: MSA Plus 400 14:20 03-06-2007 MSA Plus 400... -
Seite 103: Répétition D'un Processus De Soudage
Mode opératoire MSA Plus 400 3 Fonctions supplémentaires GAUCHE, et sélectionner les chiffres souhaités avec les touches EN HAUT et EN BAS. Confirmer avec la touche ENTER. > 39.?V MSA Plus 400 0000s 14:20 03-06-2007 Avec la touche EN BAS, changer pour l’entrée du temps de soudage. -
Seite 104: Sélection De La Langue
3 Fonctions supplémentaires Mode opératoire MSA Plus 400 Sélection de la langue La langue affichée sur l’appareil peut être changé pendant l’exploitation. LANGUE: MSA Plus 400 14:20 03-06-2007 Activer la touche DROITE jusqu’à ce que la langue souhaitée apparaisse. L’entrée n’a pas besoin d’être confirmée avec la touche ENTER. -
Seite 105: Entrée Remarque 1
Mode opératoire MSA Plus 400 3 Fonctions supplémentaires 3.11 Entrée remarque 1 + 2 Il est possible de définir 2 champs de remarques avant le soudage (jusqu’à 16 chiffres). REMARQUE 1 MSA Plus 400 RU? HAUTE 135 14:20 03-06-2007 L’endroit sur lequel se trouve le curseur, peut être édité. Changer de place avec les touches DROITE ET GAUCHE et sélectionner les chiffres souhaités... -
Seite 106: Transférer Des Langues
• ATTENTION ! Les périphériques mémoire USB ne peuvent être insérés ou retirés de l'appareil qu'en mode "Standby" du MSA Plus 400 ! • Durant le transfert des langues, veuillez ne pas débrancher la machine ! 1. Veillez à placer les fichiers langues à la racine de la clé mémoire USB. -
Seite 107: Mise À Jour Software
1.00 U K R 14:20 03-06-2007 Le procés de charge avec succés est indiqué sur l’écran MSA PLUS MSA Plus 400 CF/USB DÉCLENCHER 14:20 03-06-2007 6. Séparer courtement le MSA Plus 400 du réseau et réenclencher. (10.07) MSA Plus 400_f.doc... -
Seite 108: Configuration
4 Configuration Mode opératoire MSA Plus 400 Configuration Changer avec les touches EN HAUT ou EN BAS dans le menu configuration. La configuration actuelle est affichée. CONFIGURATION MSA Plus 400 20 / 40 / 51 / 60 / 80 14:20... -
Seite 109: Mémoire Des Protocoles Z8, Z80, Z81
Mode opératoire MSA Plus 400 4 Configuration Mémoire des protocoles Z8, Z80, Z81 La façon de sauvegarder les données de soudages ou protocoles tant sur la carte CompactFlash (mémoire externe) que dans la mémoire interne de la machine (SPS = Sicherheitsprotokollspeicher) se configure au moyen des codes à... -
Seite 110: Cartes D'opérateur Z20 Et Z21
4 Configuration Mode opératoire MSA Plus 400 Cartes d’opérateur Z20 et Z21 Le MSA Plus 400 accepte toutes les cartes d’opérateurs qui correspondent aux normes actuelles ISO/TC138/SC4 WG12176. Avec les codes-barres Z20 «Carte facultative» et le code Z21 «Carte obligatoire» on peut alternativement configurer pour le soudage l’intervention d’une carte d’opérateur ou non. -
Seite 111: Fonction Traçabilité Z44
ISO 12176-4. La saisie peut se faire soit manuellement par les touches du MSA Plus 400, soit par la lecture d'un code à barres. Ces données seront alors associés à chaque cycle de soudage et gardées en mémoire à des fins de traçabilté. -
Seite 112: Entrée Manuelle Programme De Soudage Z45
4 Configuration Mode opératoire MSA Plus 400 Saisie manuelle des longueurs. (En mode manuel, uniquement avec les touches "flèches" de l'appareil) : LONGUEUR: MSA Plus 400 ELEMENT 1 14:20 002.10 m 03-06-2007 Le point d'interrogation (?) clignotant indique la position du curseur. -
Seite 113: Entrée D'un Deuxième Numéro De Soudage Z46
Mode opératoire MSA Plus 400 4 Configuration 4.10 Entrée d’un deuxième numéro de soudage Z46 Cette fonction permet d’entrer un deuxième numéro de soudage pour chaque soudage. Le deuxième numéro de soudage comprend 4 chiffres numériques et un chiffre [espace, A-Z] séparés par le signe moins -> p.ex.: 1005-B. -
Seite 114: Affichages Temps De Soudage Z10 On/Off
4 Configuration Mode opératoire MSA Plus 400 4.13 Affichages temps de soudage Z10 ON/OFF Avec le code-barres «Décompte de temps» Z10 ON, le temps de soudage est décompté vers le haut. Avec Z10 OFF, le temps de soudage est décompté... -
Seite 115: Gestion Des Protocoles
Mode opératoire MSA Plus 400 5 Gestion des protocoles Gestion des protocoles La sauvegarde des protocoles Toutes les soudures avec leurs paramètres (durée, code opérateur, données de soudage, température extérieure etc.) sont mémorisées à la fois sur la carte CompactFlash de la machine (mémoire externe) et à la fois dans la mémoire interne de l'appareil de soudage (SPS –... -
Seite 116: Exportation Des Protocoles
Il est possible d'exporter les protocoles de la mémoire interne de la machine (SPS – Sicherheitsprotokollspeicher) vers la carte mémoire CompactFlash. Toujours veiller à placer le MSA Plus 400 en mode "Standby" avant d'insérer ATTENTION ! ou de retirer tout support mémoire. -
Seite 117: Impression De Protocole
Brancher le câble de l’imprimante dans le raccordement prévu à cet effet, à côté de la carte mémoire. ATTENTION Le câble et la carte mémoire ne doivent être connectés et déconnectés que lorsque le MSA Plus 400 est déclenché. Brancher le MSA Plus 400. MSA Plus MSA Plus 400... -
Seite 118: Communication Au Pc
à barres de fonctions "Z" pour la configuration personnalisée de la machine. ATTENTION ! Toujours veiller à placer le MSA Plus 400 en mode "Standby" avant d'insérer ou de retirer tout câble ou support mémoire. Allumer le MSA Plus 400. -
Seite 119: Messages D'erreurs
Contrôler le raccord du câble de INTERROMPU soudage COURANT SOUD. Si ce message apparaît régulièrment, TROP ELEVE faire réviser le MSA Plus 400 ou fitting défectueux TEMP. ALIMENT. Réchauffer le MSA Plus 400 dans un TROP BASSE local chauffé TEMP. ALIMENT. -
Seite 120: Messages Non Numérotés
Vérifier la puissance du générateur et le TROP BASSE câble de rallonge PUISSANCE SOUD. Si le message apparaît fréquemment, TROP ELEVEE apporter le MSA Plus 400 en réparation ERREUR Apporter le MSA Plus 400 en réparation ALIMENTATION Messages non numérotés Affichage... - Seite 121 Mode opératoire MSA Plus 400 6 Messages d'erreurs Affichage Remarques ERREUR MESURE Éloigner le MSA Plus 400 ou fitting du RESISTANCE groupe électrogène (champ magnétique). Vérifier les câbles. REVISION Apporter le MSA Plus 400 en réparation. NECESSAIRE REVISION NECESS. Apporter le MSA Plus 400 en réparation.
-
Seite 122: Caractéristiques Techniques
7 Caractéristiques techniques Mode opératoire MSA Plus 400 Caractéristiques techniques Tension de réseau 180–264VAC, Tension nom.:230VAC Fréquence de réseau 45–65Hz Fréquence nominale: 50Hz Puissance absorbée Puissance nominale : max. 3500 W Puissance de sortie du générateur 2–4KVA de forme sinusoïdale (en mode unipolaire) selon le diamètre de fitting... -
Seite 123: Maintenance
Mode opératoire MSA Plus 400 8 Maintenance Maintenance Nettoyage Nettoyer régulièrement l’appareil et le lecteur code-barres avec un chiffon humide. Le panneau frontal et la plaque peuvent être nettoyés avec de l’alcool en cas de fort encrassage (pas de solvant ni de Trichlor). -
Seite 124: Précautions Contre Les Accidents
9 Précautions contre les accidents Mode opératoire MSA Plus 400 Précautions contre les accidents Exploitation de l’appareil Ne pas laisser l’appareil à la portée de personnel non spécialisé ou d’enfants. Préserver les appareils non utilisés contre un usage inopiné dans un lieu sec et fermé. -
Seite 125: Appareil Défectueux
Mode opératoire MSA Plus 400 9 Précautions contre les accidents Appareil défectueux Les châssis endommagés – ou tout autre partie – doivent être immédiatement réparés ou remplacés auprès d’un point de service autorisé. Si l’appareil présente une anomalie de fonctionnement, l’apporter également auprès d’un point de service agréé. - Seite 126 Schweissautomat MSA Plus 300, MSA Plus 350 und MSA Plus 400 Fusion control unit MSA Plus 300, MSA Plus 350 and MSA Plus 400 Machine à souder automatique MSA Plus 300, MSA Plus 350 et MSA Plus 400 auf das sich diese Erklärung bezieht, mit den folgenden Normen übereinstimmt: to which this declaration relates is in conformity with the following standards: auquel se réfère cette déclaration est conforme aux normes:...
- Seite 127 Take-back and treatment in the end-of- life case. (Only relevant for customers in EC-Member states) The product/equipment described here falls under the scope of the European directives 2002/96/EC (WEEE) and therefore under the domestic law in your country, derived from that directive. This gives you the option to return the equipment to the producer for environmentally sound treatment, recycling and disposal.
- Seite 128 Norway www.georgfischer.se Georg Fischer AS China Italy 1351 Rud Switzerland Georg Fischer Piping Systems Ltd Shanghai Georg Fischer S.p.A. Phone +47(0)67 18 29 00 Pudong, Shanghai 201319 20063 Cernusco S/N (MI) Georg Fischer Rohrleitungssysteme no.ps@georgfischer.com Phone +86(0)21/58 13 33 33...