Inhaltsverzeichnis
Werbung
25FA86 OPM 1 - E N D
OWNER'S INSTRUCTION MANUAL
INSTRUCTIEBOEKJE
BETRIEBSANLEITUNG
CAUTION: Read
this manual
carefully before oper-
ating your new
Yamaha E-drive.
Retain for
future reference.
LET OP: Lees het
instructieboekje
goed door voordat
u uw nieuwe Yamaha
E-Drive in gebruik
neemt. Bewaar dit
boekje zorgvuldig.
ACHTUNG: Lesen Sie
die Betriebsanleitung
vor Gebrauch Ihres
neuen Yamaha
E-Drive sorgfältig
durch. Bitte bewahren
Sie diese Anleitung
für Nachschlage-
zwecke auf.
SERIAL NUMBER
PURCHASE DATE
Features
Adjustments
Operation
Battery
Wiring Diagram
Propeller Replacement
Troubleshooting
Maintenance
Limited Warranty
30-01-2012
11:09
SERIENNUMMER
AANKOOPDATUM
Kenmerken
Instellingen
Bediening
Accu
Bedradingschema
De schroef vervangen
Problemen oplossen
Onderhoud
Beperkte garantie
Pagina 1
SERIENUMMER
KAUFDATUM
Technische Daten
Einstellung
Betrieb
Batterie
Schaltplan
Propelleraustausch
Störungssuche
Wartung und Pflege
Garantie
E-DRIVE
M12
M18
M20
pg. 3
pg. 4,5
pg. 6,7
pg. 8
pg. 9
pg. 10
pg. 11
pg. 12
pg. 13
Werbung
Inhaltsverzeichnis

Verwandte Anleitungen für Yamaha E-DRIVE M12


Inhaltszusammenfassung für Yamaha E-DRIVE M12
- Seite 1 Yamaha E-drive. Retain for future reference. LET OP: Lees het instructieboekje goed door voordat u uw nieuwe Yamaha E-Drive in gebruik neemt. Bewaar dit boekje zorgvuldig. ACHTUNG: Lesen Sie die Betriebsanleitung vor Gebrauch Ihres neuen Yamaha E-Drive sorgfältig...
- Seite 2 25FA86 OPM 1 - E N D 30-01-2012 11:09 Pagina 2 Model: E-DRIVE * Thrust is measured in a static tank with an electronic load cell. Test is run with Voltage voltage equal to fully charged marine bat- Thrust (kg) * 13,6 16,3 20,9...
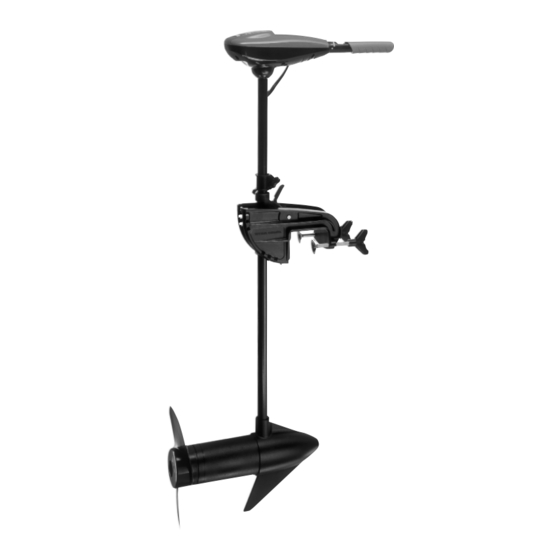
- Seite 3 25FA86 OPM 1 - E N D 30-01-2012 11:09 Pagina 3 Telescoping Tiller Handle Controls On/Off, Speed, Forward/Reverse and Steering Telescoopstuurhandel voor starten, sturen en regelen van voorwaartse/achterwaartse snelheid Ausziehbare Drehgaspinne zur Steuerung von ein/aus, Fahrgeschwindigkeit, Vorwärtsfahrt, Rückwärtsfahrt und Steuerposition 180°...
- Seite 4 25FA86 OPM 1 - E N D 30-01-2012 11:09 Pagina 4 MOTOR INSTALLATION: Install the motor on the transom of the boat. Be sure to tighten the clamp screws securely. HANDLE INSTALLATION: CAUTION: • Never operate your motor Remove the wire clip from the ball detent located on the inner handle. when it is out of the water.
- Seite 5 25FA86 OPM 1 - E N D 30-01-2012 11:09 Pagina 5 STEERING ADJUSTMENT: • Adjust the steering tension knob to provide enough tension to allow the motor to turn freely, yet remain in any position without being held or; • Tighten the knob and lock the motor in a preset position to leave your hands free for fishing. BRACKET ADJUSTMENT: You can lock your motor in a vertical position, angle it for shallow water or tilt it completely out of the water.
- Seite 6 25FA86 OPM 1 - E N D 30-01-2012 11:09 Pagina 6 WARNING : When raising / lowering motor or operating the tilt mechanism, keep fingers clear of all hinge and pivot points and all moving parts. WAARSCHUWING: Als u de motordiepte aanpast of de motor kantelt, moet u ervoor oppassen dat uw vingers niet tussen scharnierende of andere bewegende delen bekneld raken.
-
Seite 7: Ausziehbare Drehgaspinne
25FA86 OPM 1 - E N D 30-01-2012 11:09 Pagina 7 Telescoping TWIST TILLER Handle controls on/off, steering, forward/reverse. The 15 cm telescoping handle provides an additional extension for convenient operation various boats. The twist feature of the tiller handle oper- ates the speed control. -
Seite 8: Battery Information
25FA86 OPM 1 - E N D 30-01-2012 11:09 Pagina 8 BATTERY INFORMATION: The motors will operate with any deep cycle marine 12 volt battery. For best results, use a deep cycle marine battery with at least a 105 ampere hour rating. The actual ampere draw is subject to your particular environmental conditions and operation requirements. - Seite 9 25FA86 OPM 1 - E N D 30-01-2012 11:09 Pagina 9 WARNING: • Before connecting battery, make sure the twist tiller handle is in the OFF position. • Use 6 gauge wire to extend power lead. • Keep leadwire connection tight and solid to battery terminals. •...
-
Seite 10: Propeller Replacement
25FA86 OPM 1 - E N D 30-01-2012 11:09 Pagina 10 PROPELLER REPLACEMENT: CAUTION: DIsconnect the motor from the battery before beginning any prop work or maintenance. • Hold the weedless propeller and loosen the prop nut with a pliers. •... -
Seite 11: Troubleshooting
4. You experience prop vibration during normal operation: Remove and rotate the prop 180˚. See removal instructions in prop section. NB: In case of any problem we recommend to contact an authorised Yamaha Service centre PROBLEMEN OPLOSSEN: 1. De motor doet het niet of heeft onvoldoende vermogen. Controleer of de accupolen op de juiste manier zijn aangesloten. -
Seite 12: Maintenance
25FA86 OPM 1 - E N D 30-01-2012 11:09 Pagina 12 MAINTENANCE: 1. After use, these units should be rinsed with fresh water, then wiped down with a cloth dampened with an aqueous based silicon spray. Lightly coat all metal parts for prolonged storage. This motor is not designed for saltwater use. -
Seite 13: Limited Warranty
(2) year from the date of purchase, except that this warranty shall not apply to any motors used commercially. The motor must be returned, prepaid and with proof of the date of purchase and serial number to any authorized Yamaha service center. - Seite 14 25FA86 OPM 1 - E N D 30-01-2012 11:09 Pagina 14...
- Seite 15 11:09 Pagina 1 OWNER’S MANUAL E-DRIVE INSTRUCTIEBOEKJE BETRIEBSANLEITUNG CAUTION: Read this manual carefully before operating your new Yamaha E- drive. LET OP: Lees deze handlei- ding goed door voordat u uw nieuwe Yamaha E- Drive in gebruik neemt. ACHTUNG: Lesen Sie die...
- Seite 16 25FA86 OPM 1 - E N D 30-01-2012 11:09 Pagina 2 Model: E-DRIVE * Thrust is measured in a static tank with an elec- tronic load cell. Test is run with voltage equal to Voltage fully charged marine battery (12.8VDC) applied to Thrust (kg) * the brushes.
- Seite 17 25FA86 OPM 1 - E N D 30-01-2012 11:09 Pagina 3 Battery Meter Tilt Twist Tiller Handle Maximizer/Permanently Sealed Accumeter Kantelhelmstok Electronics Batteriespannungsanzeige Drehgaspinne Maximizer/permanent verzegelde elektronica Maximierer / wartungsfreie Elektronik Multi Position Mounting Bracket Montageklem met meerdere standen Depth Collar Knob Verstellbare Halterung Knop voor instellen van dieptekraag Tiefeneinstellring...
-
Seite 18: Montage Des Motors
25FA86 OPM 1 - E N D 30-01-2012 11:09 Pagina 4 MOUNT THE MOTOR: CAUTION: Install the motor on the transom of the boat. Be sure to tighten the clamp Over-tightening the clamp screws screws securely. For extra security and to prevent bracket shifting, can damage the bracket. - Seite 19 25FA86 OPM 1 - E N D 30-01-2012 11:09 Pagina 5 TILT ADJUSTMENT: You can lock your motor in a vertical position, angle it for shallow water or tilt it completely out of the water. • Firmly grasp the control head or composite shaft. •...
- Seite 20 25FA86 OPM 1 - E N D 30-01-2012 11:09 Pagina 6 Tilt Twist Tiller: This E-drive offers a choice of infinitely variable speeds as provided by the built-in Maximizer pulse width modulation system. The speed control may be operated in either direction, forward or reverse.
- Seite 21 25FA86 OPM 1 - E N D 30-01-2012 11:09 Pagina 7 BATTERY INFORMATION: The motors will operate with any deep cycle marine 12 volt battery/batteries. For best results use a deep cycle, marine battery with at least a 115 ampere hour rating. As a general on the water estimate, your 12 volt motor will draw one ampere per hour for each pound of thrust produced when the motor is running on high.
-
Seite 22: Battery Connection
25FA86 OPM 1 - E N D 30-01-2012 11:09 Pagina 8 BATTERY CONNECTION: WARNING 12 Volt Systems • Before connecting battery, make 1. Make sure the motor is switched off (speed selector on “0”). sure the tiller twist handle is in the 2. - Seite 23 25FA86 OPM 1 - E N D 30-01-2012 11:09 Pagina 9 BLACK LEADS B- ZWARTE DRADEN B- SCHWARZE KABEL B- CONTROL BOARD BEDIENINGSPANEEL BATTERY METER STEUERLEITERPLATTE BLACK ACCUSPANNINGSMETER ZWART BATTERIESPANNUNGSANZEIGE SCHWARZ ROOD POT BOARD POTMETERKAST POT-LEITERPLATTE RED M+ RED M+ ROOD M+ ROOD M+ ROT M+...
- Seite 24 25FA86 OPM 1 - E N D 30-01-2012 11:09 Pagina 10 MAXIMIZER: The built-In Maximizer’s solid state electronics create pulse width modulation to provide longer running time and extended bat tery life. With the Maximizer speed control, you may, in single battery applications, experience some interference in your depth finder display.
- Seite 25 25FA86 OPM 1 - E N D 30-01-2012 11:09 Pagina 11 PROPELLER REPLACEMENT: CAUTION: DIsconnect the motor from the battery before beginning any prop work or maintenance. • Hold the weedless propeller and loosen the prop nut with a pliers. •...
- Seite 26 25FA86 OPM 1 - E N D 30-01-2012 11:09 Pagina 12 MAINTENANCE: 1. After use, these units should be rinsed with fresh water, then wiped down with a cloth dampened with an aqueous based silicon spray. This motor is not designed for saltwater use. Use of this product in saltwater will void your warranty.
- Seite 27 5. You experience prop vibration during normal operation: • Remove and rotate the prop 180˚. See removal instructions in prop section. NOTE: In case of any problem we recommend to contact an authorised Yamaha service centre. PROBLEMEN OPLOSSEN: 1. De motor doet het niet of heeft onvoldoende vermogen.
- Seite 28 The motor must be returned, prepaid and with proof of the date of purchase and serial number to any authorized Yamaha service center. NOTE: After inspection, we find that the product was defective in material or workmanship, we shall, at our option, repair or replace it without charge.