Inhaltsverzeichnis
Werbung
Verfügbare Sprachen
Verfügbare Sprachen
Quicklinks
Werbung
Inhaltsverzeichnis

Verwandte Anleitungen für Storch Spider 2800 L


Inhaltszusammenfassung für Storch Spider 2800 L
- Seite 1 Wand- und Deckenschleifer Spider 2800 L ® Muur- en plafondschuurmachine Spider 2800 L ® Ponceuse Spider 2800 L pour murs et plafonds ® Molatrice per pareti e soffitti Spider 2800 L ® Spider 2800 L Wall and Ceiling Sander ® Nástìnný...
-
Seite 2: Technische Daten
Vielen Dank für Ihr Vertrauen zu STORCH. Mit dem Kauf haben Sie sich für ein Qualitäts-Produkt entschieden. Haben Sie trotzdem Anregungen zur Verbesserung oder aber vielleicht einmal ein Problem, so freuen wir uns sehr, von Ihnen zu hören. Bitte sprechen Sie mit Ihrem Außendienst-Mitarbeiter oder in dringenden Fällen auch mit uns direkt. -
Seite 3: Allgemeine Sicherheitshinweise
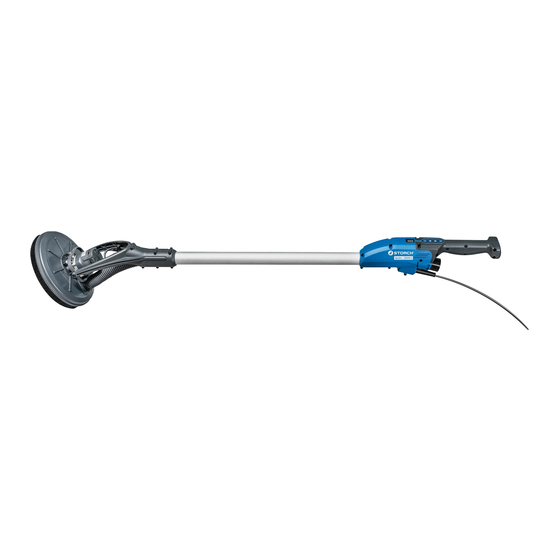
Geräteelemente 1. Hauptschalter 2. Motor-Ein/Aus-Taste 3. Drehzahlwahltasten 4. Digitalanzeige 5. Handgriff 6. Saugschlauchanschluss 7. Netzkabel 8. Saugrohr 9. Motor 10. Absaughaube drehbar 11. Klappe zum Öffnen der Absaughaube für randnahes Schleifen Allgemeine Sicherheitshinweise ACHTUNG! c. Halten Sie Kinder und andere Personen während der Lesen Sie sämtliche Sicherheitshinweise und Anwei- Benutzung des Elektrowerkzeugs fern. -
Seite 4: Sicherheit Von Personen
Betreiben Sie den Spider 2800 L immer mit einem ® Staubsauger (z. B. STORCH VacTec 30 M, Art.-Nr. 65 25 50). Dadurch reduziert sich die Exposition von Staub am Arbeitsplatz auf ein Minimum und beugt dem Gesund- heitsschutz vor. -
Seite 5: Sicherheitshinweise
Sicherheitshinweise Der Augenschutz muss in der Lage sein, umherfliegende Teile, die durch verschiedene Arbeiten erzeugt werden, aufzuhalten. Die Staubmaske oder Atemschutzmaske muss in der Lage sein, Staubteilchen, die bei der Arbeit erzeugt werden, auszufiltern. Eine längere Exposition gegenüber Lärm hoher Intensität kann Hörschäden verur- WARNUNG! sachen. -
Seite 6: Funktionsbeschreibung
Staubsauger. Die Bürsten verschleißen mit anhal- wenn das Netzkabel beschädigt ist. Ein beschädigtes tendem Gebrauch. Kabel muss sofort durch ein autorisiertes STORCH Kun- dendienstzentrum ersetzt werden. Versuchen Sie nicht, Die Absaughaube sollte ersetzt werden, wenn die Bürsten das beschädigte Kabel selbst zu reparieren. Die Verwen- zu stark abgenutzt sind, um eine effektive Absaugung und dung von beschädigten Netzkabeln kann zu einem elektri-... -
Seite 7: Anbau Des Staubsaugerschlauchs
Lösen Sie schließlich sorgfältig den Absaugschlauch und heben Sie dann die Absaughaube ab. Der Einbau erfolgt in umgekehrter Reihenfolge des Ausbaus. Vergessen Sie die Feder nicht. Lassen Sie alle Reparaturen von einem autorisierten STORCH Service Center durchführen. Übersetzung der Originalanleitung... -
Seite 8: Ein-Und Ausschalten Der Maschine
Ein-und Ausschalten der Maschine Einschalten: Halten Sie die Maschine mit der linken Hand am Saug- rohr und mit der rechten Hand am Handgriff und drücken Sie den Hauptschalter um das Werkzeug mit Strom zu versorgen und drücken Sie dann die Motor-Ein/Aus-Taste, um das Werkzeug zu starten. -
Seite 9: Das Schleifen
ACHTUNG! Wenn der Austausch des Netzkabels erforderlich ist, hat Stellen Sie stets sicher, dass die Arbeitsfläche vor dem dies durch eine autorisierte STORCH Service-Station zu Schleifen vollständig getrocknet ist. Ein nasse oder feuch- erfolgen, um ein Sicherheitsrisiko zu vermeiden. te Oberfläche führt zu Überlastung des Motors und Schä- den am Werkzeug. -
Seite 10: Fehlercodes
Fehlercodes E - 1 Überlaststrom Betätigen Sie den Motorschalter einmal, um den Fehler zu beheben, und dann noch ein zweites Mal, um das Werkzeug neu zu starten. E - 2 Überhitzung (Steuergerät Wenn die Temperatur auf unter 60° C fällt, betätigen Sie den Motor- erhitzt auf >... -
Seite 11: Detailzeichnung
Detailzeichnung Übersetzung der Originalanleitung... -
Seite 12: Ersatzteilliste
Ersatzteilliste Ersatzteilliste / Sets Pos. Art.-Nr. Bezeichnung Pos. Art.-Nr. Bezeichnung Menge Menge 8 62 56 14 Schalter Panel Spider Set 1 62 56 01 Anschlusskabel Spider ® ® 10 62 56 16 Saugschlauchanschluss Knickschutz geräteseitig, Spider ® Netzkabel 11 62 56 17 Platine EMI, Spider ®... - Seite 13 Set 1 Set 2 Set 3 Set 4 Set 5 Set 6 Übersetzung der Originalanleitung...
- Seite 14 Ersatzteilliste / Sets Set 7 Pos. Art.-Nr. Bezeichnung Menge Set 7 62 56 07 Motorbaugruppe Schraube (M4 x 25) Schraube (M4 x 10 x P0.7) Unterlegscheibe M4 Motorabdeckung Lüfterflügel Motorgehäuse Nagellager Stator Buchse (Ø6 x Ø10 x 8) Anker Sprengring (S10) Getriebezahnrad groß...
- Seite 15 Set 8 Set 9 Set 10 Set 11 Schaltschema Steuerung Entstör-Platine orange schwarz braun schwarz weiß blau braun Erdungskabel Erdungskabel Erdungskabel Netzkabel Verbindungs- Schaltertastatur stecker Saugrohr Übersetzung der Originalanleitung...
-
Seite 16: Geltendmachung
Bei Vorliegen eines Gewährleistungs- bzw. Garantiefalles bitten wir, dass das komplette Gerät zusammen mit der Rechnung frei an unser Logistik Center in Berka oder an eine von uns autorisierte Service-Station eingeschickt wird. Zuvor bitten wir Sie, uns unter unserer kostenlosen STORCH Service-Hotline 08 00. 7 86 72 47 zu kontaktieren. Gewährleistungs- bzw. Garantieanspruch Ansprüche bestehen ausschließlich an Werkstoff- oder Fertigungsfehler sowie ausschließlich bei bestimmungsgemä-... -
Seite 17: Eg-Konformitätserklärung
EG-Konformitätserklärung Name / Anschrift des Ausstellers: STORCH Malerwerkzeuge & Profigeräte GmbH Platz der Republik 6 D - 42107 Wuppertal Hiermit erklären wir, dass das nachstehend genannte Gerät aufgrund dessen Konzipierung und Bauart sowie in der von uns in Verkehr gebrachten Ausführung den einschlägigen, grundlegenden Sicherheits- und Gesundheitsanforderungen der EG-Richtli- nien entspricht. -
Seite 18: Technische Gegevens
Hartelijk dank voor uw vertrouwen in STORCH. Met deze aankoop hebt u voor een kwaliteitsproduct gekozen. Als u desondanks een tip voor verbeteringen hebt of wellicht ooit een probleem ondervindt, dan horen wij graag van u. Neem contact op met de medewerker buitendienst of in dringende gevallen rechtstreeks met ons. -
Seite 19: Apparaatbeschrijving
Apparaatbeschrijving 1. Startknop 2. Motor Aan-/Uit-knop 3. Snelheidsselectieknoppen 4. Indicatorscherm 5. Hoofdhandgreep 6. Vacuümbevestiging 7. Netsnoer 8. Kolom 9. Motor 10. Stofkap (draaibaar) 11. Halvemaanvormig sluitstuk ALGEMENE VEILIGHEIDSVOORSCHRIFTEN LET OP! c. Houd kinderen en andere personen tijdens het gebruik Lees alle veiligheidsvoorschriften en instructies. Wanneer van het elektrische gereedschap uit de buurt. -
Seite 20: Veiligheid Van Personen
Gebruik de Spider 2800 L altijd met een stofzuiger ® (bijv. STORCH VacTec 30 M, art.-nr. 65 25 50). Hierdo- or wordt de blootstelling aan stof op de werkplek tot een minimum beperkt en wordt de gezondheid beschermd. h. Zorg ervoor dat u zich als gevolg van het veelvuldige gebruik van machines niet laat leiden door gewoontevor- ming en de essentiële veiligheidsprincipes van de machine... -
Seite 21: Veiligheidsinstructies
VEILIGHEIDSINSTRUCTIES weerstaan aan rondvliegende resten van verschillende toepassingen. Het stofmasker of inhalatietoestel moet de deeltjes afkomstig van uw werken kunnen filteren. Lange blootstelling aan lawaai van hoge intensiteit kan gehoor- verlies veroorzaken • Houd omstaanders op een veilige afstand van uw werk- WAARSCHUWING! zone. -
Seite 22: Inhoud Van De Doos
DE BORSTELS AAN DE RAND digde kabel moet onmiddellijk worden vervangen door een VAN DE AFZUIGKAP geautoriseerd STORCH klantenservicecentrum. Probeer een beschadigde kabel niet zelf te repareren. Het gebruik De borstels aan de rand van de afzuigkap hebben twee van beschadigde voedingskabels kan leiden tot elektrische doelen: ze houden de slijpschijf correct uitgelijnd t.o.v. - Seite 23 Maak tenslotte de zuigslang voorzichtig los en til de afzu- igkap eraf. Ga bij het inbouwen in de omgekeerde volgo- rde te werk. Vergeet de veer niet. Laat alle reparaties uit- voeren door een erkend STORCH Service Center. Vertaling van de originele handleiding...
-
Seite 24: Gebruik Van Het Gereedschap
De machine aan- en uitzetten Aanzetten: Terwijl u de linkerhand op de kolom en de rechterhand op de hoofdhandgreep houdt, drukt u eerst op de startknop om het gereedschap van stroom te voorzien en drukt ver- volgens op de motor aan-/uit-knop om het gereedschap te starten. - Seite 25 Alle reparaties moeten worden toevertrouwd aan een is voor de taak. Papier met een te grove korrel kan het geautoriseerd STORCH servicecentrum. Verkeerd uitgevo- materiaal te snel wegnemen zodat u de controle verliest. erde reparaties kunnen leiden tot letsels of tot dodelijke Terwijl papier met een te fijne korrel vaak volloopt waar- ongevallen.
- Seite 26 FOUTCODES E - 1 Stroomoverbelasting Druk één keer op de Motorschakelaar om de fout te wissen, druk daarna nogmaals op de Motorschakelaar om het gereedschap opnieuw te starten. E - 2 Oververhitting (controller Wanneer de temperatuur onder 60° C valt, druk dan één keer op de Mo- >...
- Seite 27 Detailtekening Vertaling van de originele handleiding...
-
Seite 28: Lijst Met Vervangende Onderdelen
Lijst met vervangende onderdelen Lijst met vervangende onderdelen / sets Pos. Art.-nr. Aanduiding Pos. Art.-nr. Aanduiding Aantal Aantal 8 62 56 14 Schakelaar paneel Spider Set 1 62 56 01 Aansluitkabel Spider ® ® 10 62 56 16 Zuigslang-aansluiting aan Knikbescherming apparaatzijde, Spider ®... - Seite 29 Set 1 Set 2 Set 3 Set 4 Set 5 Set 6 Vertaling van de originele handleiding...
- Seite 30 Lijst met vervangende onderdelen / sets Set 7 Pos. Art.-nr. Aanduiding Aantal Set 7 62 56 07 Motormodule Schroef (M4 x 25) Schroef (M4 x 10 x P0.7) Onderlegschijf M4 Motorafdekking Ventilatorblad Motorbehuizing Naaldlager Stator Bus (Ø 6 x Ø 10 x 8) Anker Borgring (S10) Aandrijfwiel groot...
- Seite 31 Set 8 Set 9 Set 10 Set 11 Schakelschema Besturing Anti-interferentie plaat rood oranje rood zwart rood bruin rood zwart blauw bruin Aardingskabel Aardingskabel Aardingskabel Stroomkabel Connector Schakel-toetsenbord Zuigbuis Vertaling van de originele handleiding...
- Seite 32 Bij een garantieclaim vragen wij u het gehele apparaat samen met de rekening franco aan ons logistiekcentrum in Ber- ka of naar een door ons geautoriseerd servicestation te verzenden. Neem eerst contact op met de STORCH Service-Hotline (hiervoor worden kosten in rekening gebracht): +49 (0)202 . 49 20 – 110.
-
Seite 33: Eg-Conformiteitsverklaring
EG-conformiteitsverklaring Naam/adres van de opsteller: STORCH Malerwerkzeuge & Profigeräte GmbH Platz der Republik 6 D - 42107 Wuppertal Bij deze verklaren wij Dat het hieronder vermelde apparaat op basis van zijn ontwerp en type en in de door ons in omloop gebrachte uitvoe- ring aan de toepasselijke elementaire veiligheids- en gezondheidseisen van de EU-richtlijnen voldoet. -
Seite 34: Caractéristiques Techniques
Si vous avez malgré tout des suggestions pour l‘amélioration ou si vous deviez rencontrer un problème, nous sommes avec plaisir à votre disposition. Dans ce cas, contactez votre représentant, ou directement notre service clients, s‘il s‘agit d‘un problème urgent. Salutations dévouées SAV STORCH Tél. : +49 (0) 2 02 . 49 20 - 112 Fax : +49 (0)2 02 . -
Seite 35: Description De L'appareil
Description de l‘appareil 1. Bouton d‘alimentation 2. Bouton de mise en marche/arrêt du moteur 3. Boutons de sélection de la vitesse 4. Écran indicateur 5. Poignée principale 6. Raccord orientable pour aspirateur 7. Câble d‘alimentation 8. Colonne 9. Moteur 10. Jupe de protection anti-poussière (pivotante) 11. -
Seite 36: Sécurité Des Personnes
Toujours utiliser le Spider 2800 L avec un aspirateur ® (par ex. STORCH VacTec 30 M, réf. art. 65 25 50). Cela minimise l‘exposition aux poussières sur le poste de tra- vail et prévient les problèmes de santé. h. Ne devenez pas trop sûr de vous, par habitude suite à... -
Seite 37: Consignes De Sécurité
CONSIGNES DE SÉCURITÉ les petits fragments d‘abrasif ou de matériau projetés. La protection oculaire doit être capable d‘arrêter les débris projetés pendant le travail. Le masque anti-poussière ou le masque respirateur doit être capable de filtrer les parti- cules produites par votre travail. Une exposition prolongée à... - Seite 38 électrique est endommagé. Un câble D‘ASPIRATION endommagé doit être immédiatement remplacé par un le service client autorisé de STORCH. N‘essayez pas de Les brosses situées sur le bord du capot d‘aspiration réparer vous-même un câble endommagé. Un câble d‘ali- remplissent deux fonctions : elles alignent le disque de mentation endommagé...
- Seite 39 électrique. retirer le capot d‘aspiration. Le montage s‘effectue dans l‘ordre inverse du démontage. Ne pas oublier le ressort. Faire effectuer toutes les réparations par un centre de ser- vice clients agréé de STORCH. Traduction des instructions d‘origine...
-
Seite 40: Réglage De La Vitesse De Rotation
Mise en marche et en arrêt de la machine Mise en marche : En tenant la colonne avec la main gauche et la poignée principale avec la main droite, pressez d’abord le bouton d’alimentation pour mettre l’outil sous tension. Appuyez ensuite sur le bouton de mise en marche/arrêt du moteur pour démarrer l’outil. -
Seite 41: Entretien De L'outil
AVERTISSEMENT : qui pourra endommager l’outil. Toutes les réparations doivent être effectuées par un cen- tre de service agréé (de STORCH). Les réparations mal REMARQUE : exécutées peuvent causer des blessures ou la mort. Assurez-vous que le papier de verre que vous utilisez est adapté... -
Seite 42: Codes D'erreurs
CODES D’ERREURS E - 1 Surcharge de courant Appuyer une fois sur le contacteur du moteur pour corriger l’erreur, puis appuyer de nouveau sur le contacteur du moteur pour redémarrer l’outil E - 2 Surchauffe (contrôleur Lorsque la température chute en dessous de 60 °C, appuyer une fois sur >... -
Seite 43: Dessin Détaillé
Dessin détaillé Traduction des instructions d‘origine... -
Seite 44: Liste Des Pièces Détachées
Liste des pièces détachées Liste des pièces détachées / Kits Pos. Réf. art. Désignation Pos. Réf. art. Désignation Quantité Quantité 8 62 56 14 Interrupteur du tableau Spider Kit 1 62 56 01 Câble d‘alimentation de l‘appareil ® Spider ® 10 62 56 16 Branchement du flexible d'aspiration à... - Seite 45 Kit 1 Kit 2 Kit 3 Kit 4 Kit 5 Kit 6 Traduction des instructions d‘origine...
- Seite 46 Liste des pièces détachées / Kits Kit 7 Pos. Réf. art. Désignation Quantité Kit 7 62 56 07 Groupe moteur Vis (M4 x 25) Vis (M4 x 10 x P0.7) Rondelle M4 Capot du moteur Pale de ventilateur Carter du moteur Roulement à...
-
Seite 47: Schéma Des Connexions
Kit 8 Kit 9 Kit 10 Kit 11 Schéma des connexions Commande Platine anti-parasites rouge orange rouge noir rouge brun rouge noir blanc bleu brun Câble de terre Câble de terre Câble de terre Câble d'alimentation Connecteur Clavier Tube d'aspiration d'interrupteur Traduction des instructions d‘origine... -
Seite 48: Conditions De Garantie
Dans un cas couvert par la garantie, nous vous demandons de renvoyer l'appareil complet franco à notre centre logistique à Berka accompagné de la facture ou de l'expédier à une station SAV agréée par nous. Veuillez contacter préalablement l‘assistance téléphonique payante de la société STORCH: +49 (0)202 . 49 20 – 110. Demande de prise en garantie Les demandes couvrent exclusivement les défauts de matériau ou d‘ouvrage et ne couvrent qu‘une utilisation conforme... -
Seite 49: Déclaration De Conformité Ce
Déclaration de conformité CE Nom / adresse de l'exposant : STORCH Malerwerkzeuge & Profigeräte GmbH Platz der Republik 6 D - 42107 Wuppertal Nous déclarons, par le présent acte, que le produit cité ci-après respecte les exigences fondamentales et en vigueur en matière de sécurité et de santé des directives européennes de par leur conception ainsi que dans la version commercialisée par nos soins. -
Seite 50: Dati Tecnici
Grazie per la fiducia accordata a STORCH. Con l‘acquisto avete scelto un prodotto di qualità. Se comunque avete dei suggerimenti volti a migliorare la nostra offerta o se doveste incontrare qualche difficoltà, non esitate a rivolgerVi a noi. Contattate il Vostro rappresentante oppure rivolgeteVi direttamente a noi in casi urgenti. -
Seite 51: Descrizione Dell'apparecchio
Descrizione dell‘apparecchio 1. Pulsante di accensione 2. Pulsante di accensione/spegnimento del motore 3. Pulsanti selettori della velocità 4. Schermo indicatore 5. Impugnatura principale 6. Supporto girevole aspiratore 7. Cavo di alimentazione 8. Manico 9. Motore 10. Zoccolo antipolvere (girevole) 11. Sportello a mezzaluna Indicazioni generali per la sicurezza ATTENZIONE! c. -
Seite 52: Sicurezza Delle Persone
Impiegare Spider 2800 L sempre con un‘aspirapolvere ® (ad es. STORCH VacTec 30 M. n° art. 65 25 50). In tal modo di riduce ad un minimo l‘esposizione alla polvere sul posto di lavoro e si previene a danni alla salute. -
Seite 53: Istruzioni Di Sicurezza
ISTRUZIONI DI SICUREZZA operazioni. La maschera antipolvere o il respiratore deve essere in grado di filtrare le particelle generate dall’opera- zione in corso. Un’esposizione prolungata a rumori ad alta intensità può causare la perdita dell’udito. • Le persone presenti devono rimanere a una distanza di sicurezza dall’area di lavoro. -
Seite 54: Per Installare Un Disco In Carta Abrasiva
Quindi cambiare danneggiato deve essere sostituito immediatamente da tale componente, quando è danneggiato. Su ambo i lati un Centro assistenza autorizzato (STORCH). Non tentare presente un adesione a velcro. Per eseguire un cambio, di riparare autonomamente il cavo danneggiato. L’utilizzo estrarlo dal piatto di supporto e posizionarne un altro nuo- di cavi di alimentazione danneggiati può... - Seite 55 Allentare quindi con cura il flessibile di aspirazione e sollevare quindi la calotta di aspirazione. Il montaggio avviene in ordine inverso. Non dimenticare la molla Far eseguire eventuali riparazioni solamente da un centro di servizio di assistenza STORCH autorizzato. Traduzione delle istruzioni originali...
-
Seite 56: Accensione E Spegnimento Del Dispositivo
Accensione e spegnimento del dispositivo Accensione: Tenendo il manico con la mano sinistra e l‘impugnatura principale con la mano destra, premere il pulsante di accensione per mettere in tensione l‘utensile, quindi pre- mere il pulsante di accensione/spegnimento del motore per accenderlo. Prevedere e prepararsi alla coppia di avvi- Schermo indicatore amento al primo avvio del dispositivo. - Seite 57 Tutte le riparazioni devono essere affidate a un centro mansione da svolgere. Una carta a grana troppo grosso- assistenza autorizzato (STORCH). Eventuali riparazioni lana potrebbe rimuovere il materiale in maniera eccessi- eseguite in maniera errata possono essere causa di lesioni vamente rapida per un controllo efficace.
-
Seite 58: Codici Di Errore
CODICI DI ERRORE E - 1 Sovraccarico corrente Premere l’Interruttore Motore una volta per cancellare l’errore, poi preme- re l’Interruttore Motore ancora una volta per riavviare l’utensile E - 2 Surriscaldamento (controller Quando la temperatura scende al di sotto di 60° C Premere l’Interruttore >... -
Seite 59: Disegno Dettagli
Disegno dettagli Traduzione delle istruzioni originali... -
Seite 60: Elenco Dei Pezzi Di Ricambio
Elenco dei pezzi di ricambio Elenco dei pezzi di ricambio / Set Pos. Cod. art. Denominazione Pos. Cod. art. Denominazione Quantità Quantità 8 62 56 14 Interruttore pannello Spider Set 1 62 56 01 Cavo di allacciamento Spider ® ® 10 62 56 16 Raccordo tubo flessibile del Protezione antipiega... - Seite 61 Set 1 Set 2 Set 3 Set 4 Set 5 Set 6 Traduzione delle istruzioni originali...
- Seite 62 Elenco dei pezzi di ricambio / Set Set 7 Pos. Cod. art. Denominazione Quantità Set 7 62 56 07 Modulo motore Vite (M4 x 25) Vite (M4 x 10 x P0.7) Rondella M4 Coperchio motore Aletta presa d'aria Scatola del motore Cuscinetto ad aghi Statore Bussola (Ø...
-
Seite 63: Schema Elettrico
Set 8 Set 9 Set 10 Set 11 Schema elettrico Comando Scheda ripristino rosso arancione rosso nero rosso marrone rosso nero bianco marrone Cavo di messa a terra Cavo di messa a terra Cavo di messa a terra Cavo di alimentazione Connettore Interruttori Tubo di aspirazione... - Seite 64 In casi in cui si intende far valere il diritto di garanzia, vi preghiamo di inviarci il dispositivo in modo completo con fat- tura, franco nostro centro di logistica a Berka oppure ad una service-station da noi autorizzata. Si prega di consultare prima la Hotline di servizio STORCH a pagamento: 02 - 66 22 77 15 Diritto alla garanzia Il diritti si possono far valere solo per errori di materiale o di produzione nonché...
-
Seite 65: Dichiarazione Di Conformità Ce
Dichiarazione di conformità CE Nome / indirizzo dell'emittente: STORCH Malerwerkzeuge & Profigeräte GmbH Platz der Republik 6 D - 42107 Wuppertal Con la presente la società che l'apparecchio in seguito specificato, a causa della sua concezione e il suo tipo costruttivo come anche della sua ese- cuzione da noi messa in circolazione corrisponde alle pertinenti ed essenziali esigenze sulla sicurezza e salute riportate nelle Direttive CE. -
Seite 66: Technical Data
Thank you for purchasing a STORCH product. You have purchased a quality product. If you would like to suggest an improvement, or experience a problem with your product, please do not hesitate to con- tact us. Please contact your field sales representative or, in urgent cases, contact us directly. -
Seite 67: Device Description
Device description 1. Power Button 2. Motor On/Off Button 3. Speed Selector Buttons 4. Digital display 5. Main Handle 6. Vacuum Swivel Mount 7. Power Supply Cord 8. Column 9. Motor 10. Dust Skirt (rotatable) 11. Half-Moon Door General Safety Rules WARNING! Read all safety warnings and all instructions. -
Seite 68: Personal Safety
Always operate the Spider 2800 L with a vacuum ® cleaner (e.g., STORCH VacTec 30 M, Art. No. 65 25 50). This reduces the dust exposure at the workplace to a minimum and removes the need for health protection measures. -
Seite 69: Safety Instructions
SAFETY INSTRUCTIONS • Hold power tool by insulated gripping surfaces only, when performing an operation where the cutting acces- sory may contact hidden wiring or its own cord. Cutting accessory contacting a “live” wire may make exposed metal parts of the power tool “live” and shock the opera- tor. -
Seite 70: Unpacking
A damaged cable must be replaced immedi- order to achieve good sanding results. If it is deformed or ately by an by STORCH authorized Customer Service damaged, this leads to uneven sanding. Always replace in Center. Do not try to repair the damaged cable yourself. -
Seite 71: Vacuum Cleaner
Carefully release the extraction hose, and lift the extrac- before connecting the tool to the power circuit. tion hood off. Installation is performed in reverse order of removal. Do not forget the spring. Have all repairs con- ducted by an authorised STORCH Service Centre. Original instruction... -
Seite 72: Switching The Machine On And Off
Switching the machine on and off To switch on: While holding with the left hand on the column and the right hand on the main handle, first press the Power But- ton to energize the tool, then press the Motor On/Off but- ton to start the tool. - Seite 73 If the replacement of the power supply cord is necessary, re sanding. A wet or semi-wet surface will overload the this has to be done by the STORCH manufacturer or their motor, leading to damage to the tool. agent in order to avoid a safety hazard.
-
Seite 74: Error Codes
ERROR CODES E - 1 Current overload Press the Motor Switch once to clear the error, then press the Motor Switch once more to restart the tool E - 2 Overheat (controller > 80 °C) When the temperature drops to below 60 °C, Press the Motor Switch once to clear the error, then press the Motor Switch once more to restart the tool E - 3... -
Seite 75: Detailed Drawing
Detailed drawing Original instruction... -
Seite 76: List Of Spare Parts
List of spare parts List of spare parts / Sets Pos. Art.-Nr. Bezeichnung Pos. Art. no. Designation 8 62 56 14 Switch panel Spider Set 1 62 56 01 Connecting cable Spider ® ® 10 62 56 16 Suction hose connection device CORD ARMOR side, Spider ®... - Seite 77 Set 1 Set 2 Set 3 Set 4 Set 5 Set 6 Original instruction...
- Seite 78 List of spare parts / Sets Pos. Art. no. Designation Set 7 Set 7 62 56 07 Motor assembly PANHEAD TAPPING SCREW (M4x25) TRUSS HEAD MACHINE SCREW (M4x10xP0.7) EXTERNAL STAR WASHER (M4) MOTOR END CASTING MOTOR HOUSING BALL BEARING STATOR (60x34.8x15) BUSHING (Ø6xØ10x8) ROTOR EXTERNAL CIRCLIP (S10)
- Seite 79 Set 8 Set 9 Set 10 Set 11 Wiring Original instruction...
-
Seite 80: Noise/Vibration Information
Wear parts are not covered by such claims. All claims shall become void in the event of installation of third party components, improper handling and storage, as well as in the event of obvious disregard of the operating instructions. Repairs: All repairs have to be conducted on our premises or by an authorised STORCH service centre. Original instruction... -
Seite 81: Ec Declaration Of Conformity
EC Declaration of Conformity Name / Address of issuer: STORCH Malerwerkzeuge & Profigeräte GmbH Platz der Republik 6 D-42107 Wuppertal We herewith declare: that the following machine complies with the fundamental health and safety requirements of the EC Directives in terms of its design, construction and version we have brought into circulation. -
Seite 82: Technické Údaje
Děkujeme Vám za důvěru ve firmu STORCH. S nákupem výrobku jste se rozhodli pro kvalitní produkt. Pokud přesto máte podněty na zlepšení nebo možná nějaký problém, tak bychom byli velmi rádi, kdybyste se nám ozvali. Promluvte si s příslušným externím spolupracovníkem naší firmy nebo se v naléhavých případech obracejte přímo na nás. -
Seite 83: Bezpečnost Na Pracovišti
Prvky přístroje 1. Hlavní spínač 2. Tlačítko motor Zap/Vyp 3. Volicí tlačítko počtu otáček 4. Digitální zobrazení 5. Držadlo 6. Připojení sací hadice 7. Síťový kabel 8. Sací trubka 9. Motor 10. Odsávací nástavec otočný 11. Klapka k otevření odsávacího nástavce pro broušení... -
Seite 84: Bezpečnost Osob
2800 L vždy provozujte s vysavačem ® Třída ochrany II Elektrické nářadí, příslušenství a obal (např. STORCH VacTec 30 M, obj. č. 65 25 50). Tím se nesmí být likvidovány s domovním odpadem. sníží expozice prachu na pracovišti na minimum a je pre- ventivně... -
Seite 85: Bezpečnostní Pokyny
Bezpečnostní pokyny ty může zapříčinit poškození sluchu. Ostatní osoby se musí zdržovat v bezpečné vzdálenosti od pracovní oblasti. Jiná osoba, která vstoupí do pracovní oblasti, musí nosit osobní ochranné prostředky. Úlomky z obráběného dílu nebo odlámané díly příslušenství mohou odletovat v bezprostředním okolí pracovní oblasti a způ- VÝSTRAHA! sobit úrazy. - Seite 86 K dosažení dobrých výsledků broušení musí být upínací musí být okamžitě vyměněn autorizovaným centrem brusný kotouč úplně rovný. Když je zdeformovaný nebo zákaznických služeb STORCH. Nepokoušejte se poško- poškozený, vede to k nerovnoměrnému broušení. Vždy jej zený kabel opravit sami. Použitím poškozeného síťového vyměňte, když...
- Seite 87 štítku stroje. Nakonec opatrně uvolněte odsávací hadici a potom nadzvedněte odsávací nástavec. Namontování se prove- de v obráceném pořadí vymontování. Nezapomeňte na pružinu. Všechny opravy nechte provádět autorizované servisní centrum STORCH. Překlad originálu návodu...
-
Seite 88: Zapnutí A Vypnutí Stroje
Zapnutí a vypnutí stroje Zapnutí: Držte stroj levou rukou u sací trubky a pravou rukou za rukojeť a stiskněte hlavní spínač, aby byl k nástro- ji přiváděn el. proud a potom stiskněte tlačítko Zap/Vyp, abyste spustili nářadí. Při prvním spuštění stroje buďte připraveni na rozběhový... - Seite 89 Příliš hrubý papír podklad obrousí Když je nutná výměna síťového kabelu, má být provedena nekontrolovaně, nerovnoměrně a příliš rychle. Příliš jem- autorizovanou servisní stanicí STORCH, aby se zabránilo ný papír se může příliš často ucpávat, rychle se obrousí a bezpečnostnímu riziku.
-
Seite 90: Chybové Kódy
Chybové kódy Přetěžovací proud Stiskněte jedenkrát spínač motoru pro odstranění chyby a poté ještě jed- E - 1 nou pro opětovné spuštění nástroje. Přehřátí (řídicí jednotka Pokud teplota klesne pod 60 °C, stiskněte jedenkrát spínač motoru pro E - 2 zahřátá... -
Seite 91: Podrobný Výkres
Podrobný výkres Překlad originálu návodu... -
Seite 92: Seznam Náhradních Dílů
Seznam náhradních dílů Seznam náhradních dílů / sady Pol. Obj. č. Název Pol. Obj. č. Název Množství Množství 8 62 56 14 Spínačový panel Spider Sada 1 62 56 01 P ipojovací kabel u Spider ® ® 10 62 56 16 Přípojka sací... - Seite 93 Sada 1 Sada 2 Sada 3 Sada 4 Sada 5 Sada 6 Překlad originálu návodu...
- Seite 94 Seznam náhradních dílů / sady Sada 7 Pol. Obj. č. Název Množství Konstrukční celek motoru Sada 7 62 56 07 Šroub (M4 x 25) Šroub (M4 x 10 x P0.7) Podložka M4 Kryt motoru Křídlo ventilátoru Kryt motoru Jehlové ložisko Stator Pouzdro (Ø...
-
Seite 95: Schéma Zapojení
Sada 8 Sada 9 Sada 10 Sada 11 Schéma zapojení Řízení Odrušovací deska červená oranžová červená černá hnědá červená červená černá bílá modrá hnědá Zemnicí kabel Zemnicí kabel Zemnicí kabel Síťový kabel Spojovací zástrčka Klávesnice Sací trubka spínače Překlad originálu návodu... - Seite 96 V případě záručního příp. garančního případu žádáme, aby bylo zasláno kompletní zařízení dohromady s fakturou do našeho střediska Logisitk Center v Berka nebo do námi autorizované servisní stanice. Kontaktujte prosím nejdříve placený hotline servis firmy STORCH: +49 (0)202 . 49 20 – 110. Nárok na záruku příp. garanci Nároky na záruku existují...
-
Seite 97: Prohlášení O Shodě Es
Prohlášení o shodě ES Název / adresa výstavce: STORCH Malerwerkzeuge & Profigeräte GmbH Platz der Republik 6 D - 42107 Wuppertal Tímto prohlašujeme, že následně uvedené zařízení na základě své koncipace a druhu konstrukce a také v provedení námi uvedeném do pro- vozu odpovídá... - Seite 100 Adaptér sací hadice 65 25 36 Adaptateur de tuyau d‘aspirateur Malerwerkzeuge & Profigeräte GmbH Platz der Republik 6 D-42107 Wuppertal Telefon: +49 (0)2 02 . 49 20 - 0 Telefax: +49 (0)2 02 . 49 20 - 111 info@storch.de www.storch.de...