Pulsar DIGEX N450 Bedienungsanleitung

Verwandte Anleitungen für Pulsar DIGEX N450


Inhaltszusammenfassung für Pulsar DIGEX N450
- Seite 1 NIGHT VISION DIGITAL RIFLESCOPE DIGEX USER MANUAL N450 N455 ENGLISH | FRANÇAIS | DEUTSCH | ESPAÑOL | ITALIANO | РУССКИЙ...
- Seite 2 Attenzione! I visori notturni digitali DIGEX necessitano di un certificato nel caso in cui vengano esportati all’estero. Per migliorare le proprietà del prodotto nella sua costruzione possono essere apportate delle modifiche. La versione attuale del manuale d’uso è disponibile sul sito www.pulsar-vision.com www.pulsar-vision.com РУ...
-
Seite 26: Technische Daten
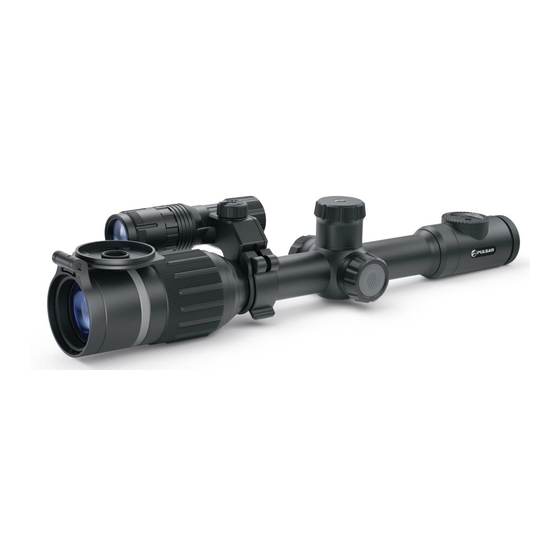
DEUTSCH TECHNISCHE DATEN MODELL DIGEX Digex N450 Digex N455 Abmessungen (LxHxB), mm 0,95 76641 76642 Abnehmbarer IR-Strahler Digex X850 Digex X940 79077 79078 Optische Kenndaten: Objektivbrennpunkt, mm Öffnungsverhältnis, D/f' 1:1,2 Strahlungswellenlänge, nm Vergrößerung, x 4 - 16 (цифровой зум) Linsendurchmesser, mm... -
Seite 27: Nützliche Funktionen Und Modi
• Foto- und Videoaufnahme mit Ton • Bild-im-Bild Funktion • Unterstützung von der Stream Vision App • Erweiterbare Funktionalität (Update von Software des Zielfernrohrs mithilfe der kostenlosen Stream Vision App) • Bequeme Bedienung • Kombiniertes Stromversorgungssystem B-Pack mini • Funktionelles und ergonomisches Design •... -
Seite 28: Betrieb Der Akkumulatorenbatterie
Funktionen der tasten ACHTUNG! Wenn Sie Akkus über den Micro-USB-Anschluss (10) aufladen, wird zuerst der eingebaute Akku Battery Pack APS3 Steuer- Erstes kurzes Nächste kurze Zustand / Betriebsmodus Langes Drücken Drehen aufgeladen. Sobald der Akku vollständig aufgeladen ist, wird elemente Drücken Drücken der abnehmbare Akku Battery Pack APS2 aufgeladen. -
Seite 29: Sicherheitshinweise
SICHERHEITSHINWEISE • In der Statusleiste wird das Symbol des Akkus , der aufgeladen wird, mit dem Wert des Ladezustands in Prozent angezeigt. • Verwenden Sie zum Laden nur das mit dem Zielfernrohr gelieferte Ladegerät. Die Verwendung eines fremden • Wenn Sie die externe Stromquelle ausschalten, schaltet das Zielfernrohr auf den austauschbaren Akku um, Ladegeräts kann den Akku oder das Ladegerät irreparabel beschädigen oder zur Entzündung des Akkus ohne sich auszuschalten. -
Seite 30: Einschalten Und Bildeinstellung
EINSCHIESSEN • Setzen Sie den Akku entlang der speziellen Führungen in das dafür vorgesehene Akkufach (20) im Gehäuse des IR-Strahlers ein. Das Zielfernrohr hat die Möglichkeit, mit der “Ein-Schuss”-Methode oder mithilfe der “Freeze”- • Bei ordnungsgemäßer Installation rastet der Akku im Akkufach (20) ein. Funktion eingeschossen zu werden. -
Seite 31: Funktionen Des Schnellstartmenüs
Der Name des ausgewählten Profils wird in der Statusleiste im unteren Teil des Displays MENÜÜBERSICHT angezeigt. Registerkarte 1 Registerkarte 2 Grafikhelligkeit Einstellung der Helligkeit der Symbole und Bildschirmschoner (Pulsar, Display off) auf dem Display. • Halten Sie die Taste des Controllers (6) gedrückt, um das Hauptmenü aufzurufen. •... - Seite 32 Absehensfarbe Vergrößerung Auswahl der Farbe des Fadenkreuzes. Mit “Vergrößerung” können Sie den Digitalzoom des Zielfernrohrs während des Einschießens • erhöhen, wodurch sich der Klickwert verringert. Dies verbessert die Genauigkeit des Drehen Sie den Ring des Controllers (6), um den Untermenüpunkt “Absehensfarbe” Einschießens.
- Seite 33 • Wi-Fi Mit diesem Menüpunkt kann das Gerät für den Betrieb im Wi-Fi-Netz eingestellt werden. Standardeins- Rufen Sie das Untermenü “Standardeinstellungen” durch kurzes Drücken der Taste des Einstellungen tellungen Controllers (6) auf. Mit diesem Menüpunkt kann ein Kennwort für den Zugang zum Gerät von einem Fremdgerät •...
-
Seite 34: Video- Und Fotoaufnahme
STATUSLEISTE Automatisches Mit diesem Menüpunkt können Sie das automatische Abschalten des Zielfernrohrs, das sich Abschalten in einer Ruheposition befindet (Neigung nach oben oder unten um mehr als 70 °, nach rechts oder links um mehr als 30°), aktivieren. • Halten Sie die Taste des Controllers (6) gedrückt, um das Hauptmenü aufzurufen. Die Statusleiste befindet sich im unteren Teil des Displays und zeigt Informationen über den Betriebsstatus des •... -
Seite 35: Stadiometrischer Entfernungsmesser
• wenn die Speicherkarte während der Videoaufnahme überfüllt wurde (die Meldung “Speicher voll” Es gibt drei voreingestellte Werte für Objekte: wird auf dem Display angezeigt); Hase - Höhe 0,3 m beim Anschließen des Zielfernrohrs an einen Computer im Modus “Speicherkarte”. Wildschwein - Höhe 0,7 m Anmerkungen: Hirsch - Höhe 1,7 m... -
Seite 36: Fehlerbeseitigung
Reinigen Sie die Außenflächen von Metall- und Kunststoffteilen mit einem Baumwolltuch von Staub und Detaillierte Anweisungen zur Bedienung von Stream Vision finden Sie in einem separaten Prospekt oder auf der Schmutz. Silikonfett ist erlaubt. Webseite www.pulsar-vision.com • Reinigen Sie die elektrischen Kontakte des Akkus und des Akkusteckplatzes mit einem fettarmen organischen Anmerkung: Im Design des Zielfernrohrs ist die Möglichkeit des Updates der Software vorgesehen. - Seite 37 Das Zielfernrohr lässt sich Falsche Einstellung. Stellen Sie das Zielfernrohr gemäß dem nicht fokussieren. Abschnitt "Einschalten und Bildeinstellung" ein. Prüfen Sie die Außenflächen der Linsen des Objektivs und Okulars; reinigen Sie sie ggf. vor Staub, Kondensat, Frost u.ä. Bei kaltem Wetter können Sie extra Anlaufschutzschichten anwenden (zum Beispiel wie für Korrekturbrillen).
- Seite 73 @PulsarNightVision @pulsar.vision Pulsar Night Vision...