Reloop RMP-1 SCRATCH MK2 B Bedienungsanleitung
Professional tabletop mp3-cd player
Quelle: reloop.com
Inhaltsverzeichnis
Verfügbare Sprachen
Verfügbare Sprachen
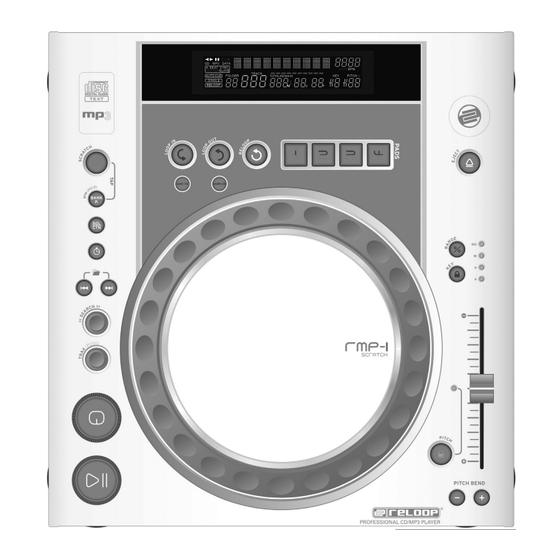
RMP-1
Professioneller Tabletop MP3-CD-Player
Professional tabletop MP3-CD player
Lecteur de MP3-CD Tabletop professionne
Bedienungsanleitung
ACHTUNG!
Lesen Sie sich vor der ersten Inbetriebnahme zur eigenen Sicherheit diese
Bedienungsanleitung sorgfältig durch! Alle Personen, die mit der Aufstel-
lung, Inbetriebnahme, Bedienung, Wartung und Instandhaltung dieses Gerä-
tes zu tun haben, müssen entsprechend qualifiziert sein und diese Betriebs-
anleitung genau beachten. Dieses Produkt erfüllt die Anforderungen der
geltenden europäischen und nationalen Richtlinien, die Konformität wurde
nachgewiesen, die entsprechenden Erklärungen und Unterlagen sind beim
Hersteller hinterlegt.
Instruction Manual
CAUTION!
For your own safety, please read this operation manual carefully before ini-
tial operation! All persons involved in the installation, setting-up, operation,
maintenance and service of this device must be appropriately qualified and
observe this operation manual in detail. This product complies with the requi-
rements of the applicable European and national regulations. Conformity has
been proven. The respective statements and documents are deposited at the
manufacturer.
Mode d'emploi
SCRATCH
ATTENTION!
Pour votre propre sécurité, veuillez lire attentivement ce mode d'emploi
avant la première utilisation ! Toutes les personnes chargées de l'installation,
de la mise en service, de l'utilisation, de l'entretien et la maintenance de
cet appareil doivent posséder les qualifications nécessaires et respecter les
instructions de ce mode d'emploi. Ce produit est conforme aux directives
européennes et nationales, la conformité a été certifiée et les déclarations
et documents sont en possession du fabricant.
DeuTSCH ............................02-13
eNGLISH .............................14-25
FRANçAIS ......................... 26-37
WARNUNG!
Um Feuer oder einen elektrischen Schock zu
vermeiden, setzen Sie dieses Gerät nicht Was-
ser oder Flüssigkeiten aus! Öffnen Sie niemals
das Gehäuse!
WARNING!
To prevent fire or avoid an electric shock
do not expose the device to water or fluids!
Never open the housing!
ATTENTION !
Afin d'éviter un incendie ou une décharge
électrique, veillez à tenir cet appareil à l'écart
des liquides et de l'humidité ! N´ouvrez jamais
le boîtier !
Für weiteren Gebrauch aufbewahren!
Keep information for further reference!
Gardez ces instructions pour des utilisa-
tions ultérieurs!
www.reloopdj.com
Reloop Trademark
Global Distribution GmbH
Schuckertstr. 28
48153 Muenster / Germany
© 2009
Nachdruck verboten!
1
Inhaltsverzeichnis
Fehlerbehebung

Verwandte Anleitungen für Reloop RMP-1 SCRATCH MK2 B


Inhaltszusammenfassung für Reloop RMP-1 SCRATCH MK2 B
- Seite 1 ! N´ouvrez jamais le boîtier ! Für weiteren Gebrauch aufbewahren! Keep information for further reference! Gardez ces instructions pour des utilisa- tions ultérieurs! www.reloopdj.com Reloop Trademark Global Distribution GmbH Schuckertstr. 28 48153 Muenster / Germany © 2009 Nachdruck verboten!
-
Seite 2: Sicherheitshinweise
Diskjockey - Technologie Ihr Vertrauen schenken. Vor Inbetriebnahme bitten wir Sie, alle Anweisungen sorgfältig zu studieren und zu befolgen. Nehmen Sie den Reloop RMP-1 Scratch aus der Verpackung. Bitte überprüfen Sie vor der ersten Inbetriebnahme, ob kein offensichtlicher Transportschaden vorliegt. Sollten Sie Schäden am Strom- kabel oder am Gehäuse entdecken, nehmen Sie das Gerät nicht in Betrieb und setzen Sie sich bitte... -
Seite 3: Bestimmungsgemässe Verwendung
• Das Gerät darf nicht in Betrieb genommen werden, wenn es von einem kalten Raum in einen warmen Raum gebracht wurde. Das dabei entstehende Kondenswasser kann unter Umständen Ihr Gerät zerstören. Lassen Sie das Gerät solange uneingeschaltet, bis es Zimmertemperatur erreicht hat! •... -
Seite 5: Bedienung
INSTALLATIONSHINweISe A) Verbinden Sie die Ausgangsbuchsen -29- mit den Line In Buchsen Ihres Mischpultes oder Ver- stärkers. Verbinden Sie optional die digitale Ausgangsbuchse -30- mit einem Gerät mit digitalem Eingang, beispielsweise einen CD-Brenner, MD-Rekorder, Digital-Mixer oder Audiokarte. B) Verbinden Sie die Anschlussbuchse -32- mit dem Netzkabel und schließen Sie es an Ihre Steck- dose an. - Seite 6 5. Search-Rad Durch Drehen des Search-Rades -5- können Sie den Track vor- (im Uhrzeigersinn) und zurückspulen (gegen den Uhrzeigersinn). Das Rad hat 4 verschiedene Suchgeschwindigkeiten; je stärker Sie das Rad in die jeweilige Richtung drehen, desto schneller spulen Sie. Wenn Sie sich im Pause-Modus befinden, können Sie Trackpassagen framengenau suchen;...
- Seite 7 10. Scratch-effekt Sie wählen den Scratch-Effekt aus, indem Sie Scratch Taste -10- drücken. Nun können Sie im Wie- dergabe-Modus den Track mit dem inneren Teil des Jog-Wheels -18- wie eine Vinyl-Platte scratchen, vor- und zurückziehen und anhalten. Das Jog Wheel erkennt dabei die Berührung mit Ihren Fingern. Drücken Sie ein zweites mal die Scratch Taste, um den Scratch-Effekt zu deaktivieren.
- Seite 8 Bei vorheriger Betätigung der Loop In-Taste geht der Player in der Loop-Modus über (Nahtlos-Schlei- fe) - „Reloop“ blinkt im Display. Um den Loop zu verlassen, drücken Sie erneut die Loop Out-Taste. >> Weitere Informationen zum Thema Loopen finden sie im Abschnitt „Sampling“.
- Seite 9 Taste loslassen kehrt der Player zur mit dem Pitch Fader eingestellten Geschwindigkeit zurück. 25.Relay-/Faderstart-Anschlussbuchse Wenn Sie Ihren Player über die Anschlussbuchse -25- mit einem anderen Reloop CD-Spieler (der auch über eine Relay-/Faderstart-Anschlussbuchse verfügt) mit dem beiliegenden 3,5 mm Klin- kekabel verbinden, ist Relay-Play verfügbar. Wählen Sie dazu bei beiden Playern mit den Single/ Continue-Tasten -8- den Single-Abspielmodus;...
- Seite 10 Loop In Taste -12-. Wählen Sie den Loop-Endpunkt durch Drücken der Loop Out-Taste -13-; der Player geht automatisch in den Loop-Modus über und die Reloop Anzeige im Display blinkt. Die so gewählte Sequenz wird so lange nacheinander nahtlos wiederholt, bis Sie ein zweites Mal die Loop Out-Taste -13- drücken;...
-
Seite 11: Ende Der Benutzung
legte Sample-Bank leuchtet rot auf, wenn die zugehörige (= sampleeigene) CD eingelegt ist; wird eine andere (= samplefremde) CD eingelegt, leuchtet die jeweilige Taste blau auf. Die Taste der zuletzt belegten Sample-Bank blinkt zudem in der entsprechenden Farbe auf. eine Sample-Bank wird überschrieben, wenn Sie darauf ein neues Sample aufnehmen. -
Seite 12: Technische Daten
TeCHNISCHe DATeN Folgende Daten des Herstellers werden von der Global Distribution GmbH nicht auf Plausibilität und Richtigkeit geprüft: Frequenzgang: 20 Hz - 20 kHz Kanaltrennung: 85 dB Rauschabstand: 90 dB D/A Wandler: 8fach/1 Bit MP3-Formate: MPEG 1 Layer 3 standard MPEG 2 Layer 3 standard MPEG 2.5 Layer 3 standard Maximale MP3-Folder:...