Inhaltsverzeichnis
Werbung
Verfügbare Sprachen
Verfügbare Sprachen
Quicklinks
Werbung
Inhaltsverzeichnis

Verwandte Anleitungen für Classic Cantabile Apollon


Inhaltszusammenfassung für Classic Cantabile Apollon
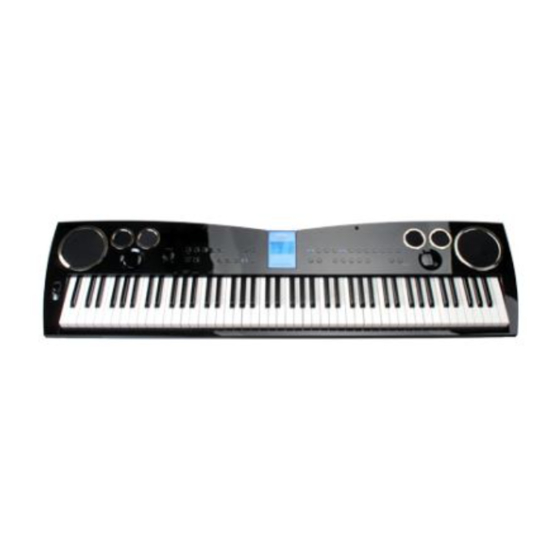
- Seite 1 High Performance Stage Piano...
-
Seite 2: Inhaltsverzeichnis
Inhaltsverzeichnis Willkommen! Hauptfunktionen! Pflege Ihres digitalen Pianos! Auspacken! Aufbau Ihres Pianos! Einschalten! Kopfhörer! Anschließen des Pedals! Anschließen von Audio-Geräten! Anschließen anderer Laufwerke! Local Control On/Off! Bedienfeld und Anschlüsse! Performance-Bildschirm! Anpassen der Lautstärke! Gesamtlautstärke! Lautstärke für die Begleitautomatik! VP-Player! Installation von Systemdaten! Auswahl der Sounds (Voices)! Voice-Arten! Übersicht über die Voices! - Seite 3 Spielen mit einer Split-Voice! Ändern des Split Points! Einstellen der Lautstärke im Pop-Up-Fenster! Einstellen der Lautstärke mit den Tasten Split Volume + und -! Lautstärke der Main-Voice! Ändern der Pedalfunktion! Ändern der Oktaveinstellung! Reverb (Hall)! Spielen mit Reverb! Auswahl eines Reverbs! Einstellen des Reverb-Levels! Einstellen des Reverb-Levels für einzelne Instrumente! Effekt!
- Seite 4 Einstellen des Tempos! Lautstärke der Begleitautomatik! Spielen mit Begleitautomatik! Benutzen der Begleitautomatik! Einstellen des Begleit-Modus! Die verschiedenen Begleit-Modi! Ändern des Split Points! Aufnahme! Aufnehmen eines Songs! Playback! Sichern eines Songs! Laden eines Songs von der SD-Karte! Registration! Aufrufen einer Registration! Speichern einer Registration! Speichern einer Registration auf eine SD-Karte! Laden einer Registration von der SD-Karte!
-
Seite 5: Willkommen
Willkommen Danke und herzlichen Glückwunsch zum Kauf des High Performance Stage Pianos. Ihr neues Piano bietet eine Vielzahl von Spezifikationen in einem kompakten Gehäuse. Ebenso wie die High End-Modelle bietet es 128-Polyphonie, eine neue, weiterentwickelte Hammermechanik (ARHA3), nützliche externe Speichermöglichkeiten (SD-Karte), USB MIDI-Interface und hunderte von Sounds und Rhythmusstyles. -
Seite 6: Pflege Ihres Digitalen Pianos
Pflege Ihres digitalen Pianos Vermeiden Sie Hitze, Feuchtigkeit oder direktes Sonnenlicht. Schützen Sie das Instrument vor Flüssigkeiten, Staub, etc. Schalten Sie während eines Gewitters das Instrument aus und trennen Sie es von der Steckdose. Geben Sie Acht, dass Sie das Gerät nicht fallen lassen. -
Seite 7: Auspacken
Versuchen Sie niemals, irgendwelche Veränderungen an Teilen des Pianos vorzunehmen. Unpacking Unpacking Unpacking Unpacking Carefully remove the digital piano and its accessories from the packing box. The digital piano set Auspacken consists of the following items. Carefully remove the digital piano and its accessories from the packing box. The digital piano set consists of the following items. -
Seite 8: Aufbau Ihres Pianos
Music Stand Non-Slip Pedal AC Adapter SD Card pter SD Card Owner's Manual Cleaning Cloth Bedienungsanleitung Non-Slip Pedal AC Adapter SD Card Reinigungstuch nual Cleaning Cloth Inspect each item carefully to make sure that it is in good condition. If you find any item missing or damaged, ou find any item missing or damaged, contact the place of purchase immediately for replacement. -
Seite 9: Kopfhörer
HEADPHONE Kopfhörer Connect a set of stereo headphones(optional) to HEADPHONE jack (standard 1/4" phone jacks). Insert the headphone plug into the HEADPHONE jack Schließen Sie einen Stereo-Kopfhörer an der Buchse on the bottom panel of the piano. PHONES an der Unterseite des Pianos an. Wenn ein When headphones are connected, the internal speaker Kopfhörer angeschlossen ist, wird das interne system is automatically shut off. -
Seite 10: Anschließen Von Audio-Geräten
3. Sostenuto: Das Pedal erzeugt einen sustainartigen Effekt, d.h. die Töne klingen länger. Der Effekt bezieht sich jedoch nur auf bereits gespielte Töne. Töne, die Sie nach dem Drücken des mittleren Pedals spielen, sind davon nicht betroffen. 4. Rhythm Fill 1/Synchro Start Pedal: Das Pedal übernimmt die gleiche Funktion wie die Taste FILL1/SYNCHRO. -
Seite 11: Anschließen Anderer Laufwerke
Setting Up Your Piano Connecting Other Devices Anschließen anderer Laufwerke Connecting the external MIDI devices (MIDI Terminals) c) Anschluss von externen MIDI-Geräten Use the built-in MIDI terminals and standard MIDI cables to connect external MIDI devices. Sie können mit Hilfe von Standard-MIDI-Kabeln an diesen Buchsen MIDI-Laufwerke MIDI IN Receives MIDI messages from an external MIDI device. -
Seite 12: Local Control On/Off
Local Control On/Off Hierbei handelt es sich um eine versteckte Funktion. Halten Sie die Taste KEYPAD gedrückt und drücken Sie gleichzeitig die Taste RIGHT (C8) auf der Tastatur. In der Funktion „Local Off“ erzeugt das Piano keine Töne ohne den Anschluss eines Computers (USB oder MIDI). - Seite 13 o) Data +/- p) Shift/Keypad q) Display Hold r) Tune s) Transpose t) Octave u) Brilliance v) Pitch Bend Panel controls and Terminals w) Touch x) Pedal y) Registration VOICE SECTION POWER Page 16 A POWER switch Page 5 Voice-Bereich VOICE buttons 1) Voice-Knöpfe Page 18...
-
Seite 14: Performance-Bildschirm
Stromversorgung A) Power - Einschaltknopf B) DC In - Buchse für Netzteil Anschlussfeld C) Kopfhörer D) USB-Buchse E) MIDI In/Out F) SD-Karte G) Line In H) Line Out I) Assignable Pedal In - Buchse für programmierbares Pedal J) Damper Pedal In - Pedalbuchse nce Screen formance Screen Performance-Bildschirm... -
Seite 15: Anpassen Der Lautstärke
Adjusting the Volume Adjusting the Volume Adjusting the Volume he piano has one volume knob on the panel for adjusting the volume. he Volume he piano has one volume knob on the panel for adjusting the volume. Adjusting the Volume MASTER VOLUME MASTER VOLUME b on the panel for adjusting the volume. -
Seite 16: Installation Von Systemdaten
Select a VP player music grou Press the VP PLAYER button. (The pop Select a VP player music group player button will be on.) Choose the de • Benutzen Sie daher die mitgelieferte SD-Karte. Press the VP PLAYER button. (The pop- •... - Seite 17 Choose the desired music in the selected VP music group. Choose the desired music by pressing the DATA UP and DOWN buttons in the VP music pop-up VP Player screen. Choose the desired music in the selected VP music group. There are 23 VP groups such as Classical, Jazz, Choose the desired music by pressing the DATA UP and DOWN buttons in the VP music pop-up There are 23 VP groups such as Classical, Jazz, H...
-
Seite 18: Auswahl Der Sounds (Voices)
Change the VP music group. Press the EXIT button in the VP music tune pop-up. Change the VP music group. Then the VP music group will be displayed on the screen. Press the EXIT button in the VP music tune pop-up. Choose the VP music group by using the DATA UP and DOWN buttons and press the ENTER button. -
Seite 19: Übersicht Über Die Voices
voice and lower voice. Select a Voice. Select the desired voice by pressing the appropriate VOICE button. Das Piano hat 11 Voice-Gruppen, in jeder Gruppe befinden sich 8 Voices. Drücken Sie einen Voice-Knopf. Im Display erscheint ein Pop-Up-Fenster, das 3 Sekunden lang den eingestellten Sound anzeigt. -
Seite 20: Lautstärke Der Main-Voice
Press the GM VOICE button. The Pop-up display shows you the current selected voice number and voice name. The Pop-up display shows you the current selected voice number and voice name. The Pop-up display shows you the current selected voice number and voice name. The Pop-up display shows you the current selected voice number and voice name. -
Seite 21: Grundeinstellungen
PLAYING WITH THE LAYER VOICE PLAYING WITH THE LAYER VOICE PLAYING WITH THE LAYER VOICE PLAYING WITH THE LAYER VOICE Select the main voice. Select the main voice. Select the main voice. Select the main voice. Select a voice in the normal way. (see the SELECTING VOICES section on page 16) Select a voice in the normal way. -
Seite 22: Ändern Der Oktaveinstellung Der Layer-Voice
1. Rufen Sie den Layer-Modus auf, indem Sie den Knopf LAYER drücken. Die Kontrolllampe leuchtet auf und das entsprechende Pop-Up-Fenster erscheint. 2. Bewegen Sie den Cursor zum Punkt „Pedal Value“ im Pop-Up-Fenster des Layer- Modus, indem Sie ENTER drücken. 3. Sie können nun die Pedalfunktion mit Hilfe der Tasten DATA + oder - ändern. Wenn Sie die Tasten gleichzeitig drücken, wird die Grundeinstellung (on) wieder aufgerufen. -
Seite 23: Ändern Des Split Points
Call up the Split mode. To call up the split mode, press the SPLIT button. Lamp lights and the split is set on. The split pop-up display appears. 3. Wählen Sie nun die Split-Voice wie zuvor unter „Auswahl der Sounds (Voices)“... -
Seite 24: Einstellen Der Lautstärke Mit Den Tasten Split Volume + Und
Return to the main menu. Press the EXIT button. Return to the main menu. Press the EXIT button. Return to the main menu. Press the EXIT button. Return to the main menu. Press the EXIT button. Even if you don't press the EXIT button, the pop-up display automatically returns to the main Even if you don't press the EXIT button, the pop-up display automatically returns to the main menu after 3 seconds. -
Seite 25: Auswahl Eines Reverbs
To turn off reverb, press the REVERB button again. The lamp turns off and reverb(or chorus) is no Auswahl eines Reverbs longer active. Drücken Sie REVERB um den Effekt einzuschalten und wählen Sie dann im Pop-Up- SELECTING REVERB TYPE Fenster mit Hilfe der Tasten DATA + oder - den gewünschten Hall aus. Das Pop-Up- Press the REVERB button. -
Seite 26: Effekt
ADJUSTING THE DEPTH FOR EACH PART The reverb part depth parameter lets you make different reverb depth setting for the rhythm, bass and chord parts of the auto-accompaniment, as well as the the rhythm, bass and chord parts of the auto-accompaniment, as well as the the rhythm, bass and chord parts of the auto-accompaniment, as well as the The reverb part depth parameter lets you make different reverb depth setting for parts you play from key board. -
Seite 27: Einstellen Des Effekt-Levels
The effect type can be changed by using DATA UP and DOWN buttons in this pop-up display. Release the the SETUP/KEYPAD button, the pop-up display returns to the main menu. Display Hold If the DISPLAY HOLD is on, the pop-up display does not return to the main menu and the LCD screen shows the current pop- Wenn Sie die Funktion „Display Hold“... -
Seite 28: Metronom
Adjust the depth of the selected part. Adjust the depth of the selected part by using the EFFECT DEPTH UP and DOWN keys . You can use the DATA UP and DOWN buttons instead of the EFFECT DEPTH UP and DOWN keys. If you press both UP and DOWN Keys at the same time automatically return to the default effect depth of each part. -
Seite 29: Setup
Setup Setup Setup Setup Tune Setup TUNE Mit Hilfe der Tuning-Funktion können Sie Feineinstellungen an der Tonhöhe vornehmen The tune function lets you make fine adjustments to the pitch, allowing you to accurately match the um die Stimmung exakt anderen Instrumenten anpassen zu können. tuning with that of other instruments. -
Seite 30: Oktaveinstellung
Oktaveinstellung Diese Funktion macht es möglich, die Tonhöhe des Pianos um eine ganze Oktave zu Setup erhöhen oder zu vermindern, um es dem Bereich anderer Instrumente anzupassen. OCTAVE SHIFT The octave function makes it's possible to shift the octave of the keyboard, allowing you to match the Für die Main-Voice octave of the keyboard to the range of other instruments. -
Seite 31: Ändern Des Pitchbend-Bereichs
Setup Setup PITCH BEND Ändern des Pitchbend-Bereichs Setup This determines the pitch bend range and the voice part for applying the pitch bend. Changing the pitch bend range. PITCH BEND Hier können Sie den maximalen Umfang des Pitchbenders festlegen. Halten Sie den Specified the maximum change in a tone that can be applied using the PITCH BEND wheel. -
Seite 32: Begleitautomatik
Setup TOUCH Touch determines how your playing strength (velocity) affects the volume of the voices. Einstellen des Anschlags 10 types are available for tailoring the keyboard response to the selected voice, type of song, or your own playing preference. Halten Sie SETUP/KEYPAD und drücken Sie TOUCH. Das Pop-Up-Fenster erscheint und Selecting the touch zeigt den aktuellen Wert an. -
Seite 33: Auto Accompaniment
Auto Accompaniment Auto Accompaniment Auto Accompaniment Auto Accompaniment Auto Accompaniment Auto Accompaniment Melodienoten bekommen, die Sie mit der rechten Hand spielen. Auf diese Weise entsteht This keyboard automatically plays bass and chord parts in accordance with the chords you finger. The bass is keyboard automatically plays bass and chord parts in accordance with the chords you finger. -
Seite 34: Lautstärke Der Begleitautomatik
MPO CONTROL ADJUSTMENT never you select a different style, the preset tempo for that style is also selected, and the tempo own in the Multi Function display after STYLE SELECT Pop-up display. (Unless you try changing angezeigt. Wenn Sie den Style während des Playback ändern, wird das Tempo style during playback, in which case the same tempo is maintained.) beibehalten. -
Seite 35: Benutzen Der Begleitautomatik
has two main loops. The lamp of the currently selected pattern lights. basic pattern of the style and Main loop2(FILL2) is a variation of Main loop 1. etween FILL 1 and FILL 2 patterns within a song can add variety and make the overall the main loop 1 plays and after the Fill 2, the main loop2(variation) always starts. -
Seite 36: Einstellen Des Begleit-Modus
Call up the SETUP/KEYPAD mode. Press and hold down the SETUP/KEYPAD button. The setup pop-up appears in the LCD screen. Press one of the AUTO ACCOMP MODE keys. Einstellen des Begleit-Modus Press one of the AUTO ACCOMP MODE keys. 4. Halten Sie den Knopf SETUP/KEYPAD gedrückt;... - Seite 37 Pressing just one key produces a full Hear a C major Pressing just one key produces a full Hear a C major major chord corresponding to that note. chord major chord corresponding to that note. chord Play Cm MINOR Play Cm MINOR Hear a C minor Simultaneously pressing any key to the...
-
Seite 38: Ändern Des Split Points
Full Keyboard-Modus Wenn Sie diesen Modus auswählen, kreiert das Piano automatisch die passende Begleitung, während Sie beidhändig nach Belieben auf der Tastatur spielen können. Der Name des Akkords, den das Piano erkannt hat, erscheint im Display. Obwohl dieser Auto Accompaniment Modus mit sehr vielen Songs funktioniert, kann es doch vorkommen, dass einige Auto Accompaniment Arrangements weniger für diese Funktion geeignet sind. -
Seite 39: Aufnahme
Aufnahme Recording Das Piano verfügt über eine umfassende Aufnahmefunktion, die es Ihnen erlaubt, Ihr Spiel Recording Recording aufzunehmen und auf einer SD-karte zu speichern. The piano features comprehensive song recording functions that allow you to record your own Recording Recording performance. -
Seite 40: Playback
Start recording to track2. Recording starts when playing the keyboard or pressing the PLAY/STOP button. During recording to the Track2, you can listen to the recorded song of the Track1. Während Sie Spur 2 aufnehmen, können Sie den Song aus Spur 1 hören. Recording 5. -
Seite 41: Laden Eines Songs Von Der Sd-Karte
data is being accessed by a save, read or load operation. Doing so can corrupt the data on the memory card or even damage the card slot. Call up the SD card menu. Press and hold down the SETUP/KEYPAD button. Press the VP PLAYER/SD CARD button. The LCD screen shows the SD card menu. -
Seite 42: Registration
Registration Registration Registration Registration Eine Registration ist eine Erfassung Ihrer Einstellungen bezüglich Rhythmus, Sound, Registration Begleitautomatik und anderer Parameter, die Sie nutzen. Sie könne diese Einstellungen auf Knopfdruck speichern und jederzeit wieder laden. Das Piano verfügt über 5 A Registration is a particular setup of rhythm, sound, Auto Accompaniment or any other parameters Registation-Speicherplätze. -
Seite 43: Laden Einer Registration Von Der Sd-Karte
Registration Call up the save registration pop-up display. Registration Go to the SAVE RECORDED SONG by using DATA UP and DOWN buttons and 3. Benutzen Sie die Knöpfe DATA +/- um zum Menüpunkt „Save Reg.“ zu gelangen und press the ENTER button. drücken Sie ENTER. -
Seite 44: Abspielen Eines Midi-Files
SMF Player Return to the play mode. between different software and sequencers. There are actually three SMF formats, named SMF 0, SMF Press the RECORD button. The Record lam 1 and SMF 2. The piano supports the SMF 0 and SMF 1 format, which are widely used today, and so all The letters "SMF"... -
Seite 45: Liste Der General Midi Voices Und Drums
Local control refers to the fact that, normally, the piano keyboard controls its internal tone generator, allowing the internal voices to be played directly from the keyboard. This situation is called Local Control ON. When the local control is set to off, the keyboard and sound source are separated and no sound is heard through the piano when playing the keyboard. - Seite 46 General MIDI Voice & Drum Table Prog 1 Prog 9 Prog 17 Prog 25 Prog 26 Standard Drum Room Drum Power Drum Elec. Drum TR-808 27 - D#2 High Q 28 - E2 Slap 29 - F2 Scratch Push 30 - F#2 Scratch Pull 31 - G2 Sticks...
- Seite 47 General MIDI Voice & Drum Table Prog 33 Prog 41 Prog 49 Prog 57 REMARKS Jazz Drum Brush Drum Orchestra SFX 1 27 - D#1 Closed Hi Hat 28 - E1 Pedal Hi-Hat 29 - F1 Open Hi Hat 30 - F#1 Ride Cymbal 31 - G1 32 - G#1...
-
Seite 48: Midi Implementation Chart
MIDI Implementation Chart MIDI Implementation Chart MIDI Implementierung Function Recognized Transmitted Remark Basic Channel Default 1 -3 Mode Default OMNI OFF, POLY OMNI OFF, POLY Note ON/OFF 9nH kk vv #kk:note ON (0-127) #vv:velocity (1-127) Pitch Bender EnH bi bh Maximum swing +/- 1 tone 00 BnH 00H cc Bank Select... -
Seite 49: Vp-Songs
VP Music Library VP Music Library VP-Songs CLASSIC 01 - CHOPIN GROUP NAME Clssic01 Display Title Composer C H 0 0 1 E t u d e o p . 1 0 n o . 1 C h o p i n , F r y d e r k C H 0 0 2 E t u d e o p . - Seite 50 VP Music Library CLASSIC 02 - Chopin GROUP NAME Clssic02 Display Title Composer C H 0 5 1 M a z u r k a o p . 2 4 n o . 3 C h o p i n , F r y d e r k C H 0 5 2 M a z u r k a o p .
- Seite 51 VP Music Library CLASSIC 03 - Chopin and Brahms GROUP NAME Clssic03 Display Title Composer C H 1 0 1 B a l l a d e n o . 3 i n A f l a t M a j o r , o p . 4 7 C h o p i n , F r y d e r k C H 1 0 2 B a l l a d e n o .
- Seite 52 VP Music Library CLASSIC 04 - Mozart and Others GROUP NAME Clssic04 Display Title Composer P i a n o S o n a t a n o . 9 i n a m i n o r , K V 3 1 0 M o z a r t , W o l f g a n g M 0 1 K 3 1 0 - 1 ( A l l e g r o m a e s t o s o )
- Seite 53 VP Music Library CLASSIC 05 - Debussy and Others GROUP NAME Clssic05 Display Title Composer D 0 1 J a r d i n s s o u s l a p l u i e D e b u s s y , C l a u d e D 0 2 A r a b e s q u e N o .
- Seite 54 VP Music Library CLASSIC 06 - Schumann and Others GROUP NAME Clssic06 Display Title Composer S C H U 0 1 P a p i l l o n o p . 2 n o . 1 , W i d m u n g S c h u m a n n , R o b e r t S c e n e s f r o m C h i l d h o o d o p .
- Seite 55 VP Music Library CLASSIC 07 - Haydn and Others GROUP NAME Clssic07 Display Title Composer A N O N 0 1 F u g a g - m o l l A n o n y m o u s P i a n o S o n a t a O p .
- Seite 56 VP Music Library CLASSIC 08 - Bach GROUP NAME Clssic08 Display Title Composer - H a r p s i c h o r d o r C l a v i c h o r d w o r k s - B a c h , J o h a n n S e b a s t i a n B A 1 - 0 1...
- Seite 57 VP Music Library CLASSIC 09 - Bach GROUP NAME Clssic09 Display Title Composer - H a r p s i c h o r d o r C l a v i c h o r d w o r k s - B a c h , J o h a n n ( F o u r D u e t t o s ) D u e t t o s f r o m ' C l a v i e r U b u n g ' I I I S e b a s t i a n...
- Seite 58 VP Music Library CLASSIC 10 - Bach GROUP NAME Clssic10 Display Title Composer - H a r p s i c h o r d o r C l a v i c h o r d w o r k s - B a c h , J o h a n n - F r e n c h S u i t e s S e b a s t i a n...
- Seite 59 VP Music Library JAZZ 01 - Ensemble GROUP NAME JAZZ01 Display Title/Artist J E 0 0 0 1 B l u e s i n C - F u l l e r , L J E 0 0 0 2 G o o d B a i t - D a m e r .
- Seite 60 VP Music Library JAZZ 02 - Ensemble GROUP NAME JAZZ02 Display Title/Artist J E 0 0 5 1 D e v o n i t e l y - R o n J o h n s t o n J E 0 0 5 2 D e v o n ' s D e l i g h t - R o n J o h n s t o n J E 0 0 5 3...
- Seite 61 VP Music Library JAZZ 03 - Ensemble GROUP NAME JAZZ03 Display Title/Artist J E 0 1 0 1 C o n g a r a m a - C o n g a J E 0 1 0 2 D e s c a r g a n d o - M a m b o L a t i n J E 0 1 0 3 T h r e e 2 S a m b a - S a m b a J E 0 1 0 4...
- Seite 62 VP Music Library JAZZ 04 - Piano Solo GROUP NAME JAZZ04 Display Title/Artist J S 0 0 0 1 O h l a d y b e g o o d - G e r s h w i n J S 0 0 0 2 S o m e o n e t o w a t c h o v e r m e - G e r s h w i n J S 0 0 0 3...
- Seite 63 VP Music Library JAZZ 05 - Piano Solo GROUP NAME JAZZ05 Display Title/Artist J S 0 0 5 1 G r o w w o r m - L i n c k e J S 0 0 5 2 W h a t a r e y o u d o i n g t h e r e s t o f y o u r l i f e - L e G r a n d e , M .
- Seite 64 VP Music Library JAZZ 06 - Piano Solo GROUP NAME JAZZ06 Display Title/Artist J S 0 1 0 1 M o o n W a l k - M i l e s B l a c k J S 0 1 0 2 O u t o f t h e V a l l e y - B r a d T u r n e r J S 0 1 0 3 T o m o r r o w ' s T u n e - M i l e s B l a c k...
- Seite 65 VP Music Library GOSPEL GROUP NAME GOSPEL Display Title G E 0 0 0 1 A m a z i n g G r a c e G E 0 0 0 2 H o w G r e a t T h o u A r t G E 0 0 0 3 H o l y , H o l y , H o l y G E 0 0 0 4...
- Seite 66 VP Music Library HOLIDAY GROUP NAME HOLIDAY Display Title C A E 0 0 1 G o d R e s t C A E 0 0 2 I t ' s B e g i n n i n g C A E 0 0 3 H a p p y X - m a s C A E 0 0 4...
- Seite 67 VP Music Library CONTEMPORARY MUSIC PIANO 01 GROUP NAME CPiano01 Display Title C P 0 1 L a k e l o u i s e - Y u k i G u r a m o t o C P 0 2 R o m a n c e - Y u k i G u r a m o t o C P 0 3 A S o n g f r o m S e c r e t G a r d e n - S e c r e t G a r d e n...
- Seite 68 VP Music Library CONTEMPORARY MUSIC PIANO 02 GROUP NAME CPiano02 Display Title C P 5 1 S h o j i C P 5 2 S k y w a r d C P 5 3 S o L o n g , M i g u e l C P 5 4 S o p h i a C P 5 5...
- Seite 69 VP Music Library Ragtime 1 GROUP NAME RAGTIME1 Display Title/Artist R A G 0 0 1 A B r e e z e F r o m A l a b a m a ( 1 9 0 2 ) - S c o t t J o p l i n R A G 0 0 2 S c o t t J o p l i n ' s N e w R a g ( 1 9 1 2 ) - S c o t t J o p l i n R A G 0 0 3...
- Seite 70 VP Music Library Ragtime 2 GROUP NAME RAGTIME2 Display Title/Artist R A G 0 5 1 C a t a r a c t R a g ( 1 9 1 4 ) - R o b e r t H a m p t o n R A G 0 5 2 C h i c k e n C h o w d e r ( 1 9 0 5 ) - I r e n e G i b l i n R A G 0 5 3...
-
Seite 71: Hilfe Bei Störungen
Hilfe bei Störungen Bitte überprüfen Sie anhand der folgenden Tabelle die aufgeführten Punkte, wenn Sie Probleme bei der Bedienung des Pianos haben. Problem Ursache Lösung Kein Sound 1. Problem mit der 1. Überprüfen Sie das Netzteil und Stromversorgung seine Verbindungen 2. - Seite 72 Sektion Inhalt Display Graphisches LCD-Display VP-Songs über 1000 Aufnahme Echtzeit, 2 Spure, max. 10.000 Noten pro Spur Lautstärke Gesamtlautstärke, Begleitautomatik, Layer, Split Anschlüsse SD-Kartenslot, MIDI IN/OUT, USB IN, 2 Pedale IN, 2 Kophhörerbuchsen Lautsprecher 2 Inches x 6 (Stereo 2 x 20 W) Stromversorgung DC IN, 15 V, 4 A Stromverbrauch...
-
Seite 73: Herstellererklärung
Herstellererklärung Garantie und Gewährleistung Neben der gesetzlichen 24 monatigen Gewährleistungsfrist übernehmen wir eine Garantie von 6 Monaten. Die Garantiezeit beginnt ab dem Datum des Kaufs von fabrikneuen ungebrauchten Produkten durch den erstmaligen Endkunden. Zum Nachweis heben Sie bitte unbedingt den Kaufbeleg auf. Ohne diesen Nachweis, die der zuständige Service- Partner prüft, werden Reparaturen grundsätzlich kostenpflichtig durchgeführt. -
Seite 74: Konformitätserklärung
Konformitätserklärung Dieses Produkt entspricht den grundlegenden Anforderungen und den weiteren folgender Richtlinien: 2004/108/EU EMV-Richtlinie 2006/95EU Niederspannungsrichtlinie Die vollständige Konformitätserklärung kann unter http://www.kirstein.de/docs/konformitaetserklaerungen eingesehen werden Akkus und Batterien Die mitgelieferten Akkus oder Batterien sind recyclingfähig. Bitte entsorgen Sie die Akkus über den Batteriecontainer oder den Fachhandel.