Inhaltsverzeichnis
Werbung
Verfügbare Sprachen
Verfügbare Sprachen
Werbung
Kapitel
Inhaltsverzeichnis
Fehlerbehebung

Verwandte Anleitungen für Classic Cantabile DP-50


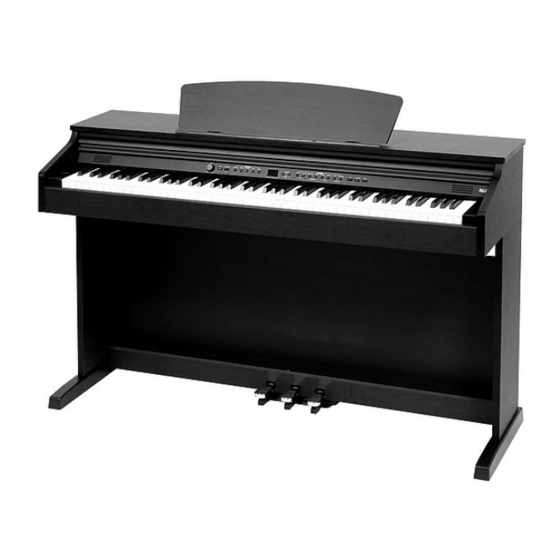
Inhaltszusammenfassung für Classic Cantabile DP-50
-
Seite 2: Einleitung
Thank you for your purchase of the Classic Cantabile DP 50 digital piano. We hope that you will enjoy the use of the Classic Cantabile DP 50 digital piano. Please read through this manual carefully before beginning to use, so that you will be able to take full advantage of the Classic Cantabile DP 50 digital piano features and enjoy trouble- free operation for years to come. -
Seite 3: Sicherheitshinweise
Sicherheitshinweise Bitte lesen Sie diese Hinweise bevor Sie das Gerät bedienen und verwahren Sie sie an einem sicheren Ort. Befolgen Sie die Sicherheitshinweise um Schäden oder gar Verletzungen durch Strom, Kurzschlüsse oder Brand zu vermeiden. Dazu gehört unter anderem Folgendes: Entfernen Sie weder Gehäuse noch Rückwand, es befinden sich keine Teile im Gerät, die von Ihnen gewartet werden könnten. -
Seite 4: Willkommen
• Setzen Sie sich nicht auf das Piano und stellen Sie keine schweren Gegenstände darauf. • Wenden Sie im Umgang mit Knöpfen, Tasten und Steckern keine Gewalt an. • Seien Sie vorsichtig, damit die Tastenabdeckung nicht Ihre Finger einklemmt. Stecken Sie keinesfalls einen Finger in den Spalt zwischen Abdeckung und Tastatur! •... -
Seite 5: Inhaltsverzeichnis
Inhaltsverzeichnis Sicherheitshinweise Vorsichtsmaßnahmen Willkommen Hauptfunktionen Inhaltsverzeichnis Auspacken Aufbau Seiten und Pedalkasten Zusammenbau des Pianostands Verbindung von Piano und Pianostand Anschluss von Pedalkabel und Netzteil Anschlüsse Inbetriebnahme des Pianos Kopfhörer Anschluss von Audio-Geräten Anschluss eines Computers Anschluss des Pedals Bedienelemente Grundlegende Bedienung Lautstärke Sounds Layer... -
Seite 6: Auspacken
Auspacken Packen Sie das Piano und sein Zubehör vorsichtig aus. Das Piano besteht aus folgenden Teilen: Piano (a) rechtes und linkes Bein (b) rechter und linker Fuß (c) Pedalkasten (d) Rückwand (e) Bedienungsanleitung Nehmen Sie jedes Teil in Augenschein und vergewissern Sie sich, dass es in gutem Zustand ist. Wenn Sie Teile vermissen oder welche beschädigt sind, wenden Sie sich bitte an Ihren Händler! "... -
Seite 7: Aufbau
Aufbau Seiten und Pedalkasten Bauen Sie die Beine (b) und Füße (c) mit Hilfe der Bolzen (g) und der Muttern (h) zu den Seitenteilen zusammen, wie in der Abbildung dargestellt. Befestigen Sie anschließend die Seitenteile mit Hilfe der 4 Bolzen (l) am Pedalkasten (d). -
Seite 8: Anschluss Von Pedalkabel Und Netzteil
Anschluss von Pedalkabel und Netzteil Stecken Sie Pedalkabel (-> Pedal) und Netzteil (-> DC 12V) in die entsprechenden Buchsen an der Unterseite des Pianos wie in der Abbildung dargestellt. Anschlüsse Inbetriebnahme des Pianos 1. Anschließen des Netzteils: Stecken Sie den DC-Stecker in die Buchse des Pianos und den Stecker des Stromkabels in eine Steckdose. -
Seite 9: Kopfhörer
Kopfhörer Sie können bei Bedarf ein oder zwei Kopfhörer (1/4“) an ihrem Piano anschließen. Die benötigten Buchsen befinden sich an der Unterseite des Pianos. Durch den Anschluss eines Kopfhörers wird das interne Lautsprechersystem automatisch abgeschaltet. Die Kopfhöreranschlüsse Headphone connectors are on the bottom of the main unit. -
Seite 10: Anschluss Des Pedals
Anschluss des Pedals Schließen Sie den Stecker des Pedals an der entsprechenden Buchse an der Unterseite des Pianos an. Pedalkabel Soft Sostenuto Dämpfer Rechtes Pedal (Dämpfer) Es funktioniert genauso wie das Pedal an einem akustischen Piano, es bewirkt also ein Sustain des Sounds, nachdem Sie Ihre Hände von den Tasten genommen haben. -
Seite 11: Grundlegende Bedienung
1. Volume (Lautstärkeregler) 2. Sound-Knöpfe 3. Split 4. Twin Piano 5. Reverb 6. Setup 7. LED-Display 8. Data Up/Down 9. Tune (Stimmen) 10. Transpose (Transponieren) 11. Touch (Anschlagsempfindlichkeit) 12. Local Control 13. Enter 14. Demo 15. Record 16. Play/Stop 17. Track 1 18. -
Seite 12: Layer
Auswahl eines Sounds Drücken Sie den gewünschten Knopf (Button). Dieses Digitalpiano verfügt über 8 Voice- (Sound-) Knöpfe, denen jeweils 2 Sounds zugewiesen sind. Wenn Sie einen der Knöpfe drücken, erscheint der ausgewählte Sound im Display. Drücken Sie erneut diesen Knopf, erscheint der zweite Sound im Display. -
Seite 13: Split
Split Dieser Modus erlaubt das Spielen mit zwei verschiedenen Sounds: einem für die rechte, einem für die linke Hand. Sie können also beispielsweise mit der linken Hand Bass spielen und mit der rechten Piano. Wählen Sie, wie üblich einen Sound aus. Drücken Sie den Knopf SPLIT. Das Lämpchen blinkt und im Display erscheint der ausgewählte Split-Sound. -
Seite 14: Metronom
Metronom Das Piano verfügt über ein Metronom, das ideal zum Üben ist. Um es einzuschalten, drücken Sie bitte den Knopf METRONOME. Drücken Sie abermals, um das Metronom wieder auszuschalten. Mit Hilfe der Knöpfe DATA/TEMPO können Sie das Tempo des Metronoms einstellen (20-280 bpm). -
Seite 15: Transpose
Das Display erscheint und zeigt den aktuell eingestellten Wert an. Diesen können Sie mit Hilfe der Knöpfe TUNE UP oder DOWN ändern. Durch gleichzeitiges Drücken dieser Knöpfe gelangen Sie zurück zur Werkseinstellung (64). Der einstellbare Bereich geht von 00 bis 64. Die Tonhöhe ist in Hertz (Hz) angegeben, die die Anzahl der Soundwellen in Sekunden angibt. -
Seite 16: Midi Local
Anzeige Anschlag Beschreibung Bei dieser Einstellung produzieren Sie einen lauten Sound, selbst bei zartem Weich Anschlag. Normal Das ist der Standard-Anschlag und dient als Grundeinstellung ab Werk. Bei dieser Einstellung müssen Sie kraftvoll anschlagen, um einen lauten Hart Sound zu erzeugen. Ist die Funktion deaktiviert, erklingen alle Töne gleich laut, unabhängig von der Kraft Ihres Anschlags. -
Seite 17: Aufnahme Und Playback
Es kann einen Song aufnehmen, Es kann einen Song aufnehmen, Es kann einen Song aufnehmen, Es kann einen Song aufnehmen, Anzeige Funktion Beschreibung Bereich ab Werk Lautstärke des ersten Sounds Anpassen der Lautstärke 00-127 Lautstärke des Split-Sounds Anpassen der Lautstärke 00-127 Lautstärke des Layer-Sounds Anpassen der Lautstärke... -
Seite 18: Demosongs
5. Um die Aufnahme in Spur 2 zu beenden, drücken Sie die Knöpfe TRACK 2 oder RECORD. Der Knopf RECORD erlischt, TRACK 2 leuchtet. Möchten Sie die Aufnahme anhören, drücken Sie bitte PLAY. Der Knopf TRACK 2 blinkt während das Playback abgespielt wird. 6. -
Seite 19: Übersicht Über Die Demosongs
Übersicht über die Demosongs Anzeige Titel Komponist Display Title Composer d 0 1 Etude op.10 no.1 C h o p i n , F r y d e r y k d 0 2 Etude op.10 no.4 F r a n c i s z e k d 0 3 Etude op.10 no.5 d 0 4... -
Seite 20: Drums Und Sfx Tabelle
Drums und SFX Tabelle Prog 1 Prog 57 Standard Drum (8-1) SFX 2 (8-2) 27 - D#1 High Q 28 - E1 Slap 29 - F1 Scratch Push 30 - F#1 Scratch Pull 31 - G1 Sticks 32 - G#1 Square Click 33 - A1 Metronome Click... -
Seite 21: Midi Implementierung
MIDI Implementierung Function Recognized Transmitted Remark Basic Channel Default 1 -3 Mode Default OMNI OFF, POLY OMNI OFF, POLY Note ON/OFF 9nH kk vv #kk:note ON (0-127) #vv:velocity (1-127) Pitch Bender EnH bi bh Maximum swing +/- 1 tone 00 BnH 00H cc Bank Select 01 BnH 01H cc Modulation Wheel... -
Seite 22: Hilfe Bei Störungen
Hilfe bei Störungen Wenn Sie Probleme mit Ihrem Piano haben, überprüfen Sie bitte die folgende Tabelle: Problem Ursache Lösung 1. Stromversorgungsproblem 1. Überprüfen Sie das Stromkabel Kein Sound 2. Lautstärke zu niedrig 2. Passen Sie die Lautstärke an 3. Kopfhörer angeschlossen 3. -
Seite 23: Weee-Erklärung / Entsorgung
WEEE-Erklärung / Entsorgung Ihr Produkt wurde mit hochwertigen Materialien und Komponenten entworfen und hergestellt, die recyclebar sind und wieder verwendet werden können. Dieses Symbol bedeutet, dass elektrische und elektronische Geräte am Ende ihrer Nutzungsdauer vom Hausmüll getrennt entsorgt werden müssen. Bitte entsorgen Sie dieses Gerät bei Ihrer örtlichen kommunalen Sammelstelle oder im Recycling Center.