Herunterladen Inhalt Inhalt Diese Seite drucken
Metz MECABLITZ 50 AF-1 digital Sony Bedienungsanleitung

Metz MECABLITZ 50 AF-1 digital Sony Bedienungsanleitung

Vorschau ausblenden Andere Handbücher für MECABLITZ 50 AF-1 digital Sony:
Inhaltsverzeichnis

Werbung

Verfügbare Sprachen
  • DE

Verfügbare Sprachen

  • DEUTSCH, seite 1
MECABLITZ 50 AF-1 digital
für/for Sony-D-SLR Kameras
mit/with ADI / HSS / Preflash-TTL
Bedienungsanleitung
Gebruiksaanwijzing
Manuale istruzioni
Mode d'emploi
Operating instruction
Manual de instrucciones

Werbung

Inhaltsverzeichnis
loading

Inhaltszusammenfassung für Metz MECABLITZ 50 AF-1 digital Sony

  • Seite 1 MECABLITZ 50 AF-1 digital für/for Sony-D-SLR Kameras mit/with ADI / HSS / Preflash-TTL Bedienungsanleitung Mode d’emploi Gebruiksaanwijzing Operating instruction Manuale istruzioni Manual de instrucciones...
  • Seite 2: Inhaltsverzeichnis

    1 Sicherheitshinweise .........3 9.5 Extended-Zoom-Betrieb („Ex“) .
  • Seite 3: Sicherheitshinweise

    • Batterien / Akkus nicht kurzschließen! • Aus verbrauchten Batterien kann Lauge austreten, was zur Beschädigung der Vielen Dank, dass Sie sich für ein Metz Produkt entschieden haben. Kontakte führt. Verbrauchte Batterien deshalb immer aus dem Gerät entnehmen. Wir freuen uns, Sie als Kunde begrüßen zu dürfen.
  • Seite 4: Dedicated-Blitzfunktionen

    2 System-Blitzfunktionen 3 Blitzgerät vorbereiten Die System-Blitzfunktionen sind speziell auf das Kamerasystem abgestimmte 3.1 Montage des Blitzgerätes Blitzfunktionen. In Abhängigkeit vom Kameratyp werden dabei verschiedene Blitzgerät auf die Kamera montieren Blitzfunktionen unterstütz: Kamera und Blitzgerät vor der Montage oder Demontage ausschalten. •...
  • Seite 5: Ein- Und Ausschalten Des Blitzgerätes

    Batterien austauschen 3.3 Ein- und Ausschalten des Blitzgerätes Das Blitzgerät wird mit dem Hauptschalter einge- Die Akkus/Batterien sind leer bzw. verbraucht, wenn die Blitzfolgezeit (Zeit vom schaltet. In der Stellung „ON“ ist das Blitzgerät einge- Auslösen eines Blitzes mit voller Lichtleistung, z.B. bei M, bis zum erneuten schaltet.
  • Seite 6: Led-Anzeigen Am Blitzgerät

    4 LED-Anzeigen am Blitzgerät 5 Anzeigen am Display Die meisten Kameras übertragen die Werte für ISO, Objektivbrennweite (mm) 4.1 Blitzbereitschaftsanzeige und Blende an das Blitzgerät. Dieses passt seine erforderlichen Einstellungen Bei aufgeladenem Blitzkondensator leuchtet am automatisch an. Es errechnet aus den Werten und seiner Leitzahl die maximale Blitzgerät die Blitzbereitschaftsanzeige auf und Reichweite des Blitzlichtes.
  • Seite 7: Reichweitenanzeige

    5.2 Reichweitenanzeige Reichweitenanzeige im manuellen Blitzbetrieb M Beim Einsatz von Kameras die Daten für ISO, Objektivbrennweite und Blende Im manuellen Blitzbetrieb M wird im Display übertragen erfolgt am Display eine Reichweitenanzeige. Dazu muss ein der Entfernungswert angezeigt, der für eine Datenaustausch zwischen Kamera und Blitzgerät stattgefunden haben, z.B.
  • Seite 8: Blitzbetriebsarten („Mode")

    7 Blitzbetriebsarten („Mode“) Vorblitz-TTL und ADI-Messung Vorblitz-TTL und ADI-Messung sind digitale TTL-Blitzbetriebsarten und Je nach Kameratyp stehen verschiedene Weiterentwicklungen des TTL-Blitzbetriebes analoger Kameras. Bei der TTL–Blitzbetriebsarten, der manuelle Aufnahme wird vor der eigentlichen Belichtung ein fast nicht erkennbarer Blitzbetrieb und die Kurzzeitsynchronisationn Zoom Messvorblitz vom Blitzgerät abgegeben.
  • Seite 9: Manueller Blitzbetrieb

    TTL-Blitzbetrieb 7.2 Manueller Blitzbetrieb Im manuellen Blitzbetrieb wird vom Blitzgerät ungeregelt die volle Energie Diese analoge TTL-Blitzbetriebsart wird von älteren analogen Kameras unter- abgestrahlt, sofern keine Teillichtleistung eingestellt ist. Die Anpassung an die stützt. Es ist der normale TTL-Blitzbetrieb (TTL-Blitzbetrieb ohne Vorblitz). Aufnahmesituation kann z.B.
  • Seite 10: Automatische Kurzzeitsynchronisation (Hss)

    7.3 Automatische Kurzzeitsynchronisation (HSS) 8 Manuelle Blitzbelichtungskorrektur Verschiedene Kameras unterstützen die Automatische Kurzzeitsynchronisation Die Blitzbelichtungsautomatik der meisten Kameras ist auf einen Reflexionsgrad (siehe Kamerabedienungsanleitung). Mit dieser Blitzbetriebsart ist es möglich, von 25 % (durchschnittlicher Reflexionsgrad von Blitzmotiven) abgestimmt. Ein auch bei kürzeren Verschlusszeiten als der Blitzsynchronzeit ein Blitzgerät einzu- dunkler Hintergrund, der viel Licht absorbiert oder ein heller Hintergrund, der setzen.
  • Seite 11: Sonderfunktionen („Select")

    9 Sonderfunktionen („Select“) Die automatische Anpassung erfolgt nicht, wenn der Hauptreflektor geschwenkt ist, wenn die Weitwinkel-Streuscheibe ausgezogen oder Je nach Kameratyp stehen verschiedene Sonderfunktionen zur Verfügung. Zum ein Mecabounce (Zubehör) montiert ist. Aufrufen und Einstellen der Sonderfunktionen muss deshalb vorher ein Auf Wunsch kann die Position des Hauptreflektors manuell verstellt werden Datenaustausch zwischen Blitzgerät und Kamera stattfinden, z.B.
  • Seite 12 Wenn die Kamera die Daten der Objektivbrennweite an das Blitzgerät automatisch gespeichert. überträgt und eine manuelle Zoomverstellung dazu führt, dass die Die Rückstellung von manuellem Zoom-Betrieb auf Auto-Zoom-Betrieb Aufnahme vom Hauptreflektor nicht vollständig ausgeleuchtet wird (z.B. erfolgt auch, wenn das Blitzgerät erneut mit dem Hauptschalter einge- bei Spot-Effekt), blinkt die Anzeige der Zoom-Position des schaltet wird.
  • Seite 13: Der Drahtlose Remote-Betrieb

    9.2 Der drahtlose Remote-Betrieb Deaktivieren des Remote-Slave-Blitzbetriebes: • Bei montiertem Blitzgerät an der Kamera den drahtlosen Remote-Blitzbetrieb 9.2.1 Remote-Slave-Blitzbetrieb ( („Wireless“ bzw. „WL“) deaktivieren, bzw. in den normalen Blitzbetrieb Das Blitzgerät unterstützt das drahtlose Sony-Remote-System in den umschalten. Betriebsarten „CTRL“ und „CTRL “, abhängig vom verwendeten •...
  • Seite 14: 1Remote-Slave-Blitzbetrieb ( Sl )

    Einstellung des Remote-Kanals Im Remote-Blitzbetrieb lässt sich die Kurzzeitsynchronisation HSS HSS bzw. HSS) nicht am Slave-Blitzgerät einstellen. Die Damit sich mehrere Remote-Systeme im gleichen Raum nicht gegenseitig stören stehen vier unabhängige Remote-Kanäle (CH 1, 2, 3 oder 4) zur Verfügung. Kurzzeitsynchronisation wird am Slave-Blitzgerät beim Abblitzen bei Bedarf automatisch für die Dauer der Aufnahme aktiviert, wenn an der •...
  • Seite 15: Servo-Betrieb

    Prüfen des Remote-Blitzbetriebes Einstellvorgang für den SERVO–Blitzbetrieb • Slave-Blitzgerät von der Kamera abnehmen und das integrierte Blitzgerät der • Stellen Sie an der Kamera eine Betriebsart Kamera aufklappen. TTL ein. • Slave-Blitzgerät so positionieren, wie für die spätere Aufnahme gewünscht. •...
  • Seite 16: Automatische Geräteabschaltung

    9.4 Einstelllicht („ML“) 9.3 Automatische Geräteabschaltung Beim Einstelllicht (ML = Modelling Light) handelt es sich um ein Die Automatische Geräteabschaltung kann so eingestellt werden, dass sie nach Stroboskop–Blitzlicht mit hoher Frequenz. Bei einer Dauer von ca. 5 Sekunden 10 Minuten oder 1 Minute erfolgt, bzw. deaktiviert ist. entsteht der Eindruck eines Quasi-Dauerlichtes.
  • Seite 17: Extended-Zoom-Betrieb („Ex")

    9.5 Extended-Zoom-Betrieb („Ex“) Systembedingt wird der Extended-Zoom-Betrieb für Objektivbrennweiten ab 28 mm (Kleinbild-Format) unterstützt. Die Kamera muss mit einem Beim Extended-Zoom-Betrieb wird die Zoom-Position des Hauptreflektors CPU-Objektiv ausgerüstet sein und die Daten für die Objektivbrennweite eine Stufe gegenüber der Objektivbrennweite der Kamera reduziert. an das Blitzgerät liefern.
  • Seite 18: Aufnahmeformat-Anpassung (S.zoom)

    9.7 Aufnahmeformat-Anpassung (S Zoom) 10 Blitztechniken Bei einigen Typen von Digitalkameras kann die Anzeige für die Position des 10.1 Indirektes Blitzen Hauptreflektors dem Chip-Format (Abmessungen des Bildaufnahmebausteines) Durch indirektes Blitzen wird das Motiv weicher ausgeleuchtet und eine ausge- mit der Zoom-Size-Funktion („S Zoom“) angepasst werden. prägte Schattenbildung verringert.
  • Seite 19: Indirektes Blitzen Mit Reflektorkarte

    10.2 Indirektes Blitzen mit Reflektorkarte 11 Blitzsynchronisation Durch indirektes Blitzen mit der integrierten Reflektorkarte können bei 11.1 Automatische Blitzsynchronzeitsteuerung Personen Spitzlichter in den Augen erzeugt werden: Je nach Kameratyp und Kamerabetriebsart wird bei Erreichen der • Den Reflektorkopf um 90° nach oben schwenken. Blitzbereitschaft die Verschlusszeit auf die Blitzsynchronzeit umgeschaltet (siehe •...
  • Seite 20: Normalsynchronisation

    11.2 Normalsynchronisation 11.4 Langzeitsynchronisation (SLOW) Bei der Normalsynchronisation wird das Blitzgerät zum Beginn der Mit der Langzeitbelichtung SLOW wird der Bildhintergrund bei geringer Verschlusszeit ausgelöst (Synchronisation auf den 1.Verschlussvorhang). Die Umgebungshelligkeit stärker zur Geltung gebracht. Erreicht wird dies durch Normalsynchronisation ist der Standardbetrieb und wird von allen Kameras Kameraverschlusszeiten, die dem Umgebungslicht angepasst sind.
  • Seite 21: Automatischer Af-Messblitz

    12 Automatischer AF-Messblitz 13 Zündungssteuerung (Auto-Flash) Ist das vorhandene Umgebungslicht für eine Belichtung im normalen Modus Sobald die Umlichtverhältnisse für eine automatische Fokussierung nicht mehr ausreichend, so verhindert die Kamera die Blitzauslösung. ausreichen, wird von der Kamera automatisch der AF-Messblitz im Blitzgerät aktiviert.
  • Seite 22: Wartung Und Pflege

    Die Firmware des Blitzgerätes kann über die USB Firmwareupdate-Buchse aktualisiert und im technischen Rahmen an die Funktionen zukünftiger Kameras angepasst werden. Nähere Informationen finden Sie im Internet auf der Metz-Homepage: www.metz.de 14.2 Reset Das Blitzgerät kann auf die Werkseinstellung bei Auslieferung zurück gestellt werden.
  • Seite 23: Hilfe Bei Störungen

    15 Hilfe bei Störungen Die Zoom-Position des Hauptreflektors wird nicht automatisch der aktuellen Zoom-Position des Objektivs angepasst. Sollte es einmal vorkommen dass z.B. im Display des Blitzgerätes unsin- • Die Kamera überträgt keine Daten an das Blitzgerät nige Anzeigen erscheinen oder das Blitzgerät funktioniert nicht so wie es •...
  • Seite 24 Es findet keine automatische Umschaltung auf die Blitzsynchronzeit statt • Die Kamera hat einen Zentralverschluss (die meisten Kompaktkameras). Die Umschaltung auf Synchronzeit ist daher nicht erforderlich. • Das Blitzgerät arbeitet mit Kurzzeitsynchronisation HSS. Dabei findet keine Umschaltung auf die Synchronzeit statt. •...
  • Seite 25: Technische Daten

    16 Technische Daten Ausleuchtung des Motorzoom-Hauptreflektors: Ab 24 mm (Kleinbild-Format 24 x 36). Maximale Leitzahl bei ISO 100; Zoom 105 mm: Ab 12 mm mit integrierter Weitwinkelstreuscheibe (Kleinbild-Format 24 x 36). Im Meter-System: 50 Im Feet-System:165 Schwenkbereiche und Raststellungen des Reflektorkopfes: Blitzbetriebsarten: Vertikal: -7°...
  • Seite 26: Sonderzubehör

    17 Sonderzubehör Batterie-Entsorgung Batterien/Akkus gehören nicht in den Hausmüll! Bitte bedienen Sie sich bei der Für Fehlfunktionen und Schäden am Blitzgerät, verursacht durch die Rückgabe verbrauchter Batterien/Akkus eines vorhandenen Rücknahmesystems. Verwendung von Zubehör anderer Hersteller, wird keine Gewährleistung übernommen! Bitte geben Sie nur entladene Batterien/Akkus ab. Batterien sind in der Regel dann entladen, wenn das damit betriebene Gerät •...
  • Seite 27: Garantiebestimmungen

    6. Beanstandete Geräte bitten wir zusammen mit dem Kaufbeleg entweder über den Fachhändler oder direkt an die Firma Metz-Werke GmbH & Co KG - Metz-Werke GmbH & Co KG Zentralkundendienst - Ohmstrasse 55, 90513 Zirndorf, transportsicher ver- packt unter genauer Schilderung der Beanstandung einzusenden.
  • Seite 28 1 Consignes de sécurité ........29 9.4 Lumière pilote («ML»...
  • Seite 29: Avant-Propos

    • Sortez immédiatement les piles usées du flash ! En effet, les piles usées peuvent „couler“ et provoquer une dégradation du flash. Nous vous remercions d’avoir choisi un produit Metz et sommes heureux de • Ne rechargez pas les piles sèches ! vous saluer au sein de la grande famille de nos clients.
  • Seite 30: Fonctions Flash Dédiées

    2 Fonctions de flash système 3 Préparation du flash Les fonctions de flash système sont des fonctions de flash conçues spécialement 3.1 Montage du flash pour le système d'appareil photo. Différentes fonctions de flash sont prises en Fixation du flash sur l’appareil charge selon le modèle d'appareil.
  • Seite 31: Mise En Marche Et Coupure Du Flash

    Si le flash reste inutilisé pendant une longue période, retirez les piles ou 3.3 Mise en marche et coupure du flash accus de l’appareil. Mettez le flash en marche en appuyant sur l’interrup- Remplacement des piles teur principal . Le flash est sous tension lorsque l’in- terrupteur principal est sur «ON».
  • Seite 32: Del De Signalisation Sur Le Flash

    4 DEL de signalisation sur le flash 5 Indications sur l’écran Les appareils photo transmettent les valeurs ISO, la distance focale de l’objectif 4.1 Affichage de disponibilité du flash (mm) et l’ouverture du diaphragme au flash. Celui-ci adapte alors automatique- Lorsque le condensateur du flash est chargé, le témoin ment ses réglages nécessaires.
  • Seite 33: Affichage De La Portée

    5.2 Affichage de la portée Indication de la portée en mode flash manuel M Lors de l’utilisation d’appareils photo qui transmettent des données concernant En mode flash manuel M, l’écran indique la l’ISO, la distance focale de l’objectif et le diaphragme, l’indication de la portée valeur de la distance à...
  • Seite 34: Modes De Fonctionnement Du Flash (Menu «Mode» )

    7 Modes de fonctionnement du flash (menu «Mode» ) Pré-éclair TTL et mesure ADI Le pré-éclair TTL et la mesure ADI sont des modes flash TTL numériques Selon le modèle d’appareil photo, vous et des variantes perfectionnées du mode flash TTL des appareils photo disposez de différents mode flash TTL, du argentiques.
  • Seite 35: Mode Flash Manuel

    Mode flash TTL 7.2 Mode flash manuel En mode flash manuel M , le flash émet un éclair non dosé avec sa pleine puissance Ce mode flash analogique est pris en charge par des appareils photo argenti- si aucune puissance partielle n’est réglée. L’adaptation à la situation de prise de vue ques relativement anciens.
  • Seite 36: Synchronisation Automatique Haute Vitesse (Hss)

    7.3 Synchronisation automatique haute vitesse (HSS) 8 Correction manuelle d’exposition au flash Plusieurs appareils photo prennent en charge la synchronisation automatique L’automatisme d’exposition au flash de la plupart des appareils photo est cali- haute vitesse (voir mode d’emploi de l’appareil photo). Ce mode flash permet bré...
  • Seite 37: Fonctions Spéciales (Menu «Select» )

    9 Fonctions spéciales (menu «Select» ) L’adaptation automatique ne s’effectue pas si le réflecteur principal est incliné, si le diffuseur grand angle est sorti ou qu’un Mecabounce Selon le modèle d’appareil photo, vous disposez de plusieurs fonctions spécia- (accessoire) est monté. les.
  • Seite 38 et qu’une adaptation manuelle du zoom fait en sorte que la prise de vue Le retour du mode zoom manuel au mode zoom automatique a lieu n’est pas intégralement éclairée par le réflecteur principal (par exemple également lorsque le flash est rallumé au niveau de lors d’un effet spot), l’indication de la position du zoom du réflecteur l’interrupteur général principal clignote pour vous en avertir !
  • Seite 39: Mode Multi-Flash Sans Fil (Mode Remote)

    9.2 Mode multi-flash sans fil (mode Remote) Désactivation du mode remote slave: • Avec le flash monté sur l’appareil photo, désactivez la fonction flash remote 9.2.1 Mode flash remote slave ( sans fil («Wireless» ou «WL») ou passez en mode flash normal. Le flash prend en charge le système sans fil Sony dans les modes «CTRL»...
  • Seite 40 la puissance lumineuse partielle peut être modifiée ultérieurement si En mode flash remote , la synchronisation haute vitesse HSS ( nécessaire avec les touches + et –. HSS) ne peut pas être réglée sur le flash esclave. La synchronisa- tion haute vitesse est automatiquement activée sur le flash esclave lors- Paramétrage du canal remote que celui-ci envoie un éclair, si nécessaire pendant la durée de la prise Pour éviter que plusieurs systèmes remote ne se dérangent mutuellement dans le...
  • Seite 41: Modo Flash Servo

    Vérification du mode flash remote Procédure de réglage pour le mode flash servo SERVO • Retirez le flash esclave de l'appareil photo et rabattez le flash intégré de • Réglez sur l’appareil photo un mode TTL. l'appareil. • Appuyez à plusieurs reprises sur Select •...
  • Seite 42: Coupure Automatique Du Flash

    9.4 Lumière pilote («ML» - Modelling Light) 9.3 Coupure automatique du flash La coupure automatique du flash peut être réglée de manière à se faire ou à La lumière pilote (ML = Modelling Light) est une séquence d’éclairs stroboscopi- être désactivée après 10 minutes ou 1 minute. ques à...
  • Seite 43: Mode Zoom Étendu («Ex»)

    9.5 Mode zoom étendu («Ex») Pour des raisons inhérentes au système, le mode zoom étendu n’est pris en charge que par les focales d’objectifs d’au moins 28 mm (film de petit Dans le mode zoom étendu, la position du zoom du réflecteur principal format).
  • Seite 44: Adaptation Du Format De La Prise De Vue (S.zoom)

    9.7 Adaptation du format de prise de vue (S Zoom) 10 Techniques de photographie au flash Sur certains modèles d’appareils photo numériques, l’affichage de la position 10.1 Éclairage indirect au flash du réflecteur principal peut être adaptée au format de la puce (dimensions du Avec l’éclairage indirect, le sujet est éclairé...
  • Seite 45: Éclairage Indirect Au Flash Avec Carte-Réflecteur

    10.2 Éclairage indirect au flash avec carte-réflecteur 11 Synchronisation du flash L’éclairage indirect au flash avec carte-réflecteur intégrée permet de générer 11.1 Commutation automatique sur la vitesse de synchro-flash des reflets de lumière dans les yeux des personnes : Suivant le modèle d’appareil photo et le mode sélectionné, le recyclage du flash •...
  • Seite 46: Synchronisation Normale

    11.2 Synchronisation normale 11.4 Synchronisation en vitesse lente (SLOW) En synchronisation normale, le flash est déclenché au début du temps de pose La synchronisation en vitesse lente SLOW permet une meilleure mise en valeur (synchronisation sur le 1er rideau). La synchronisation normale est le mode de de l’arrière-plan en faible lumière.
  • Seite 47: Illuminateur Af Automatique

    Il est possible de mettre à jour le micrologiciel du flash via la prise USB et de l’adapter aux fonctions des futurs appareils photo dans le cadre des possibilités techniques. Vous trouverez de plus amples informations à ce sujet sur Internet, sur le site Metz à l’adresse www.metz.de.
  • Seite 48: Réinitialisation

    14.2 Réinitialisation 15 Remède en cas de mauvais fonctionnement Vous pouvez réinitialiser le flash aux réglages départ usine. S’il devait arriver que l’écran de contrôle ACL du flash affiche des valeurs aberrantes ou que le flash ne fonctionne pas comme il le devrait dans les différents modes, coupez le flash pendant environ 10 secondes au moyen de l’interrupteur principal .
  • Seite 49 Il est impossible de régler automatiquement la position du réflecteur à Pas de commutation automatique sur la vitesse de synchro flash la position actuelle du zoom de l’objectif. • L’appareil photo est doté d’un obturateur focal (la plupart des appareils photo •...
  • Seite 50: Caractéristiques Techniques

    16 Caractéristiques techniques Iluminación: Reflector principal a partir de 24 mm (pequeño formato 24 x 36) Nombre-guide max. pour ISO 100/21°, Zoom 105 mm: Reflector principal con difusor de gran angular a partir de 12 mm (pequeño pour mètres : 50 pour pieds : 165 formato 24 x 36) Modes flash:...
  • Seite 51: Accessoires En Option

    17 Accessoires en option Elimination des batteries Ne pas jeter les batteries dans les ordures ménagères. Nous déclinons toute responsabilité pour le mauvais fonctionnement et l’endommagement du flash dus à l’utilisation d’accessoires d’autres con- Veuillez rendre vos batteries usées là où elles sont éventuellement reprises dans structeurs ! votre pays.
  • Seite 52 1 Veiligheidsinstructies ........53 9.5 Extended-zoomfunctie (‘Ex’) .
  • Seite 53: Veiligheidsinstructies

    • Uit verbruikte batterijen kan loog lekken, wat beschadiging van de contact- punten tot gevolg heeft. Haal daarom verbruikte batterijen altijd uit het Hartelijk dank voor uw beslissing om een product van Metz aan te schaffen. apparaat. Wij verheugen ons, u als klant te mogen begroeten.
  • Seite 54: Dedicated Flitsfuncties

    2 Systeemflits-functies 3 Flitser gereedmaken De systeemflits-functies zijn speciaal op het camerasysteem afgestemde flitsfunc- 3.1 Het aanbrengen van de flitser ties. Afhankelijk van het type worden daarbij verschillende flitsfuncties onder- Flitser op de camera monteren steund. Camera en flitser vóór het aanbrengen of afnemen uitschakelen. •...
  • Seite 55: In- En Uitschakelen Van De Flitser

    Batterijen verwisselen 3.3 In- en uitschakelen van de flitser De flitser moet via zijn hoofdschakelaar ingescha- De accu’s / batterijen zijn leeg, c.q. verbruikt. Als de flitsvolgtijd (tijd tussen het keld worden. In de stand ‘ON’ is de flitser ingescha- ontsteken van een flits met vol vermogen, bijv.
  • Seite 56: Led-Aanduidingen Op De Flitser

    4 LED-aanduidingen op de flitser 5 Aanduidingen in het display De camera’s geven de waarden van ISO, brandpuntsafstand van het objectief 4.1 Aanduiding dat de flitser is opgeladen (mm) en diafragma door naar de flitser. Deze past zijn vereiste instellingen Zodra de flitser gereed is om te flitsen licht op de flit- automatisch daaraan aan.
  • Seite 57: Aanduiding Van De Reikwijdte Van Het Flitslicht

    5.2 Aanduiding van de reikwijdte van het flitslicht Aanduiding van de reikwijdte in de functie van met de hand in te stellen flitser M Bij het gebruik van camera's die de gegevens voor ISO, de brandpuntsafstand van het objectief en de diafragmawaarde naar de flitser overbrengen wordt in het In de functie van de met de hand in te stellen display een aanduiding van de reikwijdte van het flitslicht aangegeven.
  • Seite 58: Flitsfuncties ('Mode')

    7 Flitsfuncties (‘Mode’) TTL met flits vooraf en ADI-meting De TTL met flits vooraf en de ADI-meting zijn digitale TTL-flitsfuncties en nieuwe Afhankelijk van het type camera staan u ver- ontwikkelingen van de TTL-flitsfuncties van analoge camera's. Bij de opname schillende TTL-flitsfuncties ter beschikking, de wordt dan, voor de eigenlijke belichting, een nagenoeg onzichtbare meetflits functie van met de hand in te stellen flitser...
  • Seite 59: Manual Flitsfunctie

    TTL-flitsfunctie 7.2 Manual flitsfunctie In de manual flitsfunctie wordt door de flitser altijd het volle vermogen afge- Deze analoge TTL-flitsfunctie wordt door alle analoge camera's ondersteund. geven, als er geen deelvermogen is ingesteld. Het aanpassen aan de opname- Het is de normale TTL-flitsregeling (TTL-flitsfunctie zonder meetflits vooraf). situatie kan bijv.
  • Seite 60: Automatische Synchronisatie Bij Korte Belichtingstijden (Hss)

    7.3 Automatische synchronisatie bij korte belichtingstijden (HSS) 8 Met de hand in te stellen correctie op de flitsbelichting Verschillende camera’s ondersteunen de automatische synchronisatie bij korte De automatiek van de flitsbelichting is in de meeste camera’s gebaseerd op een belichtingstijden (zie de gebruiksaanwijzing van de camera). Met deze flitsfunc- reflectiegraad van 25% (gemiddelde reflectiegraad van flitsonderwerpen).
  • Seite 61: Bijzondere Functies ('Select')

    9 Bijzondere functies (‘Select’) De automatische aanpassing vindt niet plaats als de hoofdreflector gezwenkt is, als de groothoekdiffusor auitgetrokken of een Afhankelijk van het type camerastaan verschillende, bijzondere functies ter Mecabounce (accessoire) aangebracht is. beschikking. Voor het oproepen en instellen van de bijzondere functies moet er Naar wens kan de stand van de hoofdreflector met de hand worden versteld daarom eerst een uitwisseling van gegevens tussen camera en flitser plaats heb-...
  • Seite 62: Flitsen Met Bediening Op Afstand

    9.2 Flitsen met bediening op afstand Het deactiveren van de functie van Remote-slaafflitser: • Bij de op de camera aangebrachte flitser de Remote-functie ('Wireless', c.q. 9.2.1 Remote-slaafflitsfunctie ( 'WL') deactiveren, door hem naar de normale flitsfunctie om te schakelen. De flitser ondersteunt het draadloos Sony-Remote-Systeem in de functies ‚CTRL’ •...
  • Seite 63 Als de camera de brandpuntsafstand naar de flitser overbrengt en een Na ong. 5 seconden houdt de aanduiding op te knipperen en wordt de de manual instelling ertoe leidt, dat de hoofdreflector het onderwerp niet instelling automatisch opgeslagen. volledig kan uitlichten (bijv. bij een spotlight-effect), dan knippert, als waar- Het terugzetten vanuit de manual zoomfunctie naar de autozoomfunctie schuwing daarvoor, de aanduiding van de zoomstand van de hoofdreflector! vindt ook plaats als de flitser opnieuw via zijn hoofdschakelaar...
  • Seite 64 Instelling van het Remote-kanaal In de Remote-flitsfunctie is de synchronisatie bij korte belichtings- tijden HSS ( HSS, c.q. HSS) niet op de slaafflitser in te stellen. De Verschillende Remote-systemen in één ruimte kunnen elkaar onderling storen. Om dat tegen te gaan staan u vier onafhankelijke Remote-kanalen (CH 1, 2, 3 synchronisatie bij korte belichtingstijden wordt op de slaafflitser bij het of 4) ter beschikking.
  • Seite 65: Servo-Functie

    Het testen van de Remote-flitsfunctie Het instellen van de SERVO-functie • Neem de slaafflitser van de camera af en klap het in de camera ingebouwde • Stel op de camera een TTL functie in. flitsapparaat open. • Druk zo vaak op de toetsencombinatie •...
  • Seite 66: Automatische Uitschakeling

    9.4 Instellicht ( ‘ML’) 9.3 Automatische uitschakeling Bij het instellicht (ML = Modelling Light) gaat het om stroboscopisch flitslicht met De automatische uitschakeling van het apparaat kan zo worden ingesteld, dat een hoge frequentie. Bij een duur van ong. 5 seconden ontstaat de indruk van deze na 10 minuten of na 1 minuut in werking treedt, c.q.
  • Seite 67: Extended-Zoomfunctie ('Ex')

    9.5 Extended-zoomfunctie (‘Ex’) Het systeem bepaalt, dat de extended-zoomfunctie alleen brandpuntsaf- standen van 28 mm (kleinbeeldformaat) en langer ondersteunt. De Bij de extended-zoomfunctie wordt de zoomstand van de hoofdreflector camera moet van een objectief met CPU zijn voorzien en de gegevens stap lager ingesteld dan de brandpuntsafstand van het objectief.
  • Seite 68: Aanpassing Aan Het Opnameformaat (S.zoom)

    9.7 Aanpassing aan het opnameformaat (S Zoom) 10 Flitstechnieken Bij sommige typen digitale camera's kan de aanduiding voor de stand van de 10.1 Indirect flitsen hoofdreflector worden aangepast aan het formaat van de opnamechip (de Door indirect te flitsen wordt het onderwerp zachter verlicht en een anders afmetingen van het opname-element) met de functie zoommaat ('SZoom').
  • Seite 69: Indirect Flitsen Met Een Reflectiekaart

    10.2 Indirect flitsen met een reflectiekaart 11 Flitssynchronisatie Door indirect te flitsen met de ingebouwde reflectiekaart kunnen bij personen 11.1 Automatische sturing naar de flitssynchronisatietijd spitslichtjes in de ogen worden verkregen: Afhankelijk van de camera en de daarop ingestelde camerafunctie wordt, •...
  • Seite 70: Normale Synchronisatie

    11.2 Normale synchronisatie 11.4 Synchronisatie bij lange belichtingstijden (SLOW) Bij de normale synchronisatie wordt de flits aan het begin van de belichtingstijd Bij de synchronisatie bij lange belichtingstijden SLOW komt de beeldachter- ontstoken (= synchronisatie bij het opengaan van de sluiter). Deze normale syn- grond bij een lage omgevingshelderheid beter uit.
  • Seite 71: Automatische Af-Meetflits

    ‘Mode’ wordt gedrukt. De firmware van de flitser kan via de USB-interface geactualiseerd en in technisch opzicht aan de functies van toekomstige camera’s worden aangepast Firmware-update). Nadere informaties vindt u in het internet op de Metz-homepage: www.metz.de...
  • Seite 72: Reset

    14.2 Reset 15 Troubleshooting De flitser kan naar de fabrieksinstellingen zoals bij de aflevering terug worden Zou het ooit voorkomen, dat bijv. in het display van de flitser onzinnige gezet. aanduidingen verschijnen of dat de flitser niet functioneert zoals hij op grond van zijn instellingen zou behoren te doen, schakel de flitser dan gedurende ong.
  • Seite 73 De stand van de zoomreflector wordt niet automatisch aangepast aan de De automatische omschakeling naar de flitssynchronisatietijd actuele zoomstand van het objectief. vindt niet plaats. • De camera geeft geen gegevens door naar de flitser. • De camera werkt met een centraalsluiter (de meeste compactcamera’s). Er hoeft daarbij geen omschakeling naar een flitssynchronisatietijd plaats te •...
  • Seite 74: Technische Gegevens

    16 Technische gegevens Verlichtingshoek Hoofdreflector vanaf 24 mm (kleinbeeldformaat 24 x 36 mm) Richtgetallen bij ISO 100/21°, Zoom 105 mm: ... met groothoekdiffusor vanaf 12 mm (kleinbeeldformaat 24 x 36 mm) in het metersysteem: 50 in het feetsysteem: 165 Zwenkbereiken en klikstanden van de hoofdreflector Flitsfuncties: Naar boven -7°...
  • Seite 75: Bijzondere Toebehoren

    17 Bijzondere toebehoren Afvoeren van de batterijen Batterijen horen niet bij het huisvuil. Voor foute werking van en schades aan de mecablitz, veroorzaakt door het gebruik van accessoires van andere fabrikanten, zijn wij niet aan- S.v.p. de batterijen bij een daarvoor bestemd inzamelpunt afgeven. sprakelijk.
  • Seite 76 1 Safety instructions .........77 9.4 Modelling light („ML“) .
  • Seite 77: Safety Instructions

    • Do not expose the flash unit or battery charger to dripping or splashing water such as rain! Thank you for purchasing a Metz product. We are happy to welcome you as a • Protect the flash unit from excessive heat and humidity! Do not store the customer.
  • Seite 78: Dedicated Flash Functions

    2 System flash functions 3 Preparing the flash unit for use The system flash functions are functions that have been tailored specifically to 3.1 Mounting the flash unit suit the camera system concerned, whereby different flash functions are suppor- Mounting the flash unit on the camera ted depending on the given camera type.
  • Seite 79: Switching The Flash Unit On And Off

    Replacing batteries 3.3 Switching the flash unit on and off The flash unit can be turned on by flipping the main The batteries are flat or dead if the recycling time (elapsing from the triggering switch to the „ON“ position. of a full-power flash, e.g.
  • Seite 80: Led Displays On The Flash Unit

    4 LED displays on the flash unit 5 Information in Display The cameras transmit the settings for ISO, lens focal length (mm) and aperture 4.1 Flash readiness indication to the flash unit. It calculates the maximum flash range from the settings and When the flash capacitor is charged, the flash readi- their guide number.
  • Seite 81: Range Display

    5.2 Range display Range display in manual flash mode M The flash range is displayed when using cameras that transmit ISO, lens focal In manual flash mode M, the distance that length and aperture data. For this a data exchange must have occurred bet- must be maintained from the subject for ween the camera and flash unit, for example by tapping the shutter release.
  • Seite 82: Flash Modes („Mode")

    7 Flash modes („Mode“) Preflash TTL and ADI metering Preflash TTL and ADI metering are digital TTL flash operating modes and refined Depending on the type of camera different versions of the TTL flash operation found in analogue cameras. When taking a TTL flash modes, manual flash mode and shot, an almost imperceptible measurement preflash is triggered by the camera high-speed synchronisation HSS are availa-...
  • Seite 83: Manual Flash Mode

    TTL flash mode 7.2 Manual flash mode In the manual flash mode „ “ , the flash unit emits the full uncontrolled This analogue flash mode is supported by older analogue cameras. amount of light if no partial light output has been selected. The specific photo- It is the normal TTL flash mode (TTL flash mode without preflash).
  • Seite 84: Automatic High-Speed Synchronisation (Hss)

    7.3 Automatic high-speed synchronisation (HSS) 8 Manual flash exposure correction Various cameras support automatic high-speed synchronisation (see the The auto flash exposure mode of most cameras is adjusted to a reflection factor camera’s operating instructions). This flash mode makes it possible to use a flash of 25% (the average reflection factor of flash subjects).
  • Seite 85: Special Functions („Select")

    9 Special functions („Select“) If so desired, the position of the main reflector can be manually adjusted in order to achieve particular lighting effects (such as spot effect etc.). Depending on the camera model, various special functions are available. For Manual zoom mode this purpose, data exchange must first occur between the flash unit and camera The zoom position of the main reflector must be adjusted manually to the lens...
  • Seite 86 Tip: Wide-angle diffuser If you do not necessarily need the full guide number and maximum flash range With the wide angle diffuser , focal lengths of 12 mm or more can be of the flash unit, you can leave the zoom reflector at the position for the shortest illuminated (35 mm format).
  • Seite 87: Cordless Flash Mode

    9.2 Cordless flash mode Deactivating remote slave flash operation: • With the flash unit fitted to the camera, deactivate wireless remote flash ope- 9.2.1 Remote slave flash mode ( ration (“Wireless” or “WL”) or set normal flash operation. The flash unit supports the wireless Sony remote system in the “CTRL” and •...
  • Seite 88 Setting the remote channel In remote flash operating mode , high-speed synchronisation HSS ( HSS or HSS) cannot be set via the slave flash unit. To ensure that several remote systems used in the same room do not interfere with one another, four independent remote channels (CH 1, 2, 3 or 4) are avai- High-speed synchronisation is automatically activated via the slave flash lable.
  • Seite 89: Servo Mode

    Checking remote flash operation Adjustment procedure for SERVO flash mode • Remove the slave flash unit from the camera and fold open the camera’s inte- • Set the camera to TTL mode. grated flash unit. • Press the "Select" button repeatedly until •...
  • Seite 90: Auto Off For The Flash Unit

    9.4 Modelling light („ML“) 9.3 Auto OFF for the flash unit The modelling light is a high-frequency stroboscopic flash. It creates the impres- The auto OFF for the flash unit can be set so that it occurs after 10 minutes, 1 sion of a semi-permanent light for a duration of about 3 seconds.
  • Seite 91: Extended Zoom Mode („Ex")

    9.5 Extended Zoom Mode („Ex“) Depending on the system, the extended zoom mode is supported for lens focal lengths of 28 mm or more (35mm format). The camera must be In extended zoom mode the zoom position of the main reflector is reduced to equipped with a CPU lens and be able to transfer data on the lens focal one level below the focal length of the camera lens.
  • Seite 92: Shooting Format Adjustment (S.zoom)

    9.7 Shooting format adjustment (S Zoom) 10 Flash techniques Certain types of digital cameras allow the display for the position of the main 10.1 Bounce flash reflector to be adjusted to chip-format (dimensions of the recording module) Bounce flash illuminates the subject more softly and reduces dense shadows. It using the Zoom Size function („S Zoom“).
  • Seite 93: Bounce Flash With A Reflector Card

    10.2 Bounce flash with a reflector card 11 Flash synchronisation The use of bounce flash with the integrated reflector card can bring out high- 11.1 Automatic flash sync speed control lights in the eyes of human subjects: Depending on the camera model and camera mode, the shutter speed is swit- •...
  • Seite 94: Second Curtain Synchronisation (Rear)

    11.3 Second curtain synchronisation (REAR) 11.4 Slow synchronisation (SLOW) Some cameras offer the option of second-curtain synchronisation (REAR), in A slow exposure (SLOW) gives added prominence to the image background at which the flash unit is not triggered until the end of the exposure time. This is lower ambient light levels.
  • Seite 95: Automatic Af Measuring Beam

    12 Automatic AF measuring beam 13 Triggering control (auto-flash) The camera prevents the triggering of a flash if the ambient light level is suffi- The automatic AF measuring beam is activated in the flash unit by the camera cient for an exposure in the normal mode. The exposure is then completed with when the ambient lighting conditions become inadequate for automatic focu- the shutter speed given in the display or viewfinder of the camera.
  • Seite 96: Care And Maintenance

    (Firmware Update). is not the case, contact your local dealer. For more information, visit the Metz homepage at www.metz.de. Below is a list of some of the problems that may occur when the flash unit is 14.2 Reset...
  • Seite 97 The reflector position is not automatically adjusted to the current Automatic switching to the flash sync speed fails to occur. zoom position of the lens. • The camera has a between-the-lens shutter (as do most compact cameras), • The camera does not transfer data to the flash unit Switching to sync speed is therefore unnecessary.
  • Seite 98: Technical Data

    16 Technical data Light coverage: Main reflector from 24 mm (35 mm format) Max. guide numbers at ISO 100/21°, zoom 105 mm: Main reflector with wide-angle diffuser from 12 mm (35 mm format) In the metric system: 50 In the imperial system: 165 Swivelling ranges and locking positions of the reflector Flash modes: TTL (without preflash), preflash TTL, ADI metering, manual M, high-speed syn-...
  • Seite 99: Optional Accessories

    17 Optional accessories Disposal of batteries Do not dispose of spent batteries with domestic rubbish. We accept no liability for malfunctions of or damage to the flash unit caused by the use of accessories of other manufacturers. Please return spent batteries to collecting points should they exist in your country! •...
  • Seite 100 1 Per la vostra sicurezza ........101 9.5 Modo zoom esteso („Ex“) .
  • Seite 101: Per La Vostra Sicurezza

    Rimuovere subito le batterie esaurite dall’apparecchio! • Le batterie a secco non possono essere ricaricate. Grazie per aver scelto un prodotto Metz! Siamo lieti di potervi dare il benve- nuto tra i nostri Clienti. • Non esporre il flash o il caricabatteria a gocce o spruzzi d’acqua (ad es. pioggia)! Sicuramente non vedrete l’ora di poter provare il vostro flash.
  • Seite 102: Funzioni Flash Dedicate

    2 Funzioni flash 3 Preparazione del flash Si tratta di funzioni flash adatte in particolar modo alla camera. In base al tipo 3.1 Montaggio del flash di camera possono essere supportate diverse funzioni flash. Montaggio del flash sulla camera • Indicazione di stato di carica del flash nel mirino Spegnete la camera e il flash con l’interruttore principale! •...
  • Seite 103: Accensione E Spegnimento Del Flash

    Sostituzione delle batterie 3.3 Accensione e spegnimento del flash Il flash si accende tramite l’interruttore principale Le pile o le batterie sono vuote o esaurite quando il tempo di ricarica (tempo Quando l’interruttore è posizionato su „ON“il flash è che intercorre dall’emissione del lampo a piena potenza, ad es. con M, fino acceso.
  • Seite 104: Indicazioni Sul Flash

    4 Indicazioni sul flash 5 Indicazioni sul display Le fotocamere trasmettono al flash i valori relativi all’ISO, alla distanza focale 4.1 Indicazione flash pronto (mm) e all’apertura del diaframma. Questa adatta in modo automatico le Quando il condensatore flash è carico, sul flash si impostazioni necessarie.
  • Seite 105: Indicazione Campo Di Utilizzo

    5.2 Indicazione campo di utilizzo Indicazione del campo di utilizzo del flash nel modo flash manuale M In caso di camere che trasmettono i dati ISO e quelli relativi alla distanza focale Nel modo flash manuale M il display indica il dell’obiettivo e all’apertura del diaframma, sul display verrà...
  • Seite 106: Modalità Flash („Mode")

    7 Modalità flash („Mode“) Pre-lampo TTL e misurazione ADI Il pre-lampo TTL e la misurazione ADI sono modalità digitali di TTL e rappre- A seconda della camera sono disponibili sentano l’evoluzione del modo flash TTL di camere analogiche. Nella ripresa il diverse modalità...
  • Seite 107: Modo Flash Manuale

    Modo flash TTL 7.2 Modo flash manuale Con il modo flash manuale M il flash emette un lampo non dosato a potenza Tale modalità analogica è supportata da camere analogiche più vecchie. Si piena, a meno che non sia stata impostata la potenza ridotta. Per adeguarsi tratta del modo flash TTL normale (modo TTL senza pre-lampo).
  • Seite 108: Sincronizzazione Automatica Con Tempi Corti (Hss)

    7.3 Sincronizzazione automatica con tempi corti (HSS) 8 Correzione manuale d’esposizione flash La sincronizzazione automatica con tempi corti viene supportata da diverse Il sistema di esposizione automatica del flash della maggior parte delle fotoca- fotocamere vedi il manuale di istruzioni della fotocamera). Questa funzione mere è...
  • Seite 109: Funzioni Speciali („Select")

    9 Funzioni speciali („Select“) È possibile spostare a scelta la posizione della parabola manualmente per ottenere determinati effetti di esposizione (ad es. l’effetto spot, ecc..) In base al tipo di fotocamera di appartenenza della vostra fotocamera sono Modo Zoom manuale disponibili diverse funzioni speciali.
  • Seite 110 Suggerimenti: Diffusore grandangolare Se utilizzate un obiettivo zoom e non avete sempre necessariamente bisogno Grazie al diffusore grandangolare integrato è possibile illuminare distanze del numero guida completo e del campo d’utilizzo del flash, potete lasciare la focali a partire da 12 mm (formato piccolo). posizione della parabola principale sulla focale iniziale dell’obiettivo zoom.
  • Seite 111: Controllo A Distanza

    9.2 Controllo a distanza Disattivare il modo con controllo a distanza: • Disattivare il modo con controllo a distanza senza cavo sul flash montato 9.2.1 Modo con controllo a distanza ( (“Wireless” o “WL”), oppure passare al modo flash normale. Il flash supporta il sistema Sony con controllo a distanza senza cavo nelle •...
  • Seite 112 Impostazione del canale remote Nel modo controllo a distanza non è possibile impostare sul flash slave la sincronizzazione con tempi corti HSS ( HSS o HSS). Per fare in modo che più sistemi a distanza nello stesso ambiente non si distur- bino a vicenda sono disponibili 4 canali remote indipendenti (CH 1, 2, 3 o 4).
  • Seite 113: Modo Servo

    Verifica del modo con controllo a distanza. Procedura per l’impostazione del modo flash SERVO • Estrarre il flash slave dalla camera e riaprire il flash integrato della camera. • Impostate per la fotocamera il modo TTL. • Posizionare il flash slave nel modo desiderato per la foto successiva. •...
  • Seite 114: Spegnimento Automatico Dell'apparecchio

    9.4 Luce pilota („ML“) 9.3 Spegnimento automatico dell’apparecchio La luce pilota (ML = Modelling Light) è un flash stroboscopico ad alta frequen- Lo spegnimento automatico dell’apparecchio può essere impostato in modo tale za. La sua durata è di ca. 5 secondi, si ha pertanto l’impressione di una luce che lo spegnimento avvenga dopo 10 minuti o dopo 1 minuto oppure che quasi permanente.
  • Seite 115: Modo Zoom Esteso („Ex")

    9.5 Modo zoom esteso („Ex“) Per motivi di sistema il modo zoom esteso è supportato per focali d’obiettivo a partire da 28 mm (formato piccolo). La fotocamera deve Nel modo zoom esteso la posizione zoom della parabola principale viene essere dotata di obiettivo CPU e trasmettere i dati per la distanza focale ridotta di un grado rispetto alla distanza focale dell’obiettivo della fotocamera.
  • Seite 116: Adattamento Formato Foto (S.zoom)

    9.7 Adattamento formato foto (S Zoom) 10 Tecniche lampo In alcuni tipi di camere digitali l’indicazione relativa alla posizione della para- 10.1 Lampo riflesso bola principale può essere adattata con la funzione Zoom Size (“S Zoom”) al Utilizzando il lampo riflesso la luce sul soggetto risulta più morbida e le ombre formato chip (dimensioni dell’unità...
  • Seite 117: Lampo Riflesso Con Pannello Riflettente

    10.2 Lampo riflesso con pannello riflettente 11 Sincronizzazione del lampo Utilizzando il lampo riflesso con pannello riflettente integrato, possono 11.1 Sincronizzazione automatica del lampo crearsi picchi di luce negli occhi delle persone: A seconda del tipo di fotocamera e alle sue impostazioni, il tempo di posa vie- •...
  • Seite 118: Sincronizzazione Sulla Seconda Tendina (Rear)

    11.3 Sincronizzazione sulla seconda tendina (REAR) 11.4 Sincronizzazione con tempi più lunghi (SLOW) Con alcune fotocamere è possibile anche la sincronizzazione sulla seconda La sincronizzazione con tempi lunghi consente di mettere più in luce lo sfondo tendina (REAR). In questo caso il flash viene scattato alla fine del tempo di posa. in presenza di scarsa luminosità...
  • Seite 119: Controllo Automatico Dell'illuminatore Af

    12 Controllo automatico dell’illuminatore AF 13 Soppressione del lampo (auto-flash) La camera inibisce l’emissione del lampo se il livello d’illuminazione ambiente è Non appena la luce dell’ambiente non è più sufficiente per una messa a fuoco sufficiente per un’esposizione normale. L’esposizione viene quindi effettuata con automatica, la fotocamera attiva automaticamente nel flash il flash di misura- il tempo di posa indicato sul display o nel mirino della camera.
  • Seite 120: Cura E Manutenzione

    Di seguito sono riportati alcuni errori che potrebbero verificarsi utilizzando il ware). flash. Sotto ciascun punto sono riportate le possibili cause e soluzioni per Per maggiori informazioni consultate il sito internet Metz: www.metz.de risolvere il problema. Sul display non è indicato il campo d’utilizzo.
  • Seite 121 La posizione della parabola non viene adeguata automaticamente Non ha luogo la commutazione automatica sul tempo sincro. alla posizione zoom dell’obiettivo. • La fotocamera ha un otturatore centrale (la maggior parte delle fotocamere • La camera non trasmette alcun dato al flash compatte).
  • Seite 122: Dati Tecnici

    16 Dati tecnici Illuminazione: Parabola principale, a partire da 24 mm (formato piccolo 24x36) Numero guida massimo per ISO 100/21°, Zoom 105 mm: Parabola principale con diffusore grandangolare, a partire da 12 mm in metri: 50 in piedi: 165 (formato piccolo 24x36) Modalità...
  • Seite 123: Accessori Opzionali

    Le batterie non vanno gettate insieme ai rifiuti domestici. l cattivo funzionamento e i danni eventualmente provocati al flash dall’utilizzo di accessori non prodotti dalla Metz non sono coperti dalla Si prega di utilizzare un sistema di smaltimento adeguato, p. es. portandole al nostra garanzia! negozio dove le si è...
  • Seite 124 1 Indicaciones de seguridad ........125 9.5 Modo de zoom extendido („Ex“) ......139 9.6 Conmutación de metros a pies („m“...
  • Seite 125: Indicaciones De Seguridad

    • Las pilas secas no pueden recargarse. • No exponer el flash ni el cargador a gotas o salpicaduras de agua, por Le agradecemos que se haya decidido por un producto Metz y nos complace ejemplo, a la lluvia. saludarle como usuario de nuestra marca.
  • Seite 126: Funciones Dedicadas Del Flash

    2 Funciones de flash integradas en el sistema 3 Preparación del flash Las funciones de flash integradas en el sistema están diseñadas especialmente 3.1 Montaje del flash para trabajar con el sistema de cámara. Dependiendo del modelo de cámara, Colocar el flash en la cámara se ofrecen por tanto distintas funciones de flash.
  • Seite 127: Conexión Y Desconexión Del Flash

    Cuando no se vaya a utilizar el flash durante un periodo prolongado de 3.3 Conexión y desconexión del flash tiempo, retirar las pilas del aparato. El flash se conecta con el interruptor général Cambio de las pilas En la posición „ON“, el flash está conectado. Se considera que las pilas o baterías están usadas o vacías, cuando el intervalo Para desconectarlo, desplazar el interruptor général entre destellos (tiempo desde el disparo del flash a plena potencia, por ejemplo,...
  • Seite 128: Indicadores Led En El Flash

    En caso necesario, se puede activar la desconexión automática un minuto 5 Indicaciones en la pantalla después de la conexión o desactivar esta función (consultar 9.3). Las cámaras transmiten al flash los valores de ISO, distancia focal (mm) y aper- tura.
  • Seite 129: Indicación Del Alcance

    5.2 Indicación del alcance Indicación de alcance en modo manual M Cuando se utilicen cámaras que transmiten los datos relativos a ISO, distancia En el modo manual M de funcionamiento del focal de objetivo y apertura, aparecerá en la pantalla una indicación de alcan- flash se indicará...
  • Seite 130: Modos De Funcionamiento Del Flash („Mode")

    7 Modos de funcionamiento del flash („Mode“) TTL con predestello y medición ADI Los modos TTL con predestello y la medición ADI son modos digitales de funcio- Según el modelo de cámara, se encuentran namiento de flash y nuevos desarrollos del modo de flash TTL de las cámaras disponibles distintos modos de flash TTL, el analógicas.
  • Seite 131: Modo De Flash Manual

    Modo de flash TTL 7.2 Modo de flash manual Este modo analógico de flash es compatible con cámaras analógicas de cierta En el modo de flash manual M , el flash libera un destello a plena potencia si no antigüedad. Se trata del modo TTL normal (modo TTL sin predestello). se ajusta una potencia parcial.
  • Seite 132: Sincronización Rápida Automática (Hss)

    7.3 Sincronización rápida automática (HSS) 8 Corrección manual de la exposición del flash Algunas cámaras son compatibles con la sincronización rápida automática El sistema automático de flash de la mayoría de las cámaras está diseñado con (consultar manual de instrucciones de la cámara). Con este modo de flash se un grado de reflexión del 25% (grado de reflexión medio de los motivos del puede utilizar un flash incluso con velocidades de obturación más rápidas que flash).
  • Seite 133: Funciones Especiales („Select")

    9 Funciones especiales („Select“) montado un Mecabounce (accesorio). Si se desea, puede ajustarse manualmente la posición del reflector principal Según el modelo de cámara, están disponibles distintas funciones especiales. para conseguir determinados efectos de iluminación (p. ej. efecto „spot“, etc.). Para acceder a las funciones especiales y ajustarlas, es preciso, por tanto, que se haya efectuado previamente una transmisión de datos entre el flash y la Funcionamiento manual de zoom...
  • Seite 134 indicación de la posición de zoom del reflector principal parpadea como El restablecimiento desde funcionamiento manual de zoom a auto-zoom advertencia! se efectúa igualmente cuando se vuelve a conectar el flash mediante el interruptor principal Sugerencia: Difusor de gran angular Si no siempre son necesarios el máximo número guía y alcance del flash, se puede dejar la posición del reflector principal en la distancia focal inicial del Con el difusor de gran angular...
  • Seite 135: El Funcionamiento Remoto

    9.2 El funcionamiento Remoto En la pantalla del flash aparecerá la indicación Para desactivar el modo remoto esclavo de flash: 9.2.1 Modo remoto esclavo ( • Con el flash montado en la cámara, desactivar el modo remoto inalámbrico El flash soporta el sistema inalámbrico Sony Remote en los modos de funciona- ("Wireless"...
  • Seite 136 El ajuste se aplica de forma inmediata. Tras unos 5 seg. aprox., la indicación Para visualizar cuál es la potencia parcial ajustada, puede pulsarse deja de parpadear, y la configuración queda guardada automáticamente. repetidamente la combinación de teclas "Select". En caso preciso, la potencia parcial seleccionada podrá...
  • Seite 137: Modo Servo

    En el modo esclavo remoto, el reflector principal del flash es dirigido auto- Configuración para el modo SERVO de flash máticamente a la posición 24 mm a fin de poder iluminar un campo óptico lo • Ajustar en la cámara un modo de funcionamiento TTL. más amplio posible.
  • Seite 138: Desconexión Automática

    9.4 Luz de modelado („ML“) 9.3 Desconexión automática La luz de modelado (ML = Modelling Light) es una secuencia de destellos estro- La desconexión automática puede configurarse de manera que se produzca boscópicos a alta frecuencia. Con una duración de aprox. 5 segundos, produce tras 10 minutos o 1 minuto, o bien esté...
  • Seite 139: Modo De Zoom Extendido („Ex")

    9.5 Modo de zoom extendido („Ex“) Según el sistema, el modo de zoom extendido se puede utilizar con distancias focales de objetivo a partir de 28 mm (pequeño formato). La Con el modo Extended-Zoom se reduce un nivel la posición de zoom del reflec- cámara debe tener un objetivo CPU y transmitir al flash los datos de tor principal con respecto a la distancia focal del objetivo de la cámara.
  • Seite 140: Adaptación Del Formato De Toma (S.zoom)

    9.7 Adaptación del formato de toma (S Zoom) 10 Técnicas de destello En algunos modelos de cámaras digitales, la indicación relativa a la posición 10.1 Destellos indirectos del reflector principal puede ser adaptada al formato de chip (dimensiones del Mediante los destellos indirectos, el motivo recibe una iluminación más suave y bloque básico de toma de imagen) utilizando la función grado de zoom se atenúa la formación pronunciada de sombras.
  • Seite 141: Destellos Indirectos Con Tarjeta Reflectante

    10.2 Destellos indirectos con tarjeta reflectante 11 Sincronización del flash Mediante la iluminación indirecta con el flash y una tarjeta reflectante inte- 11.1 Control automático de la sincronización del flash grada se pueden conseguir luces angulares en los ojos de las personas: Según el modelo de cámara y el modo de funcionamiento de la misma, al apa- •...
  • Seite 142: Sincronización Normal

    11.2 Sincronización normal El modo REAR se ajusta en la cámara (consultar manual de instrucciones de la misma). En el flash no aparece ninguna indicación en referencia al modo En la sincronización normal, el flash se dispara al principio del tiempo de obtu- REAR.
  • Seite 143: Destello Automático De Medición Af

    "Mode" El firmware del flash se puede actualizar mediante el conector USB y ajustar- se en el marco técnico a las funciones de cámaras futuras (actualización del firmware). Consultar más información en la página web de Metz: www.metz.de...
  • Seite 144: Reset

    14.2 Reset 15 Ayuda en caso de problemas El flash se puede restablecer a sus valores de fábrica. Si alguna vez aparecen en la pantalla, por ejemplo, indicaciones sin sen- tido o el flash no funciona como es debido, debe apagarse durante aprox.
  • Seite 145 La posición del reflector no se ajusta automáticamente a la posición real de No tiene lugar una conmutación automática a la velocidad de zoom del objetivo. sincronización del flash • La cámara no está transmitiendo datos al flash. • La cámara tiene un obturador central (como la mayoría de las cámaras com- pactas).
  • Seite 146: Características Técnicas

    16 Características técnicas Iluminación: Reflector principal a partir de 24 mm (pequeño formato 24 x 36) Máximo número guía con ISO 100/21°, zoom 105 mm: Reflector principal con difusor de gran angular a partir de 12 mm (pequeño En metros: 50 En pies: 165 formato 24 x 36) Tipos de funcionamiento del flash:...
  • Seite 147: Accesorios Especiales

    Eliminación de las baterías No se deben tirar las baterías a la basura casera. Metz no asume ninguna garantía por funcionamientos erróneos o daños en el flash, causados al utilizar accesorios de otros fabricantes. Para la devolución de sus baterías gastadas, sírvase utilizar uno de los sistemas de reciclaje existente eventualmente en su país.
  • Seite 151: Tableau 1 - 4

    Zoom 6/9° 8/10° 10/11° 12/12° 16/13° 20/14° 25/15° 32/16° 40/17° 50/18° 64/19° 80/20° 100/21° 125/22° 160/23° 200/24° 250/25° 320/26° 400/27° 500/28° 650/29° 800/30° 1000/31° 66 1250/32° 74 Tabelle 1: Leitzahlen bei maximaler Lichtleistung (P 1/1) 1600/33° 82 Tableau 1: Nombres-guides pour la puissance maximale (P 1/1) 2000/34°...
  • Seite 152 Teillichtleistung Blitzleuchtzeit (s) Leitzahl Leitzahl Niveaux de puissance Durée d’éclair (s) Nombre-guide Nombre-guide Deelvermogensstappen Flitsdur (s) Richtgetal Richtgetal Partial light output Flash duration Guide number Guide number Livello di potenza Durata del lampo Numero guida Numero guida Potencia parcial Duración de destello Número-guía Número-guía (P=Flash Power) ISO 100/50 mm...
  • Seite 153: Batterietyp

    Zoom Batterietyp Blitzfolgezeiten Blitzanzahl Type de pile/accu Temps de recyclage Nombre d’éclairs Type voeding Flitsvolgtijden Aantal flitsen Battery type Recycling times Number of flashes Tabelle 4: Maximale Leitzahlen im HSS-Betrieb Tipo batterie Tempi di ricarica Numero ampi Tipo de pila Tiempo de secuencia de dest.
  • Seite 154 Bitte helfen Sie mit die Umwelt, in der wir leben, zu erhalten. This will help to protect the environment in which we all live. Votre produit Metz a été conçu et fabriqué avec des matériaux et Il vostro prodotto Metz è stato progettato e realizzato con materi- composants de haute qualité, susceptibles d'être recyclés et...
  • Seite 155 Hinweis: Opmerking: Avvertenza: In het kader de CE-markering werd Nell’ambito delle prove EMV per il Im Rahmen des CE-Zeichens wurde bei bij de EMV-test de correcte be-lich- segno CE è stata valutata la corretta der EMV-Prüfung die korrekte ting bepaald. esposizione.
  • Seite 156 MODE MODE – / + 1/1 . . . 1/128 Reflektorkarte Carte-réflecteur Reflecterende kaart 90° Reflector card 75° Pannello riflettente Tarjeta reflectante Handauslösetaste und Blitzbereitschaftsanzeige 60° Bouton du flash et témoin de disponibilité PRESS Ontspanknop voor handbediening en flitsaparaat-aanduiding Manual firing button and flash ready indicator 45°...
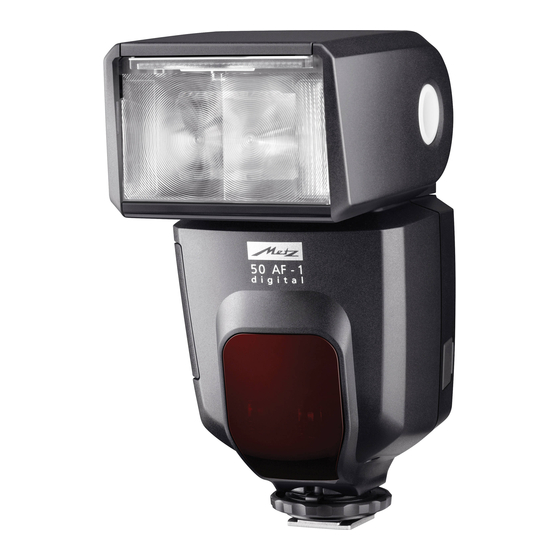
  • Seite 157 Hauptreflektor Réflecteur principale Hoofdreflector Main-reflector Parabola principale Reflector principal Batteriefachdeckel Couvercle du compartiment des piles Deksel batterijvak Battery compartment cover 50 AF-1 Coperchio del vano batteria Tapa del compartimento de pilas Firmwareupdate-Buchse Mise à jour du micrologiciel Rändelmutter AF-Messblitz Updaten van de firmware Écrou moleté...
  • Seite 158 Metz - Werke GmbH & Co KG • Postfach 1267 • D-90506 Zirndorf • info@metz.de • www.metz.de Consumer electronics Photoelectronics Plastics technology 709 47 0 Metz - always first class.

Inhaltsverzeichnis