Sharp PG-MB60X Service Anleitung
Vorschau ausblenden
Andere Handbücher für PG-MB60X:
- Anleitung (6 Seiten) ,
- Bedienungsanleitung (84 Seiten)
Inhaltsverzeichnis
Verfügbare Sprachen
Verfügbare Sprachen
In the interests of user-safety (Required by safety regulations in some countries) the set should be re-
stored to its original condition and only parts identical to those specified should be used.
Im lnteresse der Benutzersicherheit (erforderliche Sicherheitsregeln in einigen Ländern) muß das Gerät in seinen
Originalzustand gebracht werden. Außerdem dürfen für die spezifizierten Bauteile nur identische Teile verwendet
werden.
SHARP CORPORATION
SERVICE MANUAL
SERVICE-ANLEITUNG
MULTIMEDIA
MULTIMEDIA-PROJEKTOR
MODEL
PG-MB60X
MODELL
This document has been published to be used for
after sales service only.
The contents are subject to change without notice.
PG-MB60X
SY4B8PG-MB60X
-
PROJECTOR
Inhaltsverzeichnis

Verwandte Anleitungen für Sharp PG-MB60X


Inhaltszusammenfassung für Sharp PG-MB60X
-
Seite 45: Spezifikationen
Referenz-CD-ROM (UDSKAA053WJZZ), „QUICK GUIDE (Schnellanleitung)“-Aufkleber (TLABZA793WJZZ), Bedienungsanleitung (TINS-B526WJZZ) Bedingt durch fortlaufende technische Verbesserungen behält sich SHARP das Recht vor, das De- sign und die Spezifikationen ohne vorherige Ankündigung ändern zu können. Die angegebenen Leistungswerte stellen die Nennwerte einer in Serienherstellung produzierten Einheit dar. Geringe... -
Seite 46: Hinweise Für Das Wartungspersonal
PG-MB60X HINWEISE FÜR DAS WARTUNGSPERSONAL 1 2 3 4 5 6 7 8 9 0 1 2 3 4 5 6 7 8 9 0 1 2 3 4 5 6 7 8 9 0 1 2 1 2 3 4 5 6 7 8 9 0 1 2 3 4 5 6... -
Seite 47: Vorsichtsmaßregeln Für Bleifreien Lötzinn
PG-MB60X Vorsichtsmaßregeln für bleifreien Lötzinn 1 Verwendung von bleifreiem Lötzinn Bei den Platinen für dieses Modells wird bleifreies Lot verwendet. Das Symbol LF kennzeichnet bleifreies Lot und findet sich an den Platinen und in den Wartungshandbüchern. Der Buchstabe hinter LF bezieht sich auf die Art des bleifreien Lots. -
Seite 48: Bedienungsanleitung
PG-MB60X Bedienungsanleitung Projektor Draufsicht ON-Taste Netz-Anzeige Schaltet die Stromversorgung ein. 12·62 Lampen-Anzeige STANDBY-Taste Schaltet den Projektor in den 12·62 Temperaturwarn- Standby-Modus. Anzeige KEYSTONE-Taste Lautstärke-Tasten Für das Aktivieren des Für das Einstellen des Trapezverzerrungs- Lautsprecher-Tonpegels. Korrekturmodus. ZOOM/FOCUS-Taste ENTER-Taste Für das Einstellen der Für das Einstellen der... -
Seite 49: Informationen Über Die Anzeigen Des Projektors
PG-MB60X Informationen über die Anzeigen des Projektors Netz-Anzeige Rot leuchtend ... Normal (Standby) Grün leuchtend ... Normal (Eingeschaltet) Lampen-Anzeige Grün leuchtend ... Normal Grün blinkend ... Die Lampe wird aufgewärmt oder wird ausgeschaltet. Rot leuchtend ... Die Lampe wurde auf unnormale Weise ausgeschaltet oder muss ausgewechselt werden. -
Seite 50: Projektor (Rückansicht)
PG-MB60X Projektor (Rückansicht) Anschlüsse Beachten Sie die Erläuterungen unter „EINGANG/AUSGANG (INPUT/ OUTPUT)-Anschlüsse und Hauptausrüstung zum Anschließen“ auf Seite 21. INPUT 3-Anschluss AUDIO OUTPUT-Anschluss Anschluss für ein Audioausgangsanschluss des Videogerät. Gerätes, das am AUDIO INPUT- Anschluss angeschlossen ist. INPUT 4-Anschluss OUTPUT (INPUT 1, 2)-Anschluss Anschluss für ein Videogerät mit... -
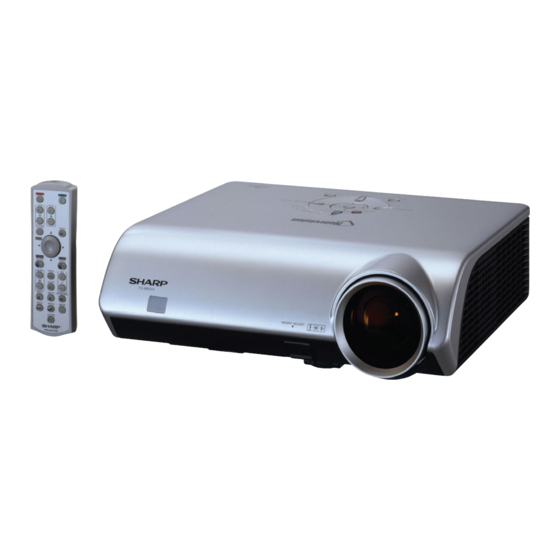
Seite 51: Fernbedienung
PG-MB60X Fernbedienung STANDBY-Taste ON-Taste Schaltet den Projektor in den Schaltet die Stromversorgung ein. Standby-Modus. ZOOM-Tasten FOCUS-Tasten Für das Einstellen der Für die Scharfeinstellung des projizierten Bildgröße. projizierten Bildes. KEYSTONE-Taste MENU-Taste Für das Aktivieren des Trapezverzerrungs - Für die Anzeige des Justierungs- und Korrekturmodus. -
Seite 52: Vorderansicht
PG-MB60X Vorderansicht Fernbedienungssensor Reichweite 30° 30° Der Projektor kann mittels der Fernbedienung innerhalb der in der Abbildung dargestellten Signalsender für Bereiche gesteuert werden. Fernbedienung 30° 23' (7 m) Hinweis Fernbedienung * Das Signal von der Fernbedienung kann für eine einfache Bedienung von der Bildwand reflektiert Rückansicht... -
Seite 53: Pin-Belegung
PG-MB60X Pin-Belegung... -
Seite 54: Abmessungen
PG-MB60X ABMESSUNGEN Einheiten: Zoll (mm) Ansicht von hinten Ansicht von Ansicht von Ansicht von der Seite oben der Seite (310) (55,05) Ansicht von vorne (99,95) (129,5) (129,5) (29,1) (30,9) Ansicht von unten (44,1) (30,9) -
Seite 55: Entfernen Der Hauptteile
PG-MB60X ENTFERNEN DER HAUPTTEILE 1. Ausbau der Lampentür und der Lampeneinheit 1-1. Die Lampentür-Befestigungsschraube herausdrehen, dann die Lampentür abnehmen. 1-2. Die 2 Lampeneinheits-Befestigungsschrauben herausdrehen, dann die Lampeneinheit abheben. Lampeneinheit Lampentür 2. Ausbau des oberen Gehäuses 2-1. Eine Postkarte oder ein dickes Papier zwischen dem Objektivtubus und dem unteren Gehäuse einführen. -
Seite 56: Ausbau Der Hauptleiterplatteneinheit Und Der Peripheren Einheiten
PG-MB60X 3. Anbringen der oberen Gehäuses (Für die geeigneten Schrauben ist auf den Abschnitt "2. Ausbau des oberen Gehäuses" Bezug zu nehmen.) 3-1. Die Postkarte oder ein dickes Papier über dem Objektivtubus einführen. 3-2. Die obere Gehäuse aufsetzen. Sicherstellen, daß die vier Haken gut einrasten. -
Seite 57: Ausbau Der Optischen Laufwerkeinheit
PG-MB60X 5. Ausbau der optischen Laufwerkeinheit 5-1. Die Befestigungsschraube für die optische Laufwerkeinheit am unteren Gehäuse herausdrehen. 5-2. Die 4 Befestigungsschrauben für die optische Laufwerkeinheit herausdrehen. 5-3. Den Kanal abnehmen. Kanal Optische Laufwerkeinheit 6. Ausbau der Vorschaltgerät/Netzteil-Einheit 6-1. Die 2 Befestigungsschrauben für die Vorschaltgerät/Netzteil-Einheit herausdrehen. -
Seite 58: Ausbau Der Peripheren Einheiten
PG-MB60X 7. Ausbau der Vorschaltgerät/Netzteil-Einheit 7-1. Die Befestigungsschraube für die hintere R/C-Leiterplatteneinheit herausdrehen. 7-2. Die 4 Befestigungsschrauben, 4 WH-Naben und den Randhalter für die Vorschaltgeräteeinheit entfernen. 7-3. Die 11 Befestigungsschrauben und 5 WH-Naben für das Netzteil entfernen. 7-4. Die 4 Befestigungsschrauben für das Gebläse herausdrehen. -
Seite 59: Befestigen Der Erdungsplatte
PG-MB60X 9. Befestigen der Erdungsplatte 9-1. Die vier Muttern anbringen. 9-2. Die Halterung A aufsetzen. 9-3. Die Erdungsplatte wie gezeigt ansetzen. 9-4. Die Halterung B aufsetzen. 9-5. Die vier M3-Schrauben festziehen. 9-6. Die vier M4-Schrauben festziehen. 9-7. Die sechs Stifte der Erdungsplatte schmelzen. -
Seite 60: Rückstellen Des Lampenbetriebszeit-Timers
Sie eine deutliche Verschlechterung der Bild- und Farbqualität feststellen. Die Lampenlebensdauer (Prozentsatz) kann auf der Bildschirmanzeige überprüft werden. ■ Erwerben Sie über einen Sharp-Projektor-Händler oder Kundendienstbetrieb in Ihrer Nähe eine Lampe des Typs AN-MB60LP. ■ Die Warnanzeigen (ON/STANDBY-Taste, Lampen-Anzeige und Temperatur-Warnanzeige) auf dem Projektor weisen auf Funktionsstörungen hin. - Seite 61 PG-MB60X...
-
Seite 62: Beschreibung Der Optik-Einheit
PG-MB60X BESCHREIBUNG DER OPTIK-EINHEIT Erläuterungen für das korrekte Setup der optischen Komponenten und Baugruppen (An- sicht von oben) (Schematische Darstellung) Reflektorspiegel Projektionslinse Farbrad Lampe Feldlinse UV-Filter Stab Beleuchtungslinsen 1 Beleuchtungslinsen 2 Objekt Funktion Lampe Lichtquelle. Gleichstrom-Hochdruck-Quecksilberlampe Farbrad Teilt durch den Farbfilter das Licht aus der Lichtquelle in R, G, B und W auf. - Seite 63 PG-MB60X Wenn nach dem Austausch von DMD eine Abschattung auf der Leinwand erscheint (siehe Abbildung 1), den Beleuchtungsbereich von DMD einstellen, indem man die Einstellschrauben für den optischen Motor dreht. 1. Die Befestigungsschraube für den Einstellhebel 1 lösen. Den Beleuchtungsbereich mit dem Einstellhebel 2 einstellen, dann die Befestigungsschraube für den Einstellhebel 1 anziehen.
-
Seite 64: Elektrische Einstellung
PG-MB60X ELEKTRISCHE EINSTELLUNG Nr. Einstellgegenstand Einstellbedingungen Einstellverfahren EEPROM wird 1. Die folgenden Einstellungen vornehmen: 1. D e n N e t z s c h a l t e r initialisiert S3563 drücken, um den Bearbeitungsmodus einschalten und das Gerät aufzurufen und "SS2"... - Seite 65 PG-MB60X Nr. Einstellgegenstand Einstellbedingungen Einstellverfahren Einstellung des 1. Die folgenden Gruppen und 1. Den Einstellwert überprüfen. DTV-Helligkeit /- Positionen wählen: Contrast : 4 Kontrastes Gruppe: DTV Bright : 40 Position: Contrast Bright DTV R- 1. Dem Eingang 1 das Weiß/ 1.
- Seite 66 PG-MB60X Nr. Einstellgegenstand Einstellbedingungen Einstellverfahren DVD- 1. Die folgenden Gruppen und 1. Den Festwert überprüfen. farbsättigungs- Positionen wählen: Color : 15 Einstellung Gruppe: DVD Position: Color Video-Helligkeit /- 1. Die folgenden Gruppen und 1. Den Festwert überprüfen. Kontrast- Positionen wählen:...
-
Seite 67: Einstellung Bei Der Montage
PG-MB60X Einstellung bei der Montage Nr. Einstellgegenstand Einstellbedingungen Einstellverfahren Einstellung der 1. Den Spannungsbereich der 1. Die Einstellung durchführen, wenn der DLP-Chip DLP-Spannung DLP-Beschreibung lesen. ausgewechselt oder die Chip-/ 2. Den Schalter gemäß dem Formatiererkombination verändert wurde. a b g e l e s e n e n B e r e i c h... -
Seite 68: Einstellbedingungen
PG-MB60X Nr. Einstellgegenstand Einstellbedingungen Einstellverfahren USB- 1. Mit einem USB-Kabel an 1. Überprüfen, dass der Fortschaltbetrieb (vor-/ Betriebsprüfung einen PC anschließen. rückwärts) auf dem PC-Bildschirm mit Hilfe der Fernbedienung möglich ist. Ausgabe- 1. Die folgenden Einstellung vornehmen: Einstellwerte Ziel Prozeß-... -
Seite 69: Prozeßmenü
PG-MB60X » Prozeßmenü Prozeßmenü 1 * Nur die schattierten Punkte in den folgenden Tabellen einstellen. Prozeßmenü 1. Schicht VERSION VIDEO TEMP OPTION LAMP LINE VIDEO1 Pedestal EXIT 2. Schicht Voreinstellung 2. Schicht Voreinstellung Contrast R-Bright2 G-Bright2 Tint B-Bright2 Color R-Contrast2... - Seite 70 PG-MB60X Adjustment mode process menu 2 2. Schicht Voreinstellung VERSION Build Boot Code Config RomCode EXIT SS3 EU SS4 US SS5 JPN SS6 CHIN EXIT TEMP Temp1 Parameter of sensor1 Temp2 Parameter of sensor2 EXIT OPTION Pixel Gamma Standard RGB...
-
Seite 71: Fehlersuchtabelle
PG-MB60X FEHLERSUCHTABELLE Überprüfung der grund-legenden Funktionen Ist die POWER LED eingeschaltet, oder NEIN Mit dem Abschnitt "Überprüfung des blinkt sie rot oder grün? Stromversorgungssystems" fortfahren. Kann das Gerät mit der Einschalttaste oder Mit dem Abschnitt "Überprüfung der NEIN über die Fernbedienungseinheit... - Seite 72 PG-MB60X Überprüfung des Stromversorgungs- systems NEIN Wird 13 V dem Stift (9) bzw. (11) von Mit dem Abschnitt "Überprüfung des P1707 zugeführt? Netzteils" fortfahren. NEIN Wird 6 V dem Stift (1) bzw. (3) von P1707 Mit dem Abschnitt "Überprüfung des Netzteils"...
- Seite 73 PG-MB60X Überprüfen des Netzteils NEIN Sind die Anschlüsse des Netzteils fest Den Anschluss fest einsetzen. eingesetzt? NEIN Ist die Lampentür vollständig Fix the lamp door with screws. geschlossen? Den Bimetall-Schalter ersetzen oder die NEIN Ist das Bimetall durchgebrannt? rote Taste zum Wiederherstellen drücken.
- Seite 74 PG-MB60X Überprüfung der peripheren Schaltkreise des Mikroprozessors NEIN Liegen ca. 3,3 V und ca. 2,5 V an den Mit dem Abschnitt "Überprüfung des beiden Enden von C2030 bzw. C2029 an? Stromversorgungssystems" fortfahren. NEIN Werden die Oszillationen von 133 Hz und Die peripheren Schaltkreise von X2001 64 Hz aus dem Stift (3) von X2001 bzw.
- Seite 75 PG-MB60X Überprüfung der Lampenfunktion NEIN Laufen die Kühlgebläse? Den Stromversorgungskreis oder Gebläse- Schaltkreis am Hauptschaltkreis überprüfen. FEHLERHAFT IC9102, 9003 und die Mit dem Abschnitt NEIN Wird das Betriebsgeräusch peripheren Schaltkreise "Überprüfung der des Farbrades gehört? des Motortreiber-IC peripheren Schaltkreise IC9101 überprüfen.
- Seite 76 PG-MB60X Überprüfung der peripheren Was ist die Störung des Bildschirms? Schaltkreise des Formatters Regenbogenfarbener Dicke und weiße Bildschirm. Falsche RGB- Schwarzer Bildschirm. Ander. vertikale Linien Farbeinstellung. (blinken). Auch nach der Einstellung Sind die Kontakt- Ist die Buchse von Ist die Buchse von von "Prozess-Menü",...
- Seite 77 PG-MB60X Überprüfung des RGB- Eingangs Die RGB-Signale an INPUT1 oder INPUT2 senden. Mit den Tasten auf dem Hauptgerät oder der Fernbedienung INPUT1 oder INPUT2 wählen. NEIN Mit dem Abschnitt Wird ein Synchronsignal an "Überprüfung des den Stift (30) bzw. (31) von Synchronsignals"...
- Seite 78 PG-MB60X Überprüfung der Komponente Die Komponentensignale an INPUT1 oder INPUT2 senden. Mit den Tasten auf dem Hauptgerät oder der Fernbedienung INPUT1 oder INPUT2 wählen. Wird ein Bildsignal mit einem Synchronsignal an den Stift (46) von IC3002 gesendet? NEIN Wird ein Bildsignal an den...
- Seite 79 PG-MB60X Überprüfung des VIDEO- Eingangs. Die Composite-VIDEO- Signale an INPUT3 senden. Mit den Tasten auf dem Hauptgerät oder der Fernbedienung INPUT3 wählen. Die VIDEO-IN-Signalleitung von Wird ein Bildsignal an den NEIN Q3104 und die Lötung von Stift (1) von IC3103 gesendet? J3101 überprüfen.
- Seite 80 PG-MB60X Überprüfung des Synchronsignal NEIN Liegt ein HV-Synchronsignal am Die peripheren Schaltkreise von C4008 überprüfen. Stift (1) bzw. (6) von IC4010? NEIN IC4008 und IC4010 sind Liegt ein HV-Synchronsignal am defekt. Stift (22) bzw. (23) von IC3002? NEIN Wird ein Takt von 27 MHz dem...
- Seite 81 PG-MB60X Überprüfung von RS-232C Eine Kommunikation ist nicht möglich, selbst wenn der Steuer-PC und der Projektor mit einem RS-232C-Kabel verbunden werden. NEIN st das Anschlusskabel richtig Das Anschlusskabel ersetzen. angeschlossen? (Crosskabel) NEIN Empfängt der Stift (8) von IC8002 ein R8002 und die peripheren Schaltkreise von SC8001 Signal? überprüfen.
-
Seite 82: Chassis Layout
PG-MB60X CHASSIS LAYOUT / CHASSIS-ANORDNUNG... - Seite 83 PG-MB60X...
-
Seite 84: Block Diagram
PG-MB60X BLOCK DIAGRAM / BLOCKSCHALTBILD PG-MB60X BLOCK DIAGRAM DCLK MAIN_UNIT COMY,COMC IC3105 TC90A69F X2001 IC3103 (B+5VA) RST_SYS VIDEO (133MHz) VIDEO VHSYNC, VVSYNC IC2003 TB1274AF ACTDA (B+5VA) X2002 POWERG IC3002 X3001 (BU+3.3V) SYNC. SEPA RESET Y,CB,CR 27MHz SYNCG (64MHz) S-VIDEO (BU+2.5V) - Seite 85 PG-MB60X DCLK FORMATTER UNIT IC9001 IC9006 RDRAM TCDCR83D K4R271TB X9001 ACTDATA (60MHz) IC9004 POWERGOOD FLASH IC9003 X9002 RESETZ (BU+3.3V) DDP1000 (100MHz) (B+3.3VD) IC9301 (B+2.5VD) DAD1000 (B+12VDMD) (B+3.3VD) LAMP_POW IC1701 IC9101 Motor Driver (B+12VDMD) LAMP LIT (B+5VA) TION Photo Sensor IC3560...
-
Seite 86: Overall Wiring Diagram
PG-MB60X OVERALL WIRING DIAGRAM / GESAMTSCHALTPLAN OVERALL WIRING DIAGRAM COLOR WHEEL CFILWA083WJ01 PHOTO SENSOR UNIT ZOOM/FOCUS MOTOR RUNTKA091WJZZ RMOTBA005WJZZ LAMP FAN SPEAKER NFANSA017WJZZ THERMAL RSP-ZA085WJQZ P1101 QCNW-D0 ZOOM MOTOR FOCUS QCNW-C720WJQZ MOTOR SC2502 P3503 P3552 P1704 P1705 P1708 MAIN UNIT... - Seite 87 PG-MB60X COLOR WHEEL CFILWA083WJ01 THERMAL FUSE QCNW-D074WJZZ FRONT R/C UNIT SC2502 FORMATTER UNIT DUNTKC615WEF1 DUNTKC613WEF1 P1501 P1708 SC9001 SC2501 P3501 THERMAL SENSOR RH-HXA005WJZZ P1702 EXHAUST FAN2 NFANRA034WJZZ P1701 EXHAUST FAN1 NFANRA035WJZZ P1703 POWER FAN P3502 QCNW-C667WJPZ LAMP CLMPFA018WEF0 BI-METAL ASSY...
-
Seite 88: Waveforms
PG-MB60X WAVEFORMS / WELLENFORMEN 1 IC3101 (28) pin 2 IC3101 (29) pin 3 IC3101 (31) pin 4 IC3101 (35) pin (VS-OUT) (HS-OUT) (SCP-IN) (R-OUT) H : 4m sec/div H : 20µ sec/div H : 20µ sec/div H : 20µ sec/div... -
Seite 89: Printed Wiring Board Assemblies
PG-MB60X PRINTED WIRING BOARD ASSEMBLIES LEITERPLATTENEINHEITEN FRONT R/C Unit (Side A) FRONT R/C Unit (Side B) VORDERE R/C-Einheit (Seite-A) VORDERE R/C-Einheit (Seite-B) REAR R/C Unit (Side A) REAR R/C Unit (Side B) Hintere R/C-Einheit (Seite-A) Hintere R/C-Einheit (Seite-B) - Seite 90 PG-MB60X MAIN Unit (Side-A) HAUPT-einheit (Seite-A)
- Seite 91 PG-MB60X...
- Seite 92 PG-MB60X MAIN Unit (Side-B) HAUPT-einheit (Seite-B)
- Seite 93 PG-MB60X...
- Seite 94 PG-MB60X FORMATTER Unit (Side-A) FORMATTER -einheit (Seite-A)
- Seite 95 PG-MB60X FORMATTER Unit (Side-B) FORMATTER -einheit (Seite-B)
-
Seite 96: Netzteeinheit (Seite-A)
PG-MB60X POWER Unit (Side A) POWER Unit (Side B) NETZTEeinheit (Seite-A) NETZTEeinheit (Seite-B) -
Seite 97: Parts List
3. ERSATZTEIL NR. 4. BESCHREIBUNG For location of SHARP Parts Distributor, 5. KODE 6. QUANTITÄT Please call Toll-Free; 1-800-BE-SHARP in CANADA: Contact SHARP Electronics of Canada Limited Phone (416) 890-2100. ★ MARK: SPARE PARTS-DELIVERY SECTION ★ MARKIERUNG : ERSATZTEILE-LIEFERUNG ★ ★... - Seite 111 PG-MB60X CABINET AND MECHANICAL PARTS 2-10 2-17 2-13 2-10 2-17 2-1-2 2-1-4 24 15 2-1-1 2-12 2-2-5 2-1-3 2-16 2-1-5 2-1-6 2-17 2-11 2-14 2-14 2-11 2-15 2-15 2-2-4 2-2-1 2-1-6 2-2-3 2-2-2...
- Seite 116 SCHEMATIC DIAGRAM SCHEMATISCHER SCHALTPLAN MODEL PG-MB60X MODELL CONTENTS Page DESCRIPTION OF SCHEMATIC DIAGRAM …………………………………………………… D2 MAIN UNIT ………………………………………………………………………………… D3 ∼ D20 FORMATTER UNIT …………………………………………………………………………D21 ∼ D30 POWER UNIT ………………………………………………………………………………D31 ∼ D32 R/C FRONT UNIT ………………………………………………………………………………… D33 R/C REAR UNIT …………………………………………………………………………………… D33...
-
Seite 117: Schematic Diagram
DESCRIPTION OF BESCHREIBUNG DES SCHEMATIC DIAGRAM SCHEMATISCHEN SCHALTPLANS VOLTAGE MEASUREMENT CONDITION: SPANNUNGSMESSUNGEN: 1. Voltages at test points are measured at the 1. Spannungen an den Prüfpunkten werden bei einer supply voltage of AC 220V. Signals are fed by a color Netzspannung von 220V gemessen, Signale werden für die Wartung mit einem Farbbalken-Signal generator bar signal generator for servicing purpose and the... - Seite 118 Ë MAIN UNIT / HAUPTEINHEIT-1/9...
- Seite 120 Ë MAIN UNIT / HAUPTEINHEIT-2/9...
- Seite 122 Ë MAIN UNIT / HAUPTEINHEIT-3/9...
- Seite 124 Ë MAIN UNIT / HAUPTEINHEIT-4/9...
- Seite 126 Ë MAIN UNIT / HAUPTEINHEIT-5/9...
- Seite 128 Ë MAIN UNIT / HAUPTEINHEIT-6/9...
- Seite 130 Ë MAIN UNIT / HAUPTEINHEIT-7/9...
- Seite 132 Ë MAIN UNIT / HAUPTEINHEIT-8/9...
- Seite 134 Ë MAIN UNIT / HAUPTEINHEIT-9/9...
- Seite 136 Ë FORMATTER UNIT / FORMATTER-EINHEIT-1/5...
- Seite 138 Ë FORMATTER UNIT / FORMATTER-EINHEIT-2/5...
- Seite 140 Ë FORMATTER UNIT / FORMATTER-EINHEIT-3/5...
- Seite 142 Ë FORMATTER UNIT / FORMATTER-EINHEIT-4/5...
- Seite 144 Ë FORMATTER UNIT / FORMATTER-EINHEIT-5/5...
- Seite 146 Ë POWER UNIT / NETZTEILEINHEIT...
- Seite 148 Ë R/C FRONT UNIT Ë R/C REAR UNIT...