Hitachi CENTRAL STATION PSC-A32MN Installations- Und Betriebshandbuch
Vorschau ausblenden
Andere Handbücher für CENTRAL STATION PSC-A32MN:
- Bedienungsanleitung (36 Seiten)
Inhaltsverzeichnis
Werbung
Verfügbare Sprachen
Verfügbare Sprachen
Quicklinks
INSTALLATION AND OPERATION MANUAL
MANUAL DE INSTALACIÓN Y FUNCIONAMIENTO
INSTALLATIONS- UND BETRIEBSHANDBUCH
MANUEL D'INSTALLATION ET DE FONCTIONNEMENT
MANUALE D'INSTALLAZIONE E D'USO
CENTRAL STATION
PSC-A32MN
MANUAL DE INSTALAÇÃO E DE FUNCIONAMENTO
INSTALLATIONS- OG BETJENINGSVEJLEDNING
INSTALLATIE- EN BEDIENINGSHANDLEIDING
INSTALLATION- OCH DRIFTHANDBOK
ΕΓΧΕΙΡΙΔΙΟ ΕΓΚΑΤΑΣΤΑΣΗΣ ΚΑΙ ΛΕΙΤΟΥΡΓΙΑΣ
Werbung
Inhaltsverzeichnis
Fehlerbehebung

Verwandte Anleitungen für Hitachi CENTRAL STATION PSC-A32MN


Inhaltszusammenfassung für Hitachi CENTRAL STATION PSC-A32MN
- Seite 1 MANUAL DE INSTALAÇÃO E DE FUNCIONAMENTO INSTALLATION AND OPERATION MANUAL INSTALLATIONS- OG BETJENINGSVEJLEDNING MANUAL DE INSTALACIÓN Y FUNCIONAMIENTO INSTALLATIE- EN BEDIENINGSHANDLEIDING INSTALLATIONS- UND BETRIEBSHANDBUCH INSTALLATION- OCH DRIFTHANDBOK MANUEL D’INSTALLATION ET DE FONCTIONNEMENT MANUALE D’INSTALLAZIONE E D’USO ΕΓΧΕΙΡΙΔΙΟ ΕΓΚΑΤΑΣΤΑΣΗΣ ΚΑΙ ΛΕΙΤΟΥΡΓΙΑΣ CENTRAL STATION PSC-A32MN...
- Seite 3 Specifikationerna i den här handboken kan ändras utan föregående meddelande för att HITACHI ska kunna leverera de senaste innovationerna till kunderna. Vi på Hitachi gör allt vi kan för att se till att alla specifikationer stämmer, men vi har ingen kontroll över tryckfel och kan därför inte hållas ansvariga för den typen av fel.
- Seite 4 C A U T I O N This product shall not be mixed with general house waste at the end of its life and it shall be retired according to the appropriated local or national regulations in a environmentally correct way. Due to the refrigerant, oil and other components contained in Air Conditioner, its dismantling must be done by a professional installer according to the applicable regulations.
- Seite 5 DANGER – Hazards or unsafe practices which COULD result in severe personal injuries or death. PELIGRO – Riesgos o prácticas poco seguras que PODRÍAN producir lesiones personales e incluso la muerte. GEFAHR – Gefährliche oder unsichere Anwendung, die zu schweren Körperverletzungen oder zum Tod führen kann. DANGER –...
- Seite 6 Central Station Block/Group Register Table Tabla de registro de bloque/grupo de la estación central / Tabelle Block-/Gruppenregistrierung der Zentraleinheit / Tableau d’enregistrement de les zones/ groupes de la télécommande centralisée / Tabella di registrazione zona/gruppo della postazione centrale / Tabela de registo de blocos/grupos da estação central / Skema for centralenhedsblok/grupperegister / Registratietabel blokken/groepen van centrale bedieningspaneel / Central styrenhet Block/grupp registreringstabell / Κλείδωμα...
- Seite 7 Central Station Block/Group Register Table (2) Tabla de registro de bloque/grupo de la estación central (2) / Tabelle (2) Block-/Gruppenregistrierung der Zentraleinheit / Tableau d’enregistrement de les zones/groupes de la télécommande centralisée (2) / Tabella di registrazione zona/gruppo della postazione centrale (2) / Tabela de registo de blocos/ grupos da estação central (2) / Skema for centralenhedsblok/grupperegister (2) / Registratietabel blokken/groepen van centrale bedieningspaneel (2) / Central styrenhet Block/grupp registreringstabell (2) / Κλείδωμα...
-
Seite 8: Inhaltsverzeichnis
INDEX ÍNDICE 1 SAFETY SUMMARY 1 RESUMEN DE SEGURIDAD 2 MAIN FEATURES 2 CARACTERÍSTICAS PRINCIPALES 3 INSTALLATION 3 INSTALACIÓN 4 ELECTRICAL WIRING 4 CABLEADO ELÉCTRICO 5 OPERATION 5 FUNCIONAMIENTO 6 TROUBLESHOOTING 6 RESOLUCIÓN DE PROBLEMAS 7 MAINTENANCE 7 MANTENIMIENTO INHALTSVERZEICHNIS INDEX 1 SICHERHEITSÜBERSICHT 1 CONSIGNES DE SÉCURITÉ... -
Seite 9: Safety Summary
D A N G E R • DO NOT pour water into the central station (hereafter called “controller”). This product is equipped with electrical parts. If water is poured, it will cause a serious electrical shock. • Prior to the installation work, ensure that foundation is flat, level and sufficiently strong and then fix the unit securely. If the foundation is not strong enough, it may lead to injuries caused by falling of the product, electrical shock or fire. • DO NOT install the unit in a place where generation, flow, accumulation or leakage of flammable gas is detected. • DO NOT perform installation work and electrical wiring connection by yourself. Contact your distributor or dealer of HITACHI and ask them for installation work and electrical wiring by a trained service person. • Perform electrical work according to the Installation Manual and all relevant regulation and standards. If the instructions are not followed, electrical shock and fire may occur due to insufficient capacity and inadequate performance. • Use the specified cables for connection between indoor unit and central station. Selecting incorrect cables may lead to fire or electrical shock. • Turn OFF the main power supply entirely before opening or closing the service cover of the indoor unit, since the power terminal or the power switch part may otherwise be still powered on and cause an electrical shock. Turn OFF the main power supply also when... -
Seite 10: Main Features
main features 2 MAIN FEATURES This central station (PSC-A32MN) is connected to H-LINK and used for the central control and monitoring of air conditioners The following functions are available for all the indoor units which are connected to the central stations. 1 Run/Stop, Operation Mode Change, Fan Speed Control, Swing Louver Direction Control, Temperature Setting and Permitting/ Prohibiting Operation by Remote Control Switch 2 Monitoring of Operating Conditions for Block/Groups... -
Seite 11: Installation
Cable SPEC: 0.75 to 1.25 mm H-LINK Cable (For control) Recommended cable: JKEPV-S, JKEV-S, CVV-S, CVV, 600V VCT * The recommended cables are the model name of Hitachi Cable, Ltd. 3.2 COMPONENTS LIST Unpack the unit and check that: •... -
Seite 12: Description Of The Parts
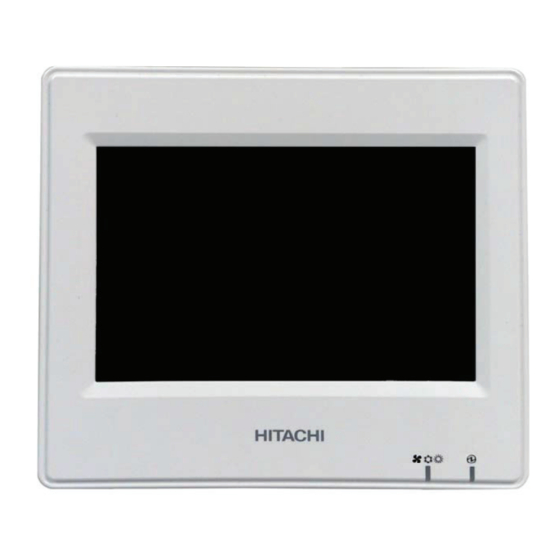
Installation 3.3 DESCRIPTION OF THE PARTS Colour LCD with touchscreen For operation and monitoring of the units through the touchscreen display. It is operated by using the touch pen (accessory). The touchscreen display will be automatically turned off when the touchscreen is not operated for a given Front side length of time. -
Seite 13: General Data
Installation 3.4 GENERAL DATA Model PSC-A32MN Outer Dimension 140 × 120 × 22 + 52.7 (mm) <W x H x D + (Built-in Part)> Net Weight 0.5 kg (approx.) Installation Location Indoor Wall built-in with Installation Method JIS switch box for 2 switches (with cover) (JIS C 8340) Connected Indoor Units (Quantity) 160 (Max.) Clock Accuracy... -
Seite 14: Installation Space
Installation 3.6 INSTALLATION SPACE Keep the installation space for the central station as shown below. (Unit: mm) 52.7 Do not place anything in the shaded area “ ”. When installing two or more central stations side by side, keep the following separation between each of them. * Vertical space: 50mm * Horizontal space:... - Seite 15 Installation 3 Connect the wiring to the terminal board of the central station. Terminal Board Connection procedure M3 screw-on terminal For power supply Round terminal connection For H-LINK transmission Tightening torque 0.5N·m 3-pin connector CN1 ~ 3 For external input/output Insert connector cords (accessory) H-LINK (Non-pole) AC100 to 240V...
-
Seite 16: Electrical Wiring
Length of wiring Cable specification Recommended cable model Power supply cable AC100 ~ 240V 1.25 to 2 mm 600V CV, CCV, CEV (Hitachi Cable) Earth wiring H-LINK (Control wire) DC5V ≤1000 m 0.75 to 1.25 mm JKPEV-S, JKEV-S, CVV-S, CVV,... - Seite 17 Electrical wiring D A N G E R • Turn OFF the main power switch for the indoor units, outdoor units, and central stations before the electrical wiring work is performed. If not, it may cause a fire, electrical shock or device breaking down. • Do not use cables that are lighter than the normal flexible coated polychloroprene cable (code H05RN-F). Switch setting procedure The list for switch settings of central stations is shown in the following table. 1 Apply switch settings as appropriate. Switch Factory Switch Usage Remarks number...
- Seite 18 Electrical wiring DSW1 Setting Name Model DSW1 DSW2 DSW3 DSW4 Central Station EZ PSC-A64GT Central Station mini PSC-A32MN Central Station PSC-A64S Centralised ON/OFF Controller PSC-A16RS Combination of HC-A(8/64)MB Not compatible Other central PSC- A32MN with other controllers HC-A16KNX Not compatible central controllers BMS Gateways KNX001...
-
Seite 19: Operation
Operation 5 OPERATION 5.1 TEST RUN The outline of the test run procedure is indicated as shown in the figure. The items marked with the thick frame ( ) are required items. The rest of items, which are not specifically required for the test run procedure but they are optional, are explained in its specific section. - Seite 20 Operation List of Items Item Function Language Setting This function is used for language selection. Date and Time Settings This function is used for adjusting the date and time. The function is used for the registration of groups or blocks of the indoor units connected to the same H-LINK, Group Register and which have been identified by the central station.
- Seite 21 Operation Item Function This function is used for setting of “Demand Function” to the terminal of “Input 1”. Operation state changes by demand signals such as operation stop, or thermo-OFF. “Demand Function” is available under the following conditions. Demand Function Setting 1.
-
Seite 22: Language Setting
Operation 5.1.1 Power ON Turn on the power supply of the air conditioners. To protect the compressor, the power supply should be turned on 12 hours before starting operation. Do not turn the power supply off during air conditioning seasons. Perform a test run of each air conditioner first to ensure normal operation. -
Seite 23: Adjusting Date/Time
Operation 5.1.4 Adjusting Date/Time After setting the temperature unit, the screen for adjusting date and time screen is displayed on the touchscreen as shown in the figure. Tap “Set” on the touchscreen display, and set the date and time following the indicated procedure. Refer to the “5.3.5 Date and time settings”... - Seite 24 Operation 5.1.6 Setting of control patterns After adjusting date and time settings, the control pattern screen is displayed. Tap “Set” on the touchscreen to proceed to the setting of control patterns. When tapping on a control pattern button, the selected button is highlighted with an orange outline. The procedure for the setting of control patterns is explained below.
- Seite 25 Operation 5.1.7 Group register Register the connected indoor units to groups and blocks of the central station. 5.1.7.1 Definitions • Group: The minimum operation unit controlled by one central station. 1 remote control group is considered as 1 group, and the same setting is applied to the entire group.
- Seite 26 Operation 5.1.7.3 Sub Unit Registration • A maximum of 15 sub units can be registered in the same remote group with the main unit (when applying the control pattern of 2 blocks with 16 groups each). • Indoor units without a remote control switch cannot be registered as sub units. •...
- Seite 27 Operation 3 Select the group for registration of the main unit. • Tap buttons “<” and “>” on the upper left of the touchscreen to switch the block display. • The numbers shown inside the buttons indicate block number and group number. •...
- Seite 28 Operation Tap buttons “<” and “>” on the upper left of the touchscreen to continue with the setting of another Block, or tap the “Setting complet.” button to exit. 6 Tap “Setting Complet.” to register the group and return to Group Register menu screen. 7 Tap “Monitor screen”...
- Seite 29 Operation 2 Select “Sub Unit Register” on the screen of “Group Register”. 3 Select the group for registration of the sub unit. • Tap buttons “<” and “>” on the upper left of the touchscreen to switch the block display. •...
- Seite 30 Operation Tap buttons “<” and “>” on the upper left of the touchscreen to continue with the setting of another Block, or tap the “Setting complet.” button to exit. 6 Tap “Setting complet.” on “Group Register (Sub Unit Register)” to return to the “Group Register” screen. 7 Tap “Monitor screen”...
- Seite 31 Operation 5.1.7.6 Cancellation of group registration 1 Select “Group Register” on the screen of “Service Menu”. Refer to “5.1.7.4 Registration of a group (Main unit)”. N O T E This function cannot be selected when the external input signal is input to the external input terminal 1 or 2. 2 Select “Main Unit Register (or Sub Unit Register)” on the screen of “Group Register”. 3 Select the group to cancel registration. Tap buttons “<”...
- Seite 32 Operation 5.1.7.7 Checking of group registration (Checking of main unit register) 1 Select “Group Register” on the “Service Menu” screen. Refer to section “5.1.7.4 Registration of a group (Main unit)”. N O T E This function cannot be selected when the external input signal is input to the external input terminal 1 or 2. 2 Select “Main Unit Register” (or “Sub Unit Register”) on the “Group Register” screen. 3 Tap “Check Setting”...
- Seite 33 Operation 5.1.7.8 Checking of group registration (checking register details) 1 Select “Group Register” on the “Service Menu” screen. Refer to section “5.1.7.4 Registration of a group (Main unit)”. N O T E This function cannot be selected when the external input signal is input to the external input terminal 1 or 2. 2 Select “Display list of registers” on the Group Register screen. 3 Select the display target (All Groups / individual Blocks) 4 The refrigerant system number and the address of all the units connected to each Group are displayed.
-
Seite 34: Main Screen
Operation 5.2 MAIN SCREEN 5.2.1 Overall view “Monitor (All Groups)” Block button Unit state Current display The screen display changes into “Block” Monitor Indicates the state of the unit with Indicates the current display (Block) display by tapping this button. icons like filter sign, demand, etc. - Seite 35 Operation “Monitor (Block)” Block tab Changes the monitor display into “Block” or “All Groups” display. Current display Group button Unit state Indicates the operation status Indicates the current display Indicates the state of the unit with Green: Running (groups in block) icons like filter sign, demand, etc.
- Seite 36 Operation 5.2.2 Group and block settings 5.2.2.1 Display of All Groups 1 Tap “All Groups” on the touchscreen display. The tab marked with (1), “All Groups”, is not displayed if only one block has been registered. (1)* 2 All groups are displayed on the touchscreen (all the indoor units connected to the central station are shown). The operation status of each group is indicated by the colour of the group, as shown below: Green: Run Grey:...
- Seite 37 Operation 5.2.2.2 Display of Specified Block 1 Select the target block from the screen of “Monitor (All Groups)” or “Monitor (Block)”. Monitor (All Groups) Monitor (Block) 2 The groups in the selected block are displayed on the touchscreen. The operation status of each group is indicated by the colour of the group, as shown below: Green: Grey:...
- Seite 38 Operation 5.2.2.3 Simultaneous Run/Stop for All Groups 1 Tap “All Groups” on the touchscreen display. 2 Tap “Run all gr.” to run all the groups simultaneously. Tap “Stop all gr.” to stop all the groups simultaneously. 3 The confirmation window is displayed. Tap “Yes” for simultaneous operation of all indoor units connected to the central station. Tap “No”...
- Seite 39 Operation 5.2.2.4 Simultaneous Run/Stop for each Block 1 Select the target block from the touchscreen display to set simultaneous Run/Stop operation. 2 Tap “Run by Block” to run all the groups in the selected block simultaneously. Tap “Stop by Block” to stop all the groups in the selected block simultaneously. 3 The confirmation window is displayed.
- Seite 40 Operation 5.2.2.5 Run/Stop for Each Group Check the control mode before setting. The control method is different depending whether the control mode is set to “Normal” or “Run/Stop Only”. Run/Stop operation for each group (Control mode: Normal) 1 Select the screen of “Monitor (All Groups)” or “Monitor (Block)”. Select the group to set by tapping its group button. Monitor (All Groups) Monitor (Block) 2 The settings of the selected group appear displayed on the touchscreen display.
- Seite 41 Operation Run/Stop operation for each group (Control mode: Run/Stop only) Monitor (All Groups) 1 Select the target group at the “Monitor (All Groups)” screen in “Run/Stop Only” mode. 2 The operation state of the selected group is switched alternatively between Run and Stop when tapping its button. In this mode, simultaneous Run/Stop operation for all groups is available with the “Run all gr.”...
-
Seite 42: Operation Mode
Operation 5.2.3 Main parameters setting 5.2.3.1 Operation Mode 1 Select the target group for the change of operation mode settings at the “Monitor (All Groups)” or “Monitor (Block)” screens. The screen with the settings for the selected group is displayed on the touchscreen. Monitor (All Groups) Monitor (Block) 2 By tapping the “... -
Seite 43: Fan Speed
Operation 5.2.3.2 Fan Speed 1 Select the target group for the change of fan speed setting at the “Monitor (All Groups)” or “Monitor (Block)” screens. The screen with the settings for the selected group is displayed on the touchscreen. Monitor (All Groups) Monitor (Block) 2 By tapping “... - Seite 44 Operation 5.2.3.3 Swing Louvre Direction 1 Select the target group for the change of swing louvre direction at the “Monitor (All Groups)” or “Monitor (Block)” screens. The screen with the settings for the selected group is displayed on the touchscreen. Monitor (All Groups) Monitor (Block) 2 By tapping “...
-
Seite 45: Setting Temperature
Operation 5.2.3.4 Setting Temperature 1 Select the target group for the change of setting temperature at the “Monitor (All Groups)” or “Monitor (Block)” screens. The screen with the settings for the selected group is displayed on the touchscreen. Monitor (All Groups) Monitor (Block) 2 By tapping “... - Seite 46 Operation 5.2.3.5 Permission/prohibition of operation from remote control switch This function is used for prohibiting the operation from the remote control switch (RCS). When the remote control switch is set as prohibited (by item / for all Items), the control of the selected item becomes unavailable. The items that can be selected are: Run/Stop, operation mode, fan speed, swing louvre and temperature.
- Seite 47 Operation 3 Tap “Monitor screen” to return to the “Monitor” screen. N O T E • By tapping “<” or “>” at the detailed setting screen, the remote control switch Permitted/ Prohibited will be switched to another group in the same block. • Control Prohibited (Run/Stop Only) : In case of “Enable”, each Setting Change is for all Groups or Blocks. Setting Change is not possible for each Group. • Even if remote control switch is set as “Prohibit.”, it is possible to stop operation with the remote control switch while running. It is also possible to restart operation using the remote control switch. However, the Stop operation will be only used in the case of an emergency. Do not use it in normal operation. • If “Power Supply ON/OFF” (d1, d3) is set, do not set the remote control switch as “Prohibit.”. If the remote control switch is restricted when using “Power Supply ON/OFF”, the function “Control lock” for the remote control switch shall be used. • If a communication error occurs, the remote control switch “STOP” (by item) may be cancelled. In this case, do the setting again. • Do not set the prohibiting operation if multiple centralised controllers are used in the same H-LINK. Additionally, do not set this by other centralised controller or it may cause malfunction. PMML0332A rev.0 - 05/2015...
- Seite 48 Operation 5.3 MENU The table below shows the menu items and their functions. Item Function This function is used for turning off the filter sign display of indoor units in which filter sign has occurred. Filter Sign Reset Regardless of the occurrence of the filter sign, it is also possible to reset the display time of the filter sign in the air conditioner units.
-
Seite 49: Display Menu Screen
Operation 5.3.1 Display menu screen The setting items for the indoor unit and central station are laid out in the menu. 1 Tap “Menu” at the “Monitor (All Groups)” or “Monitor (Block)” screens. Monitor (All Groups) Monitor (Block) 2 The “Menu” screen is displayed. 3 Select the item from the “Menu”... - Seite 50 Operation 5.3.2 Filter Sign Reset 5.3.2.1 Reset Filter Sign 1 Select “Filter Sign Reset” at the “Menu” screen. (This is available only when the filter sign is indicated) 2 Select the target to reset the filter sign. • Tap “Display with Sign” to indicate only the groups with filter sign. •...
- Seite 51 Operation 5.3.2.2 Reset Filter Operating Time 1 Select “Filter Sign Reset” at the “Menu” screen. (This is available only when the filter sign is indicated) 2 Select the target to reset the Filter operating time. • Tap “Display All Groups” to target all groups. •...
- Seite 52 Operation 5.3.3 Scheduled settings This function is used for timer operation. It is possible to set a schedule for a block and for each group. A holiday setting independent of the schedule is also available. 5.3.3.1 Schedule timer settings Timer setting for weekly schedule 1 Select “Schedule Settings”...
- Seite 53 Operation 7 Tap “Setting completed” to confirm the setting. If “No” is tapped, the displayed setting contents are discarded, and the screen returns to the schedule setting screen. • Go back to step (5) to continue adding settings for the same day of the week. •...
- Seite 54 Operation Copying schedule setting by days of the week 1 Select “Schedule Settings” at the “Menu” screen. 2 Select “Schedule Timer Setting” at the “Schedule Settings” screen. 3 Select the target (all groups, block or group). 4 Tap “Copy Day of Week”. 5 Select the day of the week to copy.
- Seite 55 Operation Copying schedule setting by each group 1 Select “Schedule Settings” at the “Menu” screen. 2 Select “Schedule Timer Setting” at the “Schedule Settings” screen. 3 Tap “Copy Settings”. 4 Select the group to copy. (A block cannot be selected as a source for copy). •...
- Seite 56 Operation Deleting schedule setting by individual item 1 Select “Schedule Settings” at the “Menu” screen. 2 Select “Schedule Timer Setting” at the “Schedule Setting” screen. 3 Select the target (all groups, block or group). 4 Tap “Delete Settings”. 5 Select a schedule item number to delete that schedule item. •...
- Seite 57 Operation Deleting schedule setting by each group 1 Select “Schedule Settings” at the “Menu” screen. 2 Select “Schedule Timer Setting” at the “Schedule Settings” menu. 3 Tap “Delete Settings”. 4 Select the groups or blocks to delete their settings. •...
- Seite 58 Operation 5.3.3.2 Holiday setting for suspending operation 1 Select “Schedule Settings” at the “Menu” screen. 2 Select “Holiday Setting” at the “Schedule Settings” screen. 3 Select the target (all groups, block or group). The calendar for the selection is shown. •...
- Seite 59 Operation 5.3.3.3 Schedule timer ON/OFF setting 1 Select “Schedule Settings” at the “Menu” screen. 2 Select “Schedule Timer ON/OFF Setting” at the “Schedule Settings” screen. The screen changes to “Schedule Timer ON/OFF Setting”. The initial setting is “ON”, as indicated with the “ ”...
- Seite 60 Operation 5.3.4 Adjustment of the setting temperature range of the remote control 1 Select “Setting temp range of the remote control” at the “Menu” screen.* * Selection is not possible in case that the connected air conditioners do not support this function. 2 Select the target for setting of temperature range.
-
Seite 61: Date And Time Settings
Operation 5.3.5 Date and time settings 1 Select “Date and time Settings” at the “Menu” screen. 2 Set the display in order of “Year”, “Month” and “Day”. 3 Tap or press-and-hold the “ ” or “ ” buttons for each field to adjust the date and time. 4 Tap “Setting completed”... -
Seite 62: Touchscreen Calibration
Operation 5.3.7 Touchscreen Calibration 1 Select “Touchscreen Calibration” at the “Menu” screen. 2 Calibrating touchscreen • Tap the intersections of white lines in order, as prompted on the screen. • After that, the display changes to the screen shown in figure (3). •... - Seite 63 Operation 5.3.8 Registration of names of Groups and Blocks 5.3.8.1 Group name register 1 Select “Group Name Register” at the “Menu” screen. 2 Select the target (block or group) to register its name. 3 The display changes to the text input screen. It is possible to choose between upper case, lower case and symbol keyboards.
- Seite 64 Operation 5.3.8.2 Copy of group or block name 1 Select “Group Name Register” at the “Menu” screen. 2 Select the source group or block to copy. • The button of the selected group or block appears highlighted with an orange frame. •...
- Seite 65 Operation 5.3.9 Screen Display Setting 5.3.9.1 Adjustment of backlight brightness of the touchscreen display 1 Select “Screen Display Setting” at the “Menu” screen. 2 Select “Brightness” at the “Screen Display Setting” screen. 3 Tap “<” or “>” to adjust the brightness of the backlight. 4 Tap “Setting Completed”...
- Seite 66 Operation 5.3.9.2 Language setting 1 Select “Screen Display Setting” at the “Menu” screen. 2 Select “Language” at the “Screen Display Setting” screen. 3 A confirmation window is displayed when selecting the language button. 4 Tap “Setting completed” to return to the “Screen Display Setting” screen. PMML0332A rev.0 - 05/2015...
- Seite 67 Operation 5.3.9.3 Temperature unit setting 1 Select “Screen Display Setting” at the “Menu” screen. 2 Select “Temperature Unit” at the “Screen Display Setting” screen. 3 Select Celsius degrees or Fahrenheit degrees with the corresponding button. The selected button is highlighted in yellow. 4 Tap “Setting completed”...
- Seite 68 Operation 5.3.10 Accumulated Operation Time 5.3.10.1 Display by month 1 Select “Accumulated Operation Time” at the “Menu” screen. 2 Tap “Display by Month”. 3 Tap the “<” or “>” buttons to select the target block. 4 Tap the “<” or “>” buttons to select the target year and month. 5 Tap “Menu”...
- Seite 69 5 Tap “Menu ” to return to the “Menu” screen. N O T E • Accumulated operation time of this central station is displayed for reference purposes only. Hitachi does not ensure the precise accuracy of the aforementioned accumulated operation time for reference. • “Thermo ON Time” can also be displayed additionally, if the corresponding option is selected in “Optional Function...
-
Seite 70: Contact Information
Operation 5.3.11 Contact Information 1 Select “Contact Information” at the “Menu” screen. The following information is displayed: Contact information (2 independent items) Name of block and group of the latest alarm occurrence Latest alarm code 2 Tap “Menu” to return to the “Menu” screen. N O T E •... - Seite 71 Operation 5.3.12 Summer time setting 1 Select “Summer Time Setting” at the “Menu” screen. The following information is displayed: 2 Select the function concerning each item. Then, the colour of the selected function changes. 3 Tap “Setting completed” to confirm the content and return to Menu screen. PMML0332A rev.0 - 05/2015...
-
Seite 72: Service Menu
Operation 5.4 SERVICE MENU N O T E • This switch is for the serviceman only. Therefore do not use it. • If this switch is used and the service menu is indicated on the screen, tap “Back”. The screen will return to the menu. Items Contents The connected indoor units are checked by the central station in the same H-LINK. This function is used for Group Register the group or block registration of them. Setting of control patterns Set the control pattern. - Seite 73 Operation 1 Tap “Menu” on the “Monitor (All Groups)” or “Monitor (Block)” screens. Monitor (All Groups) Monitor (Block) 2 “Menu” screen is displayed. 3 Press and hold “Service Menu” for at least 3 seconds. “Service Menu” is displayed. 4 Select the service menu item by tapping each item button. The setting screen of the tapped item will be displayed. 5 Tap “Menu”...
- Seite 74 Operation 5.4.1 Group register N O T E This function is detailed in section “5.1 Test run” since it is a required item when performing the Test run procedure. 5.4.2 Optional Function Setting This function is used for setting and changing the selection of air conditioner and central station functions listed in the following table. Set by Monitor Menu Service Menu Optional Function Setting.
- Seite 75 Operation 5.4.2.1 Air Conditioner Remote Control Settings 1 Select “Optional Function Setting” on the “Service Menu” screen when the air conditioners are not in operation. 2 Select “Remote control setting” on the Menu screen. Selection is not possible when one or more air conditioners are in operation. 3 Select the target of Optional Function (All Groups/Block/Group).
-
Seite 76: Controller Setting
Operation 5.4.2.2 Controller Setting 1 Select “Optional Function Setting” on the “Service Menu” screen when the air conditioners are not in operation. 2 Select “Controller setting” on the “Optional Function Setting” screen. 3 Select the setting of each of the function items as necessary. The selected setting appears highlighted in yellow. About OFF time Remote control prohibition When it is enabled, it is not possible to set remote operation prohibition (for individual items). - Seite 77 Operation 5.4.3 Exception Setting of Run/Stop Operation “RUN” and “STOP” orders are not accepted when the group is set to operation in “All groups” or “All blocks”. However, it is possible to set an exception rule for any of the following orders or combinations of orders, affecting specific groups: •...
- Seite 78 Operation 5.4.4 External Input/Output Setting The External Input/Output function of the central station provides the capacity to control 4 inputs and 2 outputs. Select “External Input/Output Setting” on the “Optional Function Setting” screen to access the setting menu. Input and Output Connection Function All Run/Stop (Level)
-
Seite 79: Connection Procedure
Operation 5.4.4.2 External Output Function 1 All Run Output External output of indoor unit operation signal to the target group. The operation signal is output even if one indoor unit in the target group is in operation. 2 External Output Alarm External output alarm signal of indoor units to the target group. - Seite 80 Operation 5.4.4.4 External Input setting 1 Select “External Input/Output setting” on the Service Menu screen. Selection is not possible when air conditioners are in operation, or when the contact for external input signal is ON. 2 Select the input target (From input 1 to 4) of the external input. 3 Select the function to be used with the external input.
- Seite 81 Operation Outdoor unit capacity control 5 Select the value for Outdoor Unit Capacity. The selected capacity value button is highlighted in yellow. 6 Use the buttons on the right side of the screen in order to schedule outdoor unit capacity control when there is no external input contact being applied for this purpose.
-
Seite 82: Other Settings
Operation Other settings 10 Select the target of External Input Control. (All Groups/Block/Group). • Tap the button of a Group to switch its selection state. • Tap the button of a Block to switch the selection state of all the Groups in the Block. •... - Seite 83 Operation 5.4.5 Button Setting Button setting is used to select whether to show or hide certain operation buttons, thus restricting operation. Set by Monitor Menu Service Menu Button Setting. 1 Select “Button Setting” on the screen of “Service Menu”. 2 Select the function concerning each items. The selected function appears highlighted in yellow. 3 Tap “Setting completed”...
- Seite 84 Operation 5.4.6 Contact Information Register This function is used to edit or register the displayed contact information. Set by Monitor Menu Service Menu Contact Information Register. 1 Select “Contact Information Register” on the “Service Menu” screen. 2 Tap “Name Edition” or “TEL.No.Edition” buttons (2) to register the information corresponding to each field of “Contact Information 1”...
- Seite 85 Operation 5.4.7 Memo 5.4.7.1 Register memo 1 Select “Memo” on the “Service Menu” screen. 2 Select the target to register. The character input screen is displayed. 3 Select a registered character from the character list. 4 Input characters. Tap “Delete” to erase the character on the left side of the cursor. The memo can have a maximum length of 52 characters.
- Seite 86 Operation 5.4.7.2 Delete memo 1 Select “Memo” on the “Service Menu screen. 2 Tap “Delete Memo”. 3 Select the memo to delete. • Tap a memo button to switch its selection state. • It is possible to select multiple memos. •...
-
Seite 87: Restore Settings
Operation 5.4.8 Restore Settings 1 Select “Restore Settings” on the “Service Menu” screen. N O T E This function cannot be selected when remote control switch operation is prohibited, an external input contact is ON, or outdoor unit capacity control is not cancelled. Cancel these parameters before performing “Restore settings”. 2 Tap “Yes” at the confirmation screen. N O T E If “No” is tapped, the screen returns to “Service Menu”. 3 A second confirmation screen is displayed. Tap “Yes” here to restore the settings. The screen changes after several seconds, and a check of the connections of the system starts. - Seite 88 Operation 5.4.9 Checking Connection 1 Select “Checking Connection” on the “Service Menu” screen. N O T E This function cannot be selected when there is one ore more air conditioners in operation, or if there is an external input signal input to external input terminals 1 or 2. 2 Tap “Yes” at the confirmation screen. N O T E If tapping “No”, the screen returns to “Service Menu”. The type of update of connection information depends on the following setting: • Proceed to step 3 to update connection information while keeping Group register and settings such as schedule setting, etc. (3) • Proceed to step 7 to perform connection checking initializing each setting. (It is same as restoring the settings). (7) Keeping settings 3 Tap “Yes” at the confirmation screen for keeping settings. 4 When the process of checking connection is finished, the number of connected units is indicated on the confirmation screen.
- Seite 89 Operation 6 A further confirmation screen is displayed. Check the air conditioners and tap “Yes”. N O T E • If “No” is tapped, the screen returns to “Service Menu”. • This function cannot be selected when remote control switch operation is prohibited, an external input contact is ON, or outdoor unit capacity control is not cancelled. Cancel these parameters before restoring the settings. Not keeping settings 7 Tap “No” at the confirmation window. 8 The confirmation window of initialisation is displayed. Tap “Yes” to initialise all the settings and to start checking connection. “Yes”...
-
Seite 90: Alarm History
Operation 5.4.10 Alarm History This function is used to record the time of alarm occurrence, the unit in which the abnormality has occurred and the relevant alarm code. The deletion of the alarm history record is also performed by this function. Set by Monitor Menu Service Menu... -
Seite 91: In Normal Condition
Displayed when demand input is set by optional external input function. The icon blinks during Demand the demand control. Contact your dealer or a Hitachi customer service centre for detailed information. Displayed when optional outdoor unit capacity control schedule is enabled, blinks during the Demand (Schedule) control. - Seite 92 When the device stops due to this reason, perform the starting procedures again. Freezing of display at the “Start-up” screen • There is the possibility that a communication error occurred. Contact your dealer or a Hitachi customer service centre for detailed information. PMML0332A rev.0 - 05/2015...
-
Seite 93: Troubleshooting
Troubleshooting 6 TROUBLESHOOTING Check the following table before contacting a dealer for assistance. Condition Cause • Check that the wiring for the power supply is connected to the wall plug. Indications on the touchscreen are not displayed. • Check that the power supply is turned ON. •... -
Seite 95: Resumen De Seguridad
• NO instale la unidad en lugares en los que se detecte generación, flujo, acumulación o fugas de gas inflamable. • NO realice por sí mismo tareas de instalación ni de cableado eléctrico. Póngase en contacto con el distribuidor o proveedor de HITACHI para solicitar que personal de servicio cualificado realice los trabajos de instalación y de cableado eléctrico. • Realice los trabajos eléctricos siguiendo las instrucciones del Manual de instalación y respete la normativa y regulación vigente. Si no se respetan las instrucciones, puede provocar descargas eléctricas o un incendio debido a una capacidad insuficiente o un rendimiento inadecuado. -
Seite 96: Características Principales
Características principales 2 CARACTERÍSTICAS PRINCIPALES Esta estación central (PSC-A32MN) está conectada al H-LINK y se utiliza para el control central y la supervisión de los acondicionadores de aire. Las siguientes funciones están disponibles para todas las unidades interiores conectadas a la estación central. 1 Marcha/Paro, cambio del modo de funcionamiento, control de la velocidad del ventilador, control de la dirección del deflector oscilante, temperatura de ajuste y funcionamiento permitido/prohibido por el mando a distancia. -
Seite 97: Selección Del Lugar De Instalación
Cable SPEC: de 0,75 a 1,25 mm Cable H-LINK (para el control) Cable recomendado: JKEPV-S, JKEV-S, CVV-S, CVV, 600V VCT * Los cables recomendados son los de Hitachi Cable, Ltd. 3.2 LISTA DE COMPONENTES Desembale la unidad y compruebe que: •... - Seite 98 Instalación 3.3 DESCRIPCIÓN Pantalla táctil LCD a color Para controlar y supervisar las unidades desde la pantalla táctil. Funciona con un lápiz para pantalla táctil (accesorio). Si durante un periodo de tiempo no se toca la pantalla, ésta pasará automáticamente a modo Parte delantera reposo.
-
Seite 99: Datos Generales
Instalación 3.4 DATOS GENERALES Modelo PSC-A32MN Dimensiones externas 140 × 120 × 22 + 52,7 (mm) <Al x An x F + (parte empotrada)> Peso neto 0,5 kg (aprox.) Ubicación de la instalación Interior Método de instalación Empotrado en la pared con una caja JIS para 2 interruptores (con tapa) (JIS C8340) Unidades interiores conectadas 160 (Máx.) Precisión del reloj... -
Seite 100: Espacio De Instalación
Instalación 3.6 ESPACIO DE INSTALACIÓN Mantenga los siguientes espacios para la instalación de la estación central. (Unidades: mm) 52,7 Deje libre las zonas alrededor del dispositivo, que aparecen sombreadas “ ” en la imagen. Cuando instale dos o más controladores centrales en paralelo mantenga las siguientes distancias entre ellos: * Distancia vertical: 50mm * Distancia horizontal:... - Seite 101 Instalación 3 Conecte el cableado al cuadro de terminales de la estación central. Cuadro de Procedimiento de conexión terminales Para la fuente de Tornillos M3 al terminal alimentación Conexión de terminal redonda Para la transmisión H-LINK Par de apriete 0,5 N·m Conector de 3 pins CN1 ~ 3 Para entrada/salida externa...
-
Seite 102: Cableado Eléctrico
Cable recomendado cableado del cable Cable de alimentación CA 100 ~ 240V de 1,25 a 2 mm 600 V CV, CCV, CEV (cable Hitachi) Cable de tierra H-LINK 5 V CC ≤ 1000 m de 0,75 a 1,25 mm (cable de control) - Seite 103 Cableado eléctrico P E L I G R O • Apague el interruptor de alimentación principal de las unidades interiores, de las exteriores y de las estaciones centrales antes de realizar cualquier trabajo eléctrico. De lo contrario, puede provocar un incendio, descargas eléctricas o la rotura del dispositivo. • No emplee cables más ligeros que el cable flexible normal de policloropreno forrado (código H05RN-F). Procedimiento de ajuste de los interruptores En la siguiente tabla puede consultar la lista de ajustes de los interruptores de la estación central.
- Seite 104 Cableado eléctrico Ajuste de DSW1 Nombre Modelo DSW1 DSW2 DSW3 DSW4 Estación central EZ PSC-A64GT Estación central mini PSC-A32MN Estación central PSC-A64S Controlador centralizado PSC-A16RS deencendido y apagado Combinación del Otros HC-A(8/64)MB No compatible PSC-A32MN con otros controladores controladores centrales centrales HC-A16KNX No compatible...
-
Seite 105: Prueba De Funcionamiento
Funcionamiento 5 FUNCIONAMIENTO 5.1 PRUEBA DE FUNCIONAMIENTO El siguiente diagrama muestra el procedimiento para la prueba de funcionamiento. Los elementos con marco doble ( ) son elementos obligatorios. El resto no son necesarios para el procedimiento de prueba de funcionamiento, son opcionales y cada uno tiene su apartado específico. - Seite 106 Funcionamiento Lista de elementos Elemento Función Ajuste de idioma Esta función se utiliza para seleccionar el idioma. Configuración día/hora Esta función se utiliza para ajustar la fecha y la hora. La función se utiliza para registrar los grupos o bloques de unidades interiores conectadas al mismo H-LINK, y Registro de grupo que han sido identificadas por la estación central.
- Seite 107 Funcionamiento Elemento Función Selección de los grupos de Esta función se utiliza para seleccionar los grupos cuyas órdenes de funcionamiento están canceladas por excepción para la entrada entrada externa 1. externa 1 Selección de los grupos de Esta función se utiliza para seleccionar los grupos cuyas órdenes de funcionamiento están canceladas por excepción para la entrada entrada externa 2.
-
Seite 108: Ajuste De Idioma
Funcionamiento 5.1.1 Encendido Encienda la fuente de alimentación de los aires acondicionados. Para proteger el compresor, la fuente de alimentación se debe encender 12 horas antes de iniciar el funcionamiento. No apague la fuente de alimentación durante los periodos de utilización del aire acondicionado. Realice una prueba de funcionamiento de cada aire acondicionado para confirmar su correcto funcionamiento. -
Seite 109: Ajuste De La Hora De Verano
Funcionamiento 5.1.4 Ajuste día/hora Una vez ajustada la unidad de temperatura se mostrará la pantalla de configuración de día y hora tal como se muestra en la imagen. Pulse "Set" en la pantalla táctil y ajuste la fecha y la hora según el procedimiento indicado. Para más información consulte el apartado “5.3.5 Ajustes de día y hora”... - Seite 110 Funcionamiento 5.1.6 Ajuste de los patrones de control Una vez ajustada la fecha y la hora se mostrará la pantalla de patrones de control. Pulse "Set" para continuar con los ajustes de los patrones de control. Al tocar en un botón de patrón, éste aparece resaltado con un contorno naranja. A continuación se detalla el procedimiento para el ajuste de los patrones de control: 1 Seleccione "Registro de grupo"...
-
Seite 111: Definiciones
Funcionamiento 5.1.7 Registrar grupo Registre las unidades interiores conectadas a los grupos y bloques de la estación central. 5.1.7.1 Definiciones • Grupo: El número mínimo de unidades controladas por una estación central. Un mando a distancia se considera un grupo y se aplica el mismo ajuste a todo el grupo. - Seite 112 Funcionamiento 5.1.7.3 Registro de la unidad secundaria • Se pueden registrar un máximo de 15 unidades secundarias en el mismo grupo de control remoto con una unidad principal (si aplica el patrón de control de dos bloques con 16 grupos cada uno). •...
- Seite 113 Funcionamiento 3 Seleccione el grupo en el que se encuentra la unidad que desea registrar como principal. • Pulse “<” y “>” en la parte superior izquierda de la pantalla para visualizar el bloque. • Los números en los botones indican el número de bloque y de grupo. •...
- Seite 114 Funcionamiento Pulse “<” y “>” en la parte superior izquierda de la pantalla para seguir con el ajuste de otro bloque o pulse "Ajuste completo" para salir. 6 Pulse "Ajuste completo" para registrar el grupo y volver a la pantalla de registro de grupo. 7 Pulse "Pantalla Monitor"...
- Seite 115 Funcionamiento 2 Seleccione "Registro de unidad secundaria" en la pantalla de registro de grupo. 3 Seleccione el grupo en el que se encuentra la unidad que desea registrar como secundaria. • Pulse “<” y “>” en la parte superior izquierda de la pantalla para visualizar el bloque. •...
- Seite 116 Funcionamiento Pulse “<” y “>” en la parte superior izquierda de la pantalla para seguir con el ajuste de otro bloque o pulse "Ajuste completo" para salir. 6 Pulse "Ajuste completo" en la pantalla "Reg. Grupo (Registro unidad secundaria)" para volver a la pantalla de registro de grupo. 7 Pulse "Pantalla Monitor"...
- Seite 117 Funcionamiento 5.1.7.6 Cancelar el registro de un grupo 1 Seleccione "Registro de grupo" en la pantalla "Menú de mantenimiento". Consulte el capítulo “5.1.7.4 Registro de un grupo (unidad principal)”. N O TA Si la señal de entrada externa se recibe en el terminal de entrada externa 1 o 2, esta función no se podrá seleccionar. 2 Seleccione "Registro de unidad principal" (o "Registro de unidad secundaria") en la pantalla de registro de grupo. 3 Seleccione el grupo para cancelar el registro.
- Seite 118 Funcionamiento 5.1.7.7 Comprobar el registro del grupo (comprobar el registro de la unidad principal) 1 Seleccione "Registro de grupo" en la pantalla de "Menú de mantenimiento". Consulte el apartado “5.1.7.4 Registro de un grupo (unidad principal)”. N O TA Si la señal de entrada externa se recibe en el terminal de entrada externa 1 o 2, esta función no se podrá seleccionar. 2 Seleccione "Registro de unidad principal" (o "Registro de unidad secundaria") en la pantalla de registro de grupo. 3 Pulse "Comprob.
- Seite 119 Funcionamiento 5.1.7.8 Comprobar el registro del grupo (comprobación de los detalles del registro) 1 Seleccione "Registro de grupo" en la pantalla de "Menú de mantenimiento". Consulte el apartado “5.1.7.4 Registro de un grupo (unidad principal)”. N O TA Si la señal de entrada externa se recibe en el terminal de entrada externa 1 o 2, esta función no se podrá seleccionar. 2 Seleccione “Mostrar la lista de registros” en la pantalla de registro de grupo. 3 Seleccione aquello que desea mostrar, Todos los grupos o Bloques individuales.
-
Seite 120: Pantalla Principal
Funcionamiento 5.2 PANTALLA PRINCIPAL 5.2.1 Vista general Monitor (Todos los grupos) Botón de Bloque Estado de la unidad Pantalla actual Cambia la visualización de la pantalla a Indica el estado de la unidad con Indica cuál es la pantalla actual "Bloque"... - Seite 121 Funcionamiento Monitor (Bloque) Pestaña de Bloque Cambia la visualización de la pantalla a "Bloque" o "Todos los grupos". Estado de la unidad Pantalla actual Botón de Grupo Indica el estado de la unidad con Indica cuál es la pantalla actual iconos, por ejemplo, señal de Indica el estado de funcionamiento (Grupos del bloque)
- Seite 122 Funcionamiento 5.2.2 Ajuste de grupo y bloque 5.2.2.1 Visualización de todos los grupos 1 Pulse "Todos los grupos" en la pantalla táctil. Si solo se ha registrado un bloque, la pestaña (1), "Todos los grupos", no se mostrará. (1)* 2 Se muestran todos los grupos (todas las unidades interiores conectadas a la estación central). El estado de funcionamiento de cada grupo se indica con el color del grupo del siguiente modo: Verde: Marcha...
- Seite 123 Funcionamiento 5.2.2.2 Visualización del bloque especificado 1 Seleccione el bloque en la pantalla "Monitor (Todos los grupos)" o "Monitor (Bloque)". Monitor (Todos los grupos) Monitor (Bloque) 2 Se muestran los grupos del bloque seleccionado. El estado de funcionamiento de cada grupo se indica con el color del grupo del siguiente modo: Verde: Marcha...
- Seite 124 Funcionamiento 5.2.2.3 Marcha/Paro simultáneo de todos los grupos 1 Pulse "Todos los grupos" en la pantalla táctil. 2 Pulse "Arranque de todos" para poner en marcha todos los grupos simultáneamente. Pulse "Paro de todos" para detener todos los grupos simultáneamente. 3 Se muestra la ventana de confirmación.
- Seite 125 Funcionamiento 5.2.2.4 Marcha/Paro simultáneo de cada bloque 1 Seleccione el bloque para el que desea ajustar la marcha/paro simultáneos en la pantalla táctil. 2 Pulse "Arranque bloque" para poner en marcha todos los grupos del bloque seleccionado simultáneamente. Pulse "Paro por bloque" para detener todos los grupos del bloque seleccionado simultáneamente. 3 Se muestra la ventana de confirmación.
- Seite 126 Funcionamiento 5.2.2.5 Marcha/Paro de cada grupo Compruebe el modo de control antes de realizar el ajuste. El método de control es diferente dependiendo de si el modo de control está ajustado como “Normal” o “Solo Marcha/Paro. Marcha/Paro de cada grupo (Modo de control: normal) 1 Seleccione la pantalla "Monitor (Todos los grupos)"...
- Seite 127 Funcionamiento Marcha/Paro de cada grupo (Modo de control: Solo Marcha/Paro) Monitor (Todos los grupos) 1 Seleccione el grupo en la pantalla "Monitor (Todos los grupos)" en el modo "Solo Marcha/Paro". 2 El estado de funcionamiento del grupo seleccionado alterna entre Marcha y Paro al pulsar su botón. En este modo puede poner en marcha/detener todos los grupos de forma simultánea con los botones "Arranque de todos"...
-
Seite 128: Modo De Funcionamiento
Funcionamiento 5.2.3 Ajuste de los parámetros principales 5.2.3.1 Modo de funcionamiento 1 Seleccione el grupo para el que desea modificar los ajustes del modo de funcionamiento en la pantalla "Monitor (Todos los grupos)" o "Monitor (Bloque)". Se visualizan los ajustes del grupo seleccionado. Monitor (Todos los grupos) Monitor (Bloque) 2 Pulsando “... -
Seite 129: Velocidad Del Ventilador
Funcionamiento 5.2.3.2 Velocidad del ventilador 1 Seleccione el grupo para el que desea modificar los ajustes de la velocidad del ventilador en la pantalla "Monitor (Todos los grupos)" o "Monitor (Bloque)". Se visualizan los ajustes del grupo seleccionado. Monitor (Todos los grupos) Monitor (Bloque) 2 Pulsando “... - Seite 130 Funcionamiento 5.2.3.3 Dirección del deflector oscilante 1 Seleccione el grupo para el que desea modificar los ajustes de la dirección del deflector oscilante en la pantalla "Monitor (Todos los grupos)" o "Monitor (Bloque)". Se visualizan los ajustes del grupo seleccionado. Monitor (Todos los grupos) Monitor (Bloque) 2 Pulsando “...
- Seite 131 Funcionamiento 5.2.3.4 Temperatura de ajuste 1 Seleccione el grupo para el que desea modificar la temperatura de ajuste en la pantalla "Monitor (Todos los grupos)" o "Monitor (Bloque)". Se visualizan los ajustes del grupo seleccionado. Monitor (Todos los grupos) Monitor (Bloque) 2 Pulsando “...
- Seite 132 Funcionamiento 5.2.3.5 Funcionamiento permitido/prohibido desde el mando a distancia Esta función se utiliza para prohibir el funcionamiento desde el mando a distancia. Si el funcionamiento del mando a distancia está prohibido (para uno/todos los elementos), no estará disponible el control del elemento seleccionado.
- Seite 133 Funcionamiento 3 Pulse "Pantalla Monitor" para volver a la pantalla "Monitor". N O TA • Pulsando "<" o ">" en la pantalla de ajustes, podrá modificar el estado del control remoto, permitido/prohibido, de otro grupo en el mismo bloque. • Control prohibido (solo Marcha/Paro): en caso de estar "Activado", cada cambio en el ajuste es para todos los grupos o bloques. No se puede modificar el ajuste de cada grupo. • Aunque el mando a distancia esté configurado como "Prohibido", puede utilizarlo para detener el funcionamiento, aunque solo en caso de emergencia, no lo utilice durante el funcionamiento normal. También puede utilizar el mando a distancia para volver a ponerlo en marcha.
- Seite 134 Funcionamiento 5.3 MENÚ La siguiente tabla muestra los elementos del menú y sus funciones. Elemento Función Esta función se utiliza para reiniciar la señal de filtro de las unidades interiores en las que se mostró. Reinicio de la señal de filtro Independientemente de la aparición de la señal de filtro, también se puede reiniciar el tiempo de visualización de la señal en las unidades.
- Seite 135 Funcionamiento 5.3.1 Visualización de la pantalla de menú En el menú figuran los elementos de ajuste para la unidad interior y la estación central. 1 Pulse "Menú" en la pantalla "Monitor (Todos los grupos)" o "Monitor (Bloque)". Monitor (Todos los grupos) Monitor (Bloque) 2 Se muestra la pantalla "Menú".
- Seite 136 Funcionamiento 5.3.2 Reinicio de la señal de filtro 5.3.2.1 Reinicializar la señal de filtro 1 Seleccione "Reinicio de la señal de filtro" en la pantalla "Menú". (Solo disponible cuando hay señal de filtro). 2 Seleccione el grupo en el que desea reinicializar la señal de filtro. •...
- Seite 137 Funcionamiento 5.3.2.2 Reinicializar el tiempo de funcionamiento del filtro 1 Seleccione "Reinicio de la señal de filtro" en la pantalla "Menú". (Solo disponible cuando hay señal de filtro). 2 Seleccione el grupo en el que desea reinicializar el tiempo de funcionamiento del filtro. •...
-
Seite 138: Ajuste Del Temporizador
Funcionamiento 5.3.3 Ajustes de programa Esta función se utiliza para el funcionamiento del temporizador. Se puede ajustar un programa para un bloque o para cada grupo. También se puede ajustar un día festivo independientemente del programa. 5.3.3.1 Ajuste del temporizador ... - Seite 139 Funcionamiento 7 Pulse "Ajuste completado" para confirmar los ajustes. Si pulsa "No" se descartarán los cambios y la pantalla volverá a la pantalla de ajustes de programa. • Vaya al paso (5) para seguir añadiendo ajustes para el mismo día de la semana. •...
- Seite 140 Funcionamiento Copiar los ajustes del programa a otros días de la semana 1 Seleccione "Ajustes de programa" en la pantalla "Menú". 2 Seleccione "Ajuste del temporizador" en la pantalla de ajustes de programa. 3 Seleccione el grupo, bloque o todos los grupos. 4 Pulse "Copiar día de semana".
- Seite 141 Funcionamiento Copiar los ajustes del programa a cada grupo 1 Seleccione "Ajustes de programa" en la pantalla "Menú". 2 Seleccione "Ajuste del temporizador" en la pantalla de ajustes de programa. 3 Pulse "Copiar ajustes". 4 Seleccione el grupo que desea copiar. (No puede seleccionar un bloque para copiar). •...
- Seite 142 Funcionamiento Borrar los ajustes del programa por elemento 1 Seleccione "Ajustes de programa" en la pantalla "Menú". 2 Seleccione "Ajuste del temporizador" en la pantalla ajustes de programa. 3 Seleccione el grupo, bloque o todos los grupos. 4 Pulse "Borrar configur.". 5 Seleccione el número de elemento que desea borrar.
- Seite 143 Funcionamiento Borrar los ajustes del programa por cada grupo 1 Seleccione "Ajustes de programa" en la pantalla "Menú". 2 Seleccione "Ajuste del temporizador" en la pantalla de ajustes de programa. 3 Pulse "Borrar ajustes". 4 Seleccione los grupos o bloques de los que desea borrar los ajustes. •...
- Seite 144 Funcionamiento 5.3.3.2 Ajuste del día festivo para suspender el funcionamiento 1 Seleccione "Ajustes de programa" en la pantalla "Menú". 2 Seleccione "Ajuste de días festivos" en la pantalla de ajustes de programa. 3 Seleccione el grupo, bloque o todos los grupos. Se mostrará el calendario correspondiente a la selección. •...
- Seite 145 Funcionamiento 5.3.3.3 Ajuste del temporizador de encendido/apagado 1 Seleccione "Ajustes de programa" en la pantalla "Menú". 2 Seleccione "Ajuste del temporizador de encendido/apagado" en la pantalla de ajustes de programa. Se muestra la pantalla de "Ajuste de temporizador encend./apag.". El ajuste inicial es "Encendido", y se indica con " ".
- Seite 146 Funcionamiento 5.3.4 Configuración del rango de temperatura del mando a distancia 1 Seleccione "Ajuste rango temperatura control remoto" en el menú.* * En caso de que los aires acondicionados no admitan esta función no se podrá seleccionar. 2 Seleccione el objeto para ajustar el rango de temperatura. (Todos los grupos/Bloque/Grupo)* •...
- Seite 147 Funcionamiento 5.3.5 Ajustes de día y hora 1 Seleccione "Ajustes de día y hora" en la pantalla "Menú". 2 Ajuste la fecha en este orden: "Año", "Mes" y "Día". 3 Pulse o mantenga pulsado “ ” o “ ” en cada campo para ajustar la fecha y la hora. 4 Pulse “Ajuste completado”...
-
Seite 148: Calibración De La Pantalla Táctil
Funcionamiento 5.3.7 Calibración de la pantalla táctil 1 Seleccione "Calibración de la pantalla táctil" en la pantalla "Menú". 2 Calibración de la pantalla táctil • Toque las intersecciones de las líneas blancas en la pantalla cuando se le solicite. • Después se mostrará... - Seite 149 Funcionamiento 5.3.8 Registro de los nombres de grupos y bloques 5.3.8.1 Registrar nombre del grupo 1 Seleccione "Registro de nombre del grupo" en la pantalla de "Menú". 2 Seleccione el bloque o grupo para el que desea registrar el nombre. 3 Aparece la pantalla para introducir el texto.
- Seite 150 Funcionamiento 5.3.8.2 Copiar el nombre del grupo o bloque 1 Seleccione "Registro de nombre del grupo" en la pantalla de "Menú". 2 Seleccione el grupo o bloque que desea copiar. • El botón del grupo o bloque seleccionado aparece resaltado con un contorno naranja. •...
-
Seite 151: Ajustes De La Pantalla
Funcionamiento 5.3.9 Ajustes de la pantalla 5.3.9.1 Configuración del brillo de la pantalla táctil 1 Seleccione "Ajustes de la pantalla" en la pantalla "Menú". 2 Seleccione "Brillo" en la pantalla "Ajustes de la pantalla". 3 Pulse “<” o “>” para ajustar el brillo. 4 Pulse "Ajuste completado"... - Seite 152 Funcionamiento 5.3.9.2 Ajuste de idioma 1 Seleccione "Ajustes de la pantalla" en la pantalla "Menú". 2 Seleccione "Idioma" en la pantalla "Ajustes de la pantalla". 3 Una vez seleccionado el idioma se mostrará la ventana de confirmación. 4 Pulse “Ajuste completado” para volver a la pantalla de “Ajustes de la pantalla”. PMML0332A rev.0 - 05/2015...
- Seite 153 Funcionamiento 5.3.9.3 Ajuste de la unidad de temperatura 1 Seleccione "Ajustes de la pantalla" en la pantalla "Menú". 2 Seleccione "Unidad de temperatura" en la pantalla "Ajustes de la pantalla". 3 Seleccione grados Celsius o grados Fahrenheit. El botón seleccionado quedará resaltado en amarillo. 4 Pulse "Ajuste completado"...
- Seite 154 Funcionamiento 5.3.10 Tiempo de funcionamiento acumulado 5.3.10.1 Mostrar por mes 1 Seleccione "Tiempo de funcionamiento acumulado" en la pantalla "Menú". 2 Pulse "Mostrar por mes". 3 Pulse “<” o “>” para seleccionar el bloque. 4 Pulse “<” o “>” para seleccionar el año y el mes. 5 Pulse "Menú"...
- Seite 155 4 Pulse “<” o “>” para seleccionar el grupo. 5 Pulse "Menú" para volver a la pantalla de menú. N O TA • El tiempo de funcionamiento acumulado de esta estación central se muestra únicamente como referencia. Hitachi no garantiza una precisión exacta del tiempo de funcionamiento acumulado mencionado como referencia. • Si está seleccionada la opción en "Ajuste de funciones opcionales", también se puede visualizar el "Tiempo de...
-
Seite 156: Información De Contacto
Funcionamiento 5.3.11 Información de contacto 1 Seleccione "Información de contacto" en la pantalla "Menú". Se muestra la siguiente información: Información de contacto (dos elementos independientes) Nombre del bloque o grupo de la última alarma Último código de alarma 2 Pulse "Menú" para volver a la pantalla de menú. N O TA •... - Seite 157 Funcionamiento 5.3.12 Ajuste de la hora de verano 1 Seleccione "Ajustes de la hora de verano" en la pantalla "Menú". Se muestra la siguiente información: 2 Seleccione la función. El color de la función seleccionada cambia. 3 Pulse “Ajuste completado” para confirmar los ajustes y volver al menú. PMML0332A rev.0 - 05/2015...
-
Seite 158: Menú De Mantenimiento
Funcionamiento 5.4 MENÚ DE MANTENIMIENTO N O TA • Esta opción es solo para el personal de mantenimiento. No debe usarla. • En caso de hacerlo aparecerá el menú de mantenimiento, pulse "Atrás". La pantalla volverá al menú. Elementos Contenido Las unidades interiores conectadas son verificadas por la estación central en el mismo H-LINK. Esta función Registro de Grupo se utiliza para el registro del grupo o bloque. Ajuste de los patrones de Ajusta el patrón de control. - Seite 159 Funcionamiento 1 Pulse "Menú" en la pantalla "Monitor (Todos los grupos)" o "Monitor (Bloque)". Monitor (Todos los grupos) Monitor (Bloque) 2 Se muestra la pantalla "Menú". 3 Mantenga pulsado "Menú de mantenimiento" durante 3 segundos. Se muestra el "Menú de mantenimiento". 4 Seleccione en el menú...
- Seite 160 Funcionamiento 5.4.1 Registrar Grupo N O TA Esta función se detalla en el capítulo “5.1 Prueba de funcionamiento”, ya que se trata de un elemento obligatorio para realizar la prueba de funcionamiento. 5.4.2 Ajuste de funciones opcionales Esta función se utiliza para ajustar y modificar la selección de funciones de la siguiente tabla para el aire acondicionado y la estación central.
- Seite 161 Funcionamiento 5.4.2.1 Ajuste del aire acondicionado y del mando a distancia 1 Seleccione "Ajuste de funciones opcionales" en la pantalla "Menú de Mantenimiento" cuando los aires acondicionados no estén funcionando. 2 Seleccione "Ajuste aire acondicionado, control remoto" en el Menú. Si uno o varios aires acondicionados están funcionando no podrá...
- Seite 162 Funcionamiento 5.4.2.2 Ajuste del controlador 1 Seleccione "Ajuste de funciones opcionales" en la pantalla "Menú de Mantenimiento" cuando los aires acondicionados no estén funcionando. 2 Seleccione "Ajuste del controlador" en la pantalla "Ajuste de funciones opcionales". 3 Seleccione el ajuste de cada función según sus necesidades. El ajuste seleccionado se mostrará resaltado en amarillo. Acerca del bloqueo del mando a distancia por temporizador Si está...
- Seite 163 Funcionamiento 5.4.3 Ajuste de la excepción de Marcha/Paro Las órdenes de "Marcha" y "Paro" no se aceptan si el grupo está ajustado como "Todos los grupos" o "Todos los bloques". No obstante, se puede establecer una regla de excepción para cualquiera de las siguientes órdenes o combinaciones de órdenes, que afectará...
- Seite 164 (*6): En algunos casos la unidad exterior no admite ciertos ajustes, o admite ajustes distintos según su capacidad. Para más información póngase en contacto con su proveedor o con el servicio de atención al cliente de Hitachi. (*7): Se puede controlar mediante programación, sin utilizar el control de demanda.
-
Seite 165: Procedimiento De Conexión
Funcionamiento 5.4.4.2 Función de salida externa 1 Salida de "Marcha todos" Salida externa de la señal de funcionamiento de la unidad interior del grupo de destino. La señal de funcionamiento se envía incluso si una de las unidades interiores del grupo de destino está en funcionamiento. 2 Alarma de Salida Externa Señal de alarma de salida externa de las unidades interiores del grupo de destino. - Seite 166 Funcionamiento 5.4.4.4 Ajuste de entrada externa 1 Seleccione "Ajuste de Entrada/Salida externa" en el menú de mantenimiento. Si la señal de entrada externa está activada o los aires acondicionados están funcionando no se puede seleccionar. 2 Seleccione la entrada (de la 1 a la 4). 3 Seleccione la función que se debe utilizar con la entrada externa.
- Seite 167 Funcionamiento Control de capacidad de la unidad exterior 5 Seleccione el valor correspondiente a la capacidad de la unidad exterior. El botón seleccionado quedará resaltado en amarillo. 6 Utilice los botones de la derecha de la pantalla para programar el control de capacidad de la unidad exterior si no hay ningún contacto de entrada externa aplicado.
-
Seite 168: Otros Ajustes
Funcionamiento Otros ajustes 10 Seleccione el objeto de control de entrada externa (Todos los grupos/Bloque/Grupo). • Pulse el botón de un grupo para cambiar su estado de selección. • Pulse el botón de un bloque para cambiar el estado de selección de todos los grupos de ese bloque. •... - Seite 169 Funcionamiento 5.4.5 Configuración de los botones La configuración de los botones se utiliza para seleccionar si desea mostrar u ocultar ciertos botones para limitar su funcionamiento. Ajustado desde: Monitor Menú Menú de Mantenimiento Ajuste de botones. 1 Seleccione "Ajuste de botones" en la pantalla "Menú de mantenimiento". 2 Seleccione la función.
- Seite 170 Funcionamiento 5.4.6 Registrar información de contacto Esta función se utiliza para editar o registrar la información de contacto que se muestra. Ajustado desde: Monitor Menú Menú de mantenimiento Registro de información de contacto. 1 Seleccione "Registro de información de contacto" en la pantalla "Menú de mantenimiento". 2 Pulse "Modificar nombre cont."...
- Seite 171 Funcionamiento 5.4.7 Notas 5.4.7.1 Registrar notas 1 Seleccione "Notas" en la pantalla de "Menú de mantenimiento". 2 Seleccione el objeto del registro. Aparece la pantalla para introducir los caracteres. 3 Seleccione un carácter de la lista. 4 Introduzca los caracteres. Pulse “Borrar” para borrar el carácter situado a la izquierda del cursor. El campo memo admite un máximo de 52 caracteres.
- Seite 172 Funcionamiento 5.4.7.2 Borrar notas 1 Seleccione "Notas" en la pantalla de "Menú de mantenimiento". 2 Pulse "Borrar nota". 3 Seleccione la nota que desea borrar. • Pulse el botón de la nota para cambiar su estado de selección. • Puede seleccionar varias notas. •...
- Seite 173 Funcionamiento 5.4.8 Restaurar la configuración 1 Seleccione "Restaurar la configuración" en la pantalla de "Menú de mantenimiento". N O TA Si el funcionamiento del manto a distancia está prohibido o algún contacto de entrada externa está activado o no está cancelado el control de capacidad de la unidad exterior, esta función no se podrá seleccionar. Cancele estos parámetros antes de restaurar los ajustes.
-
Seite 174: Comprobar La Conexión
Funcionamiento 5.4.9 Comprobar la conexión 1 Seleccione "Comprobando la conexión" en la pantalla de "Menú de mantenimiento". N O TA Si uno o varios aires acondicionados están funcionando o si entra una señal de entrada externa a los terminales 1 o 2, esta función no se puede seleccionar. 2 Pulse "Sí" en la pantalla de confirmación. N O TA Si pulsa "No" la pantalla volverá al Menú de mantenimiento. El tipo de actualización de la información de conexión depende de la siguiente configuración: • Continúe con el paso 3 para actualizar la información de conexión manteniendo el registro de grupo y los ajustes como el de programa, etc. (3) • Continúe con el paso 7 para comprobar la conexión inicializando cada ajuste. (Es lo mismo que restaurar la configuración). (7) Mantener los ajustes 3 Pulse "Sí"... - Seite 175 Funcionamiento 6 Aparecerá una segunda pantalla de confirmación. Compruebe los aires acondicionados y pulse "Sí". N O TA • Si pulsa "No" la pantalla volverá al Menú de mantenimiento. • Si el funcionamiento del manto a distancia está prohibido o algún contacto de entrada externa está activado o no está cancelado el control de capacidad de la unidad exterior, esta función no se podrá seleccionar. Cancele estos parámetros antes de restaurar los ajustes. No mantener los ajustes 7 Pulse "No" en la ventana de confirmación. 8 Se muestra la ventana de confirmación de la inicialización. Pulse "Sí" para inicializar todos los ajustes y comprobar la conexión. En caso de que haya unidades con el funcionamiento del mando a distancia prohibido no podrá...
- Seite 176 Funcionamiento 5.4.10 Historial de alarmas Esta función se utiliza para registrar la hora de ocurrencia de una alarma, la unidad con anomalía y el código de alarma. A través de esta función también puede borrar el histórico de alarmas. Ajustado desde: Monitor Menú...
- Seite 177 Para más información póngase en contacto con su proveedor o con el servicio de atención al cliente de Hitachi. Indica el grupo en el que está prohibido el funcionamiento desde el mando a distancia.
- Seite 178 La pantalla se congela en la pantalla de arranque • Puede que haya un error de comunicación. Para más información póngase en contacto con su proveedor o con el servicio de atención al cliente de Hitachi. PMML0332A rev.0 - 05/2015...
-
Seite 179: Resolución De Problemas
Resolución de problemas 6 RESOLUCIÓN DE PROBLEMAS Antes de contactar con el servicio técnico compruebe la siguiente tabla: Condición Causa • Compruebe que cable de alimentación esté enchufado. No se visualizan las indicaciones en la pantalla táctil. • Compruebe que la fuente de alimentación esté encendida. •... -
Seite 181: Sicherheitsübersicht
• Stellen Sie vor der Installation sicher, dass der Untergrund flach, waagerecht und ausreichend tragfähig ist, und befestigen Sie dann das Gerät auf eine sichere Weise. Wenn der Untergrund nicht stark genug ist, kann dies durch das Herunterfallen des Geräts, elektrischen Stromschlägen oder Feuer zu Verletzungen führen. • Installieren Sie die Steuerung nicht nicht an Orten, an denen möglicherweise entzündbare Gase gebildet werden, zirkulieren, vorhanden sind oder entweichen. • Führen Sie Installationsarbeiten und die Kabelanschlüsse NICHT selbst aus. Die Installationsarbeit und die Kabelanschlüsse werden auf Anfrage bei Ihrem HITACHI-Fach- oder Vertragshändler von qualifiziertem Fachpersonal durchgeführt. • Führen Sie die Verkabelungsarbeiten gemäß dem Installationshandbuch durch, und beachten Sie die relevanten Bestimmungen und Normen. Wenn die Anleitungen nicht befolgt werden, kann es aufgrund einer mangelnden Leistung und fehlerhaften Ausführung zu Stromschlägen oder Feuer führen. • Verwenden Sie die spezifizierten Kabel zum Anschluss zwischen der Zentraleinheit und den Innengeräten. Die Wahl der falschen Kabel kann zu Feuer oder Stromschlägen führen. • Schalten Sie die Hauptstromversorgung ganz AUS, bevor Sie die Wartungsklappe des Innengeräts öffnen oder schließen, da der Stromanschluss oder der Netzschalter sonst immer noch unter Strom stehen und Stromschläge verursachen können. Schalten Sie die... -
Seite 182: Hauptmerkmale
Hauptmerkmale 2 HAUPTMERKMALE Die Zentraleinheit (PSC-A32MN) wird am H-LINK System angeschlossen und zur zentralen Steuerung und Überwachung der Klimaanlagen verwendet. Die folgenden Funktionen sind für alle an den Zentraleinheiten angeschlossenen Innengeräte verfügbar. 1 Start/Stopp, Betriebsartenwechsel, Lüfterdrehzahlsteuerung, Steuerung der Schwingluftklappenrichtung, Temperatureinstellung und Erlauben/Verbieten des Betriebs über die Fernbedienung. -
Seite 183: Installation
Kabel SPEZ.: 0,75 bis 1,25 mm H-LINK-Kabel (Zur Steuerung) Empfohlenes Kabel: JKPEV-S, JKEV-S, CVV-S, CVV, 600 V VCT * Die empfohlenen Kabel sind die Modellnamen von Hitachi Cables, Ltd. 3.2 TEILELISTE Packen Sie das Gerät aus und überprüfen Sie Folgendes: • Es sind alle Teile enthalten (siehe die Tabelle). -
Seite 184: Beschreibung Der Teile
Installation 3.3 BESCHREIBUNG DER TEILE Farbige LCD-Anzeige mit Touchscreen Für den Betrieb und die Überwachung von den Geräten mittels des Touchscreens. Wird unter Verwendung des Touch-Pen (Zubehör) betrieben. Die Touchscreen-Anzeige wird automatisch abgeschaltet, wenn Vorderseite der Touchscreen über eine vorgegebene Zeitdauer nicht verwendet wird. Steuerfunktionen wie das mehrfache Drücken (gleichzeitig mehrere Punkte des Touchscreens betätigen) oder die Swipe-Funktion werden nicht unterstützt. -
Seite 185: Technische Daten
Installation 3.4 TECHNISCHE DATEN Modell PSC-A32MN Außenabmessung 140 × 120 × 22 + 52,7 (mm) <W x H x D + (Eingebautes Teil)> Nettogewicht 0,5 kg (ca.) Installationsort Innen Installationsverfahren Wandbefestigung mit JIS-Schaltkasten für 2 Schalter (mit Abdeckung) (JIS C 8340) Angeschlossene Innengeräte (Anzahl) 160 (max.) Uhrgenauigkeit... -
Seite 186: Installationsschritte
Installation 3.6 PLATZBEDARF Planen Sie den Platzbedarf der Zentraleinheit so wie unten dargestellt. (Maßeinheit: mm) 52,7 Befestigen Sie nichts im Schattenbereich “ ”. Wenn zwei oder mehr Zentraleinheiten nebeneinander aufgestellt werden, muss der folgende Abstand dabei eingehalten werden. * Vertikaler Abstand: 50mm * Horizontaler Abstand: 30mm... - Seite 187 Installation 3 Schließen Sie die Kabel an der Anschlussleiste der Zentraleinheit an. Anschlussleiste Verwenden Anschlussverfahren M3 Schraubanschluss Zur Stromversorgung Rundanschluss Für H-LINK-Übertragung Anzugsdrehmoment 0,5 Nm 3-pin Anschlusskabel Für externen CN1 ~ 3 Führen Sie die Anschlusskabel Eingang/Ausgang H-LINK (ungepolt) 100 bis 240 V WS (Zubehör) ein, bis ein Klick ertönt.
-
Seite 188: Kabelanschluss
5 V GS ≤ 1000 m 0,75 bis 1,25 mm (Fernbedienungskabel) JKPEV-S, JKEV-S, CVV-S, CVV, Eingang: Verkabelung für den 600 V VCT (Hitachi-Kabel) Spannungsfreier normal geöffnet externen Eingang und ≤ 300 m 0,5 bis 1,25 mm Ausgang Ausgang: 12V GS, 75mA> H I N W E I S •... - Seite 189 Kabelanschluss • Verwenden Sie einen Fehlerstromschutzschalter mit mittlerer Empfindlichkeit und einer Aktivierungsgeschwindigkeit von höchstens 0,1. Sollten diese Bedingungen nicht erfüllt werden, kann es zu Stromschlägen oder Brand kommen. • Installieren Sie ein Fehlerstromschutzschalter, eine Sicherung und einen Trennschalter für jede Außengerätstromleitung. Sollten diese Bedingungen nicht erfüllt werden, kann es zu Stromschlägen oder Brand kommen. • Bei diesem Modell handelt es sich um ein Einphasengerät (1~, WS 100-240 V, 50/60 Hz). Schließen Sie keinen Dreiphasenstrom an. Dies könnte zu Störungen führen. G E FA H R • Vor dem Beginn der Verkabelungsarbeiten müssen Sie den Stromschalter der Innen- und Außengeräte sowie der Zentralstationen auf AUS stellen. Sollten Sie dies nicht tun, kann es zu Brand, Stromschlägen oder Störungen kommen. • Benutzen Sie keine Kabel, die leichter sich als ein normales, biegsames Kabel aus Polychloropren (Code H05RN-F). Einstellungsverfahren der Schalter Die Liste für die Schalter-Einstellung der Zentraleinheiten werden in der folgenden Tabelle angezeigt. 1 Führen Sie nötigen Schaltereinstellungen durch. Werkseitige Schalter Schalternr.
-
Seite 190: Dsw1-Einstellung
Kabelanschluss DSW1-Einstellung Name Modell DSW1 DSW2 DSW3 DSW4 Zentraleinheit EZ PSC-A64GT Kleine Zentraleinheit PSC-A32MN Zentraleinheit PSC-A64S Zentralisierte EIN/AUS- PSC-A16RS Steuerung PSC-A32MN mit Andere HC-A(8/64)MB Nicht kompatibel anderen zentralen zentrale Steuerungen kombiniert Steuerungen HC-A16KNX Nicht kompatibel BMS-Gateways KNX001 Nicht kompatibel HARC-BX E (A/B) Nicht kompatibel CSNET Manager LT Nicht kompatibel... -
Seite 191: Betrieb
Betrieb 5 BETRIEB 5.1 TESTLAUF Der Überblick des Testlaufverfahrens wird in der Abbildung gezeigt. Die dick umrandeten Elemente ( ) sind notwendig. Aller weiteren Elemente, die für den Testlauf nicht ausdrücklich notwendig aber optional sind, werden in einem eigenen Abschnitt erklärt. -
Seite 192: Funktion
Betrieb Liste der Elemente Element Funktion Spracheneinstellen Diese Funktion dient zur Auswahl der Sprache. Einstellung von Datum und Diese Funktion dient zur Einstellung von Datum und Uhrzeit. Uhrzeit Diese Funktion dient der Registrierung von Gruppen und Blocks der Innengeräte, die an denselben H-LINK Gruppenregistrierung geschlossen sind und die von der Zentraleinheit erkannt wurden sind. - Seite 193 Betrieb Element Funktion Auswahl der Ausnahme- Diese Funktion dient zur Auswahl der Gruppen, deren Betriebskommandos vom externen Eingang 1 Gruppen für den externen abgebrochen werden. Eingang 1 Auswahl der Ausnahme- Diese Funktion dient zur Auswahl der Gruppen, deren Betriebskommandos vom externen Eingang 2 Gruppen für den externen abgebrochen werden.
-
Seite 194: Einschaltung
Betrieb 5.1.1 Einschaltung Schalten Sie die Stromversorgung der Klimaanlagen ein. Zum Schutz des Kompressors sollte die Stromversorgung 12 Stunden vor Beginn des Betriebs eingeschaltet werden. Unterbrechen Sie die Stromversorgung nicht während der Klimaanlagenperioden. Führen Sie ein Testlauf für alle Klimaanlagen durch, um den Normalbetrieb zu prüfen. Schalten Sie die Stromversorgung der Zentraleinheit ein. -
Seite 195: Einstellung Von Datum Und Uhrzeit
Betrieb 5.1.4 Einstellung von Datum und Uhrzeit Nach Einstellen der Temperatureinheit erscheint der Bildschirm für das Einstellen von Datum/Uhrzeit auf dem Touchscreen, wie in der Abbildung gezeigt. Tippen Sie auf "Set" an der Touchscreen-Anzeige und stellen Sie Datum und Uhrzeit gemäß dem angezeigten Verfahren ein. Detaillierte Informationen finden Sie im Abschnitt “5.3.5 Einstellung von Datum und Uhrzeit”... -
Seite 196: Einstellung Der Steuerungsschablonen
Betrieb 5.1.6 Einstellung der Steuerungsschablonen Nach der Einstellung von Zeit und Datum, wird die Steuerungsschablone angezeigt. Tippen Sie auf "Set" am Touchscreen, um mit der Einstellung der Steuerungsschablone zu beginnen. Wenn eine der Schablonentasten betätigt wird, leuchtet diese mit einem orangenen Rahmen auf. Die Einstellung der Steuerungsschablonen wird anschließend erklärt. -
Seite 197: Gruppenregistrierung
Betrieb 5.1.7 Gruppenregistrierung Registrieren Sie die an die Gruppen oder Blocks der Zentraleinheit angeschlossenen Innengeräte. 5.1.7.1 Definitionen • Gruppe: Die Mindestanzahl an von der Zentraleinheit gesteuerten Betriebsgeräte. 1 Fernbedienungsgruppe wird als 1 Gruppe gehandelt und es gelten dieselben Einstellungen für die ganze Gruppe. Maximal können 32 Gruppen (aufgeteilt in 4 Blocks mit jeweils 8 Gruppen, 8 Blocks mit jeweils 4 Gruppen, 2 Blocks mit jeweils 16 Gruppen oder 16 Blocks mit jeweils 2 Gruppen) über eine Zentraleinheit gesteuert werden. -
Seite 198: Nebengeräte-Registrierung
Betrieb 5.1.7.3 Nebengeräte-Registrierung • Bis zu 15 Nebengeräten mit einem Hauptgerät können in einer Fernbedienungsgruppe registriert werden (bei Anwendung des Steuerungsmuster 2 Blocks mit je 16 Gruppen). • Das Innengerät ohne Fernbedienung kann nicht als Nebengerät registriert werden. • Wenn ein schon als Nebengerät registriertes Innengerät geändert werden soll, brechen Sie erst die Registereinstellung ab und starten Sie dann erneut. - Seite 199 Betrieb 3 Wählen Sie die Gruppe für die Registrierung des Hauptgeräts. • Wenn Sie oben links am Touchscreen auf “<” und “>” tippen, erscheint die Block-Anzeige. • Die Nummer, die auf den Tasten angezeigt werden, stehen für die Gruppen- und Blocknummern. • Wählen Sie durch Tippen auf eine der Tasten die Gruppe aus.
-
Seite 200: Registrieren Einer Gruppe (Nebengerät)
Betrieb Drücken Sie die Tasten “<” und “>” links oben am Touchscreen, um mit der Einstellung eines anderen Blocks fortzufahren oder drücken Sie auf "Einstel. beendet", um den Vorgang zu verlassen. 6 Drücken Sie auf "Einstel. beendet", um die Gruppe zu registrieren und kehren Sie zum Registriermenü der Gruppe zurück. 7 Tippen Sie auf "Geräte übersicht", um zum Bildschirm "Monitor"... - Seite 201 Betrieb 2 Wählen Sie am Bildschirm "Gruppenregistrierung" das "Nebengerät registrieren". 3 Wählen Sie die Gruppe für die Registrierung des Nebengeräts. • Wenn Sie oben links am Touchscreen auf “<” und “>” tippen, erscheint die Block-Anzeige. • Wählen Sie durch Tippen auf die Gruppe diese aus. Die gewählte Taste ist mit einer orangenen Linie eingerahmt. • Wenn die gewählte Gruppen-Taste erneut getippt wird, wird die Auswahl storniert.
- Seite 202 Betrieb Drücken Sie die Tasten “<” und “>” links oben am Touchscreen, um mit der Einstellung eines anderen Blocks fortzufahren oder drücken Sie auf "Einstel. beendet", um den Vorgang zu verlassen. 6 Tippen Sie auf "Einstel. beendet" in "Gruppenregistrierung (Nebengerät registrieren)", um zum Bildschirm "Gruppenregistrierung" zurückzukehren.
-
Seite 203: Abbruch Der Gruppenregistrierung
Betrieb 5.1.7.6 Abbruch der Gruppenregistrierung 1 Wählen Sie am "Wartungsmenü"-Bildschirm "Gruppenregistrierung". Siehe “5.1.7.4 Registrieren einer Gruppe (Hauptgerät)”. H I N W E I S Diese Funktion kann nicht gewählt werden, wenn das externe Eingangssignal im externen Eingangsanschluss 1 oder 2 eingeht. 2 Wählen Sie am Bildschirm "Gruppenregistrierung" das Element "Hauptgerät registrieren" (oder "Nebengerät registrieren"). 3 Wählen Sie die Gruppe, um die Registrierung abzubrechen. Wenn Sie oben links am Touchscreen auf “<”... -
Seite 204: Prüfen Der Gruppenregistrierung (Prüfen Des Hauptgerätregisters)
Betrieb 5.1.7.7 Prüfen der Gruppenregistrierung (Prüfen des Hauptgerätregisters) 1 Wählen Sie am "Wartungsmenü"-Bildschirm "Gruppenregistrierung". Siehe Abschnitt “5.1.7.4 Registrieren einer Gruppe (Hauptgerät)”. H I N W E I S Diese Funktion kann nicht gewählt werden, wenn das externe Eingangssignal im externen Eingangsanschluss 1 oder 2 eingeht. 2 Wählen Sie am Bildschirm "Gruppenregistrierung" das Element "Hauptgerät registrieren" (oder "Nebengerät registrieren"). 3 Tippen Sie auf “Eins. überpr.” unten links am Touchscreen. 4 Der Bildschirm wechselt zur Prüfung der Gruppenregistrierung. -
Seite 205: Prüfen Der Gruppenregistrierung (Prüfen Der Registerdetails)
Betrieb 5.1.7.8 Prüfen der Gruppenregistrierung (Prüfen der Registerdetails) 1 Wählen Sie am "Wartungsmenü"-Bildschirm "Gruppenregistrierung". Siehe Abschnitt “5.1.7.4 Registrieren einer Gruppe (Hauptgerät)”. H I N W E I S Diese Funktion kann nicht gewählt werden, wenn das externe Eingangssignal im externen Eingangsanschluss 1 oder 2 eingeht. 2 Wählen Sie bei der Gruppenregistrierung "Verbindung überprüfen". 3 Wählen Sie die Zielanzeige (alle Gruppen / einzelne Blocks). 4 Die Kühlsystemnummer und die Adresse aller an eine Gruppe angeschlossenen Geräte anzeigen. -
Seite 206: Hauptbildschirm
Betrieb 5.2 HAUPTBILDSCHIRM 5.2.1 Gesamtübersicht "Monitor (Alle Gruppen)" Block-Taste Durch Tippen auf diese Taste wird die Geräte-Status Stromanzeige Bildschirmanzeige zur Anzeige “Block” Monitor Zur Anzeige des Gerätezustands mit Zeigt den Strom an (Block) gewechselt. z.B. Filterzeichen, Anforderung, usw. (Alle Gruppen) Gruppen-Taste Zeigt die Betriebsbedingungen jeder Gruppe folgendermaßen an:... -
Seite 207: Stromanzeige
Betrieb "Monitor (Block)" Block-Tab Zum Wechsel der Monitor-Anzeige zu "Block" oder "Alle Gruppen". Stromanzeige Geräte-Status Gruppen-Taste Zeigt den Strom an Zur Anzeige des Gerätezustands mit Anzeige des Betriebsstatus (Gruppen im Block) z.B. Filterzeichen, Anforderung, usw. Grün: Start Grau: Stopp Rot: Störung Wenn die Gruppen-Taste getippt wird, werden... -
Seite 208: Gruppen- Und Blockeinstellung
Betrieb 5.2.2 Gruppen- und Blockeinstellung 5.2.2.1 Anzeige von allen Gruppen 1 Tippen Sie auf "Alle die Gruppen" an der Touchscreen-Anzeige. Der mit (1) markierte Tab "Alle die Gruppen" wird nicht angezeigt, wenn nur ein Block registriert wurde. (1)* 2 Alle Gruppen werden auf dem Touchscreen angezeigt (alle an die Zentraleinheit angeschlossenen Innengerät werden angezeigt). -
Seite 209: Anzeige Eines Spezifizierten Blocks
Betrieb 5.2.2.2 Anzeige eines spezifizierten Blocks 1 Wählen Sie den Zielblock am Bildschirm von "Monitor (Alle Gruppen)" oder "Monitor (Block)". Monitor (Alle Gruppen) Monitor (Block) 2 Die Gruppen im gewählten Block werden am Touchscreen angezeigt. Der Betriebsstatus jeder Gruppe wird mit Farbe der Gruppentaste wie folgt angezeigt: Grün: Start... -
Seite 210: Gleichzeitiger Start/Stopp Für Alle Gruppen
Betrieb 5.2.2.3 Gleichzeitiger Start/Stopp für alle Gruppen 1 Tippen Sie auf "Alle die Gruppen" an der Touchscreen-Anzeige. 2 Drücken Sie auf "Alle starten", um alle Gruppen gleichzeitig zu starten. Drücken Sie auf "Alle ausges.", um alle Gruppen gleichzeitig zu stoppen. 3 Das Bestätigungsfenster wird nun angezeigt. -
Seite 211: Gleichzeitiger Start/Stopp Für Jede Block
Betrieb 5.2.2.4 Gleichzeitiger Start/Stopp für jede Block 1 Wählen Sie den Zielblock in der Touchscreen-Anzeige, um den gleichzeitigen Start/Stopp-Betrieb einzustellen. 2 Drücken Sie auf "Start Block", um alle Gruppen des gewählten Blocks gleichzeitig zu starten. Drücken Sie auf "Stopp Block", um alle Gruppen des gewählten Blocks gleichzeitig zu stoppen. 3 Das Bestätigungsfenster wird nun angezeigt. -
Seite 212: Start/Stopp Für Jede Gruppe
Betrieb 5.2.2.5 Start/Stopp für jede Gruppe Prüfen Sie den Steuermodus vor der Einstellung. Je nachdem ob der Steuerbetrieb auf "Normal" oder "Nur Start/Stopp" gestellt ist, variiert die Steuerungsmethode. Start/Stopp-Betrieb für jede Gruppe (Steuermodus: Normal) 1 Wählen Sie den Bildschirm von "Monitor (Alle Gruppen)" oder "Monitor (Block)". Wählen Sie die einzustellende Gruppe, indem Sie auf die Gruppen-Taste tippen. - Seite 213 Betrieb Start/Stopp-Betrieb für jede Gruppe (Steuermodus: Nur Start/Stopp) Monitor (Alle Gruppen) 1 Wählen Sie die Zielgruppe am Bildschirm von "Monitor (Alle Gruppen)" im Modus "Nur Start/Stopp". 2 Der Betriebsstatus der gewählten Gruppe wechselt zwischen Start und Stopp, wenn diese Taste gedrückt wird. In diesem Modus ist der gleichzeitige Start/Stopp-Betrieb für alle Gruppen über die Tasten "Alle starten"...
-
Seite 214: Hauptparametereinstellung
Betrieb 5.2.3 Hauptparametereinstellung 5.2.3.1 Betriebsart 1 Wählen Sie den Zielgruppe am Bildschirm von "Monitor (Alle Gruppen)" oder "Monitor (Block)", um die Einstellungen der Betriebsart zu ändern. Die Einstellungen für die gewählte Gruppe werden am Touchscreen angezeigt. Monitor (Alle Gruppen) Monitor (Block) 2 Durch das Drücken der Tasten “... -
Seite 215: Lüfterdrehzahl
Betrieb 5.2.3.2 Lüfterdrehzahl 1 Wählen Sie die Zielgruppe am Bildschirm von "Monitor (Alle Gruppen)" oder "Monitor (Block)", um die Einstellungen der Lüfterdrehzahl zu ändern. Die Einstellungen für die gewählte Gruppe werden am Touchscreen angezeigt. Monitor (Alle Gruppen) Monitor (Block) 2 Durch das Drücken der Tasten “ ” oder “ ” unterhalb der "LÜFTERSTUFE", wird die Einstellung dieser wie folgt geändert: HI-H AUTO * "HI-H"... -
Seite 216: Schwingluftlklappen-Richtung
Betrieb 5.2.3.3 Schwingluftlklappen-Richtung 1 Wählen Sie die Zielgruppe am Bildschirm von "Monitor (Alle Gruppen)" oder "Monitor (Block)", um die Richtung der Schwingluftklappen zu ändern. Die Einstellungen für die gewählte Gruppe werden am Touchscreen angezeigt. Monitor (Alle Gruppen) Monitor (Block) 2 Durch das Drücken der Tasten “ ” oder “ ” der "LUFTAUSBLAS" wird die Richtung dieser wie folgt geändert: LCD-Anzeige AUTO Automatik-... -
Seite 217: Temperatureinstellung
Betrieb 5.2.3.4 Temperatureinstellung 1 Wählen Sie die Zielgruppe am Bildschirm von "Monitor (Alle Gruppen)" oder "Monitor (Block)", um die Einstelltemperatur zu ändern. Die Einstellungen für die gewählte Gruppe werden am Touchscreen angezeigt. Monitor (Alle Gruppen) Monitor (Block) 2 Durch Drücken auf “ ”, wird die Temperatur um 1ºC gehoben (Max. 30ºC). Durch Drücken auf “ ”, wird die Temperatur um 19ºC gesenkt (Min. -
Seite 218: Erlaubt/Verbot Vom Betrieb Über Die Fernbedienung
Betrieb 5.2.3.5 Erlaubt/Verbot vom Betrieb über die Fernbedienung Diese Funktion dient zum Sperren des Betriebs über die Fernbedienung. Wenn die Fernbedienung auf gesperrt gestellt ist (pro Element/für alle Elemente), ist die Steuerung der gewählten Elemente nicht mehr möglich. Die Elemente, die ausgewählt werden können, sind Folgende: Start/Stopp, Betriebsart, Lüfterdrehzahl, Schwingluftklappe und Temperatur. - Seite 219 Betrieb 3 Tippen Sie auf "Geräte übersicht", um zum Bildschirm "Monitor" zurückzukehren. H I N W E I S • Durch Antippen von “<” oder “>” auf dem detaillierten Einstellungsbildschirm wechselt die Fernbedienung Zulässig/Unzulässig in eine andere Gruppe desselben Blocks. • Steuerung Unzulässig (Nur Start/Stopp): Im Falle von “Aktivieren” gilt jede Einstellungsänderung für alle Gruppen oder Blöcke. Eine Einstellungsänderung ist nicht für jede Gruppe möglich.
-
Seite 220: Funktion
Betrieb 5.3 MENÜ Die Tabelle unten zeigt die Menü-Elemente und ihre Funktionen. Element Funktion Diese Funktion dient zum Ausschalten des Filterzeichens der angeschlossenen Innengeräte, bei denen das Filterzeichen angezeigt wurde. Filteranzeige zurücksetzen Unabhängig von dem Erscheinen des Filterzeichen ist es möglich, die angezeigte Zeit des Filterzeichen an der Klimaanlage zurückzusetzen. - Seite 221 Betrieb 5.3.1 Anzeigenmenü-Bildschirm Die Einstellelemente für das Innengerät und die Zentraleinheit werden im Menü angelegt. 1 Tippen Sie auf "Menü" am Bildschirm von "Monitor (Alle Gruppen)" oder "Monitor (Block)". Monitor (Alle Gruppen) Monitor (Block) 2 “Menü”-Bildschirm wird angezeigt. 3 Wählen Sie das Element vom Bildschirm "Menü". 4 Tippen Sie auf "Monitor", um zum Bildschirm zurückzukehren.
-
Seite 222: Rückstellung Des Filterzeichens
Betrieb 5.3.2 Rückstellung des Filterzeichens 5.3.2.1 Filteranzeige zurücksetzen 1 Wählen Sie am "Menü"-Bildschirm "Filteranzeige zurücksetzen". (Dies ist nur verfügbar, wenn das Filterzeichen angezeigt wird). 2 Wählen Sie den Zielbereich, um das Filterzeichen zurückzusetzen. • Drücken Sie auf "Mit akt. Meldung", um nur die Gruppen mit Filterzeichen anzuzeigen. • Die Zielgruppen werden in Gelb angezeigt. -
Seite 223: Filter-Betriebszeit Zurücksetzen
Betrieb 5.3.2.2 Filter-Betriebszeit zurücksetzen 1 Wählen Sie am "Menü"-Bildschirm "Filteranzeige zurücksetzen". (Dies ist nur verfügbar, wenn das Filterzeichen angezeigt wird). 2 Wählen Sie den Zielbereich, um die Filterbetriebszeit zurückzusetzen. • Wählen Sie den Zielbereich, um die Filterbetriebszeit zurückzusetzen. • Die Zielgruppen werden in Gelb angezeigt. • Nach der Auswahl wird die Gruppen-Taste mit dem Zeichen “... -
Seite 224: Timer Programmieren
Betrieb 5.3.3 Timer programmieren Diese Funktion wird für den Betrieb mit Timer verwendet. Es kann ein Zeitplan für einen Block und für jede Gruppe eingerichtet werden. Außerdem steht auch unabhängig von dem Zeitplan eine Ferieneinstellung zur Verfügung. 5.3.3.1 Einstellung des Wochen Timers ... - Seite 225 Betrieb 7 Drücken Sie auf “Speichern”, um die Einstellung zu bestätigen. Wenn auf “Abbrechen” gedrückt wird, wird der angezeigte Einstellungsinhalt nicht berücksichtigt und der Bildschirm kehrt zu den Zeitplaneinstellungen zurück. • Gehen Sie zurück zum Schritt (5), um weitere Einstellungen für denselben Wochentag vorzunehmen. • Gehen Sie zurück zum Schritt (4), um weitere Einstellungen für einen anderen Wochentag vorzunehmen.
- Seite 226 Betrieb Kopieren der Zeitplan-Einstellung per Wochentage 1 Wählen Sie am "Menü"-Bildschirm "Timer programmieren". 2 Wählen Sie "Einstellung des Wochen Timers" von der "Timer programmieren". 3 Wählen Sie das Ziel (alle Gruppen, Block oder Gruppe). 4 Tippen Sie auf "Wochentag kopieren". 5 Wählen Sie den zu kopierenden Wochentag.
- Seite 227 Betrieb Kopieren der Zeitplan-Einstellung für jede Gruppe 1 Wählen Sie am "Menü"-Bildschirm "Timer programmieren". 2 Wählen Sie "Einstellung des Wochen Timers" von der "Timer programmieren". 3 Drücken Sie auf "Einstell. kopieren". 4 Wählen Sie die zu kopierende Gruppe aus. (Ein Block kann nicht als Vorlage für eine Kopie ausgewählt werden). • Die Taste der gewählten Gruppe erscheint in Orange.
- Seite 228 Betrieb Zeitplan-Einstellung über einzelnes Element löschen 1 Wählen Sie am "Menü"-Bildschirm "Timer programmieren". 2 Wählen Sie "Einstellung des Wochen Timers" von der "Timer programmieren". 3 Wählen Sie das Ziel (alle Gruppen, Block oder Gruppe). 4 Tippen Sie auf "Einstell. löschen". 5 Wählen Sie die Zeitplan-Elementen-Nr., um das Zeitplanelement zu löschen.
- Seite 229 Betrieb Löschen der Zeitplan-Einstellung für jede Gruppe 1 Wählen Sie am "Menü"-Bildschirm "Timer programmieren". 2 Wählen Sie "Einstellung des Wochen Timers" von der "Timer programmieren". 3 Tippen Sie auf "Einstell. löschen". 4 Wählen Sie die Gruppen oder Blocks zum Löschen der Einstellungen. • Ein Kontrollzeichen “...
-
Seite 230: Feiertag-Einstellung Zum Abbruch Des Betriebs
Betrieb 5.3.3.2 Feiertag-Einstellung zum Abbruch des Betriebs 1 Wählen Sie am "Menü"-Bildschirm "Timer programmieren". 2 Wählen Sie "Einstellung der Feiertage" am "Timer programmieren" -Bildschirm. 3 Wählen Sie das Ziel (alle Gruppen, Block oder Gruppe). Der Kalender für die Auswahl wird angezeigt. • Die Tasten der Gruppen mit der Ferienkonfiguration erscheinen in Blau. -
Seite 231: Einstellung Des On/Off Timers
Betrieb 5.3.3.3 Einstellung des ON/OFF Timers 1 Wählen Sie am "Menü"-Bildschirm "Timer programmieren". 2 Wählen Sie "Einstellung des ON/OFF Timers" bei der "Timer programmieren". Der Bildschirm wechselt zu "Wochentimer-EIN/AUS Einstellung". Die anfängliche Einstellung ist "EIN", wie es auch durch das “... -
Seite 232: Einstellung Des Einstelltemperaturbereichs Der Fernbedienung
Betrieb 5.3.4 Einstellung des Einstelltemperaturbereichs der Fernbedienung 1 Wählen Sie unter dem "Menü" den "Sollwertbegr. an der Fernbedienung".* * Wenn die angeschlossene Klimaanlage diese Funktion nicht unterstützt, ist die Wahl nicht möglich. 2 Wählen Sie das Ziel für den Einstelltemperaturbereich. (Alle Gruppen/Block/Gruppe)* • Die Tasten der Gruppen mit der Einstelltemperaturbereich erscheinen in Blau. - Seite 233 Betrieb 5.3.5 Einstellung von Datum und Uhrzeit 1 Wählen Sie am "Menü"-Bildschirm "Einstellung von Datum und Uhrzeit". 2 Display in der Reihenfolge “Jahr”, “Monat” und “Tag” einstellen. 3 Drücken oder halten Sie Tasten “ ” oder “ ” für jedes Feld gedrückt, um die Zeit und das Datum einzustellen. 4 Tippen Sie auf “Speichern”, um zum Bildschirm “Menü”...
-
Seite 234: Touchscreen-Kalibrierung
Betrieb 5.3.7 Touchscreen-Kalibrierung 1 Wählen Sie am "Menü"-Bildschirm "Touchscreen-Kalibrierung" aus. 2 Kalibrierung des Touchscreen • Tippen Sie auf alle Schnittpunkte der weißen Linien, die am Bildschirm angezeigt werden. • Danach wird der in Abbildung (3) aufgeführte Bildschirm angezeigt. • Wenn die Schnittpunkte der weißen Linien nicht normal erkannt werden, erscheint "Kalibrierung wird abgebrochen" am Bildschirm. -
Seite 235: Registrierung Der Gruppen- Und Blocknamen
Betrieb 5.3.8 Registrierung der Gruppen- und Blocknamen 5.3.8.1 Gruppennamen festlegen 1 Wählen Sie am "Menü"-Bildschirm "Gruppennamen festlegen". 2 Wählen Sie das Ziel (Block oder Gruppe), um den Namen zu registrieren. 3 Die Anzeige wechselt zum nächsten Eingabebildschirm. Es kann zwischen Groß- und Kleinbuchstaben sowie Symbole der Tastatur gewählt werden. 4 Name der Gruppe oder des Blocks eingeben. - Seite 236 Betrieb 5.3.8.2 Kopieren Gruppen- und Blocknamen. 1 Wählen Sie am "Menü"-Bildschirm "Gruppennamen festlegen". 2 Wählen Sie die Ausgangsgruppe oder Block zum Kopieren aus. • Die Taste der gewählten Gruppe oder Block erscheint mit einem orangenem Rahmen. • Drücken Sie auf die Taste der gewählten Gruppe oder Blocks, um die Auswahl zu stornieren. Dann erlischt der orangene Rahmen.
-
Seite 237: Einstellung Der Helligkeit Des Hintergrundlichts Von Der Touchscreen-Anzeige
Betrieb 5.3.9 Bildschirmeinstellung 5.3.9.1 Einstellung der Helligkeit des Hintergrundlichts von der Touchscreen-Anzeige 1 Wählen Sie am "Menü"-Bildschirm "Bildschirmeinstellung". 2 Wählen Sie "Helligkeit" vom Bildschirm "Bildschirmeinstellung". 3 Tippen Sie auf “<” oder “>” und stellen Sie die Helligkeit des Hintergrundlichts ein. 4 Tippen Sie auf “Speichern”... - Seite 238 Betrieb 5.3.9.2 Spracheneinstellen 1 Wählen Sie am "Menü"-Bildschirm "Bildschirmeinstellung". 2 Wählen Sie "Sprache" am Bildschirm "Bildschirmeinstellung". 3 Ein Bestätigungsfenster wird angezeigt, wenn Sie die Taste der Sprache wählen. 4 Tippen Sie auf “Speichern”, um zum Bildschirm “Bildschirmeinstellung” zurückzukehren. PMML0332A rev.0 - 05/2015...
- Seite 239 Betrieb 5.3.9.3 Einstellung Temperatureinheit 1 Wählen Sie am "Menü"-Bildschirm "Bildschirmeinstellung". 2 Wählen Sie "Temperatureinheit" am Bildschirm "Bildschirmeinstellung". 3 Wählen Sie Celsius oder Fahrenheit mit der jeweiligen Taste. Die gewählte Taste erleuchtet gelb. 4 Tippen Sie auf "Speichern", um zum Bildschirm "Bildschirmeinstellung" zurückzukehren. PMML0332A rev.0 - 05/2015...
- Seite 240 Betrieb 5.3.10 Akkumulierte Betriebszeit 5.3.10.1 Per Monat anzeigen 1 Wählen Sie am "Menü"-Bildschirm "Akkumulierte Betriebszeit". 2 Tippen Sie auf "Anzeigen Monat". 3 Drücken Sie zur Wahl des Zielblocks die Taste “<” oder “>”. 4 Drücken Sie zur Wahl des Zieljahres und Monats die Taste “<” oder “>”. 5 Tippen Sie auf "Menü", um zum Bildschirm "Menü"...
- Seite 241 5 Tippen Sie auf "Menü", um zum Bildschirm "Menü" zurückzukehren. H I N W E I S • Die akkumulierte Betriebszeit dieser Zentraleinheit ist nur als Referenz gedacht. Hitachi gewährleistet nicht die Genauigkeit der besagten akkumulierten Betriebszeit. • "Thermo-EIN Zeit" kann ebenfalls zusätzlich angezeigt werden, wenn die entsprechende Option bei "Einstellung...
-
Seite 242: Kontaktinformation
Betrieb 5.3.11 Kontaktinformation 1 Wählen Sie am "Menü"-Bildschirm "Kontaktinformation". Folgende Informationen werden angegeben: Kontaktinformation (2 unabhängige Elemente) Name des Blocks und der Gruppe des letzten Alarms. Letzter Alarmcode 2 Tippen Sie auf "Menü", um zum Bildschirm "Menü" zurückzukehren. H I N W E I S •... - Seite 243 Betrieb 5.3.12 Sommerzeiteinstellung 1 Wählen Sie am "Menü"-Bildschirm "Autom. Sommerzeitumstellung". Folgende Informationen werden angegeben: 2 Wählen Sie die entsprechende Funktion für jedes Element. Danach verändert sich die Farbe der ausgewählten Funktion. 3 Drücken Sie auf “Speichern”, um den Inhalt der Einstellungen zu bestätigen und zum Bildschirm “Menü” zurückzukehren. PMML0332A rev.0 - 05/2015...
- Seite 244 Betrieb 5.4 WARTUNGSMENÜ H I N W E I S • Diese Taste ist nur für das Wartungspersonal vorgesehen. Bedienen Sie sie daher nicht. • Wenn diese Taste verwendet wird und das Wartungsmenü am Bildschirm angezeigt wird, tippen Sie auf "Zurück". Das Fenster kehrt zum Menü zurück. Elemente Inhalt Die angeschlossenen Innengeräte werden von der Zentraleinheit im selben H-LINK geprüft. Diese Funktion Gruppenregistrierung dient ihrer Gruppen- oder Blockregistrierung. Einstellung der Stellen Sie die Steuerungsschablone ein. Steuerungsschablonen Diese Funktion dient zur Registrierung des Hauptgeräts in jeder Fernbedienungsgruppe.
- Seite 245 Betrieb 1 Tippen Sie auf "Menü" am Bildschirm von "Monitor (Alle Gruppen)" oder "Monitor (Block)". Monitor (Alle Gruppen) Monitor (Block) 2 “Menü”-Bildschirm wird angezeigt. 3 Drücken Sie "Wartungsmenü" mindestens 3 Sekunden lang. "Wartungsmenü" wird angezeigt. 4 Wählen Sie das Wartungsmenü-Element durch Antippen des jeweiligen Elements. Der Einstellungsbildschirm des angetippten Elements wird angezeigt.
-
Seite 246: Gruppe Registrieren
Betrieb 5.4.1 Gruppe registrieren H I N W E I S Dies Funktion wird im Abschnitt “5.1 Testlauf” erläutert, da sie erforderlich ist, um den Testlauf durchzuführen. 5.4.2 Einstellung des optionalen Funktionen Diese Funktion dient zur Einstellung und Änderung der Funktionsauswahl der Klimaanlage und Zentraleinheit, die in der folgenden Tabelle aufgelistet sind: Einstellung über Monitor Menü... -
Seite 247: Einstellungen Der Klimaanlage Und Fernbedienung
Betrieb 5.4.2.1 Einstellungen der Klimaanlage und Fernbedienung 1 Wählen Sie "Einstellung des optionalen Funktionen" am "Wartungsmenü"-Bildschirm, wenn die Klimaanlagen nicht in Betrieb sind. 2 Wählen Sie am "Menü"-Bildschirm "Klimaanlage Fernbedienung Einstellung". Wenn eine oder mehrere Klimaanlagen in Betrieb sind, ist diese Auswahl nicht möglich. 3 Wählen Sie das Ziel für die optionale Funktion (Alle Gruppen/Blocks/Gruppe). -
Seite 248: Steuerungseinstellung
Betrieb 5.4.2.2 Steuerungseinstellung 1 Wählen Sie "Einstellung des optionalen Funktionen" am "Wartungsmenü"-Bildschirm, wenn die Klimaanlagen nicht in Betrieb sind. 2 Wählen Sie "Steuerung Einstellung" am Bildschirm "Optionale Funktionseinstellen". 3 Wenn es erforderlich sein sollte, wählen Sie die Einstellung von jedem Funktionselement. Die gewählte Einstellung erleuchtet in Gelb. Timerfunktion ist über Fernbedienung gesperrt Wenn es aktiviert ist, kann das Betriebsverbot nicht eingestellt werden (für einzelne Elemente). -
Seite 249: Einschränken Der Start/Stopp Funktion
Betrieb 5.4.3 Einschränken der Start/Stopp Funktion "Start-" und "Stopp-" Befehle werden nicht akzeptiert, wenn die Gruppe auf Betrieb in "Allen Gruppen" oder "Allen Blocks" geschaltet ist. Allerdings kann man eine Ausnahme für die folgenden Befehle oder Befehlskombinationen einrichten, die bestimmte Gruppen betreffen wird: • Keine • Start + Stopp... -
Seite 250: Einstellung Des Externen Ein / Ausgang
(*6): In manchen Fällen unterstützt das Außengerät manche Einstellungen nicht oder die verfügbaren Einstellungen variieren je nach Leistungswert. Detaillierte Informationen erhalten Sie von Ihrem HITACHI-Händler oder Vertragspartner. (*7): Die Steuerung über den Zeitplan ist ohne den Gebrauch der Anforderungssteuerung möglich. -
Seite 251: Externe Ausgangs-Funktion
Betrieb 5.4.4.2 Externe Ausgangs-Funktion 1 Ausgang Alle Start Externer Ausgang für das Innengeräte-Betriebssignal in der Zielgruppe. Das Betriebssignal wird gegeben, sogar wenn ein Innengerät der Zielgruppe betrieben wird. 2 Externer Alarmausgang Externer Alarmausgang für das Innengerät in der Zielgruppe. Die Alarmsignalausgänge, sogar wenn in einem Innengerät der Zielgruppe eine Störung auftritt. -
Seite 252: Externe Eingangseinstellung
Betrieb 5.4.4.4 Externe Eingangseinstellung 1 Wählen Sie am "Wartungsmenü"-Bildschirm "Einstellung des externen Ein / Ausgang". Die Auswahl ist bei Betrieb der Klimaanlage nicht möglich, auch nicht wenn der Kontakt für das externe Eingangssignal AN ist. 2 Wählen Sie das Eingabeziel (von Eingabe 1 bis 4) der externen Eingabe. 3 Wählen Sie die Funktion, die mit der externen Eingabe verwendet werden soll. -
Seite 253: Leistungssteuerung Des Außengeräts
Betrieb Leistungssteuerung des Außengeräts 5 Wählen Sie den Wert für die Leistung des Außengeräts. Die Taste des gewählten Leistungswerts erleuchtet gelb. 6 Nutzen Sie die Tasten rechts auf dem Bildschirm, um die Leistungssteuerung des Außengeräts zu bestimmen, wenn für diesen Zweck kein externer Eingabekontakt vorliegt. -
Seite 254: Andere Einstellungen
Betrieb Andere Einstellungen 10 Wählen Sie das Ziel für die Steuerung des externen Eingangs. (Alle Gruppen/Block/Gruppe). • Drücken Sie auf die Taste einer Gruppe, um den Auswahlstatus zu ändern. • Drücken Sie auf eine Blocktaste, um den Auswahlstatus aller Gruppen von diesem Block zu ändern. • Drücken Sie auf "Alle auswählen", um den Auswahlstatus aller Gruppen zu ändern. -
Seite 255: Tastenbelegung
Betrieb 5.4.5 Tastenbelegung Die Tasten-Konfiguration wird verwendet, um bestimmte Betriebstasten ein- oder auszublenden, dies beschränkt den Betrieb. Einstellung über Monitor Menü Wartungsmenü Tastenbelegung. 1 Wählen Sie am "Wartungsmenü"-Bildschirm die "Tastenbelegung". 2 Wählen Sie die Funktion in Hinblick auf jedes Element aus. Die gewählte Funktion erleuchtet in Gelb. 3 Drücken Sie auf "Speichern", um den Inhalt der Einstellungen zu bestätigen und zum Wartungsbildschirm zurückzukehren. PMML0332A rev.0 - 05/2015... -
Seite 256: Kontaktinformation
Betrieb 5.4.6 Kontaktinformation Diese Funktion dient zum Bearbeiten oder Speichern der angezeigten Kontaktinformation. Einstellung über Monitor Menü Wartungsmenü Kontaktinformation einrichten. 1 Wählen Sie am "Wartungsmenü"-Bildschirm "Kontaktinformation einrichten". 2 Drücken Sie auf die Taste "Name bearbeiten" oder "Tel.-Nr. bearbeiten" (2), um die Information von jedem Feld der "Kontaktinformation 1"... - Seite 257 Betrieb 5.4.7 Speicher 5.4.7.1 Registrierspeicher 1 Wählen Sie am "Wartungsmenü"-Bildschirm "Memo". 2 Wählen Sie das zu registrierende Ziel aus. Der Eingabebildschirm wird angezeigt. 3 Wählen Sie ein gespeichertes Zeichen aus der Liste. 4 Geben Sie die Zeichen ein. Gehen Sie auf “Löschen”, um das Zeichen auf der linken Seite des Cursors zu löschen. Der Vermerk kann aus maximal 52 Zeichen bestehen.
-
Seite 258: Speicher Löschen
Betrieb 5.4.7.2 Speicher löschen 1 Wählen Sie am "Wartungsmenü"-Bildschirm "Memo". 2 Tippen Sie auf "Memo löschen". 3 Wählen Sie den zu löschenden Speicher aus. • Drücken Sie auf die Taste eines Speichers, um den Auswahlstatus zu ändern. • Es können mehrere Speicher gewählt werden. • Ein Kontrollzeichen wird bei den gewählten Speichern angezeigt. -
Seite 259: Werkseinstellung Wiederherstellen
Betrieb 5.4.8 Werkseinstellung wiederherstellen 1 Wählen Sie am "Wartungsmenü"-Bildschirm "Werkseinstellung wiederherstellen". H I N W E I S Diese Funktion kann nicht gewählt werden, wenn der Fernbedienungsbetrieb nicht zugelassen ist, ein externer Eingangskontakt AN ist oder die Leistungssteuerung des Außengeräts nicht abgebrochen wurde. Brechen Sie diese Parameter ab, bevor Sie "Werkseinstellung wiederherstellen" durchführen. -
Seite 260: Geräte Suchen
Betrieb 5.4.9 Geräte suchen 1 Wählen Sie am "Wartungsmenü"-Bildschirm "Geräte suchen". H I N W E I S Diese Funktion kann nicht gewählt werden, wenn eine oder mehrere Klimaanlagen in Betrieb sind oder wenn ein externes Eingangssignal an den externen Eingangsanschlüssen 1 oder 2 eingeht. 2 Tippen Sie auf "Ja" am Bestätigungsbildschirm. H I N W E I S Wenn Sie auf "Nein" tippen, kehrt der Bildschirm zum "Wartungsmenü" zurück. Der Typ der Aktualisierung der Anschluss-Information ist abhängig von der folgenden Einstellung: • Gehen Sie zu Schritt 3, um die Anschluss-Information mit Beibehaltung des Gruppenregistrierung und Einstellungen wie Timer programmieren, usw. (3) zu aktualisieren. • Gehen Sie weiter bis zu Schritt (7), um eine Anschlussprüfung durch das Starten von jeder Einstellung durchzuführen. (Es ist das Gleiche wie beim Wiederherstellen der Einstellung). (7) Einstellungen beibehalten... -
Seite 261: Einstellungen Nicht Beibehalten
Betrieb 6 Danach wird ein weiterer Bestätigungsbildschirm angezeigt. Prüfen Sie die Klimaanlagen und drücken Sie auf "Ja". H I N W E I S • Wenn Sie auf "Nein" tippen, kehrt der Bildschirm zum "Wartungsmenü" zurück. • Diese Funktion kann nicht gewählt werden, wenn der Fernbedienungsbetrieb nicht zugelassen ist, ein externer Eingangskontakt AN ist oder die Leistungssteuerung des Außengeräts nicht abgebrochen wurde. Brechen Sie diese Parameter ab, bevor Sie die Einstellungen wiederherstellen. Einstellungen nicht beibehalten 7 Tippen Sie auf "Nein" im Bestätigungsfenster. 8 Das Bestätigungsfenster der Initialisierung wird nun angezeigt. Drücken Sie auf "Ja", um alle Einstellungen und die Anschlussprüfung zu starten. -
Seite 262: Alarmhistorie
Betrieb 5.4.10 Alarmhistorie Diese Funktion wird verwendet, um die Zeit einer Alarmauslösung, das betroffene Gerät und den entsprechenden Alarmcode zu speichern. Über diese Funktion kann auch der Alarmhistorie gelöscht werden. Einstellung über Monitor Menü Wartungsmenü Alarmhistorie. 1 Wählen Sie am "Wartungsmenü"-Bildschirm den "Alarmhistorie". 2 Der Bildschirm "Alarmhistorie"... -
Seite 263: Weitere Anzeigen An Der Lcd-Anzeige
Anforderung eingestellt wird. Das Symbol blinkt während der Anforderungssteuerung. Detaillierte Informationen erhalten Sie von Ihrem HITACHI-Händler oder Vertragspartner. Wird angezeigt, wenn der Zeitplan der optionalen Leistungssteuerung des Außengeräts aktiviert ist. Blinkt während der Steuerung. Abgesehen von dem Zeitplan blinkt das Symbol... - Seite 264 Elektrorauschen an. Wenn das Gerät aus diesem Grund gestoppt wird, führen Sie das Startverfahren erneut durch. Anhalten der Anzeige am "Startup"-Bildschirm • Ein Kommunikationsfehler ist möglicherweise aufgetreten. Detaillierte Informationen erhalten Sie von Ihrem HITACHI-Händler oder Vertragspartner. PMML0332A rev.0 - 05/2015...
-
Seite 265: Fehlerbehebung
Fehlerbehebung 6 FEHLERBEHEBUNG Prüfen Sie die folgende Tabelle, bevor Sie sich mit einem Händler zur Beratung in Verbindung setzen. Zustand Ursache • Prüfen Sie, dass das Stromversorgungskabel an der Wand eingesteckt ist. Die Anzeigen werden am Touchscreen nicht angezeigt. • Überprüfen Sie, ob die Stromversorgung eingeschaltet ist (PWRs ON). -
Seite 267: Consignes De Sécurité
D A N G E R • NE versez PAS d'eau sur la télécommande centralisée. Cet appareil contient des composants électriques. L’infiltration d’eau provoquerait de graves décharges électriques. • Avant l’installation, vérifiez que les fondations sont planes, à niveau et suffisamment solides puis fixez l’unité solidement. Si les fondations ne sont pas suffisamment solides, cela pourrait entraîner des blessures dues à la chute du produit, à une décharge électrique ou à un incendie. • N’installez PAS l'unité dans un lieu où un gaz inflammable est généré, circule, s’accumule ou fuit. • N'effectuez JAMAIS vous-même les travaux d’installation et la connexion du câblage électrique. Contactez votre distributeur HITACHI et demandez-lui de vous mettre en contact avec du personnel de maintenance qualifié qui réalisera les travaux d’installation et de câblage électrique. • Les travaux électriques doivent être réalisés conformément au Manuel d'installation et aux normes et réglementations applicables. Si les instructions ne sont pas suivies, une décharge électrique et un incendie peuvent se produire en raison d'une puissance insuffisante et d'une marche insatisfaisante. • Employez les câbles indiqués pour la connexion entre l'unité intérieure et la télécommande centralisée. L'utilisation de câbles incorrects peut entraîner un incendie ou une décharge électrique. •... -
Seite 268: Caractéristiques Principales
Caractéristiques principales 2 CARACTÉRISTIQUES PRINCIPALES Cette télécommande centralisée (PSC-A32MN) est connectée au système H-LINK et utilisée pour la commande et la surveillance centralisées des conditionnements d'air. Les fonctions suivantes sont disponibles pour toutes les unités intérieures reliées aux télécommandes centralisées. 1 Marche/Arrêt, modification de mode de fonctionnement, commande de la vitesse de ventilation, commande de la direction du déflecteur, réglage de la température, autorisation/interdiction du fonctionnement par télécommande. - Seite 269 Câble SPEC : de 0,75 à 1,25 mm Câble du H-LINK (pour la commande) Câble recommandé : JKEPV-S, JKEV-S, CVV-S, CVV, 600V VCT * Les câbles recommandés sont les câbles d’Hitachi Cables, Ltd. 3.2 LISTE DES COMPOSANTS Déballez l’unité et assurez-vous que : •...
-
Seite 270: Description Des Éléments
Installation 3.3 DESCRIPTION DES ÉLÉMENTS LCD en couleur avec écran tactile Pour le fonctionnement et la surveillance des unités par l'affichage d'écran tactile. Il est activé en utilisant le stylet (accessoire). L’écran tactile s’éteint automatiquement lorsqu’il n’est pas utilisé pendant un certain temps. Avant Les commandes de geste telles que multi contacts (pression simultanée de plusieurs points de l'écran) ou le fonctionnement «... -
Seite 271: Caractéristiques Générales
Installation 3.4 CARACTÉRISTIQUES GÉNÉRALES Modèle PSC-A32MN Dimensions extérieures 140 × 120 × 22 + 52,7 (mm) <L x H x P + (partie intégrée)> Poids net 0,5 kg (environ) Lieu d’installation Intérieur Murale, intégrée, avec boîte de commutation JIS pour 2 commutateurs (avec panneau) Méthode d’installation (JIS C 8340) Unités intérieures connectées (Quantité) -
Seite 272: Espace D'installation
Installation 3.6 ESPACE D'INSTALLATION Maintenez un espace d’installation pour la télécommande centralisée comme illustré ci-dessous. (Unité : mm) 52,7 Ne placez rien dans la zone grisée « ». Lors de l'installation de deux ou plusieurs télécommandes centralisées côte à côte, garder la séparation suivante entre chacun d'eux. * Espace vertical : 50mm * Espace horizontal :... - Seite 273 Installation 3 Branchez le câblage au bornier de la télécommande centralisée. Bornier Utilisation Procédure de raccordement Borne M3 à vis Pour la source d'alimentation Connexion bornier rond Pour la transmission H-LINK Couple de serrage de 0,5 Nm Connecteur à 3 broches CN1 ~ 3 Pour entrée/sortie extérieure Insérez les câbles connecteurs...
-
Seite 274: Câblage Électrique
Modèle de câble recommandé câblage câble Câble d'alimentation 100 ~ 240V CA de 1,25 à 2 mm 600 V CV, CCV, CEV (câble Hitachi) Câblage de terre H-LINK 5 V CC ≤ 1 000 m de 0,75 à 1,25 mm (câble de commande) - Seite 275 Câblage électrique • Utilisez un disjoncteur de fuite à la terre de sensibilité moyenne avec une vitesse d’activation de 0,1 s ou inférieure. Si vous ne l’installez pas, cela pourrait entraîner un risque de décharge électrique et/ou d’incendie. • Installez un disjoncteur de fuite à la terre, un fusible et un disjoncteur pour chaque ligne d’alimentation de groupe extérieur. Dans le cas contraire, cela pourrait provoquer une décharge électrique ou un incendie. • Ce modèle est une unité monophasée (1~, CA 100-240V, 50/60Hz). Ne connectez pas de source d’alimentation triphasée. Cela pourrait provoquer un dysfonctionnement. D A N G E R • Éteignez l’interrupteur d’alimentation principal des unités intérieures, des groupes extérieurs et des télécommandes centralisées avant de réalise l’intervention sur le câblage électrique. Sinon, cela pourrait entraîner un incendie, une décharge électrique ou la panne du dispositif. • N’utilisez pas de câbles plus légers que le câble flexible normal en polychloroprène gainé (code H05RN-F). Réglage des commutateurs La liste pour le réglage des commutateurs des télécommandes centralisées est fournie dans le tableau ci-dessous. 1 Appliquez les réglages de commutateur comme appropriés.
- Seite 276 Câblage électrique Réglage du DSW1 Modèle DSW1 DSW2 DSW3 DSW4 Télécommande centralisée EZ PSC-A64GT Télécommande centralisée mini PSC-A32MN Télécommande centralisée PSC-A64S Contrôleur MARCHE/ARRÊT PSC-A16RS centralisé Combinaison de Autres PSC-A32MN avec HC-A(8/64)MB Non compatible contrôleurs d'autres contrôleurs centralisés HC-A16KNX Non compatible centralisés Passerelle BMS KNX001...
-
Seite 277: Test De Fonctionnement
Fonctionnement 5 FONCTIONNEMENT 5.1 TEST DE FONCTIONNEMENT Le schéma de la procédure de test de fonctionnement est indiqué comme illustré sur la figure. Les éléments identifiés par un cadre en gras ( ) sont des éléments exigés. Le reste des éléments, qui ne sont pas spécifiquement exigés pour la procédure du test de fonctionnement mais qui sont optionnels, sont expliqués dans leur section spécifique. - Seite 278 Fonctionnement Liste des éléments Élément Fonction Réglage de la langue Cette fonction est utilisée pour le réglage de la langue. Réglages de date et d’heure Cette fonction est utilisée pour régler la date et l'heure. La fonction est employée pour l'enregistrement des groupes ou des blocs des unités intérieures reliées au même Registre de Groupe H-LINK, et qui ont été...
- Seite 279 Fonctionnement Élément Fonction Sélection des groupes Cette fonction est utilisée pour sélectionner le groupe dont les commandes de fonctionnement sont annulées exceptés pour l'entrée depuis l'entrée extérieure 1. extérieure 1 Sélection des groupes Cette fonction est utilisée pour sélectionner le groupe dont les commandes de fonctionnement sont annulées exceptés pour l'entrée depuis l'entrée extérieure 2.
-
Seite 280: Réglage De La Langue
Fonctionnement 5.1.1 Allumage Allumez la source d’alimentation des conditionneurs d'air. Pour protéger le compresseur, la source d’alimentation doit être allumée 12 heures avant le début du fonctionnement. Ne le mettez pas hors tension pendant les saisons d’utilisation du conditionneur d'air. Effectuez un test de fonctionnement de chaque conditionneur d'air d'abord pour assurer le fonctionnement normal. - Seite 281 Fonctionnement 5.1.4 Réglage de la date / l'heure Après avoir réglé l'unité de température, l’écran de réglage de la date et de l’heure s’affiche sur l’écran tactile comme illustré sur la figure. Appuyez sur « OK » sur l’écran tactile et configurez la date et l’heure en suivant la procédure indiquée. Reportez-vous au chapitre “5.3.5 Réglage de la date et de l’heure”...
- Seite 282 Fonctionnement 5.1.6 Réglage des modes de contrôle Après le réglage de la date et de l'heure, l'écran du mode de contrôle est montré. Taper « OK » sur l'écran tactile pour procéder au réglage des modes de contrôle. En tapant sur un bouton de mode de contrôle, le bouton choisi est accentué avec un contour orange. Le procédé pour le réglage des modes de contrôle est expliqué...
- Seite 283 Fonctionnement 5.1.7 Registre de groupe Enregistrez les unités intérieures connectées aux groupes et blocs de la télécommande centralisée. 5.1.7.1 Définitions • Groupe : l'unité minimale de fonctionnement contrôlée par une télécommande centralisée. 1 groupe de télécommande est considéré comme 1 groupe, et le même réglage est appliqué au groupe entier. Un maximum de 32 groupes (organisés sous forme de 4 blocs avec 8 groupes chacun, 8 blocs avec 4 groupes chacun, 2 blocs avec 16 groupes chacun ou 16 blocs avec 2 groupes chacun) peut être contrôlé...
- Seite 284 Fonctionnement 5.1.7.3 Enregistrement de l’unité secondaire • Un maximum de 15 unités secondaires peut être enregistré dans le même groupe de télécommande avec l'unité principale (en appliquant le gabarit de contrôle de 2 blocs avec 16 groupes chacun). • Des unités d'intérieures sans télécommande ne peuvent pas être enregistrées comme unités secondaires. •...
- Seite 285 Fonctionnement 3 Sélectionnez le groupe pour l'enregistrement de l'unité principale. • Tapez sur les boutons « < » et « > » sur le haut à gauche de l'écran tactile pour passer l'affichage du bloc. • Les nombres montrés à l'intérieur des boutons indiquent le numéro du bloc et le numéro du groupe. •...
- Seite 286 Fonctionnement Tapez sur les boutons « < » et « > » sur le haut à gauche de l'écran tactile à continuer le réglage d'un autre Bloc, ou taper sur le bouton « Réglage terminé » pour sortir. 6 Appuyez sur « Réglage terminé » pour enregistrer le groupe et pour retourner à « Registre de Groupe ». 7 Tapez sur l'«...
- Seite 287 Fonctionnement 2 Sélectionnez « Registre d'unité secondaire » sur l’écran « Registre de Groupe ». 3 Sélectionnez le groupe pour l'enregistrement de l'unité secondaire. • Tapez sur les boutons « < » et « > » sur le haut à gauche de l'écran tactile pour passer l'affichage du bloc. •...
- Seite 288 Fonctionnement Tapez sur les boutons « < » et « > » sur le haut à gauche de l'écran tactile à continuer le réglage d'un autre Bloc, ou taper sur le bouton « Réglage terminé » pour sortir. 6 Appuyez sur « Réglage terminé » sur « Reg. Groupe (Registre unité secondaire) » pour revenir à l’écran « Registre de Groupe ». 7 Tapez sur l'«...
- Seite 289 Fonctionnement 5.1.7.6 Annulation de l'enregistrement d'un groupe 1 Sélectionnez « Registre de Groupe » sur l’écran « Menu maintenance ». Reportez-vous à la section “5.1.7.4 Enregistrement d’un groupe (Unité principale)”. R E M A R Q U E Cette fonction ne peut pas être sélectionnée lorsque le signal d’entrée extérieur est l’entrée extérieure au bornier 1 ou 2 . 2 Sélectionnez « Registre d'unité principale (ou Registre d'unité secondaire) » sur l’écran « Registre de Groupe ». 3 Sélectionnez le groupe pour annuler l'enregistrement.
- Seite 290 Fonctionnement 5.1.7.7 Vérification de l'enregistrement de groupe (vérification de la définition de l'unité principale) 1 Sélectionnez « Registre de Groupe » sur l’écran « Menu maintenance ». Reportez-vous à la section “5.1.7.4 Enregistrement d’un groupe (Unité principale)”. R E M A R Q U E Cette fonction ne peut pas être sélectionnée lorsque le signal d’entrée extérieur est l’entrée extérieure au bornier 1 ou 2 .
- Seite 291 Fonctionnement 5.1.7.8 Vérification de l'enregistrement de groupe (vérification des détails du registre) 1 Sélectionnez « Vérification de la communication » sur l’écran « Menu maintenance ». Reportez-vous à la section “5.1.7.4 Enregistrement d’un groupe (Unité principale)”. R E M A R Q U E Cette fonction ne peut pas être sélectionnée lorsque le signal d’entrée extérieur est l’entrée extérieure au bornier 1 ou 2 .
-
Seite 292: Écran Principal
Fonctionnement 5.2 ÉCRAN PRINCIPAL 5.2.1 Vue générale "Contrôle (Tous les Groupes)" Bouton de Bloc État de l'unité Affichage en cours Pour modifier l’écran à "Contrôle (Bloc)" en Indique l'état de l'unité avec des Indique l'affichage en cours appuyant sur ce bouton. icônes comme le témoin du filtre, la (tous les groupes) Bouton de Groupe... - Seite 293 Fonctionnement "Contrôle (Bloc)" Onglet du Bloc Change l'affichage de l’écran à l'affichage de « Bloc » ou « Tous les Groupes ». Affichage en cours État de l'unité Bouton de Groupe Indique l'affichage en cours Indique l'état de l'unité avec des Indique l'état de fonctionnement icônes comme le témoin du filtre, (groupes en bloc)
- Seite 294 Fonctionnement 5.2.2 Réglage des groupes et des blocs 5.2.2.1 Affichage de tous les groupes 1 Appuyez sur « Tous les groupes » sur l’écran tactile. L’onglet (1), « Tous les groupes » ne sera pas affiché si seulement un bloc a été enregistré. (1)* 2 Tous les groupes sont montrés sur l'écran tactile (toutes les unités intérieures connectées a la télécommande centralisée sont montrées).
- Seite 295 Fonctionnement 5.2.2.2 Affichage du bloc spécifié 1 Sélectionnez le bloc cible de l'écran « Contrôle (Tous les Groupes) » ou « Contrôle (Bloc) ». Contrôle (Tous les Groupes) Contrôle (Bloc) 2 Les groupes du bloc sélectionné seront affichés sur l’écran tactile. L'état de fonctionnement de chaque groupe est indiqué par la couleur du groupe, comme montré...
- Seite 296 Fonctionnement 5.2.2.3 Marche et arrêt simultanés de tous les groupes 1 Appuyez sur « Tous les groupes » sur l’écran tactile. 2 Tapez sur « Marche globale » pour mettre en marche tous les groupes simultanément. Tapez sur « Arrêt global » pour arrêter tous les groupes simultanément. 3 La fenêtre de confirmation est affichée.
- Seite 297 Fonctionnement 5.2.2.4 Marche/Arrêt simultanés pour chaque bloc 1 Sélectionnez le bloc cible de l’écran tactile pour configurer le fonctionnement simultané de Marche/Arrêt. 2 Tapez sur « Marche par bloc » pour mettre en marche simultanément tous les groupes dans le bloc sélectionné. Tapez sur «...
- Seite 298 Fonctionnement 5.2.2.5 Marche/Arrêt pour chaque groupe Vérifiez le mode de contrôle avant le réglage. La méthode de contrôle est différente selon si le mode de contrôle est réglé sur « Normal » ou « Marche/Arrêt uniquement ». Marche / arrêt de chaque groupe (Mode de contrôle : Normal) 1 Sélectionnez l'écran de «...
- Seite 299 Fonctionnement Marche / arrêt de chaque groupe (Mode de contrôle : Marche/Arrêt uniquement) Contrôle (Tous les Groupes) 1 Sélectionnez le groupe cible sur l’écran « Contrôle (Tous les Groupes) » du mode « Marche/Arrêt uniquement ». 2 L'état de fonctionnement du groupe sélectionné est commuté alternativement entre Marche et Arrêt en tapant sur son bouton. Dans ce mode, il est possible pour tous les groupes d'être en Marche/Arrêt simultanément avec les boutons «...
-
Seite 300: Mode De Fonctionnement
Fonctionnement 5.2.3 Réglage des principaux paramètres 5.2.3.1 Mode de fonctionnement 1 Sélectionnez le groupe cible de l'écran « Contrôle (Tous les Groupes) » ou « Contrôle (Bloc) » pour modifier le mode de fonctionnement. L'écran avec les réglages pour le groupe choisi est affiché sur l'écran tactile. Contrôle (Tous les Groupes) Contrôle (Bloc) 2 En tapant sur les boutons «... -
Seite 301: Vitesse De Ventilation
Fonctionnement 5.2.3.2 Vitesse de ventilation 1 Sélectionnez le groupe cible de l'écran « Contrôle (Tous les Groupes) » ou « Contrôle (Bloc) » pour modifier la vitesse de ventilation. L'écran avec les réglages pour le groupe choisi est affiché sur l'écran tactile. Contrôle (Tous les Groupes) Contrôle (Bloc) 2 En tapant sur les boutons «... - Seite 302 Fonctionnement 5.2.3.3 Direction du déflecteur 1 Sélectionnez le groupe cible de l'écran « Contrôle (Tous les Groupes) » ou « Contrôle (Bloc) » pour modifier la direction du déflecteur. L'écran avec les réglages pour le groupe choisi est affiché sur l'écran tactile. Contrôle (Tous les Groupes) Contrôle (Bloc) 2 En appuyant sur «...
-
Seite 303: Température De Consigne
Fonctionnement 5.2.3.4 Température de consigne 1 Sélectionnez le groupe cible de l'écran « Contrôle (Tous les Groupes) » ou « Contrôle (Bloc) » pour modifier la température de consigne. L'écran avec les réglages pour le groupe choisi est affiché sur l'écran tactile. Contrôle (Tous les Groupes) Contrôle (Bloc) 2 En appuyant sur «... - Seite 304 Fonctionnement 5.2.3.5 Autorisation/interdiction du fonctionnement de la télécommande Cette fonction est utilisée pour interdire le fonctionnement à partir de la télécommande. Quand la télécommande est placé en tant qu'interdit (par élément/pour tous les éléments), le contrôle de l'élément choisi devient indisponible.
- Seite 305 Fonctionnement 3 Tapez sur « Écran de contrôle » pour retourner à l'écran de contrôle. R E M A R Q U E • En appuyant sur « < » ou « > » sur l’écran de configuration détaillé, la fonction Autorisé/Interdit de la télécommande passera à un autre groupe du même bloc. • Contrôle interdit (Marche/Arrêt uniquement) : Si réglé sur « Activer », chaque changement de réglage s’applique à tous les groupes ou blocs. Le changement de réglage pour chaque groupe n’est pas possible. • Même si la télécommande est réglée comme « Interdict. », il est possible d'arrêter le fonctionnement avec la télécommande pendant la marche. Il est également possible de redémarrer le fonctionnement à l'aide de la télécommande. Toutefois, le fonctionnement d’arrêt ne sera utilisé qu’en cas d’urgence. Ne l’utilisez pas lors du fonctionnement normal. • Si « Alimentation ON / OFF » (d1, d3) est réglée, ne réglez pas la télécommande comme « Interdit ». Si la télécommande est restreinte tout en utilisant « Alimentation ON / OFF », la fonction « Verrouillage des commandes » de la télécommande doit être utilisée. • Si une erreur de communication se produit, la commande de la télécommande pour l'« ARRÊT » (par élément) peut être annulée. Dans ce cas-ci, exécutez le réglage à nouveau. • Ne configurez pas le fonctionnement interdit si plusieurs télécommandes centralisées sont utilisées pour le même H-LINK. De plus, n’utilisez pas un autre contrôleur centralisé car cela pourrait entraîner un dysfonctionnement.
- Seite 306 Fonctionnement 5.3 MENU Le tableau ci-dessous montre éléments du menu et leurs fonctions. Élément Fonction Cette fonction est utilisée pour désactiver l'affichage du témoin de filtre des unités intérieures dans lesquelles le signe du filtre s'est affiché. Réinitialisation du témoin de filtre Indépendamment de l'occurrence du témoin de filtre, il est également possible de réinitialiser le temps d'affichage du témoin de filtre dans les climatiseurs.
- Seite 307 Fonctionnement 5.3.1 Affichage de l’écran du menu Les éléments de configuration de l’unité intérieure et de la télécommande centralisée sont indiqués dans le menu. 1 Appuyez sur « Menu » de l'écran « Contrôle (Tous les Groupes) » ou « Contrôle (Bloc) ». Contrôle (Tous les Groupes) Contrôle (Bloc) 2 L'écran du «...
- Seite 308 Fonctionnement 5.3.2 Réinitialisation du témoin de filtre 5.3.2.1 Réinitialisation du témoin de filtre 1 Sélectionnez « Réinitialisat. du témoin de filtre » sur l’écran « Menu ». (Uniquement disponible lorsque le témoin du filtre est indiqué). 2 Sélectionnez la cible pour réinitialiser le témoin du filtre. •...
- Seite 309 Fonctionnement 5.3.2.2 Réinitialisation de durée du fonctionnement de filtre 1 Sélectionnez « Réinitialisat. du témoin de filtre » sur l’écran « Menu ». (Uniquement disponible lorsque le témoin du filtre est indiqué). 2 Sélectionnez la cible pour réinitialiser la durée de fonctionnement du filtre. •...
-
Seite 310: Réglages Du Programme
Fonctionnement 5.3.3 Réglages du programme Cette fonction est utilisée pour le fonctionnement du programmateur. Il est possible de régler un programme pour un bloc et pour chaque groupe. Un réglage de jours fériés indépendant du programme est également disponible. 5.3.3.1 Réglage du programmateur ... - Seite 311 Fonctionnement 7 Tapez « Réglage terminé » pour confirmer le réglage. Si « Non » est tapé, le contenu du réglage affiché est abandonné, et l'écran revient à l'écran de réglage du programmateur. • Retournez à l'étape (5) pour continuer à ajouter des paramètres pour le même jour de la semaine. •...
- Seite 312 Fonctionnement Copiez le réglage du programme par jours de la semaine 1 Sélectionnez « Réglages du programme » de l’écran « Menu ». 2 Sélectionnez « Réglage du programmateur » de l’écran « Horloge ». 3 Sélectionnez la cible (tous les groupes, bloc ou groupe). 4 Appuyez sur «...
- Seite 313 Fonctionnement Copiez le réglage du programme pour chaque groupe 1 Sélectionnez « Réglages du programme » de l’écran « Menu ». 2 Sélectionnez « Réglage du programmateur » de l’écran « Horloge ». 3 Tapez sur « Copier réglages ». 4 Sélectionner le groupe à...
- Seite 314 Fonctionnement Supprimer le réglage de programme par élément individuel 1 Sélectionnez « Réglages du programme » de l’écran « Menu ». 2 Sélectionnez « Réglages du programmateur » de l’écran « Horloge ». 3 Sélectionnez la cible (tous les groupes, bloc ou groupe). 4 Appuyez sur «...
- Seite 315 Fonctionnement Effacez le réglage du programme pour chaque groupe 1 Sélectionnez « Réglages du programme » de l’écran « Menu ». 2 Sélectionnez « Réglage du programmateur » de l’écran « Horloge ». 3 Appuyez sur « Effacer réglages ». 4 Sélectionner les groupes/ blocs pour effacer leurs réglages.
- Seite 316 Fonctionnement 5.3.3.2 Réglage des jours fériés pour interruption du fonctionnement 1 Sélectionnez « Réglages du programme » de l’écran « Menu ». 2 Sélectionnez « Réglage jours fériés » de l’écran « Horloge ». 3 Sélectionnez la cible (tous les groupes, bloc ou groupe). Le calendrier pour sélectionner est montré. •...
- Seite 317 Fonctionnement 5.3.3.3 Réglage du programmateur Marche/Arrêt 1 Sélectionnez « Réglages du programme » de l’écran « Menu ». 2 Sélectionnez « Réglage de programmateur Marche/Arrêt » de l’écran « Horloge ». L’écran passe à « Réglage Marche/Arrêt ». Le réglage initial est « ON », comme indiqué avec la marque « ».
- Seite 318 Fonctionnement 5.3.4 Réglage de la plage de température de la télécommande 1 Sélectionnez « Réglage plage de température télécommande » à l'écran « Menu ».* * La sélection n'est pas possible au cas où les conditionneurs d'air connectés ne supportent pas cette fonction. 2 Sélectionnez la cible pour le réglage de la plage de température.
-
Seite 319: Réglage De La Date Et De L'heure
Fonctionnement 5.3.5 Réglage de la date et de l’heure 1 Sélectionnez « Réglages de date et heure » à l'écran « Menu ». 2 Réglez l’affichage dans l’ordre indiqué « An », « Mois » et « Jour ». 3 Tapez ou appuyez- et- maintenez les boutons « »... - Seite 320 Fonctionnement 5.3.7 Étalonnage de l’écran tactile 1 Sélectionnez « Étalonnage de l’écran tactile » de l’écran « Menu ». 2 Étalonnage de l’écran tactile • Tapez les intersections des lignes blanches dans l'ordre, comme invité à l'écran. • Ensuite, l'affichage passe à l'écran illustré à la figure (3). •...
- Seite 321 Fonctionnement 5.3.8 Enregistrement des noms des groupes et des blocs 5.3.8.1 Registre des noms de Groupe 1 Sélectionnez « Registre des noms de Groupe » sur l’écran « Menu ». 2 Sélectionnez la cible (bloc ou groupe) pour enregistrer son nom. 3 L'affichage change à...
- Seite 322 Fonctionnement 5.3.8.2 Copier le nom du groupe ou bloc 1 Sélectionnez « Registre des noms de Groupe » sur l’écran « Menu ». 2 Sélectionner le groupe ou bloc source à copier. • Le bouton du groupe ou du bloc sélectionné apparaît accentué avec un cadre orange. •...
-
Seite 323: Configuration De L'écran
Fonctionnement 5.3.9 Configuration de l’écran 5.3.9.1 Réglage de la luminosité du rétroéclairage de l'écran tactile 1 Sélectionnez « Configuration de l’écran » de l’écran « Menu ». 2 Sélectionnez « Luminosité » de l’écran « Configuration de l’écran ». 3 Appuyer sur « < » ou « > » et ajuster la luminosité du rétroéclairage. 4 Tapez sur «... - Seite 324 Fonctionnement 5.3.9.2 Réglage de la langue 1 Sélectionnez « Configuration de l’écran » de l’écran « Menu ». 2 Sélectionnez « Langue » de l’écran « Configuration de l’écran ». 3 L’écran de confirmation s'affiche lorsque le bouton de la langue est sélectionné. 4 Tapez sur «...
- Seite 325 Fonctionnement 5.3.9.3 Réglage de l’unité de température 1 Sélectionnez « Configuration de l’écran » de l’écran « Menu ». 2 Sélectionnez « Unité de température » de l’écran « Configuration de l’écran ». 3 Sélectionnez les degrés Celsius ou les degrés Fahrenheit avec le bouton correspondant. Le bouton sélectionné est accentué en jaune.
- Seite 326 Fonctionnement 5.3.10 Durées de fonctionnement cumulées 5.3.10.1 Affichage par mois 1 Sélectionnez « Durées de fonctionnement cumulées » de l’écran « Menu ». 2 Tapez sur « Afficher par mois ». 3 Appuyez sur les boutons « < » ou « > » pour sélectionner le bloc de cible. 4 Tapez sur les boutons «...
- Seite 327 R E M A R Q U E • La durée de fonctionnement accumulée de cette télécommande centralisée est affiché à titre de référence uniquement. Hitachi ne garantit pas l'exactitude précise de la durée du fonctionnement accumulé susmentionnés pour référence. •...
- Seite 328 Fonctionnement 5.3.11 État des contacts 1 Sélectionnez « État des contacts » de l’écran « Menu ». Les informations suivantes sont affichées : Information de contact (2 éléments indépendants) Nom de bloc et groupe du dernier évènement d'alarme Dernier code d’alarme 2 Appuyez sur «...
- Seite 329 Fonctionnement 5.3.12 Configuration de l’heure d’eté 1 Sélectionnez « Configuration de l'heure d'été » de l’écran « Menu ». Les informations suivantes sont affichées : 2 Sélectionnez la fonction concernant chaque élément. La couleur de la fonction sélectionnée change. 3 Tapez sur « Réglage terminé » pour confirmer le contenu réglé et retourner à l’écran « Menu ». PMML0332A rev.0 - 05/2015...
-
Seite 330: Paramètres Avancés
Fonctionnement 5.4 PARAMÈTRES AVANCÉS R E M A R Q U E • Ce bouton ne concerne que le responsable de la maintenance. Par conséquent ne l'utilisez pas. • Si vous appuyez sur cette touche et que le menu de maintenance s'affiche sur l'écran, appuyez sur « Précédent ». L’écran repassera au menu. Éléments Contenu Les unités intérieures connectées sont vérifiées par la télécommande centralisée dans le même H-LINK. Registre de Groupe Cette fonction permet d’enregistrer le nom du bloc ou du groupe. Réglage des modes de contrôle Régler le mode de contrôle. - Seite 331 Fonctionnement 1 Appuyez sur « Menu » de l'écran « Contrôle (Tous les Groupes) » ou « Contrôle (Bloc) ». Contrôle (Tous les Groupes) Contrôle (Bloc) 2 L'écran du « Menu » s’affiche. 3 Appuyez sur le bouton « Menu de maintenan. » et maintenez-le enfoncé pendant au moins 3 secondes. « Menu maintenance » s’affiche.
- Seite 332 Fonctionnement 5.4.1 Définition des groupes R E M A R Q U E Cette fonction est détaillée dans la section “5.1 Test de fonctionnement” puisque c'est un élément exigé pour exécuter le test de fonctionnement. 5.4.2 Réglage des functions optionnelles Cette fonction est utilisée pour configurer et modifier la sélection de la fonction des conditionneurs d'air et des télécommandes centralisées indiquée dans le tableau ci-dessous. Réglé par Contrôle Menu Menu maintenance Réglage des fonctions...
- Seite 333 Fonctionnement 5.4.2.1 Réglages de la télécommande des conditionneurs d'air 1 Sélectionnez « Réglage des fonctions optionnelles » sur l'écran « Menu maintenance » lorsque les conditionneurs d'air ne fonctionnent pas. 2 Sélectionnez « Réglage de la télécommande » sur l’écran « Fonctions optionnelles ». La sélection n'est pas possible lorsqu'un ou plusieurs climatiseurs sont en fonctionnement.
- Seite 334 Fonctionnement 5.4.2.2 Réglage du contrôleur 1 Sélectionnez « Réglage des fonctions optionnelles » sur l'écran « Menu maintenance » lorsque les conditionneurs d'air ne fonctionnent pas. 2 Sélectionnez « Réglage du contrôleur » sur l’écran « Fonctions optionnelles ». 3 Sélectionnez le réglage de chacun des éléments si nécessaire. Le réglage sélectionné apparaît accentué en jaune. Au sujet de l'interdiction de l'heure d'arrêt de la télécommande Quand est activée, il n'est pas possible de régler l'interdiction de fonctionnement à...
- Seite 335 Fonctionnement 5.4.3 Réglage des exceptions de marche/arrêt Les commandes « Marche » et « Arrêt » ne sont pas acceptées lorsque le groupe est réglé pour fonctionner en « Tous les groupes » ou « Tous les blocs ». Cependant, il est possible de placer une règle d'exception pour les commandes suivantes ou les combinaisons de commande, affectant les groupes spécifiques : •...
- Seite 336 Fonctionnement 5.4.4 Configuration entrée / sortie extérieure La fonction d'entrée/sortie extérieure de la télécommande centralisée permet de contrôler 4 entrées et 2 sorties. Sélectionner « Configuration entrée / sortie extérieure » sur l'écran « Réglage des fonctions optionnelles » pour accéder au menu de réglage.
-
Seite 337: Procédure De Raccordement
Fonctionnement 5.4.4.2 Fonction de sortie extérieur 1 Sortie « Marche général » Sortie externe du signal de fonctionnement de l'unité intérieure au groupe cible. Le signal de fonctionnement est envoyé même si l’une des unités intérieures du groupe cible est en fonctionnement. 2 Alarme de sortie extérieure Signal d'alarme de sortie extérieure des unités intérieures au groupe cible. - Seite 338 Fonctionnement 5.4.4.4 Configuration entrée / sortie extérieure 1 Sélectionnez « Configuration entrée / sortie extérieure » sur l’écran « Menu maintenance ». La sélection n'est pas possible quand les conditionneurs d'air sont en fonctionnement, ou quand le contact pour le signal d'entrée extérieure est allumé.
- Seite 339 Fonctionnement Contrôle de la puissance du groupe extérieur 5 Sélectionnez la valeur de la puissance du groupe extérieur. Le bouton de valeur de puissance sélectionné est accentué en jaune. 6 Utilisez les boutons sur le côté droit de l'écran afin de programmer la variation de puissance du groupe extérieur quand il n'y a aucun contact d'entrée extérieure appliquée à...
-
Seite 340: Autres Réglages
Fonctionnement Autres réglages 10 Sélectionnez la cible du Contrôle d'entrée extérieure. (Tous les groupes/Bloc/Groupe). • Tapez sur le bouton d'un Groupe pour commuter l'état de sélection de ce groupe. • Appuyez sur un bouton d'un Bloc pour commuter l'état de sélection de tous les Groupes dans ce Bloc. •... - Seite 341 Fonctionnement 5.4.5 Réglage des touches Le réglage des touches est utilisé pour sélectionner si montrer ou cacher certains boutons, de ce fait limitant le fonctionnement. Réglé par Contrôle Menu Menu maintenance Réglage des touches. 1 Sélectionnez « Réglage des touches » sur l’écran « Menu maintenance ». 2 Sélectionnez la fonction concernant chaque élément.
- Seite 342 Fonctionnement 5.4.6 État des contacts Cette fonction est employée pour éditer ou enregistrer l'information affichée de contact. Réglé par Contrôle Menu Menu maintenance Registre de personne à contacter. 1 Sélectionnez « Registre de personne à contacter » sur l’écran « Menu maintenance ». 2 Tapez sur «...
- Seite 343 Fonctionnement 5.4.7 Notes 5.4.7.1 Registre des notes 1 Sélectionnez « Notes » sur l'écran « Menu maintenance ». L’écran de saisie de caractères s’affiche. 2 Sélectionnez la cible à enregistrer. 3 Sélectionnez un caractère enregistré depuis la liste de caractères. 4 Caractères de saisie.
- Seite 344 Fonctionnement 5.4.7.2 Supprimez notes 1 Sélectionnez « Notes » sur l'écran « Menu maintenance ». 2 Tapez sur « Effacer Note ». 3 Sélectionnez la note à effacer. • Tapez sur le bouton d'une note pour commuter son état de sélection. •...
- Seite 345 Fonctionnement 5.4.8 Restaurer les réglages 1 Sélectionnez « Restaurer réglages » sur l’écran « Menu maintenance ». R E M A R Q U E Cette fonction ne peut pas être sélectionnée quand le fonctionnement de la télécommande est interdit, un contact d'entrée extérieure est allumé, ou le contrôle de puissance du groupe extérieur n'est pas annulée. Annulez ces réglages avant d'exécuter la restauration des réglages. 2 Tapez sur « Oui » sur l’écran de confirmation. R E M A R Q U E En appuyant sur « Non », l’écran repassera au « Menu maintenance ».
-
Seite 346: Vérification De La Connexion
Fonctionnement 5.4.9 Vérification de la connexion 1 Sélectionnez « Vérification de la connexion » sur l’écran « Menu maintenance ». R E M A R Q U E Cette fonction ne peut pas être sélectionnée lorsqu'il y a un ou plusieurs conditionneur(s) d'air en fonctionnement ou s'il y a un signal d’entrée extérieure au bornier 1 ou 2 de l’entrée extérieure. - Seite 347 Fonctionnement 6 Un deuxième écran de confirmation est affiché. Vérifiez les conditionneurs d'air et tapez sur « Oui ». R E M A R Q U E • En appuyant sur « Non », l’écran repassera au « Menu maintenance ». • Cette fonction ne peut pas être sélectionnée quand le fonctionnement de la télécommande est interdit, un contact d'entrée extérieure est allumé, ou le contrôle de puissance du groupe extérieur n'est pas annulée. Annulez ces réglages avant d'exécuter la restauration des réglages. Ne pas sauvegarder les réglages 7 Appuyez sur « Non » sur la fenêtre de confirmation. 8 La fenêtre de confirmation de l'initialisation est affichée.
-
Seite 348: Historique Des Alarmes
Fonctionnement 5.4.10 Historique des alarmes Cette fonction est employée pour enregistrer la période de l'occurrence d'alarme, l'unité dans laquelle l'anomalie s'est produite et le code approprié d'alarme. La suppression de l'enregistrement historique d'alarme est également effectuée par cette fonction. Réglé par Contrôle Menu Menu maintenance Historique des alarmes. - Seite 349 L'icône clignote pendant le contrôle de la demande. Entrez en contact avec votre revendeur ou un centre de service à la clientèle Hitachi pour l'information détaillée. Affiché quand le programme optionnel de contrôle de la puissance du groupe extérieur est activé, et clignote pendant le contrôle.
- Seite 350 « < » ou « > » à la fenêtre « Alarme ». Contactez votre revendeur ou un centre de service à la clientèle de Hitachi pour l'information détaillée, après vérification des indications de l'écran LCD. ...
- Seite 351 Dépannage 6 DÉPANNAGE Vérifiez le tableau ci-dessous avant de contacter le distributeur pour les réparations. Conditions Cause • Vérifiez que le câble d’alimentation est branché à la prise de courant. L’affichage sur l’écran tactile n’apparaît pas. • Vérifiez que l’alimentation est en marche. •...
-
Seite 353: Precauzioni Per La Sicurezza
Se il piano d'appoggio non è abbastanza resistente, ciò potrebbe provocare danni dovuti alla caduta del prodotto, a scosse elettriche o a incendi. • NON installare il dispositivo in punti in cui si riscontra la generazione, l'accumulazione, il flusso o la perdita di gas infiammabili. • NON eseguire da soli l’installazione e i collegamenti elettrici. Contattare il distributore o il concessionario HITACHI di fiducia e richiedere l'installazione e il collegamento elettrico da parte del personale di assistenza qualificato. • Effettuare i collegamenti elettrici seguendo il Manuale di Installazione e tutte le normative e gli standard relativi. Se non venissero seguite le istruzioni, potrebbero verificarsi scosse elettriche o incendi a causa di insufficiente capacità o prestazioni inadeguate. -
Seite 354: Caratteristiche Principali
caratteristiche principali 2 CARATTERISTICHE PRINCIPALI Questa postazione centrale (PSC-A32MN) è collegata all'H-LINK ed è utilizzata per il controllo centrale ed il monitoraggio dei climatizzatori. Le seguenti funzioni sono disponibili per tutte le unità interne collegate alle postazioni centrali. 1 Avvio/arresto, modifica modalità di funzionamento, controllo della velocità della ventola, controllo della direzione della feritoia orientabile, impostazione della temperatura, abilitazione/disabilitazione del funzionamento dal controllo remoto. -
Seite 355: Installazione
Cavo SPEC: tra 0,75 e 1,25 mm Cavo H-LINK (per controllo) Cavo consigliato: JKEPV-S, JKEV-S, CVV-S, CVV, 600V VCT * I cavi consigliati sono quelli recanti il nome del modello di Hitachi Cable, Ltd. 3.2 ELENCO DEI COMPONENTI Disimballare l’unità e verificare che: •... -
Seite 356: Descrizione Dei Componenti
Installazione 3.3 DESCRIZIONE DEI COMPONENTI LCD a colori con touchscreen Per il funzionamento e il monitoraggio delle unità attraverso il display touchscreen. È avviato per mezzo della touch pen (accessorio). Il display touchscreen si spegnerà automaticamente se il touchscreen non funziona Lato anteriore per un certo periodo di tempo. -
Seite 357: Specifiche Generali
Installazione 3.4 SPECIFICHE GENERALI Modello PSC-A32MN Dimensioni esterne 140 × 120 × 22 + 52,7 (mm) <A x L x P + (Parte incorporata)> Peso netto 0,5 kg (circa) Luogo d’installazione Interno Metodo d'installazione Incorporato alla parete con scatola di interruttori JIS per 2 interruttori (con coperchio) (JIS C 8340) Unità... -
Seite 358: Spazio Di Installazione
Installazione 3.6 SPAZIO DI INSTALLAZIONE Mantenere lo spazio di installazione della postazione centrale come mostrato in seguito. (Unità: mm) 52,7 Non posizionare nulla nell'aria ombreggiata “ ”. Se si installano due o più postazioni centrali una accanto all'altra, mantenere la seguente distanza di separazione tra di loro: * Spazio verticale: 50mm * Spazio orizzontale:... - Seite 359 Installazione 3 Collegare il cablaggio alla morsettiera della postazione centrale. Morsettiera Procedura di collegamento Vite M3 su terminale Per l'alimentazione elettrica Collegamento dal terminale rondo Per trasmissione H-LINK Coppia di serraggio 0,5N·m Connettore a 3 pin CN1 ~ 3 Per ingressi/uscite esterni Inserire i cavi connettore da 100 a 240 V CA H-LINK (senza polarità)
-
Seite 360: Collegamento Dello Schema Elettrico
5 V CC ≤1000 m tra 0,75 e 1,25 mm (cavo di controllo) JKPEV-S, JKEV-S, CVV-S, Ingresso: CVV, 600V VCT (cavo Hitachi) Cavi per ingressi e Apertura normale a tensione zero ≤300 m tra 0,5 e 1,25 mm uscite esterni Uscita: 12 V CC, 75 mA>... - Seite 361 Collegamento dello schema elettrico • Installare un interruttore differenziale, un fusibile e un interruttore di circuito per ogni linea di alimentazione di ogni unità esterna. In caso contrario potrebbero verificarsi scosse elettriche o incendi. • Questo modello è un’unità monofase (1~, CA 100-240V, 50/60Hz). Non collegare una fonte di alimentazione trifase. Ciò potrebbe provocare guasti. P E R I C O L O • Spegnere l’interruttore dell’alimentazione principale delle unità interne, delle unità esterne, e della postazione centrale prima di effettuare i collegamenti elettrici. In caso contrario, potrebbe verificarsi un incendio, una scossa elettrica o il malfunzionamento del dispositivo. • Non utilizzare cavi più leggeri del normale cavo flessibile in policloroprene (codice H05RN-F). Procedura di impostazione degli interruttori L'elenco delle impostazioni degli interruttori della postazione centrale è indicato nella tabella seguente: 1 Applicare le impostazioni dell'interruttore come appropriato.
- Seite 362 Collegamento dello schema elettrico Impostazione DSW1 Nome Modello DSW1 DSW2 DSW3 DSW4 Postazione centrale EZ PSC-A64GT Mini postazione centrale PSC-A32MN Postazione centrale PSC-A64S Controllo centralizzato di PSC-A16RS accensione/spegnimento Combinazione di Altri dispositivi PSC-A32MN con altri HC-A(8/64)MB Non compatibile di controllo dispositivi di controllo centrale HC-A16KNX...
-
Seite 363: Funzionamento
Funzionamento 5 FUNZIONAMENTO 5.1 PROVA DI FUNZIONAMENTO Lo schema della procedura della prova di funzionamento è quello mostrato nella figura. Gli elementi marchiati con il bordo spesso ) sono elementi richiesti. Il resto degli elementi, che non sono specificatamente necessari per la procedura della prova di funzionamento, ma soltanto opzionali, sono spiegati nella loro specifica sezione. - Seite 364 Funzionamento Lista degli elementi Elemento Funzione Impostazione lingua Questa funzione è utilizzata per selezionare la lingua. Impostazione data e ora Questa funzione è utilizzata per regolare la data e l'ora. La funzione è utilizzata per la registrazione dei gruppi o zone di unità interne collegate allo stesso H-LINK, e che Registrazione gruppo sono stati identificati dalla postazione centrale.
- Seite 365 Funzionamento Elemento Funzione Selezione del gruppo Questa funzione è utilizzata per selezionare i gruppi i cui ordine di funzionamento vengono annullati dall'ingresso escluso per l'ingresso esterno 1. esterno 1 Selezione del gruppo Questa funzione è utilizzata per selezionare i gruppi i cui ordine di funzionamento vengono annullati dall'ingresso escluso per l'ingresso esterno 2.
-
Seite 366: Impostazione Lingua
Funzionamento 5.1.1 Avviamento Collegare l'alimentazione dei climatizzatori. Al fine di proteggere il compressore, l'alimentazione dovrà essere attivata 12 ore prima dell'avvio. Non scollegare l'alimentazione nel corso delle stagioni del climatizzatore. Effettuare una prova di funzionamento di ciascun climatizzatore prima di autorizzare il funzionamento normale. Collegare l’alimentazione della postazione centrale. -
Seite 367: Impostare Data/Ora
Funzionamento 5.1.4 Impostare data/ora Dopo aver impostato l'unità di temperatura, lo schermo della regolazione di data/ora viene visualizzato sul touchscreen come mostrato in figura. Premere "Set" sullo schermo del touchscreen e impostare la data e l'ora seguendo la procedura indicata. Fare riferimento alla sezione “5.3.5 Impostazione data e ora attuali”... - Seite 368 Funzionamento 5.1.6 Impostazione dei modelli di controllo Dopo la regolazione dell'impostazione della data e dell'ora, viene visualizzato lo schermo modello di controllo. Premere "Set" sul touchscreen per proseguire con l'impostazione dei modelli di controllo. Quando si preme un pulsante del modello di controllo, tale pulsante viene sottolineato da una linea arancione. La procedura per l'impostazione dei modelli di controllo è...
- Seite 369 Funzionamento 5.1.7 Registrazione gruppo Registrare le unità interne collegate ai gruppi e alle zone della postazione centrale. 5.1.7.1 Definizioni • Gruppo: L'unità di funzionamento minima controllata dalla postazione centrale. Un gruppo di controllo remoto viene considerato come 1 gruppo e la stessa impostazione viene applicata all'intero gruppo. Con una postazione centrale è possibile controllare un massimo di 32 gruppi (organizzati come 4 zone da 8 gruppi ciascuna, 8 zone da 4 gruppi ciascuna, 2 zone da 16 gruppi ciascuna o 16 zone da 2 gruppi ciascuna).
- Seite 370 Funzionamento 5.1.7.3 Registrazione unità secondaria • Nello stesso gruppo remoto insieme all'unità principale possono essere registrate un massimo di 15 unità secondarie (applicando lo schema di controllo di 2 zone di 16 gruppi ciascuna). • Le unità interne senza controllo remoto non possono essere registrate come unità secondarie. •...
- Seite 371 Funzionamento 3 Selezionare il gruppo per la registrazione dell'unità principale. • Premere i pulsanti “<” e “>” in alto a sinistra del touchscreen per cambiare la visualizzazione della zona. • I numeri indicati all'interno dei pulsanti indicano il numero della zona e il numero del gruppo. •...
- Seite 372 Funzionamento Premere i pulsanti “<” e “>” in alto a sinistra del touchscreen per continuare con l'impostazione di un altra Zona, o premere il pulsante “Impostaz. Completa” per uscire. 6 Premere “Impostaz. Completa” per registrare il gruppo e tornare allo schermo "Registrazione gruppo". 7 Premere “Visualizza Monitor”...
- Seite 373 Funzionamento 2 Selezionare "Registrazione unità cdz. secondaria" sullo schermo "Registrazione gruppo". 3 Selezionare il gruppo per la registrazione dell'unità secondaria. • Premere i pulsanti “<” e “>” in alto a sinistra del touchscreen per cambiare la visualizzazione della zona. • Selezionare un gruppo premendolo.
- Seite 374 Funzionamento Premere i pulsanti “<” e “>” in alto a sinistra del touchscreen per continuare con l'impostazione di un altra Zona, o premere il pulsante “Impostaz Completa” per uscire. 6 Premere "Impostaz Completa" in "Regist. Gruppo (Regis. Unità Secondaria)" per tornare allo schermo "Registrazione gruppo". 7 Premere “Visualizza Monitor”...
- Seite 375 Funzionamento 5.1.7.6 Annullamento della registrazione gruppo 1 Selezionare "Registrazione Gruppi Unità Climatizz." sullo schermo del "Menù Service". Fare riferimento a “5.1.7.4 Registrazione di un gruppo (unità principale)”. N O TA Questa funzione non può essere selezionata quando il segnale dell'ingresso esterno è immesso nei terminali 1 e 2 dell'ingresso esterno. 2 Selezionare "Registrazione unità cdz. principale (o Registrazione unità cdz. secondaria)" sullo schermo "Registrazione Gruppo". 3 Selezionare il gruppo dal quale annullare la registrazione.
- Seite 376 Funzionamento 5.1.7.7 Controllo della registrazione del gruppo (controllo della registrazione dell'unità principale) 1 Selezionare “Registrazione Gruppi Unità Climatizz.” sullo schermo del “Menù Service”. Fare riferimento alla sezione “5.1.7.4 Registrazione di un gruppo (unità principale)” N O TA Questa funzione non può essere selezionata quando il segnale dell'ingresso esterno è immesso nei terminali 1 e 2 dell'ingresso esterno. 2 Selezionare "Registrazione unità cdz. principale" (o "Registrazione unità cdz. secondaria") sullo schermo "Registrazione Gruppo".
- Seite 377 Funzionamento 5.1.7.8 Controllo della registrazione del gruppo (controllo dei dettagli della registrazione) 1 Selezionare “Registrazione Gruppi Unità Climatizz.” sullo schermo del “Menù Service”. Fare riferimento alla sezione “5.1.7.4 Registrazione di un gruppo (unità principale)” N O TA Questa funzione non può essere selezionata quando il segnale dell'ingresso esterno è immesso nei terminali 1 e 2 dell'ingresso esterno. 2 Selezionare "Controllo della connessione" sullo schermo "Registrazione Gruppo". 3 Selezionare il target (tutti i gruppi / zone singoli).
- Seite 378 Funzionamento 5.2 SCHERMO PRINCIPALE 5.2.1 Visualizzazione globale Monitor (Tutti i gruppi) Tasto della zona Stato dell'unità Display corrente Premendo questo tasto il display passa Indica lo stato dell'unità con icone Indica il display corrente all'indicazione "Zona" Monitor (Zona). del tipo segnale filtro, richiesta, ecc. (Tutti i gruppi) Tasto del gruppo Mostra lo stato di funzionamento di ogni gruppo...
- Seite 379 Funzionamento Monitor (Zona) Scheda zona Il display del monitor passa ad indicare "Zona" o "Tutti i Gruppi". Display corrente Stato dell'unità Tasto del gruppo Indica il display corrente Indica lo stato dell'unità con icone Indica lo stato operativo (gruppi nella zona) del tipo segnale filtro, richiesta, ecc.
- Seite 380 Funzionamento 5.2.2 Impostazioni de gruppo e zona 5.2.2.1 Visualizzazione di tutti i gruppi 1 Premere "Tutti i gruppi" sul display touchscreen. La scheda segnalata con (1), "Tutti i gruppi" non viene visualizzata se solo una zona è stata registrata. (1)* 2 Tutti i gruppi vengono visualizzati sul touchscreen (vengono mostrate tutte le unità...
- Seite 381 Funzionamento 5.2.2.2 Visualizzazione di una zona specifica 1 Selezionare la zona target dallo schermo "Monitor (Tutti i Gruppi)" o "Monitor (Zona)". Monitor (Tutti i Gruppi) Monitor (Zona) 2 I gruppi nella zona selezionata vengono visualizzati sul touchscreen. Lo stato operativo di ciascun gruppo è indicato dal colore del gruppo, come mostrato in seguito: Verde: Avvio...
-
Seite 382: Avvio/Arresto Contemporaneo Di Tutti I Gruppi
Funzionamento 5.2.2.3 Avvio/arresto contemporaneo di tutti i gruppi 1 Premere "Tutti i gruppi" sul display touchscreen. 2 Premere “Avviare Tutti Gr.” per avviare tutti i gruppi contemporaneamente. Premere “Arresta Tutti Gr.” per arrestare tutti i gruppi contemporaneamente. 3 La finestra di conferma è visualizzata di nuovo. Premere “Si” per il funzionamento simultaneo di tutte le unità interne collegate alla postazione centrale. -
Seite 383: Avvio/Arresto Contemporaneo Di Ciascuna Zona
Funzionamento 5.2.2.4 Avvio/arresto contemporaneo di ciascuna zona 1 Selezionare la zona target dal display touchscreen per impostare il funzionamento contemporaneo di avvio/arresto. 2 Premere “Avviare per Zona” per avviare tutti i gruppi nella zona selezionata contemporaneamente. Premere “Arresta per Zona” per arrestare tutti i gruppi nella zona selezionata contemporaneamente. 3 La finestra di conferma è... - Seite 384 Funzionamento 5.2.2.5 Avvio/arresto di ogni gruppo Verificare la modalità di controllo prima dell'impostazione. Il metodo di controllo è diverso in base a come è impostata la modalità di controllo: "Normale" o solo "Avvio/Arresto". Avvio/arresto di ogni gruppo (modalità di controllo: normale) 1 Selezionare lo schermo "Monitor (Tutti i Gruppi)"...
- Seite 385 Funzionamento Avvio/arresto di ogni gruppo (modalità di controllo: solo avvio/arresto) Monitor (Tutti i Gruppi) 1 Selezionare il gruppo obiettivo sul "Monitor (Tutti i Gruppi)" in modalità "Solo Avvio/Arresto". 2 Lo stato operativo del gruppo selezionato commuta alternativamente tra Avvia e Arresta alla pressione del relativo pulsante. In questa modalità, il funzionamento contemporaneo di avvio/arresto per tutti i gruppi è...
-
Seite 386: Modalità Di Funzionamento
Funzionamento 5.2.3 Impostazione dei parametri principali 5.2.3.1 Modalità di funzionamento 1 Selezionare il gruppo obiettivo per la modifica delle impostazione della modalità di funzionamento dallo schermo "Monitor (Tutti i Gruppi)" o "Monitor (Zona)". Lo schermo con le impostazioni per il gruppo selezionato è visualizzato sul touchscreen. Monitor (Tutti i Gruppi) Monitor (Zona) 2 Premendo i pulsanti “... -
Seite 387: Velocità Della Ventola
Funzionamento 5.2.3.2 Velocità della ventola 1 Selezionare il gruppo obiettivo per la modifica della velocità della ventola dallo schermo "Monitor (Tutti i Gruppi)" o "Monitor (Zona)". Lo schermo con le impostazioni per il gruppo selezionato è visualizzato sul touchscreen. Monitor (Tutti i Gruppi) Monitor (Zona) 2 Premendo i pulsanti “... - Seite 388 Funzionamento 5.2.3.3 Direzione del deflettore orientabile 1 Selezionare il gruppo obiettivo per modificare la direzione del deflettore orientabile dallo schermo "Monitor (Tutti i Gruppi)" o "Monitor (Zona)". Lo schermo con le impostazioni per il gruppo selezionato è visualizzato sul touchscreen. Monitor (Tutti i Gruppi) Monitor (Zona) 2 Premendo i pulsanti “...
-
Seite 389: Impostazione Della Temperatura
Funzionamento 5.2.3.4 Impostazione della temperatura 1 Selezionare il gruppo obiettivo per la modifica della temperatura di impostazione dallo schermo "Monitor (Tutti i Gruppi)" o "Monitor (Zona)". Lo schermo con le impostazioni per il gruppo selezionato è visualizzato sul touchscreen. Monitor (Tutti i Gruppi) Monitor (Zona) 2 Premendo “... - Seite 390 Funzionamento 5.2.3.5 Abilitazione/disabilitazione del funzionamento dal controllo remoto Questa funzione è utilizzata per proibire il funzionamento dal controllo remoto (RCS). Quando il controllo remoto è impostato come disattivato (per elemento/per tutte gli elementi), il controllo dell'elemento selezionato non è disponibile. Gli elementi che possono essere selezionati sono: Avvio/Arresto, modalità di funzionamento, velocità della ventola, feritoia orientabile e temperatura.
- Seite 391 Funzionamento 3 Premere “Visualizza Monitor” per tornare allo schermo "Monitor". N O TA • Premendo i pulsanti “ <” o “ >” nella schermata di impostazione dettagliata, il controllo remoto Autorizzato/Bloccato sarà commutato ad un altro gruppo nello stesso blocco. • Controllo bloccato (Solo Avvio/Arresto): Se si imposta su “Attiva”, ogni modifica delle impostazioni verrà estesa a tutti i gruppi o blocchi. Non è possibile modificare le impostazioni per ciascun gruppo. • Anche se il controllo remoto è impostato come "Bloccato", è possibile arrestare il funzionamento con il controllo remoto mentre l'unità è in funzione. È anche possibile, usando il controllo remoto, riavviare il funzionamento. Tuttavia, l’arresto sarà utilizzato solo in caso di emergenza. Non utilizzare durante il funzionamento normale. • Se è impostato “Collegamento/scollegamento dell'alimentazione” (d1, d3), non impostare il controllo remoto come “Bloccato”. Se il controllo remoto è limitato quando si usa “Collegamento/scollegamento dell’alimentazione”, si deve utilizzare la funzione di “Blocco” per il controllo remoto. • Se si verifica un errore di comunicazione, l'ordine del controllo remoto per l'“Arresto” (per elemento) potrebbe essere annullato. In tal caso, eseguire nuovamente l'impostazione. • Non impostare la disabilitazione del funzionamento se diversi dispositivi di controllo centralizzati sono utilizzati nello stesso H-LINK. Inoltre, non impostarla per mezzo di un altro dispositivo di controllo centralizzato in quanto ciò potrebbe provocare malfunzionamento. PMML0332A rev.0 - 05/2015...
- Seite 392 Funzionamento 5.3 MENÙ La tabella sotto mostra gli elementi del menù e le loro funzioni. Elemento Funzione Questa funzione è utilizzata per spegnere il segnale del filtro delle unità interne per le quali viene mostrato il segnale del filtro. Reset indicazione pulizia filtro aria Indipendentemente dalla visualizzazione del segnale del filtro, è...
- Seite 393 Funzionamento 5.3.1 Visualizzazione dello schermo del menù Gli elementi di impostazione dell'unità interna e della postazione centrale sono descritti nel menù. 1 Premere "Menù" sullo schermo "Monitor (Tutti i Gruppi)" o "Monitor (Zona)". Monitor (Tutti i Gruppi) Monitor (Zona) 2 È visualizzato lo schermo "Menù". 3 Selezionare l'elemento dallo schermo del "Menù".
- Seite 394 Funzionamento 5.3.2 Reset indicazione pulizia filtro aria 5.3.2.1 Reset indicazione pulizia filtro aria 1 Selezionare "Reset Indicaz. pulizia filtro aria" dallo schermo "Menù". (È disponibile solo quando l'indicazione del filtro è presente). 2 Selezionare l'obiettivo in cui ripristinare l'indicazione del filtro. •...
- Seite 395 Funzionamento 5.3.2.2 Ripristinare il tempo di funzionamento del filtro 1 Selezionare "Reset Indicaz. pulizia filtro aria" dallo schermo "Menù". (È disponibile solo quando l'indicazione del filtro è presente). 2 Selezionare l’obiettivo in cui ripristinare il tempo di funzionamento del filtro. •...
- Seite 396 Funzionamento 5.3.3 Impostazione del programma orario settimanale Questa funzione è utilizzata per il funzionamento del timer. È possibile impostare un programma per una zona e per ciascun gruppo. È anche disponibile una impostazione vacanza del programma indipendente. 5.3.3.1 Impostazione programma orario ...
- Seite 397 Funzionamento 7 Premere "Impostaz. completata" per confermare l'impostazione. Se viene premuto "No", il contenuto delle impostazioni visualizzate viene scartato, e lo schermo torna allo schermo di impostazione del programma orario. • Andare indietro al punto (5) per continuare ad aggiungere impostazioni per lo stesso giorno della settimana. •...
- Seite 398 Funzionamento Copiare l'impostazione del programma per giorni della settimana 1 Selezionare "Impostazione programma orario settim." dallo schermo "Menù". 2 Selezionare "Impostazione programma orario" dallo schermo "Programma orario". 3 Selezionare l'obiettivo (tutti i gruppi, zona o gruppo). 4 Premere "Copia. GG settimana". 5 Selezionare il giorno della settimana da copiare.
- Seite 399 Funzionamento Copiare l'impostazione del programma per ogni gruppo 1 Selezionare "Impostazione programma orario settim." dallo schermo "Menù". 2 Selezionare "Impostazione programma orario" dallo schermo "Programma orario". 3 Premere “Copiare Impostaz.”. 4 Selezionare il gruppo da copiare. (Non è possibile selezionare una zona come origine per la copia). •...
- Seite 400 Funzionamento Cancellare l'impostazione del programma per elemento singolo 1 Selezionare "Impostazione programma orario settim." dallo schermo "Menù". 2 Selezionare "Impostazione programma orario" dallo schermo "Programma orario". 3 Selezionare l'obiettivo (tutti i gruppi, zona o gruppo). 4 Premere "Cancella Impostaz.". 5 Selezionare un numero dell'elemento di programmazione per cancellarlo.
- Seite 401 Funzionamento Cancellare l'impostazione del programma per ciascun gruppo 1 Selezionare "Impostazione programma orario settim." dallo schermo "Menù". 2 Selezionare "Impostazione programma orario" dallo schermo "Programma orario". 3 Premere "Cancella Impostaz.". 4 Selezionare il gruppo o zona del quale cancellare le impostazioni. •...
- Seite 402 Funzionamento 5.3.3.2 Impostazione vacanza per sospensione del funzionamento 1 Selezionare "Impostazione programma orario settim." dallo schermo "Menù". 2 Selezionare "Impostazione periodo vacanza" dallo schermo "Programma orario". 3 Selezionare l'obiettivo (tutti i gruppi, zona o gruppo). Viene mostrato il calendario per la selezione. •...
- Seite 403 Funzionamento 5.3.3.3 Impostazione programma Avvio/Arresto 1 Selezionare "Impostazione programma orario settim." dallo schermo "Menù". 2 Selezionare "Impostazione programma Avvio/Arresto" dallo schermo "Programma orario". Lo schermo passa a "Impostaz. avvio/arresto". L'impostazione iniziale è “Avvio”, come indicato dal simbolo “ ”. 3 Selezionare l'obiettivo (tutti i gruppi, zone o gruppi). •...
- Seite 404 Funzionamento 5.3.4 Regolazione dell'intervallo della temperatura di impostazione del controllo remoto 1 Selezionare "Impostazione limiti temper. comando remoto" dallo schermo "Menù".* * La selezione non è possibile se i condizionatori collegati non supportano questa funzione. 2 Selezionare l'obiettivo per l'impostazione dell'intervallo della temperatura. (Tutti i gruppi/Zona/Gruppo)* •...
- Seite 405 Funzionamento 5.3.5 Impostazione data e ora attuali 1 Selezionare "Impostazione data e ora attuali" dallo schermo "Menù". 2 Impostare lo schermo in ordine di “Anno”, “Mese” e “Giorno”. 3 Premere o tenere premuto i pulsanti “ ” o “ ” per ogni campo per regolare la data e l'ora. 4 Premere “Impostaz.
- Seite 406 Funzionamento 5.3.7 Calibratura del monitor Touchscreen 1 Selezionare "Calibratura precisione del Touchscreen" dallo schermo "Menù". 2 Calibratura del Touchscreen • Premere le intersezioni delle linee bianche in ordine, come indicato sullo schermo. • Dopo, la visualizzazione passa allo schermo mostrato in figura (3). •...
- Seite 407 Funzionamento 5.3.8 Registrazione dei nomi dei gruppi e delle zone 5.3.8.1 Registrazione del nome del Gruppo 1 Selezionare "Impostazione Nome Zona Nome Gruppo" dallo schermo "Menù". 2 Selezionare l'obiettivo (zona o gruppo) di cui registrare il nome. 3 La visualizzazione passa allo schermo per l'inserimento del testo. E' possibile scegliere tra le tastiere delle lettere minuscole, maiuscole o dei simboli.
- Seite 408 Funzionamento 5.3.8.2 Copia del nome del gruppo o della zona 1 Selezionare "Impostazione Nome Zona Nome Gruppo" dallo schermo "Menù". 2 Selezionare il gruppo o la zona da cui copiare. • Il pulsante della zona o del gruppo selezionato viene evidenziato con una cornice color arancio. •...
-
Seite 409: Impostazione Del Display
Funzionamento 5.3.9 Impostazione del display 5.3.9.1 Regolazione della luminosità della retroilluminazione del display touchscreen 1 Selezionare "Impostazione Display Personalizzate" dallo schermo "Menù". 2 Selezionare "Luminosità" dallo schermo "Impostazione display". 3 Premere “<” o “>” per regolare la luminosità della retroilluminazione. 4 Premere "Impostaz. -
Seite 410: Impostazione Della Lingua
Funzionamento 5.3.9.2 Impostazione della lingua 1 Selezionare "Impostazione Display Personalizzate" dallo schermo "Menù". 2 Selezionare "Lingua" dallo schermo "Impostazione display". 3 Una finestra di conferma è visualizzata quando è selezionato il tasto della lingua. 4 Premere “Impostaz. completata” per tornare allo schermo “Impostazione display”. PMML0332A rev.0 - 05/2015... - Seite 411 Funzionamento 5.3.9.3 Impostazione dell'unità di misura della temperatura 1 Selezionare "Impostazione Display Personalizzate" dallo schermo "Menù". 2 Selezionare "Unità di misura della temperatura" dallo schermo "Impostazione display". 3 Selezionare gradi Celsius o Fahrenheit con i pulsanti corrispondenti. Il pulsante selezionato viene evidenziato in giallo. 4 Premere "Impostaz.
- Seite 412 Funzionamento 5.3.10 Storico tempo di funzionamento 5.3.10.1 Mostrare per mese 1 Selezionare "Storico tempo di funzionamento" dallo schermo "Menù". 2 Premere "Visualizza per Mese". 3 Premere i pulsanti “<” o “>” per selezionare la zona obiettivo. 4 Premere i pulsanti “<” o “>” per selezionare l'anno e il mese obiettivo. 5 Premere "Menù"...
- Seite 413 “Impostazione funzione opzionale”, attraverso l'opzione per la selezione della funzione. Contattare il proprio rivenditore o il centro di assistenza clienti di Hitachi per ottenere informazioni dettagliate. Rosso: Tempo richiesta termica attiva, Blu: Tempo di funzionamento accumulato Sinistra: Tempo richiesta termica attiva, Destra: Tempo di funzionamento accumulato...
- Seite 414 Funzionamento 5.3.11 Informazioni di contatto service 1 Selezionare "Informazioni di contatto Service" dallo schermo "Menù". Vengono visualizzate le seguenti informazioni: Informazioni di contatto (2 elementi indipendenti) Nome della zona o del gruppo dove si è verificato l'ultimo allarme. Ultimo codice di allarme 2 Premere "Menù"...
- Seite 415 Funzionamento 5.3.12 Impostazione estate 1 Selezionare "Impostazione ora legale" dallo schermo "Menù". Vengono visualizzate le seguenti informazioni: 2 Selezione della funzione che riguarda ciascun elemento. Poi, il colore della funzione selezionata cambia. 3 Premere “Impostaz. completata” per confermare il contenuto e tornare allo schermo del Menù. PMML0332A rev.0 - 05/2015...
-
Seite 416: Menù Di Manutenzione
Funzionamento 5.4 MENÙ DI MANUTENZIONE N O TA • Riservato unicamente all'addetto alla manutenzione. Quindi non utilizzarlo. • Nel caso in cui fosse utilizzato ed il menù di manutenzione apparisse sullo schermo, premere "Indietro". Lo schermo tornerà al menù. Elementi Contenuti Registrazione gruppi unità Le unità interne vengono controllate dalla postazione centrale nello stesso H-LINK. Questa funzione è climatizzazione utilizzata per la registrazione della zona o del gruppo. Impostazione dei modelli di Impostare il modello di controllo. - Seite 417 Funzionamento 1 Premere “Menù” sullo schermo “Monitor (Tutti i gruppi)” o “Monitor (Zona)". Monitor (Tutti i gruppi) Monitor (Zona) 2 È visualizzato lo schermo "Menù". 3 Tenere premuto il pulsante "Menù Service" per almeno 3 secondi. È visualizzato il menù di manutenzione. 4 Selezionare l’elemento dal menù...
- Seite 418 Funzionamento 5.4.1 Registrazione gruppo N O TA Questa funzione è illustrata in dettaglio nella sezione “5.1 Prova di funzionamento” poiché si tratta di un elemento necessario per l'esecuzione della prova di funzionamento. 5.4.2 Impostazione delle funzioni opzionali Questa funzione è utilizzata per impostare e modificare la selezione delle funzioni del climatizzatore e della postazione centrale indicate nella seguente tabella: Impostare mediante Visualizzazione Menù Menù...
- Seite 419 Funzionamento 5.4.2.1 Impostazioni del controllo remoto del climatizzatore 1 Selezionare "Impostazione delle funzioni opzionali" sullo schermo "Menù Service" quando i climatizzatori sono spenti. 2 Selezionare "Impostazione di comando remoto" dal sottomenu. La selezione non è possibile se uno o più condizionatori sono in funzione. 3 Selezionare l’obiettivo della funzione opzionale (Tutti i gruppi/Zona/Gruppo) 4 Selezione della funzione che riguarda ciascun elemento.
- Seite 420 Funzionamento 5.4.2.2 Impostazione del Touchscreen 1 Selezionare "Impostazione delle funzioni opzionali" sullo schermo "Menù Service" quando i climatizzatori sono spenti. 2 Selezionare "Impostazione del Touchscreen" sullo schermo "Funzioni opzionali". 3 Selezionare l'impostazione di ogni elemento della funzione come necessario. L'impostazione selezionata viene evidenziata in giallo. Sulla disattivazione dell'impostazione dell'ora di spegnimento dal controllo remoto Quando abilitata, non è...
- Seite 421 Funzionamento 5.4.3 Impostazione eccezioni di avvio/arresto Gli ordini “AVVIO” e “ARRESTO” non sono accettati se il gruppo è stato selezionato dal funzionamento “Tutti i gruppi” o “Tutti le zone”. Comunque è possibile impostare una regola di eccezione per ognuna dei seguenti ordini o combinazioni di ordini, che influenza i gruppi specifici: •...
- Seite 422 Funzionamento 5.4.4 Impostazione ingressi/uscite esterni La funzione "Impostazione ingressi/uscite esterni" della postazione centrale fornisce la capacità di controllare 4 ingressi e 2 uscite. Selezionare “Impostazione ingressi/uscite esterni” sullo schermo “Impostazione funzione opzionale” per accedere al menù di impostazione. Ingresso e uscita Collegamento Funzione Avvio/Arresto Tutto (Contat.)
- Seite 423 Funzionamento 5.4.4.2 Funzione uscita esterna 1 Uscita "Avviare Tutto" Uscita esterna del segnale di funzionamento dell'unità interna al gruppo obiettivo. Il segnale di funzionamento viene inviato anche se una delle unità interne del gruppo di destinazione è in funzione. 2 Allarme uscita esterna Segnale dell'allarme uscita esterna dell'unità...
- Seite 424 Funzionamento 5.4.4.4 Impostazione ingresso esterno 1 Selezionare "Impostazione input/output esterni" sullo schermo del "Menù Service". La selezione non è possibile quando i condizionatori sono in funzione, o quando il contatto per il segnale di ingresso esterno è attivo. 2 Selezionare l'ingresso obiettivo (da 1 al 4) dell'ingresso esterno. 3 Selezionare la funzione da usare con l'ingresso esterno.
- Seite 425 Funzionamento Controllo della capacità dell'unità esterna 5 Selezionare il valore per la capacità dell'unità esterna. Il pulsante del valore della capacità selezionata viene evidenziato in giallo. 6 Usare i pulsanti al lato destro dello schermo per programmare il controllo della capacità dell'unità esterna se non vi è nessun contatto di ingresso esterno utilizzato allo scopo.
-
Seite 426: Altre Impostazioni
Funzionamento Altre impostazioni 10 Selezionare l'obiettivo del controllo dell'ingresso esterno. (Tutti i gruppi/Zona/Gruppo). • Premere il pulsante di un gruppo per commutare il suo stato di selezione. • Premere il pulsante di una zona per commutare lo stato di selezione di tutti i gruppi nella zona. •... - Seite 427 Funzionamento 5.4.5 Impostazione dei pulsanti L'impostazione dei pulsanti viene utilizzata per mostrare o nascondere alcuni pulsanti, limitando quindi il funzionamento. Impostare mediante Monitor Menu Menu Service Impostazione dei pulsante. 1 Selezionare "Impostazione dei pulsante" sullo schermo "Menù Service". 2 Selezione della funzione che riguarda ciascun elemento. La funzione selezionata viene evidenziata in giallo. 3 Premere “Impostaz.
- Seite 428 Funzionamento 5.4.6 Registrazione informazioni recapito servizio Questa funzione è utilizzata per modificare o registrare le informazioni di contatto visualizzate. Impostare mediante Monitor Menù Menù Service Registrazione Informazioni Recapito Serv. 1 Selezionare "Registrazione Informazioni Recapito Serv." sullo schermo "Menù Service". 2 Premere il pulsante “Inserire Nome” o “Inserire Num. Telef.” (2) per registrare le informazioni corrispondenti a ciascun campo delle “Informazioni Recapito Serv.
- Seite 429 Funzionamento 5.4.7 Note 5.4.7.1 Registrazione note 1 Selezionare "Note" sullo schermo del "Menù Service". 2 Selezionare l'obiettivo da registrare. Viene visualizzata la schermata di inserimento dei caratteri. 3 Selezionare un carattere registrato dalla lista dei caratteri. 4 Input characters. Premere “Canc.” per cancellare la lettera alla sinistra della posizione del cursore. I campi permettono una lunghezza massima 52 lettere.
- Seite 430 Funzionamento 5.4.7.2 Cancellazione note 1 Selezionare "Note" sullo schermo del "Menù Service". 2 Premere "Cancellare la nota". 3 Selezionare la nota da cancellare. • Premere il pulsante di una nota per commutare il suo stato di selezione. • È possibile selezionare più note. •...
- Seite 431 Funzionamento 5.4.8 Ripristino configurazione iniziale 1 Selezionare "Ripristino configurazione iniziale" sullo schermo "Menù Service". N O TA Questa funzione non può essere selezionata se il funzionamento del controllo remoto è disabilitato, un contatto di ingresso esterno è attivo, o il controllo della capacità dell'unità esterna non è annullato. Annullare questi parametri prima di eseguire "Ripristino configurazione iniziale".
-
Seite 432: Controllo Della Connessione
Funzionamento 5.4.9 Controllo della connessione 1 Selezionare "Controllo della connessione" sullo schermo "Menù Service". N O TA Questa funzione non può essere selezionata se vi sono uno o più climatizzatori in funzione, o se vi è un segnale d'ingresso esterno ai terminali di ingresso esterni 1 o 2. 2 Premere "Si" sullo schermo di conferma. N O TA Premendo "No", lo schermo torna al "Menù Service". Il tipo di aggiornamento delle informazioni di connessione dipende dalla seguente configurazione: • Procedere al punto 3 per aggiornare le informazioni di connessione conservando la registrazione del gruppo e impostazioni come programmazione, ecc. (3) • Procedere al punto 7 per eseguire il controllo delle connessioni inizializzando ciascuna impostazione. (Come per il ripristino delle impostazioni). (7) Conservazione impostazioni 3 Premere "Si" sullo schermo di conferma per conservare le impostazioni. 4 Una volta terminato il processo di verifica della connessione, il numero di unità... - Seite 433 Funzionamento 6 Viene visualizzato un ulteriore schermo di conferma. Controllare i climatizzatori e premere “Si”. N O TA • Premendo "No", lo schermo torna al "Menù Service". • Questa funzione non può essere selezionata se il funzionamento del controllo remoto è disabilitato, un contatto di ingresso esterno è attivo, o il controllo della capacità dell'unità esterna non è annullato. Annullare questi parametri prima di ripristinare le impostazioni. Non conservare le impostazioni 7 Premere "No" sulla finestra di conferma. 8 Viene visualizzata la finestra di conferma dell'inizializzazione. Premere “Si” per inizializzare tutte le impostazione e per avviare il controllo della connessione.
-
Seite 434: Storico Allarmi
Funzionamento 5.4.10 Storico allarmi Questa funzione è usata per registrare l'ora in cui si è verificato l'allarme, l'unità in cui si è verificata l'anomalia e il relativo codice di allarme. E' possibile cancellare lo storico allarmi anche attraverso questa funzione. Impostare mediante Monitor Menù... -
Seite 435: In Condizione Normale
Richiesta opzionale. L'icona lampeggia durante il controllo di richiesta. Contattare il proprio rivenditore o il centro di assistenza clienti di Hitachi per ottenere informazioni dettagliate. Visualizzato quando è abilitato il programma di controllo opzionale della capacità dell'unità esterna, lampeggia durante il controllo. Oltre che con il programma, l'icona lampeggia anche Richiesta (Programma) durante il normale controllo di richiesta quando è... - Seite 436 In questi casi, è anche possibile selezionare il gruppo in condizione anomala da visualizzare premendo i pulsanti “<” o “>” nella finestra “Allarmi”. Contattare il proprio rivenditore o il centro di assistenza clienti di Hitachi per ottenere informazioni dettagliate, dopo aver controllato le indicazioni sull'LCD. ...
-
Seite 437: Risoluzione Dei Problemi
Risoluzione dei problemi 6 RISOLUZIONE DEI PROBLEMI Verificare la tabella seguente prima di contattare un rivenditore per richiedere assistenza. Condizione Causa • Verificare che i cavi di alimentazione sia collegato alla presa a parete. Le indicazioni sul touchscreen non sono visualizzate. •... -
Seite 439: Resumo De Segurança
• NÃO molhe a estação central. Este produto está equipado com peças elétricas. Se estas forem molhadas, ocorrerá um choque elétrico grave. • Antes da instalação, verifique se a base é plana, nivelada e suficientemente resistente e depois fixe a unidade de forma segura. Se a base não for suficientemente resistente, podem ocorrer lesões provocadas pela queda do produto, choque elétrico ou fogo. • NÃO instale a unidade num local em que exista geração, fluxo, acumulação ou fuga de gás inflamável. • NÃO realize você mesmo qualquer trabalho de instalação nem de ligações elétricas. Entre em contacto com o seu distribuidor ou revendedor HITACHI e solicite um técnico habilitado para efetuar a instalação e as ligações elétricas. • A instalação elétrica deve ser realizada de acordo com o Manual de Instalação e com todas as normas e regulamentos aplicáveis. Se as instruções não forem seguidas, podem ocorrer choques elétricos e fogo devido a uma potência insuficiente e a rendimento inadequado. • Utilize os cabos especificados para ligar a unidade interior e a estação central. A utilização de cabos incorretos pode provocar um fogo ou choque elétrico. • Desligue completamente a fonte de alimentação principal antes de abrir ou fechar a tampa de manutenção da unidade interior, visto que o terminal ou o interruptor de alimentação ainda podem ter energia e provocar um choque elétrico. Desligue a fonte de alimentação principal quando efetuar as ligações. -
Seite 440: Principais Características
Principais características 2 PRINCIPAIS CARACTERÍSTICAS Esta estação central (PSC-A32MN) está ligada ao H-LINK e serve para controlar e monitorizar de forma centralizada os ares condicionados. Estão disponíveis as seguintes funções para todas as unidades interiores ligadas às estações centrais: 1 Ligar/parar, mudança do modo de operação, controlo da velocidade do ventilador, controlo da direção do defletor oscilante, ajuste de temperatura e autorização/proibição de funcionamento através do controlo remoto. -
Seite 441: Seleção Do Local De Instalação
Cabo SPEC: 0,75 mm a 1,25 mm Cabo H-LINK (para controlo) Cabo recomendado: JKEPV-S, JKEV-S, CVV-S, CVV, 600V VCT * Os cabos recomendados são modelos da Hitachi Cable, Ltd. 3.2 LISTA DE COMPONENTES Desembale a unidade e confira se: •... -
Seite 442: Descrição Das Peças
Instalação 3.3 DESCRIÇÃO DAS PEÇAS Monitor LCD a cores com ecrã tátil Para operar e monitorizar as unidades com o ecrã tátil. É utilizado com Lado frontal uma caneta tátil (acessório). O ecrã tátil desliga-se automaticamente quando não for utilizado durante um determinado período. Não é... -
Seite 443: Dados Gerais
Instalação 3.4 DADOS GERAIS Modelo PSC-A32MN Dimensões externas 140 × 120 × 22 + 52,7 (mm) <A x L x P + (peça integrada)> Peso líquido 0,5 kg (aprox.) Local de instalação Interior De montagem mural com caixa de interruptores JIS para dois interruptores (com tampa) Método de instalação (JIS C8340) Unidades interiores ligadas (quantidade) -
Seite 444: Espaço De Instalação
Instalação 3.6 ESPAÇO DE INSTALAÇÃO As medidas do espaço de instalação para a estação central devem respeitar o desenho abaixo. (Unidades: mm) 52,7 Não coloque nada na área sombreada “ ”. Se instalar duas ou mais estações centrais, mantenha a seguinte distância entre elas: * Espaço vertical: 50 mm * Espaço horizontal:... - Seite 445 Instalação 3 Ligue os cabos à placa de terminais da estação central. Placa de Utilização Método de ligação terminais Terminal de parafuso M3 Para a fonte de alimentação Ligação de terminal redondo Para transmissão H-LINK Binário de aperto 0,5 N.m Conector três pinos CN1 ~ 3 Para entrada/saída externa...
-
Seite 446: Ligações Elétricas
Modelo de cabo recomendado cablagem Cabo de alimentação 100 V CA ~ 240 V CA 1,25 mm a 2 mm 600 V CV, CCV, CEV (cabo Hitachi) Ligação à terra H-LINK (cabo de controlo) 5 V CC ≤ 1000 m 0,75 mm... - Seite 447 Ligações elétricas P E R I G O • Desligue o interruptor principal da alimentação para unidades interiores, unidades exteriores e estações centrais antes de realizar as ligações elétricas. Caso contrário, isto pode originar um incêndio, choque elétrico ou avaria no dispositivo. • Não utilize cabos mais leves que o cabo flexível normal revestido de policloropreno (código H05RN-F). Procedimento de ajuste dos comutadores O seguinte quadro indica a lista de ajuste dos comutadores de estações centrais. 1 Aplique os ajustes dos comutadores conforme apropriado. Número de Ajuste de Comutador...
- Seite 448 Ligações elétricas Ajuste do DSW1 Nome Modelo DSW1 DSW2 DSW3 DSW4 Estação central EZ PSC-A64GT Mini estação central PSC-A32MN Estação central PSC-A64S Controlador ON/OFF PSC-A16RS centralizado Combinação de PSC- Outros HC-A(8/64)MB Incompatível A32MN com outros controladores controladores centrais centrais HC-A16KNX Incompatível Gateways BMS KNX001...
-
Seite 449: Teste De Funcionamento
Funcionamento 5 FUNCIONAMENTO 5.1 TESTE DE FUNCIONAMENTO A descrição geral do procedimento do teste de funcionamento é indicada na figura abaixo. Os itens assinalados com quadro duplo ) são obrigatórios. Os restantes itens, que não são especificamente necessários para o teste de funcionamento (opcionais), estão descritos na secção específica. - Seite 450 Funcionamento Lista de itens Item Função Ajuste da língua Esta função usa-se para selecionar a língua. (Language Setting) Ajuste da data e hora Esta função é usada para definir a data e a hora. (Date and Time Settings) Registo de grupo Esta função é...
- Seite 451 Funcionamento Item Função Esta função é usada para cancelar comandos de funcionamento como "Ligar/desligar todos os grupos" (All Groups Run/Stop) através do sinal de entrada externo. Exceção de entrada externa (Exception of External Input) A "Exceção de entrada externa" (Exception External Input) está disponível para cada entrada externa (entrada 1 e entrada 2).
- Seite 452 Funcionamento 5.1.1 Ligação Ligue a fonte de alimentação dos ares condicionados. A fonte de alimentação deve ser ligada 12 horas antes do início do funcionamento para proteger o compressor. Não desligue a fonte de alimentação durante os períodos de utilização do ar condicionado. Realize primeiro um teste de funcionamento de cada ar condicionado para assegurar o seu correto funcionamento.
- Seite 453 Funcionamento 5.1.4 Ajuste de data/hora Depois de ajustar a unidade de temperatura, o ecrã de ajuste da data/hora é exibido no ecrã tátil, conforme mostrado na figura. Carregue em "Set" no ecrã tátil e defina a data e a hora de acordo com o procedimento indicado. Consulte a secção “5.3.5 Ajuste da data e da hora”...
- Seite 454 Funcionamento 5.1.6 Ajuste dos padrões de controlo Depois de ajustar a data e a hora, é apresentado o ecrã de padrão de controlo. Carregue em "Set" no ecrã tátil para avançar para o ajuste dos padrões de controlo. Ao tocar num botão do padrão de controlo, este botão fica destacado com um contorno laranja. O procedimento para ajustar os padrões de controlo é...
- Seite 455 Funcionamento 5.1.7 Registro de grupo Regista as unidades interiores ligadas a grupos e blocos da estação central. 5.1.7.1 Definições • Grupo: A unidade de funcionamento mínimo controlada por uma estação central. Um grupo de controlo remoto é considerado como um grupo e o mesmo ajuste é aplicado a todo o grupo. Uma estação central pode controlar no máximo 32 grupos (organizados em 4 blocos com 8 grupos cada, 8 blocos com 4 grupos cada, 2 blocos com 16 grupos cada ou 16 bloco com 2 grupos cada).
- Seite 456 Funcionamento 5.1.7.3 Registo de unidade secundária • Pode registar no máximo 15 unidades secundárias no mesmo grupo de controlo remoto com a unidade principal (ao aplicar o padrão de controlo de 2 blocos com 16 grupos cada). • As unidades interiores sem um controlo remoto não podem ser registadas como unidades secundárias. •...
- Seite 457 Funcionamento 3 Selecione o grupo para registar a unidade principal. • Toque nos botões "<" e ">" na parte superior esquerda do ecrã tátil para mudar a visualização do bloco. • Os números no interior dos botões indicam o número de bloco e o número de grupo. •...
- Seite 458 Funcionamento Toque nos botões "<" e ">" na parte superior esquerda do ecrã tátil para prosseguir com a configuração de outro bloco ou toque no botão "Setting complet." (Ajuste concluído) para sair. 6 Toque em "Setting Complet." (Ajuste concluído) para registar o grupo e voltar ao ecrã de registo de grupo. 7 Toque em "Monitor Screen"...
- Seite 459 Funcionamento 2 Selecione "Sub Unit Register" (Registo de unidade secundária) no ecrã de "Group Register" (Registo de grupo). 3 Selecione o grupo para registar a unidade secundária. • Toque nos botões "<" e ">" na parte superior esquerda do ecrã tátil para mudar a visualização do bloco. •...
- Seite 460 Funcionamento Toque nos botões "<" e ">" na parte superior esquerda do ecrã tátil para prosseguir com a configuração de outro bloco ou toque no botão "Setting complet." (Ajuste concluído) para sair. 6 Carregue em "Setting complet." (Ajuste concluído) no "Group Register (Sub Unit Register)" (Registo de grupo (Registo de unidade secundária)) para voltar ao ecrã...
- Seite 461 Funcionamento 5.1.7.6 Cancelamento do registo de grupo 1 Selecione “Group Register” (Registo de grupo) no ecrã de “Service Menu” (Menu de manutenção). Consulte a secção “5.1.7.4 Registo de um grupo (unidade principal)”. N O TA Esta função não pode ser selecionada quando o sinal de entrada externa for introduzido no terminal de entrada externa 1 ou 2. 2 Selecione "Main Unit Register" ou "Sub Unit Register" (Registo da unidade principal ou secundária) no ecrã "Group Register" (Registo de grupo).
- Seite 462 Funcionamento 5.1.7.7 Verificar o registo do grupo (Verificar o registo da unidade principal) 1 Selecione “Group Register” (Registo de grupo ) no ecrã de "Service Menu" (Menu de manutenção). Consulte a secção “5.1.7.4 Registo de um grupo (unidade principal)”. N O TA Esta função não pode ser selecionada quando o sinal de entrada externa for introduzido no terminal de entrada externa 1 ou 2. 2 Selecione "Main Unit Register" ou "Sub Unit Register" (Registo da unidade principal ou secundária) no ecrã "Group Register" (Registo de grupo).
- Seite 463 Funcionamento 5.1.7.8 Verificar o registo do grupo (Verificar os detalhes de registo) 1 Selecione “Group Register” (Registo de grupo ) no ecrã de "Service Menu" (Menu de manutenção). Consulte a secção “5.1.7.4 Registo de um grupo (unidade principal)”. N O TA Esta função não pode ser selecionada quando o sinal de entrada externa for introduzido no terminal de entrada externa 1 ou 2. 2 Selecione “Display list of registers” (Visualizar lista de registos) no ecrã de registo de grupo. 3 Selecione o destino de visualização (todos os grupos / blocos individuais) 4 São apresentados o número do sistema de refrigeração e o endereço de todas as unidades ligadas a cada grupo.
-
Seite 464: Ecrã Principal
Funcionamento 5.2 ECRÃ PRINCIPAL 5.2.1 Vista geral Monitor (todos os grupos) Botão de bloco Estado da unidade Ecrã atual Ao tocar neste botão muda para o ecrã "Monitor Para indicar o estado da unidade (Block)" (Monitor (bloco)). Indica o ecrã atual com ícones como o sinal de filtro, (todos os grupos) o pedido, etc. - Seite 465 Funcionamento Monitor (bloco) Separador de bloco Para alterar o ecrã para “Bloco" ou "Todos os grupos". Estado da unidade Ecrã atual Botão de grupo Para indicar o estado da unidade Indica o ecrã atual (grupos no com ícones como o sinal de filtro, Indica o estado de funcionamento bloco) Verde:...
- Seite 466 Funcionamento 5.2.2 Ajustes de grupo e bloco 5.2.2.1 Exibição de todos os grupos 1 Toque em "All Groups" (Todos os grupos) no ecrã tátil. O separador marcado com (1), "All Groups" (Todos os grupos), não será exibido se apenas tiver registado um bloco. (1)* 2 Todos os grupos são visualizados no ecrã...
- Seite 467 Funcionamento 5.2.2.2 Exibição do bloco especificado 1 Selecione o bloco de destino no ecrã de “Monitor (All Groups)” (Monitor (todos os grupos)) ou “Monitor (Block)” (Monitor (bloco)). Monitor (todos os grupos) Monitor (bloco) 2 Os grupos no bloco selecionado serão exibidos no ecrã tátil. O estado de funcionamento de cada grupo é indicado pela cor do botão de grupo, da seguinte forma: Verde: Ligar...
- Seite 468 Funcionamento 5.2.2.3 Ligar/parar em simultâneo para todos os grupos 1 Toque em "All Groups" (Todos os grupos) no ecrã tátil. 2 Toque em “Run all gr.” para ligar simultaneamente todos os grupos. Toque em “Stop all gr.” para desligar simultaneamente todos os grupos. 3 A janela de confirmação é...
- Seite 469 Funcionamento 5.2.2.4 Ligar/parar em simultâneo para cada bloco 1 Selecione o bloco de destino no ecrã tátil para definir o funcionamento simultâneo de ligar/parar. 2 Toque em “Run by Block” para ligar simultaneamente todos os grupos no bloco selecionado. Toque em “Stop by Block” para desligar simultaneamente todos os grupos no bloco selecionado. 3 A janela de confirmação é...
- Seite 470 Funcionamento 5.2.2.5 Ligar/parar para cada grupo Verifique o modo de controlo antes de ajustar. O método de controlo é diferente conforme o modo de controlo esteja definido em "Normal" (Normal) ou "Run/Stop Only" (Apenas ligar/parar). Funcionamento de ligar/parar para cada grupo (Modo de controlo: Normal) 1 Selecione o ecrã...
- Seite 471 Funcionamento Funcionamento de ligar/parar para cada grupo (Modo de controlo: Apenas ligar/parar) Monitor (todos os grupos) 1 Selecione o grupo de destino no ecrã de “Monitor (All Groups)” (Monitor (todos os grupos)) no modo “Run/Stop Only” (Apenas ligar/parar). 2 O estado de funcionamento do grupo selecionado pode ser mudado alternadamente entre Run (Ligar) e Stop (Parar) tocando no botão.
-
Seite 472: Modo De Operação
Funcionamento 5.2.3 Ajuste dos parâmetros principais 5.2.3.1 Modo de operação 1 Selecione o grupo de destino para alterar os ajustes do modo de operação nos ecrãs “Monitor (All Groups)” (Monitor (todos os grupos)) ou “Monitor (Block)” (Monitor (bloco)). O ecrã com os ajustes para o grupo selecionado é exibido no ecrã tátil. Monitor (todos os grupos) Monitor (bloco) 2 Ao tocar nos botões “... -
Seite 473: Velocidade Do Ventilador
Funcionamento 5.2.3.2 Velocidade do ventilador 1 Selecione o grupo de destino para alterar o ajuste da velocidade do ventilador nos ecrãs “Monitor (All Groups)” (Monitor (todos os grupos)) ou “Monitor (Block)” (Monitor (bloco)). O ecrã com os ajustes para o grupo selecionado é exibido no ecrã tátil. Monitor (todos os grupos) Monitor (bloco) 2 Ao tocar nos botões “... - Seite 474 Funcionamento 5.2.3.3 Direção do defletor oscilante 1 Selecione o grupo de destino para alterar o ajuste da direção do defletor oscilante nos ecrãs “Monitor (All Groups)” (Monitor (todos os grupos)) ou “Monitor (Block)” (Monitor (bloco)). O ecrã com os ajustes para o grupo selecionado é exibido no ecrã tátil. Monitor (todos os grupos) Monitor (bloco) 2 Ao tocar em “...
-
Seite 475: Ajuste De Temperatura
Funcionamento 5.2.3.4 Ajuste de temperatura 1 Selecione o grupo de destino para alterar o ajuste de temperatura nos ecrãs “Monitor (All Groups)” (Monitor (todos os grupos)) ou “Monitor (Block)” (Monitor (bloco)). O ecrã com os ajustes para o grupo selecionado é exibido no ecrã tátil. Monitor (todos os grupos) Monitor (bloco) 2 Ao tocar em “... - Seite 476 Funcionamento 5.2.3.5 Autorização ou proibição de funcionamento a partir do controlo remoto Pode utilizar esta função para restringir o funcionamento a partir do controlo remoto (RCS). Ao configurar o controlo remoto como proibido (por elemento / para todos os elementos), o controlo do elemento selecionado fica indisponível.
- Seite 477 Funcionamento 3 Toque em "Monitor screen" (Ecrã de monitor) para voltar a este ecrã. N O TA • Ao tocar em “<” ou “>” no ecrã de ajuste detalhado, o controlo remoto Permitido/Proibido será mudado para outro grupo no mesmo bloco. • Controlo proibido (apenas ligar/parar): Em caso de “Enable” (ativado), cada alteração de ajuste aplica-se a todos os grupos ou blocos. A alteração do ajuste não pode ser realizada para cada grupo. • Mesmo se o controlo remoto estiver definido como "Prohibit." (Proibido), é possível realizar uma paragem com o controlo remoto durante o funcionamento. Também é possível reiniciar o funcionamento com o controlo remoto. No entanto, a paragem deve ser utilizada exclusivamente em caso de emergência. Não a utilize durante o funcionamento normal.
- Seite 478 Funcionamento 5.3 MENU O quadro abaixo mostra os itens do menu e as respetivas funções. Item Função Esta função é usada para desligar a visualização do sinal do filtro das unidades interiores ligadas que tiverem Reinicialização do sinal de apresentado o sinal de filtro. filtro Independentemente da ocorrência do sinal de filtro, também pode reiniciar o tempo de visualização do sinal de (Filter Sign Reset)
- Seite 479 Funcionamento 5.3.1 Visualização do ecrã menu Os elementos de ajuste para a unidade interior e a estação central estão dispostos no menu. 1 Carregue em "Menu" nos ecrãs de “Monitor (All Groups)” (Monitor (todos os grupos)) ou “Monitor (Block)” (Monitor (bloco)). Monitor (todos os grupos) Monitor (bloco) 2 O ecrã...
- Seite 480 Funcionamento 5.3.2 Reinicialização do sinal de filtro 5.3.2.1 Reinicializar o sinal de filtro 1 Selecione “Filter Sign Reset” (Reinicialização do sinal de filtro) no ecrã do “Menu”. Só está disponível quando for indicado o sinal de filtro). 2 Selecione o destino para reiniciar o sinal do filtro. •...
- Seite 481 Funcionamento 5.3.2.2 Reinicialização do tempo de funcionamento do filtro 1 Selecione “Filter Sign Reset” (Reinicialização do sinal de filtro) no ecrã do “Menu”. Só está disponível quando for indicado o sinal de filtro). 2 Selecione o destino para reiniciar o tempo de funcionamento do filtro. •...
- Seite 482 Funcionamento 5.3.3 Ajustes de programa Esta função é usada para operações com o temporizador. É possível definir um programa para um bloco e para cada grupo. Também está disponível um ajuste de férias independente para o programa. 5.3.3.1 Ajuste do temporizador de programação ...
- Seite 483 Funcionamento 7 Toque em "Setting completed" (Ajuste concluído) para confirmar a configuração. Se tocar em "No", os conteúdos de ajuste visualizados são rejeitados e o monitor volta ao ecrã de ajuste de programa. • Regresse ao passo (5) para continuar a adicionar ajustes para o mesmo dia da semana. •...
- Seite 484 Funcionamento Copiar o ajuste de programa por dias da semana 1 Selecione “Schedule Settings” (Ajustes de programa) no ecrã de "Menu". 2 Selecione “Schedule Timer Setting” (Ajuste do temporizador de programação) no ecrã “Schedule Settings” (Ajustes de programa). 3 Selecione o destino (todos os grupos, bloco ou grupo). 4 Carregue em “Copy Day of Week”...
- Seite 485 Funcionamento Copiar o ajuste de programa por cada grupo 1 Selecione “Schedule Settings” (Ajustes de programa) no ecrã de "Menu". 2 Selecione “Schedule Timer Setting” (Ajuste do temporizador de programação) no ecrã “Schedule Settings” (Ajustes de programa). 3 Toque em “Copy Settings” (Copiar ajustes). 4 Selecione o grupo a copiar.
- Seite 486 Funcionamento Eliminar o ajuste de programa por elemento individual 1 Selecione “Schedule Settings” (Ajustes de programa) no ecrã de "Menu". 2 Selecione “Schedule Timer Setting” (Ajuste do temporizador de programação) no ecrã “Schedule Setting” (Ajuste de programa). 3 Selecione o destino (todos os grupos, bloco ou grupo). 4 Toque em “Delete Settings”...
- Seite 487 Funcionamento Eliminar o ajuste de programa por cada grupo 1 Selecione “Schedule Settings” (Ajustes de programa) no ecrã de "Menu". 2 Selecione “Schedule Timer Setting” (Ajuste do temporizador de programação) no menu “Schedule Settings” (Ajustes de programa). 3 Toque em “Delete Settings” (Eliminar ajustes). 4 Selecione os grupos ou blocos para eliminar os ajustes respetivos.
- Seite 488 Funcionamento 5.3.3.2 Ajuste de feriados para suspender o funcionamento 1 Selecione “Schedule Settings” (Ajustes de programa) no ecrã de "Menu". 2 Selecione “Holiday Setting” (Ajuste de feriados) no ecrã “Schedule Settings” (Ajustes de programa). 3 Selecione o destino (todos os grupos, bloco ou grupo). É apresentado o calendário para a seleção. •...
- Seite 489 Funcionamento 5.3.3.3 Ajuste do temporizador de ligar/desligar 1 Selecione “Schedule Settings” (Ajustes de programa) no ecrã de "Menu". 2 Selecione “Schedule Timer ON/OF Setting” (Ajuste do temporizador de ligar/desligar) no ecrã “Schedule Settings” (Ajustes de programa). É apresentado o ecrã “Schedule Timer ON/OFF Setting” (Ajuste do temporizador de ligar/desligar). O ajuste inicial é "ON", conforme indicado com o símbolo "...
- Seite 490 Funcionamento 5.3.4 Definição do intervalo de ajuste de temperatura do controlo remoto 1 Selecione “Setting temp. range of the remote control” (Ajuste do intervalo de temperatura no controlo remoto) do ecrã “Menu”.* * Não é possível selecionar se os ares condicionados ligados não forem compatíveis com esta função. 2 Selecione o destino para ajustar o intervalo de temperatura.
- Seite 491 Funcionamento 5.3.5 Ajuste da data e da hora 1 Selecione “Date and time Settings” (Ajuste de data e hora) no ecrã “Menu”. 2 Configure por ordem de “Year” (Ano), “Month” (Mês) e “Day” (Dia). 3 Toque ou mantenha premido o botão “ ” ou “ ” em cada campo para definir a hora e a data. 4 Toque em “Setting completed”...
- Seite 492 Funcionamento 5.3.7 Calibraço do ecrã tátil 1 Selecione “Touchscreen Calibration” (Calibração do ecrã tátil) no ecrã "Menu". 2 Calibração do ecrã tátil • Toque nas intersecções das linhas brancas sequencialmente, conforme indicado no ecrã. • Depois o monitor muda para o ecrã mostrado na figura (3). •...
- Seite 493 Funcionamento 5.3.8 Regristro de nomes de grupos e blocos 5.3.8.1 Registo dos nomes de grupos 1 Selecione “Group Name Register” (Registo do nome de grupo) no ecrã “Menu”. 2 Selecione o destino (bloco ou grupo) para registar o nome respetivo. 3 Surge o ecrã...
- Seite 494 Funcionamento 5.3.8.2 Copiar o nome de grupo ou bloco 1 Selecione “Group Name Register” (Registo do nome de grupo) no ecrã “Menu”. 2 Selecione o grupo ou bloco de origem para copiar. • O botão do grupo ou bloco fica destacado com um contorno laranja. •...
- Seite 495 Funcionamento 5.3.9 Ajustes do ecrã 5.3.9.1 Ajustar o brilho da retroiluminação do ecrã tátil 1 Selecione “Screen Display Setting” (Ajustes do ecrã) no ecrã "Menu". 2 Selecione “Brightness” (Brilho) no ecrã "Screen Display Setting" (Ajustes do ecrã). 3 Toque em “ < ” ou “ > ” para ajustar o brilho da retroiluminação. 4 Toque em "Setting completed"...
- Seite 496 Funcionamento 5.3.9.2 Ajuste da língua 1 Selecione “Screen Display Setting” (Ajustes do ecrã) no ecrã "Menu". 2 Selecione “Language” (Idioma) no ecrã "Screen Display Setting" (Ajustes do ecrã). 3 A janela de confirmação será exibida quando selecionar o botão da língua. 4 Toque em “Setting completed”...
- Seite 497 Funcionamento 5.3.9.3 Ajuste da unidade de temperatura 1 Selecione “Screen Display Setting” (Ajustes do ecrã) no ecrã "Menu". 2 Selecione “Temperature Unit” (Unidade de temperatura) no ecrã "Screen Display Setting" (Ajustes do ecrã). 3 Selecione graus Celsius ou Fahrenheit com o botão respetivo. O botão selecionado é destacado em amarelo. 4 Toque em "Setting completed"...
- Seite 498 Funcionamento 5.3.10 Tempo de funcionamento acumulado 5.3.10.1 Visualização por mês 1 Selecione “Accumulated Operation Time” (Tempo de funcionamento acumulado) no ecrã “Menu”. 2 Carregue em “Display by Month” (Visualizar por mês). 3 Toque no botão “<” ou “>” para selecionar o bloco de destino. 4 Toque no botão “<”...
- Seite 499 4 Toque no botão “<” ou “>” para selecionar o grupo de destino. 5 Toque em "Menu" para voltar a este ecrã. N O TA • O tempo de funcionamento acumulado desta estação central é apresentado unicamente como referência. A Hitachi não garante a exatidão do mencionado tempo de funcionamento acumulado para referência. • Também é possível visualizar “Thermo ON Time” (Tempo Thermo ON), se a opção respetiva for selecionada em...
-
Seite 500: Informação De Contacto
Funcionamento 5.3.11 Informação de contacto 1 Selecione “Contact Information” (Informação de contacto) no ecrã "Menu". É apresentada a seguinte informação: Informação de contacto (dois elementos independentes) Nome de bloco e grupo da última ocorrência de alarme Código do último alarme 2 Toque em "Menu"... - Seite 501 Funcionamento 5.3.12 Ajuste da hora de verão 1 Selecione “Summer Time Setting” (Ajuste da hora de verão) no ecrã "Menu". É apresentada a seguinte informação: 2 Selecione a função relativa a cada elemento. A cor da função selecionada vai mudar. 3 Toque em “Setting Completed”...
-
Seite 502: Menu De Manutenção
Funcionamento 5.4 MENU DE MANUTENÇÃO N O TA • Este interruptor está reservado ao pessoal de manutenção. Portanto, não o use. • Se utilizar este interruptor e o ecrã indicar o menu de manutenção, carregue em “Back” (Atrás). O ecrã regressará para o menu. Itens Conteúdo Registo de grupo As unidades interiores ligadas são verificadas pela estação central no mesmo H-LINK. Esta função é usada (Group Register) para o registo do grupo ou do bloco delas. Ajuste dos padrões de controlo Ajusta o padrão de controlo. - Seite 503 Funcionamento 1 Carregue em "Menu" nos ecrãs de “Monitor (All Groups)” (Monitor (todos os grupos)) ou “Monitor (Block)” (Monitor (bloco)). Monitor (todos os grupos) Monitor (bloco) 2 O ecrã "Menu" é exibido. 3 Mantenha "Service Menu" (Menu de manutenção) premido durante pelo menos 3 s. O menu de manutenção é exibido. 4 Selecione o elemento do menu de manutenção tocando o botão respetivo.
- Seite 504 Funcionamento 5.4.1 Registo de grupo N O TA Esta função é descrita na secção “5.1 Teste de funcionamento” por ser obrigatória ao realizar o teste de funcionamento. 5.4.2 Ajuste das funções opcionais Esta função é usada para ajustar e alterar a seleção de aparelhos de ar condicionado e estações centrais listadas na tabela seguinte. Ajustar por "Monitor" "Menu" "Service Menu"...
- Seite 505 Funcionamento 5.4.2.1 Ajustes do ar condicionado e do controlo remoto 1 Selecione "Optional Function Setting" (Ajuste das funções opcionais) no ecrã "Service Menu" (Menu de manutenção) quando os ares condicionados não estiverem a funcionar. 2 Selecione “Remote Control Setting” (Ajuste do controlo remoto) no ecrã "Menu". A seleção não é...
- Seite 506 Funcionamento 5.4.2.2 Ajuste do controlador 1 Selecione "Optional Function Setting" (Ajuste das funções opcionais) no ecrã "Service Menu" (Menu de manutenção) quando os ares condicionados não estiverem a funcionar. 2 Selecione “Controller Settig” (Ajuste do controlador) no ecrã “Optional Function Setting” (Ajuste das funções opcionais). 3 Selecione o ajuste de cada elemento da função da forma necessária.
- Seite 507 Funcionamento 5.4.3 Ajuste de exceção de ligar/parar As ordens de ligar e parar (RUN/STOP) não são aceites quando o grupo for ajustado para funcionar em “All groups” (Todos os grupos) ou “All blocks” (Todos os blocos). No entanto é possível definir uma exceção para as seguintes ordens ou combinações de ordens, que afetam grupos específicos: •...
- Seite 508 Funcionamento 5.4.4 Ajuste de Entrada/Saída externa A função de entrada/saída externa na estação central permite controlar quatro entradas e duas saídas. Selecione “External Input/Output Setting” (Ajuste de entrada/saída externa) no ecrã “Optional Function Setting” (Ajuste das funções opcionais) para aceder ao menu de ajuste. Entrada e saída Ligação Função...
- Seite 509 Funcionamento 5.4.4.2 Função de saída externa 1 Saída de "All Run" (Ligar todos) Saída externa para o sinal de funcionamento da unidade interior no grupo de destino. O sinal de funcionamento é emitido mesmo que uma unidade interior esteja a funcionar no grupo de destino. 2 Alarme de saída externa Sinal de alarme da saída externa para as unidades interiores no grupo de destino.
- Seite 510 Funcionamento 5.4.4.4 Ajuste de entrada externa 1 Selecione “External Input/Output Setting” (Ajuste de entrada/saída externa) no ecrã de “Service Menu” (Menu de manutenção). Não é possível realizar a seleção se o sinal de entrada externa estiver ativado ou se os ares condicionados estiverem a funcionar. 2 Selecione o destino de entrada (de 1 a 4) da entrada externa.
- Seite 511 Funcionamento Controlo de potência da unidade exterior 5 Selecione o valor para a potência da unidade exterior. O botão selecionado com o valor da potência fica destacado em amarelo. 6 Utilize os botões do lado direito do ecrã para programar o controlo da potência da unidade exterior se não existir nenhum contacto de entrada externa aplicado.
- Seite 512 Funcionamento Outros ajustes 10 Selecione o destino do controlo de entrada externa. (Todos os grupos/bloco/grupo). • Toque no botão de um grupo para mudar o seu estado de seleção. • Toque no botão de um bloco para mudar o estado de seleção de todos os grupos nesse bloco. •...
- Seite 513 Funcionamento 5.4.5 Ajuste dos botões Esta função pode ser utilizada para mostrar ou ocultar determinados botões de forma a limitar o funcionamento. Ajustar a través de "Monitor" "Menu" "Service Menu" "Button Setting". 1 Selecione “Button Setting” (Ajuste dos botões) no ecrã “Service Menu” (Menu de manutenção). 2 Selecione a função relativa a cada elemento.
- Seite 514 Funcionamento 5.4.6 Registo de informação de contacto Esta função é usada para editar ou registar a informação de contacto visualizada. Ajustar por "Monitor" "Menu" "Service Menu" "Contact Information Register". 1 Selecione "Contact Information Register" (Registo de informação de contacto) no ecrã "Service Menu" (Menu de manutenção). 2 Toque em “Name Edition”...
- Seite 515 Funcionamento 5.4.7 Apontamentos 5.4.7.1 Registar apontamentos 1 Selecione "Memo" (Apontamentos) no ecrã de "Service Menu" (Menu de manutenção). 2 Selecione o destino de registo. É exibido o ecrã de introdução de carateres. 3 Selecione um caráter registado na lista de carateres. 4 Introduza os carateres.
- Seite 516 Funcionamento 5.4.7.2 Eliminar apontamentos 1 Selecione "Memo" (Apontamentos) no ecrã de "Service Menu" (Menu de manutenção). 2 Toque em “Delete Memo” (Eliminar apontamentos). 3 Selecione o apontamento a eliminar. • Toque no botão do apontamento para mudar o estado de seleção. •...
- Seite 517 Funcionamento 5.4.8 Restaurar ajustes 1 Selecione “Restore Setting” (Restaurar ajustes) no ecrã de “Service Menu” (Menu de manutenção). N O TA Não é possível selecionar esta função se o funcionamento do controlo remoto for proibido, se um contacto de entrada externa estiver ativado ou se o controlo da potência da unidade exterior não estiver cancelado. Cancele estes parâmetros antes de restaurar os ajustes. 2 Toque em "Yes" no ecrã de confirmação. N O TA Se carregar em "No", o ecrã regressa ao menu de manutenção. 3 Surge um segundo ecrã de confirmação. Toque em "Yes" para restaurar os ajustes. O ecrã muda passados alguns segundos e começa uma verificação das ligações do sistema.
- Seite 518 Funcionamento 5.4.9 Verificar a ligação 1 Selecione “Checking Connection” (Verificar a ligação) no ecrã “Service Menu” (Menu de manutenção). N O TA Esta função não pode ser selecionada se um ou mais ares condicionados estiverem a funcionar ou se o sinal de entrada externa for introduzido no terminal de entrada externa 1 ou 2. 2 Toque em "Yes" no ecrã de confirmação. N O TA Se carregar em "No", o ecrã regressa a Menu de manutenção. A atualização da informação de ligação depende dos seguintes ajustes: • Avance para o passo 3 para atualizar a informação de ligação, mantendo o registo do grupo e ajustes como a programação, entre outros. (3) • Avance para o passo (7) para verificar as ligações, inicializando os ajustes. (É igual ao restauro dos ajustes). (7) Manter os ajustes 3 Carregue em "Yes"...
- Seite 519 Funcionamento 6 É mostrado outro ecrã de confirmação. Verifique os ares condicionados e toque em “Yes”. N O TA • Se carregar em "No", o ecrã regressa ao menu de manutenção. • Não é possível selecionar esta função se o funcionamento do controlo remoto for proibido, se um contacto de entrada externa estiver ativado ou se o controlo da potência da unidade exterior não estiver cancelado. Cancele estes parâmetros antes de restaurar os ajustes. Sem manter os ajustes 7 Toque em "No" no ecrã de confirmação. 8 A janela de confirmação da inicialização é apresentada. Toque em “Yes” para inicializar todos os ajustes e iniciar a verificação das ligações.
- Seite 520 Funcionamento 5.4.10 Histórico de alarmes Esta função é utilizada para registar a hora de ocorrência de um alarme, a unidade com anomalia e o código de alarme. Esta função também permite eliminar o histórico de alarmes. Ajustar por "Monitor" "Menu" "Service Menu"...
- Seite 521 Pedido O ícone pisca durante o controlo de pedido. Para obter mais informação, contacte um distribuidor ou o centro de atendimento ao cliente da HITACHI. É apresentado se o programa de controlo da potência da unidade exterior estiver ativado, Pedido (programa) piscando durante o controlo.
- Seite 522 Se o dispositivo parar por este motivo, realize de novo os procedimentos de arranque. Bloqueio do monitor no ecrã “Start-up” • Existe a possibilidade de um erro de comunicação. Para obter mais informação, contacte um distribuidor ou o centro de atendimento ao cliente da HITACHI. PMML0332A rev.0 - 05/2015...
-
Seite 523: Resolução De Problemas
Resolução de problemas 6 RESOLUÇÃO DE PROBLEMAS Consulte a tabela seguinte antes de contactar um distribuidor para solicitar assistência. Condição Causa • Comprove se o cabo de alimentação está ligado à tomada. As indicações não são exibidas no ecrã tátil. •... -
Seite 525: Oversigt Over Sikkerhed
Dette produkt er udviklet til klimaanlæg. FA R E ! • Hæld IKKE vand i centralenheden (i det følgende benævnt "styreenhed"). Produktet indeholder elektriske dele. Hvis der hældes vand i, vil det forårsage et kraftigt elektrisk stød. • Forud for installationsarbejdet skal du sikre, at fundamentet er fladt, lige og tilstrækkeligt stærkt, hvorefter enheden fastgøres. Hvis fundamentet ikke er stærkt nok, kan der opstå skader som følge af elektrisk stød eller brand, eller produktet kan falde ned. • Monter IKKE enheden på steder med udvikling, strømning eller udsivning af brændbar gas. • Udfør IKKE selv monteringsarbejde og elektrisk ledningstilslutning. Kontakt din distributør eller HITACHI forhandler, og bed dem anbefale en udannet servicemedarbejder til udførelse af monteringsarbejdet og ledningstilslutningen. • El-arbejde skal udføres i henhold til installationsvejledning og i henhold til alle gældende bestemmelser og standarder. Hvis vejledningen ikke følges, kan det medføre elektrisk stød og brand grundet utilstrækkelig kapacitet og forkert drift. • Brug de kabler, der angives i vejledningen til ledningsføring mellem indendørsenheden og centralenheden. Valg af de forkerte kabler kan føre til brand eller elektrisk stød. • Afbryd hovedstrømforsyningen fuldstændigt inden åbning eller lukning af servicedækslet på indendørsenheden, da strømterminaldelen eller strømkontaktdelen i modsat fald stadig kan være strømførende og forårsage elektrisk stød. Hovedstrømforsyningen skal ligeledes være afbrudt, når man foretager ledningsføring. -
Seite 526: Hovedfunktioner
hovedfunktioner 2 HOVEDFUNKTIONER Denne centralenhed (PSC-AA32MN) er tilsluttet H-LINK og anvendes til central styring og overvågning af klimaanlæg. Der findes følgende funktioner for alle de indendørsenheder, som er forbundet til centralenhederne. 1 Run/stop, ændring af driftstilstand, styring af ventilatorhastighed, styring af spjældretning, temperaturindstilling og tilladelse/ blokering af driften med fjernbetjening. -
Seite 527: Montering
Anbefalet kabel: 600 V CV, CCV, CEV Kabel SPEC: 0,75 til 1,25 mm H-LINK kabel (til styring) Anbefalet kabel: JKEPV-S, JKEV-S, CVV-S, CVV, 600V VCT * De anbefalede kabler er modelnavnet for Hitachi Cable, Ltd. 3.2 KOMPONENT LISTE Udpak enheden og kontrollér, at: •... -
Seite 528: Beskrivelse Af Delene
Montering 3.3 BESKRIVELSE AF DELENE Farve-LCD med berøringsskærm Til at betjene og overvåge enhederne via berøringsskærmen. Den betjenes med en touchpen (tilbehør). Berøringsskærmen slukkes automatisk, når Forside den ikke anvendes i et nærmere fastlagt tidsrum. Gestusser som multi-berøring (samtidig tryk på adskillige punkter på skærmen) eller svirp understøttes ikke. -
Seite 529: Generelle Data
Montering 3.4 GENERELLE DATA Model PSC-A32MN Ydre mål 140 × 120 × 22 + 52,7 (mm) <H x B x D + (indbygget del)> Nettovægt 0,5 kg (cirka) Placering af installation Indendørs Installationsmetode Indbygget i væg med JIS-kontaktskab til 2 kontakter (med dæksel) (JIS C 8340) Tilsluttede indendørsenheder (antal) 160 (maks.) Ur nøjagtighed... - Seite 530 Montering 3.6 MONTERINGSAFSTAND Hold monteringsafstanden for centralenheden som vist nedenfor. (Måleenhed: mm) 52,7 Undlad at anbringe noget i det skraverede område " ". Ved montering af to eller flere centralenheder ved siden af hinanden, skal følgende separation mellem dem overholdes. * Lodret: 50mm * Vandret:...
- Seite 531 Montering 3 Tilslut ledningerne til klemmebrættet til centralenheden. Klemmebræt Brug Forbindelsesprocedure M3-skrueterminal Til strømforsyning Rund terminalforbindelse Til H-LINK-transmission Tilspændingsmoment 0,5 Nm 3-bens stik CN1 ~ 3 til eksternt input/output Indsæt forbindelsesledninger H-LINK (ikke-polær) 100 til 240 V AC (tilbehør), indtil du hører et klik. Terminaler til eksternt input/output Se afsnittet “5.4.2 Indstilling af valgfrie funktioner”.
-
Seite 532: Elektrisk Ledningsføring
Type ledningsføring Specifikationer Ledningslængde Kabelspecifikationer Anbefalet kabeltype Strømforsyningskabel 100 ~ 240V AC 1,25 til 2 mm 600 V CV, CCV, CEV (Hitachi-kabel) Jording H-LINK 5 V DC ≤1000 m 0,75 til 1,25 mm (fjernbetjeningskabel) JKPEV-S, JKEV-S, CVV-S, CVV, 600 V VCT (Hitachi-kabel) Ledningsføring til... - Seite 533 Elektrisk ledningsføring FA R E ! • Sluk på hovedafbryderen til indendørsenhederne, udendørsenhederne og centralenhederne inden der udføres elektrisk ledningsføringsarbejde. I modsat fald er der fare for brand, elektrisk stød, eller at enheden bryder sammen. • Undlad at anvende kabler, som er lettere end almindelige fleksible belagte polychloropren kabeler (kode H05RN-F). Indstillingsprocedure for kontakter I nedenstående tabel anføres kontaktindstillingerne for centralenhederne. 1 Udfør kontaktindstillinger efter omstændighederne. Kontakt Kontaktnummer Anvendelse Fabriksindstilling Bemærkninger...
- Seite 534 Elektrisk ledningsføring DSW1-indstilling Navn Model DSW1 DSW2 DSW3 DSW4 EZ-centralenhed PSC-A64GT Centralenhed mini PSC-A32MN Centralenhed PSC-A64S Centraliseret ON/OFF- PSC-A16RS styreenhed PSC-A32MN Andre centrale HC-A(8/64)MB Ikke kompatible kombineret med andre styreenheder centrale styreenheder. HC-A16KNX Ikke kompatible BMS gateways KNX001 Ikke kompatible HARC-BX E (A/B) Ikke kompatible CSNET Manager LT...
- Seite 535 Drift 5 DRIFT 5.1 TESTKØRSEL Testkørselsproceduren er vist i nedenstående diagram. Punkterne med dobbeltramme omkring ( ) er påkrævede punkter. Resten af punkterne, som ikke specifikt kræves til testkørselsproceduren, men er valgfrie, er forklaret i deres specifikke respektive afsnit. B E M Æ R K Den faktiske opsætning på skærmene kan variere i forhold til screenshotsene i dette kapitel.
-
Seite 536: Funktion
Drift Liste over punkter Element Funktion Sprogindstilling Denne funktion anvendes til valg af sprog. (Language Setting) Dato og klokkeslæt-indstilling Denne funktion anvendes til justering af dato og klokkeslæt. (Date and Time Settings) Registrer gruppe Denne funktion bruges til registrering af grupper eller blokke af indendørsenheder, som er tilsluttet den samme (Group Register) H-LINK, og som er blevet identificeret af centralenheden. - Seite 537 Drift Element Funktion Denne funktion anvendes til at annullere driftskommandoer såsom alle grupper run/stop (All Groups Run/Stop) Undtagelse eksternt input m.m. ved hjælp af det eksterne inputsignal. (Exception of External Input) Undtagelse fra eksternt input (Exception External Input) er disponibel for hvert eksterne input (input 1 og input 2). Valg af undtagelsesgrupper for eksternt input 1 Denne funktion anvendes til at vælge de grupper hvis driftskommandoer skal annulleres fra det eksterne input 1.
- Seite 538 Drift 5.1.1 Tænd Tænd for strømforsyningen til klimaanlæggene. For at beskytte kompressoren bør strømforsyningen tændes 12 timer, før driften igangsættes. Sluk ikke for strømforsyningen på årstider, hvor klimaanlægget anvendes. Udfør testkørsel af hvert klimaanlæg først for at bekræfte normal drift. Tænd for strømforsyningen til centralenheden.
- Seite 539 Drift 5.1.4 Justering af dato/klokkeslæt Når temperaturenheden er valgt, vises skærmen til justering af dato/klokkeslæt på berøringsskærmen som vist i figuren. Tryk på indstil (Set) på berøringsskærmen, og indstil dato og klokkeslæt i følge til den anførte fremgangsmåde. Se kapitlet “5.3.5 Dato og klokkeslæt-indstilling”...
- Seite 540 Drift 5.1.6 Indstilling af kontrolskabeloner Efter indstilling af dato og klokkeslæt, vises skærmen til indstilling af kontrolskabelon. Tryk på indstil (Set) på berøringsskærmen for at indstille kontrolskabeloner. Når du trykker på en kontrolskabelon-knap, fremhæves den valgte knap med en orange ramme. Proceduren for indstilling af kontrolskabeloner er forklaret nedenfor.
- Seite 541 Drift 5.1.7 Registrer gruppe Registrer de tilsluttede indendørsenheder til grupper og blokke i centralenheden. 5.1.7.1 Definitioner • Gruppe: Min. driftsenhed, der styres af én centralenhed 1 fjernbetjeningsgruppe anses for at være 1 gruppe, og den samme indstilling gælder for hele gruppen. Maks. 32 grupper (organiseret som 4 blokke med 8 grupper i hver, 8 blokke med 4 grupper i hver, 2 blokke med 16 grupper i hver eller 16 blokke med 2 grupper i hver) kan styres fra én centralenhed.
- Seite 542 Drift 5.1.7.3 Registrering af underenhed • Der kan højst registreres 15 enheder i samme fjernbetjeningsgruppe sammen med hovedenheden (ved brug af kontrolskabelonen med 2 blokke med 16 grupper i hver). • Indendørsenheder uden fjernbetjening kan ikke registreres som underenheder. • Hvis man ændrer registreringen af en indendørsenhed, som allerede er registreret som en underenhed, skal registreringsindstillingerne først annulleres, inden man registrerer på...
- Seite 543 Drift 3 Vælg den gruppe, hovedenheden skal registreres til. • Blokdisplayet ændres ved tryk på knapperne "<" og ">" i det øverste venstre hjørne af berøringsskærmen. • Tallene inden i knapperne indikerer bloknummer og gruppenummer. • Vælg en gruppeknap ved at trykke på den. Den valgte knap omgives af en orange ramme. Valget af gruppe annulleres, hvis der trykkes igen på...
- Seite 544 Drift Tryk på knapperne "<" og ">" i det øverste venstre hjørne af berøringsskærmen for at forsætte og indstille en anden blok, eller tryk på knappen indstilling udført (Setting complet.) for at forlade skærmen. 6 Tryk på knappen indstilling udført (Setting complet.) for at registrere gruppen og vende tilbage til skærmen til registrering af gruppe (Group Register).
- Seite 545 Drift 2 Vælg “Sub Unit Register” på skærmen “Group Register”. 3 Vælg den gruppe, underenheden skal registreres til. • Blokdisplayet ændres ved tryk på knapperne "<" og ">" i det øverste venstre hjørne af berøringsskærmen. • Vælg en gruppe ved at trykke på den. Den valgte knap omgives af en orange ramme. •...
- Seite 546 Drift Tryk på knapperne "<" og ">" i det øverste venstre hjørne af berøringsskærmen for at forsætte og indstille en anden blok, eller tryk på knappen indstilling udført (Setting complet.) for at forlade skærmen. 6 Tryk på indstilling udført (Setting complet.) på skærmen til registrering af gruppe ((Group Register) (Sub Unit Register)) for at komme tilbage til skærmen til registrering af gruppe (Group Register).
- Seite 547 Drift 5.1.7.6 Annullering af en grupperegistrering 1 Vælg “Group Register” på skærmen “Service Menu”. Se “5.1.7.4 Grupperegistrering (hovedenhed)”. B E M Æ R K Denne funktion kan ikke vælges, når det eksterne inputsignal sendes til den eksterne inputterminal 1 eller 2. 2 Vælg “Main Unit Register (eller Sub Unit Register)” på skærmen “Group Register”. 3 Vælg den gruppe, der skal annulleres. Blokdisplayet ændres ved tryk på...
- Seite 548 Drift 5.1.7.7 Kontrol af grupperegistrering (kontrol af registrer hovedenhed) 1 Vælg registrer gruppe (Group Register) på servicemenuskærmen (Service Menu). Se afsnittet “5.1.7.4 Grupperegistrering (hovedenhed)”. B E M Æ R K Denne funktion kan ikke vælges, når det eksterne inputsignal sendes til den eksterne inputterminal 1 eller 2. 2 Vælg registrer hovedenhed (Main Unit Register) (eller registrer underenhed (Sub Unit Register)) på skærmen til registrering af gruppe (Group Register).
- Seite 549 Drift 5.1.7.8 Kontrol af grupperegistrering (kontrol af registreringsinformation) 1 Vælg registrer gruppe (Group Register) på servicemenuskærmen (Service Menu). Se afsnittet “5.1.7.4 Grupperegistrering (hovedenhed)”. B E M Æ R K Denne funktion kan ikke vælges, når det eksterne inputsignal sendes til den eksterne inputterminal 1 eller 2. 2 Vælg visning af liste med registreringer (Display list of registers) på skærmen til registrering af gruppe (Group Register). 3 Vælg visningsmåden: alle grupper/individuelle blokke (All Groups / individual Blocks).
- Seite 550 Drift 5.2 HOVEDSKÆRM 5.2.1 Overordnet visning Overvåge alle grupper Blokknap Enhedstilstand Nuværende display Skærmvisningen ændres til visning af blok Viser enhedens tilstand såsom Viser det nuværende display (Block) ved at trykke på denne knap. filtersymbol, krav, m.m. alle grupper (All Groups) Gruppeknap (Group button) Viser driftstilstanden af hver gruppe som følger: Grøn:...
- Seite 551 Drift Overvåge blok Blokfanen Ændrer skærmen til at vise “Blok” eller “Alle grupper”. Nuværende display Enhedstilstand Gruppeknap Viser det nuværende display Viser enhedens tilstand såsom Viser driftsstatus (grupper i en blok) filtersymbol, krav, m.m. Grøn: I drift Grå: Standset Rød: Unormal Når der trykkes på...
- Seite 552 Drift 5.2.2 Indstillinger af gruppe og blokke 5.2.2.1 Visning af alle grupper 1 Tryk på “All Groups” på berøringsskærmen. Fanen med mærket (1), alle grupper (All Groups) vises ikke, hvis der kun er registreret én blok. (1)* 2 Alle grupper vises på berøringsskærmen (alle de indendørsenheder, som er forbundet til centralenheden vises). Driftsstatus for hver enkelt gruppe angives af farven på...
- Seite 553 Drift 5.2.2.2 Visning af en angivet blok 1 Vælg målblokken på skærmen til overvågning af alle grupper (Monitor (All Groups)) eller en blok (Monitor (Block)). Overvåge alle grupper (Monitor (All Groups)) Overvåge blok (Monitor (Block)) 2 Grupperne i den valgte blok vises på berøringsskærmen. Driftsstatus for hver enkelt gruppe angives af farven på gruppen som følger: Grøn: Grå:...
- Seite 554 Drift 5.2.2.3 Samtidig run/stop for alle grupper 1 Tryk på “All Groups” på berøringsskærmen. 2 Tryk på kør alle grupper (Run all gr.) for at igangsætte alle grupper samtidigt. Tryk på stop alle grupper (Stop all gr.) for at stoppe alle grupper samtidigt. 3 Bekræftelsesskærmen vises nu.
- Seite 555 Drift 5.2.2.4 Samtidig run/stop for hver blok 1 Vælg målblokken på berøringsskærmen for at indstille samtidig run/stop-drift. 2 Tryk på kør pr. blok (Run by Block) for at køre alle grupper i den valgte blok samtidigt. Tryk på stop pr. blok (Stop by Block) for at stoppe alle grupper i den valgte blok samtidigt. 3 Bekræftelsesskærmen vises nu.
- Seite 556 Drift 5.2.2.5 Run/stop for hver gruppe Kontroller kontroltilstanden, før den aktiveres. Kontroltilstanden varierer alt efter, om kontroltilstanden er indstillet til "Normal" eller "Run/Stop Only". Run/stop-drift for hver gruppe (kontroltilstand: Normal) 1 Skærmen til overvågning af alle grupper (Monitor (All Groups)) eller en blok (Monitor (Block)). Vælg den gruppe, der skal indstilles, ved at trykke på...
- Seite 557 Drift Run/stop-drift for hver gruppe (kontroltilstand: Run/Stop only) Overvåge alle grupper (Monitor (All Groups)) 1 Vælg målgruppen på skærmen til overvågning af alle grupper (Monitor (All Groups)) i tilstanden kun run/stop (Run/Stop Only). 2 Driftstilstanden for den valgte gruppe skifter mellem hhv. Run og Stop, når der trykkes på gruppens knap. I denne tilstand er samtidig run/stop-drift for alle grupper disponibel med knapperne kør alle grupper (All Groups Run) og stop alle grupper (All Groups Stop).
- Seite 558 Drift 5.2.3 Indstilling af hovedparametre 5.2.3.1 Driftstilstand 1 Vælg målgruppen for ændring af indstillinger for driftstilstand på skærmen til overvågning af alle grupper (Monitor (All Groups)) eller skærmen til overvågning af en blok (Monitor (Block)). Skærmen med indstillingerne for den valgte gruppe vises på berøringsskærmen.
- Seite 559 Drift 5.2.3.2 Ventilatorhastighed 1 Vælg målgruppen for ændring af ventilatorhastighed på skærmen til overvågning af alle grupper (Monitor (All Groups)) eller skærmen til overvågning af en blok (Monitor (Block)). Skærmen med indstillingerne for den valgte gruppe vises på berøringsskærmen. Overvåge alle grupper (Monitor (All Groups)) Overvåge blok (Monitor (Block)) 2 Ved at trykke på...
- Seite 560 Drift 5.2.3.3 Spjældretning 1 Vælg målgruppen for ændring af spjældretning på skærmen til overvågning af alle grupper (Monitor (All Groups)) eller skærmen til overvågning af en blok (Monitor (Block)). Skærmen med indstillingerne for den valgte gruppe vises på berøringsskærmen. Overvåge alle grupper (Monitor (All Groups)) Overvåge blok (Monitor (Block)) 2 Ved at trykke på...
-
Seite 561: Indstilling Af Temperatur
Drift 5.2.3.4 Indstilling af temperatur 1 Vælg målgruppen for ændring af indstillingstemperaturen på skærmen til overvågning af alle grupper (Monitor (All Groups)) eller skærmen til overvågning af en blok (Monitor (Block)). Skærmen med indstillingerne for den valgte gruppe vises på berøringsskærmen. - Seite 562 Drift 5.2.3.5 Tilladelse/blokering af driften fra fjernbetjeningen Denne funktion anvendes til at forhindre betjening fra fjernbetjeningen (RCS). Når fjernbetjeningen er indstillet til blokering pr. punkt/alle punkter, er kontrol af det valgte punkt ikke længere mulig. De punkter, som kan vælges er: Kør/stop (OPERAT.), driftstilstand (OPERAT. MODE), ventilatorhastighed (FAN SPEED), spjæld (LOUVRE) og temperatur (SET TEMPERAT.).
- Seite 563 Drift 3 Tryk på overvågningsskærm (Monitor screen) for at vende tilbage til overvågningsskærmen. B E M Æ R K • Ved at trykke på "<" eller ">" på skærmen med de detaljerede indstillinger, skifter fjernbetjeningen tilladelse/blokering (Permitted/ Prohibited) til en anden gruppe i samme blok. • Blokeret styring (Run/Stop only): Hvis aktiveret (Enable), vil hver indstillingsændring gælde for alle grupper eller blokke. Indstillingsændring er ikke mulig for hver enkelt gruppe. • Selvom fjernbetjeningen er indstillet til blokering "Prohibit), er det muligt at stoppe igangværende drift med fjernbetjeningen. Det er ligeledes muligt at genstarte driften fra fjernbetjeningen. Dog anvendes stop af driften kun i nødstilfælde. Brug den ikke under normal drift. • Hvis strømforsyningen til/fra (Power Supply ON/OFF) (d1, d3) er valgt, må fjernbetjeningen ikke anvendes til blokering (Prohibit.). Hvis fjernbetjeningen er begrænset, når man anvender strømforsyningen til/fra (Power Supply ON/OFF), skal kontrollåsefunktionen (Control lock) anvendes.
-
Seite 564: Funktion
Drift 5.3 MENU Nedenstående tabel viser menupunkter med deres tilhørende funktioner. Element Funktion Denne funktion anvendes til at slå filtersymbolet fra for de tilsluttede indendørsenheder, hvori filtersymbolet er blevet vist. Nulstilling af filtersymbol (Filter Sign Reset) Uafhængig af, om filtersymbolet er vist, den det også muligt at nulstille visningstiden for filtersymbolet i klimaanlægsenhederne. - Seite 565 Drift 5.3.1 Serviemenuskærm Indstillingspunkterne for indendørsenheden og centralenheden er anført i menuen. 1 Tryk på Menu på skærmen til overvågning af alle grupper (Monitor (All Groups)) eller skærmen til overvågning af en blok (Monitor (Block)). Overvåge alle grupper (Monitor (All Groups)) Overvåge blok (Monitor (Block)) 2 Skærmen "Menu"...
- Seite 566 Drift 5.3.2 Nulstilling af filtersymbol 5.3.2.1 Nulstil filtersymbol 1 Vælg nulstilling af filtersymbol (Filter Sign Reset) på skærmen "Menu". (Den er kun disponibel, når filtersymbolet er vist). 2 Vælg målet for at nulstille filtersymbolet. • Tryk på vis med symbol (Display with Sign) for at kun at angive grupperne med filtersymbol. •...
- Seite 567 Drift 5.3.2.2 Nulstilling af filterdriftstid 1 Vælg nulstilling af filtersymbol (Filter Sign Reset) på skærmen "Menu". (Den er kun disponibel, når filtersymbolet er vist). 2 Vælg målet for at nulstille filterdriftstiden. • Tryk på vis alle grupper (Display All Groups) for at målrette handlingen til alle grupperne. •...
- Seite 568 Drift 5.3.3 Tidsindstillet drift Denne funktion ændres til timerdrift. Det er muligt at indstille et program for en blok og for hver gruppe. En ferieindstilling, som er uafhængig af programmet er også tilgængelig. 5.3.3.1 Indstilling af programtimer Indstilling af timer for ugentligt program 1 Vælg programindstilling (Schedule Setting) på...
- Seite 569 Drift 7 Tryk på indstilling udført (Setting completed) for at bekræfte indstillingen. Tryk på "No" annullerer de viste indstillinger, og skærmen vender tilbage til skærmen til programindstilling (Schedule Setting). • Gå tilbage til trin (5) for at fortsætte med at tilføje indstillinger til den samme ugedag. •...
- Seite 570 Drift Kopiering af programindstilling for ugens dage 1 Vælg programindstilling (Schedule Setting) på Menu-skærmen. 2 Vælg indstilling af programtider (Schedule Timer Setting) på skærmen til programindstilling. 3 Vælg målet (alle grupper, blok eller gruppe). 4 Tryk på kopier ugedag (Copy Day of Week). 5 Vælg den ugedag, der skal kopieres.
- Seite 571 Drift Kopiering af programindstilling for hver gruppe 1 Vælg programindstilling (Schedule Setting) på Menu-skærmen. 2 Vælg indstilling af programtider (Schedule Timer Setting) på skærmen til programindstilling. 3 Tryk på kopier indstillinger (Copy Settings). 4 Vælg den gruppe, der skal kopieres. (Der kan ikke vælges en blok som kilde til kopiering). •...
- Seite 572 Drift Sletning af programindstilling fort hvert punkt 1 Vælg programindstilling (Schedule Setting) på Menu-skærmen. 2 Vælg indstilling af programtider (Schedule Timer Setting) på skærmen til programindstilling. 3 Vælg målet (alle grupper, blok eller gruppe). 4 Tryk på slet indstillinger (Delete Setting). 5 Vælg det programnummer, som skal slettes for at slette programmet.
- Seite 573 Drift Sletning af programindstilling for hver gruppe 1 Vælg programindstilling (Schedule Setting) på Menu-skærmen. 2 Vælg indstilling af programtider (Schedule Timer Setting) i menuen for programindstilling. 3 Tryk på slet indstillinger (Delete Setting). 4 Vælg de grupper eller blokke, som indstillingerne skal slettes for. •...
-
Seite 574: Ferieindstilling For Midlertidig Driftsstandsning
Drift 5.3.3.2 Ferieindstilling for midlertidig driftsstandsning 1 Vælg programindstilling (Schedule Setting) på Menu-skærmen. 2 Vælg ferieindstilling (Holiday Setting) på skærmen til programindstilling. 3 Vælg målet (alle grupper, blok eller gruppe). Der vises nu en kalender for valget. • Knapperne tilhørende grupperne med ferieindstilling angives med blå farve. •... - Seite 575 Drift 5.3.3.3 ON/OFF-indstilling af programtimer 1 Vælg programindstilling (Schedule Setting) på Menu-skærmen. 2 Vælg ON/OFF-indstilling af programtimer (Schedule Timer ON/OFF Setting) på skærmen til programindstilling. Skærmen ændres nu til ON/OFF-indstilling af programtimer (Schedule Timer ON/OFF Setting). Den første indstilling er "ON", angives med "...
- Seite 576 Drift 5.3.4 Justering af området for indstillingstemperaturen på fjernbetjeningen 1 Vælg området for indstillingstemperaturen på fjernbetjeningen (Setting temp. range of the remote control) på Menu-skærmen. * Det er ikke muligt at foretage valg, hvis de tilsluttede klimaanlæg ikke understøtter denne funktion. 2 Vælg målet for indstilling af temperaturområde.
- Seite 577 Drift 5.3.5 Dato og klokkeslæt-indstilling 1 Vælg indstilling af dato og klokkeslæt (Date and time Settings) på Menu-skærmen. 2 Vælg rækkefølgen "Year", "Month" og "Day". 3 Tryk eller tryk-og-hold " " eller " " for at ændre dato og klokkeslæt. 4 Tryk på...
- Seite 578 Drift 5.3.7 Kalibrering af berøringsskærm 1 Vælg kalibrering af berøringsskærm (Touchscreen Calibration) på Menu-skærmen. 2 Kalibrering af berøringsskærm • Tryk på alle skæringspunkterne af de hvide linjer, som er vist på skærmen. • Derefter skifter displayet til skærmen, der er ses i figur (3). •...
- Seite 579 Drift 5.3.8 Registrering af navn på grupper og blokke 5.3.8.1 Registrer gruppenavn 1 Vælg registrering af gruppenavn (Group Name Register) på Menu-skærmen. 2 Vælg målet (blok eller gruppe) for at registrere dets navn. 3 Skærmen ændres nu til tekstindtastningsskærmen. Der kan vælges imellem stor eller små bogstaver samt tastatur med symboler. 4 Indtast navnet på...
- Seite 580 Drift 5.3.8.2 Kopiering af navn på gruppe eller blok 1 Vælg registrering af gruppenavn (Group Name Register) på Menu-skærmen. 2 Vælg den kildegruppen (-blokken), der skal kopieres. • Knappen tilhørende den valgte gruppe eller blok fremhæves med en orange ramme. •...
- Seite 581 Drift 5.3.9 Indstilling af skærmbillede 5.3.9.1 Justering af baggrundsbelysningens styrke på berøringsskærmen 1 Vælg indstilling af skærmvisning (Screen Display Setting) på Menu-skærmen. 2 Vælg belysning (Brightness) på skærmen til indstilling af skærmvisning (Screen Display Setting). 3 Tryk på " < " eller " > " og juster styrken af baggrundsbelysningen. 4 Tryk på...
- Seite 582 Drift 5.3.9.2 Sprogindstilling 1 Vælg indstilling af skærmvisning (Screen Display Setting) på Menu-skærmen. 2 Vælg sprog (Language) på skærmen til indstilling af skærmvisning. 3 Der vises et bekræftelsesvindue, når der trykkes på sprogknappen. 4 Tryk på indstilling udført (Setting completed) for at komme tilbage til skærmen til indstilling af skærmvisning. PMML0332A rev.0 - 05/2015...
- Seite 583 Drift 5.3.9.3 Indstilling af temperaturenhed 1 Vælg indstilling af skærmvisning (Screen Display Setting) på Menu-skærmen. 2 Vælg temperaturenhed (Temperature Unit) på skærmen til indstilling af skærmvisning (Screen Display Setting). 3 Vælg celsius- eller fahrenheitgrader ved at trykke på de respektive knapper. Den valgte knap fremhæves med gul farve. 4 Tryk på...
- Seite 584 Drift 5.3.10 Akkumuleret driftstid 5.3.10.1 Display efter måned 1 Vælg akkumuleret driftstid (Accumulated Operation Time) på Menu-skærmen. 2 Tryk på månedsvisning (Display by Month). 3 Tryk på "<" eller ">"-knapperne for at vælge målblokken. 4 Tryk på "<" eller ">"-knapperne for at vælge målåret og -måneden. 5 Tryk på...
- Seite 585 5 Tryk på "Menu" for at komme tilbage til Menu-skærmen. B E M Æ R K • Den akkumulerede driftstid for denne centralenhed er kun vejledende. Hitachi kan derfor ikke garantere, at den ovennævnte vejledende driftstid er nøjagtig. • Thermo-ON-tid (Thermo ON Time) kan også vises derudover, hvis denne funktion vælges under indstilling af valgfrie funktioner (Optional Function Setting) via muligheden for funktionsindstilling. Kontakt din forhandler eller kundeservice...
-
Seite 586: Kontaktinformation
Drift 5.3.11 Kontaktinformation 1 Vælg kontaktinformation (Contact information) på Menu-skærmen. Følgende information vises: Kontaktinformation (2 uafhængige punkter) Navn på blok eller gruppe tilhørende den senest opståede alarm. Seneste alarmkode 2 Tryk på "Menu" for at komme tilbage til Menu-skærmen. B E M Æ R K •... - Seite 587 Drift 5.3.12 Indstilling af sommertid 1 Vælg indstilling af sommertid (Summer Time Setting) på Menu-skærmen. Følgende information vises: 2 Vælg funktionen for hvert punkt. Derefter skifter farven på den valgte funktion. 3 Tryk på indstilling udført (Setting Completed) for at bekræfte indholdet og vende tilbage til Menu-skærmen. PMML0332A rev.0 - 05/2015...
- Seite 588 Drift 5.4 SERVICEMENU B E M Æ R K • Denne kontakt må kun betjenes af serviceteknikeren. Undlad derfor helt at anvende den. • Tryk på tilbage (Back), hvis denne kontakt er i brug, og servicemenuen vises på skærmen. Skærmen går tilbage til menuen. Elementer Indholdsfortegnelse Registrer gruppe De tilsluttede indendørsenheder kontrolleres af centralenheden i den samme H-LINK. Denne funktion bruges (Group Register) til at registrere navne på grupper og blokke, der tilhører dem. Indstilling af kontrolskabeloner Indstil kontrolskabelonen.
- Seite 589 Drift 1 Tryk på Menu på skærmene for overvågning af alle grupper (Monitor (All Groups)) eller skærmen til overvågning af en blok (Monitor (Block)). Overvåge alle grupper (Monitor (All Groups)) Overvåge blok (Monitor (Block)) 2 Skærmen ”Menu” kommer frem. 3 Tryk og hold på “Service Menu” i mindst 3 sekunder. “Service Menu” vises. 4 Vælg det ønskede punkt på...
-
Seite 590: Funktion
Drift 5.4.1 Registrer gruppe B E M Æ R K Denne funktion er nærmere beskrevet i afsnittet “5.1 Testkørsel”, da det er et obligatorisk punkt under udførelse af testkørsel. 5.4.2 Indstilling af valgfrie funktioner Denne funktion anvendes til at definere og ændre valget af de funktioner for klimaanlæg og centralenhed, der er anført i nedenstående skema. Defineres via: “Monitor” “Menu”... - Seite 591 Drift 5.4.2.1 Indstilling af Klimaanlæg og fjernbetjening 1 Vælg indstilling af valgfrie funktioner (Optional Function Setting) på servicemenuskærmen (Service Menu), når klimaanlægget ikke er i drift. 2 Vælg indstilling af fjernbetjening (Remote Control Setting) på Menu-skærmen. Dette er ikke muligt, hvis en eller flere af klimaanlæggene er i drift. 3 Vælg målet valgfri funktion (Optional Function) ved at trykke på...
- Seite 592 Drift 5.4.2.2 Indstilling af styreenhed 1 Vælg indstilling af valgfrie funktioner (Optional Function Setting) på servicemenuskærmen (Service Menu), når klimaanlægget ikke er i drift. 2 Vælg indstilling af styreenhed (Controller setting) på skærmen til indstilling af valgfrie funktioner. 3 Foretag indstilling af hver funktion efter behov. Den valgte indstilling fremhæves med gul farve. Om blokering af fjernbetjening med frakoblingstid Når dette er aktiveret, er det ikke muligt at indstille blokering af fjerndrift (remote operation prohibition) - for individuelle elementer.
- Seite 593 Drift 5.4.3 Undtagelsesvis indstilling af run/stop-drift Ordre om igangsætning (RUN) og standsning (STOP) accepteres ikke, når gruppen er indstilles til drift i alle grupper (All Groups) eller alle blokke (All blocks). Det er imidlertid muligt at indstille en undtagelsesregel for en hvilken som helst af de følgende ordrer eller kombination af ordre, som omfatter specifikke grupper: •...
- Seite 594 Drift 5.4.4 Indstilling af eksternt input/output Funktionen indstilling af eksternt input/output for centralenheden giver mulighed for at kontrollere 4 inputs og 2 outputs. Vælg indstilling af eksternt input/output (External Input/Output Setting) på servicemenuskærmen (Service Menu). Input og output Forbindelse Funktion Alle run/stop (trin) Input 1 CN1 ben 1-2...
- Seite 595 Drift 5.4.4.2 Ekstern outputfunktion 1 Alle run-output (All Run Output) Eksternt output for indendørsdriftssignal til målgruppen. Driftssignalet sendes, selv om en indendørsenhed i målgruppen er i drift. 2 Ekstern outputalarm Eksternt outputalarmsignal for indendørsenhederne i målgruppen. Alarmsignalet sendes, selvom der opstår unormal drift i en indendørsenhed i målgruppen.
- Seite 596 Drift 5.4.4.4 Indstilling af eksternt input 1 Vælg indstilling af eksternt input/output (External Input/Output Setting) på servicemenuskærmen (Service Menu). Valg er ikke muligt, når klimaanlæggene er i drift, eller når kontakten til eksternt inputsignal er ON. 2 Vælg inputmålet (fra input 1 til 4) for det eksterne input. 3 Vælg den funktion, der skal anvendes med det eksterne input.
- Seite 597 Drift Kapacitetskontrol af udendørsenhed 5 Vælg værdien, der svarer til udendørsenhedens kapacitet. Den valgte værdi fremhæves med gul farve. 6 Brug knapperne i højre side af skærmen for at programmere kapacitetskontrol af udendørsenhed, hvis inden ekstern inputkontakt anvendes til dette formål. •...
-
Seite 598: Andre Indstillinger
Drift Andre indstillinger 10 Vælg målet for kontrol af eksternt input. Alle grupper/blokke/gruppe (All Groups/Block/Group). • Tryk på knappen tilhørende en gruppe for at ændre gruppens valgstatus. • Tryk på knappen tilhørende en blok for at ændre valgstatussen for alle grupper i denne blok. •... - Seite 599 Drift 5.4.5 Knapindstilling Med knapindstilling kan man vælge at vise eller skjule bestemte driftsknapper, og derved begrænse betjeningen. Defineres via: “Monitor” “Menu” “Service Menu” “Button Setting”. 1 Vælg “Button Setting” på skærmen “Service Menu”. 2 Vælg funktionen for hvert punkt. Den valgte funktion fremhæves med gul farve. 3 Tryk på...
- Seite 600 Drift 5.4.6 Registrer kontaktinformation Denne funktion anvendes til at redigere eller registrere de kontaktinformationer, der skal vises. Defineres via: “Monitor” “Menu” “Service Menu” “Contact Information Register”. 1 Vælg registrer kontaktinformation (Contact Information Register) på servicemenuskærmen (Service Menu). 2 Tryk på knapperne (2) redigering af navn (Name Edition) eller redigerings af telf. nr. (TEL.No.Edition) for at registrere informationerne fra hvert felt i "Contact Information 1"...
- Seite 601 Drift 5.4.7 Memo 5.4.7.1 Registrer memo 1 Vælg Memo på servicemenuskærmen (Service Menu). 2 Vælg det mål, der skal registreres. Skærmen for indtastning af tegn vises. 3 Vælg et begrænset tegn fra listen med tegn. 4 Indtastningstegn. Tryk på “Slet” (Delete) for at slette tegnet til venstre for cursoren. Hukommelsen kan gemmen højst 52 tegn. 5 Tryk på...
- Seite 602 Drift 5.4.7.2 Slet memo 1 Vælg Memo på servicemenuskærmen (Service Menu). 2 Tryk på slet Memo (Delete Memo). 3 Vælg det memo, der skal slettes. • Tryk på en memo-knap for at ændre dens valgstatus. • Det er muligt at vælge flere memoer ad gangen. •...
- Seite 603 Drift 5.4.8 Genopret indstillinger 1 Vælg genopret indstillinger (Restore Settings) på servicemenuskærmen (Service Menu). B E M Æ R K Denne funktion kan ikke vælges, når drift fra fjernbetjeningen er blokeret, en ekstern inputkontakt er ON, eller kapacitetskontrol af udendørsenhed er annulleret. Disse parametre skal annulleres inden indstillingerne genoprettes. 2 Tryk på "Yes" på bekræftelsesskærmen. B E M Æ R K Når der trykkes på "No", går skærmen tilbage til servicemenuskærmen. 3 Der vises endnu et bekræftelsesvindue. Tryk på "Yes" her for at genoprette indstillingerne. Skærmen skifter efter nogle sekunder, og en kontrol af anlæggets forbindelser starter.
- Seite 604 Drift 5.4.9 Kontrol af forbindelse 1 Vælg Kontrol af forbindelse (Checking Connection) på servicemenuskærmen (Service Menu). B E M Æ R K Denne funktion kan ikke vælges, når et eller flere klimaanlæg er i drift, eller hvis der sendes et eksternt inputsignal til den eksterne inputterminal 1 eller 2. 2 Tryk på "Yes" på bekræftelsesskærmen. B E M Æ R K Hvis der trykkes på "No", går skærmen tilbage til servicemenuskærmen (Service Menu). Typen af opdatering af forbindelsesinformationer afhænger af den efterfølgende indstilling: • Fortsæt til trin 3 for at opdatere forbindelsesinformationerne, grupperegistreringen bevares samt indstillinger såsom programindstilling etc. (3) • Fortsæt til trin 7 for at udføre kontrol af forbindelse ved at initialisere hver indstilling. (Det samme som at genoprette indstillingerne). (7) Bevar indstillinger 3 Tryk på...
- Seite 605 Drift 6 Der yderligere et bekræftelsesvindue. Kontroller klimaanlæggene og tryk på "Yes". B E M Æ R K • Når der trykkes på "No", går skærmen tilbage til servicemenuskærmen (Service Menu). • Denne funktion kan ikke vælges, når drift fra fjernbetjeningen er blokeret, en ekstern inputkontakt er ON, eller kapacitetskontrol af udendørsenhed er annulleret. Disse parametre skal annulleres inden indstillingerne genoprettes. Bevar ikke indstillinger 7 Tryk på "No" i bekræftelsesvinduet. 8 Vinduet til bekræftelse af initialisering vises. Tryk på "Yes" for at initialisere alle indstillinger, og starte forbindelseskontrollen. "Yes"...
- Seite 606 Drift 5.4.10 Alarmhistorik Med denne funktion kan man indstille tidspunktet, hvor alarmer opstår, samt enheden med unormal drift og den pågældende alarmkode. Sletning af alarmhistorikposter udføres også af denne funktion. Defineres via: “Monitor” “Menu” “Service Menu” “Alarm History”. 1 Vælg alarmhistorik (Alarm History) på servicemenuskærmen (Service Menu). 2 Alarmhistorikken (Alarm History) vises nu på...
- Seite 607 Kontakt venligst stedet, hvor produktet er købt. Vises når krav-signalet aktiveres af en valgfri ekstern inputfunktion. Dette symbol blinker under Belastning krav-styring. Kontakt din forhandler eller kundeservice hos Hitachi for yderligere oplysninger. Vises når valgfrit program for kapacitetskontrol af udendørsenhed er aktiveret, blinker under Krav (program) selve kontrollen.
- Seite 608 Følg opstartsproceduren igen, når enheden er standset på grund af dette. Displayet fryser på opstartsskærmen • Der er muligvis opstået en kommunikationsfejl. Kontakt din forhandler eller kundeservice hos Hitachi for yderligere oplysninger. PMML0332A rev.0 - 05/2015...
-
Seite 609: Fejlfinding
Fejlfinding 6 FEJLFINDING Tjek følgende skema, før du kontakter en forhandler for at få assistance. Forhold Årsag • Kontroller, at ledningen til strømforsyningen er forbundet til stikkontakten i væggen. Meddelelserne på berøringsskærmen vises ikke. • Kontroller, at der er tændt for strømforsyningen. •... -
Seite 611: Veiligheidssamenvatting
• Voordat u de installatie begint, moet u controleren of de fundering vlak, effen en sterk genoeg is om de unit veilig erop te kunnen plaatsen. Als de fundering niet sterk genoeg is, kan dit leiden tot verwondingen door het vallen van het product, of tot elektrische stoot en brand. • Installeer de unit niet op een plek waar ontvlambaar gas wordt gegenereerd, vloeit, hangt of lekt. • Verricht zelf GEEN installatiewerken en sluit de elektrische bedrading niet zelf aan. Neem contact op met uw HITACHI-distributeur of -dealer en laat het installatiewerk en het aanleggen van de bedrading verrichten door een opgeleide installateur. • Voer elektriciteitswerken uit volgens de installatiehandleiding en de relevante regelgeving en normen. Volgt u de instructies niet, dan kan dit leiden tot elektrische schok en brand als gevolg van onvoldoende capaciteit en ontoereikende resultaten. • Gebruik de aanbevolen kabels voor de bedrading tussen de buitenunits en het centraal station. Als u verkeerde kabels gebruikt, kan dit brand of elektrische schok veroorzaken. •... -
Seite 612: Belangrijkste Kenmerken
Belangrijkste kenmerken 2 BELANGRIJKSTE KENMERKEN Dit centraal station (PSC-A32MN) is aangesloten op H-LINK en wordt gebruikt om de airconditioners centraal te beheren en op te volgen. De volgende functies zijn beschikbaar op alle binnenunits die zijn aangesloten op het centraal station. 1 Starten/stoppen, bedrijfsmodus wijzigen, ventilatorsnelheid regelen, lamellenrichting regelen, temperatuur instellen, bediening via afstandsbediening vergrendelen/ontgrendelen 2 Opvolgen van bedrijfsstatus van blok/groepen... -
Seite 613: Installatie
Kabelgrootte SPEC: 0,75 tot 1,25 mm H-LINK-kabel (voor besturing) Aanbevolen kabel: JKEPV-S, JKEV-S, CVV-S, CVV, 600 V VCT * De aanbevolen kabels zijn de modelnamen van Hitachi Cable, Ltd. 3.2 ONDERDELENLIJST Haal de unit uit de verpakking en controleer of: •... -
Seite 614: Beschrijving Van De Onderdelen
Installatie 3.3 BESCHRIJVING VAN DE ONDERDELEN LCD-kleurenscherm met touchscreen Om de units te bedienen en op te volgen via de touchscreen. Het scherm wordt bediend met de touchpen (meegeleverd). De touchscreen schakelt Voorkant automatisch uit als hij een bepaalde tijd niet is gebruikt. Handmatige commando's zoals multi-touch-bewegingen (het tegelijkertijd aanraken van meerdere punten op het scherm) of veegbewegingen worden niet ondersteund. -
Seite 615: Algemene Informatie
Installatie 3.4 ALGEMENE INFORMATIE Model PSC-A32MN Buitenafmeting 140 × 120 × 22 + 52,7 (mm) <B x H x D + (ingebouwd deel)> Nettogewicht 0,5 kg (ongeveer) Installatieplek Binnen Installatiemethode Ingebouwd in wand met JIS-schakelbox voor 2 schakelaars (met deksel) (JIS C 8340) Aangesloten binnenunits (aantal) 160 (max.) Nauwkeurigheid van de klok... -
Seite 616: Installatieprocedure
Installatie 3.6 INSTALLATIERUIMTE Houd voor het centraal station een installatieruimte vrij zoals hieronder afgebeeld. (Eenheid: mm) 52,7 Plaats niets in de grijze zone " ". Wanneer u twee of meer centrale stations naast elkaar installeert, bewaar dan de volgende afstand tussen de stations. * Verticale richting: 50 mm * Horizontale richting:... - Seite 617 Installatie 3 Sluit de bedrading aan op de aansluitklemplaat van het centraal station. Aansluitklemplaat Gebruik Aansluitingsprocedure Aansluitklem type M3 schroef Voor voedingsspanning Ronde verbinding met aansluitklem Voor H-LINK-transmissie Aanhaalmoment 0,5 N.m Stekker type 3 pinnen Voor externe CN1 ~ 3 Steek aansluitkabel (accessoire) ingang/uitgang H-LINK (niet-polair)
-
Seite 618: Elektrische Bedrading
Specificaties Kabellengte Kabelspecificaties Aanbevolen kabelmodel Voedingskabel 100~240 V AC 1,25 tot 2 mm 600 V CV, CCV, CEV (kabel Hitachi) Aardedraad H-LINK (besturingsdraad) 5 V DC ≤1000 m 0,75 tot 1,25 mm JKPEV-S, JKEV-S, CVV-S, CVV, 600 V VCT (kabel Hitachi) - Seite 619 Elektrische bedrading G E VA A R • Schakel de hoofdschakelaar van de binnenunits, buitenunits en besturingen uit voordat u bedradingswerken uitvoert. Zo niet, dan kan dit brand, elektrische schok of storing veroorzaken. • Gebruik geen kabels die lichter zijn dan de normale, flexibele, beschermde polychloropreenkabels (code H05RN-F). Instellingsprocedure schakelaars De onderstaande lijst geeft de schakelaarsinstellingen van het centraal station weer. 1 Pas de schakelaarsinstellingen waar nodig toe. Schakelaar- Fabrieks- Schakelaar Gebruik Opmerkingen nummer instelling RSW1 Voor het instellen van het adres van het Bij gebruik van meerdere centrale...
- Seite 620 Elektrische bedrading Instelling DSW1 Name Model DSW1 DSW2 DSW3 DSW4 Centraal station EZ PSC-A64GT Centraal station mini PSC-A32MN Centraal station PSC-A64S Centrale besturing AAN/UIT PSC-A16RS Combinatie van Andere HC-A(8/64)MB Niet compatibel PSC-A32MN met centrale andere centrale HC-A16KNX Niet compatibel besturingen BMS-gateways besturingen KNX001...
-
Seite 621: Bediening
Bediening 5 BEDIENING 5.1 PROEFDRAAIEN Het onderstaande schema geeft de procedure voor het proefdraaien weer. De stappen die met een dik kader ( ) gemarkeerd zijn, zijn verplichte stappen. De andere items, die niet specifiek nodig zijn voor het proefdraaien maar optioneel zijn, worden in hun respectievelijke hoofdstuk beschreven. - Seite 622 Bediening Lijst van stappen Item Functie Taal instellen Deze functie wordt gebruikt om de taal te selecteren. (Language Setting) Datum en tijd instellen Deze functie is bedoeld voor het instellen van de datum en tijd. (Date and Time Settings) Groep registreren Deze functie is bedoeld voor het registreren van groepen of blokken van binnenunits die zijn aangesloten op (Group Register)
- Seite 623 Bediening Item Functie Deze functie wordt gebruikt om via het extern-ingangssignaal commando's te annuleren zoals “All Groups Run/ Externe ingang sperren Stop” (Alle groepen starten/stoppen) enz. (Exception of External Input) “Externe ingang sperren” is beschikbaar voor elke externe ingang (ingang 1 en ingang 2). Gesperde groepen voor externe ingang 1 selecteren Deze functie wordt gebruikt om te selecteren voor welke groepen de commando's via externe ingang 1 moeten...
-
Seite 624: Taal Instellen
Bediening 5.1.1 Zet Schakel de voedingsspanning van de airconditioners in. Om de compressor te beschermen moet de voedingsspanning 12 uur vóór bedrijf worden ingeschakeld. Schakel de voedingsspanning tussen de seizoenen niet uit. Laat elke airconditioner proefdraaien om te controleren of hij correct werkt. Schakel de voedingsspanning van het centraal station in. - Seite 625 Bediening 5.1.4 De datum/tijd instellen Nadat u de temperatuureenheid hebt ingesteld, verschijnt in de touchscreen het scherm voor het instellen van de datum en tijd, zoals afgebeeld. Tik in de touchscreen op "Set" en stel de tijd en de datum in volgens de vermelde procedure. Raadpleeg punt “5.3.5 Datum en tijd instellen”...
- Seite 626 Bediening 5.1.6 Besturingspatronen instellen Nadat u de datum en tijd hebt ingesteld, verschijnt het scherm voor het instellen van de besturingspatronen. Tik in de touchscreen op "Set" en het scherm voor het instellen van besturingspatronen verschijnt. Wanneer u op een knop tikt, wordt deze knop gemarkeerd met een oranje kader. De procedure voor het instellen van de besturingspatronen wordt hieronder beschreven.
- Seite 627 Bediening 5.1.7 Groep registreren Registreer de binnenunits voor aansluiting op de groepen en blokken van het centraal station. 5.1.7.1 Definities • Groep: de minimale bedieningsunit die wordt geregeld door één centraal station. Een afstandsbedieningsgroep wordt beschouwd als één groep, en dezelfde instellingen worden op de hele groep toegepast. Maximaal 32 groepen (georganiseerd in 4 blokken van elk 8 groepen, 8 blokken met elk 4 groepen, 2 blokken met elk 16 groepen of 16 blokken met elk 2 groepen) kunnen met één enkel centraal station worden bestuurd.
- Seite 628 Bediening 5.1.7.3 Subunit registreren • In een afstandsbedieningsgroep kunnen maximaal 15 subunits op dezelfde hoofdunit worden geregistreerd (wanneer een besturingspatroon van 2 blokken met elk 16 groepen wordt toegepast). • Binnenunits zonder afstandsbediening kunnen niet worden geregistreerd als subunit. • Als u de registratie van een binnenunit die reeds als subunit is geregistreerd wilt wijzigen, annuleer dan eerst de oude registratie en voer daarna pas de nieuwe registratie uit.
- Seite 629 Bediening 3 Selecteer de groep waar u de hoofdunit voor wilt registreren. • Tik op de knoppen “<” en “>” link boven in de touchscreen om de blokken weer te geven. • De nummers op de knoppen zijn de blok- en groepnummers. •...
- Seite 630 Bediening Tik op de knoppen “<” en “>” links boven in de touchscreen om een volgend blok in te stellen of tik op de knop “Setting complet.” (Instelling voltooid) om af te sluiten. 6 Tik op de knop “Setting Complet.” (Instelling voltooid) om de groep te registreren en terug te keren naar het menu "Group Register"...
- Seite 631 Bediening 2 Selecteer in het scherm "Group Register" (Groep registreren) de optie "Sub Unit Register" (Subunit registeren). 3 Selecteer de groep waar u de subunit voor wilt registreren. • Tik op de knoppen “<” en “>” link boven in de touchscreen om de blokken weer te geven. •...
- Seite 632 Bediening Tik op de knoppen “<” en “>” links boven in de touchscreen om een volgend blok in te stellen of tik op de knop “Setting complet.” (Instelling voltooid) om af te sluiten. 6 Tik in het scherm "Group Register (Sub Unit Register)" (Groep registreren (Subunit registeren)) op de knop "Setting Complet." (Instelling voltooid) om terug te keren naar het scherm "Group Register"...
- Seite 633 Bediening 5.1.7.6 De registratie van een groep annuleren 1 Selecteer in het scherm "Service Menu" (Onderhoudsmenu) de optie "Group Register" (Groep registreren). Raadpleeg het hoofdstuk “5.1.7.4 De groep registreren (hoofdunit)”. O P M E R K I N G Deze functie kan niet worden geselecteerd wanneer het externe ingangssignaal is aangesloten op externe ingang 1 of 2. 2 Selecteer in het scherm "Group Register" (Groep registreren) de optie “Main Unit Register (of Sub Unit Register)” (Hoofdunit registeren of Subunit registeren).
- Seite 634 Bediening 5.1.7.7 De registratie van een groep controleren (de registratie van een hoofdunit) 1 Selecteer in het scherm "Service Menu" (Onderhoudsmenu) de optie "Group Register" (Groep registreren). Raadpleeg het hoofdstuk “5.1.7.4 De groep registreren (hoofdunit)”. O P M E R K I N G Deze functie kan niet worden geselecteerd wanneer het externe ingangssignaal is aangesloten op externe ingang 1 of 2.
- Seite 635 Bediening 5.1.7.8 De registratie van een groep controleren (de registratiegegevens) 1 Selecteer in het scherm "Service Menu" (Onderhoudsmenu) de optie "Group Register" (Groep registreren). Raadpleeg het hoofdstuk “5.1.7.4 De groep registreren (hoofdunit)”. O P M E R K I N G Deze functie kan niet worden geselecteerd wanneer het externe ingangssignaal is aangesloten op externe ingang 1 of 2. 2 Selecteer in het scherm "Group Register" (Groep registreren) de optie “Display list of registers” (Display list of registers). 3 Selecteer de weergegeven items (alle groepen/individuele blokken) 4 Het koelmiddelsysteemnummer en het adres van alle aangesloten units van elke groep worden weergegeven.
-
Seite 636: Hoofdscherm
Bediening 5.2 HOOFDSCHERM 5.2.1 Algemeen aanzicht "Opvolging (alle groepen)" Blokknop Status van unit Huidig scherm Het scherm schakelt naar "(Monitor) Block" Geeft de toestand van de unit weer Geeft het huidige scherm aan (Opvolging (blok)) door op deze knop te drukken. met symbolen zoals filtersymbool, (Alle groepen) Groepknop... - Seite 637 Bediening "Opvolging (blok)" Tabblad blok Schakelt tussen de weergaven "Blok" en "Alle groepen". Status van unit Huidig scherm Groepknop Geeft de toestand van de unit Geeft het huidige scherm aan Geeft de bedrijfsmodus weer: weer met symbolen zoals (groepen in blokken) Groen: Ingeschakeld filtersymbool, vraag, etc.
- Seite 638 Bediening 5.2.2 Groep en blok instellen 5.2.2.1 Alle groepen weergeven 1 Tik in de touchscreen op "All Groups" (Alle groepen). Het tabblad gemarkeerd met (1), "Alle groepen" verschijnt niet als er slechts één blok is geregistreerd. (1)* 2 Alle groepen worden weergegeven op het touchscreen (alle binnenunits die op het centraal station zijn aangesloten, worden weergegeven).
- Seite 639 Bediening 5.2.2.2 Een specifiek blok weergeven 1 Selecteer in het scherm “Monitor (All Groups)” (Opvolging (alle groepen)) of “Monitor (Block)” (Opvolging (blok)) het doelblok. Opvolging (alle groepen) Opvolging (blok) 2 De groepen in het geselecteerde blok worden weergegeven in de touchscreen. De bedrijfsstatus van elke groep wordt aangeduid met de kleur van de groepknop, zoals hieronder beschreven: Groen: Starten...
- Seite 640 Bediening 5.2.2.3 Simultaan starten/stoppen van alle groepen 1 Tik in de touchscreen op "All Groups" (Alle groepen). 2 Tik op “Run all gr.” (Alle groepen starten) om alle groepen tegelijkertijd te starten. Tik op “Stop all gr.” (Alle groepen stoppen) om alle groepen tegelijkertijd te stoppen. 3 Het bevestigingsscherm verschijnt.
- Seite 641 Bediening 5.2.2.4 Simultaan starten/stoppen van elk blok 1 Selecteer in de touchscreen het blok dat u simultaan wilt starten/stoppen. 2 Tik op “Run by Block” (Starten per blok) om alle groepen in het geselecteerde blok tegelijkertijd te starten. Tik op “Stop by Block” (Stoppen per blok) om alle groepen in het geselecteerde blok tegelijkertijd te stoppen. 3 Het bevestigingsscherm verschijnt.
- Seite 642 Bediening 5.2.2.5 Starten/stoppen van elke groep Controleer de besturingsmodus voordat u deze functie inschakelt. De besturingsmodus varieert naargelang de besturingsmodus is ingesteld op "Normal" of "Run/Stop Only" (alleen starten/stoppen). Starten/stoppen van elke groep (besturingsmodus: Normal) 1 Selecteer het scherm “(Monitor) All Groups” (Opvolging (alle groepen)) of “(Monitor) Block” (Opvolging (blok)). Selecteer de in te stellen groep door op de knop van de desbetreffende groep te tikken.
- Seite 643 Bediening Starten/stoppen van elke groep (besturingsmodus: alleen starten/stoppen) Opvolging (alle groepen) 1 Selecteer in de modus "Run/Stop Only" (alleen starten/stoppen) de doelgroep in het scherm "(Monitor) All Groups" (Opvolging (alle groepen)). 2 De bedrijfsstatus van de geselecteerde groep kan worden gewijzigd van "Starten" naar "Stoppen" en vice versa door op de knop te tikken.
- Seite 644 Bediening 5.2.3 Belangrijkste parameters instellen 5.2.3.1 Bedrijfsmodus 1 Selecteer in het scherm “(Monitor) All Groups” (Opvolging (alle groepen)) of “(Monitor) Block” (Opvolging (blok)) het blok waarvan de bedrijfsmodus moet worden gewijzigd. Het scherm met de instellingen voor de geselecteerde groep verschijnt in de touchscreen.
- Seite 645 Bediening 5.2.3.2 Ventilatorsnelheid 1 Selecteer in het scherm “(Monitor) All Groups” (Opvolging (alle groepen)) of “(Monitor) Block” (Opvolging (blok)) de groep waarvan de ventilatorsnelheid moet worden gewijzigd. Het scherm met de instellingen voor de geselecteerde groep verschijnt in de touchscreen. Opvolging (alle groepen) Opvolging (blok) 2 Door op de knoppen “...
- Seite 646 Bediening 5.2.3.3 Richting van de lamellen 1 Selecteer in het scherm “(Monitor) All Groups” (Opvolging (alle groepen)) of “(Monitor) Block” (Opvolging (blok)) de groep waarvan de lamellenrichting moet worden gewijzigd. Het scherm met de instellingen voor de geselecteerde groep verschijnt in de touchscreen.
-
Seite 647: Temperatuur Instellen
Bediening 5.2.3.4 Temperatuur instellen 1 Selecteer in het scherm “(Monitor) All Groups” (Opvolging (alle groepen)) of “(Monitor) Block” (Opvolging (blok)) de groep waarvan de ingestelde temperatuur moet worden gewijzigd. Het scherm met de instellingen voor de geselecteerde groep verschijnt in de touchscreen. Opvolging (alle groepen) Opvolging (blok) 2 Door op “... - Seite 648 Bediening 5.2.3.5 Bediening via de afstandsbediening vergrendelen/ontgrendelen Deze optie kan worden gebruikt om bediening via de afstandsbediening te vergrendelen. Wanneer de afstandsbediening als vergrendeld (per items/voor alle items) is ingesteld, kunnen de geselecteerde items niet meer geregeld worden. De selecteerbare items zijn: starten/stoppen (OPERAT.), bedrijfsmodus (OPERAT. MODE), ventilatorsnelheid (FAN SPEED), pendellamellen (LOUVRE) en temperatuur (SET TEMPERAT.).
- Seite 649 Bediening 3 Tik op “Monitor screen” (Opvolgingsscherm) om terug te keren naar het scherm "Monitor". O P M E R K I N G • Door te tikken op “<” of “>” in het scherm met instellingen, schakelt de vergrendeling/ontgrendeling van de afstandsbediening naar een andere groep in hetzelfde blok. • Vergrendeld besturing (alleen starten/stoppen): Als dit ingesteld is op "Enable", dan geldt elke instellingswijziging voor alle groepen of blokken. De instellingen kunnen niet voor aparte groepen worden gewijzigd. • Zelfs als de afstandsbediening is ingesteld als “Prohibit.” (Gesperd), kan het systeem worden uitgeschakeld met behulp van de afstandsbediening. Het is ook mogelijk om het systeem opnieuw in te schakelen met behulp van de afstandsbediening. De functie "Stop" mag echter alleen in noodgevallen worden gebruikt. Gebruik het niet bij normale werking.
- Seite 650 Bediening 5.3 MENU De onderstaande tabel toont de menuopties en hun functies. Item Functie Deze functie wordt gebruikt om het filtersymbool van de binnenunits met filtersymbool uit te schakelen. Filtersymbool resetten Ongeacht de aanwezigheid van een filtersymbool kan de weergavetijd van het filtersymbool in de airconditioners (Filter Sign Reset) worden gereset.
-
Seite 651: Menuscherm
Bediening 5.3.1 Menuscherm De diverse instellingsopties voor de binnenunits en voor het centraal station worden weergegeven in het menu. 1 Selecteer in het scherm “(Monitor) All Groups” (Opvolging (alle groepen)) of “(Monitor) Block” (Opvolging (blok)) de optie "Menu". Opvolging (alle groepen) Opvolging (blok) 2 Het scherm "Menu"... - Seite 652 Bediening 5.3.2 Filtersymbool resetten 5.3.2.1 Filtersymbool resetten 1 Selecteer in het scherm "Menu" de optie "Filter Sign Reset" (Filtersymbool resetten). (Deze optie is alleen beschikbaar wanneer het filtersymbool wordt weergegeven). 2 Selecteer de items waarvoor u het filtersymbool wilt resetten. •...
- Seite 653 Bediening 5.3.2.2 Bedrijfstijd van filter resetten 1 Selecteer in het scherm "Menu" de optie "Filter Sign Reset" (Filtersymbool resetten). (Deze optie is alleen beschikbaar wanneer het filtersymbool wordt weergegeven). 2 Selecteer de items waarvoor u de bedrijfstijd wilt resetten. • Tik op “Display All Groups”...
- Seite 654 Bediening 5.3.3 Tijdschema instellen Deze functie wordt gebruikt voor werking met een timer. Er kan een tijdsschema voor een blok en voor elke groep worden ingesteld. Er is ook een aparte vakantie-instelling beschikbaar. 5.3.3.1 Instellingen geprogrammeerde werking instellen Timer instellen voor weekprogramma 1 Selecteer in het scherm "Menu"...
- Seite 655 Bediening 7 Tik op “Setting completed” (Instelling voltooid) om de instelling te bevestigen. Als u op “No” tikt, worden de instellingen gewist en keert het scherm terug naar "Schedule Settings" (Tijdschema instellen). • Ga terug naar stap (5) om andere instellingen voor dezelfde dag van de week toe te voegen. •...
- Seite 656 Bediening De programma's kopiëren per weekdag 1 Selecteer in het scherm "Menu" de optie "Schedule Settings" (Tijdschema instellen). 2 Selecteer in het scherm "Schedule Settings" de optie "Schedule Timer Setting" (Instellingen geprogrammeerde werking instellen). 3 Selecteer het doel (alle groepen, een blok of een groep). 4 Druk op "Copy Day of Week"...
- Seite 657 Bediening Programma's per groep kopiëren 1 Selecteer in het scherm "Menu" de optie "Schedule Settings" (Tijdschema instellen). 2 Selecteer in het scherm "Schedule Settings" de optie "Schedule Timer Setting" (Instellingen geprogrammeerde werking instellen). 3 Tik op “Copy Settings” (Instellingen kopiëren). 4 Selecteer de groep die u wilt kopiëren (een blok kan niet als bron voor het kopiëren worden geselecteerd).
- Seite 658 Bediening Programma's per individueel item wissen 1 Selecteer in het scherm "Menu" de optie "Schedule Settings" (Tijdschema instellen). 2 Selecteer in het scherm "Schedule Setting" (Tijdschema instellen) de optie "Schedule Timer Setting" (Instellingen geprogrammeerde werking instellen). 3 Selecteer het doel (alle groepen, een blok of een groep). 4 Tik op "Delete Settings"...
- Seite 659 Bediening Programma's per groep wissen 1 Selecteer in het scherm "Menu" de optie "Schedule Settings" (Tijdschema instellen). 2 Selecteer in het scherm "Schedule Settings" de optie "Schedule Timer Setting" (Instellingen geprogrammeerde werking instellen). 3 Tik op "Delete Settings" (Instellingen verwijderen). 4 Selecteer de groepen of blokken waarvan u het programma wilt wissen.
- Seite 660 Bediening 5.3.3.2 Vakantieperiode instellen om werking tijdelijk op te schorten 1 Selecteer in het scherm "Menu" de optie "Schedule Settings" (Tijdschema instellen). 2 Selecteer in het scherm "Schedule Settings" de optie "Holiday Setting" (Vakantieperiode instellen). 3 Selecteer het doel (alle groepen, een blok of een groep). De kalender verschijnt. •...
- Seite 661 Bediening 5.3.3.3 De in/uit-schakeling van de geprogrammeerde werking instellen 1 Selecteer in het scherm "Menu" de optie "Schedule Settings" (Tijdschema instellen). 2 Selecteer in het scherm "Schedule Settings" (Tijdschema instellen) de optie "Schedule Timer ON/OFF Setting" (De in/uit- schakeling van de geprogrammeerde werking instellen). Het scherm schakelt nu naar “Schedule Timer ON/OFF Setting”...
- Seite 662 Bediening 5.3.4 Het bereik van de ingestelde temperatuur van de afstandsbediening aanpassen 1 Selecteer de optie “Setting temp. range of the remote control” (Temperatuurbereik van afstandsbediening instellen) in het scherm “Menu”.* * Deze optie kan niet worden geselecteerd als de aangesloten airconditioners deze functie niet ondersteunen. 2 Selecteer het doel voor het instellen van het temperatuurbereik.
-
Seite 663: Datum En Tijd Instellen
Bediening 5.3.5 Datum en tijd instellen 1 Selecteer in het scherm "Menu" de optie "Date and Time Settings" (Datum en tijd instellen). 2 Stel de volgorde van “Year”, “Month” en “Day” in. 3 Tik op of houd de knoppen “ ” of “ ” ingedrukt voor elk veld om de datum en tijd in te stellen. 4 Tik op “Setting completed”... - Seite 664 Bediening 5.3.7 Touchscreen kalibreren 1 Selecteer in het scherm "Menu" de optie "Touchscreen Calibration" (Touchscreen kalibreren). 2 Touchscreen kalibreren • Druk op elk kruispunt van witte lijnen die achtereenvolgens op het scherm worden weergegeven. • Het scherm schakelt nu in de weergave zoals afgebeeld in afbeelding (3). •...
- Seite 665 Bediening 5.3.8 Registratie van blok- en groepsnamen 5.3.8.1 Groepsnaam registreren 1 Selecteer in het scherm "Menu" de optie "Group Name Register" (Groepsnaam registreren). 2 Selecteer het blok of de groep waarvan u de naam wilt registreren. 3 Het scherm schakelt naar het tekstinvoerscherm. U kunt kiezen tussen toetsenborden met hoofdletters, kleine letters en symbolen.
- Seite 666 Bediening 5.3.8.2 De naam van een groep of blok kopiëren 1 Selecteer in het scherm "Menu" de optie "Group Name Register" (Groepsnaam registreren). 2 Selecteer de groep (het blok) dat u wilt kopiëren. • De knop van de geselecteerde groep of het geselecteerde blok wordt met een oranje rand weergegeven. •...
-
Seite 667: Het Scherm Instellen
Bediening 5.3.9 Het scherm instellen 5.3.9.1 De helderheid van de achtergrondverlichting van de touchscreen instellen 1 Selecteer in het scherm "Menu" de optie "Screen Display Setting" (Het scherm instellen). 2 Selecteer in het scherm "Screen Display Setting" (Het scherm instellen) de optie "Brightness" (Helderheid). 3 Tik op “<”... - Seite 668 Bediening 5.3.9.2 Taal instellen 1 Selecteer in het scherm "Menu" de optie "Screen Display Setting" (Het scherm instellen). 2 Selecteer in het scherm "Screen Display Setting" de optie "Language" (Taal). 3 Het bevestigingsscherm verschijnt wanneer u op de knop van de gewenste taal drukt. 4 Tik op “Setting completed”...
- Seite 669 Bediening 5.3.9.3 Temperatuureenheid instellen 1 Selecteer in het scherm "Menu" de optie "Screen Display Setting" (Het scherm instellen). 2 Selecteer in het scherm "Screen Display Setting" de optie "Temperature Unit" (Temperatuureenheid). 3 Selecteer Celsius of Fahrenheit met behulp van de desbetreffende knop. De geselecteerde knop wordt in het geel weergegeven. 4 Tik op “Setting completed”...
- Seite 670 Bediening 5.3.10 Totale bedrijfstijd 5.3.10.1 Weergave per maand 1 Selecteer in het scherm "Menu" de optie “Accumulated Operation Time" (Totale bedrijfstijd). 2 Tik op “Display by Month” (Weergave per maand). 3 Tik op de knop “<” of “>” om het doelblok te selecteren. 4 Tik op de knop “<”...
- Seite 671 5 Tik op “Menu” om terug te keren naar het scherm "Menu". O P M E R K I N G • De totale bedrijfstijd van het centraal station wordt uitsluitend ter informatie weergegeven. Hitachi geeft geen garanties over de nauwkeurigheid van de vermelde totale bedrijfstijd. • Ook de “Thermo ON Time” kan worden weergegeven door deze optie te selecteren in het scherm “Optional Function Setting” (Optionele functies instellen). Neem contact op met...
- Seite 672 Bediening 5.3.11 Contactgegevens 1 Selecteer in het scherm "Menu" de optie "Contact Information" (Contactgegevens). De volgende informatie verschijnt: contactgegevens (2 aparte items); naam van blok en groep met meest recente alarm; meest recente alarmcode. 2 Tik op “Menu” om terug te keren naar het scherm "Menu". O P M E R K I N G •...
- Seite 673 Bediening 5.3.12 De zomertijd instellen 1 Selecteer in het scherm "Menu" de optie "Summer Time Setting" (De zomertijd instellen). De volgende informatie verschijnt: 2 Selecteer de functie voor elk item. Vervolgens verandert de kleur van de geselecteerde functie. 3 Tik op “Setting Completed” (Instelling voltooid) om de instellingen te bevestigen en terug te keren naar het scherm “Menu”. PMML0332A rev.0 - 05/2015...
- Seite 674 Bediening 5.4 ONDERHOUDSMENU O P M E R K I N G • Deze schakelaar is uitsluitend voor onderhoudstechnici. Gebruik hem dus niet. • Als u deze schakelaar gebruikt en onderhoudsmenu verschijnt in het scherm, tik dan op “Back”. Het scherm schakelt dan terug in het menu. Items Inhoud Groep registreren De aangesloten binnenunits worden gecontroleerd door het centraal station in dezelfde H-LINK. Deze functie (Group Register) is bedoeld voor het registeren van groepen en blokken. Besturingspatronen instellen Stel het besturingspatroon in.
- Seite 675 Bediening 1 Tik in het scherm “(Monitor) All Groups” (Opvolging (alle groepen)) of “(Monitor) Block” (Opvolging (blok)) de optie "Menu". Opvolging (alle groepen) Opvolging (blok) 2 Het scherm "Menu" wordt nu weergegeven. 3 Houd de knop "Service Menu" (Onderhoudsmenu) minstens 3 seconden ingedrukt. Het scherm "Service Menu" wordt nu weergegeven.
- Seite 676 Bediening 5.4.1 Groep registreren O P M E R K I N G Deze functie is beschreven in het hoofdstuk “5.1 Proefdraaien”, want het is een verplichte stap in de proefdraaiprocedure. 5.4.2 Optionele functies instellen Deze functie wordt gebruikt om de volgende functies van de airconditioners en het centraal station in te stellen en te wijzigen. Stel deze functie in via "Monitor"...
- Seite 677 Bediening 5.4.2.1 Afstandsbediening van airconditioner instellen 1 Selecteer “Optional Function Setting” (Optionele functies instellen) in het scherm “Service Menu” (Onderhoudsmenu) wanneer de airconditioner niet in werking is. 2 Selecteer in het scherm "Menu" de optie "Remote Control Setting" (Instelling afstandsbediening). Dit kan niet worden geselecteerd wanneer één of meerdere airconditioners in werking zijn.
- Seite 678 Bediening 5.4.2.2 Besturing instellen 1 Selecteer “Optional Function Setting” (Optionele functies instellen) in het scherm “Service Menu” (Onderhoudsmenu) wanneer de airconditioner niet in werking is. 2 Selecteer in het scherm “Optional Function Setting” (Optionele functies instellen) de optie "Controller Setting" (Instelling besturing). 3 Selecteer de instelling van elke functie, waar nodig.
- Seite 679 Bediening 5.4.3 De sperring van starten/stoppen instellen De commando's “RUN” en “STOP” worden niet aanvaard wanneer de groep is ingesteld in bedrijf “Alle groepen” of “Alle blokken”. Het is echter mogelijk om een uitzondering in te stellen voor de volgende commando's of combinaties van commando's voor specifieke groepen: •...
- Seite 680 (*6): Er zijn situaties waarbij de buitenunit bepaalde instellingen niet ondersteunt of waarbij de beschikbare instellingen afwijken afhankelijk van de capaciteit van de buitenunit. Neem contact op met uw HITACHI-distributeur of -klantenservice voor meer informatie. (*7): Het is mogelijk het systeem te bedienen via een programma zonder de vraagbesturing te gebruiken.
- Seite 681 Bediening 5.4.4.2 Functies van externe uitgang 1 Uitgang "Alle starten" Externe uitgang voor bedrijfssignaal van de binnenunits naar de doelgroep. Het bedrijfssignaal wordt uitgezonden, zelfs als er maar één binnenunit in de doelgroep in werking is. 2 Alarm externe uitgang Externe uitgang voor alarmsignaal van de binnenunits naar de doelgroep.
- Seite 682 Bediening 5.4.4.4 Externe ingang instellen 1 Selecteer in het scherm "Service Menu" (Onderhoudsmenu) de optie "External Input/Output Setting" (Externe ingang/uitgang instellen). Deze optie kan niet worden geselecteerd wanneer de airconditioners in bedrijf zijn of wanneer het contact voor externe ingangssignalen ingeschakeld is. 2 Selecteer de beoogde ingang (van 1 tot 4) van de externe ingangen.
- Seite 683 Bediening Capaciteitsregeling van de buitenunit 5 Selecteer de waarde voor de capaciteit van de buitenunit. De geselecteerde knop met de capaciteitswaarde wordt in het geel weergegeven. 6 Gebruik de knoppen rechts van het scherm om de capaciteitsregeling van de buitenunit te programmeren wanneer geen ingangscontact voor dit doel wordt gebruikt.
-
Seite 684: Overige Instellingen
Bediening Overige instellingen 10 Selecteer het doel van de externe ingangsregeling. (Alle groepen/blok/groep). • Tik op de knop van een groep om de groep te selecteren of deselecteren. • Tik op de knop van een blok om alle groepen van dat blok te selecteren of deselecteren. •... - Seite 685 Bediening 5.4.5 Knop instellen Deze functie wordt gebruikt om te selecteren of bepaalde knoppen moeten worden weergegeven of verborgen, om zo de werking ervan te beperken. Stel deze functie in via "Monitor" "Menu" "Service Menu" "Button Setting". 1 Selecteer in het scherm "Service Menu" (Onderhoudsmenu) de optie "Button Setting" (Knop instellen). 2 Selecteer in elk item een functie.
- Seite 686 Bediening 5.4.6 Contactgegevens registreren Deze functie wordt gebruikt voor het bewerken of registreren van de contactgegevens. Stel deze functie in via "Monitor" "Menu" "Service Menu" "Contact Information Register". 1 Selecteer in het scherm "Service Menu" (Onderhoudsmenu) de optie "Contact Information Register" (Contactgegevens registreren).
- Seite 687 Bediening 5.4.7 Memo 5.4.7.1 Memo registreren 1 Selecteer in het scherm "Service Menu" (Onderhoudsmenu) de optie "Memo". 2 Selecteer het doel dat u wilt registreren. Het invoerscherm verschijnt. 3 Selecteer een geregistreerd teken in de lijst. 4 Voer de tekens in. Tik op “Delete” (Verwijderen) om het teken links van de cursor te verwijderen. De memo mag maximaal 52 tekens bevatten.
- Seite 688 Bediening 5.4.7.2 Memo verwijderen 1 Selecteer in het scherm "Service Menu" (Onderhoudsmenu) de optie "Memo". 2 Tik op "Delete Memo" (Memo verwijderen). 3 Selecteer de memo die u wilt registreren. • Tik op de knop van een memo om de memo te selecteren of deselecteren. •...
-
Seite 689: Instellingen Herstellen
Bediening 5.4.8 Instellingen herstellen 1 Selecteer in het scherm "Service Menu" (Onderhoudsmenu) de optie "Restore Settings" (Instellingen herstellen). O P M E R K I N G Deze functie kan niet worden geselecteerd wanneer de bediening via de afstandsbediening vergrendeld is, wanneer een extern ingangscontact ingeschakeld is of wanneer de capaciteitsregeling van de buitenunit niet geannuleerd is. Annuleer deze parameters voordat u de actie "Restore Settings" (Instellingen herstellen) uitvoert. -
Seite 690: Instellingen Opslaan
Bediening 5.4.9 Verbindingen controleren 1 Selecteer in het scherm "Service Menu" (Verbindingen controleren) de optie "Checking Connection" (Onderhoudsmenu). O P M E R K I N G Deze functie kan niet worden geselecteerd wanneer één of meerdere airconditioners in bedrijfs zijn of wanneer er een extern ingangssignaal gaat naar externe ingangsklemmen 1 en 2. 2 Tik in het bevestigingsscherm op "Yes". O P M E R K I N G Als u op "No" tikt, schakelt het scherm terug naar "Service Menu" (Onderhoudsmenu). De verbindingsgegevens hangen af van de volgende instelling: •... - Seite 691 Bediening 6 Een tweede bevestigingsscherm verschijnt. Controleer de airconditioners en tik op "Yes". O P M E R K I N G • Als u op "No" tikt, schakelt het scherm terug naar "Service Menu" (Onderhoudsmenu). • Deze functie kan niet worden geselecteerd wanneer de bediening via de afstandsbediening vergrendeld is, wanneer een extern ingangscontact ingeschakeld is of wanneer de capaciteitsregeling van de buitenunit niet geannuleerd is. Annuleer deze parameters voordat u de actie "Restore Settings" (Instellingen herstellen) uitvoert. Instellingen niet opslaan 7 Tik in het bevestigingsscherm op "No". 8 Het bevestigingsscherm van de opstarting verschijnt. Tik op "Yes" om all instellingen op te starten en de verbindingen te controleren.
- Seite 692 Bediening 5.4.10 Alarmhistoriek Deze functie wordt gebruikt om het tijdstip van een alarm, de unit waarin de fout is opgetreden en de alarmcode te registreren. Met deze functie kan de alarmhistoriek ook worden gewist. Stel deze functie in via "Monitor" "Menu"...
- Seite 693 Neem contact op met de winkel waar de filter is gekocht. Verschijnt wanneer een vraagsignaal wordt ontvangen via de externe ingang. Het symbool Vraag knippert tijdens de vraagbesturing. Neem contact op met uw Hitachi-klantenservice voor meer informatie. Verschijnt wanneer het optionele programma voor de capaciteitsregeling van de buitenunits is Vraag (programma) ingeschakeld, en knippert tijdens de bediening.
- Seite 694 Wanneer de unit hierdoor wordt uitgeschakeld, voer dan opnieuw de opstartprocedure uit. Scherm bevriest in "Start-up" • Er is mogelijk een communicatiefout opgetreden. Neem contact op met uw Hitachi-klantenservice voor meer informatie. PMML0332A rev.0 - 05/2015...
-
Seite 695: Problemen Oplossen
Problemen oplossen 6 PROBLEMEN OPLOSSEN Controleer de volgende tabel voordat u contact opneemt met een distributeur voor hulp. Voorwaarde Oorzaak • Controleer of de voedingskabel is aangesloten op het stopcontact. Er worden geen symbolen weergegeven in de touchscreen. • Controleer of de voeding is ingeschakeld. •... - Seite 697 FA R A • Häll ALDRIG vatten i den centrala styrenheten. Denna produkt innehåller strömförande komponenter. Om vatten hälls över den så uppstår fara för allvarliga elektriska stötar. • Innan installationsarbete påbörjas ska man försäkra att fundamentet är jämnt, i nivå samt tillräckligt hållfast och sedan fästa enheten på ett säkert sätt. Om fundamentet inte är tillräckligt starkt kan detta leda till skador pga. att produkten ramlar ner, elchock eller brand. • Installera INTE enheten på en plats där bildande, flödande, ackumulering eller läckage av lättantändlig gas detekterats. • Utför INTE installationsarbete eller elektriska anslutningar själv. Kontakta din HITACHI- återförsäljare för mer information om installations- och anslutningsarbeten som måste utföras av en fackman. • Utför elektriskt installationsarbete enligt Installationshandboken och följ alla relevanta bestämmelser och standarder. Om anvisningarna inte följs så kan elchock och brand uppstå pga. otillräcklig kapacitet och felaktiga prestanda. • Använd specificerade ledningar för anslutningar mellan inomhusenheten och den centrala styrenheten. Användning av fel kablar kan orsaka brand eller elchock. • Stäng av huvudströmmen fullständigt innan inomhusenhetesn servicelucka öppnas eller stängs, då brytarens terminaldel fortfarande kan vara strömförande och orsaka en elchock. Stäng även AV huvudströmmen vid kabelarbeten.
- Seite 698 Huvudfunktioner 2 HUVUDFUNKTIONER Denna centrala styrenhet (PSC-A32MN) är ansluten till H-LINK och används för centralstyrning och övervakning av luftkonditioneringarna Följande funktioner är tillgängliga för alla inomhusenheter som är anslutna till de centrala styrenheterna. 1 Start/stopp, byte av driftläge, reglering av fläkthastighet, reglering av spjällriktning, temperaturinställning samt tillåta/spärra styrning med fjärrkontroll.
- Seite 699 Rekommenderad kabel: 600 V CV, CCV, CEV Kabelspecifikation: 0,75 till 1,25 mm H-LINK-kabel (för styrning) Rekommenderad kabel: JKEPV-S, JKEV-S, CVV-S, CVV, 600 V VCT * De rekommenderade kablarna är modellnamn för Hitachi Cable, Ltd. 3.2 KOMPONENTLISTA Packa upp enheten och kontrollera att: •...
-
Seite 700: Beskrivning Av Delarna
Installation 3.3 BESKRIVNING AV DELARNA LCD-färgskärm med pekskärm För att styra och övervaka enheterna och via pekskärmens display. Den styrs med hjälp av pekpennan (tillbehör). Pekskärmens display kommer Framsida att automatisk gå till viloläge om den inte används under en angiven tidsperiod. -
Seite 701: Allmän Information
Installation 3.4 ALLMÄN INFORMATION Modell PSC-A32MN Yttre dimensioner 140 × 120 × 22 + 52,7 (mm) <B x H x D + (Inbyggd del)> Nettovikt 0,5 kg (ca) Installationsplats Inomhus Installationsmetod Inbyggd i vägg med JIS kopplingsdosa för 2 kontakter (med lock) (JIS C8340) Antal anslutna inomhusenheter 160 (Max.) Klockans noggrannhet... - Seite 702 Installation 3.6 INSTALLATIONSPLATS Bevara installationsutrymmet för centrala styrenheten enligt nedan. (Enhet: mm) 52,7 Placera inget i det skuggade området “ ”. Vid installering av två eller flera centrala styrenheter bredvid varandra så ska de vara separerade med följande avstånd. * Vertikal riktning: 50 mm * Horisontell riktning: 30 mm...
- Seite 703 Installation 3 Anslut kablarna till centralenhetens uttagspanel. Uttagspanel Användning Anslutningsprocedur M3 skruvplint För strömförsörjning Runda kontakter För H-LINK-anslutning Vridmoment 0,5 Nm 3-stiftkontakt CN1 ~ 3 För extern ingång/utgång För in anslutningskablar (tillbehör) H-LINK (icke-polär) AC 100 till 240 V till ett klick hörs. Kontakter extern ingång/utgång.
-
Seite 704: Elektriska Kablar
Specifikationer Ledningslängd Kabelspecifikation Rekommenderad kabelmodell Strömförsörjningskabel AC 100~240 V 1,25 till 2 mm 600 V CV, CCV, CEV (Hitachi-kabel) Jordkabel H-LINK (kontrolledning) DC 5 V ≤ 1 000 m 0,75 till 1,25 mm JKPEV-S, JKEV-S, CVV-S, CVV, 600 Ingång: strömlös normalt öppen Kabeldragning för extern... - Seite 705 Elektriska kablar FA R A • Slå AV huvudströmbrytaren för inomhusenheter, utomhusenheter och de centrala styrenheterna innan elektriskt kabelarbete utförs. Om inte, kan detta orsaka en brand, elektrisk chock eller att apparaten havererar. • Använd inte kablar som är lättare än den vanliga polykloroprengummiklädda flexibla kabeln (beteckning H05RN-F). Procedur för inställning av kontakt Listan för inställning av kontakter på centrala styrenheter visas i följande tabell. 1 Applicera lämpliga inställningar på kontakterna. Kontakt Kontaktnummer Användning Fabriksinställning Kommentarer RSW1 För inställning av adress på...
- Seite 706 Elektriska kablar Inställning för DSW1 Benämning Modell DSW1 DSW2 DSW3 DSW4 Central styrenhet EZ PSC-A64GT Central styrenhet mini PSC-A32MN Central styrenhet PSC-A64S Central styrenhet för till-/frånslag PSC-A16RS Kombination av HC-A(8/64)MB Ej kompatibel PSC-A32MN med Andra centrala andra centrala styrenheter HC-A16KNX Ej kompatibel BMS-gateway styrenheter...
- Seite 707 Drift 5 DRIFT 5.1 PROVKÖRNING Provkörningsprocedurens översikt visas i figuren. Artiklar markerade med en fet ram ( ) är obligatoriska. Övriga poster, vilka inte är specifikt nödvändiga för testkörningsproceduren men är tillval, förklaras i ett speciellt avsnitt. O B S ! Skärmens design kan variera från skärmdumparna som visas i detta kapitel.
-
Seite 708: Funktion
Drift Lista med punkter Objekt Funktion Språkinställningar Denna funktion används för val av språk. (Language Setting) Inställning av datum och tid Denna funktion används för justering av datum och tid. (Date and Time Settings) Gruppregistrering Denna funktion används för att registrera grupper eller block med inomhusenheter som är anslutna till samma (Group Register) H-LINK och som har identifierats av den centrala styrenheten. - Seite 709 Drift Objekt Funktion Denna funktion används för att annullera driftskommandon som t.ex. "Alla grupper Start/stopp" (All Groups Run/ Stop) via den externa ingångssignalen. Undantag av extern ingång (Exception of External Input) "Undantag av extern ingång" (Exception External Input) är tillgänglig för varje extern ingång (ingång 1 och ingång 2).
- Seite 710 Drift 5.1.1 Slå på Slå på luftkonditioneringarnas strömförsörjning. För att skydda kompressorn så bör strömförsörjningen slås på 12 timmar innan driftstart. Stäng inte av strömförsörjningen under årstider där luftkonditionering används. Provkör varje luftkonditionering för att försäkra normal drift. Slå på strömmen till den centrala styrenheten. "Start-up"...
- Seite 711 Drift 5.1.4 Justering av datum/tid Efter inställning av temperaturenhet så visas justeringsskärmen för datum/tid på pekskärmen enligt figuren. Tryck på "Set" på pekskärmens display och ställ i datum och tid enligt anvisningarna. Se avsnitt “5.3.5 Inställning av datum och tid” i kapitel “5.3 Meny” för detaljerad information. O B S ! Inställning av datum och tid kan vara nödvändigt efter ett längre strömavbrott. Om "Set Date/Time" visas på skärmen så trycker man på "Set" för att justera datum och tid.
- Seite 712 Drift 5.1.6 Inställning av kontrollmönster Efter justering av datum och tid så visas skärmen för kontrollmönster. Tryck på "Set" på pekskärmen för att ställa in kontrollmönster. När man trycker på en knapp för kontrollmönster så markeras knappen med en orange ram. Proceduren för att ställa in kontrollmönster förklaras nedan.
- Seite 713 Drift 5.1.7 Gruppregistrering Registrera anslutna inomhusenheter till grupper och block på den centrala styrenheten. 5.1.7.1 Definitioner • Grupp: Minsta driftsenhet som styrs av en central styrenhet. 1 fjärrkontrollgrupp anses vara 1 grupp och samma inställning appliceras till hela gruppen. Maximalt 32 grupper (organiserade i 4 block med 8 grupper var, 8 block med 4 grupper var, 2 block med 16 grupper var eller 16 block med 2 grupper var) kan styras med en central styrenhet.
- Seite 714 Drift 5.1.7.3 Registrera underenhet • Maximalt 15 underenheter kan registreras i samma fjärrkontrollgrupp tillsammans med huvudenheten (med kontrollmönster 2 block med 16 grupper var). • Inomhusenheter utan fjärrkontroll kan inte registreras som underenheter. • Om man ändrar registreringen av en inomhusenhet som redan registrerats som underenhet så ska denna inställning annulleras innan den nya registreringen utförs.
- Seite 715 Drift 3 Välj grupp för registrering av huvudenheten. • Tryck på knapparna “<” och “>” på pekskärmens övre vänstra för att flytta blockindikationen. • Siffrorna inuti knapparna anger blocknummer och gruppnummer. • Välj en gruppknapp genom att trycka på den. Den valda knappen markeras med en orange ram. Om man trycker på den valda gruppknappen igen så...
- Seite 716 Drift Tryck på knapparna “<” och “>” uppe till vänster på pekskärmen för att gå vidare med inställningen av ytterligare ett block eller tryck på knappen “Setting complet.” (Inställning slutförd) för att avsluta. 6 Tryck på “Setting Complet.” (Inställning slutförd) för att registrera gruppen och gå tillbaka skärmen för registrering av grupper. 7 Tryck på...
- Seite 717 Drift 2 Välj “Sub Unit Register” (Registrera underenhet) på skärmen för “Group Register” (Gruppregistrering). 3 Välj grupp för registrering av underenheten. • Tryck på knapparna “<” och “>” på pekskärmens övre vänstra för att flytta blockindikationen. • Välj grupp genom att trycka på den. Den valda knappen markeras med en orange ram. •...
- Seite 718 Drift Tryck på knapparna “<” och “>” uppe till vänster på pekskärmen för att gå vidare med inställningen av ytterligare ett block eller tryck på knappen “Setting complet.” (Inställning slutförd) för att avsluta. 6 Tryck på “Setting compl.” på “Group Register (Sub Unit Register)” (Gruppregistrering (Registrera underenhet)) för att gå tillbaka till skärmen för “Group Register”...
- Seite 719 Drift 5.1.7.6 Annullering av gruppregistrering 1 Välj “Group Register” (Gruppregistrering) på skärmen för “Service Menu” (Servicemeny). Se avsnitt “5.1.7.4 Registrering av en grupp (huvudenhet)”. O B S ! Denna funktion kan inte väljas när den externa ingångssignalen ges till extern ingångskontakt 1 och 2. 2 Välj "Main Unit Register" (eller Sub Unit Register) (Registrera huvudenhet/underenhetpå) skärmen för “Group Register” (Gruppregistrering).
- Seite 720 Drift 5.1.7.7 Kontroll av gruppregistrering (kontroll av registrering av huvudenhet) 1 Välj “Group Register" (Gruppregistrering) på "Service Menu" (Servicemeny). Se avsnitt “5.1.7.4 Registrering av en grupp (huvudenhet)”. O B S ! Denna funktion kan inte väljas när den externa ingångssignalen ges till extern ingångskontakt 1 och 2. 2 Välj "Main Unit Register" (eller Sub Unit Register) (Registrera huvudenhet/underenhetpå) skärmen för “Group Register” (Gruppregistrering).
- Seite 721 Drift 5.1.7.8 Kontrollera gruppregistrering (kontrollera registreringsuppgifter) 1 Välj “Group Register" (Gruppregistrering) på "Service Menu" (Servicemeny). Se avsnitt “5.1.7.4 Registrering av en grupp (huvudenhet)”. O B S ! Denna funktion kan inte väljas när den externa ingångssignalen ges till extern ingångskontakt 1 och 2. 2 Välj “Display list of registers” (Visa lista med register) på gruppregistreringsskärmen. 3 Välj visningsmål (alla grupper/individuella block) 4 Kylmedelsystemets nummer och adressen till samtliga enheter som är anslutna till varje grupp visas.
- Seite 722 Drift 5.2 HUVUDSKÄRM 5.2.1 Översiktsvy Övervaka (alla grupper) Blockknapp Enhetens status Skärmen visar ändringar på skärmen "Block" Aktuell display Monitor (Block) (Övervaka (Block)) genom att Indikerar enhetens status med Indikerar aktuell display trycka på denna knapp. ikoner som t.ex. filtertecken, behov, (Alla grupper) etc.
- Seite 723 Drift Övervaka (Block) Blockflik Ändrar monitorns display till visning av "Block" eller "Alla grupper" Enhetens status Aktuell display Gruppknapp Indikerar enhetens status med Indikerar aktuell display ikoner som t.ex. filtertecken, Visar driftsstatus (grupper i block) Grön: I drift behov, etc. Grå: Stopp Röd: Onormal Om man trycker på...
- Seite 724 Drift 5.2.2 Inställningar för grupp och block 5.2.2.1 Visning av Alla grupper 1 Tryck på "All Groups" (Alla grupper) på pekskärmens display. Fliken märkt med (1), "All Groups" kommer inte att visas om endast ett block har registrerats. (1)* 2 Alla grupper visas på pekskärmen (samtliga inomhusenheter som är anslutna till den centrala styrenheten visas). Driftstatus för varje operation visas genom gruppens färg enligt följande: Grön: Start...
- Seite 725 Drift 5.2.2.2 Visning av specificerat block 1 Välj målblocket från skärmen för "Monitor (All Groups)" (Övervaka (alla grupper)) eller "Monitor (Block)" (Övervaka (Block)). Övervaka (alla grupper) Övervaka (Block) 2 Grupperna i det valda blocket visas på pekskärmen. Driftstatus för varje operation visas genom gruppens färg enligt följande: Grön: Start Grå:...
- Seite 726 Drift 5.2.2.3 Samtidig Start/stopp för alla grupper 1 Tryck på "All Groups" (Alla grupper) på pekskärmens display. 2 Tryck på “Run all gr.” (Starta alla gr.) för att köra samtliga grupper samtidigt. Tryck på “Stop all gr.” (Stoppa alla gr.) för att stoppa samtliga grupper samtidigt. 3 Bekräftelsefönstret öppnas.
- Seite 727 Drift 5.2.2.4 Samtidig Start/stopp för varje block 1 Väl målblocket från pekskärmens display för att ställa in samtidig Start/stopp-drift. 2 Tryck på “Run by Block” (Starta blockvis) för att köra samtliga grupper i det valda blocket samtidigt. Tryck på “Stop by Block” (Stoppa blockvis) för att stoppa samtliga grupper i det valda blocket samtidigt. 3 Bekräftelsefönstret öppnas.
- Seite 728 Drift 5.2.2.5 Start/stopp för varje grupp Kontrollera styrningsläget innan inställning. Kontrollmetoden är annorlunda beroende på om styrningsläget är ställt till “Normal” eller “Run/Stop Only” (Endast Start/stopp). Start/stopp för varje grupp (Styrningsläge: Normal) 1 Välj skärmen för “Monitor (All Groups)” (Övervaka (alla grupper)) eller “Monitor (Block)” (Övervaka (Block)). Välj grupp som ska ställas in genom att trycka på...
- Seite 729 Drift Start/stopp för varje grupp (Styrningsläge: endast Start/stopp) Övervaka (alla grupper) 1 Välj målgruppen på skärmen för “Monitor (All Groups)” i läget “Run/Stop Only” (endast Start/stopp). 2 Driftstatusen för den valda gruppen skiftas mellan körning och stopp när man trycker på knappen. I detta läge är samtidig Start/stopp tillgänglig via knapparna “Run all gr.”...
- Seite 730 Drift 5.2.3 Inställning av huvudparametrar 5.2.3.1 Driftsläge 1 Välj målgruppen för att ändra driftsläge från skärmarna "Monitor (All Groups)" (Övervaka (alla grupper)) eller "Monitor (Block)" (Övervaka (Block)). Skärmen med inställningarna för de valda grupperna visas på pekskärmen. Övervaka (alla grupper) Övervaka (Block) 2 Genom att trycka på...
- Seite 731 Drift 5.2.3.2 Fläkthastighet 1 Välj målgruppen för att ändra inställningen av fläkthastighet från skärmarna "Monitor (All Groups)" (Övervaka (alla grupper)) eller "Monitor (Block)" (Övervaka (Block)). Skärmen med inställningarna för de valda grupperna visas på pekskärmen. Övervaka (alla grupper) Övervaka (Block) 2 Genom att trycka på...
- Seite 732 Drift 5.2.3.3 Spjällriktning 1 Välj målgruppen för att ändra spjällriktning från skärmarna "Monitor (All Groups)" (Övervaka (alla grupper)) eller "Monitor (Block)" (Övervaka (Block)). Skärmen med inställningarna för de valda grupperna visas på pekskärmen. Övervaka (alla grupper) Övervaka (Block) 2 Genom att trycka på knapparna “ ” eller “ ” i “LOUVRE”, så ändras spjällriktningen enligt nedan. LCD-indikator AUTO Automatisk...
- Seite 733 Drift 5.2.3.4 Temperaturinställning 1 Välj målgruppen för att ändra inställningen av temperatur från skärmarna "Monitor (All Groups)" (Övervaka (alla grupper)) eller "Monitor (Block)" (Övervaka (Block)). Skärmen med inställningarna för de valda grupperna visas på pekskärmen. Övervaka (alla grupper) Övervaka (Block) 2 Genom att trycka på...
- Seite 734 Drift 5.2.3.5 Förhindra/spärra styrning med fjärrkontrollen Denna funktion används för att spärra driften från fjärrkontrollen (RCS). När fjärrkontrollen är spärrad (efter post/alla poster) så är styrning av de valda posterna inte tillgängligt. Poster som kan väljas är: Start/stopp (OPERAT.), driftsläge (OPERAT. MODE), fläkthastighet (FAN SPEED), spjäll (LOUVRE) och temperatur (SET TEMPERAT.).
- Seite 735 Drift 3 Tryck på “Monitor screen” för att gå tillbaka till monitorskärmen. O B S ! • Genom att trycka på “<” eller “>” på den detaljerade inställningsskärmen så kommer fjärrkontrollens tillåta/spärra att skiftas till en annan grupp i samma block. • Styrning spärrad (endast Start/stopp): Vid “Enable” så gäller alla ändringar i inställningar för samtliga grupper eller block. Inställningar kan inte ändras för varje grupp. • Även om fjärrkontrollen är ställd till “Prohibit.” (spärra), så kan man stoppa driften med fjärrkontrollen. Det går även att återuppta driften med hjälp av fjärrkontrollen. Driftstopp kommer emellertid endast att användas i nödfall. Använd inte detta under normal drift. • Om “Power Supply ON/OFF” (Strömförsörjning PÅ/AV) (d1, d3) har ställts in så ska fjärrkontrollen inte ställas till “Prohibit.” (spärra). Om fjärrkontrollen spärras när “Power Supply ON/OFF” (Strömförsörjning PÅ/AV) används, så ska funktionen “Control lock” (Kontroll lås) för fjärrkontrollen användas. • Om ett kommunikationsfel uppstår så kan fjärrkontrollen “STOP” (efter post) annulleras. I detta fall, utför inställningarna igen. • Ställ inte in spärrad drift om flera centrala styrenheter används i samma H-LINK. Ställ inte heller in detta via en annan central styrenhet då detta kan orsaka en felfunktion. PMML0332A rev.0 - 05/2015...
-
Seite 736: Funktion
Drift 5.3 MENY Tabellen nedan visar menyposterna och dess funktion. Objekt Funktion Denna funktion används för att stänga av filtertecknet för de inomhusenheter där de uppstått. Återställning av filtertecken Oberoende av uppkomsten av filtertecknet, så kan man även nollställa visningstiden av filtertecknet på (Filter Sign Reset) luftkonditioneringsenheterna. - Seite 737 Drift 5.3.1 Visa menyskärm Inställningspunkterna för inomhusenheten och den centrala styrenheten visas i menyn. 1 Tryck på "Menu" på skärmen "Monitor (All Groups)" (Övervaka (alla grupper)) eller "Monitor (Block)" (Övervaka (Block)). Övervaka (alla grupper) Övervaka (Block) 2 Skärmen "Menu" visas. 3 Välj posten på...
- Seite 738 Drift 5.3.2 Återställning av filtertecken 5.3.2.1 Återställa filtertecken 1 Välj "Filter Sign Reset" (Återställning av filtertecken) på skärmen "Menu". (Detta är endast tillgängligt när filtertecknet visas). 2 Välj målet för att återställa filtertecknet. • Tryck på “Display with Sign” (Visa med skylt) för att ange endast grupperna med filtertecknet. •...
- Seite 739 Drift 5.3.2.2 Återställa driftstid för filter 1 Välj "Filter Sign Reset" (Återställning av filtertecken) på skärmen "Menu". (Detta är endast tillgängligt när filtertecknet visas). 2 Välj målet för att återställa filtrets driftstid. • Tryck på “Display All Groups” (Visa alla grupper) för att markera alla grupper. •...
- Seite 740 Drift 5.3.3 Inställning av schema Denna funktion används för timerdrift. Det går att ställa in ett schema för ett block och för varje grupp. Det går även ställa in semestertid oberoende av schemat. 5.3.3.1 Inställning av schemaläggningstimer Inställning av timer för veckoschema 1 Välj "Schedule Settings"...
- Seite 741 Drift 7 Tryck på “Setting completed” (Inställning slutförd) för att bekräfta inställningen. Om man trycker på “No” så förkastas de visade inställningarna och skärmen går tillbaka till skärmen för inställning av schema. • Gå tillbaka till steg (5) för att lägga till ytterligare inställningar för samma veckodag. •...
- Seite 742 Drift Kopiera schemaläggningsinställning efter veckodagar 1 Välj "Schedule Settings" (Inställning av schema) från skärmen "Menu". 2 Välj "Schedule Timer Setting" (Inställning av schemaläggningstimer) från skärmen "Schedule Settings" (Inställning av schema). 3 Välj mål (alla grupper, block eller grupp). 4 Tryck på “Copy Day of Week” (Kopiera veckodag). 5 Välj veckodag att kopiera.
- Seite 743 Drift Kopiera schemaläggningsinställningar för varje grupp 1 Välj "Schedule Settings" (Inställning av schema) från skärmen "Menu". 2 Välj "Schedule Timer Setting" (Inställning av schemaläggningstimer) från skärmen "Schedule Settings" (Inställning av schema). 3 Tryck på “Copy Settings” (Kopiera inställningar). 4 Välj grupp att kopiera. (Ett block kan inte väljas för kopiering). •...
- Seite 744 Drift Radera schemaläggningsinställningar för individuella poster 1 Välj "Schedule Settings" (Inställning av schema) från skärmen "Menu". 2 Välj "Schedule Timer Setting" (Inställning av schemaläggningstimer) på skärmen "Schedule Settings" (Inställning av schema). 3 Välj mål (alla grupper, block eller grupp). 4 Tryck på...
- Seite 745 Drift Radera schemaläggningsinställningar för varje grupp 1 Välj "Schedule Settings" (Inställning av schema) från skärmen "Menu". 2 Välj "Schedule Timer Setting" (Inställning av schemaläggningstimer) från menyn "Schedule Settings" (Inställning av schema). 3 Tryck på “Delete Settings” (Radera inställningar). 4 Välj grupper eller block för att radera inställningarna. •...
- Seite 746 Drift 5.3.3.2 Semesterinställning för att avbryta drift 1 Välj "Schedule Settings" (Inställning av schema) från skärmen "Menu". 2 Välj "Holiday Setting" (Semesterinställning) på skärmen "Schedule Settings" (Inställning av schema). 3 Välj mål (alla grupper, block eller grupp). Urvalets kalender visas. •...
- Seite 747 Drift 5.3.3.3 Schemaläggningstimer PÅ/AV-inställningar 1 Välj "Schedule Settings" (Inställning av schema) från skärmen "Menu". 2 Välj “Schedule Timer ON/OFF Setting” (Schemaläggningstimer PÅ/AV-inställningar) från skärmen “Schedule Settings” (Inställning av schema). Skärmen ändras till “Schedule Timer ON/OFF Setting” (Schemaläggningstimer PÅ/AV-inställningar). Den initiala inställningen är “ON”, som anges med markeringen “...
- Seite 748 Drift 5.3.4 Justering av inställning för temperaturområdet på fjärrkontrollen 1 Välj “Setting temp range of the remote control” (inställning för temperaturområdet på fjärrkontrollen) på skärmen “Menu”.* * Kan inte väljas om den anslutna luftkonditioneringen inte stöder denna funktion. 2 Välj mål för inställning av temperaturområde. (Alla grupper/Block/Grupper)* •...
-
Seite 749: Inställning Av Datum Och Tid
Drift 5.3.5 Inställning av datum och tid 1 Välj "Date and time Settings" (Inställning av datum och tid) från skärmen "Menu". 2 Ställ in displayen i ordningen “Year”, “Month” och “Day”. 3 Tryck på eller tryck-och-håll knapparna “ ” eller “ ” för varje fält för att justera datum och tid. 4 Tryck på... - Seite 750 Drift 5.3.7 Kalibrering av pekskärm 1 Välj "Touchscreen Calibration" (Kalibrering av pekskärm) på skärmen "Menu". 2 Kalibrera pekskärm • Tryck på de vita korsen som visas i sekvens på skärmen. • Sedan ändras displayen till skärmen som visas i figuren (3). •...
- Seite 751 Drift 5.3.8 Registrera namn på grupper och block 5.3.8.1 Registrera gruppnamn 1 Välj "Group Name Register" (Registrera gruppnamn) på skärmen "Menu". 2 Välj mål (block eller grupp) för att registrera dess namn. 3 Displayen ändras till skärmen för inmatning av text. Man kan välja tangentbord med kapitäler, versaler eller symboler.
- Seite 752 Drift 5.3.8.2 Kopia av grupp- eller blocknamn 1 Välj "Group Name Register" (Registrera gruppnamn) på skärmen "Menu". 2 Välj källgrupp eller block att kopiera. • Knappen för den valda gruppen eller blocket markeras med en orange ram. • Tryck på den valda gruppen eller blocket igen för att annullera valet. Den orangefärgade ramen försvinner. 3 Välj destinationsgrupp eller block att klistra in.
- Seite 753 Drift 5.3.9 Inställning av skärm 5.3.9.1 Justera ljusstyrka på pekskärmens bakgrund 1 Välj "Screen Display Setting" (Inställning av skärm) på skärmen "Menu". 2 Välj "Brightness" (Ljusstyrka ) på skärmen "Screen Display Setting" (Inställning av skärm). 3 Tryck på “ < ” eller “ > ” för att justera bakgrundens ljusstyrka. 4 Tryck på...
- Seite 754 Drift 5.3.9.2 Språkinställningar 1 Välj "Screen Display Setting" (Inställning av skärm) på skärmen "Menu". 2 Välj "Language" (Språk) på skärmen "Screen Display Setting" (Inställning av skärm). 3 Ett bekräftelsefönster visas när man trycker på språkinställningsknappen. 4 Tryck på “Setting completed” (Inställning slutförd) för att gå tillbaka till skärmen “Screen Display Setting” (Inställning av skärm). PMML0332A rev.0 - 05/2015...
- Seite 755 Drift 5.3.9.3 Inställning av temperaturenheter 1 Välj "Screen Display Setting" (Inställning av skärm) på skärmen "Menu". 2 Välj “Temperature Unit” (Temperaturenhet) på skärmen “Screen Display Setting” (Inställning av skärm). 3 Välj grader i Celsius eller Fahrenheit med motsvarande knapp. Den valda knappen gulmarkeras. 4 Tryck på...
- Seite 756 Drift 5.3.10 Sammanlagd driftstid 5.3.10.1 Visas månadsvis 1 Välj "Accumulated Operation Time" (Sammanlagd driftstid) på skärmen "Menu". 2 Tryck på “Display by Month” (Visa månadsvis). 3 Tryck på knapparna “<” eller“>” för att välja målblock. 4 Tryck på knapparna “<” eller“>” för att välja målets år och månad. 5 Tryck på...
- Seite 757 5 Tryck på “Menu” för att gå tillbaka till menyskärmen. O B S ! • Sammanlagd driftstid för denna centrala styrenhet visas endast för referensändamål. Hitachi försäkrar inte noggrannheten för den nämnda sammanlagda driftstiden som referens. • “Thermo ON Time” kan även visas om motsvarande alternativ har valts i “Optional Function Setting” (Extra...
- Seite 758 Drift 5.3.11 Kontaktinformation 1 Välj "Contact Information" (Kontaktinformation) på skärmen "Menu". Följande information visas: Kontaktinformation (2 oberoende poster) Namn på block och grupp för senaste larm Senaste larmkod 2 Tryck på “Menu” för att gå tillbaka till menyskärmen. O B S ! •...
- Seite 759 Drift 5.3.12 Inställning av sommartid 1 Välj "Summer Time Setting" (Inaställning av sommartid) på skärmen "Menu". Följande information visas: 2 Välj funktionen för varje post. Färgen på den valda funktionen kommer då att ändras. 3 Tryck på “Setting Completed” (Inställning slutförd) för att bekräfta innehållet och gå tillbaka till menyskärmen. PMML0332A rev.0 - 05/2015...
- Seite 760 Drift 5.4 SERVICEMENY O B S ! • Denna kontakt är endast till för servicepersonen. Den ska därför inte användas. • Om denna kontakt används och servicemenyn visas på skärmen, klicka på “Back”. Skärmen går tillbaka till menyn. Punkter Innehåll Gruppregistrering De anslutna inomhusenheterna kontrolleras av den centrala styrenheten i samma H-LINK. Denna funktion (Group Register) används för att registrera grupper och block. Inställning av kontrollmönster Ställ in kontrollmönstret. (Setting of control patterns) Denna funktion används för att registrera huvudenheten i varje fjärrkontrollsgrupp.
- Seite 761 Drift 1 Tryck på "Menu" på skärmen "Monitor (All Groups)" (Övervaka (alla grupper)) eller "Monitor (Block)" (Övervaka (Block)). Övervaka (alla grupper) Övervaka (Block) 2 Skärmen "Menu" visas. 3 Tryck och håll in “Service Menu” (Servicemeny) minst 3 sekunder. Servicemeny visas. 4 Välj post i servicemenyn genom att trycka på...
-
Seite 762: Funktion
Drift 5.4.1 Gruppregistrering O B S ! Denna funktion beskrivs i detalj i avsnitt “5.1 Provkörning” då det är en obligatorisk post när man utför provkörningen. 5.4.2 Extra funktionsinställningar Denna funktion används för att ställa in och ändra funktioner för luftkonditioneringar och centrala styrenheter listade i följande tabell. Ställ in via "Monitor" "Menu" "Service Menu" "Optional Function Setting". Funktion Beskrivning Ställ in “Fixing Operation Mode”... - Seite 763 Drift 5.4.2.1 Inställning av luftkonditioneringens fjärrkontroll 1 Välj “Optional Function Setting” (Extra funktionsinställningar) på skärmen “Service Menu” (Servicemeny) när luftkonditioneringarna inte är i drift. 2 Välj "Remote control setting" (Inställning fjärrkontroll) på skärmen "Menu". Val kan inte göras när en eller flera luftkonditioneringar är i drift. 3 Välj mål för extrafunktion (alla grupper/block/grupp).
- Seite 764 Drift 5.4.2.2 Inställning av kontrollenhet 1 Välj “Optional Function Setting” (Extra funktionsinställningar) på skärmen “Service Menu” (Servicemeny) när luftkonditioneringarna inte är i drift. 2 Välj “Controller setting” (Inställning av kontrollenhet) på skärmen “Optional Function Setting” (Extra funktionsinställningar). 3 Välj inställningen för var och en av funktionerna efter behov. Den valda inställningen gulmarkeras. Om spärr av fjärrkontroll för OFF-tid När den är aktiv så...
- Seite 765 Drift 5.4.3 Undantagsinställning för Start/stopp Kommandon “RUN” och “STOP” accepteras inte när gruppen ställts till drift i “All groups” eller “All blocks”. Det är emellertid möjligt att ställa in en undantagsregel för följande kommandon eller kommandokombinationer, vilka påverkar specifika grupper: •...
- Seite 766 Drift 5.4.4 Inställning av extern ingång/utgång Funktionen extern ingång/utgång på den centrala styrenheten gör det möjligt att styra 4 ingångar och 2 utgångar. Välj "External Input/Output Setting" (Inställning av extern ingång/utgång) på skärmen "Optional Function Setting" (Extra funktionsinställningar) för att gå till inställningsmenyn. Ingång och utgång Anslutning Funktion...
- Seite 767 Drift 5.4.4.2 Extern utgångsfunktion 1 Utgång för "Alla start" Extern utgång för inomhusenhetens driftsignal till målgruppen. Driftsignalen sänds ut även om en inomhusenhet i målgruppen är i drift. 2 Larm för extern utgång Extern utgång för inomhusenheters larmsignal till målgruppen. Larmsignalen sänds ut även om en felfunktion i en inomhusenhet uppstår i målgruppen.
- Seite 768 Drift 5.4.4.4 Inställning av extern ingång 1 Välj "External Input/Output Setting" (Inställning av extern ingång/utgång) på servicemenyskärmen. Val är inte möjligt när luftkonditioneringar är i drift eller när kontakten för extern ingång är ON. 2 Välj mål (från ingång 1 till 4) för den externa ingången. 3 Välj den funktion som ska användas med den externa ingången.
- Seite 769 Drift Kapacitetskontroll utomhusenhet 5 Välj värdet utomhusenhetens kapacitet. Knappen för den valda kapaciteten gulmarkeras. 6 Använd knapparna på skärmens högra sida för att schemalägga utomhusenhetens kapacitetskontroll när ingen extern ingång används för detta syfte. • Välj “Enable” eller “Disable”. • Tryck på...
-
Seite 770: Övriga Inställningar
Drift Övriga inställningar 10 Välj mål för kontroll av extern ingång. (Alla grupper/Block/Grupper). • Tryck på knappen för en grupp för att skifta dess status. • Tryck på knappen för ett block för att ändra statusen för alla grupper i blocket. •... - Seite 771 Drift 5.4.5 Knappinställning Knappinställningar används för att välja om man vill visa eller dölja vissa driftknappar och på så sätt begränsa driften. Ställ in via "Monitor" "Menu" "Service Menu" "Button Setting". 1 Välj "Button Setting" (Knappinställning) på skärmen för “Service Menu” (Servicemeny). 2 Välj funktionen för varje post.
- Seite 772 Drift 5.4.6 Registrera kontaktinformation Denna funktion används för att redigera eller registrera kontaktinformation. Ställ in via "Monitor" "Menu" "Service Menu" "Contact Information Register". 1 Välj “Contact Information Register” (Registrera kontaktinformation) på skärmen “Service Menu” (Servicemeny). 2 Tryck på knapparna “Name Edition” eller “TEL.No.Edition” (2) för att registrera informationen för varje fält i “Contact Information 1”...
- Seite 773 Drift 5.4.7 Memo 5.4.7.1 Registrera memo 1 Välj “Memo” på skärmen “Service Menu” (Servicemeny). 2 Välj mål som ska registreras. Inmatningsskärmen visas. 3 Välj ett registrerat tecken från listan. 4 Mata in tecken. Tryck på “Delete” (Radera) för att radera tecknet till vänster om markören. Memo, maximal längd 52 tecken. 5 Tryck på...
- Seite 774 Drift 5.4.7.2 Radera memo 1 Välj “Memo” på skärmen “Service Menu” (Servicemeny). 2 Tryck på “Delete Memo” (Radera Memo). 3 Välj memo som ska raderas. • Tryck på en Memo-knapp för att ändra dess status. • Det går att välja flera memos. •...
-
Seite 775: Återställa Inställningar
Drift 5.4.8 Återställa inställningar 1 Välj "Restore Settings" (Återställa inställning) på skärmen "Service Menu" (Servicemeny). O B S ! Funktionen kan inte väljas när drift från fjärrkontrollen är spärrad, en extern ingång är ställd till ON eller kapacitetskontrollen för en utomhusenhet inte har annullerats. Annullera dessa parametrar innan “Restore settings” (Återställa inställning). 2 Tryck på "Yes" på bekräftelseskärmen. O B S ! Om man trycker på "No" så går skärmen tillbaka till "Service Menu" (Servicemeny). 3 En andra bekräftelseskärm visas. Tryck på “Yes” för att återställa inställningen. Skärmen ändras efter några sekunder och en kontroll av systemanslutningar påbörjas. - Seite 776 Drift 5.4.9 Kontrollera anslutning 1 Välj “Checking Connection” (Kontrollera anslutning) på skärmen “Service Menu” (Servicemeny). O B S ! Denna funktion kan inte väljas när en eller flera luftkonditioneringar är i drift eller om en externa ingångssignal ges till extern ingångskontakt 1 eller 2. 2 Tryck på "Yes" på bekräftelseskärmen. O B S ! Om man trycker på "No" så går skärmen tillbaka till "Service Menu" (Servicemeny). Typ av uppdatering av anslutningsinformationen är beroende av följande inställning: • Gå vidare till steg 3 för att uppdatera anslutningsinformationen samtidigt som man behåller inställningar för gruppregister och schemaläggning etc. (3) • Gå vidare till steg 7 för att påbörja anslutningskontroll för varje inställning. (Samma som för återställning av inställning). (7) Behålla inställningar 3 Tryck på "Yes" på bekräftelseskärmen för att behålla inställningar. 4 När anslutningskontrollen är avslutad så...
- Seite 777 Drift 6 Ytterligare en bekräftelseskärm visas. Kontrollera luftkonditioneringarna och tryck på “Yes”. O B S ! • Om man trycker på "No" så går skärmen tillbaka till "Service Menu" (Servicemeny). • Funktionen kan inte väljas när drift från fjärrkontrollen är spärrad, en extern ingång är ställd till ON eller kapacitetskontrollen för en utomhusenhet inte har annullerats. Annullera dessa parametrar innan inställningarna återställs. Förkasta inställningarna 7 Tryck på "No" på bekräftelseskärmen. 8 Bekräftelsefönstret för initialisering visas. Tryck på “Yes” för att initialisera alla inställningar och starta anslutningskontroll. Det går inte att välja “Yes”...
- Seite 778 Drift 5.4.10 Larmhistorik Denna funktion används för att spara tiden för larmet, vilket enhet det uppstod i, samt relevant larmkod. Denna funktion kan även användas för att radera larmhistoriken. Ställ in via "Monitor" "Menu" "Service Menu" "Alarm History". 1 Välj "Alarm History" (Larmhistorik) på skärmen "Service Menu" (Servicemeny). 2 Skärmen “Alarm History”...
- Seite 779 Vänligen kontakta återförsäljaren. Visas när funktionen för behovsstyrning är aktiverad av en extern ingångsfunktion. Ikonen Behovsstyrt läge blinkar under behovsstyrningen. Kontakta er återförsäljare eller Hitachi kundservice för mer information. Visas när schema för extra kapacitetskontroll på utomhusenheter är aktiverat och blinkar när Behov (schemaläggning)
- Seite 780 I dessa fall så kan man även välja gruppen med onormala förhållanden för visning genom att trycka på knapparna “<” eller “>” i fönstret “Alarm”. Kontakta er återförsäljare eller Hitachi kundservice för mer information efter att ha kontrollerat indikationerna på...
-
Seite 781: Underhåll
Felsökning 6 FELSÖKNING Kontrollera följande tabell innan ni kontaktar en återförsäljare för hjälp. Kondition Orsak • Kontrollera att nätsladden är inkopplad i vägguttaget. Indikationer på pekskärmen visas inte. • Kontrollera att strömmen är PÅ. • Pekskärmens går automatiskt till viloläge om den inte används under en angiven Pekskärmen befinner sig i viloläge. -
Seite 783: Συνοψη Ασφαλειασ
Πριν από τις εργασίες εγκατάστασης, βεβαιωθείτε ότι το θεμέλιο είναι επίπεδο, στο ίδιο επίπεδο και αρκετά δυνατό και κατόπιν στερεώστε με ασφάλεια τη μονάδα. Αν το θεμέλιο δεν είναι αρκετά δυνατό, μπορεί να προκαλέσει τραυματισμούς από την πτώση του προϊόντος, ηλεκτροπληξία ή πυρκαγιά. • ΜΗΝ εγκαθιστάτε τη μονάδα σε χώρο όπου ανιχνεύεται παραγωγή, παροχή, παραμονή ή διαρροή εύφλεκτων αερίων. • ΜΗΝ εκτελείτε τις εργασίες εγκατάστασης και τις συνδέσεις των ηλεκτρικών καλωδίων μόνοι σας. Επικοινωνήστε με τον αντιπρόσωπο ή τον έμπορο της HITACHI και ζητήστε έναν τεχνικό, για να διεξαγάγει τις εργασίες εγκατάστασης και τις συνδέσεις των ηλεκτρικών καλωδίων. • Εκτελέστε τις ηλεκτρικές εργασίες σύμφωνα με το εγχειρίδιο εγκατάστασης και όλους τους σχετικούς κανονισμούς και πρότυπα. Αν δεν ακολουθήστε τις οδηγίες, μπορεί να προκληθεί ηλεκτροπληξία και πυρκαγιά λόγω της ανεπαρκούς χωρητικότητας και της ακατάλληλης απόδοσης. • Χρησιμοποιήστε τα ειδικά καλώδια για τη σύνδεση μεταξύ της εσωτερικής μονάδας και του κεντρικού σταθμού. Αν επιλέξετε λάθος... -
Seite 784: Κυρια Χαρακτηριστικα
Κύρια χαρακτηριστικά 2 ΚΥΡΙΑ ΧΑΡΑΚΤΗΡΙΣΤΙΚΑ Αυτό το κεντρικό χειριστήριο (PSC-A32MN) συνδέεται στο H-LINK και χρησιμοποιείται για τον κεντρικό έλεγχο και την παρακολούθηση των κλιματιστικών. Οι παρακάτω λειτουργίες είναι διαθέσιμες για όλες τις εσωτερικές μονάδες συνδεδεμένες με το κεντρικό χειριστήριο. 1 Λειτουργία/διακοπή, αλλαγή της κατάστασης λειτουργίας, έλεγχος της ταχύτητας ανεμιστήρα, έλεγχος της κατεύθυνσης κίνησης των... -
Seite 785: Εγκατασταση
Καλώδιο ΠΡΟΔ: 0,75 έως 1,25 mm Καλώδιο H-LINK (για τον έλεγχο) Συνιστώμενο καλώδιο: JKEPV-S, JKEV-S, CVV-S, CVV, 600 V VCT * Τα καλώδια που σας προτείνουμε είναι της Hitachi Cable, Ltd. 3.2 ΛΙΣΤΑ ΕΞΑΡΤΗΜΑΤΩΝ Απομακρύνετε τη συσκευασία της μονάδας και ελέγξτε ότι: •... - Seite 786 Εγκατασταση 3.3 ΠΕΡΙΓΡΑΦΗ ΤΩΝ ΕΞΑΡΤΗΜΑΤΩΝ Έγχρωμη οθόνη αφής LCD Για τον έλεγχο και την παρακολούθηση των μονάδων από την οθόνη αφής. Λειτουργεί με ένα στύλο για οθόνη αφής (εξάρτημα). Αν για ένα συγκεκριμένο χρονικό διάστημα δεν αγγίζετε την οθόνη αφής, αυτή Μπροστινή...
- Seite 787 Εγκατασταση 3.4 ΓΕΝΙΚΑ ΣΤΟΙΧΕΙΑ Μοντέλο PSC-A32MN Εξωτερικές διαστάσεις 140 × 120 × 22 + 52,7 (mm) <W x H x D + (Ενσωματωμένο μέρος)> Καθαρό βάρος 0,5 kg (περίπου) Θέση εγκατάστασης Εσωτερική Τρόπος εγκατάστασης Εντοιχιζόμενο με κουτί διακοπτών JIS για 2 διακόπτες (με κάλυμμα) (JIS C 8340). Συνδεδεμένες...
- Seite 788 Εγκατασταση 3.6 ΧΩΡΟΣ ΕΓΚΑΤΑΣΤΑΣΗΣ Διατηρήστε τους παρακάτω χώρους για την εγκατάστασης του κεντρικού χειριστηρίου. (Μονάδες: mm) 52,7 Αφήστε ελεύθερες τις περιοχές γύρω από τη συσκευή, οι οποίες είναι με ελαφριά απόχρωση “ ” στην εικόνα. Όταν τοποθετούνται δύο ή περισσότερα κεντρικά χειριστήρια το ένα δίπλα στο άλλο, πρέπει να διατηρούνται οι παρακάτω αποστάσεις...
- Seite 789 Εγκατασταση 3 Συνδέστε το καλώδιο στον πίνακα ακροδεκτών του κεντρικού χειριστηρίου. Πίνακας Χρήση Διαδικασία σύνδεσης ακροδεκτών Βίδες M3 στον ακροδέκτη Για τροφοδοσία ρεύματος Στρογγυλή σύνδεση ακροδέκτη Για τη μετάδοση H-LINK Ροπή σύσφιξης 0,5 N·m Σύνδεσμος 3 ακίδων Για εξωτερική είσοδο/ Εισάγετε...
-
Seite 790: Ηλεκτρικη Καλωδιωση
Συνιστώμενο καλώδιο καλωδίωσης καλωδίου 600 V CV, CCV, CEV Καλώδιο τροφοδοσίας AC 100 ~ 240 V 1,25 έως 2 mm (Καλώδιο Hitachi) Καλωδίωση γείωσης H-LINK (καλώδιο του ελέγχου) DC 5 V ≤1000 m 0,75 έως 1,25 mm JKPEV-S, JKEV-S, CVV-S, CVV, 600 V VCT Καλωδίωση... -
Seite 791: Εργοστασιακή Ρύθμιση
Ηλεκτρικη καλωδιωση • Εγκαταστήστε ένα διακόπτη διαρροής έντασης, μια ασφάλεια και έναν αυτόματο διακόπτη στη γραμμή ηλεκτρικής τροφοδοσίας για κάθε εξωτερική μονάδα. Αν δεν τοποθετηθεί υπάρχει κίνδυνος ηλεκτροπληξίας ή φωτιάς. • Αυτό το μοντέλο είναι μονάδα μονοφασικής παροχής (1~, AC 100-240V, 50/60Hz). Μην συνδέετε σε τριφασική παροχή. Μπορεί να προκληθεί βλάβη. Κ Ι Ν ΔΥ Ν Ο Σ • Απενεργοποιείστε τον κύριο διακόπτη ηλεκτρικής τροφοδοσίας για τις εσωτερικές μονάδες, τις εξωτερικές μονάδες και τους κεντρικούς σταθμούς προτού εκτελέσετε τις εργασίες καλωδίωσης. Σε διαφορετική περίπτωση, μπορεί να προκληθεί φωτιά, ηλεκτροπληξία ή βλάβη στη συσκευή. • Μην χρησιμοποιείτε καλώδια πιο ελαφριά από το κανονικό εύκαμπτο καλώδιο με μανδύα από πολυχρωροπρένιο (κωδικός H05RN-F). Διαδικασια τησ ρυθμισησ των διακοπτων Η... - Seite 792 Ηλεκτρικη καλωδιωση Ρύθμιση του DSW1 Όνομα Μοντέλο DSW1 DSW2 DSW3 DSW4 Κεντρικό χειριστήριο EZ PSC-A64GT Κεντρικό χειριστήριο μίνι PSC-A32MN Κεντρικό χειριστήριο PSC-A64S Κεντρικό χειριστήριο για ON/OFF PSC-A16RS Συνδυασμός του HC-A(8/64)MB Μη συμβατό Άλλα κεντρικά PSC-A32MN με άλλα χειριστήρια HC-A16KNX Μη συμβατό κεντρικά...
-
Seite 793: Λειτουργια
Λειτουργια 5 ΛΕΙΤΟΥΡΓΙΑ 5.1 ΕΛΕΓΧΟΣ ΛΕΙΤΟΥΡΓΙΑΣ Το παρακάτω διάγραμμα δείχνει της διαδικασία για τον έλεγχο λειτουργίας. Τα στοιχεία που είναι σημειωμένα με φαρδύ πλαίσιο ) είναι υποχρεωτικά στοιχεία. Τα υπόλοιπα στοιχεία που δεν απαιτούνται ειδικά για τη διαδικασία ελέγχου λειτουργίας αλλά είναι προαιρετικά, αναφέρονται στη συγκεκριμένη... - Seite 794 Λειτουργια Λίστα των στοιχείων Στοιχείο Λειτουργία Ρύθμιση της γλώσσας Η λειτουργία αυτή χρησιμοποιείται για την επιλογή της γλώσσας. (Language Setting) Ρύθμιση της ημερομηνίας και της ώρας Η λειτουργία αυτή χρησιμοποιείται για τη ρύθμιση της ημερομηνίας και της ώρας. (Date and Time Settings) Καταχώριση...
- Seite 795 Λειτουργια Στοιχείο Λειτουργία Το κεντρικό χειριστήριο έχει δύο ακροδέκτες της εξωτερικής εισόδου και δύο της εξόδου. Αυτοί οι Ρύθμιση της εξωτερικής ακροδέκτες χρησιμοποιούνται για τις λειτουργίες “All Groups Run/Stop” (Λειτουργία/διακοπή όλων των εισόδου/εξόδου ομάδων) και “Demand Function” (Λειτουργία ζήτησης) για τα συνδεδεμένα κλιματιστικά. Οι ακροδέκτες (External Input/Output Setting) της...
- Seite 796 Λειτουργια 5.1.1 Ενεργοποίηση Ενεργοποιείστε την τροφοδοσία ηλεκτρικού ρεύματος των κλιματιστικών. Για προστασία του συμπιεστή, η τροφοδοσία ηλεκτρικού ρεύματος πρέπει να ενεργοποιηθεί 12 ώρες προτού εκκινηθεί τη λειτουργία. Μην αποσυνδέετε την τροφοδοσία ηλεκτρικού ρεύματος κατά τη διάρκεια των περιόδων χρήσης των κλιματιστικών. Εκτελέστε...
- Seite 797 Λειτουργια 5.1.4 Ρύθμιση ημέρα/ώρα Μετά τη ρύθμιση της μονάδας της θερμοκρασίας, εμφανίζεται η οθόνη για τη ρύθμιση της ημέρας και της ώρας όπως δείχνει η εικόνα. Πατήστε ρύθμιση (Set) στην οθόνη αφής και ρυθμίστε την ημερομηνία και την ώρα σύμφωνα με την αναφερόμενη διαδικασία. Για...
- Seite 798 Λειτουργια 5.1.6 Ρύθμιση των υποδειγμάτων ελέγχου Μετά την προσαρμογή των ρυθμίσεων της ημέρας και της ώρας, εμφανίζεται η οθόνη των υποδειγμάτων του ελέγχου. Πατήστε "Set" (ρύθμιση) για να συνεχίσετε με τη ρύθμιση των υποδειγμάτων του ελέγχου. Όταν πατηθεί ένα κουμπί του υποδείγματος, αυτό επισημαίνεται με πορτοκαλί περίγραμμα. Παρακάτω επεξηγείται η διαδικασία για ρύθμιση...
- Seite 799 Λειτουργια 5.1.7 Καταχώριση ομάδας Καταχωρίστε τις εσωτερικές μονάδες που συνδέονται στις ομάδες και μονάδες του κεντρικού χειριστηρίου. 5.1.7.1 Ορισμοί • Ομάδα: Ο ελάχιστο αριθμός των μονάδων που ελέγχονται από το κεντρικό χειριστήριο. Ένα τηλεχειριστήριο θεωρείται ως μια ομάδα και εφαρμόζεται η ίδια ρύθμιση σε ολόκληρη την ομάδα. Με ένα κεντρικό χειριστήριο ελέγχονται έως 32 ομάδες οργανωμένες...
- Seite 800 Λειτουργια 5.1.7.3 Καταχώριση της δευτερεύουσας μονάδας • Μπορούν να καταχωρηθούν έως 15 δευτερεύουσες μονάδες στην ίδια ομάδα απομακρυσμένου ελέγχου με μια κύρια μονάδα (αν εφαρμόζεται το υπόδειγμα ελέγχου των 2 μονάδων με 16 ομάδες κάθε μία). • Οι εσωτερικές μονάδες χωρίς τηλεχειριστήριο δεν μπορούν να καταχωρηθούν ως δευτερεύουσες μονάδες. •...
- Seite 801 Λειτουργια 3 Επιλέξτε την ομάδα στην οποία βρίσκεται η μονάδα που θέλετε να καταχωρηθεί ως κύρια. • Πατήστε “<” και “>” πάνω αριστερά στην οθόνη αφής για να δείτε τη μονάδα. • Οι αριθμοί των κουμπιών υποδεικνύουν τον αριθμό της μονάδας και της ομάδας. •...
- Seite 802 Λειτουργια Πατήστε “<” και “>” πάνω αριστερά στην οθόνη αφής για να συνεχίσετε με τη ρύθμιση άλλης μονάδας, ή πατήστε "Setting complet." (ολοκλήρωση ρύθμισης) για έξοδο. 6 Πατήστε "Setting complet." (ολοκλήρωση ρύθμισης) για καταχώρηση της ομάδας και επιστροφή στην οθόνη της καταχώρησης ομάδας.
- Seite 803 Λειτουργια 2 Επιλέξτε “Sub Unit Register” (Καταχώριση δευτερεύουσας μονάδας) στην οθόνη “Group Register" (Καταχώριση ομάδας). 3 Επιλέξτε την ομάδα στην οποία βρίσκεται η μονάδα που θέλετε να καταχωρήσετε ως δευτερεύουσα μονάδα. • Πατήστε “<” και “>” πάνω αριστερά στην οθόνη αφής για να δείτε τη μονάδα. •...
- Seite 804 Λειτουργια Πατήστε “<” και “>” πάνω αριστερά στην οθόνη αφής για να συνεχίσετε με τη ρύθμιση άλλης μονάδας, ή πατήστε "Setting complet." (ολοκλήρωση ρύθμισης) για έξοδο. 6 Πατήστε "Setting complet." (ολοκλήρωση ρύθμισης) στο "Group Register (Sub Unit Register)" (Καταχώριση ομάδας (Καταχώριση δευτερεύουσας...
- Seite 805 Λειτουργια 5.1.7.6 Ακύρωση της καταχώρησης μιας ομάδας 1 Επιλέξτε “Group Register” (Καταχώριση ομάδας) στην οθόνη “Service Menu" (Μενού σέρβις). Συμβουλευτείτε την ενότητα “5.1.7.4 Καταχώρηση μιας ομάδας (κύρια μονάδα)”. Σ Η Μ Ε Ι Ω Σ Η Αν το σήμα εισόδου λαμβάνεται στον ακροδέκτη 1 ή 2, δεν μπορεί να γίνει επιλογή αυτής της λειτουργίας. 2 Επιλέξτε “Main Unit Register (or Sub Unit Register)” (Καταχώριση κύριας μονάδας ή Καταχώριση δευτερεύουσας μονάδας) στην οθόνη...
- Seite 806 Λειτουργια 5.1.7.7 Έλεγχος καταχώρησης της ομάδας (έλεγχος καταχώρησης της κύριας μονάδας) 1 Επιλέξτε "Group Register " (Καταχώριση ομάδας) στην οθόνη "Service Menu" (Μενού σέρβις). Συμβουλευτείτε την ενότητα “5.1.7.4 Καταχώρηση μιας ομάδας (κύρια μονάδα)”. Σ Η Μ Ε Ι Ω Σ Η Αν το σήμα εισόδου λαμβάνεται στον ακροδέκτη 1 ή 2, δεν μπορεί να γίνει επιλογή αυτής της λειτουργίας. 2 Επιλέξτε “Main Unit Register (or Sub Unit Register)” (Καταχώριση κύριας μονάδας ή Καταχώριση δευτερεύουσας μονάδας) στην οθόνη...
- Seite 807 Λειτουργια 5.1.7.8 Έλεγχος καταχώρησης της ομάδας (έλεγχος των στοιχείων καταχώρησης) 1 Επιλέξτε "Group Register " (Καταχώριση ομάδας) στην οθόνη "Service Menu" (Μενού σέρβις). Συμβουλευτείτε την ενότητα “5.1.7.4 Καταχώρηση μιας ομάδας (κύρια μονάδα)”. Σ Η Μ Ε Ι Ω Σ Η Αν το σήμα εισόδου λαμβάνεται στον ακροδέκτη 1 ή 2, δεν μπορεί να γίνει επιλογή αυτής της λειτουργίας. 2 Επιλέξτε "Display list of registers" (εμφάνιση της λίστας καταχωρήσεων) στην οθόνη καταχώρηση ομάδας. 3 Επιλέξτε...
- Seite 808 Λειτουργια 5.2 ΚΥΡΙΑ ΟΘΟΝΗ 5.2.1 Κύρια οθόνη "Οθόνη (όλες οι ομάδες)" Κουμπί της μονάδας Κατάσταση μονάδας Τρέχουσα οθόνη Αλλάζει την απεικόνιση της οθόνης σε μονάδα Υποδεικνύει την κατάσταση της Υποδεικνύει την τρέχουσα οθόνη (Block) οθόνη (μονάδα). μονάδας με εικονίδια όπως το σήμα (Όλες...
- Seite 809 Λειτουργια "Οθόνη (μονάδα)" Καρτέλα της μονάδας Αλλάζει την απεικόνιση της οθόνης σε "Block" ή "All Groups". Κατάσταση μονάδας Τρέχουσα οθόνη Κουμπί της ομάδας Υποδεικνύει την κατάσταση της Υποδεικνύει την τρέχουσα Υποδεικνύει την κατάσταση λειτουργίας μονάδας με εικονίδια όπως το οθόνη...
- Seite 810 Λειτουργια 5.2.2 Ρυθμίσεις ομάδας και μονάδας 5.2.2.1 Εμφάνιση όλων των ομάδων 1 Πατήστε “All Groups” (όλες οι ομάδες) στην οθόνη αφής. Αν έχει καταχωρηθεί μόνο μια μονάδα, η καρτέλα (1), "όλες οι ομάδες", δεν εμφανίζεται. (1)* 2 Όλες οι ομάδες εμφανίζονται (όλες οι εσωτερικές μονάδες που συνδέονται στο κεντρικό χειριστήριο). Η κατάσταση λειτουργίας της...
- Seite 811 Λειτουργια 5.2.2.2 Εμφάνιση συγκεκριμένης μονάδας 1 Επιλέξτε τη μονάδα από την "Monitor (All Groups)" (οθόνη (όλες οι ομάδες)) ή "Monitor (Block)" (οθόνη (μονάδα)). Οθόνη (όλες οι ομάδες) Οθόνη (μονάδα) 2 Εμφανίζονται οι ομάδες της επιλεγόμενης μονάδας. Η κατάσταση λειτουργίας της κάθε ομάδας υποδεικνύεται με το χρώμα της ομάδας, ως...
- Seite 812 Λειτουργια 5.2.2.3 Ταυτόχρονη λειτουργία/διακοπή για όλες τις ομάδες 1 Πατήστε “All Groups” (όλες οι ομάδες) στην οθόνη αφής. 2 Πατήστε "Run all gr." (εκκίνηση όλων των ομάδ.) για να σταματήσουν ταυτόχρονα όλες οι ομάδες. Πατήστε "Stop all gr." (διακοπή όλων των ομάδ.) για να σταματήσουν ταυτόχρονα όλες οι ομάδες. 3 Εμφανίζεται...
- Seite 813 Λειτουργια 5.2.2.4 Ταυτόχρονη λειτουργία/διακοπή για κάθε μονάδα 1 Επιλέξτε την ομάδα που θέλετε να ρυθμίσετε την ταυτόχρονη λειτουργία/διακοπή στην οθόνη αφής. 2 Πατήστε "Run by Block" για να λειτουργήσουν ταυτόχρονα όλες οι ομάδες στην επιλεγόμενη μονάδα. Πατήστε "Stop by Block" για να διακοπούν ταυτόχρονα όλες οι ομάδες στην επιλεγόμενη μονάδα. 3 Εμφανίζεται...
- Seite 814 Λειτουργια 5.2.2.5 Λειτουργία/διακοπή για κάθε ομάδα Ελέγξτε την κατάσταση ελέγχου προτού πραγματοποιήσετε τη ρύθμιση. Ο τρόπος ελέγχου διαφέρει ανάλογα με τη ρύθμιση της κατάστασης ελέγχου, "Normal" (κανονικό) ή "Run/Stop Only" (Λειτουργία/ διακοπή μόνο). Κατάσταση λειτουργία/διακοπή για κάθε ομάδα (Κατάσταση ελέγχου: Κανονική) 1 Επιλέξτε...
- Seite 815 Λειτουργια Κατάσταση λειτουργία/διακοπή για κάθε ομάδα (Κατάσταση ελέγχου: Λειτουργία/διακοπή μόνο) Οθόνη (όλες οι ομάδες) 1 Επιλέξτε την ομάδα στην "Monitor (All Groups)" (οθόνη (όλες οι ομάδες)) στο "Run/Stop Only" (Λειτουργία/διακοπή μόνο). 2 Η κατάσταση λειτουργίας της επιλεγόμενης ομάδας αλλάζει εκ περιτροπής μεταξύ λειτουργίας και διακοπής όταν πατηθεί το κουμπί...
-
Seite 816: Κατάσταση Λειτουργίας
Λειτουργια 5.2.3 Ρυθμιση των κυριων παραμετρων 5.2.3.1 Κατάσταση λειτουργίας 1 Επιλέξτε την ομάδα που θέλετε να αλλάξετε τις ρυθμίσεις της κατάστασης λειτουργίας στην "Monitor (All Groups)" (οθόνη (όλες οι ομάδες)) ή "Monitor (Block)" (οθόνη (μονάδα)). Εμφανίζονται οι ρυθμίσεις της επιλεγόμενης ομάδας. Οθόνη... - Seite 817 Λειτουργια 5.2.3.2 Ταχύτητας του ανεμιστήρα 1 Επιλέξτε την ομάδα που θέλετε να αλλάξετε τις ρυθμίσεις της ταχύτητας του ανεμιστήρα στην "Monitor (All Groups)" (οθόνη (όλες οι ομάδες)) ή "Monitor (Block)" (οθόνη (μονάδα)). Εμφανίζονται οι ρυθμίσεις της επιλεγόμενης ομάδας. Οθόνη (όλες οι ομάδες) Οθόνη...
- Seite 818 Λειτουργια 5.2.3.3 Κατεύθυνση της κίνησης περσίδων 1 Επιλέξτε την ομάδα που θέλετε για να αλλάξετε την κατεύθυνσης της κίνηση περσίδων στην "Monitor (All Groups)" (οθόνη (όλες οι ομάδες)) ή "Monitor (Block)" (οθόνη (μονάδα)). Εμφανίζονται οι ρυθμίσεις της επιλεγόμενης ομάδας. Οθόνη (όλες οι ομάδες) Οθόνη...
-
Seite 819: Ρύθμιση Θερμοκρασίας
Λειτουργια 5.2.3.4 Ρύθμιση θερμοκρασίας 1 Επιλέξτε την ομάδα που θέλετε να αλλάξετε την ρύθμιση θερμοκρασίας στην "Monitor (All Groups)" (οθόνη (όλες οι ομάδες)) ή "Monitor (Block)" (οθόνη (μονάδα)). Εμφανίζονται οι ρυθμίσεις της επιλεγόμενης ομάδας. Οθόνη (όλες οι ομάδες) Οθόνη (μονάδα) 2 Πατώντας... - Seite 820 Λειτουργια 5.2.3.5 Λειτουργία έγκρισης/απαγόρευσης από το τηλεχειριστήριο Η λειτουργία αυτή χρησιμοποιείται για απαγόρευση της λειτουργίας μέσω του τηλεχειριστηρίου (RCS). Αν απαγορεύεται η λειτουργία το τηλεχειριστήριου (για ένα / όλα τα στοιχεία), ο έλεγχος του επιλεγόμενου στοιχείου δεν είναι διαθέσιμος. Μπορείτε να επιλέξτε τα εξής στοιχεία: Λειτουργία/διακοπή (OPERAT.), κατάσταση λειτουργίας (OPERAT. MODE), ταχύτητα...
- Seite 821 Λειτουργια 3 Πατήστε "Monitor screen" (οθόνη) για επιστροφή στην οθόνη. Σ Η Μ Ε Ι Ω Σ Η • Πατώντας “<” ή “>” στην οθόνη με τις ρυθμίσεις, μπορείτε να αλλάξετε την κατάσταση του τηλεχειριστηρίου, έγκριση/απαγόρευση, σε άλλη ομάδα της ίδιας μονάδας. • Απαγορευμένος έλεγχος (Λειτουργία/διακοπή μόνο): Σε περίπτωση "Enable" (ενεργοποίησης), κάθε αλλαγή ρύθμισης είναι για όλες τις ομάδες ή μονάδες. Δεν μπορεί να αλλάξει η ρύθμιση της κάθε ομάδας. • Παρόλο που το τηλεχειριστήριο ρυθμίζεται στην "Prohibit." (απαγόρευση), μπορείτε να το χρησιμοποιήσετε για διακοπή της λειτουργίας. Επίσης, μπορείτε να χρησιμοποιήσετε το τηλεχειριστήριο για την επανεκκίνηση. Ωστόσο, η λειτουργίας διακοπής χρησιμοποιείται μόνο σε περίπτωση εκτάκτου ανάγκης. Μην το χρησιμοποιείτε σε κανονική λειτουργία.
- Seite 822 Λειτουργια 5.3 ΜΕΝΟΥ Ο παρακάτω πίνακας δείχνει τα στοιχεία του μενού και τις λειτουργίες τους. Στοιχείο Λειτουργία Η λειτουργία αυτή χρησιμοποιείται για την επανεκκίνηση του σήματος φίλτρου των εσωτερικών ομάδων στις Επανεκκίνηση του σήματος οποίες έχει προκύψει. φίλτρου Ανεξάρτητα από την εμφάνιση του σήματος φίλτρου, μπορεί να επανεκκινηθεί ο χρόνος που απεικονίζεται το (Filter Sign Reset) σήμα...
- Seite 823 Λειτουργια 5.3.1 Απεικόνιση της οθόνης μενού Στο μενού υπάρχουν τα στοιχεία ρύθμισης για την εσωτερική μονάδα και το κεντρικό χειριστήριο. 1 Πατήστε "Menu" (μενού) στην "Monitor (All Groups)" (οθόνη (όλες οι ομάδες)) ή την "Monitor (Block)" (οθόνη (μονάδα)). Οθόνη (όλες οι ομάδες) Οθόνη...
- Seite 824 Λειτουργια 5.3.2 Επανεκκίνηση του σήματος φίλτρου 5.3.2.1 Επανεκκίνηση του σήματος φίλτρου 1 Επιλέξτε "Filter Sign Reset" (Επανεκκίνηση του σήματος φίλτρου) στο "Menu" (μενού). (Αυτό είναι διαθέσιμο μόνο όταν εμφανίζεται το σήμα φίλτρου). 2 Επιλέξτε την ομάδα που θέλετε να επανεκκινήσετε το σήμα φίλτρου. •...
- Seite 825 Λειτουργια 5.3.2.2 Επανεκκίνηση του χρόνου λειτουργίας του φίλτρου 1 Επιλέξτε "Filter Sign Reset" (Επανεκκίνηση του σήματος φίλτρου) στο "Menu" (μενού). (Αυτό είναι διαθέσιμο μόνο όταν εμφανίζεται το σήμα φίλτρου). 2 Επιλέξτε την ομάδα που θέλετε να επανεκκινήσετε το χρόνου λειτουργίας του φίλτρου. •...
-
Seite 826: Ρύθμιση Του Χρονοδιακόπτη
Λειτουργια 5.3.3 Ρύθμιση του προγράμματος Η λειτουργία αυτή χρησιμοποιείται για τη λειτουργία χρονοδιακόπτη. Μπορείτε να ρυθμίσετε ένα πρόγραμμα για μια μονάδα ή για κάθε ομάδα. Είναι επίσης διαθέσιμη η ρύθμιση διακοπών ανεξάρτητα από το πρόγραμμα. 5.3.3.1 Ρύθμιση του χρονοδιακόπτη Ρύθμιση... - Seite 827 Λειτουργια 7 Πατήστε "Setting completed" (Oλοκλήρωση ρύθμισης) για επιβεβαίωση της ρύθμισης. Αν πατήσετε "No", διαγράφονται οι αλλαγές, και η οθόνη επιστρέφει στην οθόνη των ρυθμίσεων του προγράμματος. • Επιστρέψτε στο βήμα (5) για να συνεχίσετε με τη πρόσθεση ρυθμίσεων για την ίδια ημέρα της εβδομάδας. •...
- Seite 828 Λειτουργια Αντιγραφή των ρυθμίσεων του προγράμματος για άλλες ημέρες της εβδομάδας 1 Επιλέξτε "Schedule Setting" (Ρύθμιση του προγράμματος) στο μενού. 2 Επιλέξτε "Schedule Timer Setting" (Ρύθμιση του χρονοδιακόπτη) στην οθόνη "Schedule Setting" (Ρύθμιση του προγράμματος). 3 Επιλέξτε όλες τις ομάδες, τη μονάδα ή την ομάδα. 4 Πατήστε...
- Seite 829 Λειτουργια Αντιγραφή των ρυθμίσεων του προγράμματος σε κάθε ομάδα 1 Επιλέξτε "Schedule Setting" (Ρύθμιση του προγράμματος) στο μενού. 2 Επιλέξτε "Schedule Timer Setting" (Ρύθμιση του χρονοδιακόπτη) στην οθόνη "Schedule Setting" (Ρύθμιση του προγράμματος). 3 Πατήστε "Copy Settings" (αντιγραφή ρυθμίσεων). 4 Επιλέξτε...
- Seite 830 Λειτουργια Διαγραφή των ρυθμίσεων του προγράμματος ανά στοιχείο 1 Επιλέξτε "Schedule Settings" (Ρύθμιση του προγράμματος) στο μενού. 2 Επιλέξτε "Schedule Timer Setting" (Ρύθμιση του χρονοδιακόπτη) στην οθόνη ρύθμιση προγράμματος. 3 Επιλέξτε όλες τις ομάδες, τη μονάδα ή την ομάδα. 4 Πατήστε...
- Seite 831 Λειτουργια Διαγραφή των ρυθμίσεων του προγράμματος για κάθε ομάδα 1 Επιλέξτε "Schedule Settings" (Ρύθμιση του προγράμματος) στο μενού. 2 Επιλέξτε "Schedule Timer Setting" (Ρύθμιση του χρονοδιακόπτη) στην οθόνη ρύθμιση προγράμματος. 3 Πατήστε "Delete Settings" (διαγραφή ρύθμισης). 4 Επιλέξτε τις ομάδες ή μονάδες που θέλετε να διαγράψετε τις ρυθμίσεις. •...
- Seite 832 Λειτουργια 5.3.3.2 Ρύθμιση των διακοπών για αναστολή της λειτουργίας 1 Επιλέξτε "Schedule Settings" (Ρύθμιση του προγράμματος) στο μενού. 2 Επιλέξτε "Holiday Setting" (Ρύθμιση των διακοπών) στην οθόνη ρυθμίσεις προγράμματος. 3 Επιλέξτε όλες τις ομάδες, τη μονάδα ή την ομάδα. Εμφανίζεται το ημερολόγιο που αντιστοιχεί στην επιλογή. •...
- Seite 833 Λειτουργια 5.3.3.3 Ρύθμιση του χρονοδιακόπτη για ενεργοποίηση/απενεργοποίηση 1 Επιλέξτε "Schedule Settings" (Ρύθμιση του προγράμματος) στο μενού. 2 Επιλέξτε "Schedule Timer Setting ON/OFF" (ρύθμιση του χρονοδιακόπτη για ενεργοποίηση/απενεργοποίηση) στην οθόνη ρύθμιση προγράμματος. Εμφανίζεται η οθόνη ρύθμιση του χρονοδιακόπτη για ενεργοποίηση/απενεργοποίηση. Η αρχική ρύθμιση είναι “ON”, όπως υποδεικνύεται...
- Seite 834 Λειτουργια 5.3.4 Διαμόρφωση του εύρους της θερμοκρασίας του τηλεχειριστηρίου 1 Επιλέξτε "Setting temp range of the remote control" (Ρύθμιση του εύρους της θερμοκρασίας του τηλεχειριστηρίου) στο μενού.* * Σε περίπτωση που τα κλιματιστικά δεν υποστηρίζουν αυτή τη λειτουργία δεν είναι δυνατή η επιλογή. 2 Επιλέξτε...
- Seite 835 Λειτουργια 5.3.5 Ρύθμιση της ημερομηνίας και της ώρας 1 Επιλέξτε "Date and time Settings" (Ρύθμιση της ημερομηνίας και της ώρας) στο μενού. 2 Ρυθμίστε την ημερομηνία με την εξής σειρά: έτος (Year), μήνας (Month) και ημέρα (Day). 3 Πατήστε ή πατήστε και κρατήστε τα κουμπιά “ ” ή “ ” σε κάθε πεδίο για ρύθμιση της ημερομηνίας και της ώρας. 4 Πατήστε...
- Seite 836 Λειτουργια 5.3.7 Βαθμονόμηση της οθόνη αφής 1 Επιλέξτε "Touchscreen Calibration" (βαθμονόμηση της οθόνη αφής) στην οθόνη μενού. 2 Βαθμονόμηση της οθόνης αφής • Πατήστε τις τομές των λευκών γραμμών με σειρά, σύμφωνα με το μήνυμα στην οθόνη. • Μετά, εμφανίζεται η οθόνη στη εικόνα (3). •...
- Seite 837 Λειτουργια 5.3.8 Καταχώριση των ονομάτων ομάδων και μονάδων 5.3.8.1 Καταχώριση ονόματος ομάδας 1 Επιλέξτε "Group Name Register" (καταχώρηση όνομα ομάδας) στην οθόνη μενού. 2 Επιλέξτε τη μονάδα ή ομάδα για καταχώρηση του ονόματος. 3 Εμφανίζεται η οθόνη για την εισαγωγή κειμένου. Μπορείτε...
- Seite 838 Λειτουργια 5.3.8.2 Αντιγραφή του ονόματος της ομάδας ή μονάδας 1 Επιλέξτε "Group Name Register" (καταχώρηση όνομα ομάδας) στην οθόνη μενού. 2 Επιλέξτε την ομάδα ή μονάδα που θέλετε να αντιγράψετε. • Το κουμπί της επιλεγόμενης ομάδας ή μονάδας επισημαίνεται με ένα πορτοκαλί πλαίσιο. •...
- Seite 839 Λειτουργια 5.3.9 Ρυθμίσεις της οθόνης 5.3.9.1 Προσαρμογή της φωτεινότητας στην οθόνη αφής 1 Επιλέξτε "Screen Display Setting" (Ρυθμίσεις της οθόνης) στο μενού. 2 Επιλέξτε "Brightness" (φωτεινότητα) στην οθόνη ρύθμιση οθόνης “Screen Display Setting” (Ρυθμίσεις της οθόνης). 3 Πατήστε “<” ή “>” για ρύθμιση της φωτεινότητας. 4 Πατήστε...
- Seite 840 Λειτουργια 5.3.9.2 Ρύθμιση της γλώσσας 1 Επιλέξτε "Screen Display Setting" (Ρυθμίσεις της οθόνης) στο μενού. 2 Επιλέξτε "Language" (γλώσσα) στο "Screen Display Setting" (Ρυθμίσεις της οθόνης). 3 Μόλις επιλέξετε τη γλώσσα εμφανίζεται το παράθυρο επιβεβαίωσης. 4 Πατήστε “Setting completed” (ολοκλήρωση ρύθμισης) για επιστροφή στο ρύθμιση οθόνης. PMML0332A rev.0 - 05/2015...
- Seite 841 Λειτουργια 5.3.9.3 Ρύθμιση της μονάδας της θερμοκρασίας 1 Επιλέξτε "Screen Display Setting" (Ρυθμίσεις της οθόνης) στο μενού. 2 Επιλέξτε "Temperature Unit" (Μονάδα της θερμοκρασίας) στο "Screen Display Setting" (Ρυθμίσεις της οθόνης). 3 Επιλέξτε βαθμοί Κελσίου ή Φαρενάιτ. Το επιλεγόμενο κουμπί επισημαίνεται με κίτρινο χρώμα. 4 Πατήστε...
- Seite 842 Λειτουργια 5.3.10 Συσσωρευμένος χρόνος λειτουργίας 5.3.10.1 Εμφάνιση ανά μήνα 1 Επιλέξτε "Accumulated Operation Time" (συσσωρευμένος χρόνος λειτουργίας) στο μενού. 2 Πατήστε "Display by Month" (εμφάνιση ανά μήνα). 3 Πατήστε “<” ή “>” για επιλογή της μονάδας. 4 Πατήστε “<” ή “>” για επιλογή του έτους και του μήνα. 5 Πατήστε...
- Seite 843 5 Πατήστε "Menu" (μενού) για επιστροφή στην οθόνη μενού. Σ Η Μ Ε Ι Ω Σ Η • Ο συσσωρευμένος χρόνος λειτουργίας σ’αυτό το κεντρικό χειριστήριο εμφανίζεται μόνο για αναφορά. Η Hitachi δεν μπορεί να διασφαλίσει την ακρίβεια του προαναφερόμενου συσσωρευμένου χρόνου λειτουργία για αναφορά. •...
-
Seite 844: Στοιχεία Επικοινωνίας
Λειτουργια 5.3.11 Στοιχεία επικοινωνίας 1 Επιλέξτε "Contact Information" (Στοιχεία επικοινωνίας) στο μενού. Εμφανίζονται οι παρακάτω πληροφορίες: Στοιχεία επικοινωνίας (2 ανεξάρτητα στοιχεία) Όνομα μονάδας και ομάδας της τελευταίας προειδοποίησης Ο τελευταίος κωδικός προειδοποίησης 2 Πατήστε "Menu" (μενού) για επιστροφή στην οθόνη μενού. Σ... - Seite 845 Λειτουργια 5.3.12 Ρύθμιση της καλοκαιρινής ώρας 1 Επιλέξτε "Summer Time Setting" (Ρύθμιση της καλοκαιρινής ώρας) στο μενού. Εμφανίζονται οι παρακάτω πληροφορίες: 2 Επιλέξτε τη λειτουργία. Κατόπιν, αλλάζει το χρώμα των αλλαγών της επιλεγόμενης λειτουργίας. 3 Πατήστε “Setting completed” (ολοκλήρωση ρύθμισης) για επιβεβαίωση των ρυθμίσεων και επιστροφή στην οθόνη του μενού. PMML0332A rev.0 - 05/2015...
- Seite 846 Λειτουργια 5.4 ΜΕΝΟΥ ΣΕΡΒΙΣ Σ Η Μ Ε Ι Ω Σ Η • Η επιλογή αυτή είναι μόνο για τον ειδικό συντήρησης. Επομένως, μην τον χρησιμοποιείται. • Αν την χρησιμοποιήσετε θα εμφανιστεί το μενού του σέρβις, πατήστε πίσω (Back). Η οθόνη θα επιστρέψει στο μενού. Στοιχεία Περιεχόμενα Καταχώριση ομάδας Οι συνδεδεμένες εσωτερικές μονάδες ελέγχονται από το κεντρικό χειριστήριο στο ίδιο H-LINK. Η λειτουργία (Group Register) αυτή χρησιμοποιείται για την καταχώρηση της μονάδας ή ομάδας. Ρύθμιση...
- Seite 847 Λειτουργια 1 Πατήστε "Menu" (μενού) στην "Monitor (All Groups)" (οθόνη (όλες οι ομάδες)) ή την "Monitor (Block)" (οθόνη (μονάδα)). Οθόνη (όλες οι ομάδες) Οθόνη (μονάδα) 2 Εμφανίζεται η οθόνη “Menu". 3 Πατήστε και κρατήστε το “Service Menu” (Μενού σέρβις) για τουλάχιστον 3 δευτερόλεπτα. Εμφανίζεται το “Service Menu”. 4 Επιλέξτε...
- Seite 848 Λειτουργια 5.4.1 Καταχώριση ομάδας Σ Η Μ Ε Ι Ω Σ Η Η λειτουργία αυτή περιγράφεται στην ενότητα “5.1 Έλεγχος λειτουργίας” μιας και είναι ένα απαιτούμενο στοιχείο όταν εκτελείται η διαδικασία έλεγχος λειτουργίας. 5.4.2 Ρύθμιση των προαιρετικών λειτουργιών Η λειτουργία αυτή χρησιμοποιείται για ρύθμιση και αλλαγή επιλογής των λειτουργιών του παρακάτω πίνακα για το κλιματιστικό και το κεντρικό χειριστήριο. Ρύθμιση από "Monitor "Menu"...
- Seite 849 Λειτουργια 5.4.2.1 Ρύθμιση του κλιματιστικού και του τηλεχειριστηρίου 1 Επιλέξτε "Optional Function Setting" (Ρύθμιση των προαιρετικών λειτουργιών) στην οθόνη "Service Menu" (μενού σέρβις) όταν τα κλιματιστικά δεν λειτουργούν. 2 Επιλέξτε "Remote control setting" (ρύθμιση τηλεχειριστηρίου) στο μενού. Αν λειτουργούν ένα ή περισσότερα κλιματιστικά δεν είναι δυνατόν να γίνει η επιλογή. 3 Επιλέξτε...
- Seite 850 Λειτουργια 5.4.2.2 Ρύθμιση χειριστηρίου 1 Επιλέξτε "Optional Function Setting" (Ρύθμιση των προαιρετικών λειτουργιών) στην οθόνη "Service Menu" (μενού σέρβις) όταν τα κλιματιστικά δεν λειτουργούν. 2 Επιλέξτε "Controller setting" (ρύθμιση χειριστηρίου) στην οθόνη "Optional Function Setting" (Ρύθμιση των προαιρετικών λειτουργιών). 3 Επιλέξτε τη ρύθμιση κάθε λειτουργίας όπου χρειάζεται. Η επιλεγόμενη ρύθμιση επισημαίνεται με κίτρινο χρώμα. Σχετικά...
- Seite 851 Λειτουργια 5.4.3 Ρύθμιση της εξαίρεσης της λειτουργίας/διακοπής Οι εντολές λειτουργία (RUN) και διακοπή (STOP) δεν είναι αποδεκτές αν η ομάδα έχει ρυθμιστεί στο όλες οι ομάδες ή όλες οι μονάδες. Ωστόσο, μπορεί αν προσδιοριστεί ένας κανόνας εξαίρεσης για οποιαδήποτε από τις παρακάτω εντολές ή συνδυασμούς εντολών, ο οποίος...
- Seite 852 Λειτουργια 5.4.4 Ρύθμιση της εξωτερικής εισόδου/εξόδου Η λειτουργία εξωτερική είσοδος/έξοδος του κεντρικού χειριστηρίου επιτρέπει τον έλεγχο 4 εισόδων και 2 εξόδων. Επιλέξτε "External Input/Output Setting" (Ρύθμιση της εξωτερικής εισόδου/εξόδου) στην οθόνη "Optional Function Setting" (Ρύθμιση των προαιρετικών λειτουργιών) για πρόσβαση στο μενού ρύθμισης. Είσοδος...
- Seite 853 Λειτουργια 5.4.4.2 Λειτουργία της εξωτερικής εξόδου 1 Έξοδος για λειτουργία όλων Εξωτερική έξοδος του σήματος λειτουργίας της εσωτερικής μονάδας της ομάδας στόχου. Το σήμα λειτουργίας αποστέλλεται ακόμα και αν λειτουργεί μια εσωτερική μονάδα της ομάδας στόχου. 2 Προειδοποίηση της εξωτερικής εξόδου Σήμα...
- Seite 854 Λειτουργια 5.4.4.4 Ρύθμιση της εξωτερικής εισόδου 1 Επιλέξτε "External Input/Output Setting" (Ρύθμιση της εξωτερικής εισόδου/εξόδου) στο μενού σέρβις. Αν το σήμα εξόδου είναι ενεργοποιημένο ή αν λειτουργούν τα κλιματιστικά δεν είναι δυνατή η επιλογή. 2 Επιλέξτε την είσοδο (από τη 1 έως την 4). 3 Επιλέξτε...
- Seite 855 Λειτουργια Έλεγχος ικανότητας της εξωτερικής μονάδας 5 Επιλέξτε την τιμή που αντιστοιχεί στην ικανότητα της εξωτερικής μονάδας. Το επιλεγόμενο κουμπί επισημαίνεται με κίτρινο χρώμα. 6 Χρησιμοποιείστε τα κουμπιά δεξιά της οθόνης για να προγραμματίσετε τον έλεγχο ικανότητας της εξωτερικής μονάδας αν δεν εφαρμόζεται...
- Seite 856 Λειτουργια Άλλες ρυθμίσεις 10 Επιλέξτε τον στόχο του ελέγχου της εξωτερικής εισόδου. (Όλες οι ομάδες/μονάδα/ομάδα). • Πατήστε το κουμπί μιας ομάδας για να αλλάξετε την κατάσταση της επιλογής της. • Πατήστε το κουμπί μιας μονάδας για να αλλάξετε την κατάσταση της επιλογής όλων των ομάδων σ' αυτή τη μονάδα. •...
- Seite 857 Λειτουργια 5.4.5 Ρύθμιση των κουμπιών Η ρύθμιση των κουμπιών χρησιμοποιείται για να επιλέξετε αν θέλετε να εμφανίσετε ή να κρύψετε κάποια κουμπιά για περιορισμό της λειτουργίας τους. Ρύθμιση από "Monitor "Menu" "Service Menu" "Button Setting". 1 Επιλογή “Button Setting” (Ρύθμιση των κουμπιών) στην οθόνη “Service Menu” (Μενού σέρβις). 2 Επιλέξτε...
- Seite 858 Λειτουργια 5.4.6 Καταχώρισης των στοιχείων επικοινωνίας Η λειτουργία αυτή χρησιμοποιείται για την επεξεργασία ή καταχώρηση των στοιχείων επικοινωνίας που εμφανίζονται. Ρύθμιση από "Monitor "Menu" "Service Menu" "Contact Information Register". 1 Επιλέξτε "Contact Information Register" (Καταχώριση των στοιχείων επικοινωνίας) στην οθόνη "Service Menu" (Μενού σέρβις). 2 Πατήστε...
- Seite 859 Λειτουργια 5.4.7 Σημειώσεις 5.4.7.1 Εγγραφή σημειώσεων 1 Επιλέξτε "Memo" (σημειώσεις) στην οθόνη "Service Menu" (μενού σέρβις). 2 Επιλέξτε το στόχο για καταχώρηση. Εμφανίζεται η οθόνη για την καταχώρηση χαρακτήρων. 3 Επιλέξτε έναν εγγεγραμμένο χαρακτήρα από την λίστα. 4 Χαρακτήρες καταχώρησης. Πατήστε “Delete” (διαγραφή) για να διαγράψετε το χαρακτήρα από την αριστερή πλευρά του κέρσορα.
- Seite 860 Λειτουργια 5.4.7.2 Διαγραφή σημειώσεων 1 Επιλέξτε "Memo" (σημειώσεις) στην οθόνη "Service Menu" (μενού σέρβις). 2 Πατήστε “Delete Memo” (διαγραφή σημειώσεων). 3 Επιλέξτε τις σημειώσεις που θέλετε να διαγράψετε. • Πατήστε το κουμπί των σημειώσεων για να αλλάξετε την κατάσταση της επιλογής του. •...
- Seite 861 Λειτουργια 5.4.8 Επαναφορά ρυθμίσεων 1 Επιλέξτε “Restore Settings” (Επαναφορά ρυθμίσεων) στην οθόνη μενού σέρβις. Σ Η Μ Ε Ι Ω Σ Η Αν απαγορεύεται η λειτουργία του τηλεχειριστηρίου ή είναι ενεργοποιημένη κάποια επαφή της εξωτερικής εισόδου ή δεν έχει ακυρωθεί ο έλεγχος ικανότητας της εξωτερικής μονάδας. Ακυρώστε αυτές τις παραμέτρους προτού εκτελέσετε την επαναφορά ρυθμίσεων.
- Seite 862 Λειτουργια 5.4.9 Έλεγχος της σύνδεσης 1 Επιλέξτε "Checking Connection" (έλεγχος της σύνδεσης) στην οθόνη μενού σέρβις. Σ Η Μ Ε Ι Ω Σ Η Αν λειτουργούν ένα ή περισσότερα κλιματιστικά ή αν εισέρχεται ένα σήμα της εξωτερικής εισόδου στους ακροδέκτες 1 ή 2, δεν μπορεί να γίνει επιλογή αυτής της ρύθμισης. 2 Πατήστε “Yes” στην οθόνη επιβεβαίωσης. Σ Η Μ Ε Ι Ω Σ Η Αν πατήσετε “No”, η οθόνη επιστρέφει στο “Service Menu” (μενού σέρβις). Αυτός ο τύπος αναβάθμισης των στοιχείων της σύνδεσης εξαρτάται από τις...
- Seite 863 Λειτουργια 6 Εμφανίζεται μια δεύτερη οθόνη επιβεβαίωσης. Ελέγξτε τα κλιματιστικά και πατήστε "Yes". Σ Η Μ Ε Ι Ω Σ Η • Αν πατήσετε “No”, η οθόνη επιστρέφει στο μενού σέρβις. • Αν απαγορεύεται η λειτουργία του τηλεχειριστηρίου ή είναι ενεργοποιημένη κάποια επαφή της εξωτερικής εισόδου ή δεν έχει ακυρωθεί ο έλεγχος ικανότητας της εξωτερικής μονάδας. Πρέπει πρώτα να ακυρώσετε αυτές τις παραμέτρους προτού επαναφέρετε τις ρυθμίσεις. Μην διατηρείτε τις ρυθμίσεις 7 Πατήστε “No” στην οθόνη επιβεβαίωσης. 8 Εμφανίζεται το παράθυρο επιβεβαίωσης της εκκίνησης. Πατήστε "Yes" για εκκίνηση όλων των ρυθμίσεων και έλεγχο της σύνδεσης.
- Seite 864 Λειτουργια 5.4.10 Ιστορικό προειδοποιήσεων Η λειτουργία αυτή χρησιμοποιείται για καταχώρηση της ώρας της εμφάνισης μιας προειδοποίησης, της μονάδας με πρόβλημα και τον κωδικό της προειδοποίησης. Μέσω αυτής της λειτουργίας επίσης μπορείτε να διαγράψετε το ιστορικό των προειδοποιήσεων. Ρύθμιση από "Monitor "Menu"...
- Seite 865 Εμφανίζεται όταν η είσοδος της ζήτησης ρυθμίζεται ως προαιρετική λειτουργία της εξωτερικής εισόδου. Το εικονίδιο αναβοσβήνει κατά τη διάρκεια του ελέγχου της ζήτησης. Επικοινωνήστε Ζήτηση με το προμηθευτή σας ή το κέντρο εξυπηρέτησης πελατών της Hitachi για περισσότερες πληροφορίες. Εμφανίζεται όταν ενεργοποιείται το πρόγραμμα ελέγχου της ικανότητας της εξωτερικής μονάδας, Ζήτηση...
- Seite 866 χειριστηρίου για προστασία από τον ηλεκτρικό θόρυβο. Αν συμβεί αυτό εκτελέστε ξανά τη διαδικασία εκκίνησης. Η οθόνη παγώνει στη οθόνη εκκίνησης ("Start-up") • Μπορεί να υπάρχει κάποιο σφάλμα στην επικοινωνία. Επικοινωνήστε με το προμηθευτή σας ή το κέντρο εξυπηρέτησης πελατών της Hitachi για περισσότερες πληροφορίες. PMML0332A rev.0 - 05/2015...
-
Seite 867: Αντιμετωπιση Προβληματων
Αντιμετωπιση προβληματων 6 ΑΝΤΙΜΕΤΩΠΙΣΗ ΠΡΟΒΛΗΜΑΤΩΝ Ελέγξτε τον παρακάτω πίνακα προτού επικοινωνήσετε με έναν έμπορο για βοήθεια. Συνθήκη Αιτία • Ελέγξτε αν το καλώδιο για την τροφοδοσία ηλεκτρικού ρεύματος είναι συνδεδεμένη σε μια πρίζα. Οι ενδείξεις στην οθόνη αφής δεν εμφανίζονται. •... -
Seite 870: Printed In Spain
Printed in Spain...