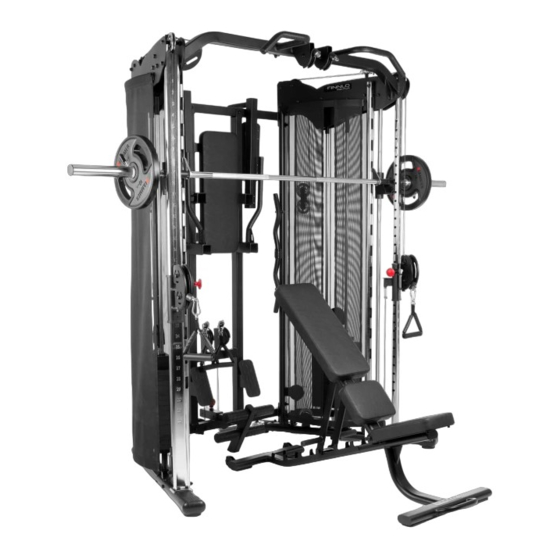
finnlo Maximum-Serie Bedienungsanleitung
Vorschau ausblenden
Andere Handbücher für Maximum-Serie:
- Bedienungsanleitung (54 Seiten) ,
- Montageanleitung und bedienungsanleitung (28 Seiten) ,
- Handbuch (27 Seiten)
Inhaltsverzeichnis
Quicklinks
Inhaltsverzeichnis

Verwandte Anleitungen für finnlo Maximum-Serie


Inhaltszusammenfassung für finnlo Maximum-Serie
- Seite 1 All manuals and user guides at all-guides.com...
-
Seite 2: Inhaltsverzeichnis
All manuals and user guides at all-guides.com Inhaltsverzeichnis Index Seite/Page Safety instructions Sicherheitshinweise General 03 Allgemeines Packaging Verpackung Assembly Montage Assembly Steps Montageschritte Care and Maintenance Pflege und Wartung Training manual Trainingsanleitung Trainings photos Übungsbilder Adjustments Verstellmöglichkeiten Explosion drawing Explosionszeichnung Parts list Teileliste Warranty (Germany only) -
Seite 3: Sicherheitshinweise
All manuals and user guides at all-guides.com 1. Sicherheitshinweise 1. Safety instructions WICHTIG! IMPORTANT! Es handelt sich bei diesem Kraftgerät um ein Trainingsgerät The gym is produced according to DIN EN 957-1/2 class der Klasse HC, nach DIN EN 957-1/2. Max. -
Seite 4: Allgemeines
All manuals and user guides at all-guides.com 2. Allgemeines 2. General Der Anwendungsbereich dieses Trainingsgerätes ist der This training equipment is for use at home. The equipment complies with the requirements of DIN EN 957-1/2 Class H. Damage to health Heimbereich. - Seite 5 All manuals and user guides at all-guides.com 3.2 Montageschritte / Assembly steps Schritt / Step 1...
- Seite 6 All manuals and user guides at all-guides.com Schritt / Step 2...
- Seite 7 All manuals and user guides at all-guides.com Schritt / Step 3...
-
Seite 8: Assembly Steps
All manuals and user guides at all-guides.com Schritt / Step 4... - Seite 9 All manuals and user guides at all-guides.com Schritt / Step 5...
- Seite 10 All manuals and user guides at all-guides.com Schritt / Step 6...
- Seite 11 All manuals and user guides at all-guides.com Schritt / Step 7...
- Seite 12 All manuals and user guides at all-guides.com Schritt / Step 8...
- Seite 13 All manuals and user guides at all-guides.com Schritt / Step 9 1) Positionieren Sie zu zweit die Langhantelstange (28) 1) Position with two persons the barbell bar (28) bet- zwischen den zwei Stützen und hängen Sie die Haken ween the two supports and hang the hooks of the long der Langstange (28) in die unteren Schlitze der linken bar (28) into the lower slots of the left and right height und rechten Höhenverstellstütze (24, 25) ein.
- Seite 14 All manuals and user guides at all-guides.com Schritt / Step 10...
- Seite 15 All manuals and user guides at all-guides.com Schritt / Step 11-1: 16 Gewichtescheiben/ weight plates If you bought the additional weight plate set with 2x4 plates, go to Haben Sie den Gewichtescheiben Zusatzpack mit 2x4 Scheiben step 11-2. gekauft, dann fahren Sie mit Schritt 11-2 fort.
- Seite 16 All manuals and user guides at all-guides.com Schritt / Step 11-2: Gewichtescheiben Zusatzpack/ weight plates extra package...
- Seite 17 All manuals and user guides at all-guides.com Schritt / Step 12...
- Seite 18 All manuals and user guides at all-guides.com Schritt / Step 13...
- Seite 19 All manuals and user guides at all-guides.com Schritt / Step 14...
- Seite 20 All manuals and user guides at all-guides.com Schritt / Step 15...
- Seite 21 All manuals and user guides at all-guides.com Schritt / Step 16...
- Seite 22 All manuals and user guides at all-guides.com Schritt / Step 17...
- Seite 23 All manuals and user guides at all-guides.com Schritt / Step 18...
- Seite 24 All manuals and user guides at all-guides.com Schritt / Step 19...
- Seite 25 All manuals and user guides at all-guides.com Schritt / Step 20...
-
Seite 26: Pflege Und Wartung
All manuals and user guides at all-guides.com 4. Pflege und Wartung 4. Care and Maintenance Wartung Maintenance Grundsätzlich bedarf das Gerät keiner Wartung In principle, the equipment does not require Kontrollieren Sie regelmäßig alle Geräteteile und den maintenance. ... -
Seite 27: Trainings Photos
All manuals and user guides at all-guides.com 5.1 Trainings photos 5.1 Übungsbilder Biceps 1: Bizeps 1: Ausgangsposition: Positionieren Sie den Schlitten in der untersten Starting position: Move the slider down. Your arms are almost stuck. Position. Ihre Arme sind fast gesteckt. Endposition: Fix the elbows to your body and raise your forearms. - Seite 28 All manuals and user guides at all-guides.com Schulterdrücken 1: Shoulder press 1: Ausgangsposition: Bringen Sie die Rückenlehne in eine vertikale Starting position: Bring the backrest into an vertical position. Move Position. Die Hantel wird soweit nach unten geführt bis diese fast the long bar as close as possible to your chest.
- Seite 29 All manuals and user guides at all-guides.com Trizeps 1: Triceps 1: Ausgangsposition: Positionieren Sie den Schlitten in der obersten Starting position: Move the slider up. Position. Endposition: Fixieren Sie die Ellenbogen am Körper und führen die Endposition: Fix the elbows to your body and move your arms all the Unterarme nach unten way down.
- Seite 30 All manuals and user guides at all-guides.com Rowing 1: Rudern 1: Starting position: Grip the middle handles, the legs are slightly angled Ausgangsposition: Greifen Sie die mittleren Griffe, die Beine stützen on the step plates. sich leicht angewinkelt an den Trittplatten ab. End position: Pull your arms back.
- Seite 31 All manuals and user guides at all-guides.com Lat-Ziehen, hinter dem Kopf: Lat pull behind the head: Ausgangsposition: Ellenbogen sind fast gestreckt. Schultern sind in Start position: Arms are nearly complete straight. der Horizontalen fixiert. Endposition: Latissimusstange nach unten führen, bis diese fast den Endposition: Pull down the lat bar, until it nearly touch your neck.
- Seite 32 All manuals and user guides at all-guides.com Butterfly: Butterfly: Start position: Position the cable slider at shoulder height, grap the Ausgangsposition: Positionieren Sie die Seilzugschlitten auf handles and go forward so far, that there is already a muscle tension Schulterhöhe, greifen die Griffe und gehen so weit nach vorne, dass in the chest even in the rearmost position.
- Seite 33 All manuals and user guides at all-guides.com Bauch gerade Ausführung: Abdominal, straight version: Ausgangsposition: Fixieren Sie die angewinkelten Beine in der Start position: Fix the angled legs in the lower foot fixation; hands unteren Fußfixierung. Hände liegen entweder auf der Brust oder für either lie on the chest or, for the more difficult variation, they are at die erschwerte Variation befinden sich diese auf Kopfhöhe.
- Seite 34 All manuals and user guides at all-guides.com Beinheben, einfache Ausführung: Leg raises, simple version: Ausgangsposition: Gehen Sie in den Unterarmstütz und greifen die Starting position: Go into the support cushions and grab the handles. Griffe. Beine hängen nach unten Leg hanging down. Endposition: Bewegen Sie die angewinkelten Beine nach oben.
- Seite 35 All manuals and user guides at all-guides.com Dips: Dips Ausgangsposition: Gehen Sie in den Stütz, Beine hängen nach unten. Starting position: Go into the support, legs hanging down Endposition: Beugen Sie die Arme. End position: Bend your arms. Klimmzug: Pull-up: Ausgangsposition: Greifen Sie die Klimmzugstange in einer für Sie Starting position: Grip the pull-up bar in a width that is comfortable komfortablen Breite...
- Seite 36 All manuals and user guides at all-guides.com Bankdrücken mit Langhantel. Bench press with barbell. Ausgangsposition: Hantel befindet sich kurz vor der Brust. Starting position: Barbell is in front of your chest. Endposition: Arme nach oben führen. End position: Guide arms up. Achtung: Ellenbogen nicht durchstrecken und kein Holzkreuz Warning: Do not stretch your elbows and do not make a wooden machen!
- Seite 37 All manuals and user guides at all-guides.com Schrägbankdrücken mit Langhantel. Incline bench press with barbell. Ausgangsposition: Rückenpolster der Bank schräg stellen, Je steiler Starting position: Position the back cushion at the bank, with an desto mehr wird der obere Brustmuskel trainiert. Hantel befindet sich incline, the more the upper chest muscle is trained.
- Seite 38 All manuals and user guides at all-guides.com Butterfly reverse: Butterfly Reverse: Starting position: Position the cable slider at shoulder height, grap Ausgangsposition: Positionieren Sie die Seilzugschlitten auf the handles and go back so far that there is muscle tension in the Schulterhöhe, greifen die Griffe und gehen so weit nach hinten, das back even in the foremost position.
-
Seite 39: Adjustments
All manuals and user guides at all-guides.com Squat: Kniebeuge: Starting position: feet are placed hip-wide. Barbell bar is on the Ausgangsposition: Füße werden hüftbreit aufgestellt. Langhantel- shoulders. stange befindet sich auf den Schultern. End position: Finish the exercise, if your knees reach a 90° angle. If Endposition: Gehen Sie in die Hocke. -
Seite 40: Explosionszeichnung 1/ Explosiondrawing
All manuals and user guides at all-guides.com 6. Explosionszeichnung 1/ Explosiondrawing 1... -
Seite 41: Explosion Drawing
All manuals and user guides at all-guides.com Explosionszeichnung 2/ Explosiondrawing 2... -
Seite 42: Explosionszeichnung 3/ Explosiondrawing
All manuals and user guides at all-guides.com Explosionszeichnung 3/ Explosiondrawing 3... -
Seite 43: Explosionszeichnung 4/ Explosiondrawing
All manuals and user guides at all-guides.com Explosionszeichnung 4/ Explosiondrawing 4... -
Seite 44: Parts List
All manuals and user guides at all-guides.com 7. Teileliste / Parts list Position Bezeichnung Description Abmessung/Dimension Menge/Quantity 3658-1 Rahmen, hinten Rear frame Rahmen, oben links Left top frame Stütze, links Left slide bar Fixierung für Gewichteführungsstangen Guide rod fixing frame Rahmen, links unten Left bottom frame Gewichteführungsstangen... - Seite 45 All manuals and user guides at all-guides.com -71* Linearlager Linear bearing LM25UUKBS Gummidämpfer Bumper Federverschluß Spring clip 50mm Kunststoffkappe Plastic square plug 50x50 Kunststoffkappe Plastic square plug 38x38 Gewichteverkleidung, außen Outer textile shroud Gewichteverkleidung, innen links Inner left textile shroud Gewichteverkleidung, innen rechts Inner right textile shroud Buchse...
-
Seite 46: Warranty (Germany Only)
Gebrauch ausgetauscht werden müssen. In diesem Falle wenden In this case, please contact Finnlo Customer Service. You can request the Sie sich bitte an den Finnlo – Kundenservice. -
Seite 47: Service-Hotline
All manuals and user guides at all-guides.com 9. Service-Hotline und Ersatzteilbestellformular Um Ihnen optimal helfen zu können, halten Sie bitte Artikel-Nummer, Seriennummer, Explosionszeichnung und Teileliste bereit S E R V I C E - H O T L I N E Tel.: 0731-97488 -62 oder -68 Fax: 0731-97488-64 Montag bis Freitag...