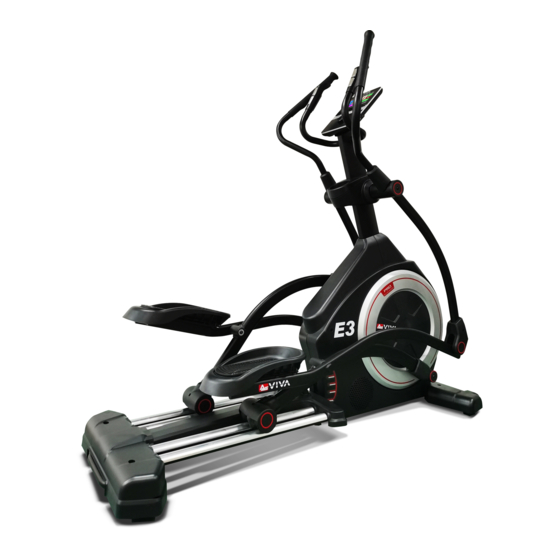
AsViva E3 Benutzerhandbuch
Vorschau ausblenden
Andere Handbücher für E3:
- Benutzerhandbuch (44 Seiten) ,
- Benutzerhandbuch (67 Seiten) ,
- Benutzerhandbuch (74 Seiten)
Inhaltsverzeichnis
Verfügbare Sprachen
Verfügbare Sprachen
Inhaltsverzeichnis

Verwandte Anleitungen für AsViva E3


Inhaltszusammenfassung für AsViva E3
- Seite 1 BENUTZERHANDBUCH / MANUAL VERSION: A-BS www.AsVIVA.de...
-
Seite 2: Inhaltsverzeichnis
INHALTSVERZEICHNIS INHALTSVERZEICHNIS ..................2 GEWÄHRLEISTUNGSBESTIMMUNGEN ............3 WICHTIGE SICHERHEITSHINWEISE ..............4 EXPLOSIONSZEICHNUNG................6 TEILEISTE ......................8 MONTAGE ......................12 COMPUTERFUNKTIONEN ................21 IC+ APP FUNKTIONEN ..................29 AUFWÄRMEN UND DEHNEN ................33 TRAININGSHINWEISE ..................35 PULSMESSTABELLE ..................36 WARTUNG UND PFLEGE ................37 STÖRUNGSSSUCHE ..................38 GEWÄHRLEISTUNGSRECHT .................39 GARANTIEBEDINGUNGEN ................40 EU-KONFORMITÄTSERKLÄRUNG ..............77 TABLE OF CONTENTS WARRANTY TERMS ..................42 IMPORTANT SAFETY INSTRUCTIONS ............43 EXPLODED DIAGRAMM ..................45... -
Seite 3: Gewährleistungsbestimmungen
Ersatzteilbestellungen und Reparaturaufträge richten Sie bitte unter Angabe der Kundennummer bzw. Rechnungsnummer an Ihren Händler oder direkt an uns. Unsere Serviceadresse: http://www.asviva.de/kontakt Damit Ihnen unsere Service-Mitarbeiter optimal weiterhelfen können, beachten Sie bitte folgende Vorgehensweise: Ist ein bestimmtes Teil beschädigt? Teilen Sie uns bitte anhand der Teileiste die genaue Teilenummer mit. -
Seite 4: Wichtige Sicherheitshinweise
WICHTIGE SICHERHEITSHINWEISE • Das Sicherheitsniveau des Gerätes kann nur gehalten werden, wenn es regelmäßig auf Schäden und Verschleiß geprüft wird. Dabei ist ein besonderes Augenmerk auf die Endkappen / Rollen der Standfüße, die Trittpedale, die Handgriffe und die beweglichen Elemente zu richten. • Wenn Sie dieses Gerät weitergeben oder von einer anderen Person benutzen lassen, stellen Sie sicher, dass derjenige den Inhalt dieser Gebrauchsanleitung kennt. - Seite 5 WICHTIGE SICHERHEITSHINWEISE Bitte lesen Sie die Anleitung genau durch, bevor Sie mit den Zusammenbau beginnen! Achten Sie beim Anziehen der Schraubverbindungen darauf, dass der Bewegungsablauf nicht durch zu festes anziehen beeinträchtigt wird. Bewegliche Gelenkteile ( Gleitträger usw. ) müssen von Zeit zu Zeit mit handelsüblichem Schmierfett eingefettet werden.
-
Seite 6: Explosionszeichnung
EXPLOSIONSZEICHNUNG A5-9 A5-9 A5-8 A5-8 A5-11 A5-11 A5-12 A5-12 A5-3 A5-3 A5-10 A5-10 A5-6 A5-6 A5-1 A5-1 A5-5 A5-5 A5-2 A5-2 A5-4 A5-4 A5-7 A5-7 A3-4 A3-4 A3-6 A3-6 A3-1 A3-1 A3-3 A3-3 A3-2 A3-2 A12-1 A12-1 A3-5 A3-5 A5-2 A5-2 A9-5 A9-5... - Seite 7 EXPLOSIONSZEICHNUNG...
-
Seite 8: Teileiste
TEILEISTE No. A No. B No. C No. D No. E No. F No. G No. S No. H No. J No. K1 No.K2 Teilenr. Beschreibung Menge Teilenr. Beschreibung Menge Main frame Decoration cover Front stabilizer Swing handlebar tube Slide track Plastic cover Central support tube Console... - Seite 9 TEILEISTE No. L No. M No. N No. O No. P No. R Teilenr. Beschreibung Menge Teilenr. Beschreibung Menge Decoration cover of pedal Decoration cover tube Adaptor Swing handlebar tube Decoration cover of joint Plastic cover pedal tube...
-
Seite 10: Teileliste
TEILELISTE Teilenr. Beschreibung Menge Teilenr. Beschreibung Menge MAIN FRAME FRONT FOOT TUBING SENSOR WIRE ADJUSTED END DRIVE WHEEL IRON A3-1 AXLE END CAP TRANSPORT ROLLER A3-2 BUSH UNIT A3-3 BEARING SCREW A3-4 SCREW SLIDE TRACK A3-5 ADJUSTED END A3-6 MAGNET END CAP BELT ALUMINUM TRACKING... - Seite 11 TEILELISTE Teilenr. Beschreibung Menge Teilenr. Beschreibung Menge JOINT PEDAL TUBE SCREW M5x15 BEARING SCREW M4x16 BUSH SCREW M8x20 SCREW SCREW M10x80 AXLE WASHER M10x20x2.0T WASHER SPRING WASHER M10x3.0T BUSH WASHER M8 WHEEL SPRING WASHER M8 BEARING WASHER M8 DECORATION COVER WASHER M9x25x2T DECORATION COVER NUT M12...
-
Seite 12: Montage
MONTAGE Befestigen Sie die Schnur vom Sicherheitsmagneten immer am Körper, bevor Sie mit den Training beginnen. BEACHTEN SIE: Bevor Sie mit der Montage starten, lesen und verstehen Sie alle Instruktionen. Schritt 1 1. Montieren Sie den Front Stabilizer (B) mit Hilfe der Schrauben R4, der Unterlegscheiben R13 und R14 an dem Hauptrahmen A. - Seite 13 MONTAGE Schritt 3 1. Verbinden Sie das Sensorkabel D2 mit dem Computerkabel A2. Stecken Sie den Central Support Tube D auf den Hauptrahmen A. Sichern Sie dies mit den Schrauben R10, sowie den Unterlegscheiben R14 und R15. 2. Montieren Sie die Plastic Cover H1 und H2 mit Hilfe der Schraube R9 an dem Support Tube D. Achtung: Vergewissern Sie sich, dass bei der Montage der Mittelstange D keine Kabel beschädigt werden.
- Seite 14 MONTAGE Schritt 4 ACHTUNG: Das Loch für die Achssperre muss nach unten zeigen. Es muss sichergestellt sein, das das Loch zwischen Rohr und Schraube ausgerichtet ist, bevor es mit Schraube (R7) von unten nach oben fixiert wird. 1. Stecken Sie das Decoration Cover G auf das Central Support Tube D. Montieren Sie die rechte Swing Handlebar Tube S1 auf die Achse Q mit Hilfe der Unterlegscheiben R15 und R17, der Unterlegscheibe R20 und der Schraube R7.
- Seite 15 MONTAGE Schritt 5 1. Montieren Sie die rechte Pedal Tube F1 an dem Pedalarm mit Hilfe der Schraube R7 und der Unterlegscheiben R20, R16 und R15. 2. Befestigen Sie die Connect Tube F9 an der Swing Right Handlebar S1 mit Hilfe der Schrauben R2 und Mutter R18.
- Seite 16 MONTAGE Schritt 6 1. Montieren Sie die linke Pedal Tube F2 an dem Pedalarm mit Hilfe der Schraube R7 und der Unterlegscheiben R20, R16 und R15. 2. Befestigen Sie die Connect Tube F9 an der Swing Right Handlebar S2 mit Hilfe der Schrauben R2 und Mutter R18.
- Seite 17 MONTAGE Schritt 7 1. Verbinden Sie die Kabel D1 und D2 vom Computer J. Stecken Sie den Computer J auf die Computerabdeckung. Befestigen Sie diesen mit den Schrauben J1. Hinweis: Achten Sie darauf, dass Sie die Kabel nicht beschädigen. 2. Befestigen Sie den Flaschenhalter K2 mit Hilfe der Schrauben R8 an der Central Support Tube D.
- Seite 18 MONTAGE Schritt 8 1. Befestigen Sie das Decoration Cover L1 mit Hilfe der Schraube R5 an der rechten Pedal Tube. 2. Befestigen Sie das Decoration Cover P1 und P2 an das Ende des Swing Tube S1 und Connect Tube F9 mit Hilfe der Schraube R5. 3.
- Seite 19 MONTAGE Schritt 9 1. Platzieren Sie die Handlebar Cover N1 und N2 an der rechten Handlebar und befestigen Sie diese mit der Schraube R5. 2. Wiederholen Sie den Vorgang auf der linken Seite.
- Seite 20 MONTAGE Schritt 10 1. Schließen Sie das Netzteil M erst an dem Gerät an. 2. Schließen Sie das Netzteil anschließend in einer geeigneten Steckdose an.
-
Seite 21: Computerfunktionen
COMPUTERFUNKTIONEN Hinweis 1. Der Computer schaltet sich automatisch ohne Signalempfang nach 4 Minuten aus. 2. Drücken Sie eine beliebige Taste um den Computer wieder einzuschalten. Überprüfen Sie bitte sorgfältig alle Steckverbindungen auf einwandfreien Kontakt, sollte der Computer keine Werte anzeigen! Die mit diesem Computer ermittelten und angezeigten Werte für den Kalorienverbrauch dienen lediglich als Anhaltspunkt für eine Person mittlerer Statur bei mittlerer Widerstandseinstellung und können erheblich von dem tatsächlichen Kalorienverbrauch abweichen. -
Seite 22: Total Reset
COMPUTERFUNKTIONEN Tastenfunktionen: ENTER Drücken Sie ENTER um die Ein- gaben zu bestätigen. Drehen Sie den Knopf um das UP / DOWN Trainingsprogramm und Ihre Werte einzustellen. Drücken Sie diese Taste um START / STOP das Training zu starten oder zu stoppen. - Seite 23 COMPUTERFUNKTIONEN Beschreibung TIME Zählt die Trainingszeit von 00:00 bis 99:59. SPEED Zeigt die Geschwindigkeit während des Trainings bis zu 99,9km/h an. DISTANCE Zeigt die zurückgelegte Distanz während jedem Workout bis zu 99.99KM. Der Computer schätzt Ihre gesamt verbrannten Kalorien zu jeder Zeit CALORIES während Ihres Workout bis zu 9999 Kalorien.
- Seite 24 COMPUTERFUNKTIONEN Anfänger Modus: 1. Drehen Sie in Richtung UP oder DOWN um das Trainingsprogramm auszuwählen. Wählen Sie BEGINNER und bestätigen Sie Ihre Eingabe mit ENTER. 2. Drehen Sie in Richtung UP oder DOWN und wählen Sie zwischen BEGINNER 1- BEGINNER 4. Drücken Sie ENTER um die Eingaben zu bestätigen.
- Seite 25 COMPUTERFUNKTIONEN Fortgeschrittener Modus: 1. Drehen Sie in Richtung UP oder DOWN um das Trainingsprogramm auszuwählen. Wählen Sie ADVANCE und bestätigen Sie Ihre Eingabe mit ENTER. 2. Drehen Sie in Richtung UP oder DOWN und wählen Sie zwischen ADVANCE 1 - ADVANCE 4. Drücken Sie ENTER um die Eingaben zu bestätigen.
- Seite 26 COMPUTERFUNKTIONEN Professioneller Modus: 1. Drehen Sie in Richtung UP oder DOWN um das Trainingsprogramm auszuwählen. Wählen Sie SPORTY und bestätigen Sie Ihre Eingabe mit ENTER. 2. Drehen Sie in Richtung UP oder DOWN und wählen Sie zwischen SPORTY 1 - SPORTY 4. Drücken Sie ENTER um die Eingaben zu bestätigen.
- Seite 27 COMPUTERFUNKTIONEN Cardio Modus: 1. Drehen Sie in Richtung UP oder DOWN um das Trainingsprogramm auszuwählen. Wählen Sie CARDIO und bestätigen Sie Ihre Eingabe mit ENTER. 2. Drehen Sie in Richtung UP oder DOWN um Ihr Alter einzustellen. 3. Drehen Sie in Richtung UP oder DOWN um Programm 55%, 75%, 90% oder TAG (Zielherzfrequenz 30-230) auszuwählen.
- Seite 28 COMPUTERFUNKTIONEN WATT Modus: 1. Drehen Sie in Richtung UP oder DOWN um das Trainingsprogramm auszuwählen. Wählen Sie WATT und bestätigen Sie Ihre Eingabe mit ENTER. 2. Drehen Sie in Richtung UP oder DOWN und wählen Sie WATT (10-350). Drücken Sie ENTER um die Eingaben zu bestätigen.
-
Seite 29: Ic+ App Funktionen
IC+ APP FUNKTIONEN IC+ Training IC+ Training unterstützt Sie bei Ihrem Training mit klaren und vollständigen Trainingsstatistiken. Überprüfung Ihrer Trainingszeiten und Ergebnisse ist mit Leichtigkeit dank der App möglich. Traningstyp • Quick Start: Mit dem Training sofort beginnen ohne Einstellungen vorzunehmen. •... - Seite 30 IC+ APP FUNKTIONEN Zusammenfassung Training Laden Sie Ihre Trainingsstatistiken nach einen Training in die Cloud und werten Sie diese aus. Geben Sie nach Ihrem Training an, wie Sie sich fühlen und erhalten so darüber Aufschluss, wie effektiv Ihr Training war. AI Training Die APP verwendet einen Algorithmus, um Ihre Trainingsaufzeichnung zu analysieren und Ihnen somit ein optimierten Trainingserlebnis zu bieten.
- Seite 31 IC+ APP FUNKTIONEN Zielbasiertes Training Über „AI Training“ können Sie entscheiden welche Art von Training Sie absolvieren wollen. Marathon Explosivenes Geeignet für Kraftausdauertraining. Training für den Aufbau von Muskeln Get Fit BAI your life Training optimiert auf den Verbrauch von Kalorien Sicheres Training für ältere Menschen / Fettverbrennung...
- Seite 32 IC+ APP FUNKTIONEN Während des Trainings Die künstliche Intelligenz unterstützt Sie für ein gesünderen Lebensstil. Automatische Anpassung Ihres Trainingsplan, Reminder zur Einhaltung Ihrer Trainingsintervalle und die Unterstützung verschiedener Trainingsgeräte. Mit Leichtigkeit können Sie zwischen den Geräten wechseln und somit Ihr Training weiter optimieren und Ihr Ziel effizienter erreichen.
-
Seite 33: Aufwärmen Und Dehnen
AUFWÄRMEN UND DEHNEN Aufwärmphase und Abkühlphase 1. Aufwärmphase 5 bis 10 Minuten Gymnastik und Stretching. Vorbereitung des Organismus auf die bevorstehende Traingsleistung. 2. Trainingsphase 15 bis 40 Minuten intensives aber nicht zu überfordendes Training 3. Abkühlphase 5 bis 10 Minuten Gymnastik und Stretching um die Muskulatur zu lockern und Muskelkater vorzu- beugen. - Seite 34 AUFWÄRMEN UND DEHNEN Dehnung der hinteren Oberschenkmuskulatur: Setzen Sie sich auf den Boden und strecken Sie Ihr- rechtes Bein. Winkeln Sie Ihr linkes Bein so an, dass die Fußsohle die Innenseite Ihres rechten Oberschen- kels berührt. Beugen Sie sich nun so weit wie möglich nach vorne und versuchen Sie, die Zehen an Ihrem rechten Bein zu berühren.
-
Seite 35: Trainingshinweise
TRAININGSHINWEISE Um spürbare körperliche und gesundheitliche Verbesserungen zu erreichen, müssen für die Bestim- mung des erforderlichen Trainingsaufwandes die folgenden Faktoren beachtet werden: 1. Intensität Die Stufe der körperlichen Belastung beim Training muss den Punkt der normalen Belastung über- schreiten, ohne dabei den Punkt der Atemlosigkeit bzw. Erschöpfung zu erreichen. Ein geeigneter Richtwert für ein effektives Training kann dabei der Puls sein. Dieser sollte sich während des Trainings im Bereich zwischen 70% und 85% des Maximalpulses befinden. -
Seite 36: Pulsmesstabelle
PULSMESSTABELLE Zielpuls-Tabelle Die folgende Tabelle zeigt Ihnen die geschätzten Ziel-Pulse für unterschiedliche Alterskategorien. Su- chen Sie sich die Kategorie aus, die Ihnen am nächsten kommt und Sie finden die Herzfrequenz: Alter Ziel Puls Zone 50 - 75% Durchschnitt max. Puls 100% 20 Jahre 100 - 150 Schläge pro Minute 25 Jahre 98 - 146 Schläge pro Minute 30 Jahre 95 - 142 Schläge pro Minute 35 Jahre... -
Seite 37: Wartung Und Pflege
WARTUNG UND PFLEGE Es empfiehlt sich, alle Geräteteile, die sich lösen könnten (Schrauben, Muttern u.ä.) regelmäßig (etwa alle 1 bis 2 Wochen, bzw. je nach Benutzungshäufigkeit) zu kontrollieren, um Unfälle durch sich lösende Einzelteile zur vermeiden. Wenn Sie Ihr Gerät pflegen möchten, verwenden Sie zur Reinigung keine aggressiven Reinigungsmit- tel, sondern beseitigen Sie Verschmutzungen und Staub mit einem weichen, evtl. leicht feuchten Tuch. Vermeiden Sie jedoch den Kontakt von Flüssigkeiten jeglicher Art mit dem Computer oder dem Geräte- inneren. Dies kann zu erheblichen Funktionsbeeinträchtigungen führen. Um ein Auslaufen der Batterie(n) zu verhindern, sollte(n) diese bei längerer Nichtbenutzung aus dem Batteriefach entnommen werden. -
Seite 38: Störungsssuche
STÖRUNGSSSUCHE Problem Mögliche Ursache Lösung Störung im Stromkreislauf Prüfen Sie ob der Stroman- schluss gewährleistet ist. Keine Anzeige Der Computer ist fehlerhaft Ersetzten Sie den Computer Beziehen Sie sich auf die Mon- tageanleitung und überprüfen Der Computer erhält kein Signal Sie alle Kabelverbindungen vom Geschwindigkeitssensor Halten Sie mit dem Service... -
Seite 39: Gewährleistungsrecht
GEWÄHRLEISTUNGSRECHT Herzlichen Glückwunsch zu Ihrer Entscheidung zum Kauf eines Gerätes aus dem Hause AsVIVA. Gemäß des zum 01. Januar 2002 geänderten europäischen Gewährleistungsrechts, steht Ihnen eine gesetzliche Gewährleistungsfrist von 2 Jahren zu. Die Gewährleistungsfrist beginnt mit der Übergabe des Fahrrades durch den Fachhändler. -
Seite 40: Garantiebedingungen
GARANTIEBEDINGUNGEN Sehr geehrte Kundin, sehr geehrter Kunde, vielen Dank, für den Erwerb eines AsVIVA-Markenproduktes. Wir freuen uns, dass wir Sie mit unseren Produkten überzeugen und Sie als Kunden hinzu gewinnen konnten. Markenprodukte von AsVIVA werden strengen Qualitätskontrollen unterzogen. Sollte ein von Ihnen erworbenes AsVIVA-Produkt dennoch eine Störung aufweisen, bitten wir Sie sich an unseren Kundensupport (am Ende der Bedingungen) zu wenden. - Seite 41 Kundensupport bereit. Dies ermöglicht eine zeitnahe Bearbeitung. Service außerhalb der Garantie Sollte Ihr AsVIVA Produkt auch nach Ablauf der Garantiezeit bzw. außerhalb der gesetzlichen Gewähr- leistung einen Defekt / eine Störung aufweisen, wie z.B. Verschleißteile und Abnutzung, stehen wir Ihnen gerne zur Verfügung.