Herunterladen Diese Seite drucken

philrouge EOS Montage- Und Bedienungsanleitung, Pflegehinweise

Vorschau ausblenden Andere Handbücher für EOS:

Werbung

Verfügbare Sprachen

Verfügbare Sprachen

Montage- und Bedienungsanleitung, Pflegehinweise.
Notice de montage et d'utilisation, conseils d'entretien.
Assembly and use manual, care instruction.
November 2016

Werbung

loading

Inhaltszusammenfassung für philrouge EOS

  • Seite 1 Montage- und Bedienungsanleitung, Pflegehinweise. Notice de montage et d’utilisation, conseils d’entretien. Assembly and use manual, care instruction. November 2016...
  • Seite 2 B O X S P R I N G Montage- und Bedienungsanleitung, Pflegehinweise Notice de montage et d’utilisation, conseils d’entretien Assembly and use manual, care instructions Öffnen Sie die Verpackung nicht mit einem Teppichmesser, um Beschädigungen Ihres Polsterbettes zu vermeiden. N’ouvrez pas l’emballage avec un cutter afin d’éviter toute détérioration de votre sommier tapissier.
  • Seite 3: Inhaltsverzeichnis

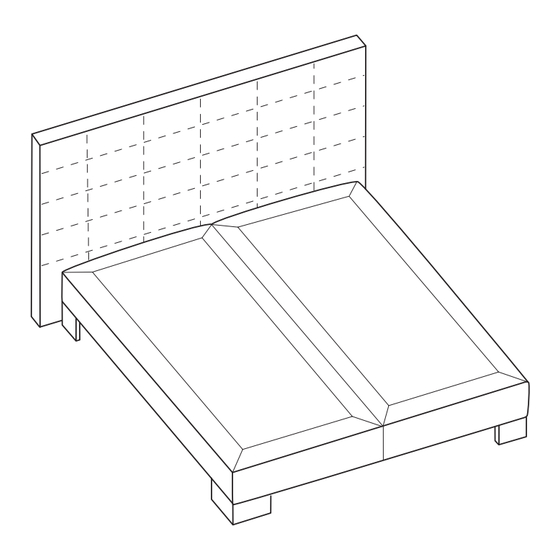
    Einführung / Introduction Inhalt Übersicht Montageteile ..................Diese Anleitung hilft Ihnen bei der Montage Ihres neuen Betts. Wir empfehlen Ihnen dringend, die Anleitung bei der Montage zu benutzen. Boxspring fix Achtung: Bitte beachten Sie ergänzende Dokumentationen für Zubehörteile, 1. Montage der Füße 5 –...
  • Seite 4: Übersicht Montageteile

    Boxspring fix Übersicht Montageteile 1. Montage der Füße Anzahl der Füße Boxspring fix 001 – Schrauben für Verbindungsfüße und Unterlegscheiben 002 – Schrauben für Holz- und Chrom-Winkelfüße Boxspring Einzelbett (80/90/100 cm) Set mit 4 Füßen Boxspring elektrisch 004 – lange Schrauben (Box) 005 –...
  • Seite 5: Abkippen Der Box

    Boxspring fix Boxspring fix 1. Montage der Füße 1. Montage der Füße Montage bei hoher Raumhöhe 1.4 Abkippen der Box 1.1 Stellen Sie die Boxsprings mit der Matratzenseite 1.2 Montage der Füße an die Wand. oder Montage der Füße mit Gewindeschrauben Schrauben Sie die Füße in die vorgesehenen Löcher mit Gewindemuffen.
  • Seite 6: Montage Des Kopfteils

    Boxspring fix Boxspring fix 1. Montage der Füße 2. Montage des Kopfteils Montage bei niedriger Raumhöhe 2.1 Heben Sie das Kopfteil zu zweit an. Beschlägeteile der Box auf die Beschläge des Kopfteils ausrichten. 1.5 Box 1 entweder auf die Längsseite oder flach 1.7 Anschließend Box 1 aufstellen (steht jetzt selb- auf die Oberseite legen und die Position des Klett- ständig).
  • Seite 7: Montage Der Elektrischen Boxspring

    Boxspring elektrisch Boxspring elektrisch 1. Montage der elektrischen Boxspring 2. Montage des Motors 1.1 Legen Sie das bewegliche Oberteil der Box 2.1 Öffnen Sie die beiden Verschlussplatten (1) ganz, auf die Oberseite und positionieren Sie das Unterteil durch seitliches Verschieben und Herausziehen. so, dass die Löcher auf die Schrauben ausgerichtet sind.
  • Seite 8 Boxspring elektrisch Boxspring elektrisch 2. Montage des Motors 2. Montage des Motors 2.3 Setzen Sie den Motor unter Beachtung der 2.5 Falls eine LED Unterflurbeleuchtung vorhanden Kopf- und Fußrichtung auf das Motorgestänge auf. ist, diese zuerst montieren und dann anschließen. Lassen Sie den Motor in den Elementen an den Das Netzteil (6) und das Netzkabel (7) können Querverstrebungen einrasten.
  • Seite 9: Montage Der Füße

    Boxspring elektrisch Boxspring elektrisch 3. Montage der Füße 3. Montage der Füße Anzahl der Füße Montage bei hoher Raumhöhe 3.1 Stellen Sie die Boxsprings mit der Matratzenseite 3.2 Montage der Füße an die Wand. Achtung: Achten Sie darauf, dass sich das Kopfteil des Betts auf dem Boden befindet.
  • Seite 10 Boxspring elektrisch Boxspring elektrisch 3. Montage der Füße 3. Montage der Füße 3.4 Abkippen der Box Montage bei niedriger Raumhöhe 3.5 Box 1 entweder auf die Längsseite oder flach 3.7 Anschließend Box 1 aufstellen (steht jetzt selb- auf die Oberseite legen und die Position des Klett- ständig).
  • Seite 11: Montage Des Kopfteils

    Boxspring elektrisch Boxspring elektrisch 4. Montage des Kopfteils 5. Inbetriebnahme 4.1 Heben Sie das Kopfteil zu zweit an. Beschlägeteile 5.1 Gemäß Position 2.1 Netzteil (6) mittels Sekundärverbinder (8) mit der der Box auf die Beschläge des Kopfteils ausrichten. Sekun därzuleitung (9) verbinden und Sekundärverschluss schließen und sichern. Netzkabel (7) mit Netzteil (6) verbinden.
  • Seite 12: Kindersicherung

    Boxspring elektrisch Boxspring elektrisch 5. Inbetriebnahme 5. Inbetriebnahme 5.3 Einlernprozedur (Teach-in) e) Gespeicherte Positionen anfahren durch Drücken Um die Kommunikation zwischen Handsender, der Tasten 9, 10 oder 11. Taste solange gedrückt Steuerung, Antrieben und Funkempfänger herzu- halten bis die Position angefahren ist. stellen, muss eine Einlernprozedur (Teach-in) durch- geführt werden.
  • Seite 13: Montage Der Matratzenhalter

    Boxspring elektrisch Boxspring elektrisch 5. Inbetriebnahme 6. Montage der Matratzenhalter 5.8 Fernbedienbare Steckdose Verhalten der Memorypositionen bei Synchron­ 6.1 Fahren Sie die Fußteile in die oberste Position. Diese Funktion ist nicht aktiv. funktion aus/ein: Grundsätzlich werden Memorypositionen dem 5.9 Synchronfunktion System zugeordnet, auf dessen Sender sie program- Um die Synchronfunktion nutzen zu können, müssen miert sind, unabhängig davon, ob die Synchron-...
  • Seite 14: Notabsenkung

    Boxspring elektrisch Boxspring elektrisch 7. Notabsenkung 8. Technische Hinweise Durch die Funktion Notabsenkung läßt sich Ihr Bett 8.1 Hinweise zum Funkbetrieb 8.4 Pflegehinweise Motor im Falle eines Stromausfalles oder Defektes in der Die Antriebe Ihrer Box sind mit einem Funkmodul Vor Beginn der Reinigung immer Netzstecker ziehen.
  • Seite 15: Sicherheit Und Nutzung

    Sicherheit und Nutzung Sicherheit und Nutzung 1. Sicherheitshinweise 2. Hinweise zur Nutzung und Aufstellung des Bettes 1.1 Der Gültigkeitsbereich der Sicherheitshinweise Sowohl die Kindersicherung als auch die Batterie- 2.1 Geräuschbildung/Knarren – Insbesondere bei zusätzlichem Einsatz eines bezieht sich auf das Bettgestell, mit ggf. zugehörigen Notabsenkung sind keine Sicherheitssysteme im Unsere Bettsysteme sind selbstverständlich so kon- Toppers muss dieser von Zeit zu Zeit gewendet...
  • Seite 16: Pflege Und Fleckenentfernung

    Dies ist eine warentypische Eigenschaft und kein Matratzen werden im Gebrauch etwas weicher, im Wasserlösliche Flecken Mangel. Mit einem speziellen Fusselrasierer lassen Durchschnitt ca. 10 –15%. Dies sind warentypische Blut, Ei, Kot, Urin Mit kaltem, destilliertem Wasser, evtl. mit Lösung aus Haar sich die Pillings problemlos wieder entfernen.
  • Seite 17 Sommaire Aperçu pièces de montage ................Boxspring fixe 1. Montage des pieds 33 –36 ................2. Montage de la partie tête ................Boxspring électrique 1. Montage du sommier tapissier (Boxspring) électrique ..... 2. Montage du moteur 39–41 ................3. Montage des pieds 42–45 ................
  • Seite 18: Aperçu Pièces De Montage

    Boxspring fixe Aperçu pièces de montage 1. Montage des pieds Nombre de pieds Boxspring fixe 001 – Vis pour pieds de liaison et rondelles 002 – Vis pour pieds d’angle en bois et en chrome Lit simple Boxspring (80/90/100 cm) Set avec 4 pieds Boxspring électrique 004 –...
  • Seite 19 Boxspring fixe Boxspring fixe 1. Montage des pieds 1. Montage des pieds Montage dans des pièces hautes 1.4 Renversement du sommier 1.1 Appuyez le sommier tapissier Boxspring côté 1.2 Montage des pieds matelas contre le mur. oder Montage des pieds avec des vis filetées Vissez les pieds dans les trous prévus à...
  • Seite 20: Montage De La Partie Tête

    Boxspring fixe Boxspring fixe 1. Montage des pieds 2. Montage de la partie tête Montage dans des pièces basses 2.1 Soulever la partie tête à deux. Positionner les éléments de fixation du sommier sur les fixations 1.5 Poser le sommier 1 soit sur le côté longitudinal, 1.7 Ensuite disposer le sommier 1 (tient désormais de la partie tête.
  • Seite 21: Montage Du Sommier Tapissier (Boxspring) Électrique

    Boxspring électrique Boxspring électrique 1. Montage du sommier tapissier (Boxspring) électrique 2. Montage du moteur 1.1 Posez la partie supérieure mobile du sommier 2.1 Ouvrez les deux plaques de fermeture (1) entièrement tapissier (box) sur le côté supérieur et positionnez la en les faisant glisser latéralement avant de les extraire.
  • Seite 22: Montage Du Moteur

    Boxspring électrique Boxspring électrique 2. Montage du moteur 2. Montage du moteur 2.3 Posez le moteur sur la tige de moteur en respectant 2.5 Si un éclairage indirect à LED est disponible, le le sens de la tête et du pied. Enclenchez le moteur dans monter en premier, puis le raccorder.
  • Seite 23: Montage Des Pieds

    Boxspring électrique Boxspring électrique 3. Montage des pieds 3. Montage des pieds Nombre de pieds Montage dans des pièces hautes 3.1 Appuyez le sommier tapissier (Boxspring) 3.2 Montage des pieds côté matelas contre le mur. Attention: veillez à ce que la partie tête du lit se trouve sur le sol.
  • Seite 24 Boxspring électrique Boxspring électrique 3. Montage des pieds 3. Montage des pieds 3.4 Renversement du sommier Montage dans des pièces basses 3.5 Poser le sommier 1 soit sur le côté longitudinal, 3.7 Ensuite disposer le sommier 1 (tient désormais soit à plat sur la face supérieure et respecter la debout tout seul).
  • Seite 25: Montage De La Partie Tête

    Boxspring électrique Boxspring électrique 4. Montage de la partie tête 5. Mise en marche 4.1 Soulevez la partie tête à deux. Positionner les 5.1 Conformément au paragraphe 2.1, connecter le bloc d’alimentation (6) éléments de fixation du sommier sur les fixations à...
  • Seite 26: Sécurité Enfant

    Boxspring électrique Boxspring électrique 5. Mise en marche 5. Mise en marche 5.3 Procédure d’apprentissage (Teach-in) b) La position actuelle est affectée à la touche de Pour établir la communication entre la télécom- mémorisation correspondante. mande, la commande, le mécanisme d’entraînement c) Lors de cette opération, les positions déjà...
  • Seite 27: Montage Du Support De Matelas

    Boxspring électrique Boxspring électrique 5. Mise en marche 6. Montage du support de matelas b) Appuyez à nouveau sur la touche 17 et main- Désactiver la fonction synchrone 6.1 Mettez les parties pieds en position supérieure. tenez-la enfoncée. Le réglage du module LED est Appuyez à...
  • Seite 28: Abaissement De Secours

    Boxspring électrique Boxspring électrique 7. Abaissement de secours 8. Instruction techniques En cas de panne de courant ou de panne de l’ali- 8.1 Remarques relatives au mode radio 8.4 Conseils d’entretien du moteur men tation courant, votre lit peut être remis en posi- Les mécanismes d’entraînement de votre sommier Avant de débuter le nettoyage, toujours retirer la tion initiale au moyen de la fonction d’abaissement...
  • Seite 29: Sécurité Et Utilisation

    Sécurité et utilisation Sécurité et utilisation 1. Instructions de sécurité 2. Instructions relatives à l’utilisation et la mise en place du lit 1.1 La validité des instructions de sécurité porte n’ont pas reçu une formation approfondie à l’utilisa- 2.1 Formation de bruits/grincements –...
  • Seite 30 Le terme boulochage désigne la formation de 2.8 Odeur de neuf et comportement en position Taches solubles à l’eau nodules sur des tissus, résultant la plupart du temps allongée Sang, œuf, excréments, urine Poursuivre le traitement avec de l’eau distillée froide, éventuelle- du frottement de différents tissus (faux boulochage), Les nouveaux produits ont toujours une odeur pro- ment avec une solution à...
  • Seite 31 Contents Summary of assembly parts ................Fixed Boxspring 1. Assembling the feet 61– 64 ................2. Assembling the head section ..............Electric Boxspring 1. Assembling the electric Boxspring ............2. Installing the motor 67– 69 ................3. Assembling the feet 70 –73 ................
  • Seite 32: Summary Of Assembly Parts

    Fixed Boxspring Summary of assembly parts 1. Assembling the feet Number of feet Fixed Boxspring 001 – Screws for connecting feet and washers 002 – Screws for wood and chrome angled feet Boxspring single bed (80/90/100 cm) Set of 4 feet Electric Boxspring 004 –...
  • Seite 33 Fixed Boxspring Fixed Boxspring 1. Assembling the feet 1. Assembling the feet Assembly with high room height 1.4 Tilting the box 1.1 Place the Boxsprings with the mattress side 1.2 Assembling the feet against the wall. oder Assembling the feet with threaded screws Screw the feet into the holes provided using threaded sleeves.
  • Seite 34: Assembling The Head Section

    Fixed Boxspring Fixed Boxspring 1. Assembling the feet 2. Assembling the head section Assembly with low room height 2.1 Two persons lift the head section. Align the fitting parts of the box to the fittings of the head section. 1.5 Place Box 1 either on the long side or flat on the 1.7 Then set up Box 1 (stands alone now).
  • Seite 35: Assembling The Electric Boxspring

    Electric Boxspring Electric Boxspring 1. Assembling the electric Boxspring 2. Installing the motor 1.1 Lay the movable top of the box on the 2.1 Open both closing plates (1) fully by sliding them upper side and position base so that the holes out sideways.
  • Seite 36 Electric Boxspring Electric Boxspring 2. Installing the motor 2. Installing the motor 2.3 Place the motor on the motor rods, taking the head 2.5 If under-bed LED lighting is provided, you and foot direction into account. Engage the motor into should now assemble these first and then connect the elements on the cross bracings.
  • Seite 37: Assembling The Feet

    Electric Boxspring Electric Boxspring 3. Assembling the feet 3. Assembling the feet Number of feet Assembly with high room height 3.1 Place the Boxsprings with the mattress side 3.2 Assembling the feet against the wall. Take care to ensure that the head section of the bed is on the floor.
  • Seite 38 Electric Boxspring Electric Boxspring 3. Assembling the feet 3. Assembling the feet 4.4 Tilting the box Assembly with low room height 3.5 Place Box 1 either on the long side or flat on the 3.7 Then set up Box 1 (stands alone now). top side and note the position of the Velcro fastener.
  • Seite 39: Assembling The Head Section

    Electric Boxspring Electric Boxspring 4. Assembling the head section 5. Start-up 4.1 Two persons lift the head section. Align the fitting 5.1 Connect power unit (6) to secondary cable (9) using secondary connector (8) parts of the box to the fittings of the head section. according to Fig.
  • Seite 40: Teach-In Process

    Electric Boxspring Electric Boxspring 5. Start-up 5. Start-up 5.3 Teach-in process 5.5 Child safety lock To establish communication between the handset, Activating the child safety lock control system, drives and receiver, a teach-in pro- a) Press the S-button (8) for approx. 10 seconds. cess must be carried out.
  • Seite 41: Assembling The Mattress Holders

    Electric Boxspring Electric Boxspring 5. Start-up 6. Assembling the mattress holders 5.9 Synchronisation function Behaviour of memory positions when the synchro­ 6.1 Move the foot sections to their In order to use the synchronisation function, both nisation function is switched on/off: uppermost position.
  • Seite 42: Emergency Lowering

    Electric Boxspring Electric Boxspring 7. Emergency lowering 8. Technical notes The emergency lowering function allows you 8.1 Information on radio control 8.4 Care instructions for motor to return your bed to the start position if there The drives of your box are equipped with a radio Before cleaning, always disconnect the mains plug.
  • Seite 43: Safety And Use

    Safety and use Safety and use 1. Safety instructions 2. Instructions on use and set-up of the bed 1.1 The safety information applies to the bed frame Never open the closing plates during operation: this 2.1 Noise/creaking – In particular, if an additional mattress topper including any associated adjustment mechanisms, can lead to malfunctions and even personal injury.
  • Seite 44 2.6 Color variation Mattresses become a little softer with use, on Water soluble stains Along with color variations due to production and average about 10–15%. These are qualities typical Blood, egg, feces, urine Treat with cold, distilled water. If necessary, follow up treatment finishing techniques, caused by different stroke of the goods and normal divergences from firmness, with a solution of shampoo or delicate fabrics wash agent.
  • Seite 46 DOC AG Mövenstrasse 8 CH-9015 St.Gallen Tel: +41 (0)71 313 90 80 Fax: +41 (0)71 313 90 89 info@doc.ch www.doc.ch...