Herunterladen Inhalt Inhalt Diese Seite drucken
SOMFY J4 RTS Installationsanleitung
Vorschau ausblenden Andere Handbücher für J4 RTS:
Inhaltsverzeichnis

Werbung

Verfügbare Sprachen

Verfügbare Sprachen

www.somfy.com
J4 RTS
Notice installateur
Installationsanleitung
Guida d'installazione
Installer Guide

Werbung

Inhaltsverzeichnis
loading

Inhaltszusammenfassung für SOMFY J4 RTS

  • Seite 1 J4 RTS Notice installateur Installationsanleitung Guida d’installazione Installer Guide...
  • Seite 2: Domaine D'application

    Il est interdit de faire une boucle complète sur le câble d’alimentation! Par la présente, Somfy SAS, F-74300 CLUSES déclare en tant que fabricant que la motorisation couverte par ces instructions, marquée pour être alimentée en 230V~50Hz et utilisée comme indiqué dans ces instructions, est conforme aux exigences essentielles des Directives Européennes applicables et en particulier de la...
  • Seite 3 Bande acous- Réducteur Frein Rotor/Stator courses tique Endschalterge- Großes Reso- Getriebe Bremse Rotor/Stator häuse nanzband Scatola del Guarnizione Scatola degli Freno Rotore/statore finecorsa acustica ingranaggi Limit switch Acoustic tape Gearbox Brake Rotor/Stator casing © 2013-2016 Somfy SAS. All rights reserved.
  • Seite 4: Inhaltsverzeichnis

    - Le moteur, le couple et le temps de fonctionnement doivent être ajustés en fonction de l‘installation complète. - Seuls les accessoires d‘origine SOMFY doivent être utilisés (adaptateurs, supports, connecteurs, câble d’alimentation, ...). - Le fonctionnement correct de l‘installation n‘est garanti que si l‘installation et le montage ont été...
  • Seite 5: Consignes Spécifiques De Sécurité

    Pour ne pas endommager le produit : 2) Ne jamais l’immerger! 3) Éviter les chocs ! 4) Éviter les chutes ! 5) Ne jamais le percer! 6) Éviter les manoeuvres lors de la formation de gel sur le B.S.O. © 2013-2016 Somfy SAS. All rights reserved.
  • Seite 6 Dans ce cas le champignon est utilisé pour assurer la sécurité du produit porteur. Inclinaison moteur Le moteur J4 RTS a été conçu pour fonctionner à l’horizontale : 10° maxi © 2013-2016 Somfy SAS. All rights reserved.
  • Seite 7: Montage

    • À l’aide des clips (5), fixer le moteur dans le caisson (4) par-dessus les bandes acoustiques (6a). • L’axe peut être fixé dans l’adaptateur avec une vis sans tête (7). Couple de serrage = 2 N.m maximum © 2013-2016 Somfy SAS. All rights reserved.
  • Seite 8: Caisson 57 X 51 Mm Ouvert En Haut

    • L’axe peut être fixé dans l’adaptateur avec une vis sans tête (7). Couple de serrage = 2 N.m maximum Les clips intérieurs ne sont pas utilisables avec les moteurs J418 (moteurs J4 à couple de 18 N.m). © 2013-2016 Somfy SAS. All rights reserved.
  • Seite 9: Caisson 78 X 67 Mm Ouvert En Bas

    (7). Couple de serrage = 2 N.m maximum Pour moteur de plus de 10 N.m • L‘étrier additionnel doit être fixé avec une nouvelle vis -> couple de serrage ≤ 4 N.m. © 2013-2016 Somfy SAS. All rights reserved.
  • Seite 10: Caisson 67 X 66 Mm Ouvert En Bas

    • Monter les deux adaptateurs de caisson (8) sur le moteur. • Insérer le moteur dans le caisson (4). • À l’aide des clips (5), fixer le moteur dans le caisson (4). © 2013-2016 Somfy SAS. All rights reserved.
  • Seite 11: Câblage

    • Toujours faire un coude sur le câble d’alimentation de la motorisation entre la platine et le moteur pour éviter la pénétration d’eau dans la motorisation ! • Ne pas entrelacer le câble d’alimentation de l’actionneur J4 RTS avec un autre câble.
  • Seite 12: Mise En Service

    4. MISE EN SERVICE La notice ne décrit que la mise en service à l’aide d’un point de commande local Somfy de type Telis MOD/ VAR. Pour une mise en service à l’aide de tout autre point de commande local Somfy, se référer à la notice correspondante.
  • Seite 13: Vérification Du Sens De Rotation Du Moteur

    (chapitre 8.3) puis recommencer la procédure de réglage. Par défaut, l’actionneur J4 RTS est réglé pour fonctionner dans un B.S.O. avec cinématique normale. Il est cependant possible de choisir entre un mode de fonctionnement pour B.S.O. avec cinématique normale ou pour B.S.O.
  • Seite 14 • Arrêter le B.S.O. à l’endroit désiré (l’usage de la molette du point de commande local de type Telis MOD/VAR permet de régler avec précision la position souhaitée). • Appuyer sur la touche Montée (Le B.S.O. effectue un bref mouvement pour confirmer l’enregistrement). © 2013-2016 Somfy SAS. All rights reserved.
  • Seite 15: Enregistrement Du Premier Point De Commande Local Somfy

    : le B.S.O. effectue un bref mouvement, le point de commande est enregistré. Contrôle des réglages 4.7. Contrôler le réglage des fins de course haute et basse à l’aide du point de commande local Somfy. 5. UTILISATION 5.1. Fonctionnement standard 5.1.1. Position favorite «my»...
  • Seite 16: Touches Montée Et Descente

    : Mode EU et mode US. Par défaut, le moteur J4 RTS est réglé pour fonctionner en mode En mode US, un appui bref sur les touches montée ou descente provoque une montée ou descente complète du B.S.O..
  • Seite 17: Réglages Supplémentaires

    Montée : Le B.S.O. effectue un bref mouvement la position «my» est effacée (la touche «my» ne servira plus que de touche «STOP». En cas d’utilisation d’un capteur soleil, s’il y a apparition de soleil, le B.S.O. ira en position basse). © 2013-2016 Somfy SAS. All rights reserved.
  • Seite 18: Ajout/Suppression De Points De

    6.2. Ajout/Suppression de points de commande RTS et capteurs RTS Somfy 6.2.1. Ajout / Suppression d’un point de commande RTS • Prendre un point de commande RTS enregistré dans le moteur. PROG. PROG. • Appuyer sur le bouton PROG du point de commande RTS (A) PROG.
  • Seite 19: Position «Disparition Soleil

    «my». • Appuyer pendant 5 secondes sur les touches «my» et Descente : Le B.S.O. effectue un bref mouvement, il ne chan- gera pas de position lors de la disparition du soleil. © 2013-2016 Somfy SAS. All rights reserved.
  • Seite 20: Molette

    • Pour valider le nouveau sens de rotation du moteur, appuyer pendant 2 secondes sur la touche «my» : le B.S.O. effectue un bref mouvement, le sens de rotation du moteur est changé. © 2013-2016 Somfy SAS. All rights reserved.
  • Seite 21: Modification Des Fins De Course

    3, arrêter le BSO avant le fin de course désiré et finir le réglage avec la molette du point de commande local. • Appuyer sur la touche Montée (Le B.S.O. effectue un bref mouvement en sens montée pour confirmer l’enregistrement). © 2013-2016 Somfy SAS. All rights reserved.
  • Seite 22: Astuces Et Conseils

    Telis Mod/VAR RTS les lames 7.2. Remplacement d’un point de commande Somfy perdu ou cassé Cette remise à zéro supprime tous les points de commande par contre les capteurs et la position favorite sont gardés. Ne réaliser la double coupure de courant qu’au niveau du moteur à...
  • Seite 23: Retour En Configuration D'origine

    Indice de protection IP 54 Nombre maximal de points de commandes associés Nombre maximal de capteurs associés Niveau de sécurité Classe I Couple (Nm) Longueur moteur (mm) Niveau de puissance acoustique LpA ≤ 70 dB(A) © 2013-2016 Somfy SAS. All rights reserved.
  • Seite 24: Ubersetzung Des Handbuchs

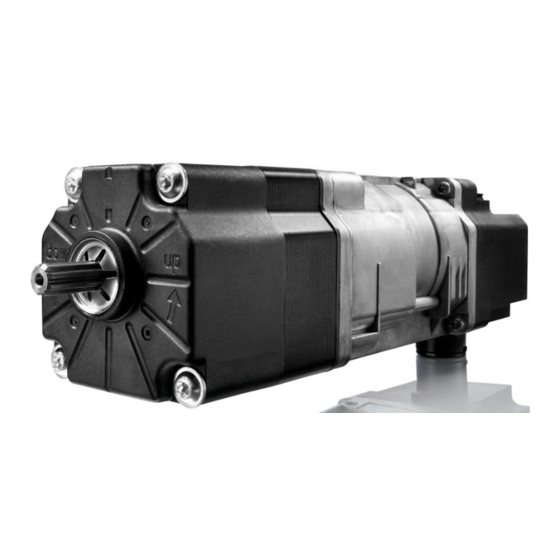
    UBERSETZUNG DES HANDBUCHS Diese Anleitung gilt für alle Antriebe vom Typ J4 RTS, deren Ausführungen im aktuellen Katalog zu finden sind. Bestimmungsgemässeverwendung Die Antriebe J4 wurden für den Antrieb aller Arten von Jalousien entwickelt. Der Installateur, ein Fachmann für Gebäudeautomation, muss sicherstellen, dass die Installation des Antriebs nach Montage den geltenden Vorschriften des Orts der Inbetriebnahme entspricht.
  • Seite 25: Sicherheit

    - Der Antrieb, das Drehmoment und die Betriebsdauer müssen auf den Betrieb der gesamten Anlage angepasst werden. - Es dürfen ausschließlich Original-Zubehörteile von Somfy verwendet werden (Adapter, Halter, Verbinder, Stromversorgungskabel, ...). - Die ordnungsgemäße Funktion kann nur garantiert werde, wenn die Montage nach den Regeln der Technik erfolgt ist, wenn die Stromversorgung ausreichend ist und eine regelmäßige Wartung durchgeführt wird.
  • Seite 26: Spezifische Sicherheitshinweise

    2) Tauchen Sie das Produkt nicht in Flüssigkeiten! 3) Vermeiden Sie Stöße! 4) Lassen Sie das Produkt nicht fallen! 5) Bohren Sie keine Löcher in das Produkt! 6) Unterlassen Sie die Bedienung der Jalousie, wenn sich Frost gebildet hat. © 2013-2016 Somfy SAS. All rights reserved.
  • Seite 27: Stanzbild Für Die Kopfschiene

    Wenn der Behang aus Z-förmigen Lamellen besteht, muss die obere Endlage des Antriebs eingestellt werden. In diesem Fall dient der Schaltfühler als Sicherheitsvorrichtung für den Behang. Neigung des Antriebs Der J4 RTS Antrieb wurde für den waagerechten Betrieb konzipiert: 10° maxi © 2013-2016 Somfy SAS. All rights reserved.
  • Seite 28: Montage

    • Unterlegen Sie den Antrieb mit kleinen Schalldämmstrei- fen (6a)und fixieren Sie ihn dann mithilfe der Halteklam- mern (5) in der Kopfschiene (4).. • Die Welle kann mit einem Gewindestift (7) im Adapter fixiert werden. Anzugsmoment = 2 N.m maximal © 2013-2016 Somfy SAS. All rights reserved.
  • Seite 29: Kopfschiene 57 X 51 Mm, Oben Offen

    • Die Welle kann mit einem Gewindestift (7) im Adapter fixiert werden. Anzugsmoment = 2 N.m maximal Die Fixierung mit innenliegenden Halteklammern ist in Verbindung mit den Antrieben J418 (Antriebe J4 mit 18 Nm Drehmoment) nicht möglich. © 2013-2016 Somfy SAS. All rights reserved.
  • Seite 30: Kopfschiene 78 X 67 Mm, Unten Offen

    • Die Welle kann mit einem Gewindestift (7) im Adapter fixiert werden. Anzugsmoment = 2 N.m maximal Antriebe mit mehr als 10 Nm: • Die zusätzliche Halteklammer muss mit einer Schraube befestigt werden -> Anzugsmoment ≤ 4 Nm. © 2013-2016 Somfy SAS. All rights reserved.
  • Seite 31: Kopfschiene 67 X 66 Mm, Unten Offen

    Teil des Antriebs oder des Gestänges verläuft. • Bringen Sie die beiden Kopfschienenadapter (8) am Antrieb an. • Schieben Sie den Antrieb in die Kopfschiene (4). • Fixieren Sie den Antrieb mithilfe der Halteklammern (5) in der Kopfschiene (4). © 2013-2016 Somfy SAS. All rights reserved.
  • Seite 32: Verkabelung

    Motorisierung, um das Eindringen von Wasser in die Motorisierung zu verhindern. • Das Versorgungskabel des J4 RTS sollte nicht mit einem anderen Kabel verdrillt sein. Für einen guten Funkempfang müssen mindestens 30 cm des Netzkabels des J4 RTS außerhalb der Kopfschiene verlaufen. L ≥ 30 cm...
  • Seite 33: Inbetriebnahme

    4. INBETRIEBNAHME Diese Anleitung beschreibt nur die Inbetriebnahme mithilfe eines lokalen Somfy-Funksenders vom Typ Telis MOD/VAR. Für die Inbetriebnahme mithilfe eines anderen Somfy-Funksenders ziehen Sie bitte die entsprechende Anleitung zurate. 4.1. Feststellung der bereits durchgeführten Einstellschritte Schließen Sie nur einen Antrieb an die Spannungsversorgung Schalten Sie die Spannungsversorgung ein und folgen Sie je nach Reaktion der Jalousie den Anweisungen „a“...
  • Seite 34: Testen Der Drehrichtung Des Antriebs

    Wurde die Programmiertaste bereits gedrückt, muss nochmals von Anfang an mit der Programmierung begonnen werden, einschliesslich der doppelten Spannungsunterbrechung Der Antrieb J4 RTS ist standardmäßig auf den Betrieb mit einer Jalousie mit normaler Kinematik eingestellt. Es kann jedoch zwischen der Betriebsart für Jalousie mit normaler Kinematik und für Jalousie mit Kinematik mit Fahrposition gewählt werden.
  • Seite 35: Obere Endlage (Manuelle Einstellung)

    • Halten Sie die Jalousie in der gewünschten Position an (mithilfe des Scrollrads an Funksendern des Typs Telis MOD/ VAR kann die Position sehr präzise eingestellt werden). • Drücken Sie die AUF-Taste (die Jalousie bewegt sich kurz, um die Speicherung zu bestätigen). © 2013-2016 Somfy SAS. All rights reserved.
  • Seite 36: Einlernen Des Ersten Lokalen Somfy-Funksenders

    Funksenders: Die Jalousie bewegt sich kurz, der Funksender ist eingelernt. Überprüfen der Einstellungen 4.7. Überprüfen Sie die Endlageneinstellungen mit dem lokalen Somfy-Funksender. 5. BEDIENUNG 5.1. Standardbetrieb 5.1.1. Lieblingsposition („my“-Position) Eine als „Lieblingsposition (my)“ bezeichnete Zwischenposition, bei der es sich nicht um die obere oder untere Endlage handelt, ist im Antrieb voreingestellt.
  • Seite 37: Auf- Und Ab-Tasten

    Ein kurzer Druck auf die AUF- oder AB-Taste verstellt die Neigung der Lamellen. 5.1.4. Wahl der Betriebsart. EU-Modus oder US-Modus • Der Antrieb J4 RTS ist werkseitig auf den US-Modus eingestellt. Es kann jedoch zwischen dem EU-Modus und dem US-Modus gewählt werden.
  • Seite 38: Zusätzliche Einstellmöglichkeiten

    AUF: Die Jalousie bewegt sich kurz, die „my“-Position ist gelöscht (die „my“-Taste hat jetzt nur noch die „Stopp“- Funktion). Wird ein Sonnensensor verwendet, fährt die Jalousie in die untere Endlage, sobald die Sonne strahlt). © 2013-2016 Somfy SAS. All rights reserved.
  • Seite 39: Hinzufügen/Löschen Von Somfy-Funksendern Und Somfy-Sensoren

    Jalousie kurz bewegt: Der Antrieb befindet sich jetzt in Lernbereitschaft. • Drücken Sie 7 Sekunden lang die PROG-Taste des RTS- Sensors (C). Die Jalousie bewegt sich zweimal kurz. Alle RTS-Sensoren sind aus dem Antrieb gelöscht. © 2013-2016 Somfy SAS. All rights reserved.
  • Seite 40: Position „Keine Sonne

    Bewegung und hält in der „my“-Position an. • Drücken Sie 5 Sekunden lang gleichzeitig die Tasten „my“ und AB: Die Jalousie bewegt sich kurz, sie ändert jetzt ihre Position nicht, wenn die Sonne nicht scheint. © 2013-2016 Somfy SAS. All rights reserved.
  • Seite 41: Änderung Der Wendeschrittlänge Pro Rastschritt Des Scrollrads

    AB: Die Jalousie bewegt sich kurz. • Drücken Sie zur Bestätigung der neuen Drehrichtung des Antriebs 2 Sekunden lang die Taste „my“: Die Jalousie bewegt sich kurz, die Drehrichtung des Antriebs ist geändert. © 2013-2016 Somfy SAS. All rights reserved.
  • Seite 42: Änderung Der Endlagen

    (mithilfe des Scrollrads der Funksender des Typs Telis MOD/ VAR kann die Position sehr präzise eingestellt werden). • Drücken Sie die AUF-Taste (die Jalousie bewegt sich kurz aufwärts, um die Speicherung zu bestätigen). © 2013-2016 Somfy SAS. All rights reserved.
  • Seite 43: Tipps Und Empfehlungen

    Der Funksender ist nicht kompatibel einlernen und verwenden leicht neigen 7.2. Austausch eines verlorenen oder beschädigten Somfy-Funksenders Diese Funktion löscht alle Funksender. Die Sensoren und die Lieblingsposition bleiben jedoch gespeichert. Führen Sie die doppelte Spannungsunterbrechung nur an dem Antrieb durch, der zurückgesetzt werden soll! Die Jalousie nicht in die obere Endlage bringen! •...
  • Seite 44: Rücksetzen Auf Werkseinstellung

    - 20 °C à + 60 °C Schutzart IP 54 Max. Anzahl Funksender, die eingelernt werden können Max. Anzahl Sensoren, die eingelernt werden können Schutzklasse Kategorie I Drehmoment (Nm) Länge des Antriebs (mm) Schalldruckpegel LpA ≤ 70 dB(A) © 2013-2016 Somfy SAS. All rights reserved.
  • Seite 45: Settore D'applicazione

    ISTRUZIONI TRADOTTE Il presente manuale si applica a tutte le motorizzazioni J4 RTS le cui versioni sono disponibili nel catalogo in vigore. Settore d’applicazione Le motorizzazioni J4 sono progettate per motorizzare tutti i tipi di tende veneziane orientabili. L’installatore, professionista della motorizzazione e dell’automazione d’interni, deve accertarsi che l’in- stallazione del prodotto motorizzato una volta installato rispetti le norme in vigore nel paese di messa in servizio come, nello specifico, la normativa sulle tende esterne EN 13561.
  • Seite 46 - Il motore, la coppia e il tempo di funzionamento devono essere regolati in funzione dell’impianto completo. - Utilizzare esclusivamente gli accessori originali Somfy (adattatori, supporti, connettori, cavo di alimentazione, ecc.). - Il corretto funzionamento dell’impianto è garantito esclusivamente se l’installazione e il montaggio sono stati eseguiti a regola d’arte, se l’alimentazione elettrica è...
  • Seite 47: Istruzioni Di Sicurezza Specifiche

    Per evitare di danneggiare il prodotto: 2) Non immergerlo mai! 3) Evitare gli urti! 4) Evitare che cada! 5) Non forarlo mai! 6) Evitare le manovre in caso di formazione di gelo sul frangisole orientabile. © 2013-2016 Somfy SAS. All rights reserved.
  • Seite 48 In questo caso il fine corsa di sicurezza serve ad assicurare la sicurezza del frangisole orientabili. Inclinazione motore Il motore J4 RTS è stato progettato per funzionare in posizione orizzontale: 10° © 2013-2016 Somfy SAS. All rights reserved.
  • Seite 49: Montaggio

    • Usando delle clip (5), fissare il motore nel cassonetto (4) sopra i piccoli nastri acustici (6a). • L‘asse può essere fissato nell‘adattatore usando una vite senza testa (7). Coppia di serraggio = 2 N.m massimo © 2013-2016 Somfy SAS. All rights reserved.
  • Seite 50: Cassonetto 57 X 51 Mm Aperto In Alto

    • L‘asse può essere fissato nell‘adattatore usando una vite senza testa (7). Coppia di serraggio = 2 N.m massimo Le clip interne non sono utilizzabili con i motori J418 (motori J4 con coppia di 18 N.m). © 2013-2016 Somfy SAS. All rights reserved.
  • Seite 51: Cassonetto 78 X 67 Mm Aperto In Basso

    (7). Coppia di serraggio = 2 N.m massimo Per motore superiore a 10 Nm • La staffa aggiuntiva deve essere fissata usando una vite nuova -> coppia di serraggio ≤ 4 Nm. © 2013-2016 Somfy SAS. All rights reserved.
  • Seite 52: Cassonetto 67 X 66 Mm Aperto In Basso

    • Montare i due adattatori del cassonetto (8) sul motore. • Inserire il motore nel cassonetto (4). • Usando delle clip (5), fissare il motore nel cassonetto (4). © 2013-2016 Somfy SAS. All rights reserved.
  • Seite 53: Cablaggio

    • Sempre fare un anello sul cavo di alimentazione di rete tra la scheda elettronica e la motorizzazione per impedire la penetrazione dell’acqua nella motorizzazione. • Non intrecciare il cavo di alimentazione del dispositivo ricevitore J4 RTS con un altro cavo.
  • Seite 54: Messa In Servizio

    4. MESSA IN SERVIZIO Il manuale descrive la messa in servizio effettuata esclusivamente con un trasmettitore locale Somfy di tipo Telis MOD/VAR. Per una messa in servizio effettuata con altri tipi di trasmettitori locali Somfy, consultare il manuale corrispondente. 4.1. Identificazione delle fasi di regolazione già effettuate Deve essere alimentato un solo motore alla volta.
  • Seite 55: Verifica Del Senso Di Rotazion Del Motore

    (Sezione 8.3) e ripetere la procedura di regolazione. Il motore J4 RTS è regolato in modo predefinito per funzionare con un frangisole orientabile con cinematica normale. È tuttavia possibile scegliere tra una modalità di funzionamento per frangisole orientabile con cine- matica normale o per frangisole orientabile con cinematica con posizione di lavoro.
  • Seite 56: Kopfschiene 58 X 51 Mm Oder 58 X

    (l’uso della rotella del trasmettitore locale di tipo Telis MOD/ VAR permette di regolare con precisione la posizione desiderata). • Premere il pulsante Salita (Il frangisole orientabile effettua un breve movimento per confermare la programmazione). © 2013-2016 Somfy SAS. All rights reserved.
  • Seite 57: Programmazione Del Primo Trasmettitore Locale Somfy

    è programmato. Controllo delle regolazioni 4.7. Controllare la regolazione dei finecorsa alto e basso utilizzando il trasmettitore locale Somfy. 5. UTILIZZO 5.1. Funzionamento standard 5.1.1. Posizione preferita «my» Una posizione intermedia chiamata «posizione preferita (my)», diversa dalla posizione alta e dalla posizione bassa, è...
  • Seite 58: Pulsanti Salita E Discesa

    Salita o Discesa attiva l’orientamento delle lamelle. 5.1.4. Scelta del tipo di modalità. (modalità EU o modalità US) • Di default, il motore J4 RTS è programmato per funzionare in modalità US. È comunque possibile scegliere tra la modalità EU e la modalità US.
  • Seite 59: Regolazioni Supplementari

    "my" viene cancellata (il pulsante "my" fungerà solo da pulsante "STOP"). In caso di utilizzo di un sensore di luminosità, alla comparsa del sole il frangisole orientabile si sposterà nella posizione bassa). © 2013-2016 Somfy SAS. All rights reserved.
  • Seite 60 6.2. Aggiunta/Eliminazione di trasmettitori RTS e di sensori RTS Somfy 6.2.1. Aggiunta/Eliminazione di un trasmettitore RTS • Prendere un trasmettitore RTS registrato nel motore. • Premere il pulsante PROG del trasmettitore RTS (A) fino PROG. PROG. al breve movimento del frangisole orientabile: Il motore è...
  • Seite 61: Posizione "Scomparsa Del Sole

    "my". • Premere per 5 secondi i pulsanti "my" e Discesa: il fran- gisole orientabile effettua un breve movimento, non cambierà posizione alla scomparsa del sole. © 2013-2016 Somfy SAS. All rights reserved.
  • Seite 62: Modifica Del Senso Di Rotazione Della Rotella

    • Per confermare il nuovo senso di rotazione del motore, premere per 2 secondi il pulsante "my": il frangisole orientabile effettua un breve movimento, il senso di rotazione del motore è cambiato. © 2013-2016 Somfy SAS. All rights reserved.
  • Seite 63: Modifica Dei Finecorsa

    3, bloccare Il frangisole orientabile prima della posizione desiderata, e regolare il limite usando la rotella zigrinata del trasmettitore locale. • Premere il pulsante Salita (Il frangisole orientabile effettua un breve movimento nel senso di salita per confermare la programmazione). © 2013-2016 Somfy SAS. All rights reserved.
  • Seite 64: Consigli E Raccomandazioni

    Il telecomando non è adatto Telis Mod/VAR RTS le lamelle 7.2. Sostituzione di un trasmettitore Somfy perso o guasto Questa operazione di reset elimina tutti i trasmettitori, mentre i sensori e la posizione preferita vengono mantenuti. Effettuare un doppio taglio di corrente solo al livello del motore da resettare.
  • Seite 65: Ritorno Alla Configurazione Originale

    Indice di protezione IP 54 Numero massimo di trasmettitori installati Numero massimo di sensori associati Livello di sicurezza Classe I Coppia (Nm) Lunghezza motore (mm) Livello di potenza acustica LpA ≤ 70 dB(A) © 2013-2016 Somfy SAS. All rights reserved.
  • Seite 66: Field Of Application

    TRANSLATED INSTRUCTIONS These instructions apply to all J4 RTS drive, the different versions of which are available in the current catalogue. Field of application J4 drive are designed to drive all types of tiltable venetian blinds. The installer, who must be a motorisation and home automation professional, must ensure that the motorised product is installed in accordance with the standards in force in the country in which it is installed such as EN 13561 relating to outdoor screens and awnings.
  • Seite 67: Safety

    - The motor, torque and operating time must be adjusted according to the complete installation. - Only Somfy original accessories should be used (adapters, brackets, connectors, power cable, etc.). - Correct operation of the installation is only guaranteed if the installation and assembly have been carried out according to best practices, if the electrical supply is adequate and if maintenance is carried out.
  • Seite 68: Specific Safety Advice

    To avoid damaging the product: 2) Never immerse it in liquid! 3) Avoid impacts! 4) Do not drop it! 5) Never drill holes in it! 6) Avoid moving the blind if ice has formed on it. © 2013-2016 Somfy SAS. All rights reserved.
  • Seite 69 If the EVB is equipped with a z-shaped slat, it will be necessary to adjust the upper end limit for the motor. In this case, the mushroom is used to ensure the safety of the EVB. Motor tilt The J4 RTS motor has been designed to operate horizontally: 10° maxi...
  • Seite 70: Installation

    • Using the clips (5), attach the motor in the head rail (4) above the small acoustic tapes (6a). • The shaft can be fitted into the adapter using a headless screw (7). Tightening torque = 2 N.m maximum © 2013-2016 Somfy SAS. All rights reserved.
  • Seite 71: 57 X 51 Mm Head Rail, Open Above

    • The shaft can be fitted into the adapter using a headless screw (7). Tightening torque = 2 N.m maximum The internal clips cannot be used with J418 motors (J4 motors with a torque of 18 Nm). © 2013-2016 Somfy SAS. All rights reserved.
  • Seite 72: 67 Mm Head Rail, Open Below

    (7). Tightening torque = 2 N.m maximum For motors with torque greater than 10 Nm • The additional clamp must be attached with a new bolt -> tightening torque ≤ 4 Nm. © 2013-2016 Somfy SAS. All rights reserved.
  • Seite 73: 66 Mm Head Rail, Open Below

    • Fit the two head rail adaptors (8) on the motor. • Insert the motor into the head rail (4). • Using the clips (5), attach the motor in the head rail (4). © 2013-2016 Somfy SAS. All rights reserved.
  • Seite 74: Wiring

    • Do not interlace the supply cable of the J4 RTS plate with another cable. To ensure that the radio signal is transmitted correctly, it is necessary to pull the J4 RTS plate supply cable out of the head rail by at least 30 cm.
  • Seite 75: Commissioning

    4. COMMISSIONING The guide only describes commissioning using a Telis MOD/VAR type Somfy local control point. For commissioning using any other Somfy local control point, refer to the corresponding guide. 4.1. Identifying setting steps already completed Only one motor should be powered at a time.
  • Seite 76: Checking The Motor's Direction Of Rotation

    (Section 8.3) then repeat the setting procedure. The J4 RTS actuator is factory set to operate with a blind with normal kinematics. However, the user can choose between blind operation modes, either with normal kinematics or kinematics with working position.
  • Seite 77 • Stop the E.V.B. in the desired position (the thumbwheel on the Telis MOD/VAR local control point can be used to set the desired position precisely). • Press the Up button (the E.V.B. moves briefly to confirm programming). © 2013-2016 Somfy SAS. All rights reserved.
  • Seite 78: Control Point

    E.V.B. moves briefly; the control point has been programmed. Checking the settings 4.7. Check the settings of the upper and lower end limits using the Somfy local control point. 5. OPERATING 5.1. Standard operation 5.1.1. Favourite position (my) Besides the upper and lower positions, an intermediate position known as the «favourite...
  • Seite 79: Up And Down Buttons

    Up or Down button angles the slats. 5.1.4. Selecting the mode. (EU mode or US mode) • The J4 RTS motor is factory set to operate in US mode. However, the user can choose between the EU and US modes.
  • Seite 80: Additional Settings

    E.V.B. moves briefly; the "my" position is deleted (the "my" button now works only as a "STOP" button. If using a sun sensor, the E.V.B. moves to the lowered position when the sun appears). © 2013-2016 Somfy SAS. All rights reserved.
  • Seite 81: Adding/Deleting Somfy Control Points And Sensors

    6.2. Adding/Deleting Somfy RTS control points and sensors 6.2.1. Adding/Deleting an RTS control point • Find an RTS control point programmed in the motor. • Press the PROG button on the RTS control point (A) until PROG. PROG. the E.V.B.moves briefly: the motor is in programming PROG.
  • Seite 82: Sun Disappearing" Position

    • Press the "my" button: the E.V.B. starts to move then stops in the favourite (my) position. • Press and hold the "my" and Down buttons for 5 seconds: the E.V.B. moves briefly; it will not change position when the sun disappears. © 2013-2016 Somfy SAS. All rights reserved.
  • Seite 83 • Press the Up and Down buttons for 5 seconds the E.V.B. moves briefly. • To confirm the motor's new direction of rotation, press and hold the "my" button for 2 seconds: the E.V.B. moves briefly; the motor's direction of rotation has been changed. © 2013-2016 Somfy SAS. All rights reserved.
  • Seite 84: Modifying The End Limits

    With a type 3 EVB, stop the EVB before the desired position, and adjust the limit with the thumbwheel of the local control point. • Press the Up button (the blind moves briefly to confirm programming). © 2013-2016 Somfy SAS. All rights reserved.
  • Seite 85: Tips And Recommendations

    The remote control is not compatible Pair then use a Telis Mod/VAR RTS remote easily control 7.2. Replacing a lost or broken Somfy control point This reset deletes all control points, however, it does not delete the sensors and the favourite position.
  • Seite 86: Restoring The Original Configuration

    - 20 °C à + 60 °C Index protection rating IP 54 Maximum number of connected control points Maximum number of connected sensors Safety level Classe I Torque (Nm) Motor length (mm) Acoustic power level LpA ≤ 70 dB(A) © 2013-2016 Somfy SAS. All rights reserved.
  • Seite 87 © 2013-2016 Somfy SAS. All rights reserved.
  • Seite 88 Somfy SAS 50 Avenue du Nouveau Monde F- 74300 CLUSES www.somfy.com...

Inhaltsverzeichnis