Inhaltsverzeichnis
Werbung
Verfügbare Sprachen
Verfügbare Sprachen
Quicklinks
SIMATIC NET
Installationsanleitung
C79000-N8974-C001-02
Installation Instructions
Ausgabe/Release 11/2002
CP 1512
6GK1151-2AA00
Nachfolgend finden Sie Informationen in deutscher Sprache.
This document contains information in English.
C79000-N8974-C001-02
© SIEMENS AG 2002
Änderungen vorbehalten
Subject to change
Siemens Aktiengesellschaft
Werbung
Kapitel
Inhaltsverzeichnis

Verwandte Anleitungen für Siemens SIMATIC NET CP 1512


Inhaltszusammenfassung für Siemens SIMATIC NET CP 1512
- Seite 1 SIMATIC NET Installationsanleitung C79000-N8974-C001-02 Installation Instructions Ausgabe/Release 11/2002 CP 1512 6GK1151-2AA00 Nachfolgend finden Sie Informationen in deutscher Sprache. This document contains information in English. C79000-N8974-C001-02 © SIEMENS AG 2002 Änderungen vorbehalten Subject to change Siemens Aktiengesellschaft...
- Seite 2 Sprachenverzeichnis Language Versions Installationsanleitung, deutsch ..........Seite Installation Instructions, English ..........Page...
- Seite 3 SIMATIC NET C79000-N8974-C001-02 Installationsanleitung Ausgabe 11/2002 6GK1151-2AA00 CP 1512 Nachfolgend finden Sie Informationen in deutscher Sprache. C79000-N8974-C001-02 © SIEMENS AG 2002 Änderungen vorbehalten Siemens Aktiengesellschaft...
-
Seite 4: Klassifizierung Der Sicherheitshinweise
Information über das Produkt, die Handhabung des Produktes oder den jeweiligen Teil der Dokumentation, auf den besonders aufmerksam gemacht werden soll und deren Beachtung wegen eines möglichen Nutzens empfohlen wird. Copyright Siemens AG 2002, All rights reserved Haftungsausschluss Weitergabe sowie Vervielfältigung dieser Unterlage, Verwertung und Wir haben den Inhalt der Druckschrift auf Übereinstimmung mit der... - Seite 5 Vorsicht Die Software darf nur für die im Katalog und in der technischen Beschreibung vorgese- henen Einsatzfälle und nur in Verbindung mit von Siemens empfohlenen bzw. zugelassenen Software-Produkten, Fremdgeräten und -komponenten verwendet werden. Bevor Sie mitgelieferte Beispielprogramme oder selbst erstellte Programme anwenden, stellen Sie sicher, dass in laufenden Anlagen keine Schäden an Personen oder Maschi-...
- Seite 6 Installationsanleitung CP 1512 C79000-N8974-C001-02...
-
Seite 7: Inhaltsverzeichnis
Installationsanleitung CP 1512 Inhaltsverzeichnis Einleitung ........................9 Beschreibung des CP 1512 ..................10 Hardware ........................13 Einbau des CP 1512..................13 Ausbau des CP 1512..................17 Installation, Konfiguration und Deinstallation des Treibers ........18 Überblick ......................18 Windows XP ....................21 4.2.1 Installation ......................21 4.2.2 Änderung des Verbindungstyps (Connection Type).........22 4.2.3 Änderung der Ethernet (MAC)-Adresse............23 4.2.4... - Seite 8 Installationsanleitung CP 1512 CP 1512 C79000-N8974-C001-02...
-
Seite 9: Einleitung
Installationsanleitung CP 1512 Einleitung SIMATIC NET PC-Software-Produkte Vielen Dank, dass Sie sich für ein Kommunikationsprodukt von SIMATIC NET ent- schieden haben. Sie haben ein Produkt gekauft, das auf innovative Weise einen schnellen Zugang zu Automatisierungsgeräten mit einfacher Installation und Inbe- triebnahme verbindet. -
Seite 10: Beschreibung Des Cp 1512
Wenn die Lieferung unvollständig ist, dürfen Sie die Baugruppe auf keinen Fall betreiben. Hardware-Voraussetzungen Der SIMATIC NET CP 1512 ist ein Ethernet-Adapter entsprechend dem PCMCIA- CardBus-Standard. Damit Sie dieses Gerät nutzen können, muss ihr PC mit einem PCMCIA-Slot Typ II oder Typ III ausgestattet sein und über eine CardBus(32 bit)- Schnittstelle verfügen. - Seite 11 Installationsanleitung CP 1512 Beschreibung Der Kommunikationsprozessor CP 1512 verbindet einen PC mit einem Ethernet- Netzwerk, das der Spezifikation IEEE 802.3 bzw. 802.3u (Fast-Ethernet) ent- spricht. Außerdem ist der CP 1512 für die Verwendung in PC-Netzwerken geeignet. Der CP 1512 erkennt automatisch die maximale Datenübertragungsrate und die Betriebsart (Halb-Duplex oder Voll-Duplex).
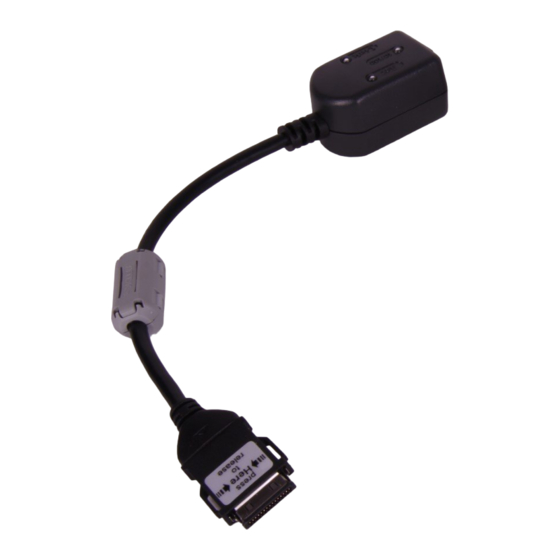
- Seite 12 Installationsanleitung CP 1512 Leuchtdiodenanzeige Der Kabeladapter verfügt über drei Leuchtdioden, die den Betriebszustand anzei- gen: Leuchtdioden- Anzeige Bedeutung bezeichnung Act (grün) leuchtet Fehlerlose Verbindung zum Netzwerk. blinkt Netzwerkkarte sendet bzw. empfängt Da- ten. 10/100 (orange) leuchtet Netzwerkkarte arbeitet mit 100 Mbit/s. ausgeschaltet Netzwerkkarte arbeitet mit 10 Mbit/s.
-
Seite 13: Hardware
Deinstallation des CP 1512 den PC herunterzufahren und abzuschalten. Die Oberseite des CP 1512 erkennen Sie an einem Aufkleber mit dem farbigen SIMATIC NET-Symbol (fünf Piktogramme für die verschiedenen Bussysteme). Die Aufschrift „SIEMENS SIMATIC NET Networking for Industry“ zeigt zur Vorderseite mit dem 68-poligen Verbindungsstecker. CP 1512 deaktivieren Allerdings sollten Sie den CP 1512 deaktivieren, bevor Sie ihn aus dem PC ent- nehmen. - Seite 14 Installationsanleitung CP 1512 Einstecken des CP 1512 Stecken Sie den CP 1512 mit der Vorderseite in einen freien PCMCIA-Slot Type II oder Typ III. Schieben Sie den CP 1512 vollständig in den PCMCIA-Slot Ihres PCs. Installationsanleitung CP 1512 C79000-N8974-C001-02...
- Seite 15 Installationsanleitung CP 1512 Einstecken des Kabeladapters Der 15-polige Stecker auf der Rückseite des Gehäuses bleibt zugänglich, wenn der CP 1512 ordnungsgemäß eingesetzt wurde. Fügen Sie hier den entsprechenden Stecker des Kabeladapters ein. Die Oberseite dieses Steckers erkennen Sie an einer dreieckigen Vertiefung (in der folgenden Grafik mit einem Hinweispfeil gekennzeichnet).
- Seite 16 Installationsanleitung CP 1512 Überprüfen der Verbindung Wenn alle Installationsschritte ordnungsgemäß durchgeführt wurden und sowohl der PC als auch Switch bzw. Hub eingeschaltet sind, leuchtet die Leuchtdiodenan- zeige "Link" des Kabeladapters. Falls diese Leuchtdiode dunkel bleibt, überprüfen Sie bitte die 68-polige Stecker- verbindung zwischen dem CP 1512 und dem PC.
-
Seite 17: Ausbau Des Cp 1512
Installationsanleitung CP 1512 Ausbau des CP 1512 Deaktivieren des CP 1512 Vor dem Ausbau des CP 1512 müssen Sie dieses Gerät im Betriebssystem deakti- vieren. Andernfalls zeigt das Betriebssystem eine Warnmeldung an. Hinweise zum Ausbau des CP 1512 Der Kabeladapter wird von zwei Arretierungshäkchen in der richtigen Position fi- xiert. -
Seite 18: Installation, Konfiguration Und Deinstallation Des Treibers
Installationsanleitung CP 1512 Installation, Konfiguration und Deinstallation des Treibers Überblick Treiberauswahl Verwenden Sie die Treiber auf der beiliegenden CD, falls Sie einen Betriebssys- temstand verwenden, bei dem die Treiber für den CP 1512 noch nicht integriert sind. Installationsanleitung CP 1512 C79000-N8974-C001-02... - Seite 19 Installationsanleitung CP 1512 Unterstützte Betriebssysteme Für die folgenden Betriebssysteme der Firma Microsoft stehen Gerätetreiber für den CP 1512 zur Verfügung: • Windows XP – Windows XP Professional mit Service-Pack 1 • Windows 2000 – Windows 2000 Professional Multilanguage mit Service-Pack 1, 2 und 3 –...
- Seite 20 Installationsanleitung CP 1512 Benötigte Rechte Zur Installation unter Windows XP, Windows 2000 und Windows NT 4.0 benötigen Sie Administratorrechte. Virenscanner Der Einsatz eines Virenscanners im laufenden Betrieb kann zur Störung von Hardware-Erweiterungen führen. Beim Betrieb von SOFTNET kann es deshalb zu einer Beeinträchtigung der Kommunikation kommen.
-
Seite 21: Windows Xp
Installationsanleitung CP 1512 Windows XP 4.2.1 Installation Beschreibung Normalerweise wird der Treiber des CP 1512 automatisch installiert. Wird der Treiber bei der automatischen Installation aber nicht gefunden, müssen Sie die Installation wie folgt beschrieben fortsetzen. Vorgehensweise Der CP 1512 ist in den Rechner eingebaut. Der „Assistent für das Suchen neuer Hardware“... -
Seite 22: Änderung Des Verbindungstyps (Connection Type)
System) Klicken Sie im Register „Hardware“ auf „Geräte-Manager“. Öffnen Sie „Netzwerkadapter“ und wählen Sie dort mit Doppelklick die Netzwerkkarte „Siemens CP1512“ aus. Wählen Sie das Register „Erweitert“. Wählen Sie im Listenfeld die Eigenschaft „Connection Type“ aus. Wählen Sie im Listenfeld mit der Überschrift „Wert“ die von Ihnen ge- wünschte Betriebsart (Datenübertragungsrate 10 bzw. -
Seite 23: Änderung Der Ethernet (Mac)-Adresse
System). Klicken Sie im Register „Hardware“ auf „Geräte-Manager“. Öffnen Sie „Netzwerkadapter“ und wählen Sie dort mit Doppelklick die Netzwerkkarte „Siemens CP1512“ aus. Wählen Sie das Register „Erweitert“. Wählen Sie in der Liste „Network Address“ aus. Markieren Sie die Option vor dem Eingabefeld „Wert“, und geben Sie die gewünschte Netzwerkadresse in Form von sechs Hexadezimal-... -
Seite 24: Deinstallation
Klicken Sie im Register „Hardware“ auf „Geräte-Manager“. Öffnen Sie „Netzwerkadapter“. Klicken Sie mit der rechten Maustaste auf die Netzwerkkarte „Siemens CP1512“ und führen Sie die Option „Deinstallieren“ aus. Bestätigen Sie die Deinstallation im folgenden Dialogfenster mit „OK“. Reaktion Die Netzwerkkartentreiber wird nun deinstalliert. -
Seite 25: Windows 2000
Installationsanleitung CP 1512 Windows 2000 4.3.1 Installation Beschreibung Normalerweise wird der Treiber des CP 1512 automatisch installiert. Wird der Treiber bei der automatischen Installation aber nicht gefunden, müssen Sie die Installation wie folgt beschrieben fortsetzen. Installationsanleitung CP 1512 C79000-N8974-C001-02... - Seite 26 Installationsanleitung CP 1512 Voraussetzung Der CP 1512 ist in den Rechner eingebaut. Als Folge davon wurde der „Assistent für das Suchen neuer Hardware“ automa- tisch gestartet. Sein Dialogfeld ist auf dem Bildschirm sichtbar. Legen Sie die mit dem CP 1512 gelieferte CD-ROM in Ihr CD-Laufwerk. Wenn Sie über eine SIMATIC NET PC-Software-CD verfügen, verwenden sie die- se stattdessen bitte dann, wenn sich auf ihr ein neuerer Treiber befindet, als auf der mit dem CP 1512 mitgelieferten CD-ROM (..\cp1512_cp1612\cp1512).
-
Seite 27: Änderung Des Verbindungstyps (Connection Type)
System). Klicken Sie im Register „Hardware“ auf „Geräte-Manager“. Öffnen Sie „Netzwerkadapter“ und wählen Sie dort mit Doppelklick die Netzwerkkarte „Siemens CP1512“ aus. Wählen Sie das Register „Erweiterte Einstellungen“. Wählen Sie im Listenfeld die Eigenschaft „Connection Type“ aus. Wählen Sie im Listenfeld mit der Überschrift „Wert“ die von Ihnen ge- wünschte Betriebsart (Datenübertragungsrate 10 bzw. -
Seite 28: Änderung Der Ethernet (Mac)-Adresse
System). Klicken Sie im Register „Hardware“ auf „Geräte-Manager“. Öffnen Sie „Netzwerkadapter“ und wählen Sie dort mit Doppelklick die Netzwerkkarte „Siemens CP1512“ aus. Wählen Sie das Register „Erweiterte Einstellungen“. Wählen Sie in der Liste „Network Address“ aus. Markieren Sie die Option vor dem Eingabefeld „Wert“, und geben Sie die gewünschte Netzwerkadresse in Form von sechs Hexadezimal-... -
Seite 29: Deinstallation
Klicken Sie im Dialogfeld „Geräte-Manager“ auf die Schaltfläche „Ge- räte-Manager“. Öffnen Sie „Netzwerkadapter“. Klicken Sie mit der rechten Maustaste auf die Netzwerkkarte „Siemens CP1512“ und führen Sie die Option „Deinstallieren“ aus. Bestätigen Sie die Deinstallation im folgenden Dialogfenster mit „OK“. Reaktion Die Netzwerkkarte wird nun deinstalliert. -
Seite 30: Windows Nt 4.0
Installationsanleitung CP 1512 Windows NT 4.0 4.4.1 Voraussetzungen Zum Betrieb des CP 1512 unter Windows NT 4.0 ist als zusätzliche Software der CardWizard von Systemsoft ab Version 5.2 erforderlich. Dabei handelt es sich um eine eigenständige Software, die vor der Installation des CP 1512 installiert werden muss. - Seite 31 Reaktion Sie kommen automatisch in das Fenster „Netzwerk“ zurück. Betätigen Sie die Schaltfläche „Schließen“. Reaktion Das Dialogfeld „Eigenschaften von Microsoft TCP/IP“ erscheint. Wählen Sie im Listenfeld „Netzwerkkarte“ „Siemens CP1512“ aus (Register IP-Adresse Listenfeld Netzwerkkarte Eintrag Sie- mens CP1512 ). Bei der Vergabe der IP-Adresse haben Sie zwei Möglichkeiten: •...
-
Seite 32: Deinstallation
Einstellungen Systemsteuerung Netzwerk). Wählen Sie das Register „Netzwerkkarte“, markieren Sie die Netzwerk- karte „Siemens CP1512“ und klicken Sie auf „Entfernen“. Bestätigen Sie die Deinstallation im folgenden Dialogfenster mit „Ja“. Reaktion Sie kommen automatisch in das Dialogfeld „Netzwerkkarte“ zurück. Klicken Sie auf „Schließen“. -
Seite 33: Windows Me
Installationsanleitung CP 1512 Windows Me 4.5.1 Installation Vorgehensweise Gehen Sie wie folgt beschrieben vor, um den Treiber des CP 1512 unter Win- dows Me zu installieren. Schritt Beschreibung Booten Sie Ihren Rechner. Reaktion Es erscheint ein Dialogfeld, in dem Sie wählen können, ob nach dem besten Treiber gesucht oder eine Liste der Treiber angezeigt werden soll. -
Seite 34: Änderung Des Verbindungstyps (Connection Type)
„Netzwerk“ (Start-Leiste Start Einstellungen Systemsteuerung Netzwerk). Markieren Sie im Listenfeld die Netzwerkkarte „Siemens CP1512“ und klicken Sie auf „Eigenschaften“. Wählen Sie das Register „Erweitert“. Wählen Sie im Listenfeld die Eigenschaft „Connection Type“ aus. Wählen Sie im Listenfeld mit der Überschrift „Wert“ die von Ihnen ge- wünschte Betriebsart (Datenübertragungsrate 10 bzw. -
Seite 35: Änderung Der Ethernet (Mac)-Adresse
„Netzwerk“ (Start-Leiste Start Einstellungen Systemsteuerung Netzwerk). Markieren Sie im Listenfeld die Netzwerkkarte „Siemens CP1512“ und klicken Sie auf „Eigenschaften“. Wählen Sie das Register „Erweitert“. Wählen Sie in der Liste „Network Address“ aus. Markieren Sie die Option vor dem Eingabefeld „Wert“, und geben Sie die gewünschte Netzwerkadresse in Form von sechs Hexadezimal-... -
Seite 36: Deinstallation
Wählen Sie die Registerkarte „Gerätemanager“. Öffnen Sie dort „Netzwerkkarten“. Klicken Sie mit der rechten Maustaste auf die Netzwerkkarte „Siemens CP1512“ und führen Sie die Option „Entfernen“ aus. Bestätigen Sie die Deinstallation im folgenden Dialogfenster mit „OK“. Reaktion Sie werden nun gefragt, ob Sie neu starten möchten Bestätigen Sie mit „Ja“. -
Seite 37: Windows 98 / Windows 98 Second Edition
Installationsanleitung CP 1512 Windows 98 / Windows 98 Second Edition 4.6.1 Installation Voraussetzung Der CP 1512 ist in den Rechner eingebaut. Der Rechner ist hochgelaufen, das Betriebssystem hat den CP 1512 als neue Baugruppe erkannt und der „Assistent für das Suchen neuer Hardware“ wurde au- tomatisch gestartet. -
Seite 38: Änderung Des Verbindungstyps (Connection Type)
Edition das Objekt „Netzwerk“ (Start-Leiste Start Einstellungen Systemsteuerung Netzwerk). Markieren Sie im Listenfeld die Netzwerkkarte „Siemens CP1512“ und klicken Sie auf „Eigenschaften“. Wählen Sie das Register „Erweitert“. Wählen Sie im Listenfeld die Eigenschaft „Connection Type“ aus. Wählen Sie im Listenfeld mit der Überschrift „Wert“ die von Ihnen ge- wünschte Betriebsart (Datenübertragungsrate 10 bzw. -
Seite 39: Änderung Der Ethernet (Mac)-Adresse
„Netzwerk“ (Start-Leiste Start Einstellungen Systemsteuerung Netzwerk). Markieren Sie im Listenfeld die Netzwerkkarte „Siemens CP1512“ und klicken Sie auf „Eigenschaften“. Wählen Sie das Register „Erweitert“. Wählen Sie in der Liste „Network Address“ aus. Markieren Sie die Option vor dem Eingabefeld „Wert“, und geben Sie die gewünschte Netzwerkadresse in Form von sechs Hexadezimal-... -
Seite 40: Deinstallation
Wählen Sie das Register „Gerätemanager“. Öffnen Sie „Netzwerkkarten“. Klicken Sie mit der rechten Maustaste auf die Netzwerkkarte „Siemens CP1512“ und führen Sie die Option „Entfernen“ aus. Reaktion Das Dialogfenster „Entfernen des Geräts bestätigen“ erscheint. Bestätigen Sie die Deinstallation mit „OK“. -
Seite 41: Technische Daten
Installationsanleitung CP 1512 Technische Daten Datenübertragung Übertragungsrate 10/100 Mbit/s Betriebsarten Voll-Duplex bei 10/100 Mbit/s Halb-Duplex bei 10/100 Mbit/s Netzwerkstandards Ethernet 100Base-TX Ethernet 10Base-T Autonegotiation Schnittstellen Anschluss an Industrial Ethernet RJ-45-Anschluss Anschluss an PC/PG PCMCIA-Steckplatz Typ II oder Typ III mit 68-poligem Stecker, CardBus(32 bit)-Schnitt- stelle Leistungsaufnahme... -
Seite 42: Maßnahmen Bei Installationsproblemen
Installationsanleitung CP 1512 Maßnahmen bei Installationsproblemen Einleitung In diesem Abschnitt finden Sie Hinweise auf mögliche Ursachen, wenn der instal- lierte CP 1512 nicht in der gewünschten Weise funktionieren sollte. Hardware Überprüfen Sie bitte folgende Punkte: • Für die Verbindungen mit Fast Ethernet (100 Mbit/s) müssen TP-Kabel der Ka- tegorie 5 verwendet werden. - Seite 43 Installationsanleitung CP 1512 Überprüfung der Installation Führen Sie folgende Schritte durch, um zu überprüfen, ob Ihr CP 1512 ordnungs- gemäß installiert ist: Schritt Beschreibung Öffnen Sie in der Systemsteuerung „Hardware“ (Start-Leiste Start Einstellungen Systemsteuerung System Register Hard- ware ). Betätigen Sie die Schaltfläche „Gerätemanager“ . Doppelklicken Sie auf den Eintrag „Netzwerkadapter“, falls dieser Ein- trag noch nicht expandiert ist.
-
Seite 44: Glossar
Installationsanleitung CP 1512 Glossar 100BASE-FX Zweiadriges Glasfaserkabel 100BASE-T4 Vierpaariges verdrilltes Kupferkabel 100BASE-TX Zweipaariges verdrilltes Kupferkabel zur Datenübertragung Autonegotiation Ein Gerät, das die Funktionalität Autonegotiation unterstützt, ermittelt selbstständig die in der gegebenen Netzwerkumgebung maximal mög- liche Datenübertragungsrate und die Betriebsart (Halb-Duplex oder Voll-Duplex). -
Seite 45: Training Und Ansprechpartner
Sollten Sie in den angegebenen Informationsquellen keine Antworten auf techni- sche Fragen zur Nutzung der beschriebenen Software erhalten, wenden Sie sich bitte an Ihren Siemens-Ansprechpartner in den für Sie zuständigen Vertretungen oder Geschäftsstellen. Die Adressen finden Sie an folgenden Stellen: •... -
Seite 46: Zertifikate Und Zulassungen
Installationsanleitung CP 1512 Zertifikate und Zulassungen Hinweise zur CE-Kennzeichnung von SIMATIC NET- Produkten Produktbezeichnung SIMATIC NET CP 1512 – 6GK1151-2AA00 EMV-Richtlinie Das obige SIMATIC NET-Produkt erfüllt die Anforderungen folgender EG-Richtlinie: Richtlinie 89/336/EWG „Elektromagnetische Verträglichkeit“ Einsatzbereich Die Produkte sind ausgelegt für den Einsatz in folgenden Bereichen:... -
Seite 47: Fcc-Zulassung
Installationsanleitung CP 1512 Konformitätserklärung Die EG-Konformitätserklärung wird gemäß den obengenannten EG-Richtlinien für die zuständigen Behörden zur Verfügung gehalten bei: Siemens Aktiengesellschaft Bereich Automatisierungs- und Antriebstechnik Industrielle Kommunikation (A&D PT 2) Postfach 4848 D-90327 Nürnberg Maschinenrichtlinie Das Produkt ist weiterhin eine Komponente nach Artikel 4(2) der EG-Maschinenrichtlinie 89/392/EWG. -
Seite 48: Anhang Software-Vertrag
Wenn der Datenträger keinen gegenteiligen Vermerk enthält, darf der Kunde von jedem Exemplar der Software bis zu 3 Kopien anfertigen, die ausschließlich für Sicherungszwecke verwendet wer- den dürfen. Im übrigen darf der Kunde die Software nur vervielfältigen, wenn ihm Siemens vorher schriftlich eine Kopierlizenz eingeräumt hat. - Seite 49 Anforderung dem Kunden zu überlassen. Bei Software der Gewährleistungsklasse C ist Siemens zur Fehlerbeseitigung nicht verpflichtet. Hat Siemens dem Kunden eine Kopierlizenz eingeräumt, kann der Kunde von dem gemäß Ab- schnitt 3.3 überlassenen neuen Produktausgabestand eine der Kopierlizenz entsprechende Anzahl von Vervielfältigungen anfertigen.
- Seite 50 Auftraggeber geltend und wird die Nutzung der Produkte hierdurch beeinträchtigt oder untersagt, so wird Siemens nach ihrer Wahl und auf ihre Kosten entweder die Produkte so ändern oder ersetzen, dass sie das Schutzrecht nicht verletzen, aber im wesentlichen dennoch den vereinbarten Spezifi- kationen entsprechen oder den Auftraggeber von Lizenzgebühren für die Benutzung der Produkte...
-
Seite 51: Anhang A&D Technical Support
Ortszeit: 0:00 bis 24:00 / 365 Tage Telefon: +49 (0) 180 5050-222 Fax: +49 (0) 180 5050-223 E-Mail: adsupport@ siemens.com GMT: +1:00 Europa / Afrika (Nürnberg) United States (Johnson City) Asien / Australien (Peking) Authorization Technical Support and Technical Support and... -
Seite 52: Service & Support Im Internet
A&D Technical Support Service & Support im Internet Zusätzlich zu unserem Dokumentations-Angebot bieten wir Ihnen im Internet unser komplettes Wissen online an. http://www.siemens.com/automation/service&support Dort finden Sie: • den Newsletter, der Sie ständig mit den aktuellsten Informationen zu Ihren Produkten versorgt. -
Seite 53: Installation Instructions
English SIMATIC NET C79000-N8974-C001-02 Installation Instructions Release 11/2002 6GK1151-2AA00 CP 1512 This document contains information in English. C79000-N8974-C001-02 © SIEMENS AG 2002 Subject to change Siemens Aktiengesellschaft... -
Seite 54: Classification Of Safety-Related Notices
Copyright Siemens AG 2002, All rights reserved Disclaimer The reproduction, transmission or use of this document or its contents We have checked the contents of this manual for agreement with the is not permitted without express written authority. - Seite 55 This software may only be used for the applications described in the catalog or the technical description, and only in connection with devices or software products from other manufacturers which have been approved or recommended by Siemens. Before you use the supplied sample programs or programs you have written yourself, make certain that no injury to persons nor damage to equipment can result in your plant or process.
- Seite 56 CP 1512 Installation Instructions C79000-N8974-C001-02...
- Seite 57 CP 1512 Installation Instructions Contents Introduction.......................59 Description of the CP 1512..................60 Hardware ........................63 Installing the CP 1512..................63 Removing the CP 1512...................67 Installing, Configuring, and Uninstalling the Driver..........68 Overview ......................68 Windows XP ....................71 4.2.1 Installation ......................71 4.2.2 Changing the Connection Type...............72 4.2.3 Changing the Ethernet (MAC) Address ............73 4.2.4...
- Seite 58 CP 1512 Installation Instructions CP 1512 C79000-N8974-C001-02...
-
Seite 59: Introduction
Purpose of this Document This document explains the properties of the CP 1512. It also describes how to install the SIMATIC NET CP 1512 communications processor in your computer along with the driver for the module. Validity of the Installation Instructions These Installation Instructions relate to the CP 1512 (MLFB no. -
Seite 60: Description Of The Cp 1512
Hardware Requirements The SIMATIC NET CP 1512 is an Ethernet adapter complying with the PCMCIA CardBus standard. To be able to use this device, your PC must be equipped with a PCMCIA slot type II or type III and must have a CardBus (32-bit) interface. - Seite 61 CP 1512 Installation Instructions Description The CP 1512 communications processor connects a PC with an Ethernet network complying with the specification IEEE 802.3 or 802.3u (Fast Ethernet). The CP 1512 is also suitable for use in PC networks. The CP 1512 detects the maximum data transfer rate and the mode (half duplex or full duplex) automatically.
- Seite 62 CP 1512 Installation Instructions LEDs The cable adapter has three LEDs that indicate the mode: LED Name Appearance Meaning Act (green) Problem-free connection to the network. flashing Network adapter is sending or receiving data. 10/100 (orange) Network adapter operating at 100 Mbps. Network adapter operating at 10 Mbps.
-
Seite 63: Hardware
You can tell the upper side of the CP 1512 by a label with the colored SIMATIC NET symbol (five pictograms for the various bus systems). The slogan "SIEMENS SIMATIC NET Networking for Industry" points to the front edge with the 68-pin connector. - Seite 64 CP 1512 Installation Instructions Inserting the CP 1512 Insert the front edge of the CP 1512 in a free PCMCIA type II or type III slot. Push the CP 1512 fully into the PCMCIA slot of your PC. CP 1512 Installation Instructions C79000-N8974-C001-02...
- Seite 65 CP 1512 Installation Instructions Inserting the Cable Adapter The 15-pin connector on the rear edge of the casing remains accessible when the CP 1512 is inserted correctly. The connector of the cable adapter is inserted here. You can recognize the top of the connector by the triangular depression (indicated by an arrow in the graphic below).
- Seite 66 CP 1512 Installation Instructions Checking the Connection If the installation was correct and both the PC and the switch or hub are turned on, the "Link" LED of the cable adapter lights up. If this LED is not lit, check the 68-pin connector between the CP 1512 and the PC. Make sure that you read the information in the following section "Instructions on Removing the CP 1512"...
-
Seite 67: Removing The Cp 1512
CP 1512 Installation Instructions Removing the CP 1512 Deactivating the CP 1512 Before removing the CP 1512, you must deactivate the device in the operating system. Otherwise the operating system displays a warning. Instructions on Removing the CP 1512 The cable adapter is locked in position by two catches. 1. -
Seite 68: Installing, Configuring, And Uninstalling The Driver
CP 1512 Installation Instructions Installing, Configuring, and Uninstalling the Driver Overview Selecting the Driver Use the drivers supplied on the accompanying CD if you use an operating system in which the drivers for the CP 1512 are not yet integrated. CP 1512 Installation Instructions C79000-N8974-C001-02... - Seite 69 – Windows NT Server, Version 4.0 with Service Pack 6a • Windows Me • Windows 98 / Windows 98 Second Edition For information about the approvals of further service packs, contact your Siemens representative. The subsections of this chapter contain the installation instructions for the various operating systems. Note Depending on the operating system, the computer will be restarted during the installation.
- Seite 70 CP 1512 Installation Instructions Required Privileges To install under Windows XP, Windows 2000 and Windows NT 4.0, you require administrator privileges. Virus Scanners Using a virus scanner during operation can cause problems with hardware expansions. When working with SOFTNET, this can therefore lead to a deterioration in communication.
-
Seite 71: Windows Xp
CP 1512 Installation Instructions Windows XP 4.2.1 Installation Description The driver of the CP 1512 is normally installed automatically. If the driver is not found during automatic installation, continue the installation as described below. Procedure The CP 1512 is installed in the computer. The wizard for finding new hardware started automatically and the dialog is displayed. -
Seite 72: Changing The Connection Type
Control Panel Performance and Maintenance System) Click on "Device Manager" in the "Hardware" tab. Open "Network Adapters" and double-click on the "Siemens CP1512" adapter. Select the "Advanced" tab. Select the "Connection Type" property in the list box. In the list box with the title "Value", select the mode you require (data transmission rate 10 or 100 Mbps, full or half duplex). -
Seite 73: Changing The Ethernet (Mac) Address
Control Panel Performance and Maintenance System) Click on "Device Manager" in the "Hardware" tab. Open "Network Adapters" and double-click on the "Siemens CP1512" adapter. Select the "Advanced" tab. Select "Network Address" in the list. Select the option button to the left of the "Value" input box and enter the required network address in the form of six hexadecimal numbers (range 00 to FF) in the input box. -
Seite 74: Uninstalling
Performance and Maintenance System) Click on "Device Manager" in the "Hardware" tab. Open "Network Adapters". Right-click on the "Siemens CP1512" network adapter and select the "Uninstall" option. Confirm that you want to uninstall the adapter in the next dialog box with "OK". -
Seite 75: Windows 2000
CP 1512 Installation Instructions Windows 2000 4.3.1 Installation Description The driver of the CP 1512 is normally installed automatically. If the driver is not found during automatic installation, continue the installation as described below. CP 1512 Installation Instructions C79000-N8974-C001-02... - Seite 76 CP 1512 Installation Instructions Requirements The CP 1512 is installed in the computer. Installing the CP automatically starts the Wizard that looks for new hardware. The dialog of this wizard is displayed on your screen. Insert the CD supplied with the CP 1512 in your CD drive. If you have a SIMATIC NET PC Software CD please use this if it contains a newer driver than the one on the CD supplied with the CP 1512 (..\cp1512_cp1612\cp1512).
-
Seite 77: Changing The Connection Type
Settings Control Panel System). Click on "Device Manager" in the "Hardware" tab. Open "Network Adapters" and double-click on the "Siemens CP1512" adapter. Select the "Advanced" tab. Select the "Connection Type" property in the list box. In the list box with the title "Value", select the mode you require (data transmission rate 10 or 100 Mbps, full or half duplex). -
Seite 78: Changing The Ethernet (Mac) Address
Settings Control Panel System). Click on "Device Manager" in the "Hardware" tab. Open "Network Adapters" and double-click on the "Siemens CP1512" adapter. Select the "Advanced" tab. Select "Network Address" in the list. Select the option button to the left of the "Value" input box and enter the required network address in the form of six hexadecimal numbers (range 00 to FF) in the input box. -
Seite 79: Uninstalling
Click the "Device Manager“ button in the "Device Manager" dialog group. Open "Network Adapters". Right-click on the "Siemens CP1512" network adapter and select the "Uninstall" option. Confirm that you want to uninstall the adapter in the next dialog box with "OK". -
Seite 80: Windows Nt 4.0
CP 1512 Installation Instructions Windows NT 4.0 4.4.1 Requirements To operate the CP 1512 under Windows NT 4.0, you require the CardWizard from Systemsoft Version 5.2 or higher as additional software. This is a separate software package that must be installed before you install the CP 1512. Further information is beyond the scope of this documentation. - Seite 81 Click the "Close" button. Reaction The "Microsoft TCP/IP Properties" dialog box appears. Select "Siemens CP1512" in the "Adapter" list box ( IP Address tab list box Adapter entry Siemens CP1512 ). There are two ways of assigning the IP address: •...
-
Seite 82: Uninstalling
Open "Network" in the Control Panel of Windows NT (taskbar (taskbar Start Settings Control Panel Network). Open the "Adapters" tab, select the network adapter "Siemens CP1512" and click on "Remove". Confirm that you want to uninstall the adapter in the next dialog box with "Yes". Reaction You automatically return to the "Network Adapters"... -
Seite 83: Windows Me
CP 1512 Installation Instructions Windows Me 4.5.1 Installation Procedure Follow the steps outlined below to install the CP 1512 driver under Windows Me. Step Description Boot your computer. Reaction A dialog box opens in which you can select between searching for the best driver and displaying a list of drivers. -
Seite 84: Changing The Connection Type
Open "Network" in the Control Panel of Windows Me (taskbar Start Settings Control Panel Network). Select the network adapter "Siemens CP1512" in the list box and click on "Properties". Select the "Advanced" tab. Select the "Connection Type" property in the list box. -
Seite 85: Changing The Ethernet (Mac) Address
Start Settings Control Panel Network). Select the network adapter "Siemens CP1512" in the list box and click on "Properties". Select the "Advanced" tab. Select "Network Address" in the list. Select the option button to the left of the "Value" input box and enter the required network address in the form of six hexadecimal numbers (range 00 to FF) in the input box. -
Seite 86: Uninstalling
Settings Control Panel System). Select the "Device Manager" tab". Open "Network Adapters". Right-click on the "Siemens CP1512" network adapter and select the "Remove" option. Confirm that you want to uninstall the adapter in the next dialog box with "OK". Reaction You will now be asked whether or not you want to restart. -
Seite 87: Windows 98 / Windows 98 Second Edition
CP 1512 Installation Instructions Windows 98 / Windows 98 Second Edition 4.6.1 Installation Requirements The CP 1512 is installed in the computer. The computer has booted, the operating system has detected the CP 1512 as a new card and the wizard for finding new hardware was started automatically. The dialog of this wizard is displayed on your screen. -
Seite 88: Changing The Connection Type
Second Edition (taskbar Start Settings Control Panel Network). Select the network adapter "Siemens CP1512" in the list box and click on "Properties". Select the "Advanced" tab. Select the "Connection Type" property in the list box. In the list box with the title "Value", select the mode you require (data transmission rate 10 or 100 Mbps, full or half duplex). -
Seite 89: Changing The Ethernet (Mac) Address
Start Settings Control Panel Network). Select the network adapter "Siemens CP1512" in the list box and click on "Properties". Select the "Advanced" tab. Select "Network Address" in the list. Select the option button to the left of the "Value" input box and enter the required network address in the form of six hexadecimal numbers (range 00 to FF) in the input box. -
Seite 90: Uninstalling
Control Panel System). Select the "Device Manager" tab". Open "Network Adapters". Right-click on the "Siemens CP1512" network adapter and select the "Remove" option. Reaction The "Confirm Device Removal" dialog box opens. Confirm that you want to uninstall the adapter with "OK". -
Seite 91: Technical Specifications
CP 1512 Installation Instructions Technical Specifications Data Transmission Transmission rate 10/100 Mbps Modes Full duplex at 10/100 Mbps Half duplex at 10/100 Mbps Network standards Ethernet 100Base-TX Ethernet 10Base-T Autonegotiation Interfaces Attachment to Industrial Ethernet RJ-45 connector Attachment to PC/PG PCMCIA slot type II or type III with 68-pin connector, CardBus (32-bit) interface Power consumption... -
Seite 92: Dealing With Installation Problems
CP 1512 Installation Instructions Dealing with Installation Problems Introduction This chapter explains some of the possible causes if the installed CP 1512 does not function as expected. Hardware Please check the following: • For Fast Ethernet connections (100 Mbps), you must use category 5 TP cable. •... - Seite 93 CP 1512 Installation Instructions Checking the Installation Follow the steps below to check whether or not your CP 1512 is installed correctly: Step Description Open "Hardware" in the Control Panel (taskbar Start Settings Control Panel System Hardware tab). Click the "Device Manager" button . Double-click on the "Network Adapter"...
-
Seite 94: Glossary
CP 1512 Installation Instructions Glossary 100BASE-FX Two-strand glass fiber cable. 100BASE-T4 Four-pair twisted copper cable. 100BASE- T X Two-pair twisted copper cable for data transmission. Autonegotiation A device that supports autonegotiation functionality automatically detects the maximum possible data transmission rate and the mode (half duplex or full duplex) in the network. -
Seite 95: Training And Contacts
+49 - (0) 721 - 595 - 6087 Internet: http://www.sitrain.com Who to Contact If you cannot find answers to technical questions on the software in the sources listed above, please contact your local Siemens office. You will find the addresses in the following: • Internet (http://www.siemens.de/simatic-net) •... -
Seite 96: Certificates And Approvals
CP 1512 Installation Instructions Certificates and Approvals Notes on the CE Mark of SIMATIC NET Products Product Name: SIMATIC NET CP 1512 – 6GK1151-2AA00 EMC Directive The SIMATIC NET product listed above meets the requirements of the following EU directive: 89/336/EEC "Electromagnetic Compatibility"... -
Seite 97: Fcc Approval
CP 1512 Installation Instructions Conformity Certificates The EU conformity certificates are available for the relevant authorities according to the EU directive and are kept at the following address: Siemens Aktiengesellschaft Bereich Automatisierungs- und Antriebstechnik Industrielle Kommunikation (A&D PT 2) Postfach 4848 D-90327 Nürnberg... -
Seite 98: Appendix Software Agreement
Copy Licence If Siemens has granted the Customer a copy licence to a Software, the Customer shall receive a written confirmation of the number of copies he is entitled to make of the data medium supplied with One Off Licence, which represents the precondition for the Copy Licence. - Seite 99 Customer and appearing in the last data medium delivered to the Customer shall be deemed to be defects in the Software. In the case of Software of warranty class A, Siemens shall remedy defects by delivery of a data medium with the new product release/version. Until such time as a new product...
- Seite 100 EUR 500.000,– per event where such damage is caused by Siemens’ negligence. In the event of loss of or damage to data media, Siemens shall not be liable for the cost of restoring lost data.
- Seite 101 - e. g. by virtue of its nature or application - (see also notes on bills of delivery and invoices). Any sub-agreements must be made in writing. Siemens has the right to transfer its rights and obligations under this Contract to a third party, unless the Customer objects in writing within four (4) weeks from being notified of such intention.
- Seite 102 CP 1512 Installation Instructions CP 1512 Installation Instructions C79000-N8974-C001-02...
-
Seite 103: Appendix A&D Technical Support
Technical Support 24 hours a day, 365 days a year Phone: +49 (0) 180 5050-222 Fax: +49 (0) 180 5050-223 E-Mail: adsupport@ siemens.com GMT: +1:00 Europe / Africa (Nuernberg) United States (Johnson City) Asia / Australia (Beijing) Authorization Technical Support and... - Seite 104 A&D Technical Support Service & Support on the Internet In addition to our documentation, we offer our Know-how online on the internet at: http://www.siemens.com/automation/service&support where you will find the following: • The newsletter, which constantly provides you with up-to-date information on your products.