Herunterladen Inhalt Inhalt Diese Seite drucken
Inhaltsverzeichnis

Werbung

Verfügbare Sprachen

Verfügbare Sprachen

Allgemeines
Technisch unterscheidet sich diese DigitAl-lok mit eingebautem DCC-
DECODER von einer normalen FlEiSCHMANN-gleich stromlok grund sätz­
lich durch den eingebauten digita len Empfänger baustein. Dies bedeutet
gleichzeitig, dass die Adresse der Lok auf die DCC­Standard­Adresse „3"
eingestellt wird.
Funktionen des DCC-DECODERS
Folgende Funktionen sind mit den digitalen FlEiSCHMANN-Steu er-
geräten tWiN-CENtER (6802), PROFi-BOSS (686601), lOK-BOSS (6865),
Z
multiMAUS, multiMAUS
und
21 wirksam:
PRO
Digital-System: DCC nach NMRA-Norm • Lastregelung: Last un ab hängige
Ge schwin digkeit • Sonderfunktion Licht: Ein-/ausschalt bar, Licht fahrt rich-
tungsabhängig • Anfahr­ und Brems ver zöge rung: In mehreren Stufen ein­
stellbar (nicht 6865) • Motor aus gang kurzschlussfest durch Abschalten.
Diese Funktionen sind zusätzlich mit DCC-Steuer geräten (nicht 6865)
nutzbar:
Adresse: Elektronisch umcodierbar von 1 bis 9999 • Mindest- und Höchst-
geschwindigkeit: Einstellbar • Motorsteuerkennlinie: Ein stell bar. Für nähere
infor ma tionen zum eingebauten DCC-DECODER siehe bei lie gen de
Be triebs anleitung.
Digitaler Betrieb
Diese DIgITAL­Lok mit eingebautem DCC­DECODER kann mit allen digita len
DCC-Steu er geräten nach NMRA-Norm be trieben wer den. Die Lok kann auch
als analoge Lok mit herkömmlichen gleichstrom­Trafos betrieben werden.
Bitte beachten Sie: Diese Lok ist mit einem digitalen Empfängerbaustein der neuesten Generation ausgestattet. Bei einem Reset werden alle CV-Werte auf die Werkseinstellungen zurückgesetzt (diese können von
den Werten in der allgemeinen Digital-Betriebsanleitung abweichen).
Attention: That locomotive is equipped with the most recent digital decoder. If you perform a reset, all CV-values will be re-set to the factory settings (which may differ from the values given in the general instruction
manual for digital operated locos).
Attention : Cette locomotive est equipée avec un décodeur à une nouvelle génération. En cas d'un reset, toutes les valeurs CV sont reconstituées à l'état du livraison (elles sont peut être differentes que les valeurs
CV dans le manuel digital DCC).
Verpackung aufbewahren! · Retain carton! · Gardez l'emballage s.v.p.! · Verpakking bewaren! · Ritenere l'imballaggio! ·
¡Conserve el embalaje! · Gem indpakningen!
01/ 0705-997210
ND
Ölen:
Geölt werden Lager und Getriebe nur an den
gekennzeichneten Lagerstellen. Nur FLEISCHMANN-
Öl 6599 verwenden. Nur ein kleiner Tropfen pro
OIL
Schmierstelle (→),sonst Überölung. Zur Dosierung die
6599
in der Verschlusskappe der Ölflasche angebrachte
Nadel verwenden.
2.
Reinigen der Lokräder: Bei Verschmutzung
sind die Lauf flächen der Räder mit sauberem
Lappen oder Schienen reinigungsgummi
6595 zu reinigen. Niemals die angetriebe-
nen Räder von Hand durchdrehen, son-
dern durch Anlegen einer Fahrspannung
mittels Anschlussdrähten antreiben. Nichtan-
getriebene Räder können von Hand gedreht
werden.
Cleaning the Loco Wheels: The running
surfaces of the wheels can be cleaned with a
clean rag or by using the track rubber block
6595. Never turn the driven wheels by
hand, only by connecting two wires with an
operating voltage to them. Wheels not driven
can be turned by hand.
Nettoyage des roues de locomotives : des
roues propres sont le garant d'un fonctionne-
ment impeccable, éliminez donc les impurtés
sur celles-ci avec un chiffon propre ou la
gomme 6595. Ne jamais faire tourner
l'ensemble moteur avec les roues, y appli-
quez une tension afin de les faire tourner et
d'atteindre la circonférence entière de la roue.
Les roues non motrices peuvent être tour-
nées à la main.
Common info
Technically, this digital loco with inbuilt DCC-DECODER basically dif fers
from a standard FlEiSCHMANN D.C. loco because of its inbuilt digital
receiver module. That means, that the address of the loco is „3" (DCC
standard address).
Functions of the DCC-DECODER
the following functions can be carried out with the digital FlEiSCH-
MANN control equipment tWiN-CENtER (6802), PROFi-BOSS (686601),
lOK-BOSS (6865), multiMAUS, multiMAUS
Digital system: DCC as per the NMRA standard • Load control: speed control
irrespective of load • Special func tion light: switchable on/off, co-ordinated
with direc tion of travel • Acce leration and braking inertia: setable in several
steps (not with 6865) • Motor output pro tec ted against short circuit.
these additional functions can be used with DCC-con trol equipment
(not 6865):
Address: electronically codeable from 1 to 9999 • Minimum and maximum
speed: settable • Motor control characteristics: settable. For further infor-
mation about the inbuilt DCC-DECODER, please see the accompanying
in struction leatflet.
Digital Operation
This digital loco with inbuilt DCC­DECODER can be used in conjunction with
the all digital DCC-control equipment of the NMRA standard. The loco can
be operated as a D.C. loco powered by a D.C. transformer as well.
09/2014
Lubrication:
The bearings and gear-box should only be
oiled at the bearing points marked. Only use FLEISCH-
MANN oil 6599. Only put a tiny drop in each place (→),
otherwise it will be overoiled. An applicator needle is
located in the cap of the oil bottle for your use.
3.
généralités
Techniquement, cette loco digitale avec DCC-DECODER intégré se dis tin ­
gue d'une loco à courant continu FlEiSCHMANN conventionelle es sen­
tiellement par son module récepteur intégré. Cèst­à­dire, l'adresse de la
loco est „3" (DCC standard adresse).
Fonctions du DCC-DECODER
les fonctions suivantes sont opérationnelles avec les com man des
digitales FlEiSCHMANN tWiN-CENtER (6802), PROFi-BOSS (686601),
Z
and
21:
lOK-BOSS (6865), multiMAUS, multiMAUS
PRO
Système digital : DCC normalisé NMRA • Régulation de la charge : vitesse
indépendante de la charge • Fonc tion spéciale éclairage : commutable,
suivant le sens de la marche • Retards de démarrage et de freinage :
réglage sur plusieurs niveaux (pas par 6865) • Sor tie moteur : protec tion
contre les courts­circuits par coupure de l'alimentation.
les fonctions suivantes sont en plus opérationnelles avec les com man-
des DCC (pas 6865) :
Adresse : réglable de 1 à 9999 • Vitesses minimale et maximale : réglable
• Courbe caractéristique de commande moteur : régl able. Pour en savoir
plus sur le DCC-DECODER, sonsultez les instruc tions de service ci-
jointes.
traction en mode digital
Cette loco digitale à DCC­DECODER intégré peut fonctionner avec les com-
mandes digitales DCC au standard NMRA. Il est possible rouler cette loco
à courant continu conventionel avec les transfos à courant continu con­
ventionnels.
GEBR. FLEISCHMANN GMBH & CO. KG
D-91560 HEILSBRONN, GERMANy
www.fleischmann.de
Graissage:
uniquement aux endroits indiqués. N'utilisez que l'huile
recommandée FLEISCHMANN 6599. Une seule goutte
par point à lubrifier (→) afin d'éviter tout excès. L'aiguille
montée dans le bouchon du petit flacon convient par-
faitement à cet usage.
Wir empfehlen, die Schmierstellen der Lok je nach
Betriebsdauer und -bedingungen zu überprüfen
00547001
und ggfs. zu ölen.
We recommend to inspect the lubrification of the
Ersatzhaftreifen
loco's bearings depending on the operational dura-
Spare friction
tion and -conditions and as a result, to oil them.
tyres
Nous recommandons pour inspecter le lubrification de
Bandages de
l'endroits indiquées dépendent de la durée et les condi-
tions opérationnelle et par conséquent, les huiler.
rechange
Ein Öffnen der Lok ist nur nötig zum Motorwechsel und Ölen der
1.
Getriebelager.
You just have to open the locomotive to change the motor and
to lubrify the bearings of the gear train.
Le démontage de la locomotive est seulement nécessaire pour
changer le moteur ou pour huiler les engrenages.
9525
herausziehen / pull out / tirez
einstecken / plug in / inserez
9545
~
Betriebsspannung 20 V
~
Normal voltage 20 V
~
Tension de service 20 V
Z
et
21:
PRO
~
20 V
Il faut huiler les essieux et les engrenages
Beleuchtung:
Das Fahrzeug ist mit wartungs-
freier LED Spitzenbeleuchtung
ausgestattet!
Electric lighting:
The loco is equipped with main-
tenance-free LED front lighting!
Éclairage électrique:
La locomotive est équipée d'un
éclairage avant LED qui est sans
entretien!
50721001
Ersatzmotor mit
Schwungmasse
Replacement motor
with flywheel
Moteur de rechange
avec volant a inertie
Motor ist wartungsfrei!
Maintenence-free motor!
Moteur sans entretien !

Werbung

Inhaltsverzeichnis
loading

Inhaltszusammenfassung für FLEISCHMANN multiMAUS 686701

  • Seite 1 Techniquement, cette loco digitale avec DCC-DECODER intégré se dis tin ­ DECODER von einer normalen FlEiSCHMANN-gleich stromlok grund sätz­ from a standard FlEiSCHMANN D.C. loco because of its inbuilt digital gue d’une loco à courant continu FlEiSCHMANN conventionelle es sen­...
  • Seite 2 686701 MAUS MAUS Handbuch Manual Manuel Manuale...
  • Seite 3: Inhaltsverzeichnis

    NHALTSVERZEICHNIS Die Fleischmann multi MAUS ......................3 Die multi MAUS im Überblick ......................3 Teil 1 • Grundlagen – Lernen Sie die multi MAUS kennen Anschluss der multi MAUS ......................4 Das Display ............................ 5 Die Tasten ............................5 Die Bedienung der multi MAUS Start ............................
  • Seite 4: Die Fleischmann Multi Maus

    Rastung der 0-Stellung des Drehreglers Mehrsprachigkeit Kompatibilität zu anderen DCC / NMRA-kompatiblen Steuerungen das Fleischmann multi MAUS-Digital-System ist ausbaubar auf bis zu 31 Eingabe-Geräte wie weitere Roco Lokmäuse oder multi MÄUSE, Roco RouteControl usw. zukünftige Updates über RS485 und ROCOMOTION (X-BUS) Die Möglichkeiten...
  • Seite 5: Teil 1 • Grundlagen

    Netzteil 681301, – Anschlussmaterial H0/N für das Fleischmann Gleissystem. Verwenden Sie ein anderes Gleissystem, achten Sie darauf, dass sich kein Kondensator im Anschlussgleis befi ndet. Welche Geräte Sie noch mit der multi MAUS verwenden können, fi nden Sie im Kapitel „K OMPATIBILITÄT DER...
  • Seite 6: Das Display

    ISPLAY Alle Funktionen der multi MAUS können Sie über das große hintergrundbeleuchtete LC-Display kontrollieren. Wir stellen Ihnen die Symbole vor. Fahrsymbole Schraubenschlüssel Weichensymbol – Pfeile zeigen Fahrtrichtung der – die multi MAUS ist in der (Lok- / Weichen-Taste) gewählten Lok an Menüebene „Einstellungen“...
  • Seite 7 – schaltet das Licht ein- oder aus (im Fahrbetrieb) Licht / OK – bestätigt Eingaben (im Weichen-Modus und in den Menüs) – aufrufen der gewünschten Menüebene bzw. der Menüpunkte – in Kombination mit — im Lokadress-Modus: – Auswahl einer anderen Lok über direkte Eingabe einer Lokadresse Shift im Fahrbetrieb: –...
  • Seite 8: Die Bedienung Der Multi Maus

    multi MAUS EDIENUNG DER Trotz ihrer vielen Möglichkeiten ist die multi MAUS leicht und intuitiv bedienbar. Im Folgenden zeigen wir Ihnen an Hand praktischer Beispiele die Bedienung der multi MAUS. Sollten bei der Bedienung bzw. Programmierung Probleme auftreten, fi nden Sie ab Seite 28 Tipps, Hinweise und die Bedeutung der Fehlermeldungen.
  • Seite 9: Displaymeldung

    Aufrufen von anderen, bereits in die Bibliothek aufgenommenen Loks („Blättern“) Die Sortierung der Loks in der Bibliothek erfolgt in der Reihenfolge der Eingabe. Sie können diese Reihenfolge selbstverständlich ändern: Lok auswählen oder Diese Tastenkombinationen (gleichzeitig drücken) verschieben die Lok in der Bibliothek nach oben oder unten.
  • Seite 10: Der Lokadress-Modus

    Verändern Sie den „Vorschlagswert“ entweder mit Hilfe der „Shift“-Taste und einer „Pfeil- taste“ oder über eine direkte Eingabe der Num- oder mer über die „Funktionstasten“. … Diese Änderung wirkt sich nur auf die Bibliotheks-Namenszuordnung aus! Decoder adresse müssen Sie über die CV1 ändern (siehe Abschnitt 6, Seite 13).
  • Seite 11: Fahren Und Funktionen

    Fahren und Funktionen Haben Sie eine Lok aus der Bibliothek oder direkt über die Lokadresse ausgewählt, ist sie sofort fahrbereit. Durch Drehen des großen Fahrreglers können Sie Fahrtrichtung und Geschwindigkeit be- stimmen. Sowohl Fahrtrichtung als auch Stillstand werden im Display über dem Loknamen bzw. der Lokadresse dargestellt.
  • Seite 12: Die Nothalt-Funktionen

    Die Nothalt-Funktionen Wenn es mal brenzlig wird: Mit der „STOP“-Taste können Sie jederzeit und sofort größeres Unheil verhindern. Um aber nicht die gesamte Anlage stillzulegen, können Sie mit Hilfe des „Selektiven Lokhaltes“ auch nur die ausgewählte und im Display angezeigte Lok sofort anhalten. 4.1.
  • Seite 13 Über die „Funktionstasten“ geben Sie die Weichenadresse ein und schalten den Antrieb über die „Pfeiltasten“, so dass die Fahrstraße „Geradeaus “ (linke „Pfeiltaste“) oder auf „Abzweig “ (rechte „Pfeiltaste“) gestellt wird. Die Weiche wird in dem Moment umgeschaltet, in dem Sie eine der „Pfeiltasten“ drücken. Die Einstel- lung der Weiche wird damit ebenfalls gespeichert.
  • Seite 14: Toggle-Betrieb

    Modus“ durchführen. Alle Änderungen der CVs 1 – 5 wirken sich nur im Digital-Betrieb der Lok aus. Da die multi MAUS in Verbindung mit den Fleischmann-Verstärkern 680801 CVs nicht auslesen kann, wird Ihnen immer ein fi ktiver Wert der aufgerufenen CV angezeigt. Zum Auslesen verwenden Sie z.
  • Seite 15: Kurzschluss Und Überlastung

    Zur Programmierung auf dem separaten Programmiergleis stecken Sie entweder eine vom übrigen System elektrisch isolierte Gleisstrecke anstelle Ihrer Anlage an den Gleis- ausgang des Verstärkers an oder Sie schalten vor dem Programmieren mit einem Schalter das übrige Gleissystem ab. Beispiel: So programmieren Sie die Lokadresse = CV1 auf den Wert 4: Eingabe Displaymeldung Bemerkung...
  • Seite 16: Die Menü-Funktionen Der Multi Maus

    2 • D ENÜS multi MAUS ENÜ UNKTIONEN DER Die multi MAUS verfügt über drei Haupt-Menüs, mit denen Sie sowohl umfangreich programmieren als auch die Grundeinstellungen der multi MAUS verändern können. Diese Menüebene erreichen Sie wahlweise durch zwei Möglichkeiten: – ca. 5 Sekunden Drücken nur der „MENU“-Taste (Dauer ist einstellbar im Menü „EINSTELLUNGEN“), praktisch bei der Einhandbedienung der multi MAUS, –...
  • Seite 17: Die Menüstruktur In Der Übersicht

    CV ÄNDERN PROGRAMMIEREN BEARBEITEN LANGE ADRESSE LÖSCHEN SUCHEN Grundsätzliche Hinweise zur Bedienung der Menü-Funktionen und zur Programmierung: – Bewegen Sie sich innerhalb der Menü- ebene (in dieser Übersicht also immer von oben nach unten), erreichen Sie die einzelnen Menüs durch Drücken einer der SENDEN beiden „Pfeiltasten“.
  • Seite 18: Bedienung

    Beleuchtung Kontrast DISPLAY EINSTELLUNGEN Sprache Menü-Tastenzeit BEDIENUNG Momentfunktionen Kindersicherung Smart-Search Adresse Automatik – Zeigt Ihnen das Display eines der drei Haupt-Menüs an, können Sie den ge- wünschten Menüpunkt auch ganz einfach FAHRSTUFEN durch Drücken der entsprechenden Num- mer über die „Funktionstasten“ aufrufen. –...
  • Seite 19: Das „Lok"-Menü

    1. D „L “-M ENÜ Im „Lok“-Menü verwaltet die multi MAUS alle Daten, die für die Lok-Bibliothek und die Identifi zierung einer Lok erforderlich sind. Auch können Sie hier die multi MAUS grundsätzlich auf Bibliotheks- oder Adress- Bedienung einstellen. 1.1. „NEU“...
  • Seite 20 1. D „L “-M ENÜ 1.3. „LÖSCHEN“ Mit diesem Menüpunkt können Sie eine Lok aus der Bibliothek entfernen. Das erste Bild zeigt die zuletzt im Lok-Modus genutzte Lok. Über die „Pfeiltasten“ wählen Sie die zu entfernende Lok aus. – Bestätigen Sie mit der „Licht / OK“-Taste. Im nächsten Bild erscheint die Laufschrift „?LOESCHEN?“...
  • Seite 21: Das Menü „Programmieren

    Sämtliche Werte eines Decoders (NMRA / DCC) sind in so genannten Konfi gurations-Variablen hinterlegt, den CVs. Mit Hilfe des Menüs „PROGRAMMIEREN“ können Sie diese Werte Ihren Bedürfnissen anpassen. Von Fleischmann bereits in Lokomotiven eingebaute Decoder werden üblicherweise mit praxisgerechten Einstellungen ausgeliefert. Prüfen Sie vor jeder Programmierung, ob diese tatsächlich notwendig ist.
  • Seite 22: Das Menü „Einstellungen

    3. D „E “ ENÜ INSTELLUNGEN Das umfangreichste Menü der multi MAUS enthält alle Daten, die für die grundsätzliche Bedienung der multi MAUS praktisch, sinnvoll oder manchmal auch notwendig sind. Auch hier möchten wir darauf hinwei- sen, dass die multi MAUS werkseitig schon mit allen erforderlichen Einstellungen versehen wurde, so dass Sie dieses Hauptmenü...
  • Seite 23: Werkseinstellung

    3. D „E “ ENÜ INSTELLUNGEN 3.2.4. Die multi MAUS verfügt über eine mehrstufi g einstellbare „KINDERSICHERUNG“, die Sie nach Aufrufen des Menüpunktes über die „Pfeiltasten“ aktivieren können. Zur Sperrung eines Bereiches ist die Eingabe eines Codes (4 Ziffern – keine Buchstaben) erforder- lich.
  • Seite 24 3. D „E “ ENÜ INSTELLUNGEN 3.5. „RESET“ Als besonders anwenderfreundliche Digital-Steuerung können Sie die multi MAUS nicht nur komplett, sondern auch in Teilen in den Werkszustand zurückbringen. 3.5.1. „ABBRECHEN“ ist sozusagen der Notausstieg aus diesem Menüpunkt. 3.5.2. Ein Reset der „SYSTEMEINSTELLUNGEN“ bringt alle Eintragungen im Menü „Einstellungen“ auf den Werkszustand zurück.
  • Seite 25: Kompatibilität Der Multi Maus - Alle Verwendbaren Geräte

    Net). Genauere Angaben über den Anschluss der multi MAUS an diese Systeme erhalten Sie bei den jewei- ligen Herstellern oder bei Ihrem Fachhändler. Auf einer von der multi MAUS gesteuert Anlage können Sie nicht nur Loks mit Fleischmann-Lokdecodern einsetzen, sondern auch Fahrzeuge mit Decodern anderer Hersteller, wenn diese der NMRA / DCC-Norm entsprechen.
  • Seite 26: Kombination Von Digitalen Und Nicht Digitalen Anlagenteilen

    OMBINATION VON DIGITALEN UND NICHT DIGITALEN NLAGENTEILEN Fleischmann Loks mit DCC-Decodern fahren ohne Probleme sowohl auf einer digitalen als auch auf einer „normalen“ Gleichstromanlage. Der Lokdecoder erkennt automatisch, auf welchem System er sich befi n- det. Deshalb ist es leicht möglich, auf einer Anlage beide Systeme zu nutzen, damit z. B. Ihre noch nicht digitalisierten Loks auf dem Gleichstromteil der Anlage fahren können.
  • Seite 27: Der Booster 10765

    Übersteigt der Gesamtstromverbrauch 2,5 A, ist der Abschnitt überlastet und muss aufgeteilt werden. Beachten Sie auch, dass gerade bei Glühbirnen große Toleranzen in der Stromaufnahme möglich sind. Schließen Sie Fleischmann Weichendecoder 6852 direkt an den Fahrstromkreis an, dann müssen Sie etwa 600 mA Reserve für den Schaltstrom der Weichen einrechnen.
  • Seite 28: Kehrschleifen Im Digitalbetrieb

    Konfi gurations-Werte übersetzen kann. Da die multi MAUS kompatibel zum NMRA / DCC-Standard ist, kann sie diese CVs lesen und schreiben. Mit dem Fleischmann-Verstärker 680801 und den Boostern Roco 10765 ist ein Auslesen der CVs eines Decoders nicht möglich! Es werden nur fi ktive Vorschlagswerte angezeigt.
  • Seite 29: Smart-Search-Funktion

    Im Gegensatz dazu liegt in einem Digitalsystem von vornherein ein feste Spannung am Gleis an. Hier erfolgt die Steuerung des Motors über Steuersignale, die der Decoder in Spannungswerte umsetzt. Da diese Signale aus „Nullen“ und „Einsen“ bestehen, sind sie abgestuft. Je kleiner die Stufen – Fahrstufen – sind, umso feiner lässt sich die Lok regeln.
  • Seite 30: Tipps, Hinweise Und Kurzhilfe

    „Automatik“ steht. Eventuell haben zwei Geräte die selbe X-Bus-Adresse. Weichenanschluss am Fleischmann-Magnetartikeldecoder 6852: 1. Mit der multi MAUS können die CVs 1 bis 255 programmiert werden. Die Einstellungen des Decoders 6852 (Adresse, Ausgangsverhalten) werden aber über CV 513 ff vorgenommen, weil nach Norm der Be- reich ab CV512 für Magnetartikel reserviert ist.
  • Seite 31: Fehlermeldungen

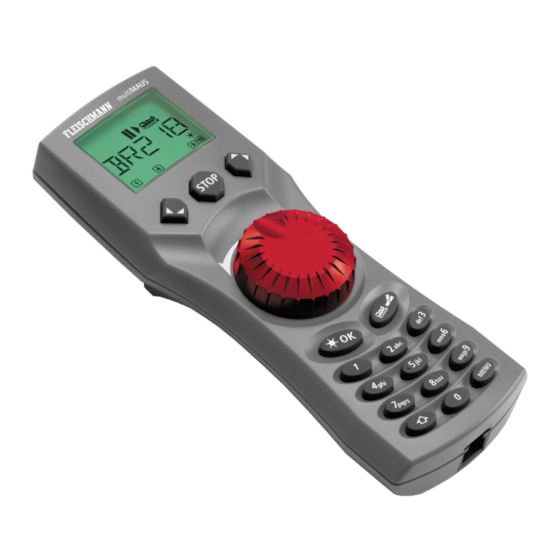
    Gerät aus und wieder ein. Sollte der Fehler dann noch nicht behoben sein, prüfen Sie die X-Bus- Adresse. ERR 14: Die Kalibrierungswerte sind ungültig. Der Fahrregler muss neu kalibriert werden. Beachten Sie dazu Seite 23, 3.5.6. ab ERR 90: Ihre multi MAUS ist leider zum Service-Fall geworden und braucht eine Grundüberholung im Fleischmann-Service.
  • Seite 32 ABLE OF ONTENTS The multiMAUS ..........................An overview of the multiMAUS ....................... Section 1 • Basics – Get to know the multiMAUS Connecting the multiMAUS ......................The display screen ..........................The keys ............................Operating the multiMAUS Start ............................Type of locomotive access ......................Driving and functions .......................
  • Seite 33: The Multimaus

    Multilingual operation Compatibility with other DCC / NMRA-compatible controllers The Fleischmann digital system is expandable to include up to 31 input devices such as extra Roco Lokmaus or multiMAUS devices, Roco RouteControl etc. Future updates via RS485 and ROCOMOTION (X-Bus) The features Managing 9,999 locomotive addresses &...
  • Seite 34: Connecting The Multimaus

    1 • B ECTION ASICS multiMAUS ONNECTING THE Fig. 2 on page 61 shows the basic connection. For a fully-functional Fleischmann digital system with the multiMAUS, you will need the following components: – A 680801 amplifi er, – A 681301 mains adapter, –...
  • Seite 35: The Display Screen

    ISPLAY CREEN All the functions of the multiMAUS can be checked on the large LCD with backlight. The symbols are as follows: Drive symbols Wrench Turnout symbol – Arrows shows the direction of – the multiMAUS is in the (locomotive / turnout key) travel of the selected locomotive “Settings”...
  • Seite 36 – Switch the light on or off (in drive mode) Light / OK key – Confi rm inputs (in turnout mode and in the menus) – Call up desired menu level or menu items – in combination with — In locomotive address mode: –...
  • Seite 37: Operating The Multimaus

    multiMAUS PERATING THE Despite its numerous options, operation of the multiMAUS is simple and intuitive. The following shows you how to operate the multiMAUS based on practical examples. If problems occur during operation or programming, hints, tips and the meaning of error messages can be found starting on page 58.
  • Seite 38 calling up other locomotives already entered in the library (“scrolling”) Locomotives in the library are sorted in the order in which they were entered. You can of course change this order: Select locomotive These key combinations (press keys together) move the locomotive up or down in the library. You can check the new order for the library with the arrow keys.
  • Seite 39 Change the suggested value by either using the “shift” key and one of the “arrow keys” or by entering the number directly using the “function keys”. This change only affects the library name order! You must change the decoder address …...
  • Seite 40: Driving And Functions

    Driving and functions If you have selected a locomotive from the library or are directly using the locomotive address, it is immediately ready to drive. You can determine the direction of travel and the speed by turning the large controller. Both the direction of travel and a standstill are shown on the display screen above the locomotive name or locomotive address.
  • Seite 41: The Emergency Stop Functions

    The emergency stop functions When a situation becomes dangerous: You can use the “STOP“ key at any time to prevent a more serious calamity immediately. In order to avoid shutting down the entire system however, you can use the “selective locomotive stop” function to stop only the locomotive selected and displayed. 4.1.
  • Seite 42 You use the function keys to enter the turnout address and the “arrow keys” to switch the drive to set the turnout to “straight-on ” (left arrow key) or “branch-off ” (right arrow key). The turnouts are switched over the moment you press on of the “arrow keys”. This also saves the turnout setting.
  • Seite 43: Quick-Programming

    CVs 1 – 5 only have an effect on the locomotive in digital operation. The multiMAUS cannot read CVs when used in conjunction with Fleischmann amplifi ers 680801 and therefore a fi ctitious value is displayed for the CV called up. To read CVs, use, for instance, a PC with ROCOMOTION 10785 or the PROFI-BOSS or TWIN-CENTER device.
  • Seite 44: Short Circuit And Overload

    To program on the separate programming track, either connect a stretch of track which is electri- cally isolated from the rest of the system instead of your layout to the track output on the booster or switch off the rest of the system with a switch before programming. Example: To program the locomotive address = CV1 to value 4: Input Display message...
  • Seite 45: The Menu Functions Of The Multimaus

    2 • T ECTION ENUS HE MENU FUNCTIONS The multiMAUS has three main menus with which you can both perform comprehensive programming and change the basic settings of the multiMAUS. This menu levels can be accessed using two simple key combinations: –...
  • Seite 46: Overview Of The Menu Structure

    CV MODIFICATION PROGRAM EDIT LONG ADDRESS DELETE SEARCH Basic instructions for operating the menu functions and programming: – Move within the menu level (i.e. in this overview, from top to bottom) to access the individual menus by pressing one of the two arrow SEND keys.
  • Seite 47 Backlight Contrast DISPLAY SETTINGS Language Menu-Key-Time USER INTERFACE Function Keys Child Lock Smart-Search Address Automatic – If the display screen shows one of the three main menus, you can call up the required menu item by simply pressing SPEED STEPS the function key with the corresponding number.
  • Seite 48: The "Loco" Menu

    1. T “L ” M The multiMAUS uses the “LOCO” menu to manage all data which is required for the locomotive library and for identifi cation of a locomotive. You can also use this menu to set the multiMAUS to library or address mode.
  • Seite 49 1. T “L ” M 1.3. “DELETE“ You use this menu item to remove a locomotive from the library. The fi rst screen shows the locomotive last used in locomotive mode. Use the “arrow keys” to select the locomotive you wish to remove. –...
  • Seite 50: The "Programming" Menu

    You should therefore check before performing programming whether it is really necessary. The Fleischmann amplifi er 680801 and the Roco booster 10765 cannot read the CVs from a decoder. The values shown on the display screen of the multiMAUS are fi ctitious suggested values and do not match the genuine values.
  • Seite 51: The "Settings" Menu

    3. T “S ” M ETTINGS The most extensive multiMAUS menu contains all the data which is practical, useful or sometimes necessary for basic operation of the multiMAUS. We would also like to point out at this point that the multiMAUS is provided with all the necessary settings in the factory so that you have to use this main menu either rarely or not at all.
  • Seite 52: Factory Setting

    3. T “S ” M ETTINGS 3.2.4. The multiMAUS has „CHILD LOCK“ which can be set to multiple levels and can be activated after calling up the menu item using the „arrow keys“. To block an area, you will need to enter a code which is comprised of 4 numbers (no letters!). The password is then always requested when you wish to call up a protected area of the multiMAUS.
  • Seite 53 3. T “S ” M ETTINGS 3.5. “RESET“ The multiMAUS is a particularly user-friendly digital controller and can be reset to the factory set- tings, not just completely but also partially. 3.5.1. “CANCEL” can be regarded as the emergency exit from this menu item. 3.5.2.
  • Seite 54: Compatibility Of The Multimaus - All Useable Devices

    On a system controlled by the multiMAUS, you can use not only locomotives with Fleischmann locomo- tive decoders but also vehicles with decoders from other manufacturers, as long as they are in line with the NMRA / DCC standards.
  • Seite 55: The Master-And-Slave Principle

    OMBINATION OF DIGITAL AND NON DIGITAL SYSTEM PARTS Fleischmann locos with DCC-decoders can be driven on both digital and “normal” direct current systems without any complications. The locomotive decoder automatically detects the type of system it is on. It is therefore simple to use both types of systems together so that you can still use non-digital locomotives on the direct current section of the system.
  • Seite 56: The Roco 10765 Booster

    Notice also that there are large tolerances in the current consumption, especially for light bulbs. If you connect the Fleischmann Receiver Module 6852 as a decoder for turnouts directly to the drive circuit, you will then have to calculate approximately 600 mA reserve for the switching current of the turnout.
  • Seite 57: Terminal Loops In Digital Operation

    The multiMAUS is compatible with the NMRA / DCC standard and can therefore read and write these vari- ables. Fleischmann amplifi ers 680801 and the Roco booster 10765 cannot be used to read the CVs from a decoder! The values shown are only fi ctitious suggested values.
  • Seite 58 In a digital system on the other hand, the track always carries a fi xed constant voltage. The motor is con- trolled by the control signals which the decoder converts into voltage values. These signals are made up of “zeros” and “ones” and are therefore modifi ed. The smaller the steps – speed steps – are, the more accurately the locomotive can be controlled.
  • Seite 59: Hints, Tips & Help

    3.3.2. is set to “automatic”. It is possible that two devices have the same X-Bus address. Connection of turnouts to the Fleischmann 6852 Receiver Module 1. The multiMAUS is capable of programming the CV‘s 1 through 255. However the adjustment (address,...
  • Seite 60: Error Messages

    If this does not solve the problem, check the X-Bus address. ERR 14: The calibration values are invalid. The controller needs to be recalibrated. See page 52, 3.5.6. ERR 90 and above: Your multiMAUS is unfortunately in need of service by the Fleischmann service department.
  • Seite 61 Fig. 1 Fig. 1 LC-Display Stop-Taste LC-Display Stop-Taste LC display Stop Key LC display Stop Key Écran touche »Stop« Écran touche »Stop« LC display Tasto di arresto LC display Tasto di arresto Pfeiltaste Pfeiltaste Pfeiltaste Pfeiltaste (links) (rechts) (links) (rechts) Arrow Key Arrow key Arrow Key...
  • Seite 62 Fig. 2 Aufbau des Fleischmann Digital-Systems (Europa-Version mit 230 V) mit der MAUS. Setting up the Fleischmann digital system (Europe version with 230 V) with the MAUS. Structure de la commande numérique Fleischmann (version européene à 230 V) avec la MAUS .
  • Seite 63 Fig. 3 Fig. 3 Anschluss eines Roco Boosters 10765 an den Verstärker 680801 und die Gleisanlage. Wiring diagram of the amplifi er 680801, the Roco booster 10765 and the tracks. Comment câbler l‘amplifi cateur complémentaire Rocoréf. 10765 avec l‘amplifi cateur principal réf. 680801 et la voie.
  • Seite 64 Fig. 4 Fig. 4 Übergangsstrecke Digital — Gleichstrom mit dem Trennmodul Roco 10768. Pass-over section with additional tracks from digital to DC-layout controlled by the Roco Separator module 10768. Canton de transition de la section en commande numérique à celle en commande analogique avec le module Roco 10768.
  • Seite 65 Fig. 5 Fig. 5 Roco Roco Eine digitale Kehrschleife mit dem Kehrschleifenmodul z. B.Roco 10769 oder 10767. Eine digitale Kehrschleife mit dem Kehrschleifenmodul z. B.Roco 10769 oder 10767. A digital turning loop controlled by the module e.g. Roco 10769 or 10767. A digital turning loop controlled by the module e.g.
  • Seite 66 ABLE DES MATIÈRES La multiMAUS ........................... 66 La multiMAUS en un clin d’oeil ......................66 Chapitre 1 • Les bases - Faites connaissance avec la multiMAUS Raccordement de la multiMAUS ....................... L’écran d’affi chage ..........................68 Les touches ............................68 Le maniement de la multiMAUS On démarre ..........................
  • Seite 67: La Multimaus

    DCC/NMRA permet l’intégration au système Fleischmann de commande numérique de 31 autres appareils de commande tels que d’autres loco-souris Roco et multiMAUS ou »Route Control (Roco)«, etc.
  • Seite 68: Raccordement De La Multimaus

    681301 – accessoires de connexion H0/N pour la voie Fleischmann. Si vous utilisez un autre système de voie avec un élément d’alimentation correspondant, veillez à ce que cet élément ne soit pas muni d’un condensateur d’antiparasitage.
  • Seite 69: L'écran D'affi Chage

    Renseignements complémentaires quant à ce manuel : Une fl èche » « devant un mot du texte renvoie à une explication complémentaire du »glossaire« situé  dans le troisième chapitre du manuel. »+« dans les croquis veut dire qu’il faut presser simultanément les deux touches reliées par »+«.
  • Seite 70 – parcourir la bibliothèque »matériel moteur« (mode »bibliothèque«) – Chercher l’adresse d’une machine (mode »adresses machines«) – Commande d’un aiguillage (»droit« ou »dévié«, mode »aiguillages«) touches »fl èches« – feuilleter un menu primaire ou secondaire — combinées avec — mode »bibliothèque« activé : –...
  • Seite 71: Le Maniement De La Multimaus

    en régime »exploitation« : … – activent ou désactivent les fonctions F1 à F10 de la machine. Les fonctions F11 à F20 sont accessibles en pressant la touche »majuscules« et une des touches touches »fonctions« »1« à »10«. Les fonctions effectivement activées s’affi chent à l’écran. en mode »menu«...
  • Seite 72: Comment Appeler Une Machine

    multiMAUS. Vous pouvez démarrer cette machine sans tarder (voir paragraphe n° 3). 1.2. Mise en service d’une déjà utilisée multiMAUS Si la a déjà été utilisée au moins une fois, elle vous affi che, dès le nouvel allumage, multiMAUS la dernière machine commandée lors de la séance précédente et se commute au dernier mode enclenché...
  • Seite 73 Enregistrement d’une machine (ici le RGP TEE de la SNCF, série X 2771 à 2781) : Touches actionnées Affi chage corres- Remarque pour saisir les données pondant à l’écran La place libre pour saisir les données de la machine est affi chée à l’écran par la mention »NOUV«;...
  • Seite 74: Marche Et Fonctions Secondaires

    Confi rmer, de nouveau, par la touche »OK«. La sélection du régime des crans de marche se fait par les touches »fl èches«. Il existe 3 régimes : 14, 28 ou 128 crans. En usine la multiMAUS est programmé en régime »28 crans«.
  • Seite 75: Marche Arrière

    Machine à l’arrêt (l’écran affi che le symbole »II«) l’écran indique le dernier sens de circulation de la ma- chine. On peut ainsi facilement vérifi er si les feux, éventuellement éclairés, correspondent effectivement au sens de marche de la machine, donc »feux blancs« en tête du convoi et »feux rouges« à l’arrière. Marche arrière Machine à...
  • Seite 76: La Commande Des Aiguillages

    STOP STOP 4.2. Arrêt d’urgence sélectif L’arrêt d’urgence sélectif ne s’adresse qu’à la machine directement commandée par la multiMAUS. Touches à L’écran affi che Remarque actionner Pressez simultanément les touches »majus- cules« et »STOP«. La machine s’arrête immé- diatement, l’écran affi che le symbole »II« (et ...
  • Seite 77 Les aiguilles changent de position au moment ou vous pressez une des deux touches »fl èches«. En même temps, la nouvelle position des aiguilles est mémorisée par la multiMAUS et confi rmée par la mise à »0« des premiers chiffres libres suivant la lettre »A«, si l’adresse du moteur n’a que trois chiffres maxi. L’affi...
  • Seite 78: Programmation Rapide

    ROCOMOTION réf. 10785 ou des appareils PROFI-BOSS 686601 ou TWIN-CENTER 6802. Les décodeurs installés en usine dans des locomotives Fleischmann sont livrés avec des CV pro- grammées à des valeurs adaptées au mieux aux caractéritiques de la machine. Veuillez donc véri- fi...
  • Seite 79: Court-Circuits Et Surcharges

    À noter : Pour programmer une machine , déconnectez le réseau de l’amplifi cateur et raccordez une voie »programmation«, électriquement entièrement isolée du réseau, à l’amplifi cateur ou prévoyez une voie bipolairement isolée du réseau par des éclisses isolantes et commutable sur l’amplifi...
  • Seite 80: Les Menus De La Multimaus Et Leurs Fonctions

    2 • L HAPITRE ES MENUS multiMAUS ES MENUS DE LA EURS ONCTIONS La multiMAUS dispose de trois menus principaux vous permettant une programmation complexe et une modifi cation facile des données de base de la multiMAUS Vous avez accès aux menus principaux par deux différentes combinaisons de touches à...
  • Seite 81: La Structure Des Menus De La Multimaus En Un Coup D'oeil

    NOUVELLE MODIFIER VARIABLE PROGRAMMER MODIFIER ADRESSE LONGUE Variable Programmer en EFFACER Ligne CHERCHER Quelques remarques fondamentales concernant l’activation des différentes fonctions des menus et la programmation: – Autant que vous restez sur le même ni- veau hiérarchique des menus (dans cette illustration les niveaux sont présentés en ENVOYER verticale pour des raisons de place), vous...
  • Seite 82 Eclairage Contraste ECRAN REGLAGES Langue Delai Touche Menu MANIEMENT Fonction Touche Verrouillage Recherche Rapide Adresse Automatique – En pressant la touche »STOP« vous re- tournez toujours au menu supérieur dans la hiérarchie. CRANS DE MARCHE Pour vous rassurer : Une protection contre l’ac- tivation involontaire d’une fonction ou d’un menu primaire ou secondaire ainsi que contre l’enregistrement involontaire d’une donnée...
  • Seite 83: Le Menu Principal »Loco

    1. L »LOCO« E MENU PRINCIPAL Le menu »LOCO« vous permet de faire gérer par votre multiMAUS toutes les données indispensables pour la bibliothèque »matériel moteur« et pour l’identifi cation d’un engin moteur. Ce menu vous permet égale- ment de préenclencher la multiMAUS aux modes »bibliothèque« ou »adresses machines«. 1.1.
  • Seite 84 1. L »LOCO« E MENU PRINCIPAL 1.3. »EFFACER« Ce menu secondaire vous permet de supprimer une machine de la bibliothèque. La première vue affi chée vous présente la machine dernièrement commandée au régime »exploita- tion«. Par les touches »fl èches« vous parcourez la liste et choisissez la machine dont les données sont à...
  • Seite 85: Le Menu Principal »Programmer

    Comme le amplifi cateur numériques Fleischmann réf. 680801, le booster Roco ref. 10765 ne sont pas bidirectionnels, la multiMAUS ne peut lire les données effectivement mémorisées dans les variables CV des décodeurs, son écran n’affi...
  • Seite 86: Le Menu Principal »Reglages

    2.3. »MODE« En usine votre multiMAUS a été programmée au mode »Programmation des variables CV«. Cepen- dant, si vous voulez programmer des machines sans faire appel à une voie spécialement réservée à la programmation, il faut commuter votre multiMAUS au mode »POM« (»Programmation on the main« = »Programmation sur voie principale«, ce qui veut dire que vous pouvez programmer le décodeur de la machine dernièrement commandée.
  • Seite 87 3. L »REGLAGES« E MENU PRINCIPAL – Confi rmer par la touche »feux / OK«. La multiMAUS retourne au départ du menu secondaire »LANGUE«. 3.2.2. Le menu »DELAI TOUCHE MENU« permet de régler la durée pendant laquelle il faut presser la touche »MENU«...
  • Seite 88: Et La Commande Numérique

    3. L »REGLAGES« E MENU PRINCIPAL 3.3. »X-BUS« Le »X-BUS« est le protocole permettant la communication entre les différents composants de la commande numérique (la multiMAUS »maître«, par exemple, avec l’amplifi cateur numérique ou une multiMAUS »esclave«). Par les menus secondaires de deuxième niveau »ADRESSE« et »AUTOMA- TIQUE«...
  • Seite 89 3. L »REGLAGES« E MENU PRINCIPAL 3.5.3. La fonction »BIBLIOTHÈQUE« : Si vous voulez uniquement effacer la bibliothèque »matériel moteur« en totalité, choisissez cette fonction. 3.5.4. »CRANS DE MARCHE« : Si vous choisissez cette fonction, vous ne réinitialisez la multiMAUS que pour la programmation générale des crans de marche.
  • Seite 90: Compatibilité De La Multimaus - Tous Les Appareils Utilisables Et Leurs Critères

    Il y a également possibilité d’equiper les locomotives »deux rails, courant continu« d’autres fabricants d’un décodeur digital Fleischmann. Si ces machines disposent, à leur tour, de l’interface normalisée, l’installation d’un décodeur devient aussi facile que pour les locomotives Fleischmann. Pour plus de renseignements se référer au mode d’emploi de décodeur.
  • Seite 91: Réseaux Hybrides Avec Zones En Commande Numérique Et D'autres En Commande Analogique

    ÉSEAUX HYBRIDES AVEC ZONES EN COMMANDE NUMÉRIQUE ET D AUTRES EN COMMANDE ANALOGIQUE Locos Fleischmann avec décodeurs DCC peuvent circuler sans problèmes en commande digitale comme en commande analogique (commande classique). Le décodeur de la machine détecte automatiquement le type de commande qui l’alimente. Cela facilite l’emploi des deux systèmes de commande sur un seul réseau et rend possible de faire circuler les machines non encore munies de décodeurs sur la section du...
  • Seite 92: L'amplifi Cateur Numérique Complémentaire Réf. 10765 (»Booster«)

    électromagnétiques 6852 directement alimentés par la voie, il vous faut une réserve de fonctionnement de 600 mA environ. Pour les informations sur la connexion des moteurs d’aiguillages à une module récepteur pour acces- soires électromagnétiques Fleischmann 6852, voir section STUCES RENSEIGNEMENTS ET PETITS DÉPAN p.
  • Seite 93: Boucles De Retournement En Commande Numérique

    Répartir ensuite le réseau en plusieurs cantons d’alimentation et isoler un canton de l’autre par des éclisses isolantes Fleischmann H0/N (une dans chaque rail !). Installer ensuite une nouvelle alimentation par un rail d’alimentation (ou une set des bornes de raccordement inclus dans une boitier de depart) et raccorder ainsi les câbles connectées à...
  • Seite 94: Glossaire

    également bidirectionnel. Vu le fait que les amplifi cateurs numériques Fleischmann 680801et le amplifi catuer complémentaire Roco 10765 sont tous unidirectionnels, la multiMAUS ne peut lire les »CV« d’un décodeur et affi che donc ainsi seulement des valeurs fi...
  • Seite 95: Astuces, Renseignements Et Petits Dépannages Rapides

    sont fi ns – les crans de marche – plus modulable est le réglage de la machine. Le protocole »DCC/NMRA« connaît, en tout, 4 régimes de crans de marche : 14, 27, 28 ou 128 crans. Pour savoir quels sont les regimes de crans de marche qu’ils connaissent vos décodeurs ou vos locos, veuillez consulter les modes d’emploi des décodeurs/locos ou consulter votre dètaillant.
  • Seite 96 Vérifi ez également au menu secondaire 3.3.2., si la fonction automatique est activée. Raccordement des aiguillages au Fleischmann module récepteur pour accessoires électromag- nétiques 6852: 1. La multi MAUS permet la progammation des CVs 1 à 255. Cependant l’ajustement (l’adresse, les carac- téristiques des sorties) du 6852 module récepteur (=decodeur) est fait par l’usage du CV 513 et suivant,...
  • Seite 97: Codes D'erreurs

    Ce code s’affi che lorsqu’il faut un recalibrage de la multiMAUS. Se référer au paragraphe 3.5.6. page 88. À partir du code »ERR 90« : votre multiMAUS est malheureusement devenue futur cliente du S.A.V. Fleischmann et a besoin d’une révision à fond.
  • Seite 98 NDICE Il multiMAUS ............................ Panoramica del multiMAUS ......................Parte 1 • Elementi di base – Imparate a conoscere il multiMAUS Collegamento del multiMAUS ......................99 Il display ............................100 I tasti ..............................100 Il funzionamento della multiMAUS Start ............................102 Tipo di accesso alla locomotiva ....................
  • Seite 99: Il Multimaus

    0 del regolatore girevole multilingue compatibilità con altri comandi compatibili DCC / NMRA il sistema digitale Fleischmann è espandibile fi no a 31 dispositivi di immissione ed altri Roco Lokmaus o multiMAUS, Roco RouteControl ecc. futuri aggiornamenti con RS485 e ROCOMOTION (X-BUS) Le possibilità...
  • Seite 100: Collegamento Del Multimaus

    1 • E ARTE LEMENTI DI multiMAUS OLLEGAMENTO DEL La fi g. 2 a pagina 61 mostra il collegamento di base. Per un sistema digitale Fleischmann funzionante con il multiMAUS sono necessari i seguenti articoli: – un amplifi catore 680801, –...
  • Seite 101: Il Display

    L DISPLAY Tutte le funzioni del multiMAUS possono essere controllate attraverso il grande display LC retroilluminato. Vi presentiamo i simboli. Simboli di marcia Chiave per dadi Simbolo scambi (tasto – le frecce indicano la direzione di – il multiMAUS si trova nel locomotiva / scambi) marcia della locomotiva selezionata piano di menu “Regolazione”...
  • Seite 102 – attiva o disattiva la luce (durante la marcia) Tasto Luce / OK – conferma le immissioni (in modalità Scambi e nei menu) – richiamo del piano di menu desiderato o delle voci di menu – in combinazione con — in modalità...
  • Seite 103: Il Funzionamento Della Multimaus

    multiMAUS UNZIONAMENTO DEL Nonostante le molte funzionalità il è facile ed intuitivo da utilizzare. Di seguito illustreremo multiMAUS sulla base di esempi pratici il funzionamento del multiMAUS. Nel caso in cui durante il funzionamento o la programmazione si dovessero verifi care dei problemi, a partire da pagina 125 sono riportati suggerimenti, avvisi ed i signifi...
  • Seite 104 La classifi cazione delle locomotive nell’archivio avviene nella sequenza dell’immissione. Ovvia- mente la sequenza può essere modifi cata: Seleziona locomotiva oppure Queste combinazioni di tasti (premere contemporaneamente) spostano la locomotiva nell’archi- vio verso l’alto o verso il basso. L’archivio riordinato può essere verifi cato con i “tasti freccia“. Nuova immissione di una locomotiva (qui ad es.
  • Seite 105 Modifi care il “valore di suggerimento“ utiliz- zando il tasto „Maiusc“ ed un “tasto freccia“ o immettendo direttamente il numero con i “tasti oppure funzione“. … Questa modifi ca ha effetti solo sull’assegna- zione dei nomi nell’archivio! L’indirizzo del decoder deve essere modifi cato con il CV1 (vedi paragrafo 6, pagina 108).
  • Seite 106: Guida E Funzioni

    La programmazione di un nuovo indirizzo di locomotiva attraverso il CV1 è riportata al para- grafo 6., pagina 108. Guida e funzioni Una volta selezionata una locomotiva dall’archivio o direttamente attraverso l’indirizzo della loco- motiva, questa può essere impiegata subito. Ruotando il grande regolatore di marcia è possibile de- terminare la direzione di marcia e la velocità.
  • Seite 107: Le Funzioni Di Arresto Di Emergenza

    Le funzioni di arresto di emergenza In situazioni critiche: Con il tasto “STOP” è possibile impedire una sciagura in qualsiasi momento ed in modo immediato. Per non dover arrestare l’intero impianto con l’”Arresto selettivo della locomo- tiva” è possibile arrestare immediatamente solo la locomotiva selezionata e visualizzata sul display. 4.1.
  • Seite 108 Attraverso i “Tasti funzione” è possibile immettere l’indirizzo dello scambio ed attivare l’azionamento attraverso i “Tasti freccia” in modo tale che la tratta venga visualizzata “Diritta “ (“tasto freccia” sinistro) o su “Deviazione “ (“tasto freccia” destro). Lo scambio viene commutato nel momento in cui si preme uno dei “tasti freccia”. Allo stesso tempo viene memorizzata l’impostazione dello scambio.
  • Seite 109: Programmazione Rapida

    Tutte le modifi che dei CV 1 – 5 agiscono solo sul funzionamento digitale della locomotiva. Poiché il multiMAUS in collegamento con gli amplifi catori Fleischmann 680801 non è in grado di leggere i CV, viene visualizzato sempre un valore fi ttizio del CV richiamato. Per la lettura si prega di impiegare ad es.
  • Seite 110: Corto Circuito E Sollecitazione Eccessiva

    Per la programmazione sul binario di programmazione a parte è possibile inserire un tratto di binario isolato elettricamente dal resto del sistema al posto del vostro impianto all’uscita del binario dell’amplifi catore oppure si disattiva prima della programmazione il sistema dei binari residuo con un interruttore.
  • Seite 111: Le Funzioni Di Menu Del Multimaus

    2 • I M ARTE multiMAUS UNZIONI DI ENU DEL Il multiMAUS dispone di tra menu principali con le quali è possibile programmare che modifi care le impo- stazioni di base del multiMAUS. Questo piano di menu può essere raggiunto a scelta con due semplici combinazioni di tasti: –...
  • Seite 112: La Struttura Dei Menu Nella Panoramica

    MODIFICARE CV LOCOMOTIVA PROGRAMMARE MODIFICARE INDIRIZZO LUNGO Programmare in CANCELLARE Linea (POM) CERCARE Avvertenze di base per l’utilizzo delle funzioni di menu e per la programma- zione: – quando ci si sposta all’interno del piano di meni (in questa panora- mica quindi sempre dall’alto verso INVIARE il basso), si raggiungono i singoli...
  • Seite 113 Illuminazione Contrasto Display REGOLAZIONE Lingua Tempo Tasto Menu UTILIZZO Funzione Inserita Sicurezza Bambini Ricerca Rapida Indirizzi Automatico – Quando il display visualizza uno dei tre menu principali è possibile richiamate la voce di menu desi- LIVELLI DI MARCIA derata anche premendo semplice- mente il numero corrispondente con i „tasti funzione“.
  • Seite 114: I Lmenu "Locomotiva

    1. I “L “ OCOMOTIVA Nel menu „Locomotiva“ il multiMAUS gestisce tutti i dati necessari per l’archivio delle locomotive e per l’identifi cazione di una locomotiva. Il multiMAUS può essere impostato anche per il funzionamento ad Archivio o Indirizzo. 1.1. “NUOVO“...
  • Seite 115 1. I “L “ OCOMOTIVA La modifi ca di un indirizzo di una locomotiva nell’archivio non ha alcun effetto sull’indirizzo memorizzato nel decoder della locomotiva. Questo potrà essere quindi modifi cato con il “CV1“. Si prega di osservare in merito quanto riportato al capitolo “Programmazione rapida“ a pagina 108 o “Modifi...
  • Seite 116: I Lmenu "Programmare

    Con i menu “PROGRAMMARE” questi valori possono essere adattati alle proprie esigenze. I decoder integrati già dalla Fleischmann nelle locomotive sono forniti solitamente con le impostazioni a regola d’arte. Prima di ogni programmazione è quindi necessario verifi care se sia effettivamente necessario.
  • Seite 117: I Lmenu "Regolazione

    2. I “P “ ROGRAMMARE – Confermare con il tasto “Luce / OK“. Il display passa brevemente su “PROG” prima di ritornare sul piano di partenza “INDIRIZZO LUNGO”. 2.3. “MODO“ Il multiMAUS è impostato in fabbrica sulla “Modalità di programmazione CV”. Se invece si desi- derano programmare le locomotive senza dover impiegare un binario di programmazione a parte è...
  • Seite 118 3. I “R ” EGOLAZIONE lingua desiderata, si prega di visitare il sito della ditta ROCO all’indirizzo “www.roco.cc“ per verifi care se esistono degli aggiornamenti. – Confermare con il tasto “Luce / OK”. Si ritorna al livello di partenza “LINGUA”. 3.2.2.
  • Seite 119: Impostazione Di Fabbrica

    3. I “R ” EGOLAZIONE 3.3.1. Dopo aver richiamato la sottovoce “INDIRIZZI” viene visualizzato l’indirizzo X-Bus attuale. Queste possono essere semplicemente sovrascritte. Intervallo valori: 0 – 31, impostazione di fabbrica: 27 (solo Master-multiMAUS) – Confermare con il tasto “Luce / OK“. Si ritorna al livello di partenza “INDIRIZZI”. 3.3.2.
  • Seite 120 3. I “R ” EGOLAZIONE – Ruotare il regolatore di marcia fi no alla battuta di arresto verso destra. Dopo aver confermato con il tasto “Luce / OK“ si ritorna nuovamente nel livello di partenza “RINIZIALIZZARE”. 3.6. “STOP-MODALITA“ In casi di emergenza premendo sul tasto „STOP“ durante il funzionamento di marcia si attiva un im- mediato arresto di emergenza.
  • Seite 121: Compatibilità Del Multimaus - Tutti I Dispositivi Impiegabili

    Anche le locomotive di altre case produttrici possono essere dotati di decoder Fleischmann per locomo- tive. Se sono dotati di un’interfaccia digitale, la modifi ca è semplice come nel caso di una locomotiva Fleischmann.
  • Seite 122: Master E Principio Slave

    OMPONENTI DIGITALI E NON DIGITALI DELL MPIANTO Tutte le locomotive digitali Fleischmann funzionano senza diffi coltà sia su un impianto digitale che su un impianto “normale“ a corrente continua. Il decoder della locomotiva riconosce automaticamente su quale sistema si trova. Per questo motivo è molto facile utilizzare su un impianto i due sistemi affi nché ad es. le vostre locomotive non ancora digitalizzate possano funzionare sulla parte a corrente continua dell’impianto.
  • Seite 123: Il Booster 10765

    6852 direttamente al circuito di corrente di marcia, quindi è necessario calcolare circa 600 mA di riserva per la corrente di commutazione degli scambi. Per più informazioni su come collegare il Fleischmann 6852 Modulo di Ricezione per articoli elettro- magnetici, vede per favore nell’appendice, la sezione “S “...
  • Seite 124: Anelli Di Ritorno In Funzionamento Digitale

    Accertarsi che i punti di passaggio dei binari presentino la stessa polarità affi nché al superamento dei punti di separazione non abbia luogo alcun corto circuito. Nel caso in cui si verifi chi un corto circuito è necessario ruotare la spina (oppure i cavi) del binario di raccordo di 180°. È...
  • Seite 125 Con gli amplifi catori Fleischmann 680801 e Roco Booster 10765 una lettura dei CV di un decoder non è possibile! Sono visualizzati solo valori di suggerimento fi ttizi. I CV possono presentare un campo di valori compreso tra “0“ e “255“. Ciò rende evidente che una modifi ca della programmazione presuppone una certa esperienza, poiché...
  • Seite 126: Suggerimenti, Avvisi E Breve Guida

    UGGERIMENTI VVISI E BREVE UIDA Modalità Archivio o Indirizzo locomotiva: – L’indirizzo della locomotiva nell’archivio coincide con l’indirizzo memorizzato nel decoder della locomotiva? la locomotiva selezionata non reagisce – È scattato l’arresto di emergenza o l’arresto di emergenza selettivo? – Selezionare un altro indirizzo nella modalità Indirizzo locomotiva.
  • Seite 127 Il collegamento di Fleischmann 6852 Modulo di ricezione per articoli elettromagnetici: 1. Il multiMAUS è capace di programmare il CVs 1 attraverso 255. Comunque la regolazione (l‘indirizzo, il comportamento di uscita) del 6852 Modulo di ricezione (=decoder) è fatto dall‘uso del CV513 in avanti, perché...
  • Seite 128: Messaggi Di Errore

    Il regolatore di marcia deve essere ricalibrato. Osservare in merito quanto riportato a pagina 118 3.5.6. a partire da ERR 90: Il vostro multiMAUS deve essere purtroppo sottoposto a manutenzione ed è necessaria una revisione ad opera del servizio assistenza Fleischmann.
  • Seite 129 • Ci riserviamo il diritto di variare la costruzione e il design! • Verandering van model en construcie Gebr. Fleischmann GmbH & Co. KG voorbehounden. Adlerstraße 2 Bitte diese Beschreibung zum späteren Gebrauch D –...
  • Seite 130 χρησιµεύει στην παροχή ρεύµατος του µοντέλου του σιδηροδρόµου σας. Παρακαλούµε ελέγχετε αυτές τις συσκευές τακτικά για πιθανές βλάβες στο περίβληµα, τα φις και τα καλώδια και αν δεν επισκευάζονται µην τα ξαναχρησιµοποιήσετε. GEBR. FLEISCHMANN GMBH & CO. KG D-91560 Heilsbronn, GERMANY www.fleischmann.de...
  • Seite 131 (snubblingsrisk). Adaptrar är inga leksaker och är endast till för strömförsörjningen av din modelljärnväg. Kontrollera dessa enheter regelbundet med avseende på ev. skador på kåpa, stickkontakter eller kablar och byt ut dem resp. låt en fackman reparera dem om de är skadade. GEBR. FLEISCHMANN GMBH & CO. KG D-91560 Heilsbronn, GERMANY www.fleischmann.de 45.1 A...
  • Seite 132 Hersteller Versions-Nr. Nur Lesen: Typnummer des eingebauten Decoders Manufacturer ID NMRA Identification No of Manufacturer. FLEISCHMANN is 155. Adresse 3 (DCC-Standard-Adresse) Hersteller ID NMRA-Hersteller-Identifikationsnummer. FLEISCHMANN hat 155. If you program values into that CV, you can achieve a reset of certain CVs to the...
  • Seite 133 Lire : No. de type de décodeurs actuel charge, c’est-à-dire que peu importe si elle ID du fabricant Numéro d’identification NMRA du fabricant. FLEISCHMANN parte le 155. monte ou descend, elle roulera toujours à la En lecture seule. La saisie sur cette CV restaure les valeurs d’usine au certaines CV.
  • Seite 134 • Die Anschlussdrähte sowohl des Gleises, als auch die des Verstärkers keinesfalls in die Steckdose stecken. Aufbau • Assembly • L‘assemblage • Montaggio • Ensamblado • Opstilling • Opbouw • Verwenden Sie aus Sicherheitsgründen bitte nur das der Packung beiliegende Steckernetzteil! Es ist kein Spielzeug und nur für die Verwendung in trockenen Räumen bestimmt.
  • Seite 135 D A CH Betriebsanleitung aufbewahren! GB Retain operating instructions! F Gardez l'instructions de service ! NL Gebruiksanwijzing bewaren! I Ritenere l'istruzione per l'uso! E ¡Conserve instucciones de servicio! DK Gem vejledning! GEBR. FLEISCHMANN GMBH & CO. KG ~ 20 V D-91560 Heilsbronn, Germany www.fleischmann.de...

Inhaltsverzeichnis