Inhaltsverzeichnis
Werbung
Verfügbare Sprachen
Verfügbare Sprachen
Quicklinks
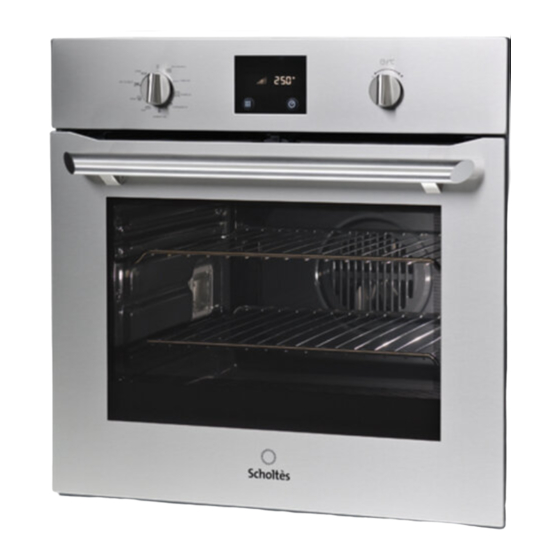
FN 34 XA (EU) S
Italiano
Istruzioni per l'uso
FORNO
Sommario
Istruzioni per l'uso,1
Descrizione dell'apparecchio,10
Installazione,12
Avvio e utilizzo,14
Programmi,14
Precauzioni e consigli,18
English
Operating Instructions
OVEN
Contents
Operating Instructions,1
Warnings,3
Assistance,6
Description of the appliance,8
Description of the appliance,10
Installation,20
Modes,22
Français
Mode d'emploi
FOUR
Sommaire
Mode d'emploi,1
Assistance,6
Description de l'appareil,8
Installation,28
Programmes,30
Español
Manual de instrucciones
HORNO
Sumario
Manual de instrucciones,1
Advertencias,4
Asistencia,6
Descripción del aparato,8
Descripción del aparato,10
Instalación,36
Programas,38
Precauciones y consejos,42
Portuges
Instruções para a utilização
FORNO
Índice
Instruções para a utilização,1
Advertências,4
Assistência,7
Descrição do aparelho,8
Descrição do aparelho,11
Instalação,44
Programas,46
Werbung
Inhaltsverzeichnis

Verwandte Anleitungen für Scholtes FN 34 XA (EU) S


Inhaltszusammenfassung für Scholtes FN 34 XA (EU) S
- Seite 2 Deutsch Bedienungsanleitung BACKOFEN Inhaltsverzeichnis Bedienungsanleitung,2 Hinweise,5 Kundendienst,7 Beschreibung Ihres Gerätes,9 Beschreibung Ihres Gerätes,11 Installation,52 Inbetriebsetzung und Gebrauch,54 Programme,54 Vorsichtsmaßregeln und Hinweise,58 Reinigung und Pflege,58 Nederlands Gebruiksaanwijzing OVEN Inhoud Gebruiksaanwijzing,2 Belangrijk,5 Service,7 Beschrijving van het apparaat,9 Beschrijving van het apparaat,11 Het installeren,60 Starten en gebruik,62 Programma’s,62 Voorzorgsmaatregelen en advies,66...
-
Seite 5: Hinweise
niet dichtbij het apparaat kunnen komen, tenzij onder constant toezicht. Het huidige apparaat mag alleen door kinderen van 8 jaar en ouder en door personen Hinweise met een beperkt lichamelijk, sensorieel of geestelijk vermogen, of zonder ervaring en kennis worden ZUR BEACHTUNG: Bei Gebrauch wird dieses gebruikt, mits ze onder adequaat toezicht zijn, of Gerät und alle zugänglichen Teile sehr heiß. -
Seite 7: Kundendienst
Antes de llamar al Servicio de Asistencia Técnica: • Verifique que la anomalía no pueda ser resuelta por Ud. mismo; • Vuelva a poner en marcha el programa para controlar si el inconveniente ha sido resuelto; Kundendienst • Si no es así, llame al Servicio de Asistencia Técnica Autorizado. Achtung: ! Nunca solicite la asistencia de técnicos no autorizados. -
Seite 9: Beschreibung Ihres Gerätes
Beschreibung Ihres Gerätes Geräteansicht 1 EINSCHUBHöHE 1 2 EINSCHUBHöHE 2 3 EINSCHUBHöHE 3 4 EINSCHUBHöHE 4 5 EINSCHUBHöHE 5 6 GLEITFÜHRUNGEN für die Einschübe 7 Einschub FETTPFANNE 8 Einschub BACKOFENROST 9 Bedienfeld Beschrijving van het apparaat Algemeen aanzicht 1 POSITIE 1 2 POSITIE 2 3 POSITIE 3 4 POSITIE 4... - Seite 11 Descrição do aparelho Painel de comandos 1 Selector PROGRAMAS 2 DISPLAY 3 Selector do TERMóSTATO/PROGRAMAçãO dos TEMPOS 4 Teclas de PROGRAMAçãO dos TEMPOS 5 Tecla de LUz DE FORNO Display 6 Dígitos numérico de TEMPERATURA e TEMPOS 7 Ícone RELóGIO 8 Ícone CONTADOR DE MINUTOS 9 Ícone do FIM DA COzEDURA 10 Ícone DURAçãO...
-
Seite 52: Aufstellung
Installation zentrieren und Befestigen Bringen Sie die 4 seitlich am Backofen befindlichen Klampen mit den 4 Löchern des Rahmens in Übereinstimmung. Achten Sie dabei darauf, dass ! Bewahren Sie diese Bedienungsanleitung bitte sorgfältig auf, damit Sie sie bei einer Stärke der Umbauschrankwand von: jederzeit zu Rate ziehen können. -
Seite 53: Typenschild
TYPENSCHILD 2. Installation des Netzkabels: Schrauben Breite 43,5 cm Sie die Schraube der Kabelklemme Abmessungen* Höhe 32,4 cm sowie die drei Schrauben der Kontakte Tiefe 41,5 cm L-N- heraus. Befestigen Sie die Drähte dann unter Beachtung der Nutzvolumen* Liter 59 entsprechenden Farben unter den Breite 45,5 cm Schraubenköpfen: Blau (N), Braun (L),... -
Seite 54: Inbetriebsetzung Und Gebrauch
Inbetriebsetzung und Gebrauch 1. Das gewünschte Garprogramm über den Drehschalter PROGRAMME auswählen. 2. Der Backofen schaltet auf Vorheizen; die Anzeigen der aktuellen ACHTUNG! Der Ofen ist mit einem Vorheiztemperatur schalten sich nach und nach an, je weiter die Temperatur Arretierungssystem der Roste steigt. -
Seite 55: Garzeit Programmieren
• Formen Sie eine Kugel und geben Sie den Teig in eine Schüssel. Decken Programm GRILL-DREHSPIESS Sie den Teig mit Frischhaltefolie ab, damit er an der Oberfläche nicht Das obere Heizelement schaltet sich ein, und der Drehspieß wird in Betrieb austrocknet. - Seite 56 Praktische Back-/Brathinweise 4. Nach Ablauf der Zeit zeigt das DISPLAY die Anzeige END an. Der Backofen schließt den Garvorgang ab und das akustische Signal wird aktiviert. ! Verwenden Sie beim Heißluftgaren nicht die Einschubhöhen 1 und 5. Sie • Beispiel: Es ist 9.00 Uhr. Programmierte Garzeit: 1 Std. und 15 Min. Das sind der Heißluft zu direkt ausgesetzt, wodurch empfindliche Gerichte leicht Programm stoppt automatisch um 10:15 Uhr.
- Seite 57 Tabelle Garen im Backofen HAUPTGERICHTE BEISPIELE FUNKTION TEMPERATUR UNTERLAGE Kuchen oder Plum-Cake (gesalzen) Plum-Cake mit Oliven, Thunfisch usw. 160 °C Form auf Backblech Heißluft Kuchen oder Pikante Kuchen Pikante Kuchen mit Käse, Lachspasteten usw. 200 °C a/ Backblech Heißluft Terrinenform auf Backblech Terrinen Fisch-, Fleisch-, Gemüseterrinen usw.
-
Seite 58: Vorsichtsmaßregeln Und Hinweise
Vorsichtsmaßregeln und Hinweise über den herkömmlichen Haushaltsmüllkreislauf entsorgt werden. Altgeräte müssen separat gesammelt werden, um die Wiederverwertung und das Recycling der beinhalteten Materialien zu optimieren und die ! Das Gerät wurde entsprechend den strengsten internationalen Einflüsse auf die Umwelt und die Gesundheit zu reduzieren. Das Symbol Sicherheitsvorschriften entworfen und gebaut. -
Seite 59: Dichtungen Prüfen
1. Hierzu die Tür vollständig öffnen (siehe Abbildung). 2. Die seitlich an den beiden Scharnieren befindlichen Hebel anheben und drehen (siehe Abbildung). 3. (Mit Vollglasinnentür). Die Tür an den beiden äußeren Seiten langsam und nicht vollständig schließen. Drücken Sie auf die Arretierbolzen F und ziehen Sie dann die Tür zu sich hin aus den Scharnieren heraus (siehe Abbildung).