Herunterladen Inhalt Inhalt Diese Seite drucken
Viscount Legend Solo Bedienungshandbuch

Viscount Legend Solo Bedienungshandbuch

Viscount by key b organ
Inhaltsverzeichnis

Werbung

Verfügbare Sprachen

Verfügbare Sprachen

viscount
Manuale Utente - IT
User Manual - EN
Bedienungshandbuch - DE
Ver. 1.1

Werbung

Inhaltsverzeichnis

Fehlerbehebung

loading

Inhaltszusammenfassung für Viscount Legend Solo

  • Seite 1 Manuale Utente - IT User Manual - EN Bedienungshandbuch - DE Ver. 1.1...
  • Seite 3: Inhaltsverzeichnis

    1. Note importanti ..............................2 1.1 Cura del prodotto ..............................2 1.2 Bote riguardanti il manuale ..........................2 2. Introduzione ..............................3 2.1 Caratteristiche generali di Legend Solo....................... 3 3. Comandi e connessioni ..........................4 3.1 Pannello frontale ..............................4 3.2 Pannello posteriore............................... 7 4.
  • Seite 4: Note Importanti

    Manuale Utente 1. NOTE IMPORTANTI 1.1 CURA DEL PRODOTTO Non applicate eccessiva forza alle strutture ed ai comandi dello strumento (manopole, pulsanti, tastiera  ecc…).  Non collocare, quando possibile, lo strumento in prossimità di unità che producano forti interferenze come apparecchi radio –...
  • Seite 5: Introduzione

    Upper e Lower, ognuna con il proprio Set di drawbars, di cui l’Upper da suonare con la tastiera di Legend Solo e la Lower da suonare con una tastiera esterna collegata al connettore [MIDI IN]. In aggiunta ai drawbars, per ogni sezione sono disponibili 4 Preset modificabili e memorizzabili liberamente dall’utente.
  • Seite 6: Comandi E Connessioni

    Manuale Utente 3. COMANDI E CONNESSIONI 3.1 PANNELLO FRONTALE 4 6 8 10 11 1. Pulsante [VIBRATO/CHORUS UPPER]. Pulsante per assegnare l’effetto di Vibrato o Chorus (vedi punto 3) alla sezione Upper. 2. Pulsante [VIBRATO/CHORUS LOWER]. Pulsante per assegnare l’effetto di Vibrato o Chorus (vedi punto 3) alla sezione Lower.
  • Seite 7 - Modalità Split o Double : tramite questi drawbars è possibile controllare il suono della sezione Upper. 15. Drawbars della pedaliera. Drawbars per controllare il suono della sezione Pedal, da suonare con la pedaliera opzionale Viscount od una qualsiasi pedaliera MIDI o con le prime 25 note della tastiera quando il led del pulsante [PEDALS TO LOWER] è...
  • Seite 8 Manuale Utente 19 20 21 22 29 30 31 32 24 25 26 27 28 17. Pulsanti [LOWER PRESETS]. Pulsanti per la selezione dei Preset della sezione Lower. Il led acceso indica quale Preset è attualmente selezionato. NOTA I Lower Preset sono selezionabili solo in modalità Split e Double.
  • Seite 9: Pannello Posteriore

    Manuale Utente 26. Pulsante [PEDALS TO LOWER]. A led acceso, è possibile suonare i drawbars di pedaliera con le prime 25 note della tastiera del Legend Solo (in modalità Single o Split ) o della tastiera collegata al connettore [MIDI IN] (in modalità Double ).
  • Seite 10 - [ANALOG IN]: ingresso di linea per ricevere il segnale da un’unità audio esterna. Questo segnale viene poi trattato dall’equalizzatore e dagli effetti interni Reverb, Drive e Rotary del Legend Solo ed inviato alle uscite [LEFT], [RIGHT], [ROTARY SPEAKER] e [PHONES].
  • Seite 11 Legend Solo ). - [OUT1] e [OUT2]: da questi connettori vengono trasmessi i dati MIDI generati dal Legend Solo . Collegare questi connettori all’ingresso MIDI del dispositivo ricevente (per es un expander).
  • Seite 12: Accensione E Normale Funzionamento

    Manuale Utente 4. ACCENSIONE E NORMALE FUNZIONAMENTO Per l’accensione dello strumento attenersi a queste semplici regole: 1. Posizionare il potenziometro [VOLUME] completamente a sinistra (volume chiuso). 2. In caso di utilizzo delle cuffie, non indossarle. 3. Accendere lo strumento tramite l’interruttore [POWER] posto nel pannello posteriore.
  • Seite 13 1’) se ne regola la brillantezza. Il Legend Solo è dotato di 20 drawbars, divisi in tre gruppi: il gruppo a sinistra è chiamato Set A, mentre quello a destra è il Set B. Il gruppo centrale sono i due drawbars della pedaliera.
  • Seite 14: Cosa Sono E Come Si Utilizzano I Presets

    Queste combinazioni, che all’inizio non potevano più essere modificate dal musicista, erano denominate Presets. Il Legend Solo dispone di quattro Presets per la sezione Upper ed altri quattro per la sezioni Lower. Questi Presets sono richiamabili con i pulsanti [UPPER PRESETS] e [LOWER PRESETS] del pannello frontale (vedi punti 13 e 17 del par.
  • Seite 15: La Percussione

    è selezionato il Set B dei drawbars ed il suono prodotto dal drawbar 1’ veniva eliminato all’attivazione della percussione. Il Legend Solo riproduce anche queste caratteristiche in quanto in modalità Single deve essere selezionato il Set B dei drawbars, mentre in Split e Double la percussione suona solo nella sezione Upper.
  • Seite 16: Aggiungere I Rumori Interni

    Questa modalità permette di simulare i due manuali (Upper e Lower) di un organo con la singola tastiera del Legend Solo . Questa infatti viene divisa in due sezioni, Upper e Lower appunto, rispettivamente a destra e a sinistra di una nota che funge da divisore e denominata Punto di Split .
  • Seite 17 MIDI di Control Change (per es con slider o potenziometri) programmabili). Tutte le informazioni inerenti i canali ed i messaggi MIDI da far ricevere a Legend Solo per controllarlo con uno dispositivo esterno sono riportate nel paragrafo “MIDI Informations”.
  • Seite 18: Aggiungere Gli Effetti Al Suono

    Il riverbero nasce come somma delle varie riflessioni acustiche prodotte da un suono in un ambiente naturale. Negli originali organi elettromeccanici il riverbero era simulato tramite un particolare dispositivo contenente una o più molle. L’effetto Reverb del Legend Solo permette di simulare un riverbero naturale e quello caratteristico dell’organo elettromeccanico.
  • Seite 19: Rotary

    ’70. 5.4 ROTARY L’effetto interno Rotary del Legend Solo simula il classico effetto acustico prodotto da un diffusore rotante collegato all’organo. Detto sistema di amplificazione e diffusione del suono si affermò con l’avvento dell’organo elettromeccanico e consisteva in due sezioni, una dedicata ai toni acuti ed un’altra riguardante i toni bassi, le...
  • Seite 20: Funzioni Aggiuntive

    Manuale Utente 6. FUNZIONI AGGIUNTIVE 6.1 TRASPOSIZIONE E’ possibile trasporre la tastiera e la pedaliera in un range di -6 / +5 semitoni. Per impostare la trasposizione, tenendo premuto il pulsante [TRANSPOSE SELECT] premere uno dei tasti da F#1 (-6 semitoni) a F2 (+5 semitoni). Il C2 corrisponde a trasposizione nulla.
  • Seite 21: Appendice

    Manuale Utente 7. APPENDICE 7.1 PRESET DI FABBRICA Upper Presets Lower Presets Button Registration Name Button Registration Name 00 5320 000 Stopped Flute 00 4545 440 Cello 00 4432 000 Dulciana 00 4432 220 Flute & Strings 00 8740 000...
  • Seite 22 Manuale Utente Il pedale d’espressione non produce alcun effetto. Verificare che il cavo di collegamento sia collegato al connettore [EXP] del pannello posteriore e che non sia danneggiato. Il/i pedali switch non producono alcun effetto. Se si desidera controllare le velocità dell’effetto Rotary controllare che il cavo di collegamento sia collegato al connettore [ROTARY] del pannello posteriore.
  • Seite 23 Smaltimento dei rifiuti elettrici ed elettronici (applicabile nell’Unione Europea e negli altri paesi europei con servizio di raccolta differenziata) Ai sensi dell’art. 13 del Decreto legislativo 25 luglio 2005, n. 151 “Attuazione delle Direttive 2002/95/CE, 2002/96/CE e 2003/108/CE” II simbolo presente sul prodotto o sulla sua confezione indica che il prodotto non verrà trattato come rifiuto domestico.
  • Seite 25 1.1 Product care ................................. 2 1.2 Notes about this manual ............................2 2. Introduction ................................3 2.1 General features of Legend Solo ......................... 3 3. Controls and connections ............................4 3.1 Front panel ................................4 3.2 Rear panel ................................7 4.
  • Seite 26: Important Notes

    User Manual 1. IMPORTANT NOTES 1.1 PRODUCT CARE Do not apply excessive force to the instrument's structures and controls (knobs, buttons, keyboard etc...).   Whenever possible, do not place the instrument close to units that generate strong interference, such as radio - TV sets, monitors, etc ...
  • Seite 27: Introduction

    2.1 GENERAL FEATURES OF LEGEND SOLO Legend Solo is a single-key digital organ, which can also be split into upper manual, lower manual and pedal, that can simulate, thanks to the new sound generation technology TMT (Tonewheel Modeling Technology), all the features of the electromechanical organ commonly known as Hammond.
  • Seite 28: Controls And Connections

    User Manual 3. CONTROLS AND CONNECTIONS 3.1 FRONT PANEL 4 6 8 10 11 1. [VIBRATO/CHORUS UPPER] button. Button to assign the Vibrato or Chorus effect (see section 3) to the Upper section. 2. [VIBRATO/CHORUS LOWER] button. Button to assign the Vibrato or Chorus effect (see section 3) to the Lower section.
  • Seite 29 15. Pedalboard drawbars. Drawbars to control the sound of the Pedal section, to be played with the optional Viscount pedal or any MIDI pedal or with the first 25 keyboard notes when the [PEDALS TO LOWER] button LED is on (see section 26) .
  • Seite 30 Lower section with a transposition of one octave upward. 26. [PEDALS TO LOWER] button. Legend Solo When the led is on, the pedalboard drawbars can be played through the first 25 keys of the keyboard (in...
  • Seite 31: Rear Panel

    User Manual 27. [TRANSPOSE SELECT] button. Adjust the keyboard transposition (see par. 6.1), set up functions and recall the Panic function (see par. 6.2). 28. [TUNING] trimmer. Adjust the instrument's fine tuning. When the trimmer is to the far left, the tuning is 1/2 semitone lower; at the far right, the tuning is 1/2 semitone higher.
  • Seite 32 [PEDALS] output. WARNINGS ON THE USE OF SPEAKERS • The [ROTARY SPEAKER] on Legend Solo should only be connected to a rotating speaker equipped with a cable with the following pinout: 1: Audio +...
  • Seite 33 Legend Solo , with an external expander module). - [OUT1] and [OUT2]: this connectors send out the MIDI data generated by Legend Solo . Connect this port to the MIDI input of the receiving device (e.g. an expander module).
  • Seite 34: Switching On And Normal Functioning

    User Manual 4. SWITCHING ON AND NORMAL FUNCTIONING To switch on the instrument follow these simple rules: 1. Turn the [VOLUME] potentiometer to the left (closed). 2. When using headphones, do not wear them. 3. Switch on the instrument through the [POWER] switch on the rear panel.
  • Seite 35 (8', 4', 2 2/3 'and 2') define the main sound and the last three drawbars (1 3/5', 1 1/3' and 1') adjust the sound brightness. Legend Solo features 20 drawbars, divided into three groups: the group on the left is called Set A, while the one on the right is the Set B.
  • Seite 36: What Are Presets And How To Use Them

    Presets could be used, without the need to manually change the position of the drawbars. These combinations, which back then could not be modified by the user, were called Presets. Legend Solo features four Presets for the Upper section and four other Presets for the Lower sections.
  • Seite 37: Percussion

    (Crosstalk), where each cable interfered with the others. Therefore, when a key was pressed, many other notes played too, but at a much lower volume. In order to make the sound of Legend Solo as faithful as possible to the original electromechanical counterpart, you can add the Keyclick effect and adjust its volume through the [K.CLICK] potentiometer.
  • Seite 38: Single, Split And Double Modes

    User Manual 4.5 SINGLE, SPLIT AND DOUBLE MODES Legend Solo Single Split Double You can use the in three operating modes: SINGLE In this mode, the set of drawbars selected using the [SET A/SET B] button (see section 5 of par. 3.1) will sound throughout the keyboard extension.
  • Seite 39: Using Effects

    In Single mode, you can play the Lower section with an external device (keyboard, sequencer, computer) connected to the [MIDI IN] port, but you can’t control the sound with the drawbars of the Legend Solo. The Lower section sound is initially adjusted based on the position of the drawbars of Set B when powering up the instrument.
  • Seite 40: Drive

    User Manual 5.3 DRIVE Legend Solo The Drive effect of faithfully reproduces the sound features of the analog distortion; the higher the input signal to the amplifier, the greater the distortion. You will notice therefore that the effect depends on a...
  • Seite 41: Additional Functions

    User Manual 6. ADDITIONAL FUNCTIONS 6.1 TRANSPOSITION The keyboard can be transposed within a range of -6 / +5 semitones. To set the transposition, while holding the [TRANSPOSE SELECT] button, press one of the keys from F#1 (-6 semitones) to F2 (+5 semitones). C2 corresponds to no transposition.
  • Seite 42: Appendix

    User Manual 7. APPENDIX 7.1 FACTORY PRESET Upper Presets Lower Presets Button Registration Name Button Registration Name 00 5320 000 Stopped Flute 00 4545 440 Cello 00 4432 000 Dulciana 00 4432 220 Flute & Strings 00 7373 430...
  • Seite 43 User Manual The switch pedal(s) have no effect. If you want to control Rotary speed check that the cable is properly connected to the [ROTARY] port. If you want to use the Hold function (Sustain) check that the pedal cable is connected to the [HOLD] connector.
  • Seite 44 Disposal of old Electrical & Electronic Equipment (Applìcable throughout the European Union and other European countries with separate collection programs) Dir. 2002/95/CE, 2002/96/CE e 2003/108/CE This syrnbol, found on your product or on its packaging, indicates that this product should not be treated as household waste when you wish to dispose of it.
  • Seite 47 1. Wichtige Hinweise ............................2 1.1 Pflege des Instruments ............................2 1.2 Hinweise zu diesem Handbuch ........................... 2 2. Einleitung ..............................3 2.1 Ausstattungsmerkmale der Legend Solo ......................3 3. Regler und Anschlüsse ..........................4 3.1 Vorderseite ................................4 3.2 Rückseite ................................7 4.
  • Seite 48: Wichtige Hinweise

    Bedienungshandbuch 1. WICHTIGE HINWEISE 1.1 PFLEGE DES INSTRUMENTS Achten Sie darauf, das Gehäuse und die Bedienelemente (Regler, Taster, Tastatur usw.) des Instruments  keinen übermäßigen mechanischen Belastungen auszusetzen.  Stellen Sie das Instrument möglichst nicht in der Nähe von starken Störquellen (Radiogerät, Fernsehgerät, PC-Monitor usw.) auf.
  • Seite 49: Einleitung

    2. EINLEITUNG 2.1 AUSSTATTUNGSMERKMALE DES LEGEND SOLO Die Legend Solo ist eine Digitalorgel mit Einzeltastatur, die man bei Bedarf auch in ein oberes und unteres Manual plus Pedal unterteilen kann. Dank der neuen TMT (Tonewheel Modeling Technology) Klangerzeugungstechnologie kann die Legend Solo alle Features der unter dem Begriff Hammond bekannten elektromechanischen Orgeln simulieren.
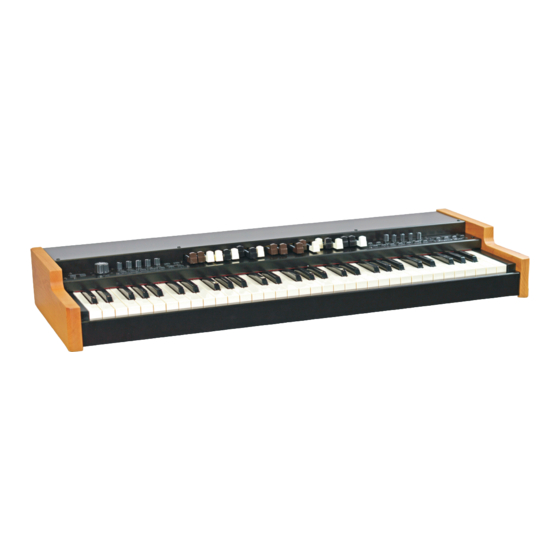
  • Seite 50: Regler Und Anschlüsse

    Bedienungshandbuch 3. REGLER UND ANSCHLÜSSE 3.1 VORDERSEITE 4 6 8 10 11 1. [VIBRATO/CHORUS UPPER]-Regler. Mit diesem Taster weisen Sie den Vibrato- oder Chorus-Effekt (siehe Abschnitt 3) der Upper-Sektion zu. 2. [VIBRATO/CHORUS LOWER]-Regler. Mit diesem Taster weisen Sie den Vibrato- oder Chorus-Effekt (siehe Abschnitt 3) der Lower-Sektion zu.
  • Seite 51 - Split - oder Double -Modus: Mit diesen Zugriegeln kann man den Klang der Upper-Sektion regeln. 15. Fußpedal-Zugriegel. Mit diesen Zugriegeln steuert man den Klang der Pedal-Sektion, die über ein optionales Viscount-Pedal oder jedes andere MIDI-Pedal oder über die ersten 25 Tasten der Tastatur gespielt wird, wenn die LED des [PEDALS TO LOWER]-Tasters leuchet (siehe Absatz 26).
  • Seite 52 Bedienungshandbuch leuchten. - Split - oder Double -Modus: Mit diesen Zugriegeln kann man den Klang der Lower-Sektion regeln. Nähere Informationen zu den Zugriegeln finden Sie in Abs. 4.1. 19 20 21 22 29 30 31 32 24 25 26 27 28 17.
  • Seite 53: Rückseite

    Bedienungshandbuch 25. [OCTAVE UP]-Taster. Split Wenn die LED dieses Tasters im -Modus leuchtet, ist die Lower-Sektion eine Oktave höher transponiert. 26. [PEDALS TO LOWER]-Taster. Bei leuchtender LED kann man die Fußpedal-Zugriegel mit den ersten 25 Tasten des unteren Manuals spielen.
  • Seite 54 Vpp) empfängt das Signal des externen Effektprozessors, der an die [FX SEND]-Buchse angeschlossen ist (siehe vorherigen Punkt). Dieses Signal wird dann vom Equalizer und den internen Effekten Reverb, Drive und Rotary der Legend Solo modifiziert und über die Ausgänge [LEFT], [RIGHT], [ROTARY SPEAKER] und [PHONES] ausgegeben.
  • Seite 55 [OUT 1]- und [OUT 2]-Ports geleitet, damit sie auch über externe Geräte gespielt werden können. - [THRU]: Dieser Port überträgt die über den [IN]-Port eingehenden Daten zu anderen MIDI-Geräten (z. B. um die von einem externen Sequenzer gesendeten Daten über eine Legend Solo mit externem Expandermodul zu spielen).
  • Seite 56: Einschalten Und Normalbetrieb

    Bedienungshandbuch 4. EINSCHALTEN UND NORMALBETRIEB Beachten Sie beim Einschalten des Instruments bitte folgende einfache Regeln: 1. Drehen Sie den [VOLUME]-Regler ganz nach links. 2. Setzen Sie Ihre Kopfhörer erst nach dem Einschalten auf. 3. Schalten Sie das Instrument mit dem rückseitigen [POWER]-Schalter ein.
  • Seite 57 Hauptklang und die letzten drei Zugriegel (1 3/5', 1 1/3' und 1') regeln die Helligkeit des Klangs. Die Legend Solo verfügt über 20 Zugriegel, die in drei Gruppen unterteilt sind: Die linke Gruppe ist Set A und die rechte Gruppe ist Set B. Die mittlere Gruppe besteht aus den beiden Zugriegeln des Fußpedals.
  • Seite 58: Über Presets Und Ihre Anwendung

    Kombinationen, die man damals als Anwender nicht modifizieren konnte, nannte man Presets. Die Legend Solo bietet vier Presets für die Upper-Sektion und vier andere Presets für die Lower-Sektion. Diese Presets kann man mit den vorderseitigen [UPPER PRESETS]- und [LOWER PRESETS]-Tastern abrufen (siehe Abschnitt 3.1, Absatz 13 und 17).
  • Seite 59: Percussion

    Percussion allerdings nur auf dem oberen Manual erzeugt, und nur wenn Zugriegel-Set B gewählt ist und der mit Zugriegel 1’ erzeugte Klang bei Aktivierung der Percussion entfernt wird. Die Legend Solo reproduziert diese Eigenschaften wie folgt: Im Single -Modus muss Zugriegel-Set B gewählt sein, während im Split - und Double -Modus die Percussion nur in der Upper-Sektion...
  • Seite 60: Interne Geräuschsimulation

    Ein anderer, zum Bestandteil des Klangs gewordener Makel sind Störgeräusche aufgrund der extremen Dichte der Audioverkabelung (Crosstalk/Übersprechen). Dadurch erklingen beim Anschlagen einer Taste auch eine ganze Reihe anderer Töne, allerdings mit viel geringerer Lautstärke. Legend Solo Um den Klang der so originalgetreu wie möglich an den ihres elektromechanischen Vorbilds anzugleichen, kann man einen Keyclick-Effekt hinzufügen...
  • Seite 61 [MIDI IN]-Port angeschlossen ist, aber man kann den Klang nicht mit den Zugriegeln der Legend Solo steuern. Nach dem Einschalten des Instruments wird der Klang der Lower-Sektion anfänglich von der Position der Zugriegel von Set B geregelt. Wie man den Klang der Lower-Sektion in Echtzeit ändert, wird im vierten Punkt weiter unten beschrieben.
  • Seite 62: Effekte Anwenden

    Bedienungshandbuch 5. EFFEKTE ANWENDEN 5.1 VIBRATO ODER CHORUS Die vorderseitige VIBRATO/CHORUS-Sektion verfügt über drei Regler, mit denen man den gewünschten Effekt (Vibrato oder Chorus) für den Klang einstellen kann. Vibrato bewirkt eine zyklische Modulation der Tonhöhe des Signals und verleiht dem Klang mehr Räumlichkeit und Fülle. Chorus fügt dem modulierten Signal das Direktsignal hinzu und beeinflusst somit sowohl die Stimmung als auch die Amplitude des Signals.
  • Seite 63: Rotary

    Röhrenverstärker übersteuert wird. 5.4 ROTARY Der interne Rotary-Effekt der Legend Solo simuliert den klassischen akustischen Effekt eines an die Orgel angeschlossenen Rotationslautsprechers. Dieses Verstärkungs- und Schalldiffusions-System erlangte mit dem Aufkommen elektromechanischer Orgeln große Verbreitung. Es besteht aus zwei Bereichen mit rotierenden Lautsprechern, einem für die hohen Töne und einem für die Bässe.
  • Seite 64: Weitere Funktionen

    Bedienungshandbuch 6. WEITERE FUNKTIONEN 6.1 TRANSPOSITION Man kann die Tastatur im Bereich von -6/+5 Halbtönen transponieren. Um die Transposition einzustellen, halten Sie den [TRANSPOSE SELECT]-Taster gedrückt und drücken eine der Tasten F#1 (-6 Halbtöne) bis F2 (+5 Halbtöne). Bei C2 findet keine Transposition statt.
  • Seite 65: Anhang

    Bedienungshandbuch 7. ANHANG 7.1 WERKS-PRESETS Upper-Sektion Lower-Sektion Taste Registrierung Name Taste Registrierung Name 00 5320 000 Stopped Flute 00 4545 440 Cello 00 4432 000 Dulciana 00 4432 220 Flute & Strings 00 8740 000 French Horn 00 7373 430...
  • Seite 66 Bedienungshandbuch Die Schaltpedale sind wirkungslos. Prüfen Sie, ob das Kabel zur Steuerung der Rotary-Geschwindigkeit korrekt mit der [ROTARY]-Buchse verbunden ist. Prüfen Sie, ob das Kabel zur Steuerung der Hold-Funktion (Sustain) korrekt mit der [HOLD]-Buchse verbunden ist. Prüfen Sie, ob das Verbindungskabel beschädigt ist.
  • Seite 67 Entsorgung von alten Elektro- und Elektronikgeräten (gültig in der Europäischen Union und anderen europäischen Ländern mit separatem Sammelsystem) Dir. 2002/95/CE, 2002/96/CE e 2003/108/CE Dieses Symbol auf dem Produkt oder auf der Verpackung bedeutet, dass dieses Produkt nicht wie Hausmüll behandelt werden darf.
  • Seite 68: Midi-Informationen

    The same type of transfer of information is used to record MIDI sequences. A sequencer can be used to Legend Solo record the MIDI data transmitted by the or any other instrument. When these recorded data are...
  • Seite 69 MAIN MIDI MESSAGES TRANSMITTED AND RECEIVED BY THE LEGEND SOLO Note On: • 9nH kkH vvH This message is transmitted when a note is played, i.e. when a keyboard key is pressed. Each Note On message includes the following codes: Note On (9nH): when a key has been pressed, n is the MIDI channel;...
  • Seite 70 LIST OF MIDI CONTROLLERS CC Function Transmitted Received Rotary bypass 0: Off, 127: On. On ch.1 (OUT 1) and 4 (OUT 2) 0-63: Off, 64-127: On. On ch.1 [PEDALS] output enable 0: Off, 127: On. On ch.1 (OUT 1) and 4 (OUT 2) 0-63: Off, 64-127: On.
  • Seite 71 MIDI IMPLEMENTATION CHART Viscount Legend Solo Version: 1.0 Drawbars Organ Date: 11/07/2017 FUNCTION… TRANSMITTED RECEIVED REMARKS BASIC Default 1, 2, 3, 4, 5, 6 1, 2, 3, 4, 5, 6 CHANNEL Changed ******** ******** MODE Default Mode 3 Mode 3...
  • Seite 72 Viscount International S.p.A. Via Borgo, 68 / 70 – 47836 Mondaino (RN), ITALY Tel: +39-0541-981700 Fax: +39-0541-981052 Website: www.viscountinstruments.com...

Inhaltsverzeichnis