Omnitronic KEY-288+ Bedienungsanleitung
Inhaltsverzeichnis
Verfügbare Sprachen
Verfügbare Sprachen
Quicklinks
Inhaltsverzeichnis

Verwandte Anleitungen für Omnitronic KEY-288+


Inhaltszusammenfassung für Omnitronic KEY-288+
-
Seite 2: Inhaltsverzeichnis
Inhalt 1 Einführung Einführung .......... 2 Willkommen bei Omnitronic! Schön, dass Sie sich für eines unserer Produkte entschieden haben. 1.1 Produktmerkmale ......... 2 1.2 Lieferumfang ........2 Diese Bedienungsanleitung zeigt Ihnen, wie Sie Sicherheitshinweise ......3 den Controller in Betrieb nehmen und nutzen. -
Seite 3: Sicherheitshinweise
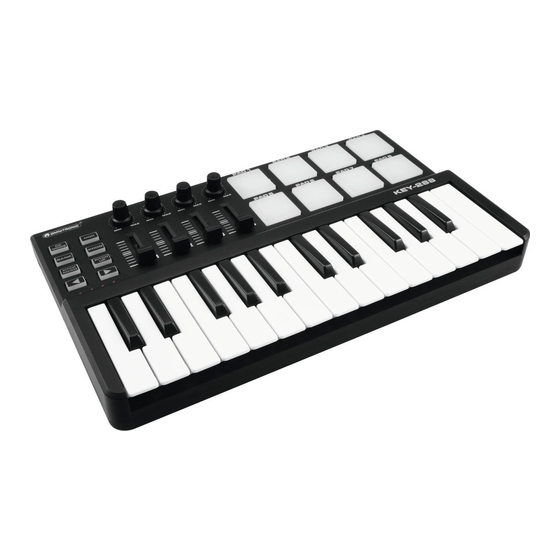
2 Sicherheitshinweise • Bitte lesen Sie vor der Verwendung des Produkts diese Anleitung. Sie enthält wichtige Hinweise für den korrekten Betrieb. Bewahren Sie diese Anleitung für weiteren Gebrauch auf. • Der KEY-288+ ist ein handlicher MIDI-Controller zur Steuerung von Musiksoftware auf PC und Mac. -
Seite 4: Bedienelemente Und Anschlüsse
4 Bedienelemente und Anschlüsse Element Element Keyboard Arp-Taste Modulationsstreifen Fixed-Chord-Taste OLED-Display ► Playback-Taste ● Parameter-Regler Record-Taste (Drücken = Enter) > Scene-Launch-Taste Menu-Taste Stop/Solo/Mute/Enter-Taste Shift-Taste USB-Anschluss Drehregler Anschluss für Sustainpedal Fader MIDI-Ausgang (3,5-mm-Stereoklinke) Trigger-Pads mit Kensington-Sicherheitsschloss RBG-Beleuchtung 4 • DE... -
Seite 5: Anschlüsse Herstellen
5 Anschlüsse herstellen 5.1 Computer Der Controller wird über den USB-Bus mit Strom versorgt, d. h. er schaltet sich ein, sobald Sie ihn über ein USB-Kabel an Ihren Computer anschließen. 5.2 Mobile Geräte Um den Controller mit einem iOS-Gerät zu betreiben, verwenden Sie den Lightning-auf-USB-3- Kameraadapter von Apple mit einem separaten 2,4-A-Lightning-Ladegerät. -
Seite 6: Beschreibung Der Funktionen
6 Beschreibung der Funktionen Element Funktion Keyboard Wenn Sie auf dem Keyboard spielen, werden MIDI-Notenmeldungen gesendet. Diese Meldungen werden von Ihrer Computer-Software oder einem externen MIDI-Gerät gelesen entsprechenden Klangerzeugung verwendet. Der vom Keyboard gespielte Sound stammt von Ihrer Computersoftware oder einem externen MIDI-Gerät. Mit der MENU- Taste und dem Parameter-Regler können Sie die Anschlagsdynamik, die Oktave, die Transponierung, den Kanal, den Programmwechsel usw. -
Seite 7: Grundlegende Midi-Steuerung
Stop/Solo/Mute-Taste Stopp/Solo/Stummschaltung: Drücken Sie diese Taste, um die Funktion der unteren 8 Pads umzuschalten. Funktioniert nur, wenn das Gerät mit Ableton Live verbunden ist. USB-Anschluss Schließen Sie den Controller über diesen Anschluss mit einem USB-Kabel an Ihren Computer an. Sustain-Pedal-Buchse Die Fußschalterbuchse fungiert als Sustain-Pedal-Schnittstelle. -
Seite 8: Steuerzuweisung
7.3 Steuerzuweisung Steuerungszuweisungsmodus können zuweisbaren Drehregler/Fader und 8 zuweisbaren Pads auf beliebige MIDI- Controller-Befehle programmiert werden, die zur Steuerung der über MIDI einstellbaren Parameter in Ihrer Software oder auf Ihrem externen MIDI-Gerät verwendet werden. einen anderen physikalischen Controller für die Programmierung auszuwählen, gehen Sie wie folgt vor: Drücken Sie wiederholt die MENU-Taste, bis das Display "Control assign CC NUMB/Pad note"... -
Seite 9: Zuweisbare Pads
7.6 Zuweisbare Pads Es gibt 8 Pads, denen MIDI-Notenbefehle zugewiesen werden können (Drums, Stabs, Bassnoten etc.). Drücken Sie die MENU-Taste wiederholt, bis das Display "CC NUMB/Pad note" anzeigt und triggern Sie dann die Pads, die Sie programmieren möchten. Geben Sie die gewünschten MIDI-Noten mit dem Parameter-Regler ein und bestätigen Sie den Wert per Enter-Funktion. -
Seite 10: Pad-Anschlagstärke
7.8 Pad-Anschlagstärke Mit der Einstellung Pad Curve wird die Reaktionskurve aller 8 Pads eingestellt. Es ist nicht möglich, die Reaktionskurve der Pads unabhängig voneinander einzustellen. Der Controller bietet 3 verschiedene Pad- Velocity-Kurven und eine konstante Velocity-Kurve, wie unten gezeigt. Die 3. Kurve ist die konstante Velocity mit dem Wert 127. -
Seite 11: Transponieren
7.10 Transponieren Drücken Sie die MENU-Taste so oft, bis das Display "Transpose" anzeigt, um die Transponierungsfunktion zu starten. Mit dieser Funktion kann das Keyboard die Tonhöhe um einen Halbton nach oben/unten verändern. Wenn diese Funktion aktiviert ist, zeigt das Display "Transpose" und den Wert der aktuellen Transponierung an. Der Wert kann mit dem Parameter-Regler angepasst werden. -
Seite 12: Auswahl Der Rgb-Hintergrundbeleuchtung Für Die Pads
7.13 Auswahl der RGB-Hintergrundbeleuchtung für die Pads Drücken Sie die MENU-Taste so oft, bis das Display "Pad color R/G/B" anzeigt, um die Funktion zur Auswahl der Hintergrundbeleuchtung zu starten. Wenn diese Funktion aktiv ist, zeigt das Display die "Pad- Farbe R/G/B" und die aktuelle RGB-Farbnummer an. R steht für Rot, G steht für Grün und B steht für Blau. Der Wert kann mit dem Parameter-Regler angepasst und per Enter-Funktion bestätigt werden. -
Seite 13: Weitere Einstellungen
7.14 Weitere Einstellungen 7.14.1 Alle Parameter speichern Drücken Sie die MENU-Taste so oft, bis das Display "Store all parameters" anzeigt, um die Funktion zum Speichern von Parametern zu starten. Es werden 3 Gruppen von Einstellwerten gespeichert. Wenn diese Funktion aktiv ist, zeigt das Display " Store all parameters"... -
Seite 14: Verwendung Mit Einer Daw
Sie müssen die Einstellungen auf der Registerkarte Link/MIDI wie folgt vornehmen. 1) Wählen Sie zunächst 'Launchkey Mini MK3' aus dem Menü Steueroberfläche. 2) Wählen Sie OMNITRONIC KEY-288+ für die Eingangs- und Ausgangseinstellungen. Passen Sie nun die Einstellungen für Track, Sync und Remote an. - Seite 15 8.1.1 Session-Modus Halten Sie die SHIFT-Taste gedrückt und drücken Sie das Session-Pad (das erste Pad oben links), um den Session-Modus auf Ihrem Controller aufzurufen. Die Session-Ansicht ist ein Raster, das aus Clips, Spuren und Szenen besteht. Der Session-Modus des Controllers bietet eine 4x2-Ansicht der Clips in Ihrer Session-Ansicht. Beispielansicht: Clips sind in der Regel Loops, die MIDI-Noten oder Audio enthalten.
- Seite 16 Szenen sind Reihen von Clips. Wenn Sie eine Szene starten, werden alle Clips in dieser Reihe gestartet. Das bedeutet, dass Sie Clips in horizontalen Reihen anordnen können. Im Session-Modus stellen die Pads das Raster der Clips dar, die sich innerhalb des farbigen Rechtecks in Ableton Lives Session-Ansicht befinden.
-
Seite 17: Starten Von Clips
Genauer gesagt können Sie das aktuell ausgewählte Raster von Clips (innerhalb des farbigen Rechtecks von Ableton Live) nach oben oder unten verschieben, indem Sie die Shift-Taste gedrückt halten und die folgenden Tasten drücken: SHIFT-Taste + Szene starten (>): Das Raster der Clips wird um eine Zeile nach oben verschoben. SHIFT-Taste + STOP, SOLO, MUTE: Bewegt das Raster der Clips um eine Reihe nach unten. -
Seite 18: Starten Von Szenen
8.1.3 Starten von Szenen Durch Drücken der Taste Scene Launch (>) werden Szenen in Ableton Live gestartet. Das bedeutet, dass alle Clips in einer Reihe gemeinsam gestartet werden können. 8.1.4 Stop, Solo, Mute Im Session-Modus ist es möglich, die Funktion der unteren 4 Pads so umzuschalten, dass sie keine Clips mehr starten. -
Seite 19: Aufnehmen / Capture Midi
8.1.5 Aufnehmen / Capture MIDI Wenn Sie diese Taste drücken, wird die Session-Aufnahme ausgelöst. Damit können Sie das, was Sie spielen, in neue Clips aufnehmen oder bestehende Clips überspielen. Halten Sie die SHIFT-Taste gedrückt und drücken Sie Record, um die Funktion Capture MIDI auszulösen. Damit können Sie nachträglich alle kürzlich gespielten MIDI-Noten in der aufnahmebereiten Spur erfassen. - Seite 20 8.1.7 Ableton-Live-Geräte verwenden Der Geräte-Modus ermöglicht es Ihnen, das ausgewählte "Gerät" (Ableton oder Instrumente und Effekte von Drittanbietern) auf einer Live-Spur zu steuern. Halten Sie die SHIFT-Taste gedrückt und drücken Sie das Device-Pad (vierte von links oben), um diesen Modus zu nutzen. In diesem Modus steuern die Drehregler und Schieberegler die ersten 8 Parameter des gewählten Geräts.
- Seite 21 8.1.8 Arp Durch Drücken der ARP-Taste am Controller wird der Arpeggiator aktiviert. Nach dem Aktivieren von Arp nimmt der Controller Ihre Akkorde und erzeugt ein Arpeggio, d. h. er spielt jede Note des Akkords nacheinander ab. Der Arpeggiator läuft so lange, wie Sie die Tasten gedrückt halten und zwar mit dem durch die Arp Rate festgelegten rhythmischen Wert.
- Seite 22 Dieser Modus ist ähnlich wie der Aufwärtsmodus aber die Noten werden in Down absteigender Reihenfolge gespielt (z. B. G3, E3, C3). In diesem Arpeggio-Modus werden die Noten zunächst in aufsteigender Up/Down Reihenfolge gespielt. Nach Erreichen der höchsten Note werden die Noten dann abwärts zur niedrigsten Note gespielt, die einmal erklingt, bevor das Arpeggio wieder ansteigt und vor Erreichen der niedrigsten Note stoppt.
-
Seite 23: Arbeiten Mit Anderen Sequenzern
Latch Mit Latch können Sie den Arpeggiator verwenden ohne Tasten gedrückt zu halten. Jede Note, die Sie gleichzeitig drücken und wieder loslassen, bildet ein neues Arpeggio-Pattern, das der Arpeggiator "einrastet". Der Arpeggiator spielt dann weiter, als hätten Sie die Tasten nie losgelassen. Wenn Sie eine neue Taste drücken, wird das vorherige Arpeggio gelöscht und ein neues gebildet. -
Seite 24: Technische Daten
9 Technische Daten KEY-288+ Spannungsversorgung: 5 V DC 100 mA USB-Anschluss: USB 2.0, Typ B Maße: Länge: 19,4 cm Breite: 31,8 cm Höhe: 4,8 cm Gewicht: 750 g Technische Daten können im Zuge der Weiterentwicklung des Produkts ohne vorherige Ankündigung geändert werden. 9.1 Minimale Systemanforderungen Wenn Sie Ihren Controller mit einem Computer verwenden, gelten die folgenden Mindestsystem- anforderungen:... - Seite 48 48 • EN...
- Seite 49 49 • EN...