Herunterladen Inhalt Inhalt Diese Seite drucken

Werbung

Verfügbare Sprachen
  • DE

Verfügbare Sprachen

  • DEUTSCH, seite 24
Vecton UV & Vecton TitanUV
ALL MODELS
4
10
17
24
30
36
42

Werbung

Inhaltsverzeichnis
loading

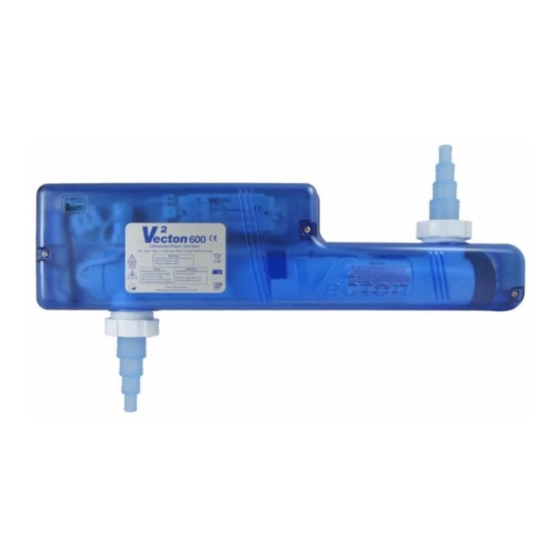
Inhaltszusammenfassung für TMC Vecton UV 400

  • Seite 1: Inhaltsverzeichnis

    Vecton UV & Vecton TitanUV ALL MODELS Instructions Instruções Instrucciones Anweisungen Instructies Istruzioni Instructions...
  • Seite 2 Model Vecton UV Vecton UV Vecton titanUV Vecton titanUV Modelo/ Modelo/Modell/Model-/ Modello/ Modèle 5212 5213 5215 5216 Code 400l 600l 550l 850l Max. Aquarium Size. 187 Imp. gal. 90 Imp. gal. 130 Imp. gal. 121 Imp. gal. Para aquários com capacidade até/ 110 US gal.
  • Seite 3 2. (x2) 3. (x3) 4. (x3) Vecton UV / Vecton titanUV Hosetail Gasket Locknut Clear Elbow Conectores de Vecton UV / Vecton titanUV Junta Contraporca Cotovelo transparente mangueira Conectores de Vecton UV / Vecton titanUV Junta Contratuerca Code Transparente manguera Eingepasste Lichtdurchlässiger Vecton UV / Vecton titanUV...
  • Seite 4 IMPORTANT SAFETY INFORMATION - PLEASE READ CAREFULLY WARNING: this unit is designed to be used indoor and is not suitable for any outdoor applications. • Never look directly at an illuminated UV lamp. • Power must be supplied through a Residual Current Device (RCD) with a rated residual operating current not exceeding 30mA.
  • Seite 5: Instructions

    INSTRUCTIONS FOR INSTALLATION AND USE This Vecton unit is supplied with two universal hosetails for connecting the steriliser to the water system. Installation is explained in detail below. POSITIONING THE VECTON UNIT CAUTION: This unit must not be mounted above the aquarium or in any position where it may accidentally fall into water or be splashed by water.
  • Seite 6 Clear Elbow Accessory This elbow offers a variety of flexible pipe orientations. As shown in the following diagram, the end with the fitted threaded locknut may be fitted to either the inlet or the outlet of the UV unit. It is important to correctly seat gasket on to the face of the UV inlet/outlet and sandwich it between this face and the face of the clear elbow.
  • Seite 7: Flow Rates

    Connection using rigid pipe This unit may also be rigid plumbed in either of the following ways: 1. Using TMC universal rigid pipe adaptors available from your aquatic supplier (part no. PCADRPACTO4). These should be fitted as shown in the diagram below.
  • Seite 8: Connection To The Electrical Supply

    CONNECTION TO THE ELECTRICAL SUPPLY Power must be supplied through a Residual Current Device (RCD) with a rated residual operating current not exceeding 30 mA. This unit is supplied fitted with a moulded plug: • For the United Kingdom: Fitted with a 3 Amp BS1363A plug •...
  • Seite 9: Assembly Process

    ASSEMBLY PROCESS 1. Slide the quartz sleeve back into the white plastic body. 2. Ensure that you locate the ‘O’ rings accurately on the ends of the quartz. Failure to do so will result in leaks when the water is turned on. 1.
  • Seite 10 INFORMAÇÃO DE SEGURANÇA IMPORTANTE - POR FAVOR LEIA COM ATENÇÃO AVISO: Este equipamento foi concebido para funcionar no interior de edifícios e não é adequado para ser utilizado no exterior. • Nunca olhe directamente para uma lâmpada UV acesa. • A energia deve ser fornecida através de um Dispositivo de Corrente Residual (RCD) com uma taxa de corrente de funcionamento residual que não exceda os 30mA.
  • Seite 11: Instruções

    INSTRUÇÕES DE INSTALAÇÃO E USO O equipamento Vecton é fornecido com conectores universais de mangueira para ligar o esterilizador ao sistema de abastecimento de água. Em baixo, são dadas instruções para a sua instalação. POSICIONAR O APARELHO VECTON CUIDADO: Este equipamento não deve ser colocado acima do aquário ou em qualquer outra área onde possa cair acidentalmente para dentro da água, ou ser salpicado por água.
  • Seite 12 Acessório Cotovelo Transparente O cotovelo oferece uma variedade de orientações de tubos flexíveis. Como mostrado no diagrama, a extremidade com a contraporca roscada montada pode ser adaptada ou na entrada ou na saída da unidade de UV. É da maior importância assentar correctamente a junta sobre a face da entrada/saída de UV e encaixá-la entre esta face e a face do cotovelo transparente.
  • Seite 13 A ligação deste equipamento à água pode também ser feita utilizando um tubo rígido de uma das seguintes duas formas: 1. Utilizando adaptadores universais para tubos rígidos TMC, os quais poderá encontrar à venda num fornecedor local de peças para canalização (nº da peça: PCADRPACTO4).
  • Seite 14: Ligação À Corrente Eléctrica

    LIGAÇÃO À CORRENTE ELÉCTRICA A electricidade deve ser fornecida através de um dispositivo de corrente residual (RCD) com uma intensidade de corrente residual atribuída não superior a 30mA. A ficha eléctrica fornecida varia conforme o lugar de destino do equipamento: •...
  • Seite 15: Montagem Das Peças

    SUBSTITUIÇÃO DE LÂMPADA E LIMPEZA DO QUARTZO Desligue a ficha da tomada de corrente eléctrica e feche a fonte de abastecimento de água antes de retirar a tampa de cobertura do equipamento. Cuidado: Se a tampa de cobertura do equipamento estiver molhada quando for realizar uma operação de reparação ou manutenção, limpe cuidadosamente a água antes de retirar a tampa.
  • Seite 16 1. CABO ELÉCTRICO 2. RANHURA PARA CABO 3. PROTECTOR TUBULAR BORRACHA 4. DISCO DE PROTECÇÃO CONTRA ÁGUA IMPORTANTE: O corpo de plástico e os conectores de mangueira fornecidos com este equipamento são feitos de polímeros que foram especificamente estabilizados para terem protecção contra os efeitos do comprimento de onda da luz UVC emitida pela lâmpada.
  • Seite 17 INFORMACIÓN IMPORTANTE SOBRE LA SEGURIDAD POR FAVOR, LEA ATENTAMENTE ADVERTENCIA: Esta unidad fue diseñada para usarse en interiores y no se recomienda su uso al aire libre. • Nunca mire fijamente una lámpara de rayos UV encendida. • Residual (RCD, por su abreviatura en inglés) con una corriente de trabajo residual que no exceda los 30 mA.
  • Seite 18: Instrucciones

    INSTRUCCIONES PARA LA INSTALACIÓN Y USO Esta unidad Vecton viene con dos extremos universales para mangueras que permiten la conexión del esterilizador al sistema de agua. Más abajo encontrará la explicación en detalle de cómo se instala. COLOCACIÓN DE LA UNIDAD VECTON PRECAUCIÓN: La unidad no debe montarse sobre el acuario ni en lugares donde corra riesgos de recibir salpicaduras o de caerse al agua.
  • Seite 19: Procedimiento De Instalación

    Accesorio de Codo Transparente El codo ofrece diversas orientaciones del tubo flexible. Tal y como muestra el diagrama, el extremo con la contratuerca roscada se puede instalar tanto en la entrada como en la salida de la unidad UV. Es importante colocar correctamente la junta en la boca de la entrada/salida UV y sujetarla entre esta boca y la boca del codo transparente.
  • Seite 20 Conexión con manguera rígida Esta unidad podrá conectarse con una manguera rígida en cualquiera de las siguientes maneras: 1. Utilizando adaptadores universales TMC para tubos rígidos, disponibles a través de su proveedor de accesorios para acuarios (pieza número PCADRPACTO4). Dichos adaptadores deberían colocarse según se muestra en el diagrama a continuación.
  • Seite 21: Mantenimiento Periódico

    CONEXIÓN AL SUMINISTRO DE ENERGÍA ELÉCTRICA La energía debe suministrarse a través de un Dispositivo de corriente residual (RCD, por su abreviatura en inglés) con una corriente de trabajo residual que no exceda los 30 mA. Esta unidad se provee con un enchufe moldeado. •...
  • Seite 22 SUSTITUCIÓN DE LA LÁMPARA Y LIMPIEZA DEL CUARZO Separe el ensamblado de las fuentes de alimentación eléctrica y de suministro de agua antes de retirar la tapa de la unidad. Precaución: Si la tapa de la unidad se encuentra húmeda, seque cualquier rastro de agua suavemente antes de quitarla para su reparación o mantenimiento.
  • Seite 23 1. CABLE DEL SUMINISTRO ELÉCTRICO PRINCIPAL 2. RANURA PARA EL CABLE 3. JUNTA TUBULAR GOMA 4. JUNTA IMPERMEABLE IMPORTANTE: El cuerpo plástico y cualquier extremo para mangueras proporcionados con esta unidad se fabrican con polímeros estabilizados específicamente para protegerlos de los efectos de la luz de rayos UVC emitida por la lámpara.
  • Seite 24: Entsorgen Sie Diese Einheit Auf Eine Verantwortungsvolle Weise

    WICHTIGE SICHERHEITSINFORMATIONEN! - BITTE SORGFÄLTIG LESEN WARNUNG: Diese Einheit wurde für den Innenbetrieb entwickelt und eignet sich nicht für Außenanwendungen. • Schauen Sie nie direkt in eine beleuchtete UV-Leuchte hinein. • Der Strom ist über einen Fehlstromschutzschalter zuzuführen, wobei der Fehlernennstrom 30 mA nicht überschreiten darf.
  • Seite 25: Anleitung Für Installation Und Bedienung

    ANLEITUNG FÜR INSTALLATION UND BEDIENUNG Diese Vecton-Einheit ist mit zwei universellen Schlauchenden zum Anschluss des Steril sators an das Wassersystem ausgestattet. Weiter unten wird die Installation detailliert beschrieben. AUFSTELLUNG DER VECTON-EINHEIT VORSICHT: Diese Einheit darf nicht über dem Aquarium oder in einer Position montiert werden, in der sie versehentlich ins Wasser fallen oder mit Wasser bespritzt werden kann.
  • Seite 26 Die gelieferten Schlauchenden bestehen aus einem durchsichtigen Material, das aufleuchtet, wenn die Einheit ordnungsgemäß arbeitet. (Hinweis: Das Leuchten ist nur bei geringem Lichteinfall sichtbar.) Lichtdurchlässiges Rohrbogenzubehör Der Rohrbogen bietet er eine Vielzahl von flexiblen Rohrausrichtungen. Wie aus der Abbildung ersichtlich ist, kann das Ende mit der mit dem Gewinde versehenen Sicherheitsmutter entweder an den Einlass oder den Auslass der UV-Einheit angeschlossen werden.
  • Seite 27: Durchsatzraten

    Anschluss mittels eines festen Schlauches Diese Einheit lässt sich auch mit einer der beiden folgenden Methoden fest anschließen. 1. Mit den universellen Adaptern für feste Schläuche "TMC", die bei Ihrem Aquarium-Händler erhältlich sind (Teilenummer: PCADRPACTO4). Diese sind wie im folgenden Schema gezeigt anzubringen.
  • Seite 28 ANSCHLUSS AN DIE STROMVERSORGUNG Der Strom ist über einen Fehlstromschutzschalter zuzuführen, wobei der Fehlernennstrom 30 mA nicht überschreiten darf. Die Einheit ist mit einem Formstecker ausgestattet: • Für das Vereinigte Königreich: BS1363A-Stecker (3-Amp) • Für Kontinentaleuropa: Schukostecker (2-polig + Erdstecker) – 10/16 Amp •...
  • Seite 29 MONTAGEPROZESS 1. Streifen Sie den Quarz-Mantel in das weiße Plastikgehäuse zurück. 2. Die O-Ringe müssen sich dabei unbedingt an den Quarz-Enden befinden. Ansonsten entstehen, wenn Sie das Wasser anstellen, Lecks. 1. ENDKAPPE 2. DRUCKARMATUR 3. UV-LEUCHTE 4. QUARZHÜLSE 5. O-RING 6.
  • Seite 30 BELANGRIJKE VEILIGHEIDSINFORMATIE - S.V.P ZORGVULDIG LEZEN WARNUNG: Dit toestel is bedoeld voor gebruik binnenshuis en mag niet buiten gebruikt worden. • Kijk nooit rechtstreeks in een UV-lamp. • De stroom moet worden geleverd via een reststroomtoestel met een nominale reststroom die niet meer dan 30mA bedraagt.
  • Seite 31: Instructies

    INSTRUCTIES VOOR INSTALLATIE EN GEBRUIK Deze Vecton wordt geleverd met twee universele koppelstukken voor de aansluiting van de sterilisator aan het watersysteem. PLAATSING VAN HET V2ECTON-TOESTEL OPGELET: Dit toestel mag niet gemonteerd worden boven het aquarium of op een plaats waar het per ongeluk in het water kan vallen of waar het bespat kan worden.
  • Seite 32: Installatieprocedure

    Doorzichtig elleboogstuk Dit elleboogstuk biedt de mogelijkheid leidingen in flexibele richtingen aan te brengen. Zoals getoond in het diagram, kan het uiteinde met de aangebrachte borgmoer met schroefdraad met zowel de invoer als de afvoer van de UV-installatie worden verbonden. Het is belangrijk om pakking op de juiste wijze op de voorkant van de UV-invoer/uitvoer te positioneren en hem tussen deze zijde en de zijde van het doorzichtige elleboogstuk vast te zetten.
  • Seite 33 Dit toestel kan ook op de volgende manieren met een onbuigzame buis worden aangesloten: 1. Met gebruik van TMC universele buisadaptors die u bij uw aquariumverdeler kunt kopen (onderdeelnr. PCADRPACTO4). Deze moeten worden aangesloten zoals in het onderstaande diagram wordt getoond.
  • Seite 34: Aansluiting Op Het Elektriciteitsnet

    AANSLUITING OP HET ELEKTRICITEITSNET De stroom moet worden geleverd via een reststroomtoestel met een nominale reststroom die niet meer dan 30 mA bedraagt. Dit toestel wordt geleverd met een gegoten contactstop: • Voor het Verenigd Koninkrijk: Met een 3 Amp BS1363A contactstop •...
  • Seite 35 MONTAGE 1. Schuif de kwartsvoering terug in het witte plastic element. 2. Zorg dat u de ‘O’ - ringen nauwkeurig op de uiteinden van de kwarts plaatst. Als u dit niet doet, kan er lekkage zijn wanneer het water wordt opengezet. 1.
  • Seite 36 IMPORTANTI INFORMAZIONI DI SICUREZZA - SI PREGA DI LEGGERE ATTENTAMENTE ATTENZIONE: Questo apparecchio è concepito per uso interno e non deve essere usata per installazioni esterne. • Non guardare mai direttamente una lampada a raggi ultravioletti accesa. • L’unità deve essere alimentata tramite un Dispositivo di Corrente Residua (DCR) con una corrente residua nominale massima di 30 mA.
  • Seite 37: Istruzioni

    ISTRUZIONI D’INSTALLAZIONE E USO Quest’unità Vecton è fornita con due flessibili con raccordi universali per il collegamento dello sterilizzatore al rifornimento idrico. POSIZIONAMENTO DELL’APPARECCHIO VECTON ATTENZIONE: Questo apparecchio non deve essere montato sopra l’acquario o collocato in una posizione in cui possa cadere nell’acqua o bagnarsi. L’unità...
  • Seite 38 Accessorio con Raccordo a Gomito Il raccordo a gomito consente di orientare le tubazioni in maniera flessibile. Come si vede dal diagramma, l'estremità con il controdado filettato può essere raccordata con l'ingresso o l'uscita dell'unità UV. È importante posizionare correttamente la guarnizione sulla faccia dell'ingresso/uscita UV e stringerla tra la stessa e quella del raccordo a gomito.
  • Seite 39 Collegamento con un tubo rigido Questo apparecchio può essere collegato anche usando tubazioni rigide come segue: 1. Usare adattatori universali per tubi rigidi TMC disponibili presso i rivenditori di prodotti acquatici (rif. PCADRPACTO4). Montarli in base al diagramma qui sotto.
  • Seite 40 COLLEGAMENTO ALL’ALIMENTAZIONE ELETTRICA L’unità deve essere alimentata tramite un Dispositivo di Corrente Residua (DCR) con una corrente residua nominale massima di 30 mA. Questo apparecchio viene fornito con una spina sagomata: • Regno Unito: Spina British BS1363A da 3 ampere •...
  • Seite 41 PROCESSO DI ASSEMBLAGGIO 1. Infilare il manicotto di quarzo nel corpo in plastica bianca. 2. Controllare che gli anelli torici siano montati in modo corretto sulle estremità del manicotto di quarzo. In caso contrario si potrebbero verificare delle perdite quando si apre il rubinetto dell’acqua. 1.
  • Seite 42 IMPORTANTES CONSIGNES DE SÉCURITÉ - À LIRE ATTENTIVEMENT AVERTISSEMENT: L’unité est conçue pour être utilisée en intérieur et ne convient à aucune utilisation en extérieur. • Ne jamais regarder directement une lampe à UV allumée. • L’électricité doit être amenée par le biais d’un appareil de courant résiduel (ACR), dont l’intensité ne devra pas dépasser 30 mA.
  • Seite 43: Instructions

    INSTRUCTIONS POUR L’INSTALLATION ET L’UTILISATION L’unité Vecton est fournie avec deux raccords universels permettant de relier le stérilisateur au réseau de distribution d’eau. INSTALLATION DE L’UNITÉ VECTON Attention: Cette unité ne doit pas être positionnée au-dessus de l’aquarium, ni se trouver dans n’importe quelle position où...
  • Seite 44 Accessoire Coude Transparent Le coude permet d’installer le tuyau flexible dans plusieurs sens. Comme illustré sur le schéma, l’extrémité sur laquelle est installé le contreécrou fileté peut être raccordée à l’entrée ou à la sortie de l’unité UV. Il est important d’installer correctement le joint sur l’entrée/la sortie UV et de la coincer entre l’entrée/la sortie UV et le coude transparent.
  • Seite 45 L’unité peut être raccordée à un tuyau rigide de deux façons différentes : 1. En utilisant des adaptateurs universels TMC de tuyau rigide que vous pourrez vous procurer auprès de votre fournisseur de produits aquatiques (numéro de pièce PCADRPACTO4). Ceux-ci devront être raccordés conformément au diagramme ci-dessous.
  • Seite 46: Durée De Vie De L'ampoule

    RACCORDEMENT A L’ALIMENTATION ÉLECTRIQUE L’électricité doit être amenée par le biais d’un appareil de courant résiduel (ACR), dont l’intensité ne devra pas dépasser 30 mA. L’unité est fournie avec une fiche à contact de terre : • Royaume-Uni : Fiche de 3 ampères BS1363A •...
  • Seite 47: Procédure D'assemblage

    PROCÉDURE D’ASSEMBLAGE 1. Replacez le manchon en quartz sur le boîtier en plastique blanc. Veillez à bien réintégrer les bagues rondes au niveau du quartz. 2. Si cela n’est pas fait correctement, il y aura des risques de fuites lorsque l’eau sera à nouveau ouverte. 1.
  • Seite 48 tropicalmarinecentre.com Iberia Solesbridge Lane Rua Cidade de Paris 6 info@tropicalmarinecentre.co.uk Chorleywood Parque Industrial do Arneiro Hertfordshire WD3 5SX 2660-456 São Julião do Tojal England Portugal Call +351 (0) 219 739 140 Call +44 (0)1923 284151...

Inhaltsverzeichnis